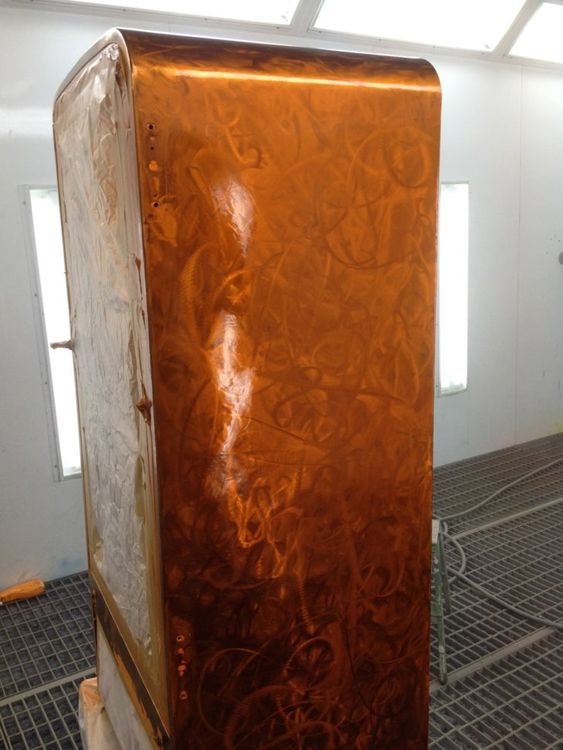
Painting technology
The painting technology differs depending on the paint purchased, the method chosen and the initial state of the refrigerator.
Required materials and tools
For painting you will need:
- Painting tool: spray gun or roller with a brush.
- Thinner and sponge. No matter how master you are, there is always a danger of painting something wrong.
- Rubber gloves and a respirator to protect yourself from the toxic effects of paint.
- Sandpaper for preparing surfaces for painting. Better to use medium and fine sandpaper one by one.
- Another sponge to be used to get rid of streaks.
- Covering material around the refrigerator. It may not need fabric, film, several layers of old newspapers. If you plan to make a drawing on the refrigerator, then it is better to cover the places not intended for painting with paper tape.

Preparing the refrigerator
Preparing a refrigerator is not much different from preparing any other surface to be painted:
- It is necessary to remove everything from the interior of the refrigerator. All food, shelves and drawers must be temporarily removed.
- Free up space around the refrigerator or take it outside. By this action, we have two goals: to facilitate painting and to protect as many surfaces as possible from paint splashes that will certainly appear.
- Wash and degrease the surface of the refrigerator. It has already been said about the contamination of the kitchen air, so it is worth making sure that the layer of paint lies on the metal surface of the refrigerator, and not on the layer of fat on its surface.
- After that, the surface must be sanded. It is better to use a medium-grained sandpaper first, and then a fine-grained one. Keep in mind that chips and cracks should be sanded and cleaned as thoroughly as possible. These are the places of the future uneven coloring of the refrigerator, so it is worth making them as even as possible.
Stages of painting with a roller
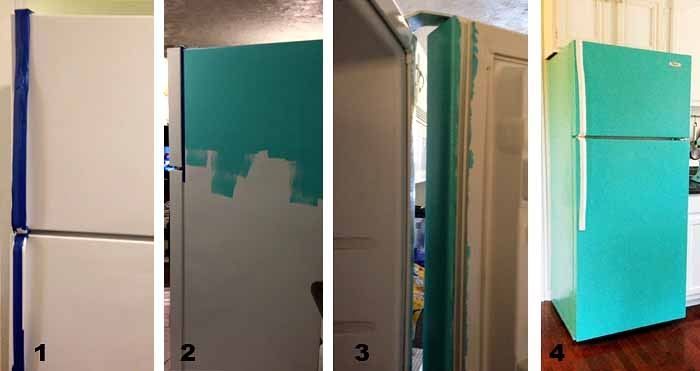
You can paint the refrigerator with a roller in three steps:
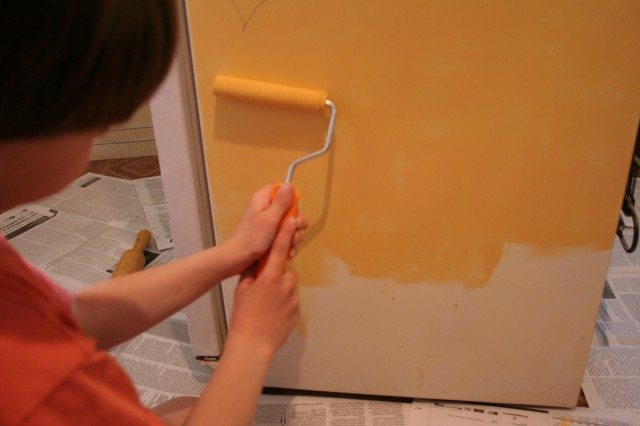
- Apply paint to the surface with a roller. It is worth applying the paint as evenly as possible, without paying special attention to any area. Too thick layers will stand out brightly on the even surface of the refrigerator.
- Paint over missing and hard-to-reach areas with a brush. The first layer is ready.
- After half an hour, apply a second, and then after the same break, and a third layer.
Spray painting instructions
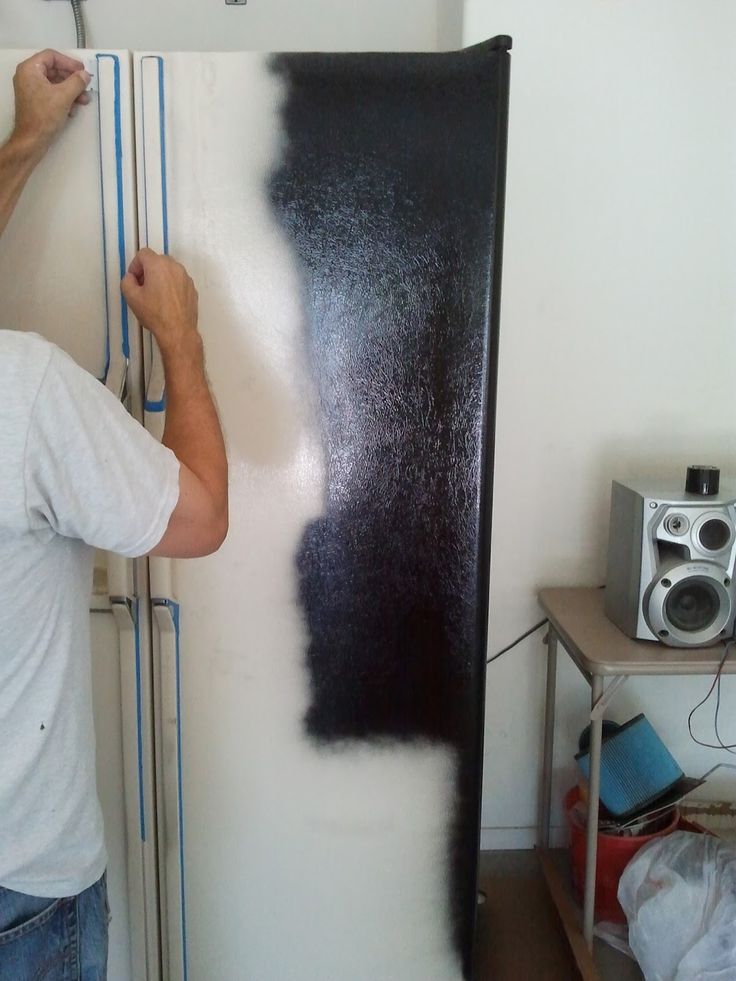
It is a little more difficult to paint with a spray can, since the hand with the spray must move evenly along the paint surface of the refrigerator. One or two seconds of delay in one place is fraught with a too thick layer and an ugly spot or smudges.
Too thick stains of paint can be smeared over the surface with gentle movements of the sponge, but the sponge itself must be firm enough so as not to leave fibers on the surface of the refrigerator.
You cannot work with a spray can without a respirator, because such paint is much more toxic. You need to apply paint from left to right and from top to bottom. Take breaks of 30 minutes between different layers.
2-3 layers will be more than enough for the refrigerator. The can should be kept at a distance of 30 cm from the surface, so the layers will be more uniform, and the process of applying paint is faster.
As you can see, painting the refrigerator is not that difficult. It is enough to choose the right paint and choose the most convenient staining method for you. The right approach, patience and care in the process will guarantee you a beautiful piece of furniture with an extended service life.A bright or vice versa anthracite-black refrigerator will become a good accent in the kitchen.
How to choose paint
The selection of a helmet depends on what goals they plan to achieve:
- changing the overall interior by painting the refrigerator in bright colors using stencils, drawings, prints;
- painting over visible defects such as rust, chips, cracks.
The paint can be applied with a brush, rollers, spray cans.
Requirements
The choice of paint begins with an analysis of the required qualities of the composition. The paint should:
- adhere to the surface with a vertical type of application;
- be resistant to temperatures;
- be resistant to chemical elements found in popular kitchen detergents.
Suitable options
Several types of paints are distinguished among suitable formulations. For many, the defining quality is the ability to give in to tinting. Experts advise to try the resulting shade on a part of the surface and wait for it to dry completely. Many paints, after drying, acquire unusual variants of the selected color, which becomes an unpleasant surprise.
Zinc
The zinc compound is known as zinc white. This paint is used to cover old refrigerators, they are able to cover cracks and chips. White has advantages and disadvantages.

| pros | Minuses |
| Resistant to sunlight | Dry for a long time, smell when painting |
| Non-toxic | Prone to cracking |
| Tolerate elevated temperatures | It is necessary to apply about 3-4 coats for an even coverage |
| Lie flat |
Alkyd
Compositions based on alcohol-acid compounds. They form a strong film that is not prone to rapid cracking. Among the advantages of alkyd bases are:
Organosilicon
Suspension based on polymers. The main advantage of organic silicon paint is heat resistance. Painting work is allowed to be carried out at any air temperature, the composition dries up in 2 hours. At the same time, the paint exhibits high wear resistance.

Nitrocellulose
Enamel paints based on cellulose nitrate. They are also called nitro paints. Unlike other formulations, nitro paints are applied in 5-6 layers. When applying a base, the surface is treated with primers to improve the quality of the overlay.
Epoxy
Paints are made on the basis of epoxy resins. Formulations are suitable for aerosol application. Epoxy paints are often used to coat metal coatings.
Acrylic
Popular acrylic compositions based on polymers obtained by cleavage of acrylic acid. Advantages of acrylic-type paints:
- safe, environmentally friendly;
- dry quickly;
- strong, durable;
- varied in shades, amenable to coloring.
Acrylic is applied to any surface using any tools. The only condition for working with acrylic compounds is that the air temperature should not be lower than +10 degrees.
In this way, you can mask the problem area of the refrigerator without resorting to full staining.
Oil
The base for oil paint is linseed oil.

These compositions cover well various types of defects, but they have significant disadvantages:
- toxic;
- have a pungent odor;
- dry for a long time;
- with prolonged use tend to peel off
Polyurethane
Polyol based formulations. They differ in high covering ability, can be different in the method of application. Suitable for painting refrigerators due to their resistance to high temperatures.
How to choose the right paint for your refrigerator?
How to competently change the appearance of the refrigerator? To do this, you need to make the right choice of coloring agent. At the same time, do not forget that the device has an unusual surface, therefore, a special paint is needed. The new coating should act not only as a decoration, but also as a reliable protection for the cladding from various damages.
Since the device will always be in a dry and warm room, you shouldn't waste money on anti-corrosion agents. You will not need fire-fighting paint either, since the refrigerator cannot be placed, for example, near the stove.
Thus, to answer the question "How to paint the device?", You need to know the characteristics of the paint.
- Ability to maintain an even layer on a vertical surface.
- The ability not to lose its properties when adding new shades.
- Ability to maintain elasticity, as the temperature in refrigerators rises significantly.
- Resistant to detergents.
To summarize, choose a water resistant metal paint for interior use.
In this case, it is worth paying attention to the fact that different components may be included in the composition of paint for metal surfaces. So, the composition can be:
- Oil.
- Alkyd.
- Epoxy.
- Zinc.
- Polyurethane.
- Organosilicon.
- Nitrocellulose.
Refrigerator painting can be done:
- paint, which includes acrylic with the ability to apply to the metal surface;
- nitroenamel. The substance that cars are coated with;
- polyurethane or epoxy paint.
Since there is no harmful substance in acrylic dyes, they can be used without fear. This type of staining will allow not only to update the refrigerator, but also to make it original, since the color range of acrylic is wide enough. Apply the paint with a roller in two coats.
Substance for car coloring, is a long-lasting paint with beautiful shades. It is applied from a spray can. However, it is impractical to use the dye, since its purchase will not be cheap. In addition, the paint is toxic, therefore, when applied, it requires protection of exposed parts of the body and surrounding objects from splashes. If traces of paint do get to the surface, they can only be removed with a solvent.
The most resistant and durable paints are polyurethane and epoxy. True, their preparation can take a lot of time, since mixing the two components requires competent preparation.
General cleaning has not been canceled
Even observing the rules of daily care of the device, it will have to be thoroughly washed once every 1, maximum 2 months. And it's worth starting here with the means by which you need to do this.
For those who do not want to bother, industrial refrigerator detergents are perfect. Prices for them start at around 100 rubles per 500 ml. There are 500 rubles each, it all depends on your financial capabilities. However, choose a liquid based on composition and safety, not economy.
A really economical and safe way to clean your refrigerator is to make your own detergent. To do this, you need baking soda, vinegar, ammonia, lemon juice, or mustard powder. The products cost a penny, and the benefits are colossal.

But do not rush to mix the listed products together, each product has its own recipe.
How to paint an old refrigerator with your own hands: stages of work
Before you paint the refrigerator at home, you need to prepare the surface. Otherwise, the paint will begin to flake off after a short period of time. We also decide in what way the painting will be done. Let's consider a step-by-step algorithm for the production of work from the first to the last step.
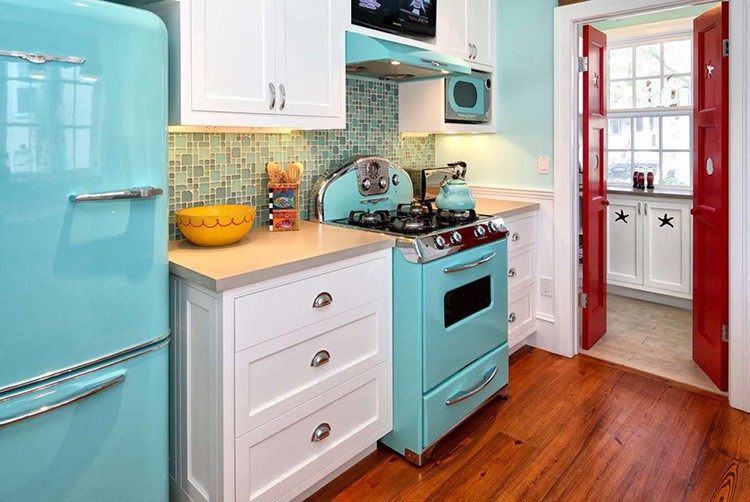
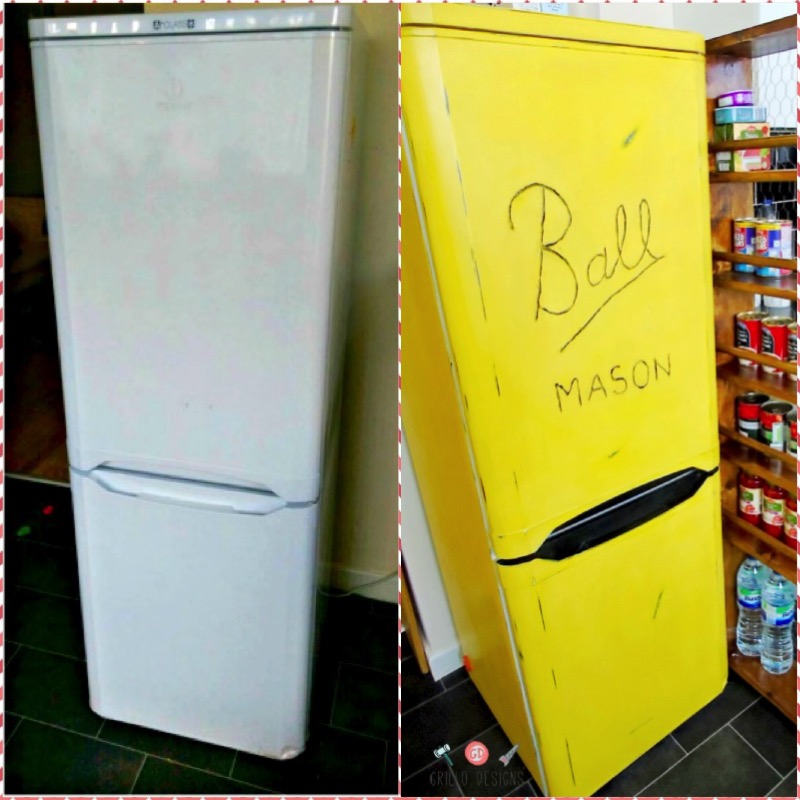
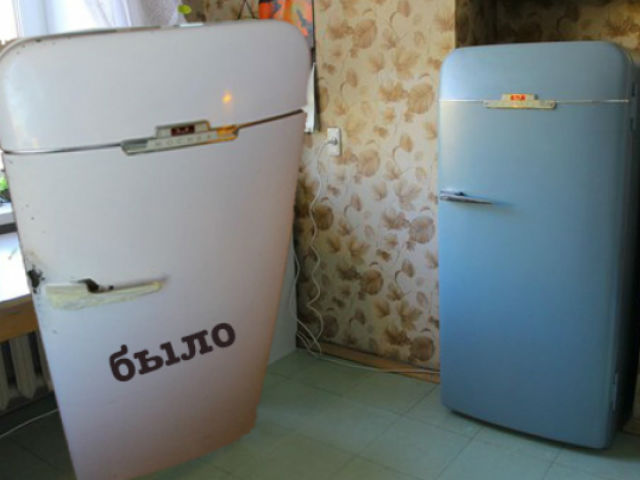
Refrigerator painted in a color to match the interior. You can't buy this in a store
Tools and materials required for staining
The choice of tool, and paint, in particular, is best approached wisely. After all, not all enamel, especially an old refrigerator, can tolerate painting well.
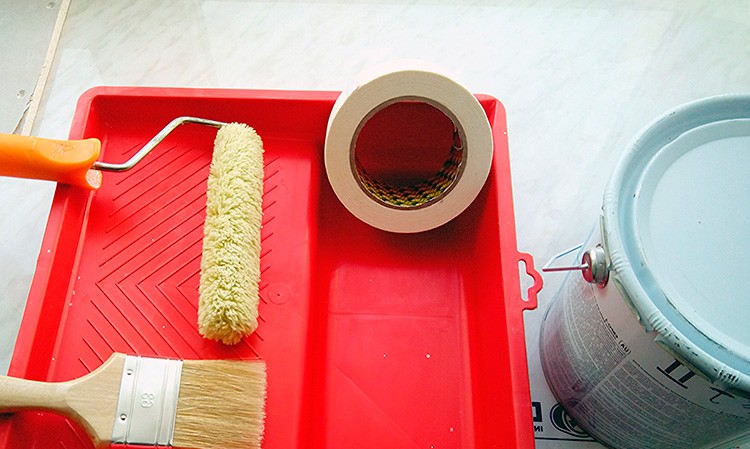
Before painting, you need to prepare all the necessary tools.
For work you will need:
- solvent for degreasing the surface;
- sandpaper;
- masking tape, with which non-painted surfaces are glued;
- roller, brush (if this option is selected);
- dye;
- clean dry rags;
- film or paper to protect the floor covering if work is done indoors.
Having prepared everything you need, you can start work.
How to prepare the surface of the refrigerator for painting at home
To begin with, we lay out a newspaper or film around it to protect the floor covering. Next, using sandpaper, peel off the paint in places where it will peel off. If there are spots of corrosion, they also need to be cleaned. Then we pass with sandpaper over the entire surface, ripping off the gloss. The entire area of the refrigeration unit must be matt to ensure good adhesion. Wipe the refrigerator with a dry cloth, and then with a cloth soaked in solvent, degreasing the surface. All non-painted surfaces are sealed with masking tape. After the preparation made, you can proceed directly to staining.
How to update the outside of the refrigerator: staining methods
Choosing a method of painting the surface with a roller, brush, it should be understood that the work will be more difficult. With an excess of paint on the brush, smudges may form, which is unacceptable for the refrigerator - this will spoil the appearance even more than it was before the painting began. The paint is taken with a brush in small quantities, there is no need to rush. The resulting smudge can be removed with a sponge, and then paint over this place again using a smaller amount of the coloring composition.
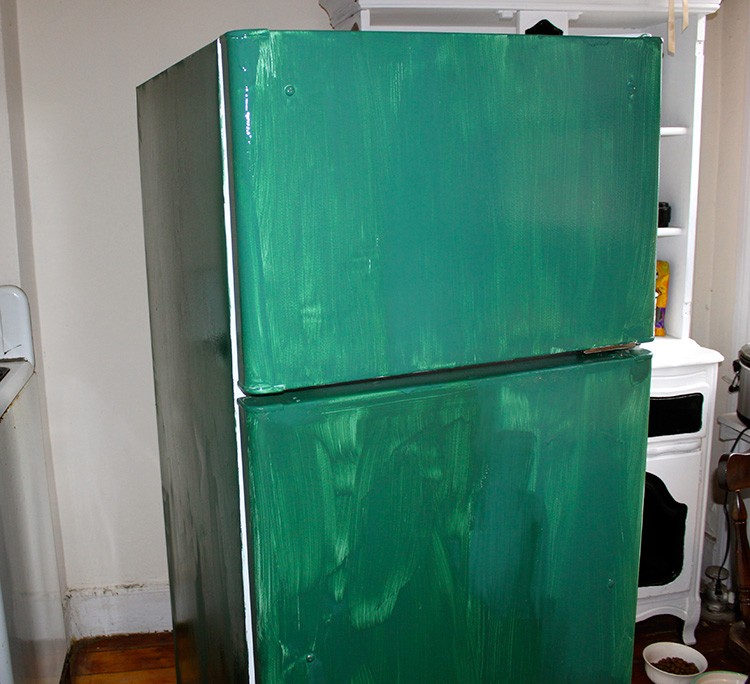
Such an update will clearly not be beneficial - the unit must have looked better before painting.
If the option of painting with an aerosol can is chosen, and there is no way to take the refrigerator out into an open space, you should take care of protecting not only the floor covering, but also the walls. Ventilation is very important - the room must be well ventilated.
IMPORTANT INFORMATION! (click to find out)
× IMPORTANT INFORMATION!
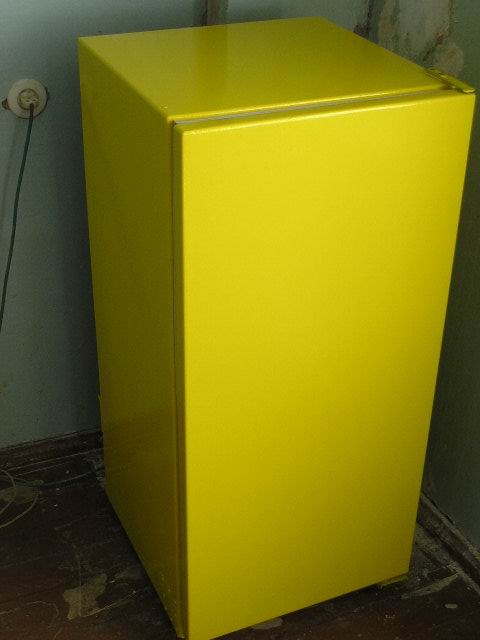
Despite the fact that the paint from the spray can lays down in an even and thin layer, if it lingers in one place, the formation of smudges is also possible. Spray paint from a balloon evenly, without lingering in individual areas. It is better to paint over the surface a little later with a second coat. Car nitro paint dries very quickly. Photos of self-painted refrigerators can be seen below. Perhaps you use some ideas for decorating and painting your equipment.
Close
Can I paint the refrigerator with slate paint

A new range of paints are classified as slate and magnetic types. The magnetic base contains iron and has the ability to attract. Magnets stick to the surface.
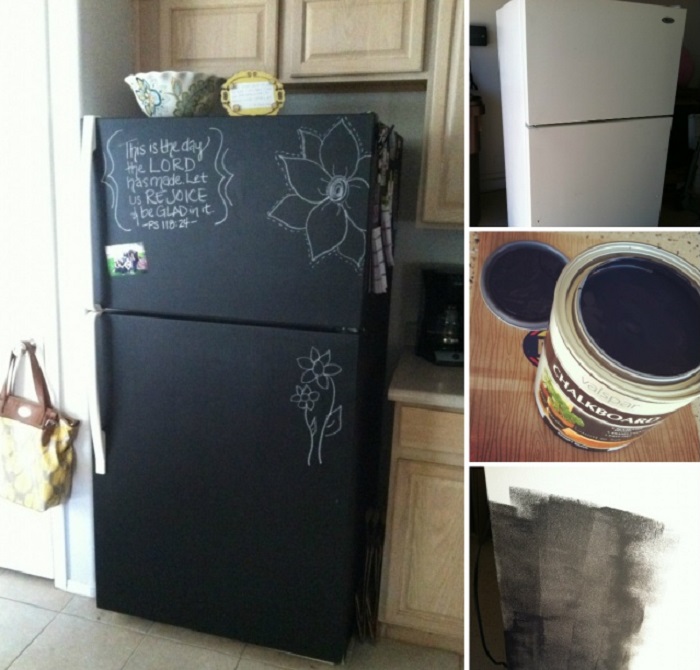
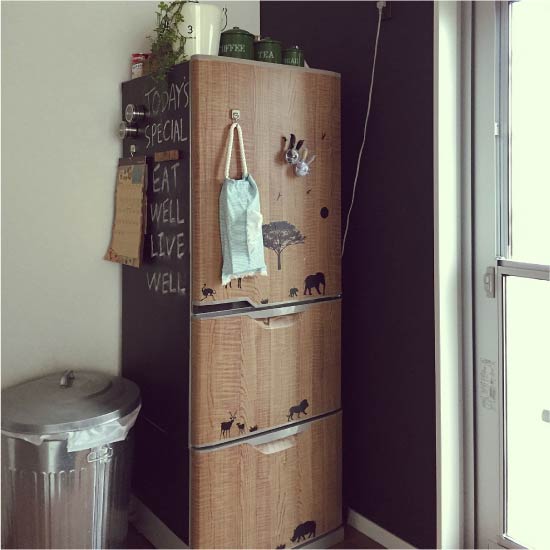
Blackboard paint creates a surface that you can write on with chalk. Durable latex-based film slightly rough from used fillers. Therefore, the chalk drawing lies flat. You can wash it off with plain water and soap. For the refrigerator, the drawing can become part of the decor. But most importantly, the color of the coating depends on the filler. Matte paint lays down beautifully, looks dignified.
The old refrigerator will be transformed, will find a second life if you paint it with slate paint. This is not difficult to do; spray or canned composition is applied to the primed surface, like ordinary paints. You can find gray, golden, copper shades, but more often they sell black and dark green. The surface would be nice to decorate, there are many options.
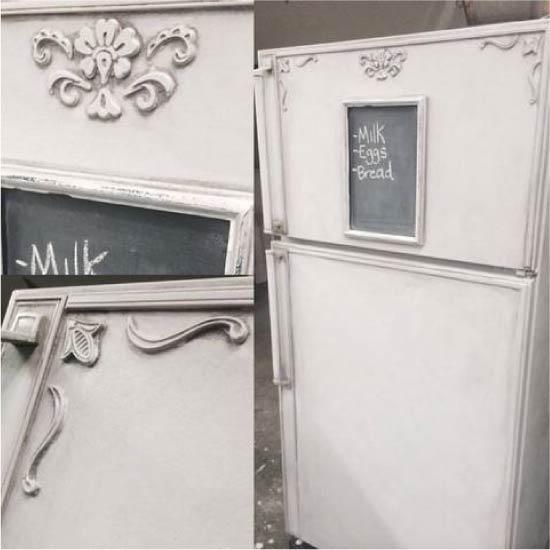
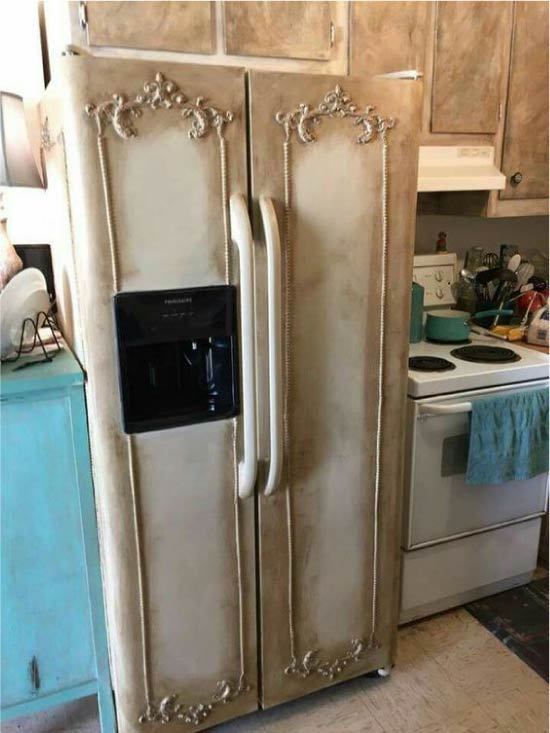
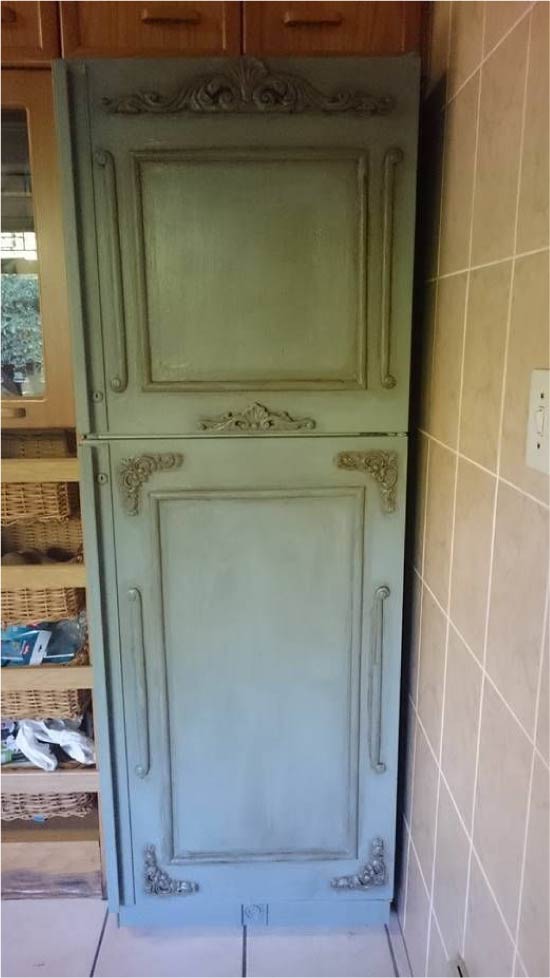
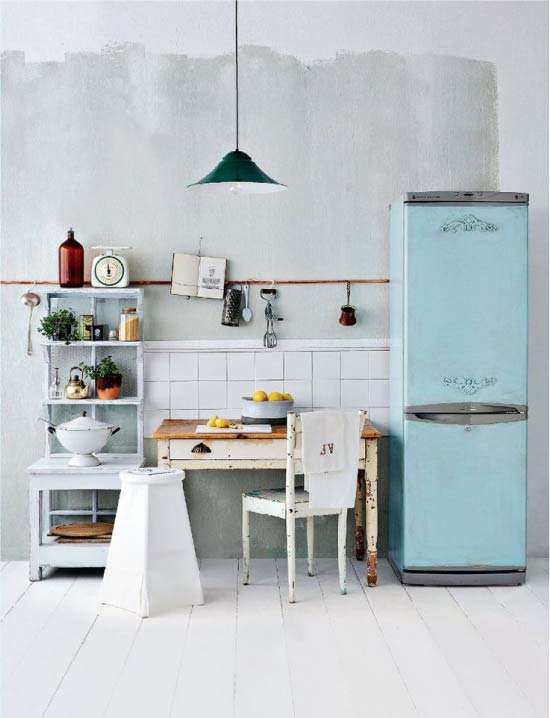
Method 7. Decoration with moldings and "carved" details (+ master class)
If your kitchen is decorated in a classic style, then a grandiose project of converting the refrigerator into ... an old sideboard will help you to fit a freestanding refrigerator into its interior.
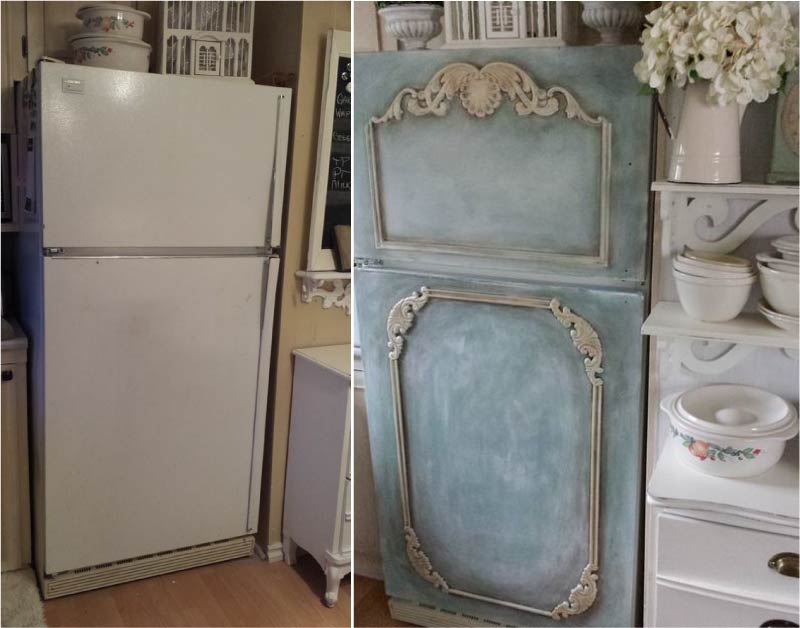
View of the old refrigerator before and after the alteration
What you need for decoration:
- Wood or PVC moldings;
- Carved wood / PVC furniture or plaster / polyurethane stucco molding in the shape of a crown, as well as patterned corners (if possible);
- Saw for trimming moldings;
- Adhesive for metal.
What you need for painting:
- Adhesive primer;
- White chalk paint (you can do it yourself according to recipes from the Internet or buy, say, from designer Daria Geller);
- Chalk paint of the main color;
- Paint brush, 1 round brush with a diameter of 8-7 cm (useful for both painting and waxing), flat medium brush (for wax);
- Dark wax (can be replaced with a mixture of colorless wax with dark brown paint);
- Colorless wax;
- Painting supplies: film, masking tape, etc.
Instructions:
Step 1. Remove the gloss from the surfaces with a sandpaper, clean and degrease it with an alcohol solution.
Step 2. We make markings and glue the carved parts: crown, moldings, corners.
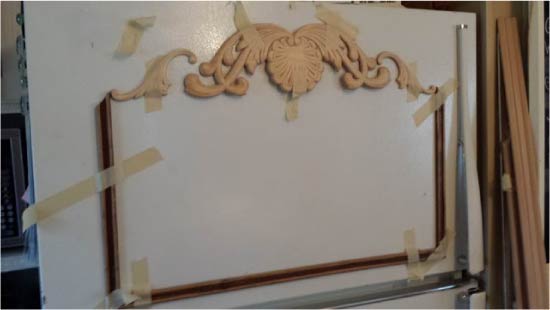
Step 3. Paint the refrigerator with white paint in two layers, letting each layer dry.
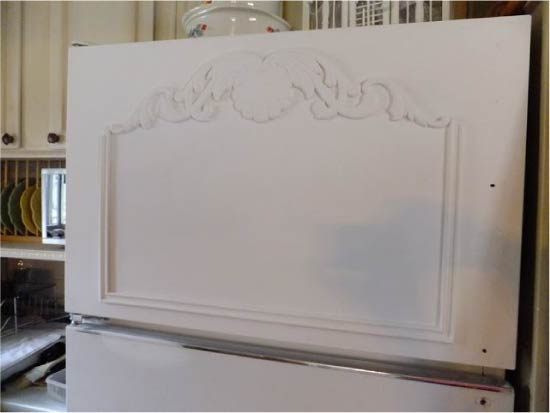
Step 4. Now with a large round brush, roughly paint the refrigerator in the main color in one layer with cross movements. This will create a scuffed effect.
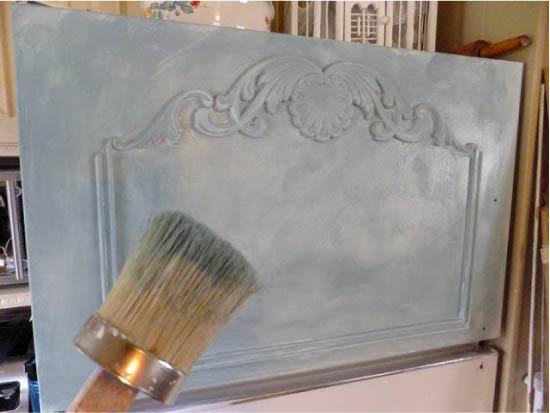
- The pens must either be removed and resigned to their absence, or painted as well.
- At this stage, the decor and skirting boards can be painted with paint in the main color or white / gold / silver (in this case, the paint will fall outside the decor, but this is not a big deal).
Step 5. Apply colorless wax to the skirting boards and decor using a cloth or brush, let it soak and dry, then rub the excess with a paper napkin.
Step 6. Now, with a brush, apply dark wax to the decor and baseboards, then rub it in and remove the excess with paper napkins, achieving the desired antiquity effect.
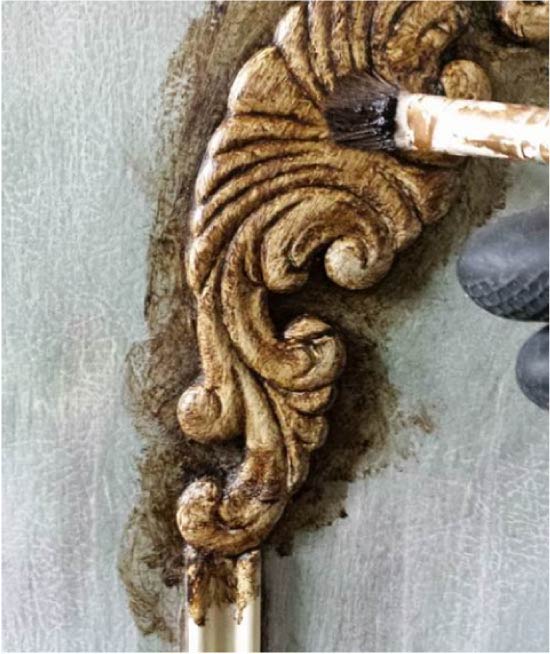
In places where the wax appears to be too dark, apply some colorless wax and wipe the surface with a paper towel.
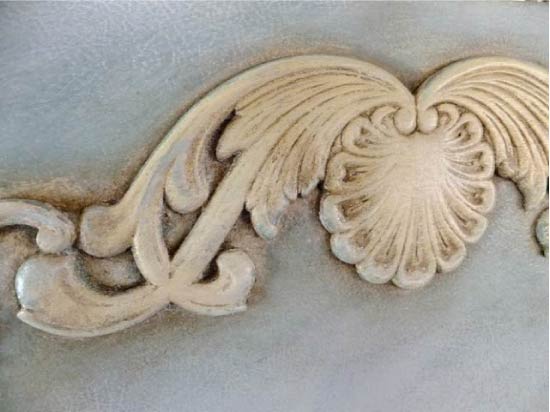
Step 7. Now treat the entire refrigerator with colorless wax with the same large round brush (you don't need to wash it to remove paint residues!). When the wax is dry, wipe off the excess with a tissue. Ready!

In this selection of photos, you can find similar ideas for decorating the refrigerator with moldings and carved decorations.
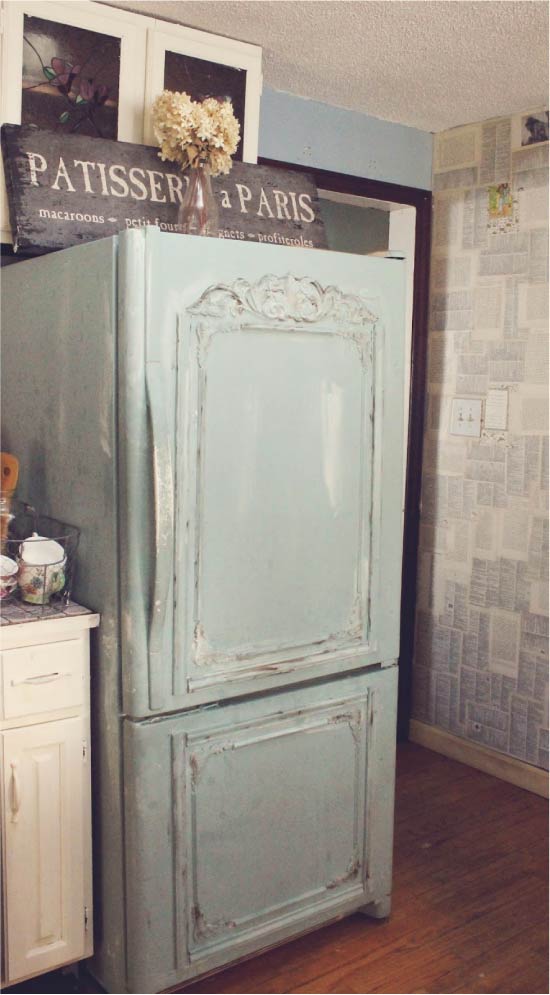
How to choose the right paint and tool?

Old paintable refrigerator
To paint the refrigerator with your own hands, you need to buy paint and find the right tools.
The main task is the correct choice of coloring materials, because the surface of refrigerators is not made of the simplest material, and not any means can be suitable for this purpose.
It is worth paying your attention to the fact that a layer of paint should first of all serve as protection against mechanical damage, and then be a decoration. To paint the refrigerator with your own hands with high quality, paints and varnishes must differ in the following characteristics:
To paint the refrigerator with your own hands with high quality, paints and varnishes must differ in the following characteristics:
- have the possibility of tinting;
- be able to keep the paint layer upright;
- differ in elasticity;
- do not be afraid of the effects of detergents.
Taking into account the above requirements for paint, we can conclude that water-resistant paint is suitable for transforming the device for indoor work on metal surfaces.
This kind of paints and varnishes can have a varied composition.
But, to decorate the surface, it is not necessary to go too deep into the compositions of the paints. For such purposes, the following may be suitable:
- nitro enamel, which is used in the automotive industry;
- acrylic mass for metal work;
- epoxy or polyurethane mass.
From such a variety, you can choose whatever you like. Also, these tools can be used to treat the device inside. For work, a roller with a not very wide working blade or a brush is perfect. You can also use aerosols, for which no tools are required at all.
Today, the most popular are rubber-based paints. Their detailed technical characteristics are shown in the table below.
| Characteristic | Paint name | |||
| PlastiDip (USA) | Rezolux (Russia) | Rubber Paint (China) | Farbex
(Ukraine) |
|
| Palette | Wide variety of colors | Base of 8 shades | Wide variety of colors | Base of 9 shades, and 5 colors can be ordered |
| Type of surface to be obtained | Matt or glossy, luminescent possible | Smooth or fine texture | Matt | Matt |
| Paint consumption | 130-150 ml / m2 | 120-200 g / m2 | 110-140 ml / m2 | 120-200 g / m2 |
| Drying time of each layer | 60 minutes | 30 minutes. | 30 minutes. | 120 minutes |
| Price | 15 € for 310 ml | 18 € for 14 kg | up to 10 € for 400 ml | up to 3 € for 1.2 kg |
Why paint a refrigerator?
The owners of the refrigerator always have their own reason to change its appearance.
- The unit needs restoration, as a rule, when it performs its functions properly, but does not fit into the interior of the kitchen. For example, white refrigerators violate the color scheme of the room and since, unlike other household appliances, they are large, it is difficult to make them invisible.
- Painting the device becomes necessary in case of damage to the enamel. These can be scratches, rust spots, scuffs resulting from careful cleaning. Since a new refrigerator costs a lot of money, and the old one works without interruptions, it remains to restore the last one.
- Creative people use the device to embody their design ideas. The repainted unit makes the kitchen fashionable and original. Traditionally, a white refrigerator, after painting, ceases to stand out from the general interior.
Thus, painting an old appliance is a great solution that will save money and at the same time update the kitchen.
How to decorate an updated refrigerator
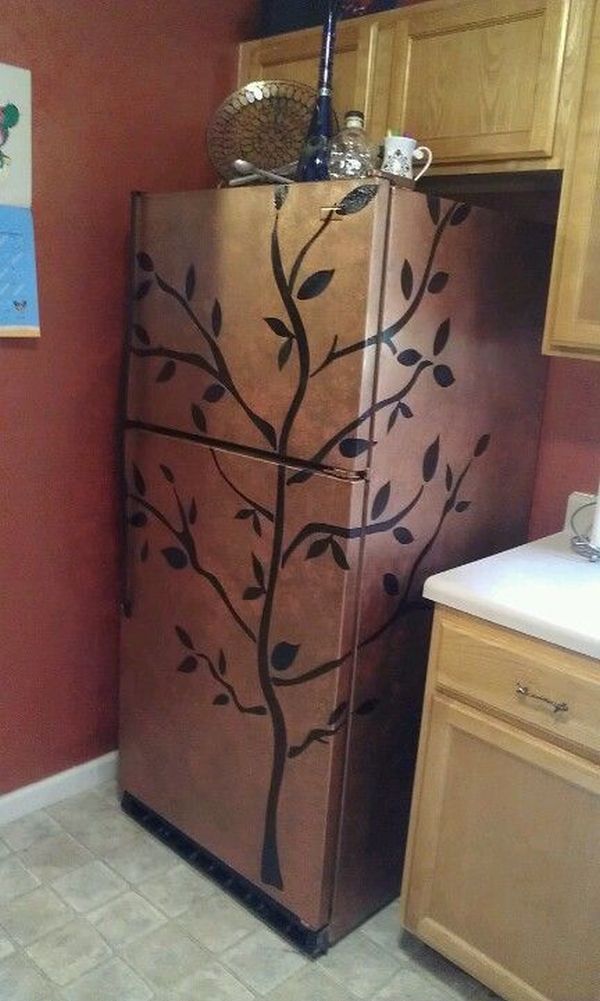
When using coloring compositions with magnetic chips on the surface, you can write with crayons. If a solid color seems boring to you, decorate the surface with simple geometric lines or figures. Use masking tape in places of color transitions.
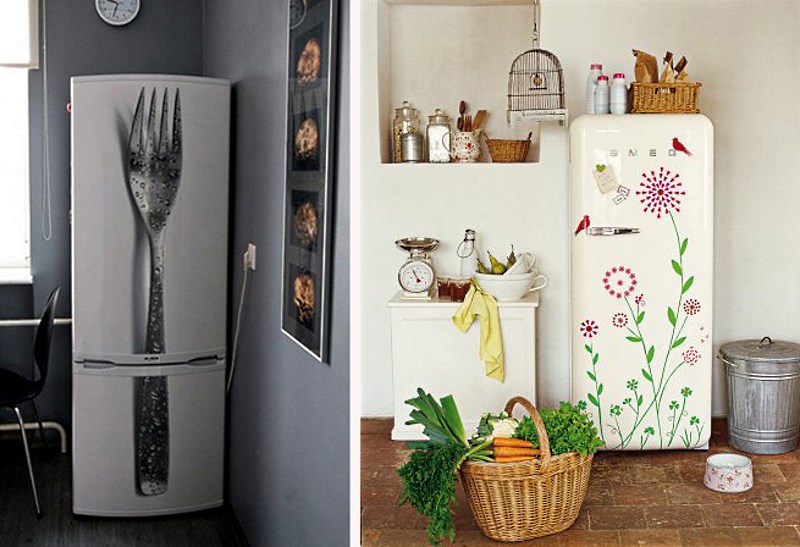
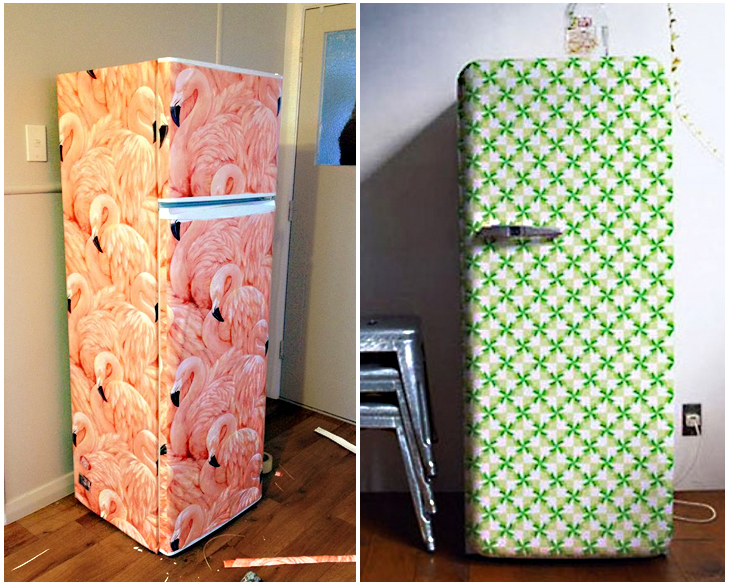
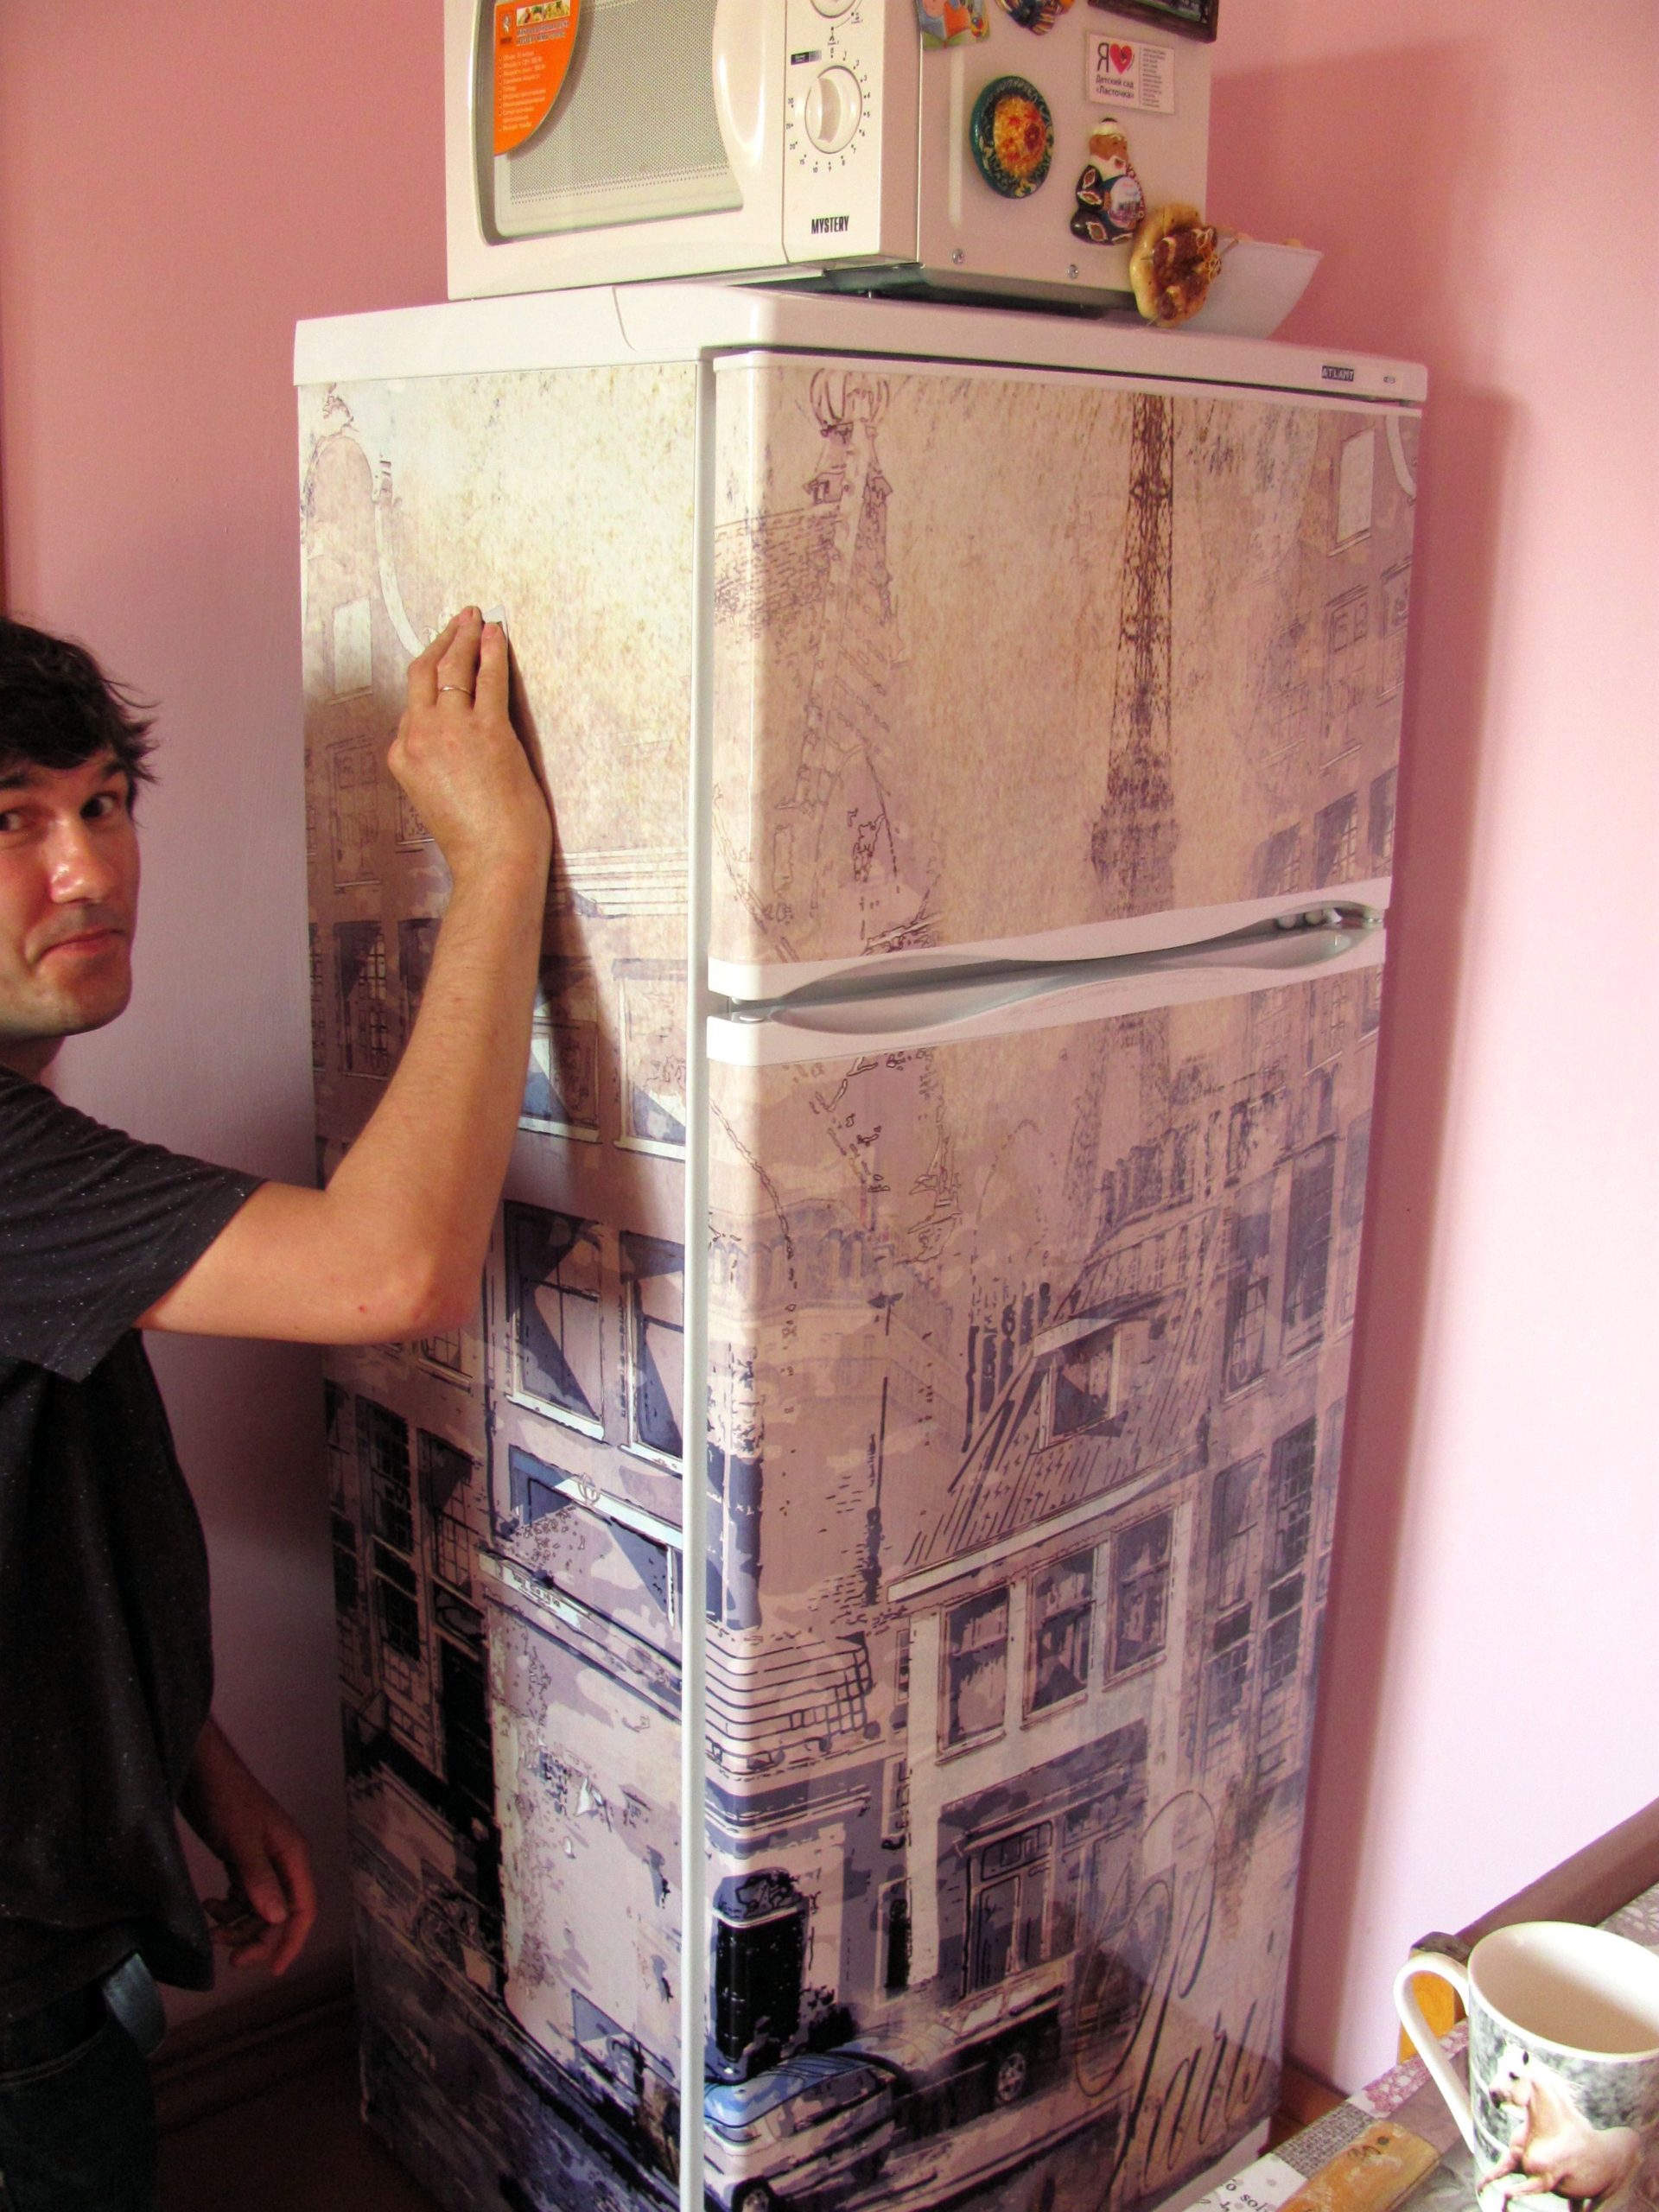
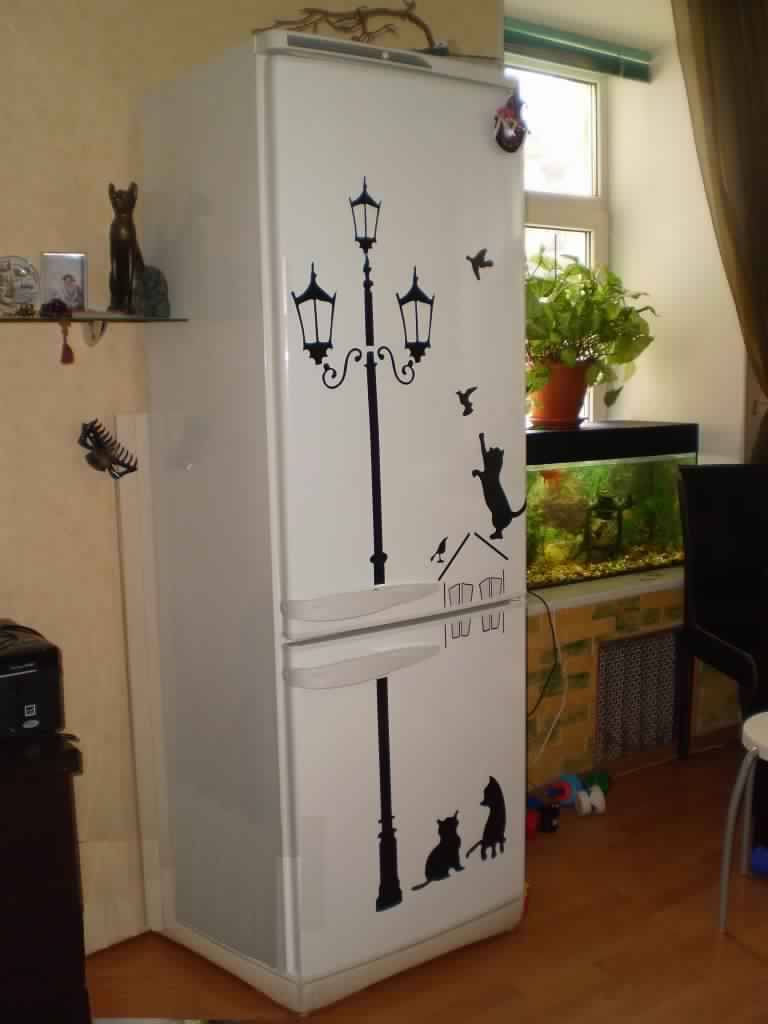
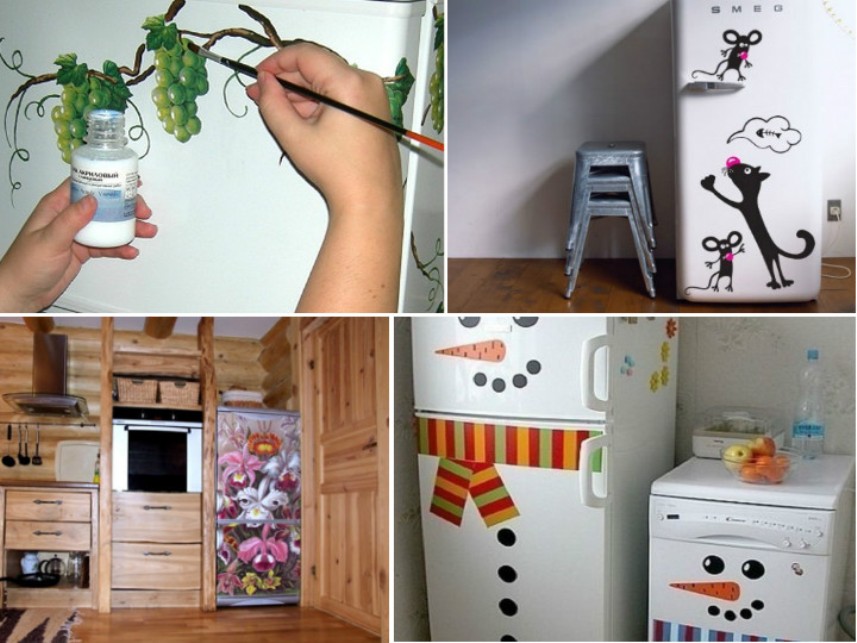
An easy way to decorate a refrigerator is with a regular “self-adhesive” film. It is sold in the form of ready-made graphics, plots, figurines of birds, animals and flowers. Vinyl stickers, which are available in all hardware stores, are also suitable. The main thing is to choose a sticker of the appropriate size and color. As for working with the film, it must be glued carefully - so that there are no creases, irregularities and “bubbles” in the drawing.
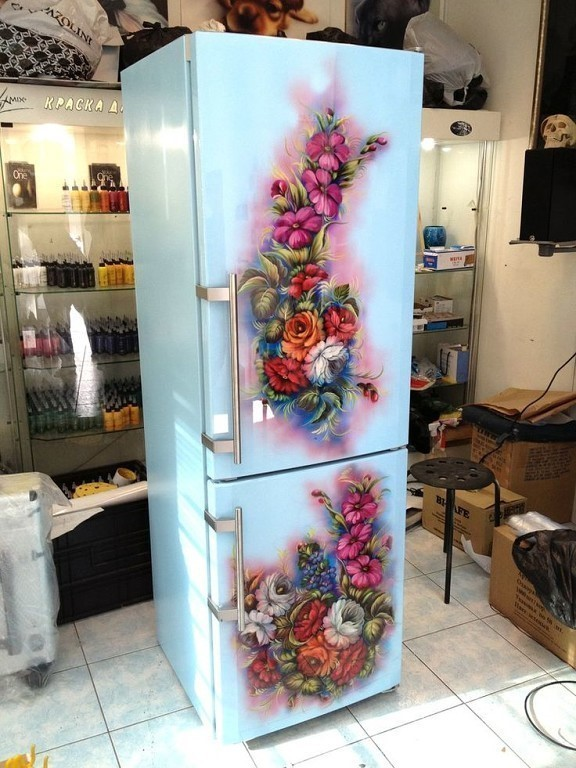
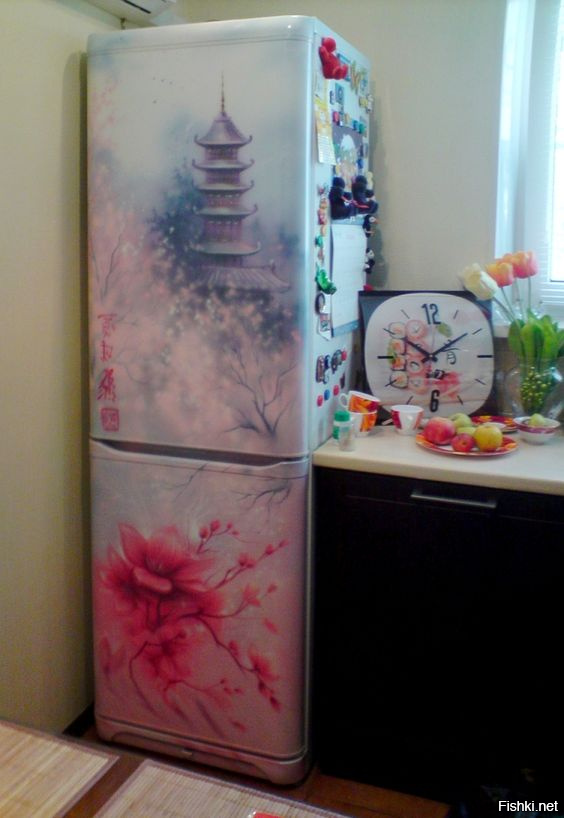
If you are familiar with the technique of airbrushing, apply any pattern to the surface by spot spraying. This technique is often used to paint cars. It is possible that the painting process may seem monotonous and tedious - for example, when the surface of the refrigerator requires the application of two or even three layers. For variety and originality, use the decoupage technique. This is an applique in the form of an expressive acrylic pattern. In such drawings, small elements are carefully traced, and the strokes look lively and bright. Thick varnished paper is used as a material for decoupage. It is sold in art stores and is often referred to as a “decoupage card”.
Also suitable as such an application:
- napkins folded in several layers;
- pictures cut from a magazine;
- illustrations drawn by yourself;
- printouts from the Internet, made on a color printer.
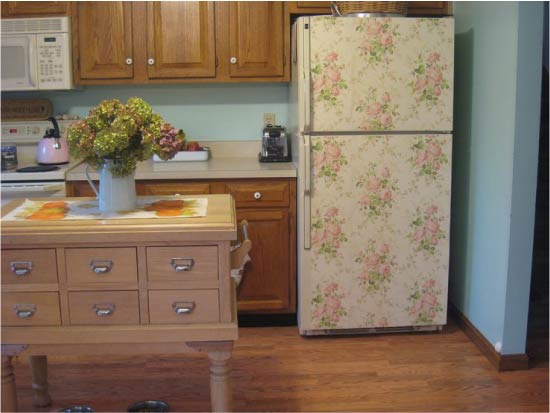
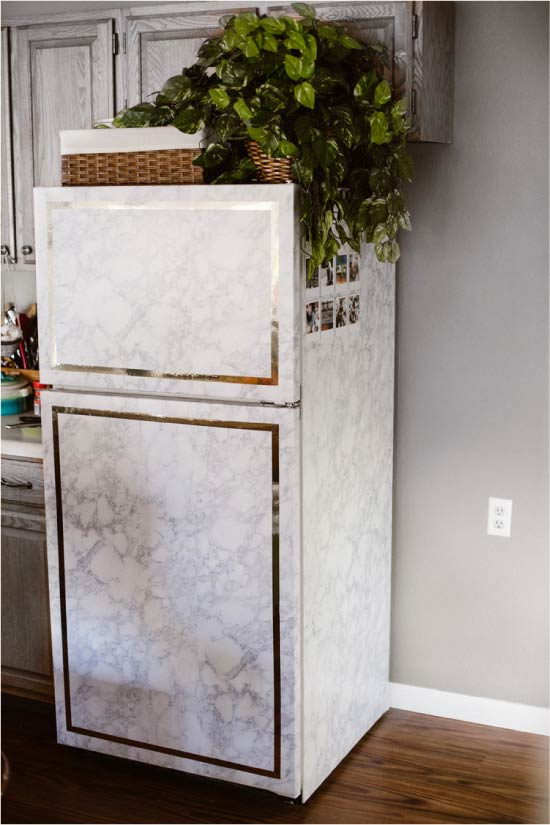
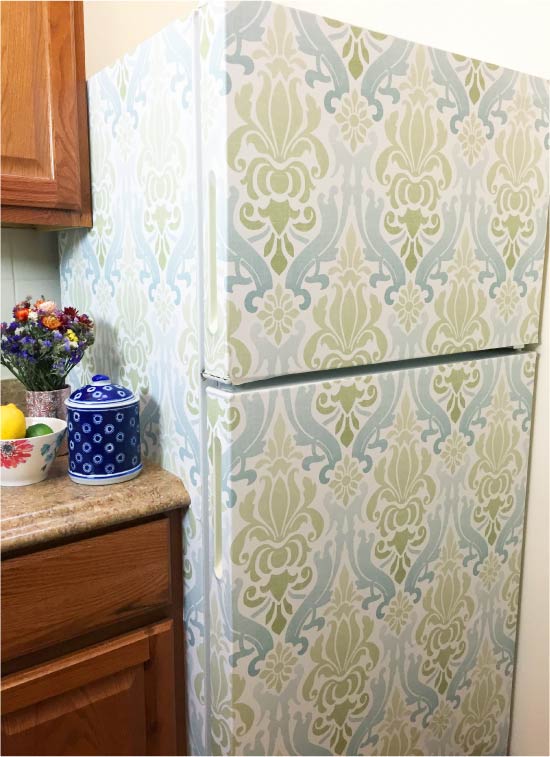
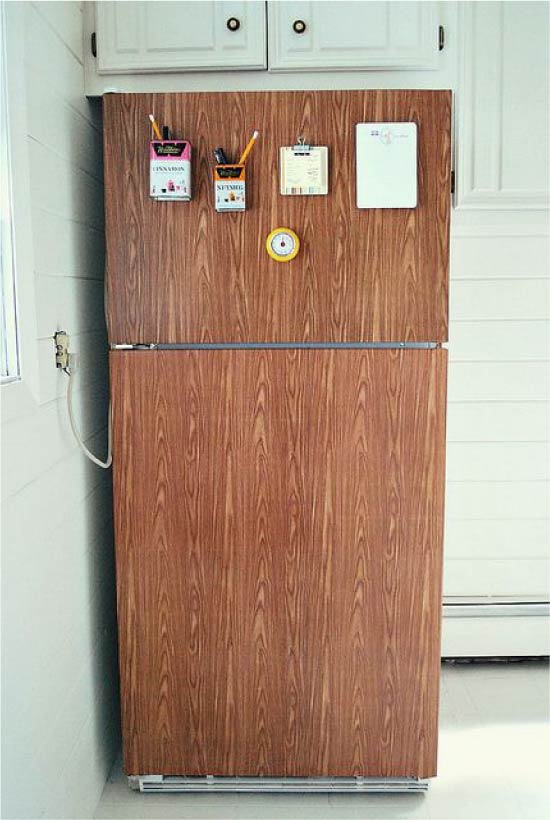
Method 8. Decor with self-adhesive film
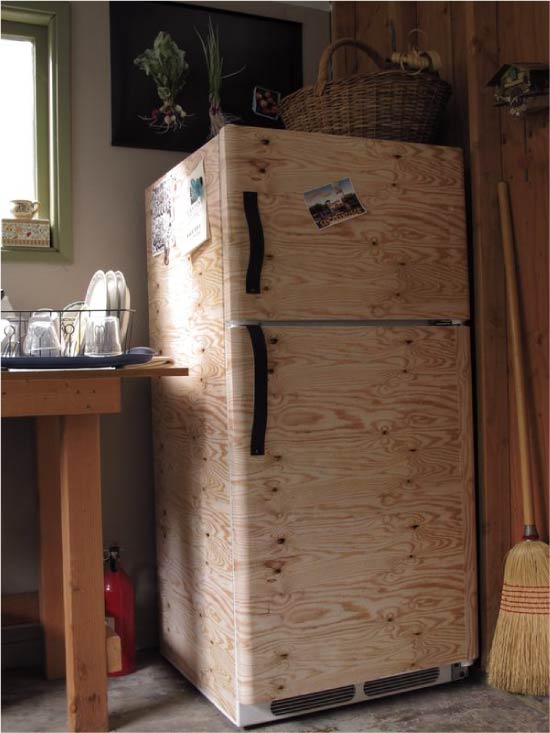
Altering the refrigerator with self-adhesive film is a budget and simple alternative to photo printing and painting. All you need to do to change the design of the refrigerator: degrease the surface and remove the handles, glue the film, simultaneously smoothing it with a non-sharp flat object, then wrap it around the edges, cut off the excess and return the handles to their place.
Unfortunately, self-adhesive film, unlike photo-printed film, does not have a lamination layer and wears out quickly. In addition, it adheres worse to uneven and rounded surfaces.

- How to paint or decorate walls
- Kitchen wall decor - 12 super ideas
- 10 tips to decorate your kitchen with paintings
- 12 super DIY home and kitchen ideas
- Panels for the kitchen - ideas and instructions
- Indoor flowers and plants for the kitchen
Method 6. Decoupage (+ master class)
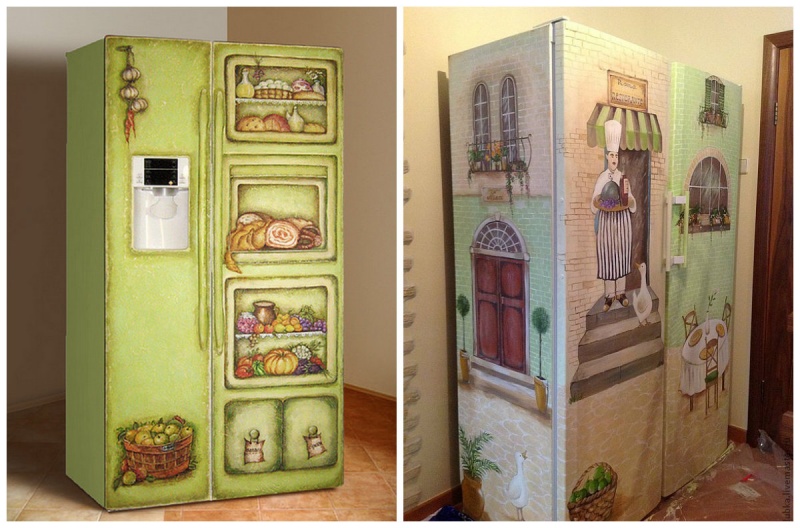
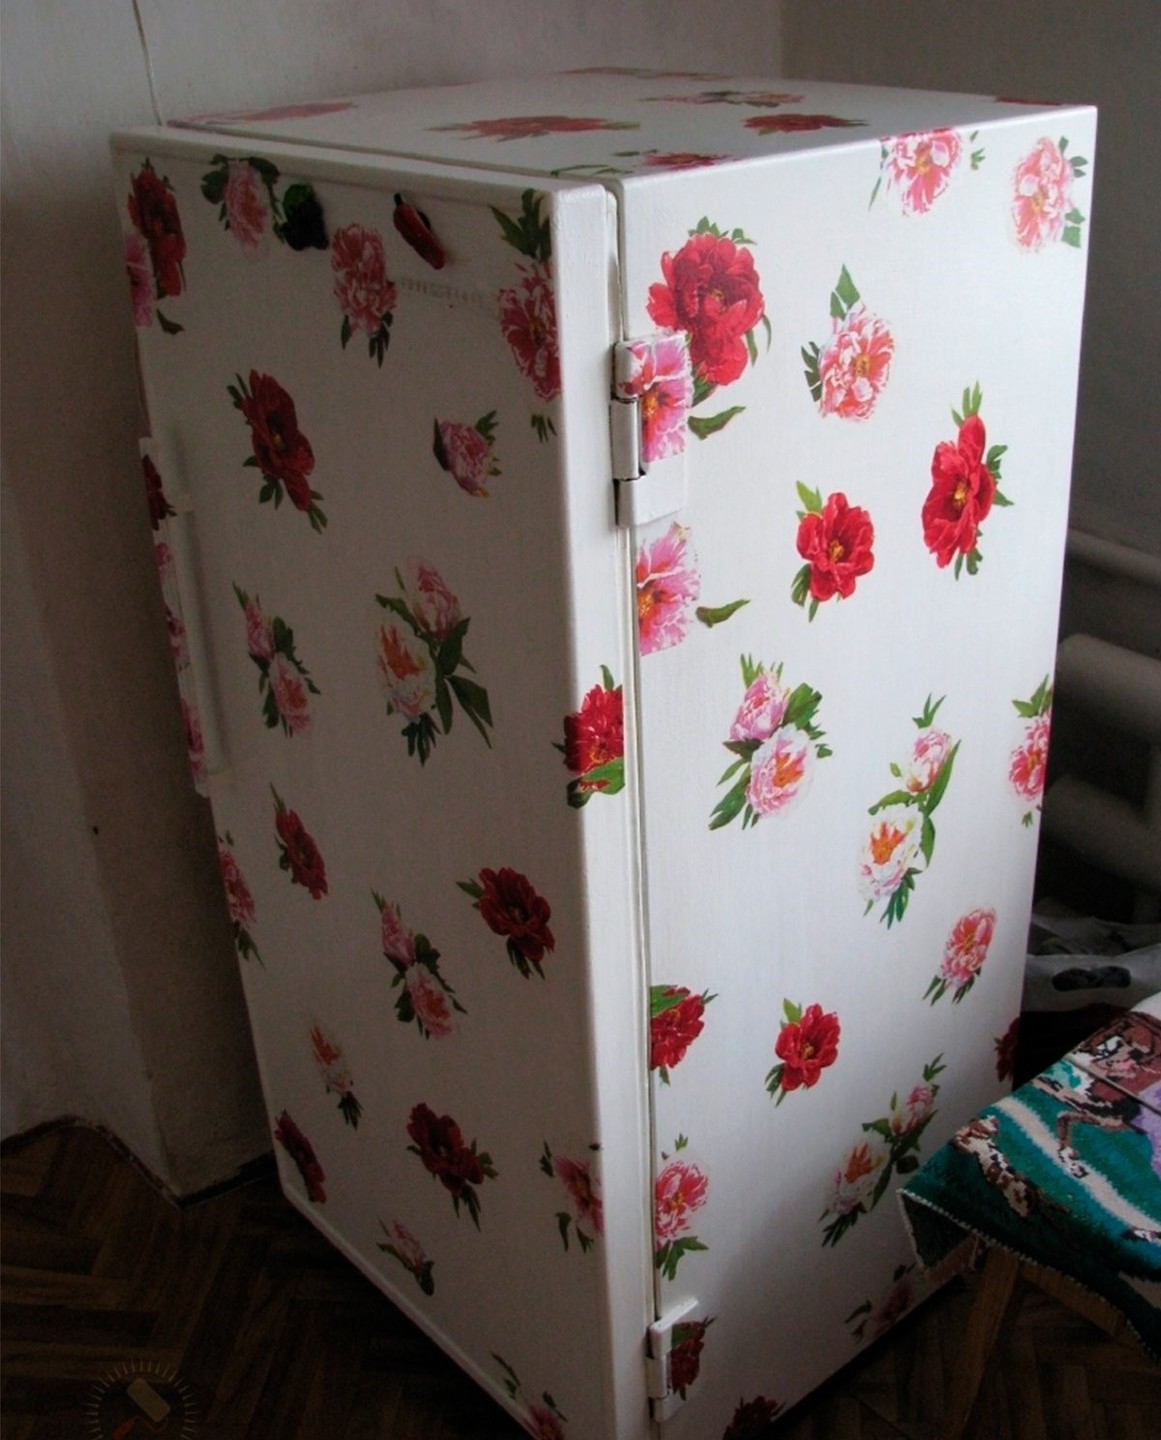
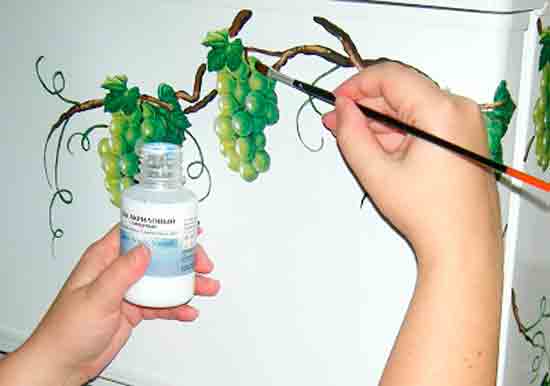
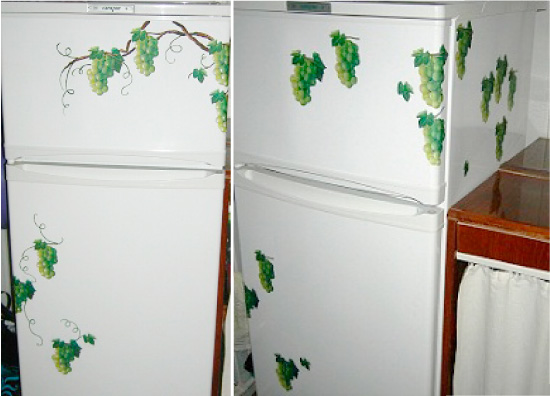
Decoupage is a simple and great way to update an old refrigerator, adapt it to a rustic or traditional kitchen interior, or add hand-painted or decorative moldings.
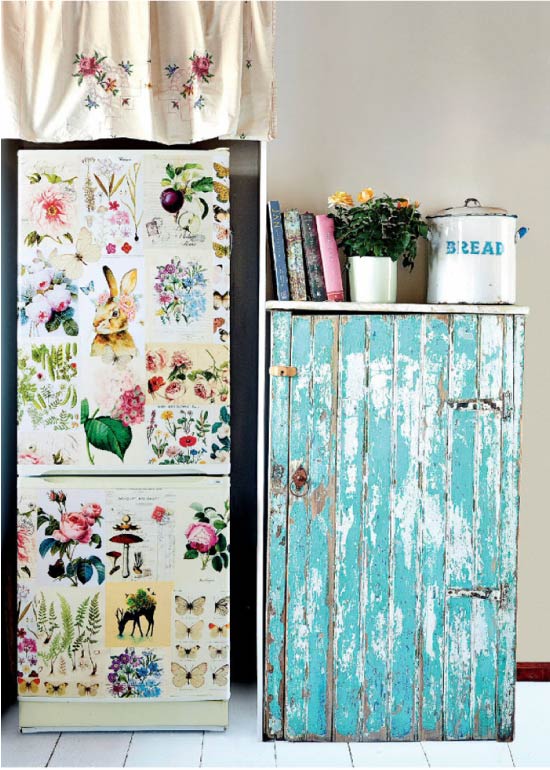
Refrigerator decor using decoupage technique
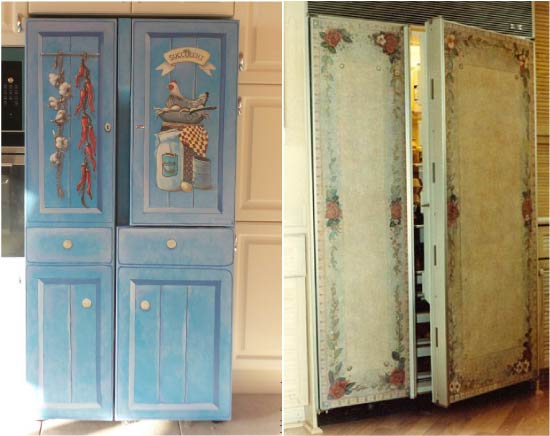
Decoupage of a Side by side refrigerator
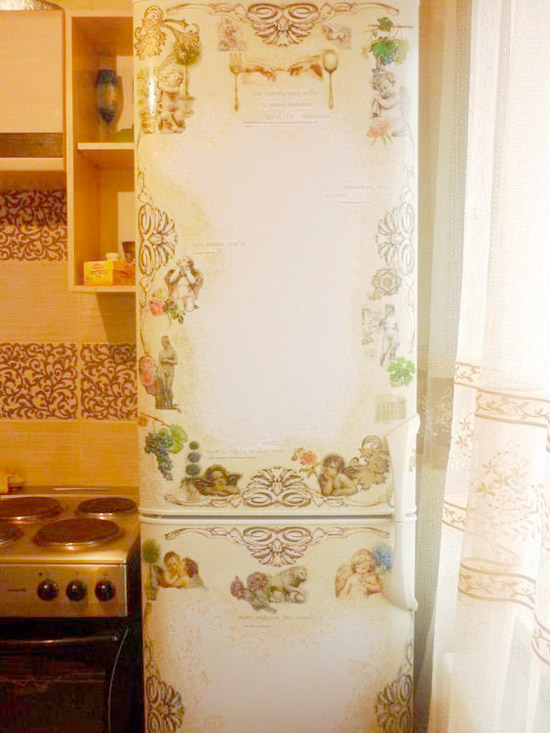
Refrigerator decoupage
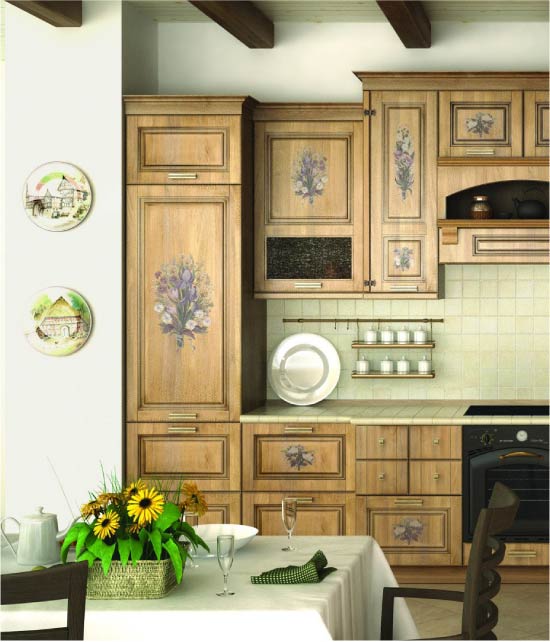
Decoupage of the built-in refrigerator

Decoupage of the built-in refrigerator
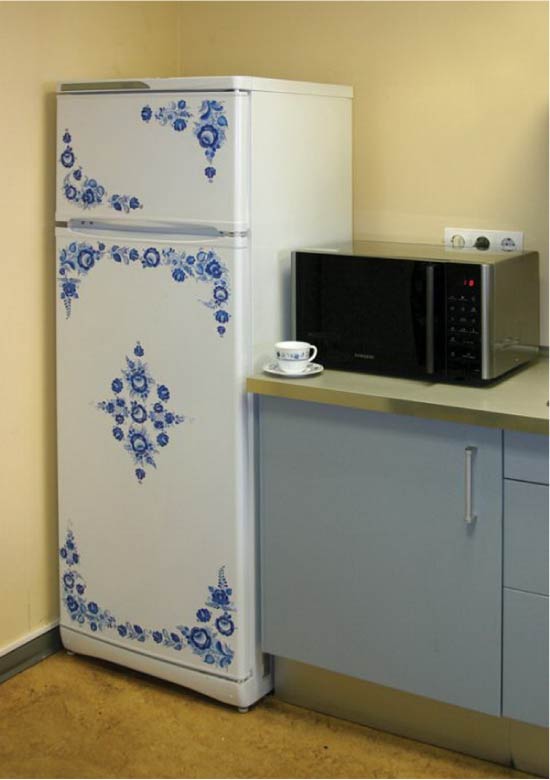
Decoupage of a refrigerator in gzhel style
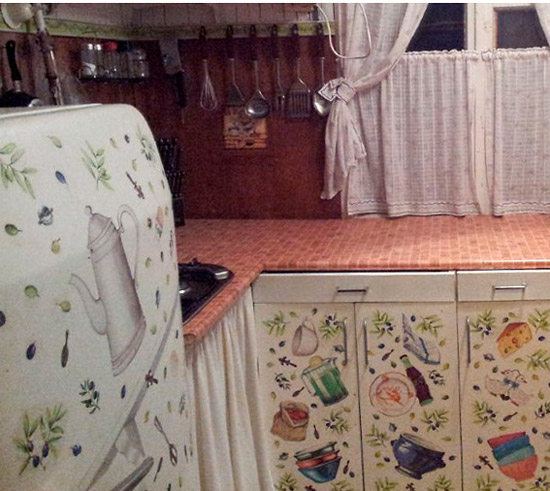
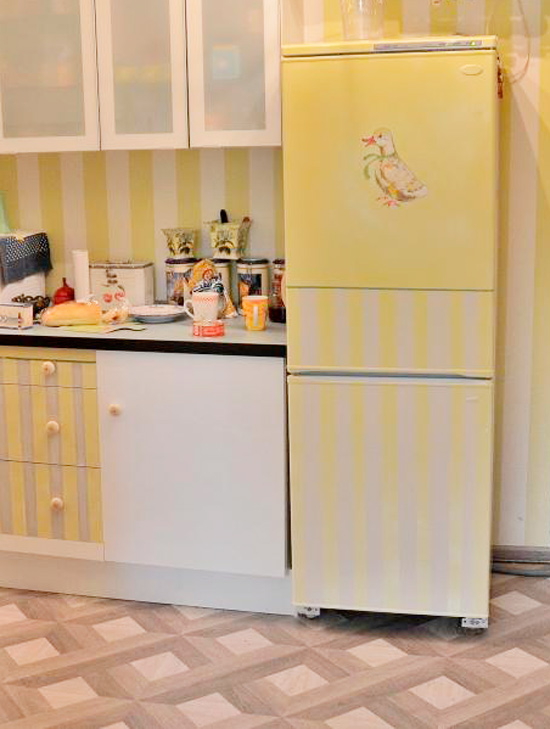
DIY fridge decoupage idea
To decoupage the refrigerator, you will need:
- Multi-layer napkins with the desired print, or better special cards for decoupage (they can be large in size, and the drawings themselves have already been compiled);
- Scissors;
- PVA glue;
- Brushes: flat squirrel (for decoupage and varnishing) and thin synthetic (for drawing details);
- Pencil (for marking and sketching);
- Acrylic paints;
- Acrylic varnish (matte, glossy or with craquelure effect).
Instructions:
Step 1. Prepare the surface: degrease with an alcohol solution if you plan to glue the drawing on the factory finish, or paint the refrigerator the desired color and wait for the paint to dry.
Step 2. Separate the pattern layer from the napkin and cut the desired element along the contour with scissors. Cut as many pieces as needed.
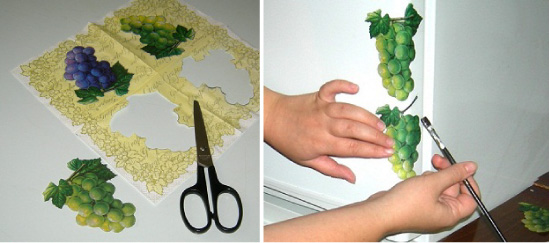
Step 3
Start gluing the first drawing: coat the inside with glue, attach it to the desired place, then carefully smooth out the bubbles and folds with a brush, remove excess glue with a damp cloth using tamping movements. Next, glue all the other blanks, moving from the center to the edges, starting with large and ending with small elements.
Before gluing the napkins, it is advisable to apply markings to the surface of the door.
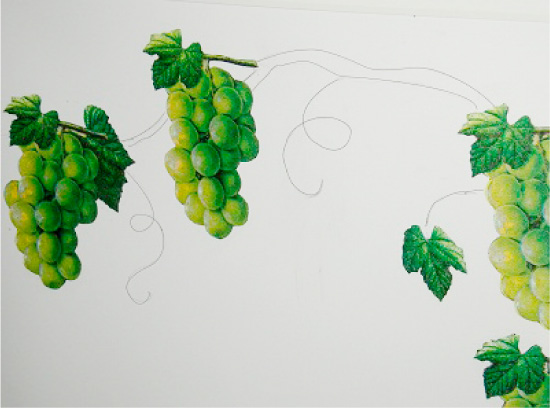
Step 4. When the whole composition is folded, draw in small details and outlines.
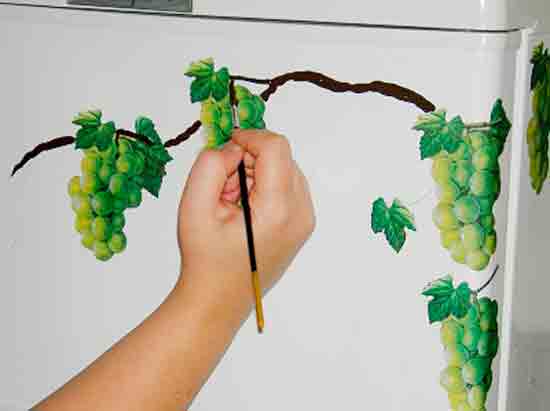
Step 5. Apply a matte or glossy varnish to the drawing in two or more layers to give it greater strength and moisture resistance.
For a more detailed master class on decoupage of a Provence-style refrigerator, see this video.
How to paint a refrigerator at home
Having decided to paint the refrigerators with their own hands, the user must choose how the paints and varnishes will be distributed over the surface. The paint can be applied by brush, roller or spray. After that, they are determined with the type of coloring composition.
How to paint
For painting household appliances outside, the following compositions are used:
- Enamel. This paint is used in the manufacture of refrigerators in an industrial environment. The choice of such a composition is considered the best option. The enamel adheres well to the surface. After staining, the body of the device acquires a pleasant shine. The disadvantage is the presence of toxic substances in the composition. Repairs should be carried out in a well-ventilated area or outdoors.
- Epoxy composition. After application, it acquires properties similar to those of enamel coatings. The disadvantages are the high cost and complexity of use.
- Acrylic paint. The quality of the coating composition obtained during application is inferior to the characteristics of the enamel one. However, for painting household appliances used indoors, acrylics are suitable. In addition, such paints have a lower cost.
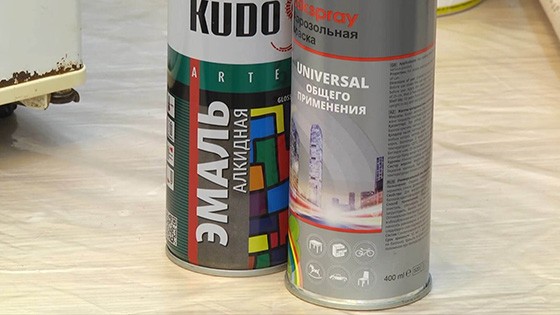
- Aerosol paints. The application of such a composition does not require the use of a brush or roller. For processing the surface of the refrigerator, automotive paints in spray cans, the quality of which is comparable to the properties of enamel, are suitable. Spray application facilitates repair work. The disadvantage is the high cost.
Required tools
To paint the refrigerator, you will need the following materials and tools:
- degreasing compound;
- abrasive material;
- masking tape used to protect unpainted areas;
- brushes or rollers of different sizes;
- coloring composition;
- dry clean rags;
- sheets of paper or plastic wrap to protect the floor (when carrying out repairs indoors);
- personal protective equipment (gloves, respirator).
How to prepare the surface of the refrigerator
After preparing all the necessary materials and tools, you can proceed to preparing the unit for home painting. The work execution process includes the following stages:
- Disconnecting from the network. After that, the refrigerator is freed from food, shelves and trays.
- Primary surface treatment. Remove grease, dust and other dirt with a sponge and detergent.
- Removing old paint. To do this, use first coarse-grained, then fine-grained sandpaper. This helps not only to remove the old coating, but also to level the surface, providing better adhesion to the dye composition.
- Degreasing. The surface is treated first with a damp cloth, then with a dry cloth. Use a lint-free cloth. The surfaces are treated with a degreasing agent.
- Protection of unpainted areas. These areas are sealed with masking tape or cling film. Do not paint sealing gums, chrome-plated parts and technological holes.
- Floor protection. To do this, you can use old newspapers that cover floors and nearby pieces of furniture.
- Primer application. The composition is sprayed from a can onto corroded areas of the body. The primer is allowed to dry, after which the treatment is repeated.
Refrigerator painting inside
You can paint the refrigerator both outside and inside. Since the inner surfaces of the refrigerator are in different operating conditions, this must be taken into account when choosing a coloring composition and coloring method. Do not use colorants just to change color. Painting is advisable if corrosion and yellowness appear inside the chamber.
For painting, choose waterproof compounds that tolerate temperature changes well. They can be used to paint over the enamel chips that often occur under the rubber bands and in the area of the footrests. Remember that only white paints are released to restore the inner surface of refrigerators. If there is a desire to give the camera an interesting shade, special colors are chosen. It is necessary to apply such paint only with a roller or a brush: you cannot use a spray or a spray can for working on metal. Drying time is about 24 hours. Only after the lapse of a day is it permissible to apply a new layer.
The algorithm for painting the refrigerating chamber looks like this:
- the corrosion is carefully removed with sandpaper. You can use special tools;
- apply the first layer of the composition, which will help the acrylic to "grab" faster;
- the surface is degreased with gasoline;
- make a primer for "problem" areas;
- dried and sanded with emery;
- apply paint in one layer, holding time - 24 hours;
- the second layer is applied, the holding time is 24 hours;
- leave the refrigerator open.
After painting the chamber, a specific smell of paint will remain inside for a long time. You cannot use the refrigerator right away, because all food will be saturated with toxic fumes. You need to deal with this problem immediately after the last layer has completely dried. The chamber is thoroughly washed with vinegar solution, the refrigerator is turned on and several pots filled with clean water are left in it. The water will gradually absorb the smell of the paint. The saucepans are changed regularly within three days without being covered.
Dry brewing, activated charcoal and ground coffee will also help to combat the smell of paint.
Advice!
If you have no desire to prepare homemade tools and formulations, use a desiccant for refrigerators. They are changed every day for 7 days, and the unpleasant odor disappears completely.
Fridge coloring is a tricky but fun creative process. It needs to be approached seriously - so that later you do not have to regret the wrongly chosen paint. If you do it right, your old refrigerator will take on new life and serve you for a long time.


