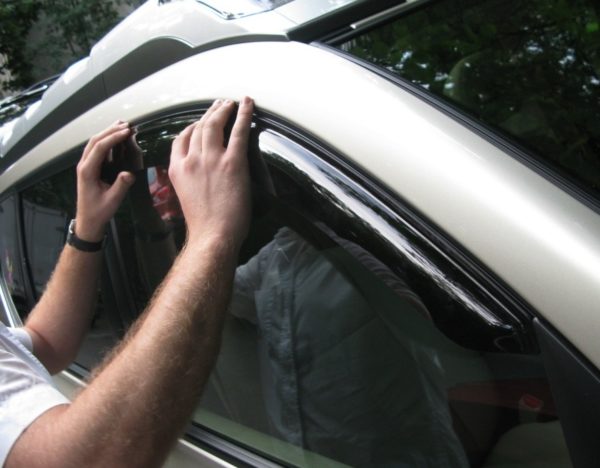
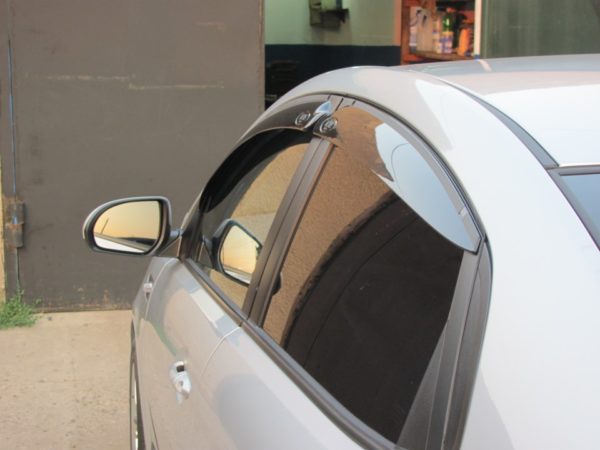
What is a car deflector and how does it work?
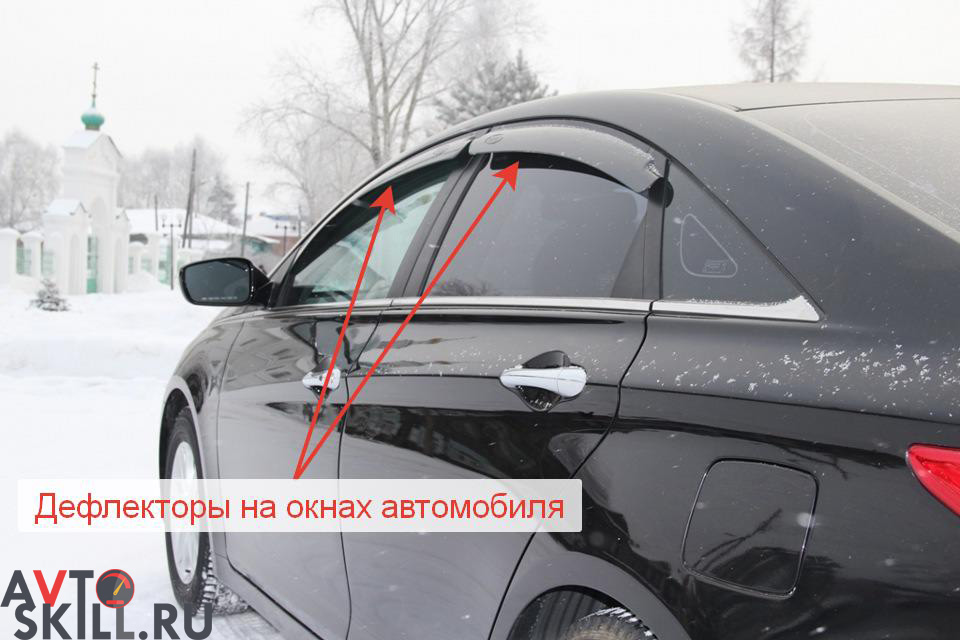
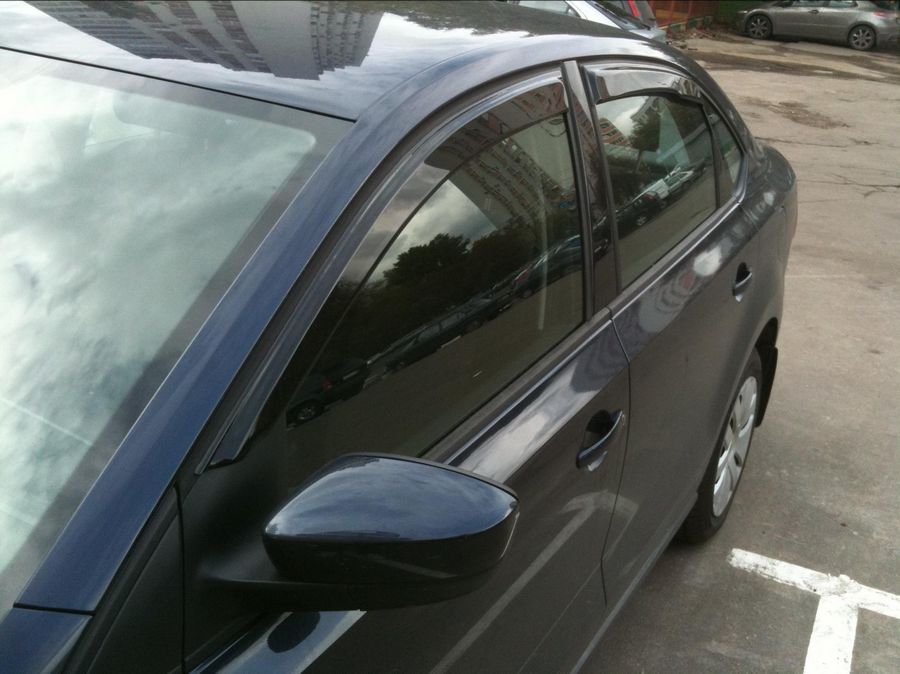
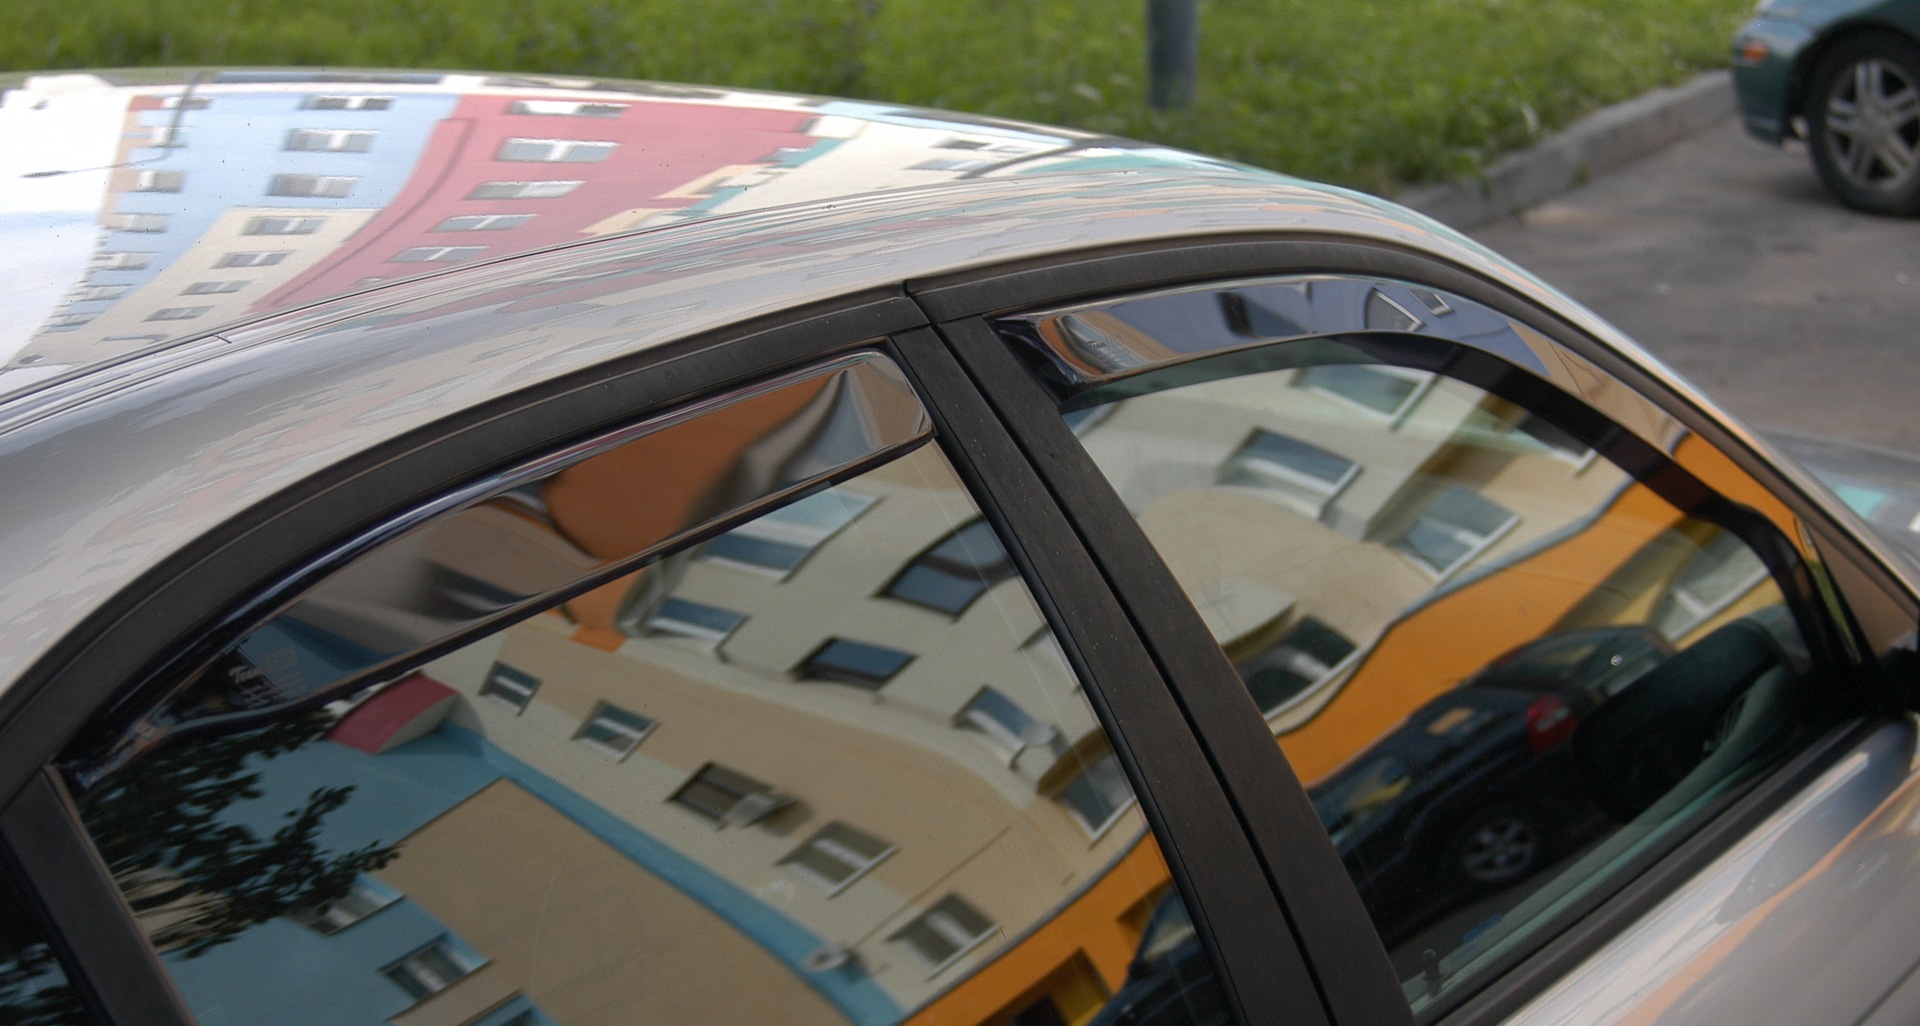
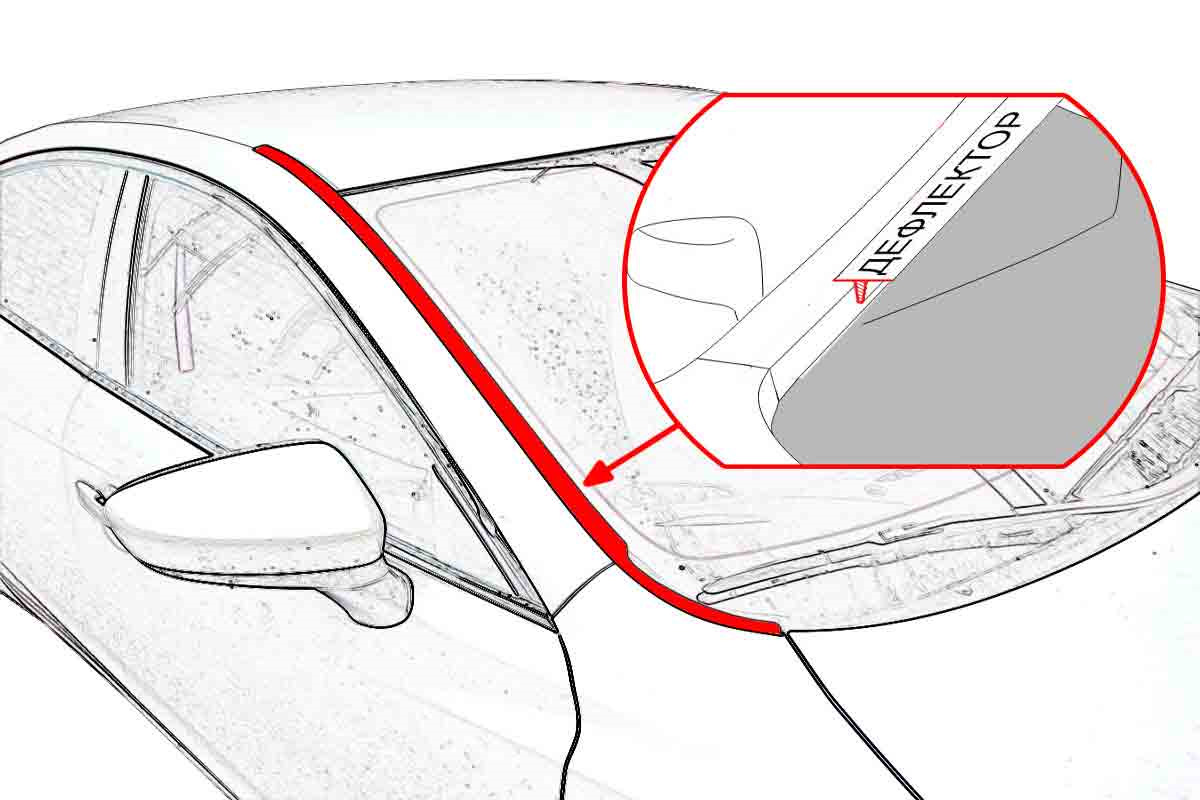
This, so to speak, pad performs quite practical functions. Installed in the right place, it prevents insects, various stones, dust and other dirt from getting on the hood, roof and windshield, thus protecting the paintwork and glass, which is easily damaged. In general, it carries a protective function, which we simply have no right to underestimate.
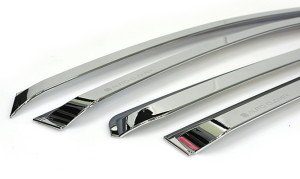
Deflectors on the car door prevent rain drops and, accordingly, water splashes from other road users from entering the passenger compartment. In addition, they also have a positive effect on air circulation. If this element was installed on the roof of the car above the hatch, then its purpose is somewhat different than in the first case. Rather, it also performs a protective function and does not allow various dirt, dust and other debris to enter the interior, but this is not its only task. At the same time, it also significantly reduces noise levels, which directly affects our comfort. And by reducing turbulence, the ventilation of the passenger compartment is also improved.
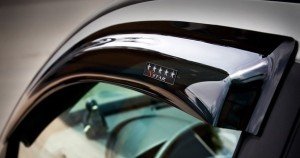
Automotive deflectors have the following principle of operation. When we drive, the air in front of the edge is in constant motion, and as soon as debris gets there, it also has to move with this air flow. In this case, the flow is directed in such a way that foreign matter can never get onto the windshield. This is achieved thanks to the shape of the accessory and the place of its attachment (it is located in the area where the pressure is highest).
What are they needed for?
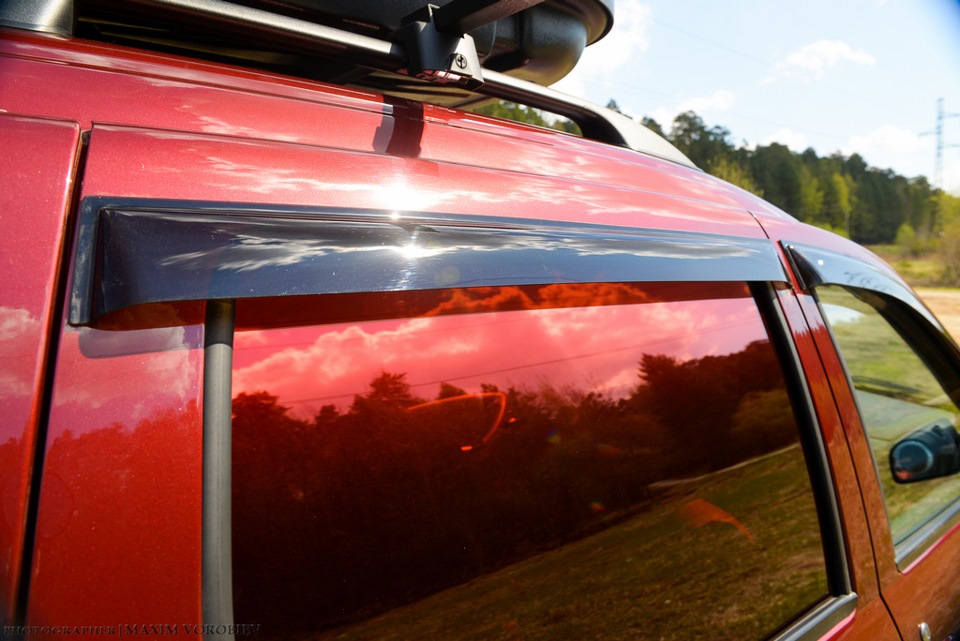
How to glue the visor on the car? Before answering this question, you need to figure out what it is for. Deflectors are a kind of visors over the glass of the car. This protects the side windows from dirt. Such a refinement will allow avoiding the appearance of dead zones when the glass is dirty. The advantage of such equipment can be especially appreciated in the rain. If you have visors, you can slightly open the windows to ventilate the cabin. In this case, water will not get into the cabin. This will prevent the windows from fogging up while driving.
Drivers who smoke know that the flow of oncoming air can blow all the smoke back into the passenger compartment. By installing deflectors, you get rid of this problem.
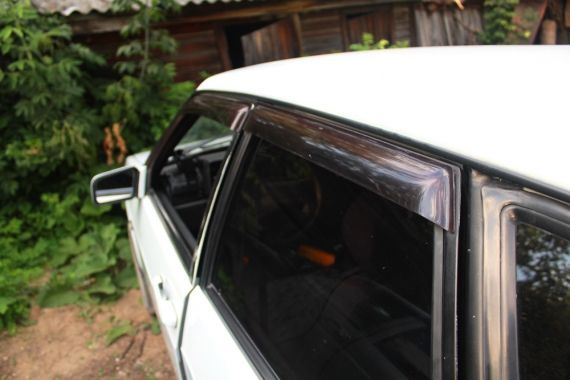
Actually, there are only 2 main types of deflectors, they differ in the way of attachment:
- Plug-in... They are attached between the sealing rubber and the glass. They are rather inconvenient to operate;
- Pasted... They are a little more difficult to set up, but much easier to use.
Shape, color and other features usually depend on your car model and personal preferences.
How to glue deflectors on a car - installation nuances
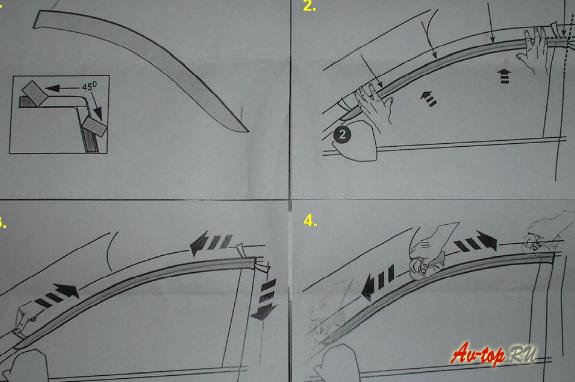
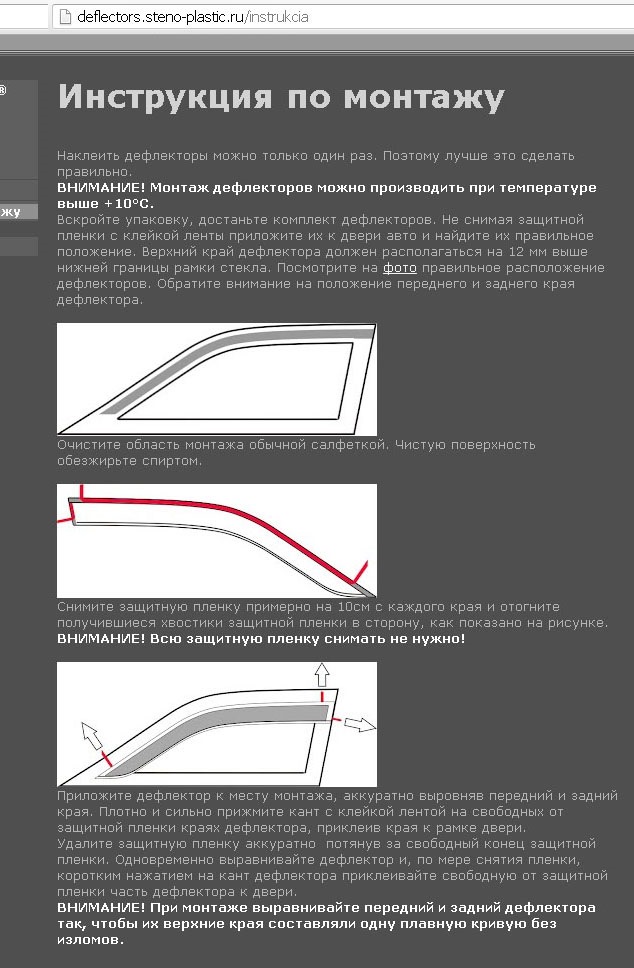
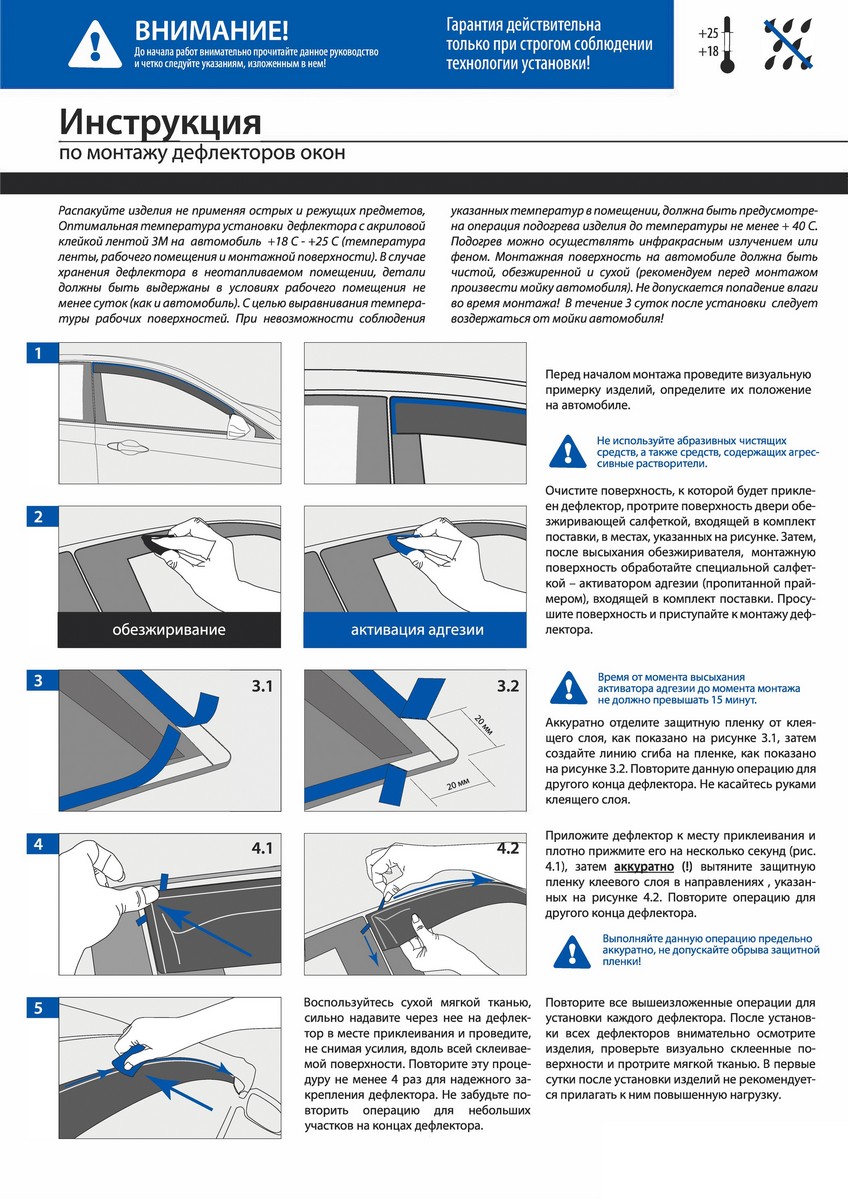
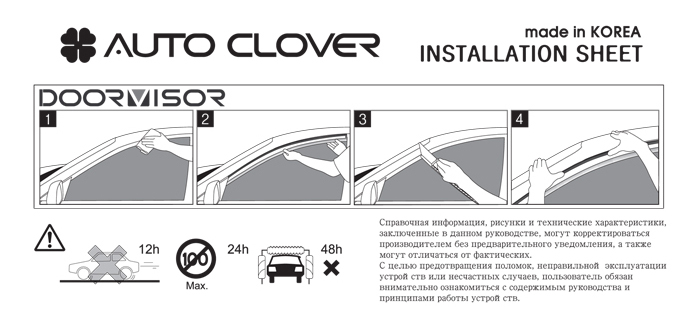
Having found out what a car deflector is, you also need to figure out how it can be glued to the surface. At the same time, keep in mind that sometimes you come across a bad adhesive tape that will not fix the part properly, this is another reason to buy only high-quality products. This procedure usually takes no more than 10 minutes and consists of the following steps. First you need to try on the accessory so that it does not interfere with the view (especially when it comes to deflectors for windows), is located in the center, etc. Next, degrease the surface with a special napkin (it should be included in the kit).

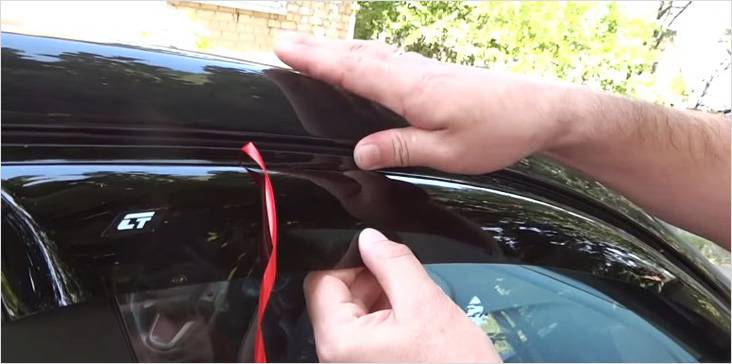
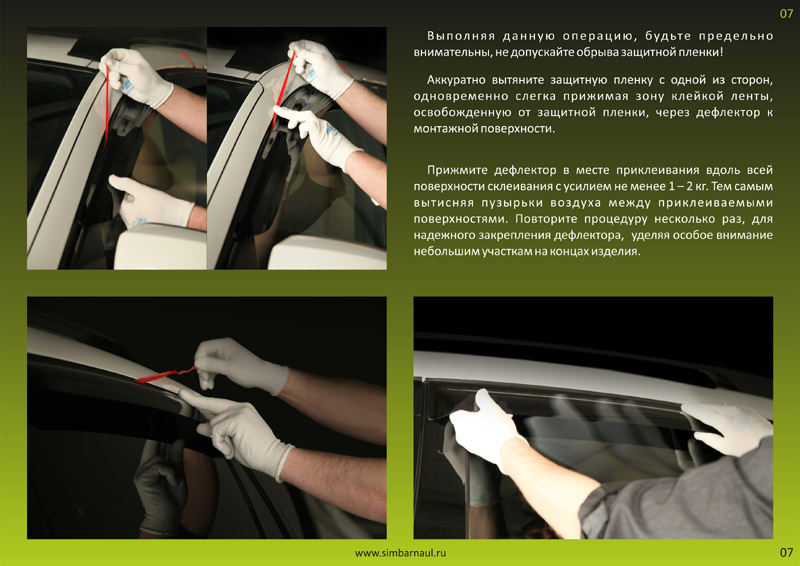
Now you need to separate 5 cm from both sides of the edge of the protective film from the double-sided tape and glue the part. If it turned out unevenly, then you need to instantly re-glue, and when the work is done perfectly, you need to pull the antennae of the protective film and press the deflector for a while. There is also a universal car holder in the deflector, this fixture is attached through the ventilation panel and is used as a stand for mobile phones, tablets and other similar equipment.

Home →
Operation → Accessories →
Why are deflectors installed on the car
Modern cars have a streamlined shape, which gives them the ability to develop high speed. But this design has a drawback - all moisture or debris falling on the hood is blown away by a powerful wind flow onto the windshield and side windows. Manufacturers do not install deflectors, leaving the owners to decide what is more important to them - speed or comfort.
Visor functions:
- Prevention of dirt and precipitation entering the passenger compartment.
- "Cutting off" sun glare, cigarette ash (if someone smokes in the car).
- Draft protection by creating a calm zone.
- Diversion of gravel and debris from glass, hood.
- Protection from knocked down insects.
In rainy weather, some cars have sweaty windows. The presence of protection helps to ventilate the interior. At the same time, moisture does not get inside, there is no draft either. This improves lateral visibility. In addition, visors affect the appearance of the vehicle.
Instructions for installing deflectors on tape
 Can only be installed on double-sided tape
So, let's move on to the installation process itself. If deflectors are chosen that are installed only on tape, then installation will be the easiest.
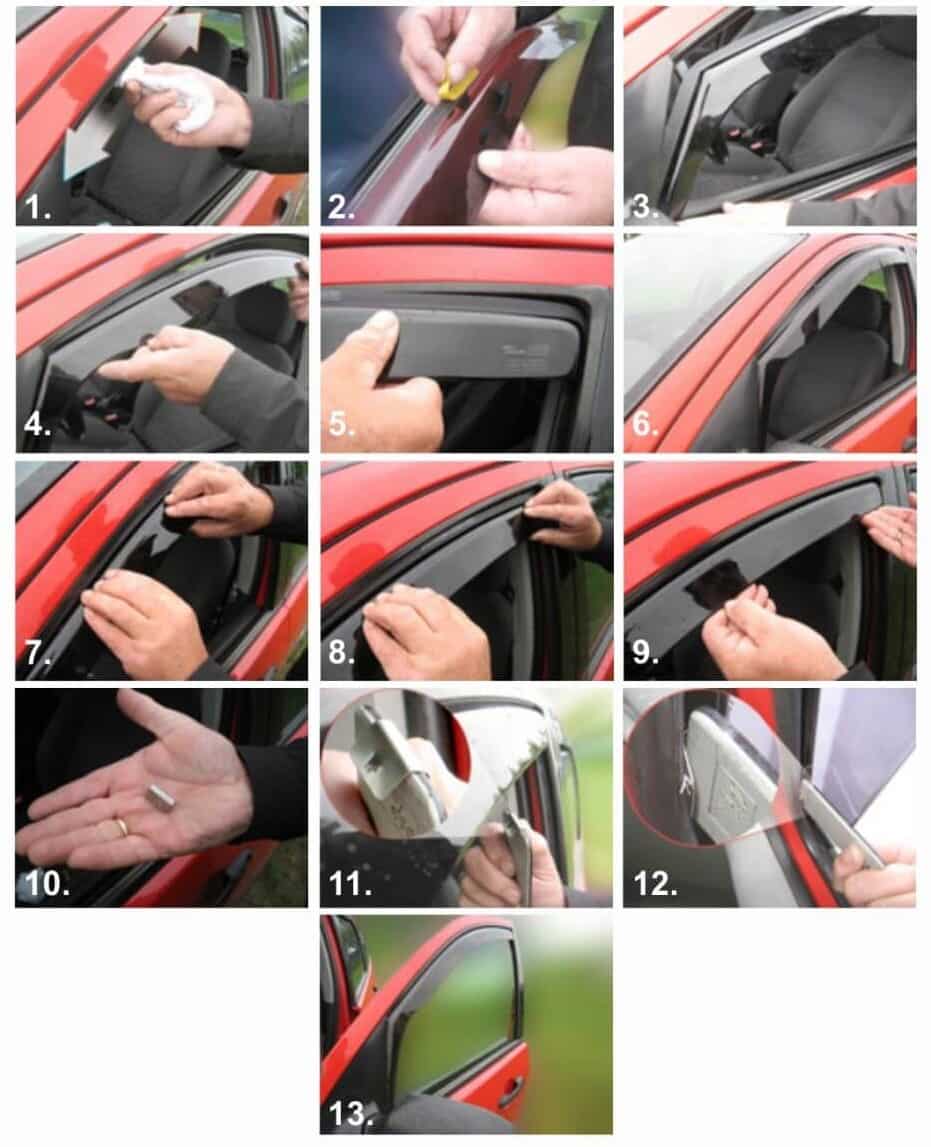
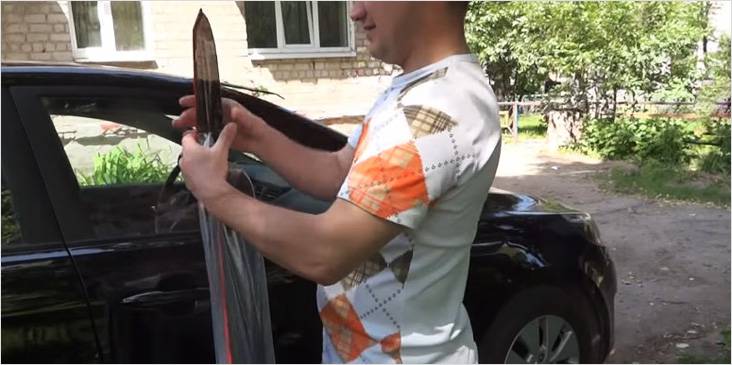 We take out from the package We take out from the package |
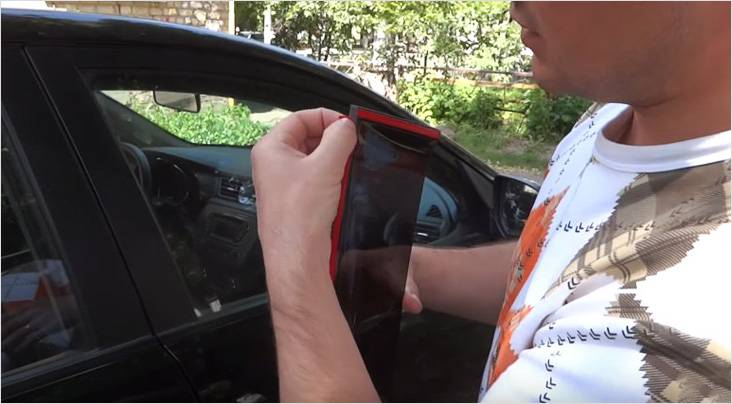
We remove the protective covers from the deflector, as a rule, it is a plastic film. |
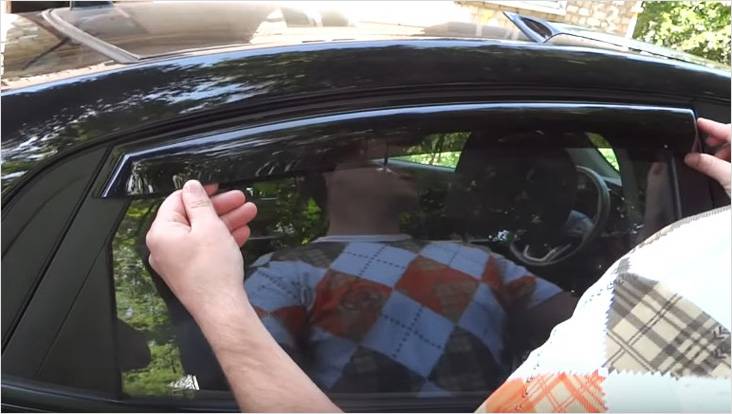 Trying on the spot Trying on the spot |
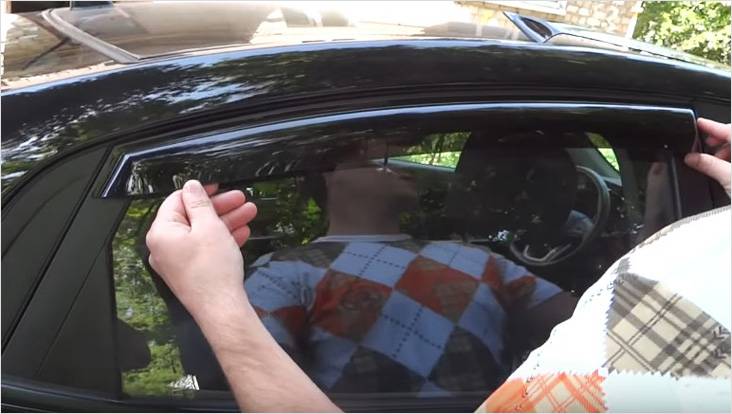
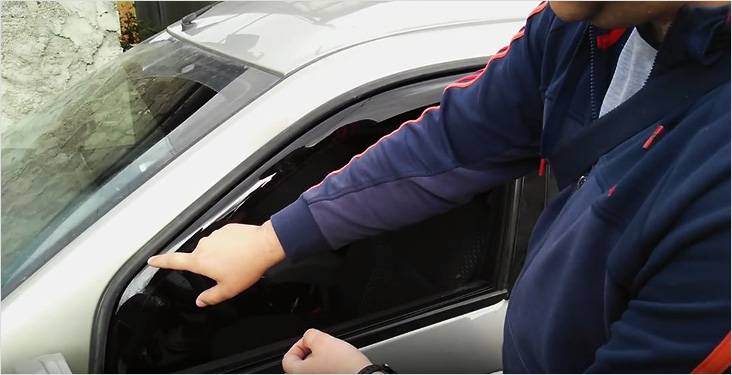
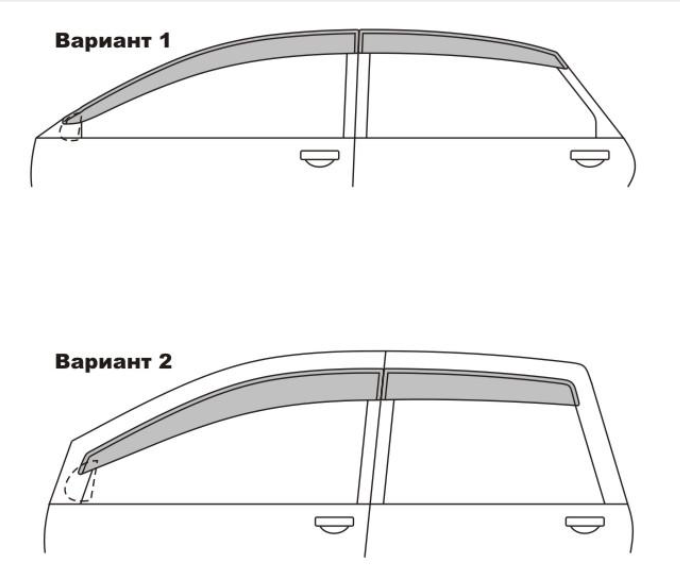
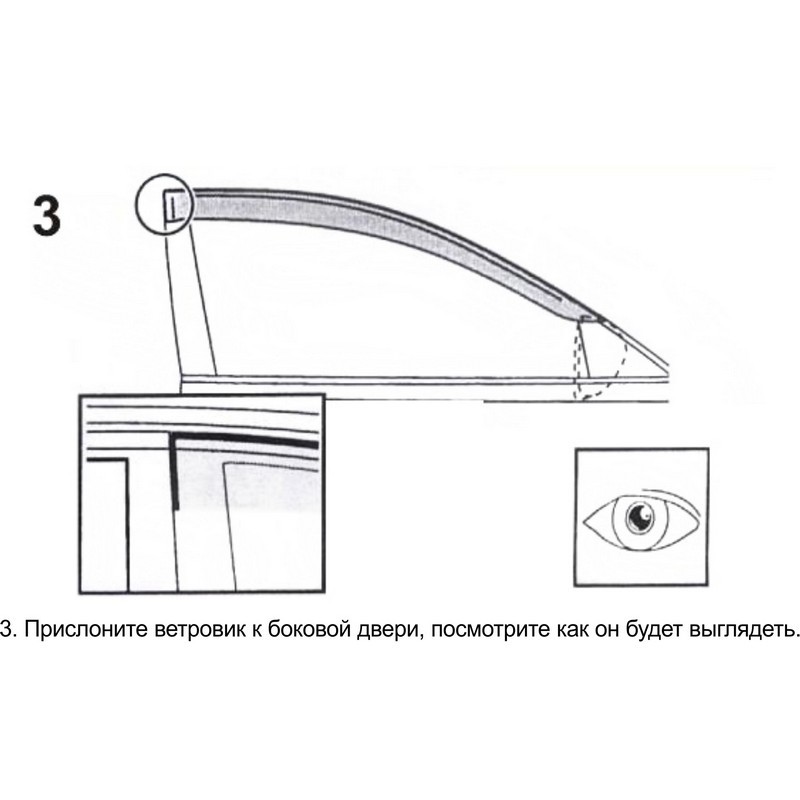
Before installation, you need to attach deflectors to figure out how they will be located correctly. The deflector must run along the edge of the window! Place marks where the deflector will be located. This can be done with masking tape. |
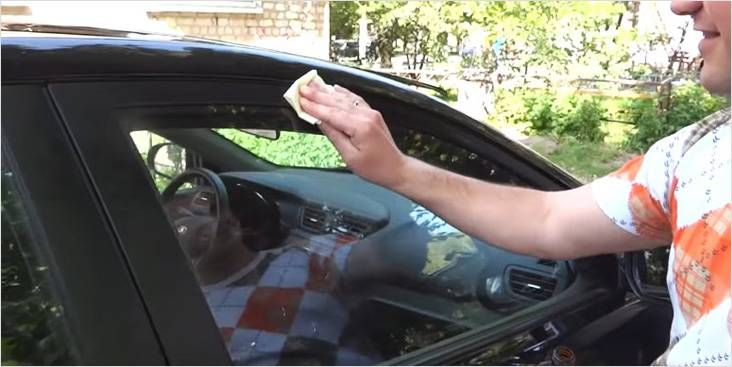 Wipe with an alcohol napkin Wipe with an alcohol napkin |
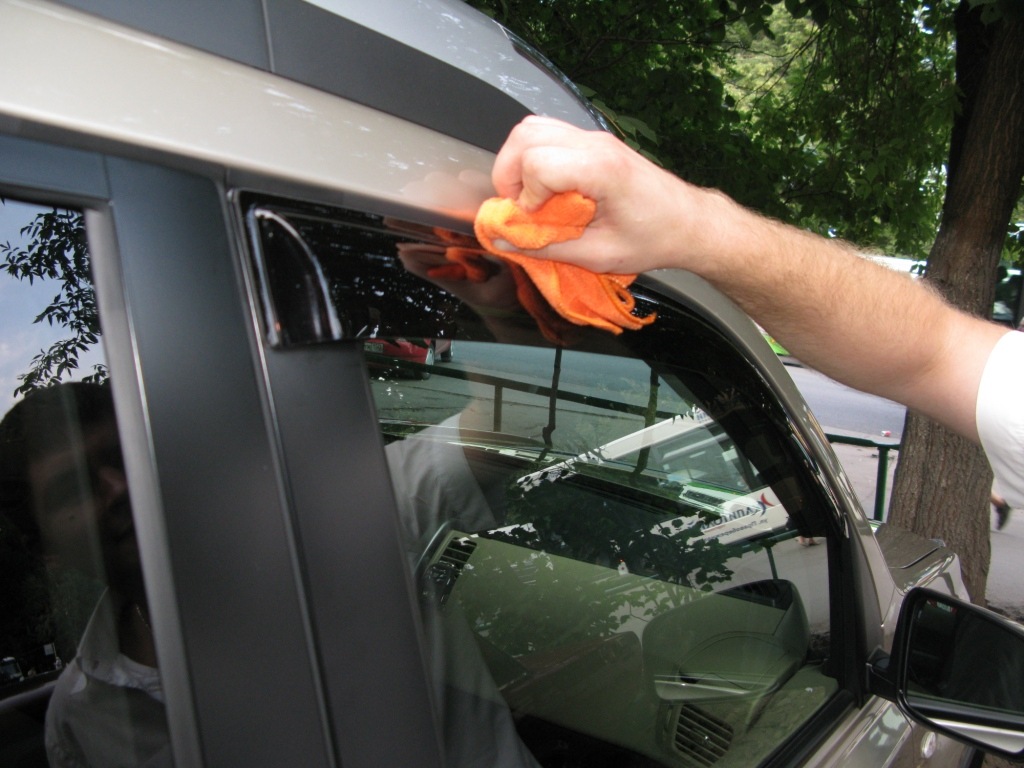
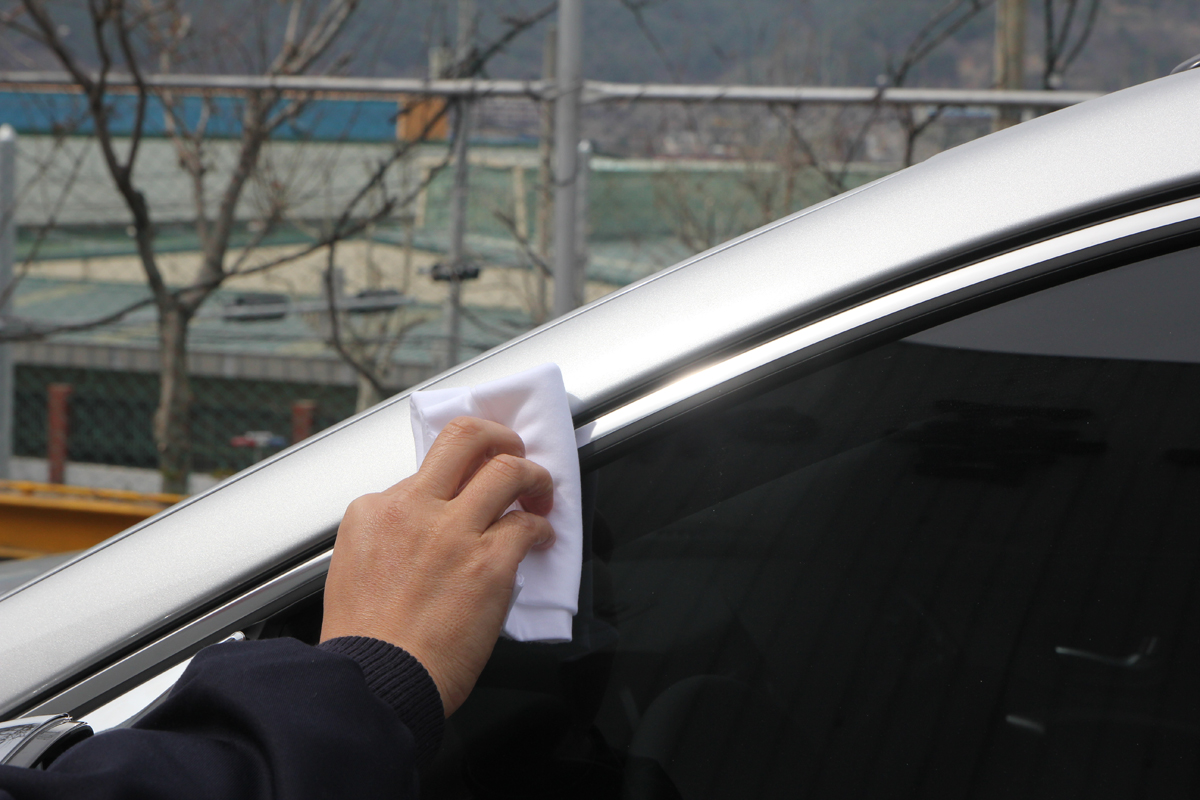
After that, degrease the place of gluing with alcohol or alcohol-containing liquids. Usually, new deflectors come with a degreasing cloth. After degreasing the surface, wipe it with a dry and clean cloth or just let it dry. |
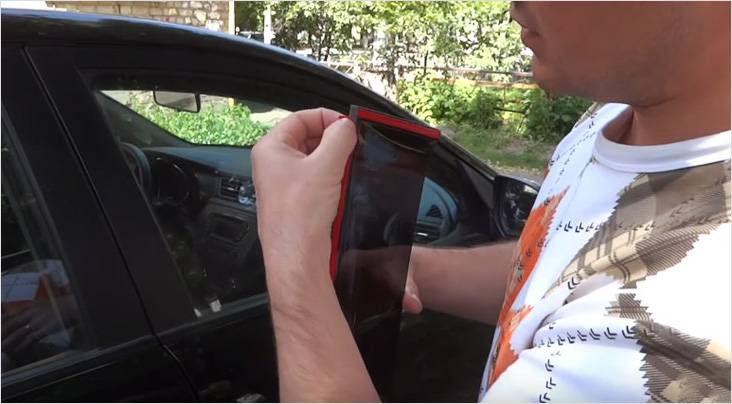 Disconnect the protective strip a little Disconnect the protective strip a little |
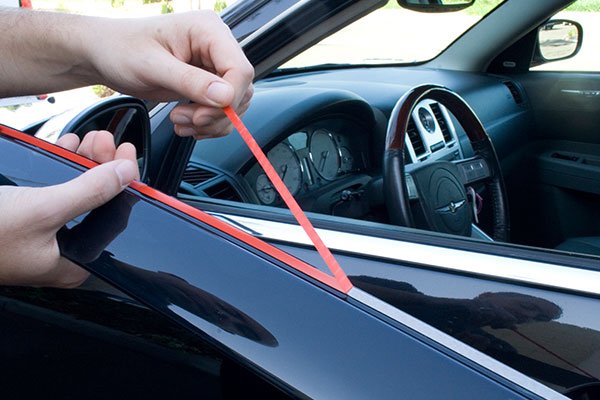
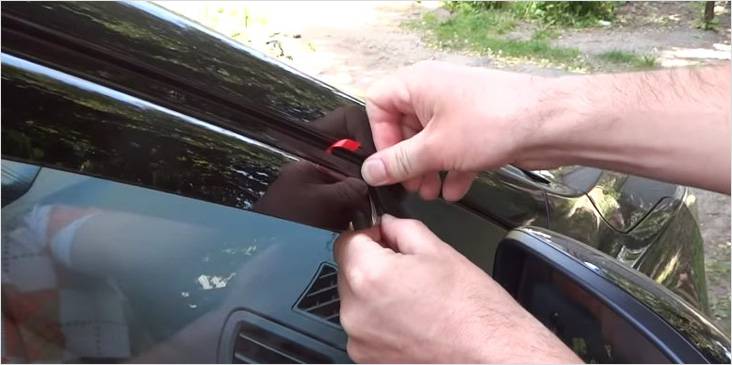
Then peel off the protective tape of double-sided tape a couple of centimeters and bend up the peeled off fragments. |
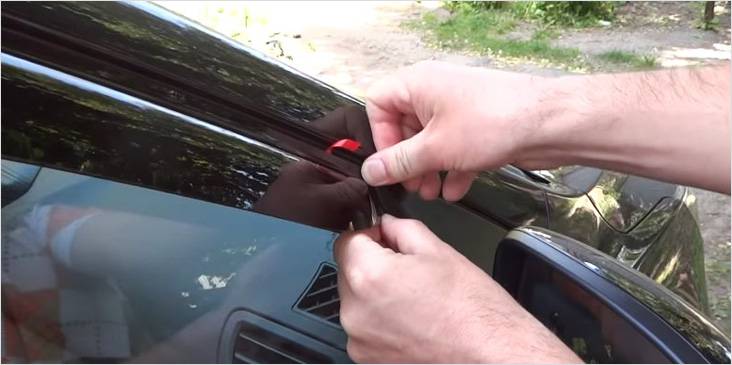 We glue along the edges We glue along the edges |
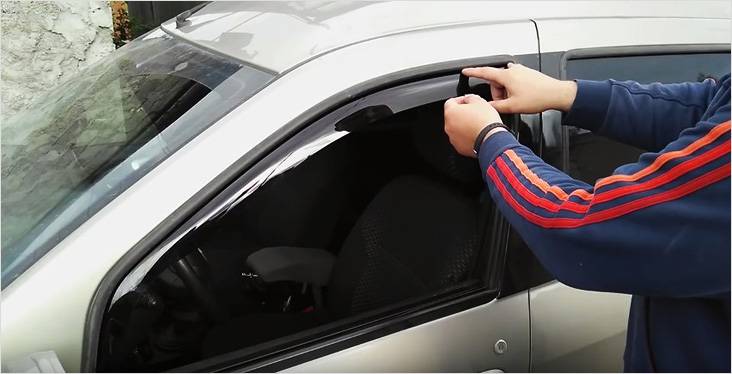
Gently glue the deflector to the place that has already been marked, gradually tearing off the rest of the tape. |
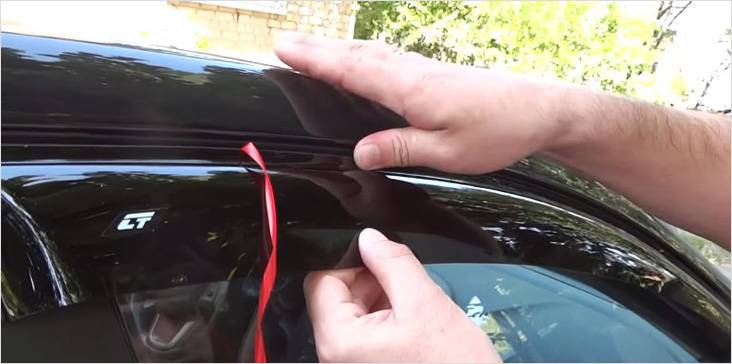 We press well We press well |
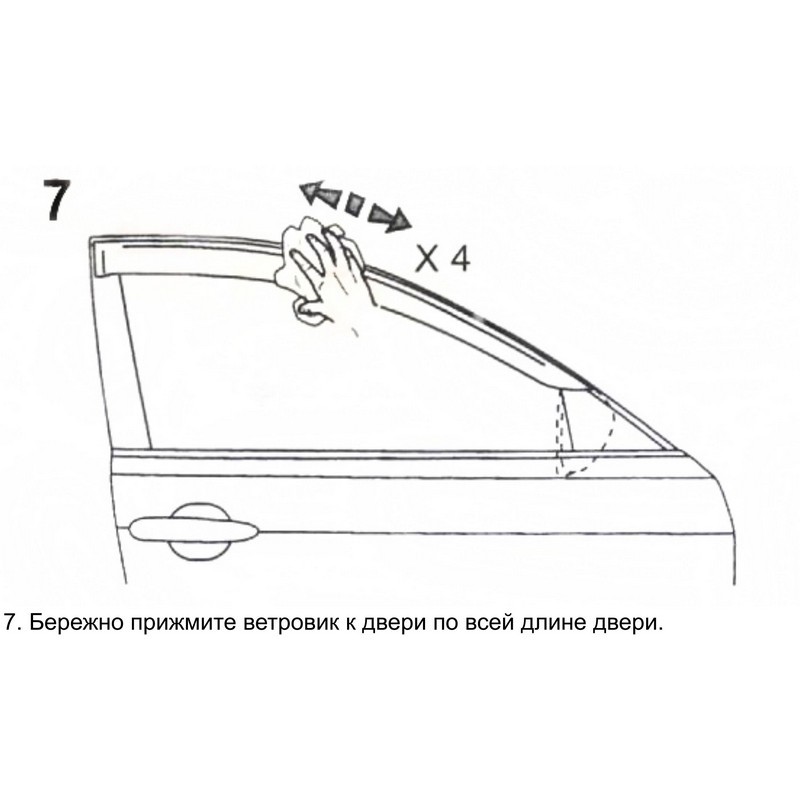
Immediately after this, the deflector must be pressed firmly. It is better to do this with a clean dry cloth. |
At the last stage, we remove the marks that we made at the beginning. We heat with a hairdryer so that the gluing site grabs faster. If you have not heated it with a hairdryer, then it is advisable that water does not get on the car for at least a day. Everything, deflectors are installed.
What are deflectors and why are they needed?
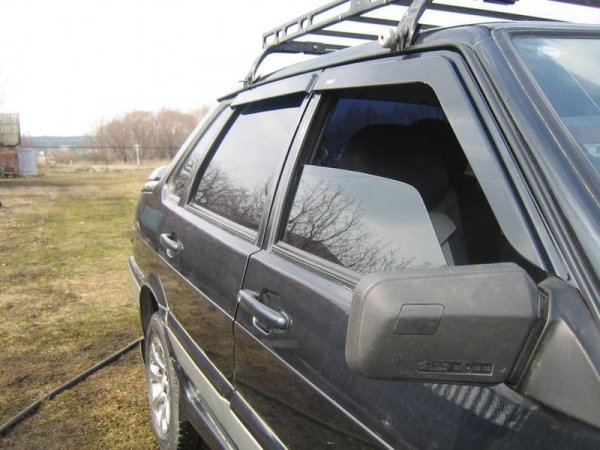
This ingenious invention was invented not so long ago. Namely, at the time when cars began to appear, in which the width of the body in the area of \ u200b \ u200bthe doors was greater than the width of the roof body. This design made it possible to improve the aerodynamic properties of the vehicle, as well as its stability on a straight road and in turns, but rather, for some drivers, there were slight difficulties. Firstly, in the summer, the sun more often shone from the side into the passenger compartment, since even at the top point, its light calmly fell into the eyes of the drivers. In addition, in rainy weather, it was unrealistic to open the window in order, for example, to smoke a cigarette, since the drops instantly wetted the door card and the driver's or passenger's hand.
This was the turning point on the path of the invention of deflectors. This is probably why in the common people they are called "canopies", because they are like canopies to protect from the direct rays of the sun, as well as from the rain.
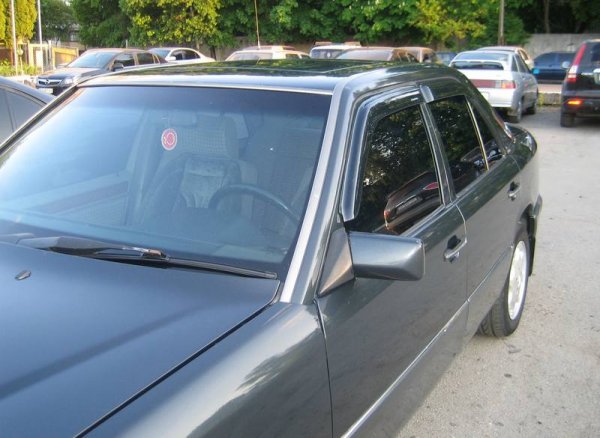
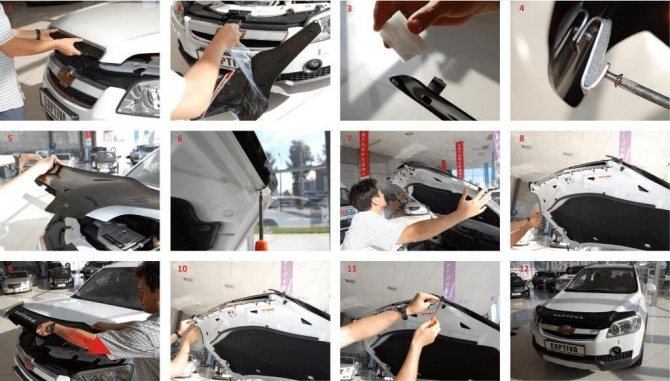
But it should also be said that today there are not only deflectors for windows, but also for the hood, roof and other parts of the car. That is, there are several main positive aspects of installing them on a car:
- Protective function.Asking the question of how to glue the visor on a car, you protect yourself from stones, debris, dust, flying insects and other things flying from under other cars. This also includes protection from rain.
- Aesthetic function. It's no secret that the visors on the windows, on the hood or on the roof look very impressive, giving your favorite vehicle new tones and colors.
- An additional layer of tinting. By installing deflectors on the side windows, you can further protect the cabin and passengers from direct sunlight.
- In addition to all of the above, it is worth adding that the deflectors are made in such a way as to complement the car with aerodynamic properties.
Problems with the installation of deflectors on the side windows and their operation
Novice drivers do not always know who, how and with what glues the visor on the car door. In view of this, manufacturing firms equip their products with good adhesives. For example, high-quality 3M glue is used on the elements. However, the plates may not stick at all, stick only halfway, or come off while the machine is moving.
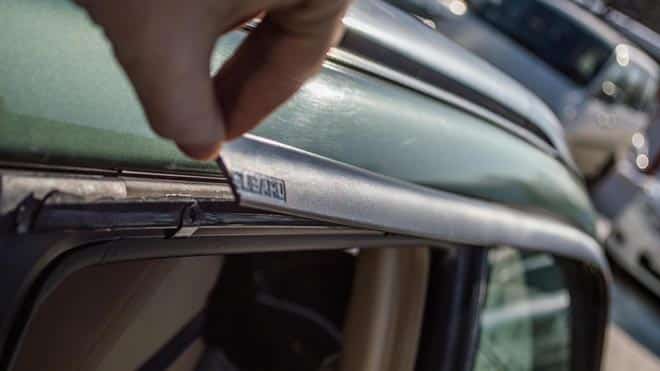
The salvation in such a situation will be double-sided tape:
- Take duct tape and cut out a strip of the same size as your visor plate.
- Glue one side of the tape to the fairing.
- Attach the other side of the adhesive strip to the door frame.
- Do the same if you want to re-glue the fairing. Pre-wash the place of its attachment with warm, soapy water, then walk with a solvent to finally remove the excess of the old glue.
Surface and car preparation for installation
Before buying, you need to carefully consider the cut-off devices. Deflectors correspond to a certain brand of car, differ in the way of fastening, shape, size. Models for front doors can be glued or inserted into special grooves. Rear window protectors are attached only with double-sided tape.
For machines equipped with electronics, adhesive deflectors are used.
The kit contains the products themselves, alcohol wipes, instructions for use. Sometimes there are adhesives in the composition for better fixing of parts. To carry out a high-quality installation of visors, you need to prepare the surfaces:
- clean the body from dirt;
- wait until the surface is dry;
- degrease fasteners;
- if necessary, apply an adhesive.
Conditions for secure attachment:
- Carry out work in a warm and dry garage.
- Do not operate a car with glued arcs within 72 hours after their installation.
- Do not wash the car after installation for 3 days.
In calm, windless weather, gluing can be carried out outdoors. To do this, you need a set of arcs, rags, degreaser or alcohol, and a hair dryer.
Side window deflectors sticker
As experience has shown, both mine and other drivers have fewer problems with glued-on windbreakers. The main technological dimension, like thickness, in this case no longer plays a significant role, since the deflector is glued from above along the edge of the door.

In this case, the very geometry of the deflector is important, so that it fully coincides with the geometry of the door edge. I think it is unnecessary to say that in this case, each model of the car has its own visor.
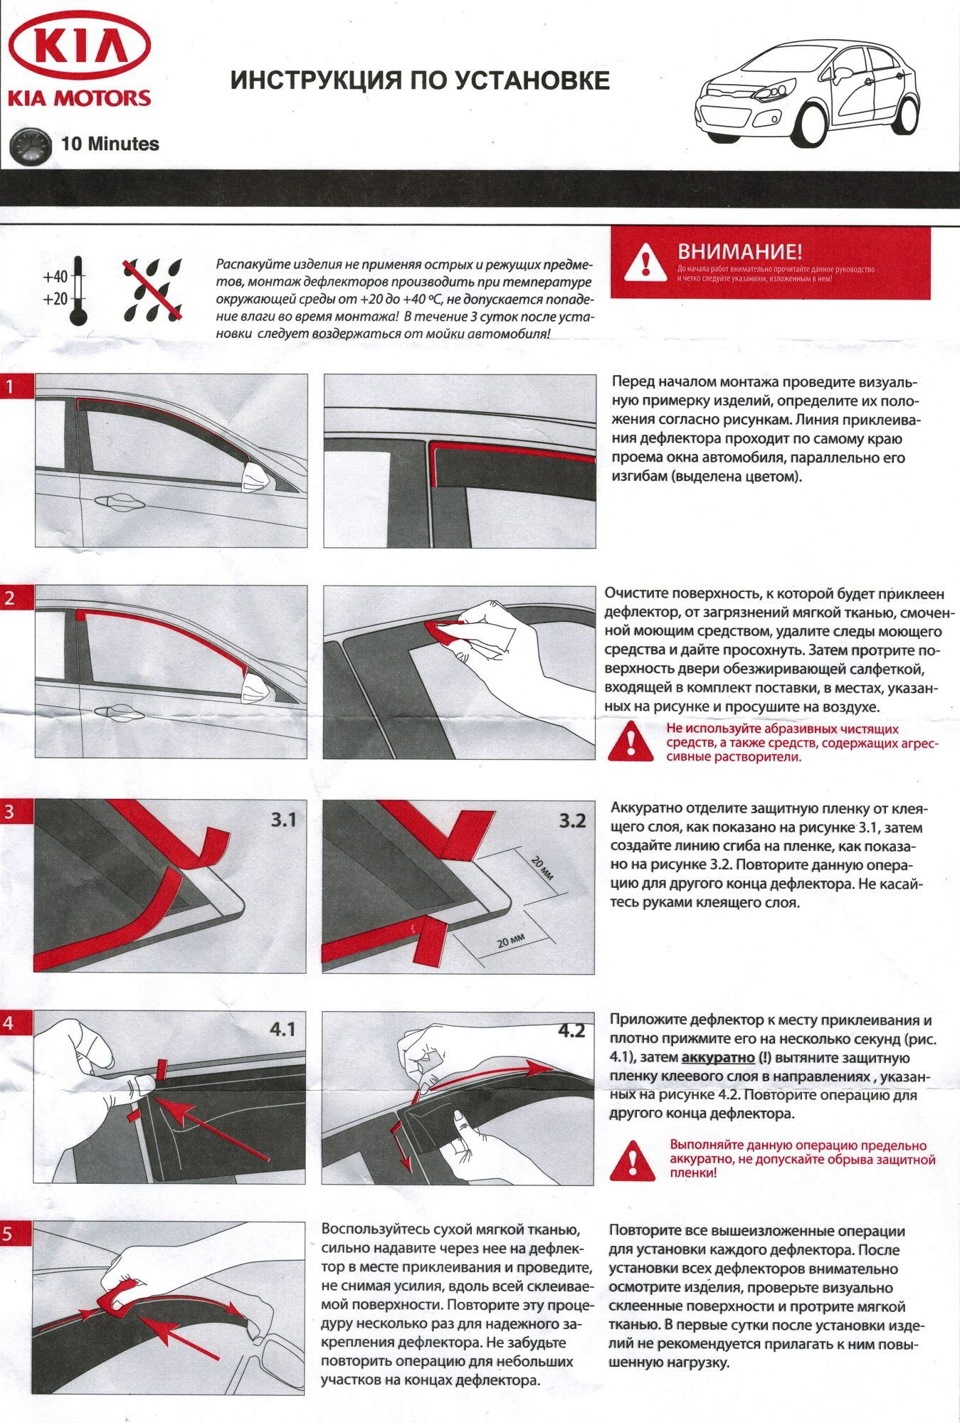
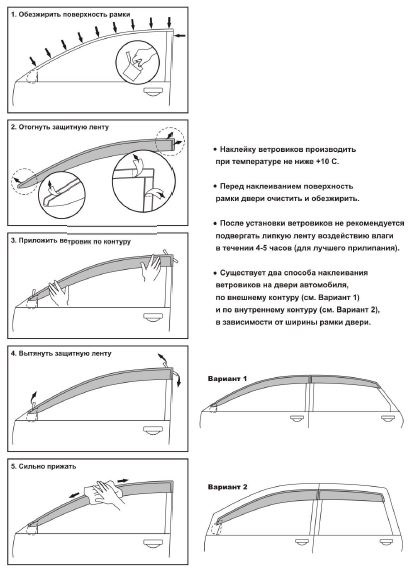
Deflectors for side windows should be installed according to the attached instructions, but, as a rule, the procedure is the same everywhere.
First, the edge of the door is wiped with an alcohol wipe or a cloth moistened with medical alcohol. This must be done, otherwise all the work will go down the drain.
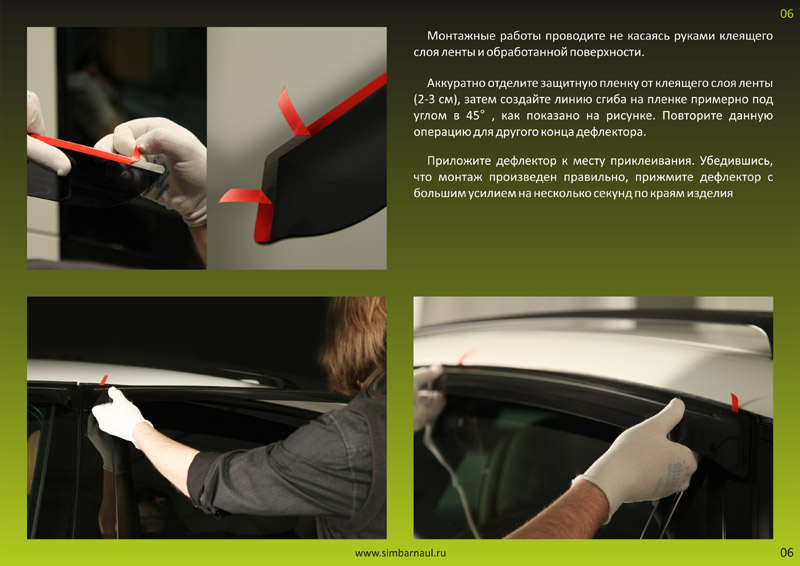
The adhesive base of the deflector is covered with a protective film. It must be removed. But not all at once, but only along the edges by 1 cm.
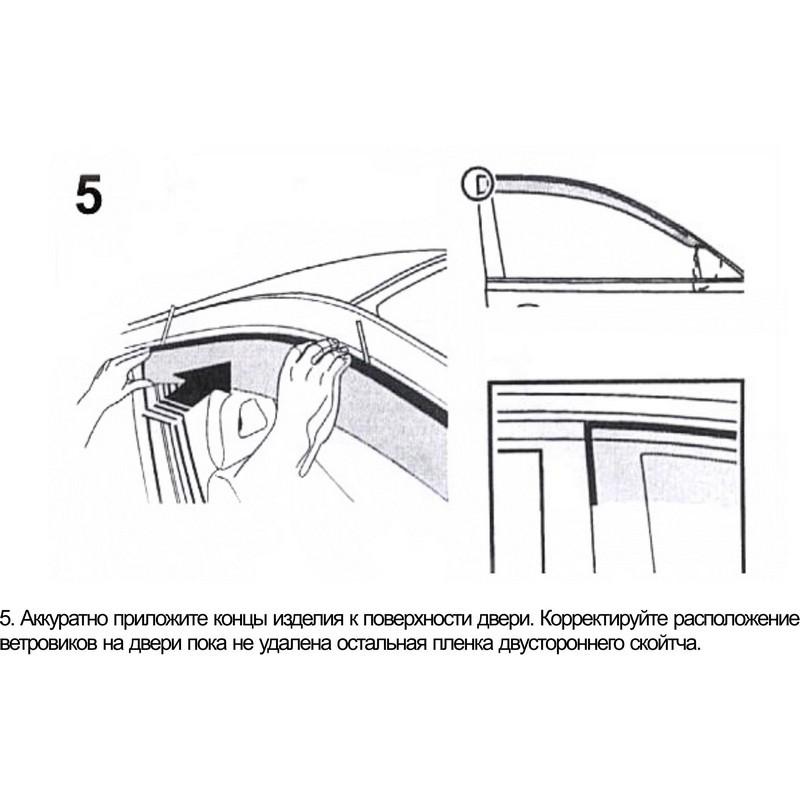
Then we apply the visor to the installation site with adhesive edges, which we have so far only on the sides, carefully glue it.
When you are convinced that everything is glued as you intended, carefully remove the remaining protective film and glue the deflector. But that is not all.
When gluing the next deflector to the rear door, make sure that it is flush with the front.
Then, for better adhesion, run over the edge of the adhesive backing with a hairdryer and then with a rubber roller. With a hair dryer, you will warm up the glue base, and pressing it with a rubber roller will improve the glue quality.
That's basically all, the side window deflectors are installed, you can go.
For example, on my car, I installed side window deflectors four years ago.
I installed it using the sticker method, in the same way as described above, everything was installed clearly, firmly and reliably.
For four years of operation, no problems have arisen, which is what I wish for you.
How this happens visually, you can find out by watching this video.
Deflector sticker
This mounting method is much more reliable. Its only drawback is the more complicated execution process. But, along with this, it is not required to select the part by thickness. Usually, such visors are universal, which allows you to use the option you like the most for your car.
The work is done in the following order:
First you need to degrease the deflector attachment point on the front doors;
We attach the visor and see how it gets up;
Peel off the protective tape from the tape, which is attached to the edges of the visor, and is designed to attach it;
Carefully attach the piece in place. Do not press down on the windscreen immediately. You must first assess the correctness of the fastening.
If necessary, you need to correct the deflector, and fix it completely;
It remains to install additional latches connecting the deflector and the door;
Before installing the visor on the tailgate, try it on first
You need to pay attention to its position relative to the front door. In some cases, it can interfere with the opening of doors.
Choose a position in which the doors will open without problems;
Degrease the surface of the door, for example, alcohol is suitable;
Otherwise, the steps described above are repeated.
Deflectors designed for gluing hold more firmly. This happens due to additional fastening in the form of latches.

How to install deflectors on car windows
Big
some of the models are attached to the body by gluing. Of course you need
know how to glue the deflectors so that they hold firmly. Fastened with
built-in adhesive strip, double-sided tape or sealant for gluing
glasses.
For
during the procedure, the car is installed in a dry and warm room.
The body must be thoroughly washed and dried. Installing a deflector on windows can
be carried out outdoors if the weather is sunny and calm.
Here's what you need to get started:
- set of visors;
- a piece of dry cloth;
- remedy for
degreasing.
WITH
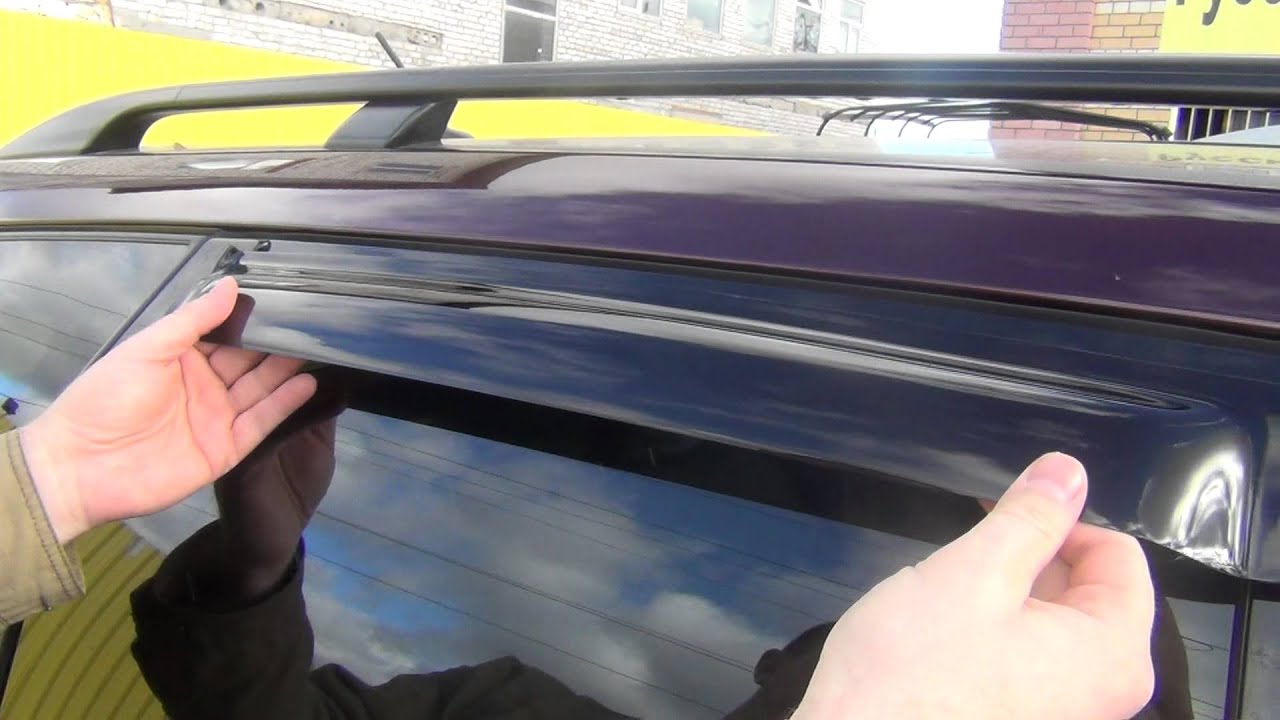
the protective film is removed from the product (the film is still on the adhesive strip),
after which it is installed. First, the device is tried on in place
installation. Bonding points are thoroughly cleaned and degreased. With glue
the protection is removed from the strips, the visor is applied to the place of gluing.

Gluing
carried out by light pressing gradually. First, the protective film is removed on
2-3 cm, this area is glued, then removed as it is glued
film from the rest.
If there is no adhesive tape, then you need to attach the visor with the help of others
devices. On some car models, this car accessory may
be installed without anchoring. The plates are selected so that their edges
rest against the corners of the window frames, and the side is fixed with a glass seal.
For
brackets made of metal or plastic are also used for attaching the visor
By applying
this method, care should be taken, as it is easy to damage
paintwork or glass. Also, fixed in this way
the visor will be difficult to dismantle
And under this type of fastener is produced
very few tuning accessories.
What are deflectors on a car for?
Visor and fly swatter are not at all "bells and whistles" with which, preoccupied with external effects, motorists equip their "trotter".
Installing these accessories provides:
- the absence of a layer of broken insects on the hood and windshield;
- removing gravel and other hazardous debris from contact with the front surfaces of the machine;
- protecting the passenger compartment from water ingress during rain.
Therefore, car factories allow owners to independently search for the perfect combination of aesthetics, safety and gasoline costs.
But manufacturers of structures for auto-tuning, quickly assessing the real needs, began to produce a wide range of visors and flywheels that meet not only material capabilities, but also different taste preferences.
When choosing accessories for your car, you must remember that universal cut-off devices do not exist. Before buying, the deflectors must be tried on, since they are produced taking into account the contours of a certain car brand.
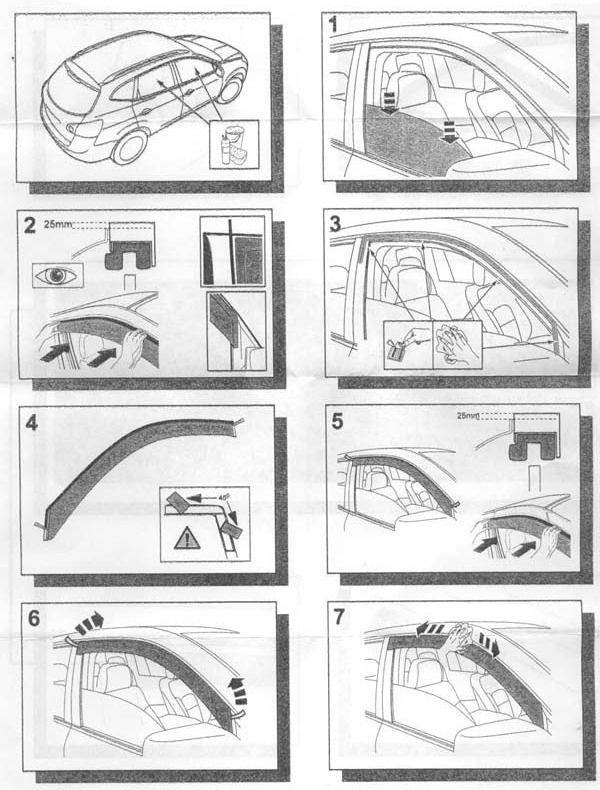
Step-by-step installation of deflectors on windows
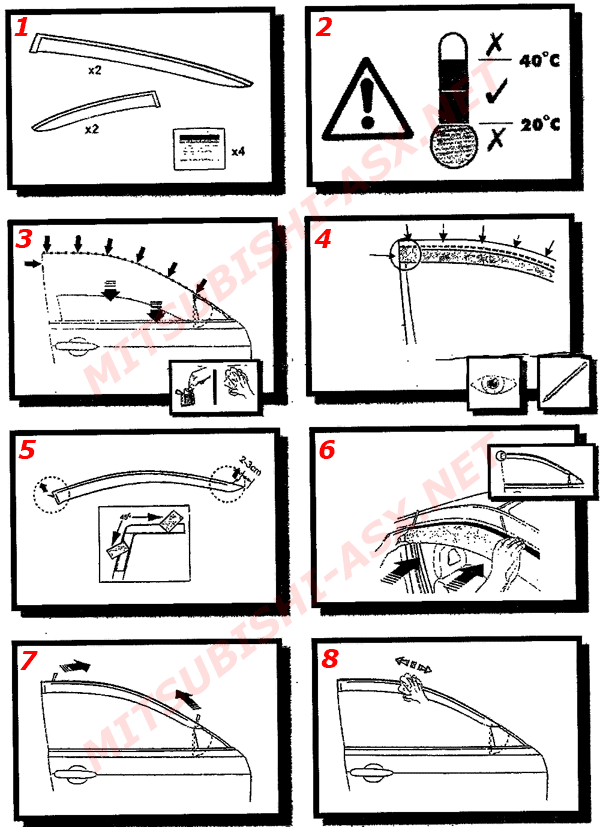
- Attach and secure with mounting tape the cut-off devices above the front and rear side windows.
- Shine a flashlight from the inside to control the correct position.
- Mark the localization of the edge with construction tape or in another convenient way.
- Remove the visor, degrease the marked surface above the door with a professional primer, alcohol or a napkin from the kit.
- Peel off and bend out the protective tape from all edges by 2-3 cm and attach the deflector to the door, according to the markers.
- Holding the visor in the desired position with one hand, with the other pull out the entire protective tape by the tip and press the product to the surface.
- Walk along the edge with a rag, pressing down and, with force ironing, the edge.
- Warm up the junction with a building hair dryer and iron it again.
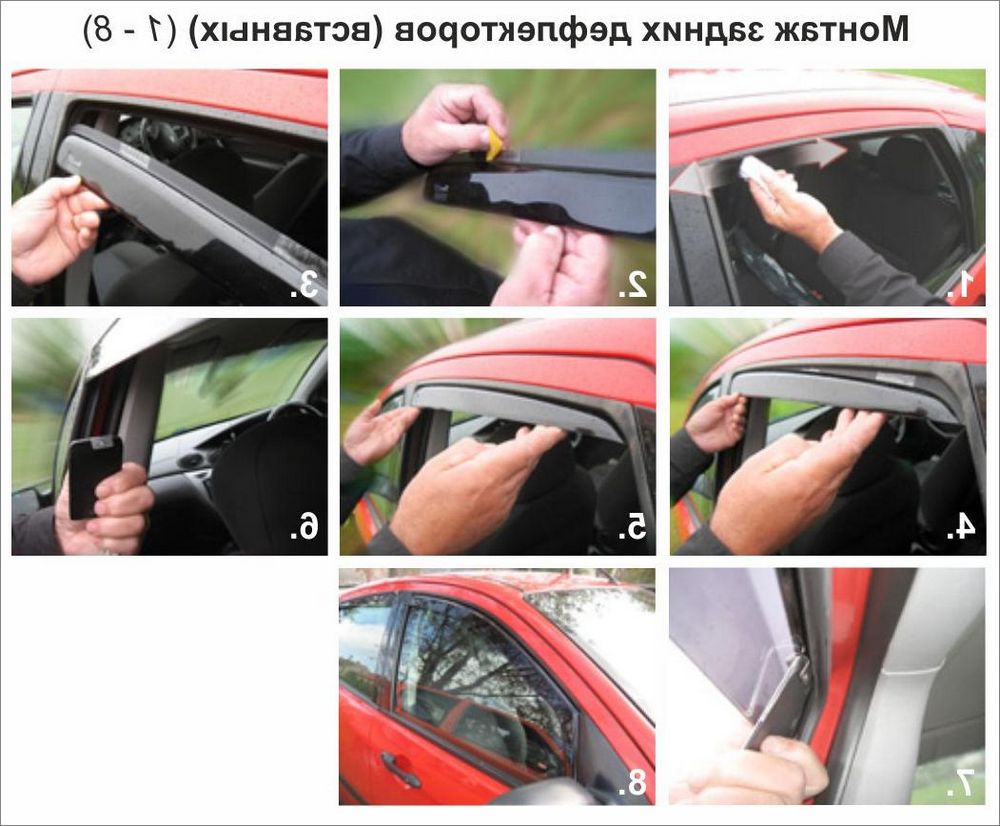
Installing plug-in deflectors
- Lower the glass.
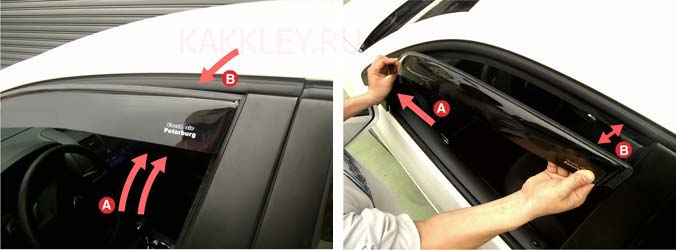
- Insert the edge of the visor into the upper slot for the glass entry.
- Deflectors are attached to the rear door with double tape.
Since the bumper is held in the front door by elasticity, when the edge contour does not coincide with the groove, it should be slightly bent.
For an illustrative example, watch the video
However, even high-quality plug-in visors are not suitable for all car models. On some brands, the deflector is installed only using an adhesive base.
Installing plug-in deflectors
First you need to choose the thickness of the deflector. The most important problem is the frequent mismatch between the dimensions of the part and the door. In this case, you will either not be able to insert the visor, or vice versa, it will fall out of the groove. This is the most unpleasant property of such deflectors. To avoid problems, drivers usually use double-sided tape. You need to take a thin tape and stick it on the outside of the visor mount. When installing, carefully insert the deflector into the groove.
Make sure that the tape does not lift up or come off prematurely. After inserting the visor completely, you need to press it for a few seconds. That's it, the deflector is installed.
Just keep in mind that scotch tape is very bad, both high and low temperatures. Therefore, there is a risk that the visors may fall off in winter or in extreme heat.
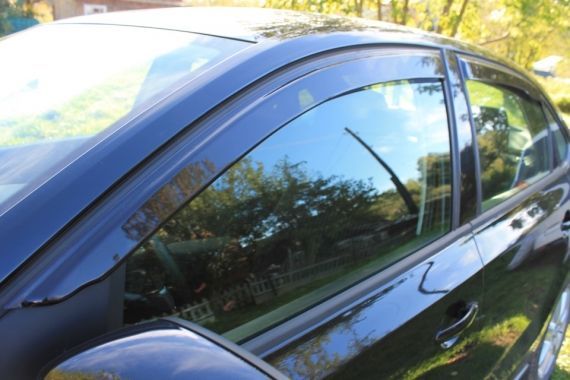
Installation procedure for deflectors with internal brace fasteners
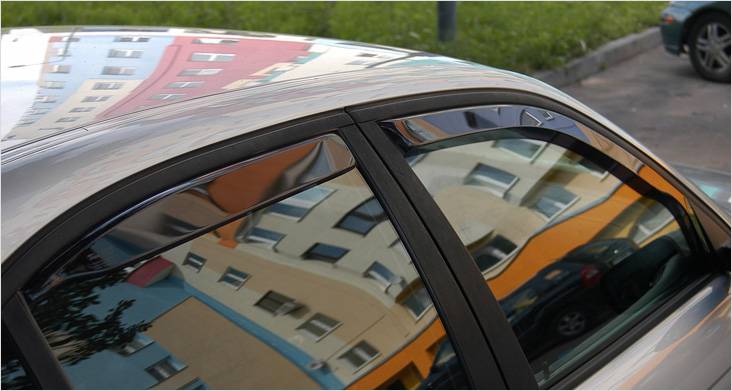 Polish Heko deflectors are installed in this way
There is another type of fasteners, when a deflector is first installed, and then fasteners are inserted inside. When the glass is lifted, it falls into place and firmly fixes the deflector, expanding it. In the diagram, the installation of a deflector with fasteners looks like this:
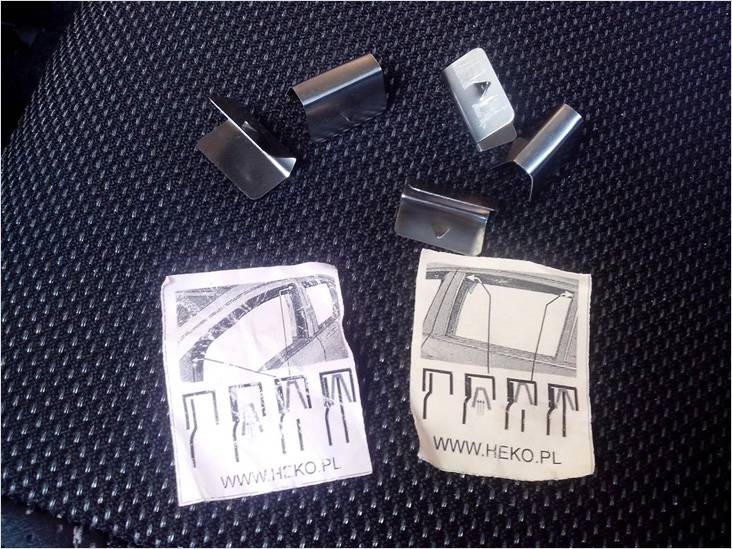 Fastening installation diagram
How such visors are installed, see the following table.
Deflector kit with fasteners
This is what a set of deflectors with brackets looks like.
Two for each deflector.
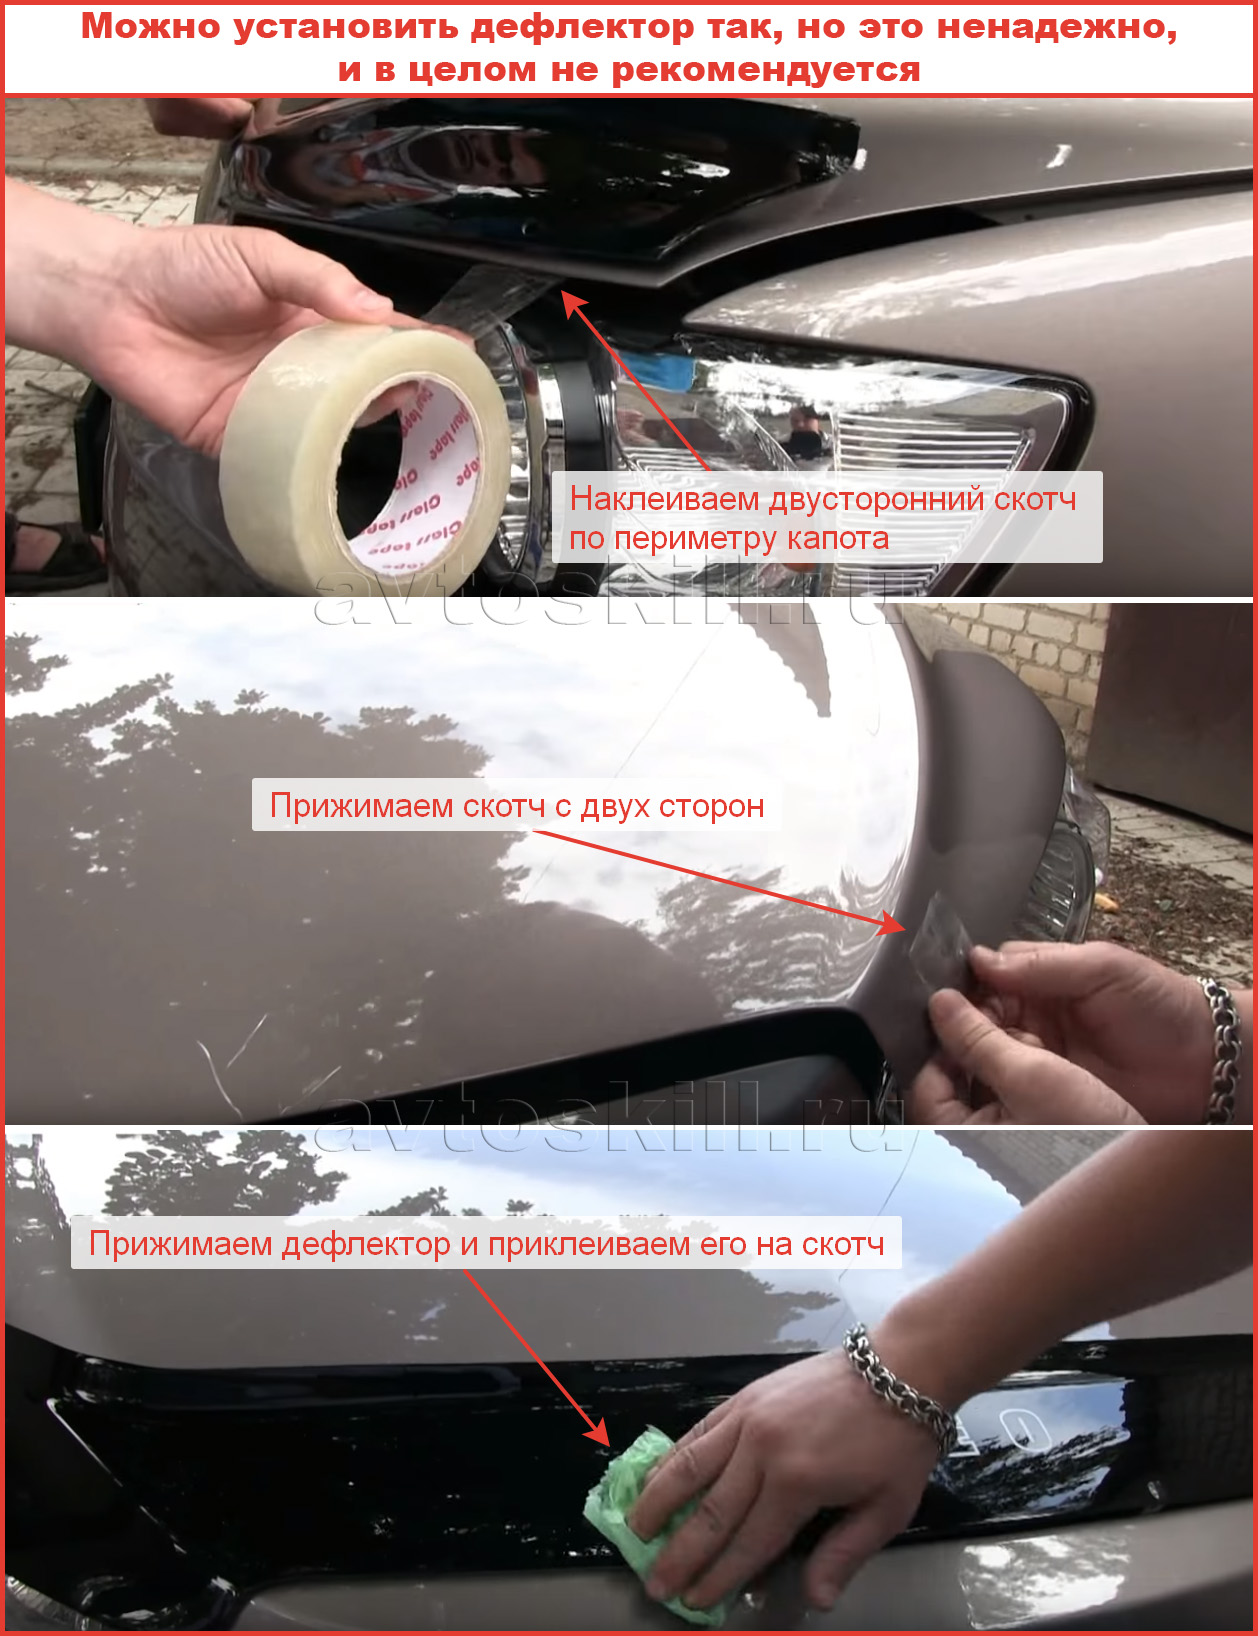
Pieces of scotch tape
Additionally, scotch tape is applied to the deflectors.
The deflector is inserted under the elastic
We put the visor into the corners of the doors under the elastic band, after removing the protective strip from the tape.
Spacer fasteners
Please note that the fastening brackets have a "burr", with this "burr" the fasteners are turned towards the passenger compartment.
Spacer insert here
They retreat slightly from the edge of the deflector. And they install the fasteners here.
And still here
And in this place.
How to dismantle an old deflector
Dismantling the visor is not as difficult as it seems to every second driver. Prepare the necessary tools, a set of new fairings and get to work. If the old cut-off devices are glued to the tape, proceed as follows:
Open the car door and lock it in one position.
Take a building hair dryer and warm up well the place of joining the plate and the door edge with it. Do not overdo it - if the paintwork overheats, it can begin to bubble and flake off.
Pry off the heated edge with a sharp object and stick a strong fishing line into the resulting hole
It can be replaced with a clerical knife, but you need to handle it with the utmost care, otherwise scratches on the paint cannot be avoided.
In the opposite direction from the unsticked corner, guide the line along the entire width of the tape. Cut off the visor from the door frame
Proceed carefully to avoid damaging the coating.
If the plate does not come off badly, blow over the area again with a hairdryer.
Set aside the removed windscreen, and remove pieces of double-sided tape from the place of its attachment.
Take an old rag, abundantly moistened with alcohol or solvent, and carefully process the glue base with it. Then use a ruler or scraper to remove the remaining adhesive.
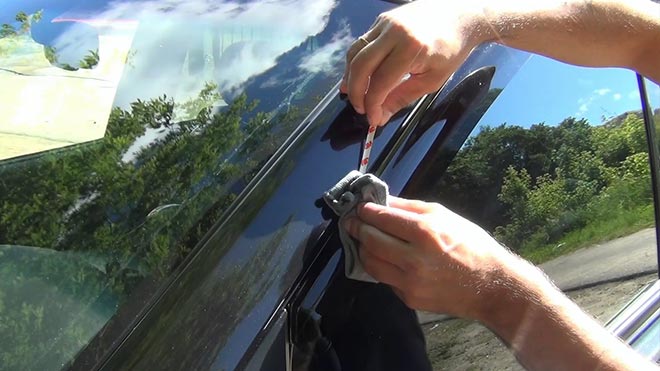
If the visors are plug-in, then it will be even easier to deal with them:
pry the retainer located at the edge and inserted into the window opening with a screwdriver;
carefully move the visor down and remove it;
If dust / dirt accumulates at the docking areas, wipe them with a cloth soaked in solvent.
Deflector selection
Window deflectors
To install the deflectors easily and without problems, you need to know how to choose them correctly. First of all, you need to take into account that different deflectors are produced for each specific car model. You can determine which model of machine they are intended for by special markings on the packaging or on the strips themselves.
Since all cars differ from each other in design, it is not worth trying to find universal deflectors on sale, since those simply do not exist. You should also be aware that some car door frames are equipped with chrome trims. Deflectors for such machines are made with imitation of chrome pads.
Today, such protective strips are produced by many manufacturers, including Chinese ones. If the model is original, then it will cost much more, while most of the Chinese products have a more favorable price.
Tuning
This detail is quite simple, but craftsmen often modify it with the help of improvised means. Most often, they are painted with various patterns. To apply a pattern, you will need to remove the deflectors. It is recommended to degrease the surface before applying paint. This will allow the paint to be applied more evenly. If you want to make the visor monochromatic, you can use a regular spray can or spray. If you need to apply a pattern, it is better to use an airbrush. This will help you create an original drawing that will allow you to stand out from the traffic.
Many will say, why do everything yourself, because it is easier to buy a ready-made version? Colored deflectors are much more expensive than conventional ones. If you have an airbrush made on your car, then picking up the same drawing is very problematic. It's much easier to do it yourself. Moreover, such a finishing touch is minimal. You just need to find an airbrush.
Conclusion... Among the useful modifications to the car, you can single out the deflector. It allows you to get rid of excess moisture in the cabin when driving with the doors open. The question of how to glue the visor on the car is often asked by motorists. In fact, this is a very simple job that requires almost no skills.
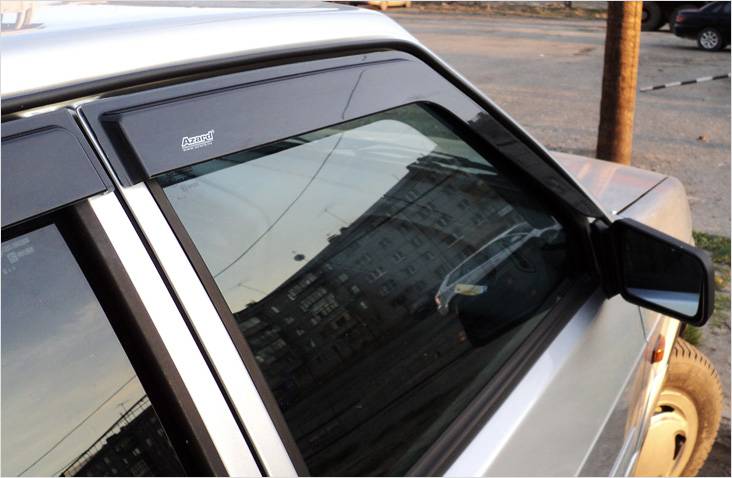
First, let's figure out what a deflector is. Most often, deflectors are called visors. Translated from English, the deflector means a cut-off device. Deflectors are not ordinary accessories for an interesting car appearance, they have other useful functions as well. They are designed to provide added comfort and improve aerodynamics.
How to install overhead deflectors
To install overhead windscreens against rain on the car door, you need a tool and a little more time.
- Wash your car thoroughly.
- Walk with the cleaner along the places of the future attachment of the fairings.
- Dry these areas, preferably with a lint-free cloth.
- Degrease the attachment points of the cut-off devices with vodka or ethyl alcohol. Do not use sponges for this, but paper napkins.
- Attach one of the visor to the attachment point so that the view from the window is not obstructed, and the installed part will fully perform all its functions in the future.
- After determining the place of fixation of the shutter, make notes on the car body with a pencil or chalk - this will allow you to better orient yourself while gluing the visor.
- Remove the protective layer from the tape and attach the fairing to the intended location.
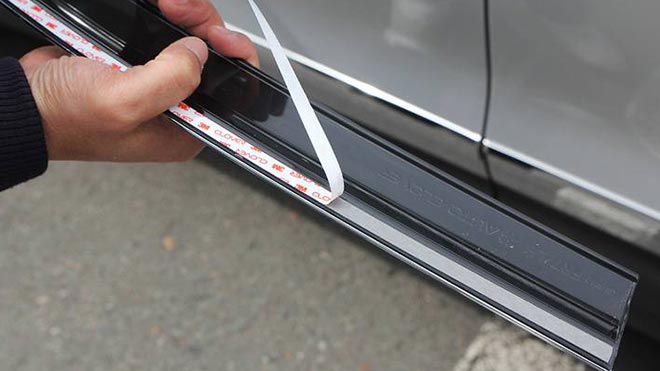
Experienced motorists and car service technicians recommend doing this before gluing the parts:
- slightly warm up the adhesive tape and the fastening place with a hairdryer - this will make the glue more viscous and hold the part more tightly;
- Apply a little Moment quick-drying glue to the glue base, literally one drop every 5 cm - this will give the adhesive tape an extra grip.
Do not use the vehicle for about three hours after installing the windscreens. Do not wash your car for at least 3-4 days, otherwise the glue base will not dry out.
Installation of the deflector "Vetrovik"
It is very simple to mount such a device with your own hands. Once everything you need to install the deflector has been correctly selected and prepared, you can start working. First of all, you need to carefully the surface where the installation will take place. It is advisable to use a degreasing agent. For polishing it is best to use a technical solvent, rags, as well as paraffin and wax-containing mastic. It is best to glue side window deflectors when the weather is dry and the body temperature is at least eighteen degrees. It should be noted that installation work must be carried out simultaneously for the front and rear windows of the car.
When installing a deflector for windows, you should adhere to the following algorithm of actions:
 Deflector installation process
- On the surface of the car door frame, where the device will be glued, you need to degrease with alcohol or alcohol-containing liquid and wipe dry;
- The protective film on the adhesive part of the deflector for windows must be peeled off a couple of centimeters and the peeled off fragments must be bent upwards;
- The deflector of the side windows must be attached to the installation site, having previously lubricated the exposed parts with glue to ensure better adhesion to the surface of the window body;
- After a visual assessment confirms the correct installation, the protective film must be carefully removed to the end and glued over the entire surface;
- Carry out the same procedure for the remaining windows.
Installation
There are the following ways of attaching protective strips to windows:
- metal staples;
- gluing to the outer part of the door frame;
- installation under the sealing rubber.
Fastening with staples is rarely used, since this method is considered impractical: scratches can form from the staples on the coating of the car.
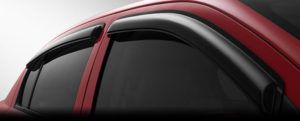 Deflector car
Many deflectors already have an adhesive strip, with which they are glued to the door frame. This method is considered the simplest and most convenient, so every car owner can easily and quickly glue the deflectors with his own hands. However, it should be borne in mind that the protective visor strips should be perfectly aligned on the windows. If you allow a misalignment, the strip will have to be torn off and glued again, which can lead to insufficiently strong fastening of the deflector.
For degreasing, you can use alcohol, regular vodka, or a special napkin, which is usually supplied with the strips.
Gluing
- First, you should prepare the surface to which the wind strips will be attached - wash, dry and degrease.
- Peel off the protective tape from the adhesive layer about 3-4 cm, and bring its ends up.
- Then attach the strip with the ends peeled off, make sure that it lies flat and, gently pulling on one end of the protective film, press the deflector along its entire length.
- Secure the result by lightly pressing the strip so that it adheres as firmly as possible to the paint and varnish surface.
- Some do-it-yourself car owners use a hair dryer for the best effect. After one strip is glued, it is processed along its entire length with hot air, while pressing it with your hand or with a rubber roller.
- Repeat the procedure for all other windows.
How to properly perform the gluing procedure can be seen in the following video:
Installation without gluing
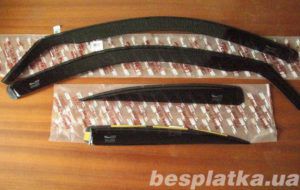 Plug-in visors
Some deflector models are sold without an adhesive layer. This means that they must be installed in a sealing strip that contains the glass. This method is even simpler than the previous one, but it requires some physical effort.
- Fully lower the car window before installing.
- Remove the sealing strip from the top of the window.
- Then insert a deflector into the hole formed after dismantling the seal. Continue to hold it with one hand, while with the other begin to return the sealing strip to its place.
- The seal will fit into the grooves rather hard, but it must be returned to the same position it was in before. As a result, the deflector will be tightly fixed with a sealing tape.
- The instructions from the manufacturer indicate that the correct installation must be evidenced by the unhindered entry of the glass into the groove of the seal. However, in practice, the first time the glass can rise and fall rather hard, and sometimes it does not completely close at all. In this case, it is recommended to open and close the glass at least 20 times in a row so that it rub against the seal. During the operation of the car, try to raise and lower the glass as often as possible until they begin to enter the grooves easily enough.
How to properly install the deflectors in the sealing gum is shown in the following video:
How to glue side window deflectors on a car
The advantages of using this adhesive material include ease of use, since there is no need to drill holes or use additional fasteners. The car doors remain intact.
We glue the visor on the car - instructions
The following materials are required for gluing:
- a set of deflectors (it is better to purchase original options for your model, having previously tried them on the door or hood and making sure that they fit - the deflectors should not obstruct the view),
- construction hair dryer.
VIDEO INSTRUCTION
Operating procedure:
- Remove all dirt from both surfaces, remove with napkins, which usually come with a visor. To do this, while holding the device in your hands, peel back the film covering the outer layer at both ends. You can heat the adhesive strip, as well as the place for installing the deflector with a building hairdryer. This will improve the adhesive properties and increase the service life of the windscreens.
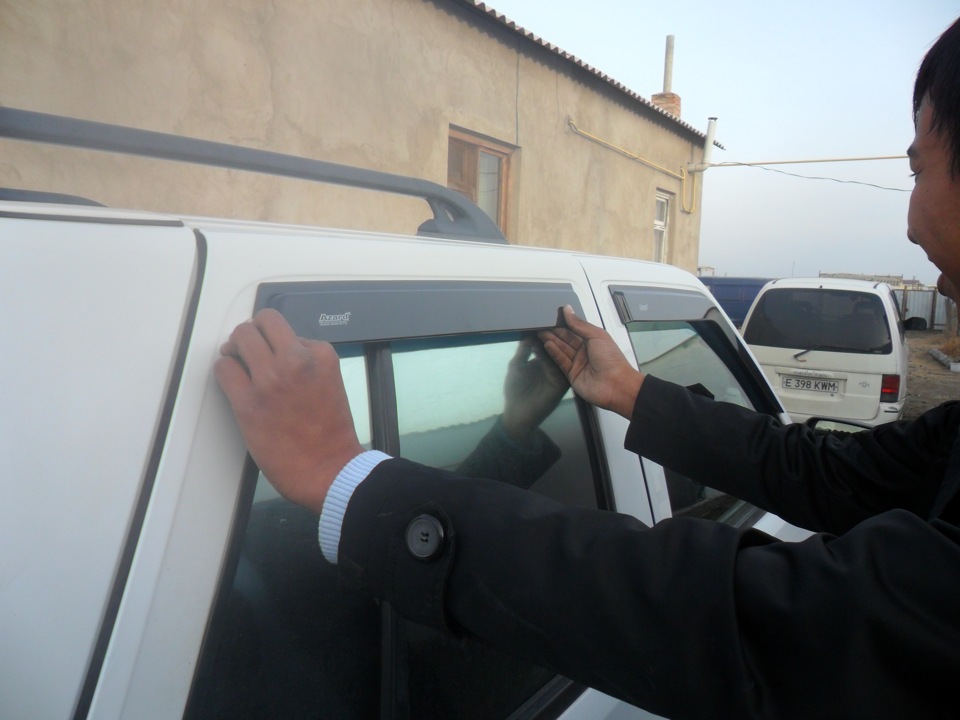
- Attach the visor to the installation site and glue the edges. Make sure there are no gaps. If they are not there, then pull the protective film from under the deflector and firmly glue the device. It is more convenient to do this together: one person will hold the product, and the second will remove the film and press the visor to the surface. Working together, you can correct the position of the deflector at the very beginning of the installation.
- Press down on the visor and hold for five minutes.
All work must be carried out in a warm room, the temperature must be at least + 10C. On average, it takes no more than 10 minutes to glue the visor.
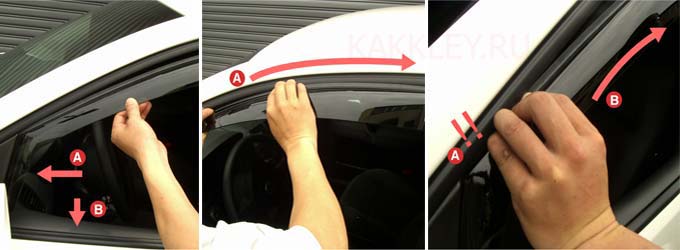
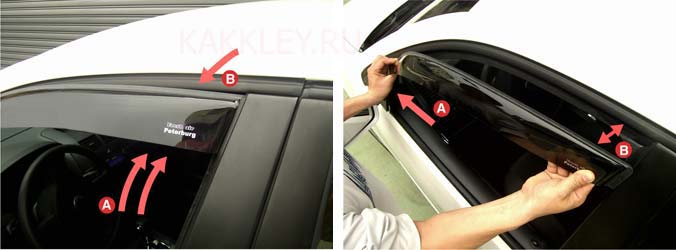 We glue the deflector to the car door
If you have purchased the plug-in options, it will be even easier to install them.
This requires:
- Lower the glass.
- Insert the products into the glass groove under the door frame of the machine. If the shape of the deflector is not suitable, the visor needs to be bent a little. The visors are held in the front doors by installing in the spacer. In the rear doors, they are glued around the perimeter with double-sided tape.
It should be borne in mind that cheap visors spoil the protective film of the glass, since such manufacturers do not sharpen the mounting edge properly and the tight edge will not allow the car window to close.
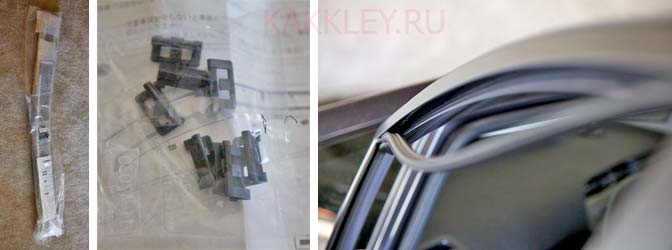
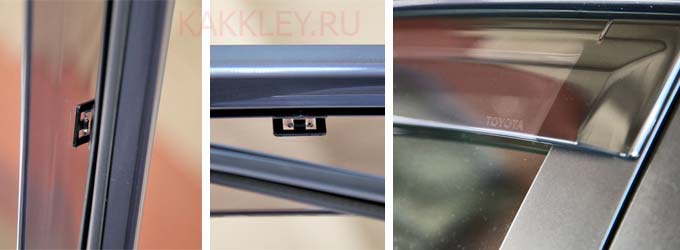
For quality accessories, the edge is ground to the maximum, so this problem will not affect you, however, good visors do not always fit any car, since only adhesive visors can be installed on some car models.
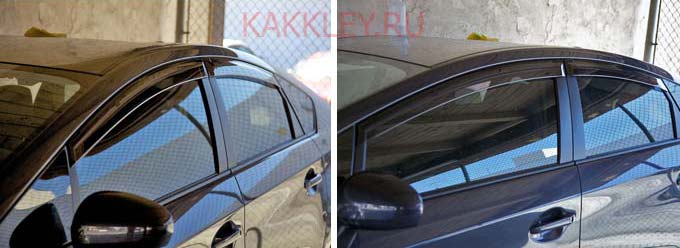
Is it possible to glue visors in winter
If the need for gluing products has arisen in winter time years, in no case should you work on the street when the temperature is below + 10C. If this is not observed, the visors will disappear after a few hours.
In order for the result to be durable, use the garage or warm hangar. If this is not possible, contact a car service specialist or wait for the warm season.

First, let's figure out what a deflector is. Most often, deflectors are called visors. Translated from English, the deflector means a cut-off device. Deflectors are not ordinary accessories for an interesting car appearance, they have other useful functions as well. They are designed to provide added comfort and improve aerodynamics.

