Types of stepladders
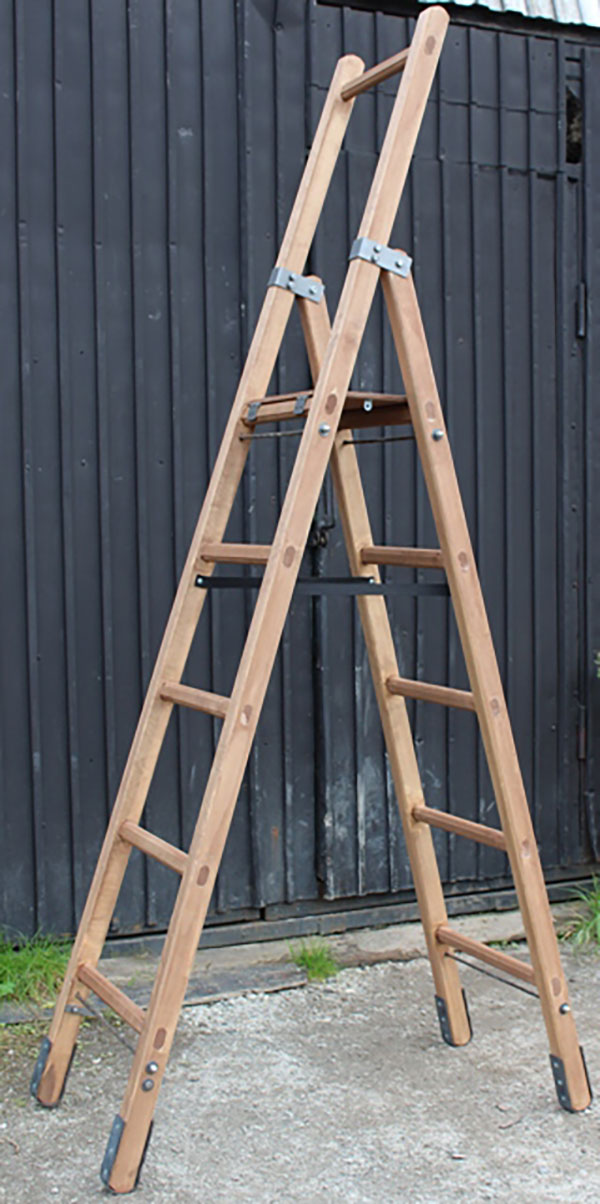
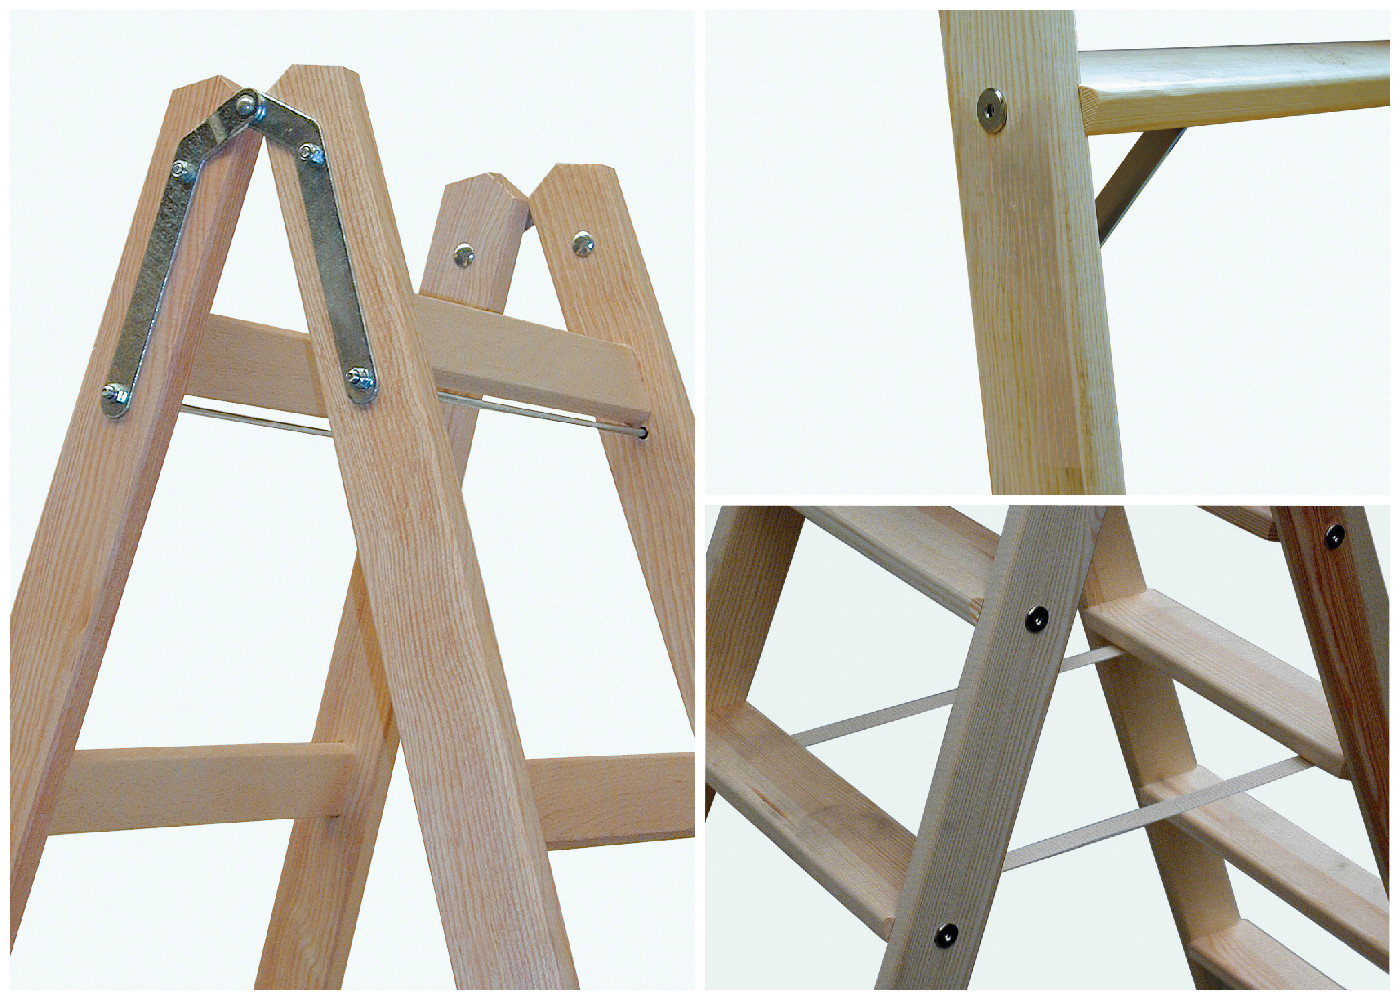
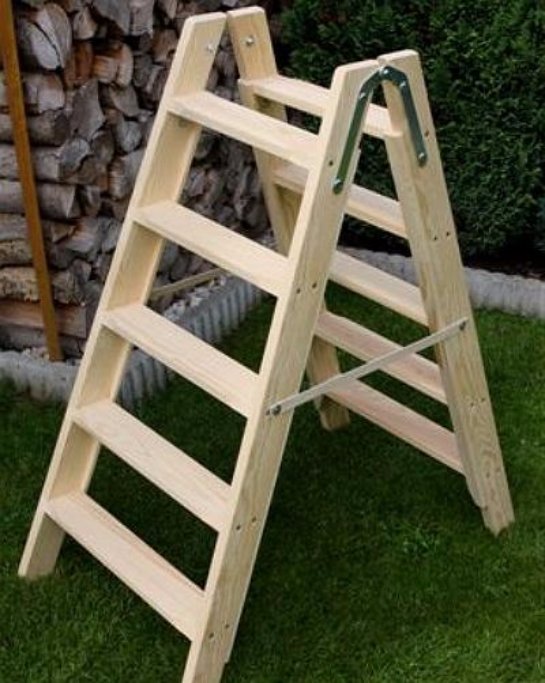
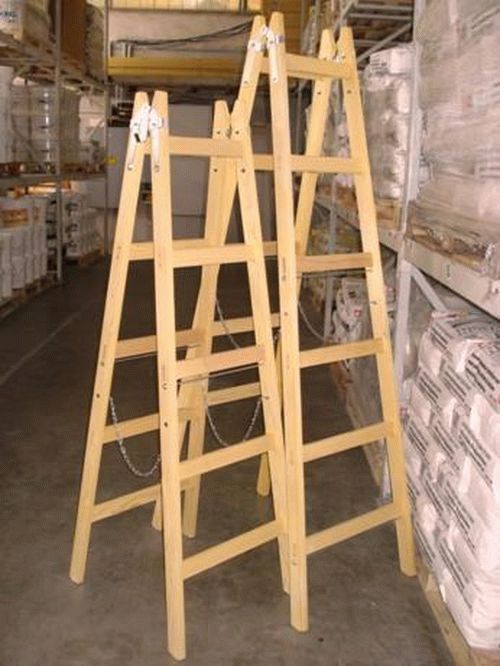
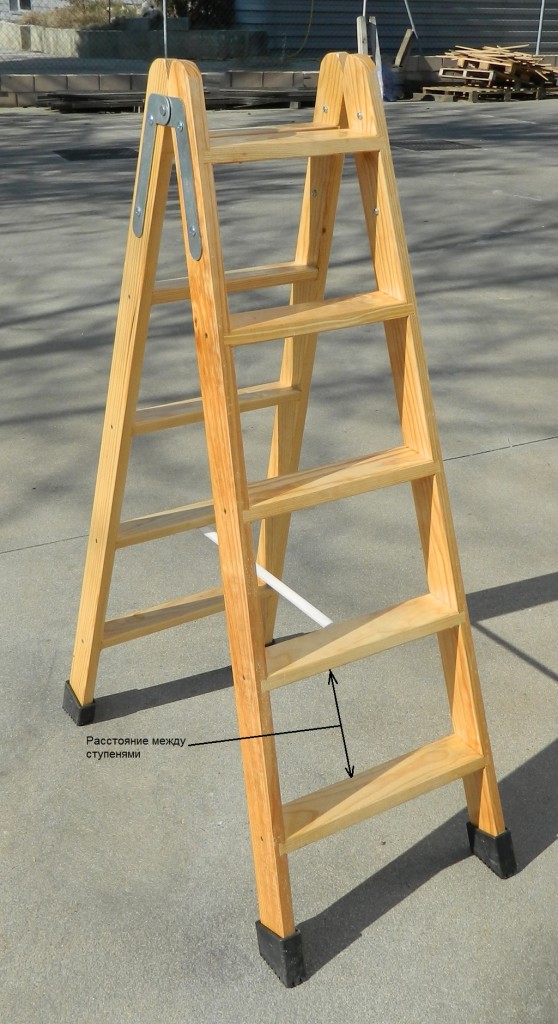
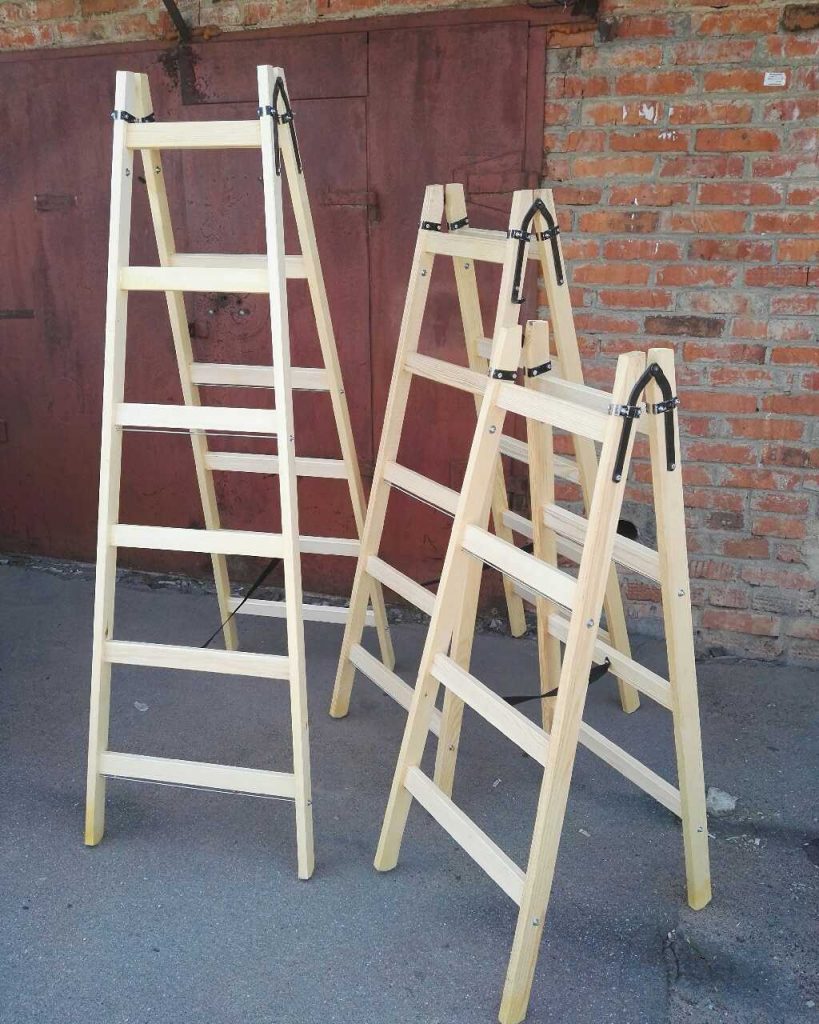
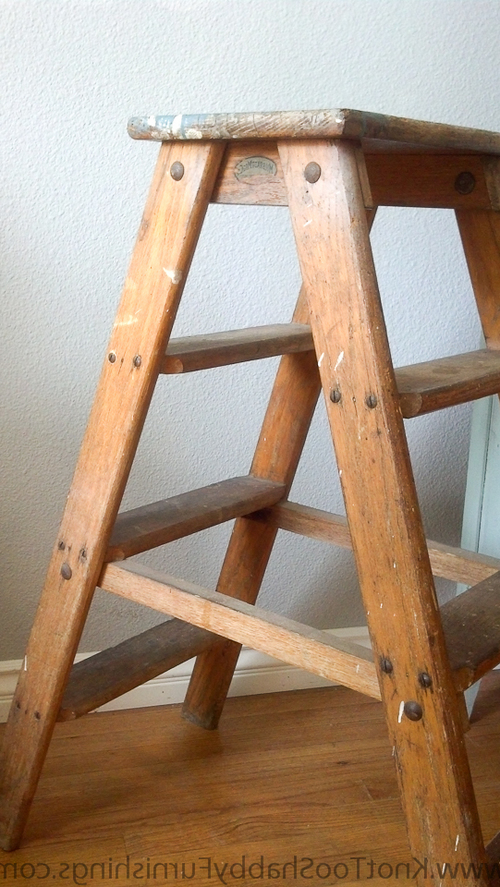
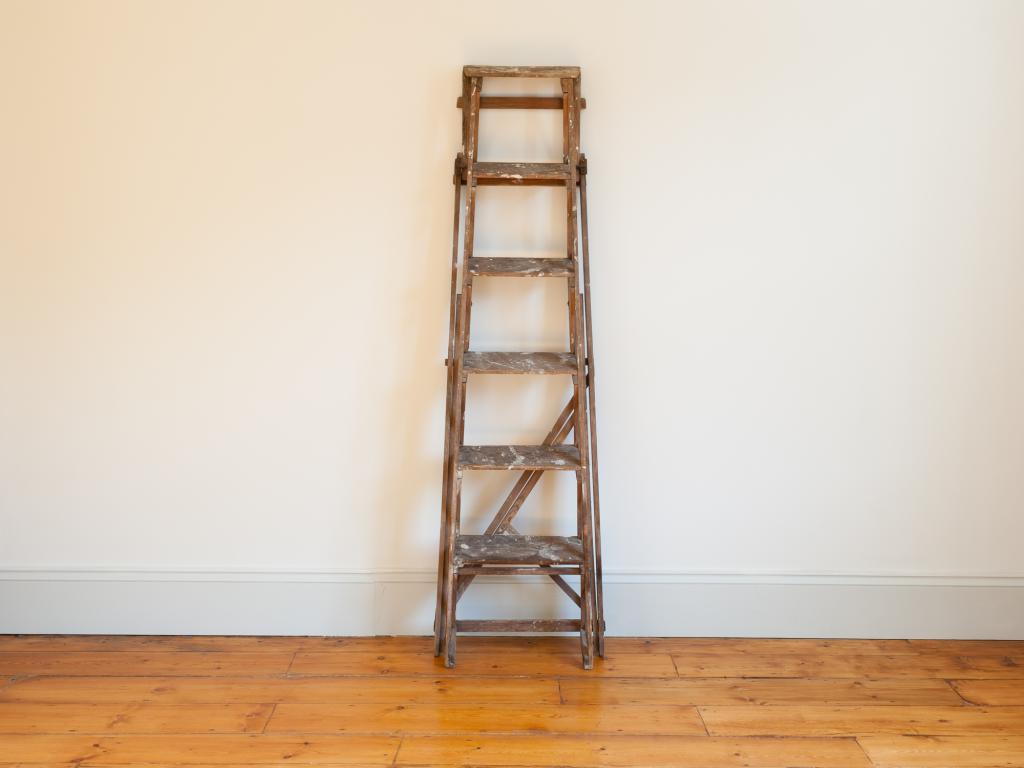
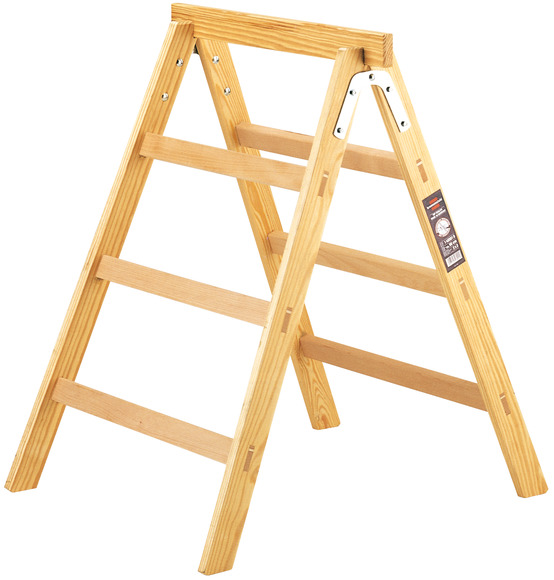
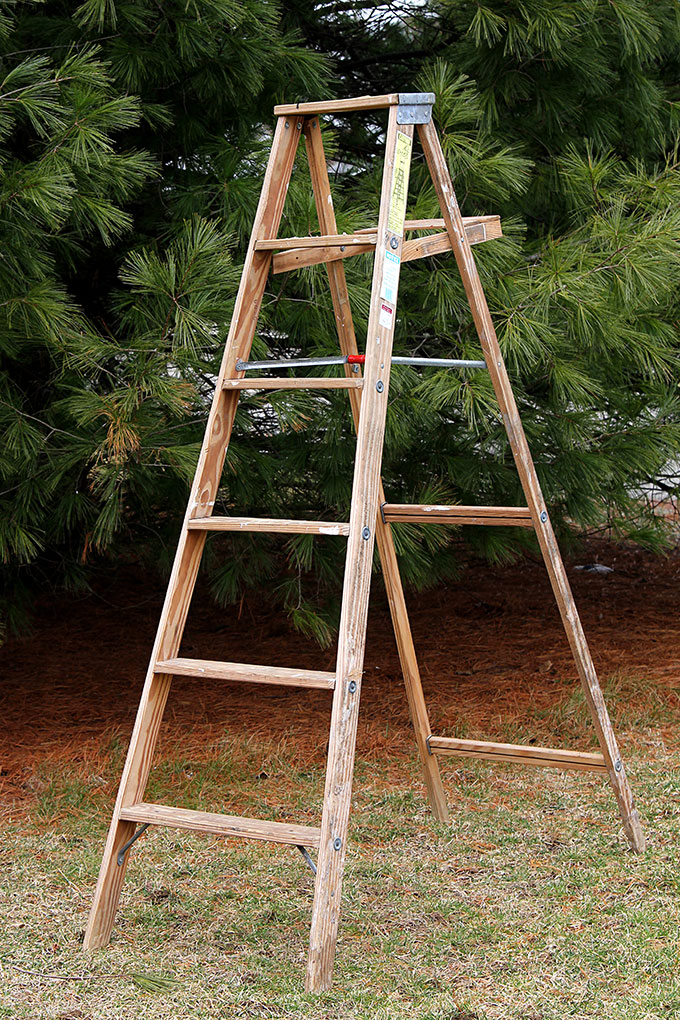
 Stepladders are made of various materials, including wood
When making stepladders, use:
- wood;
- metal (iron, steel);
- aluminum alloys.
The wooden structure is considered the simplest, but not very practical. Under the influence of climatic conditions, wood loses its appearance and properties, which does not have the best effect on the product.
Metal ladders are durable and durable. In operation, they are inconvenient because they weigh a lot and take up a lot of space due to their dimensions.
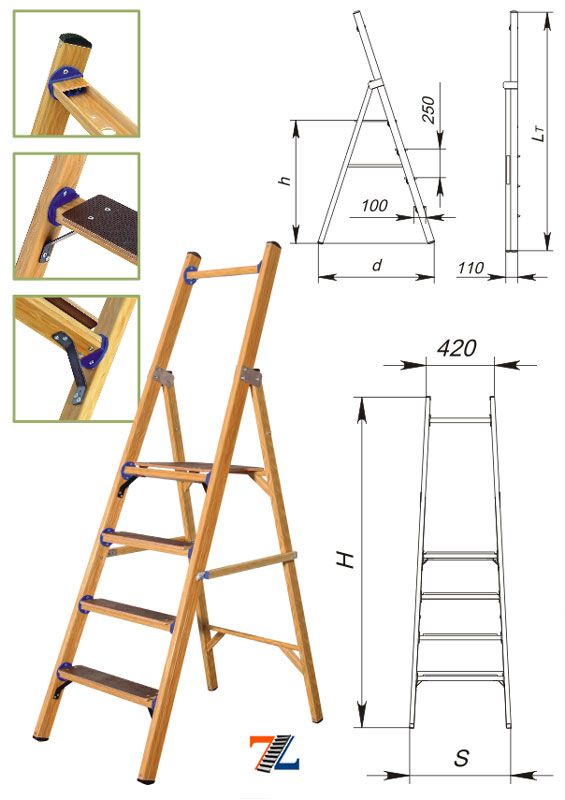
Aluminum products are the best option. They are reliable, compact and lightweight.
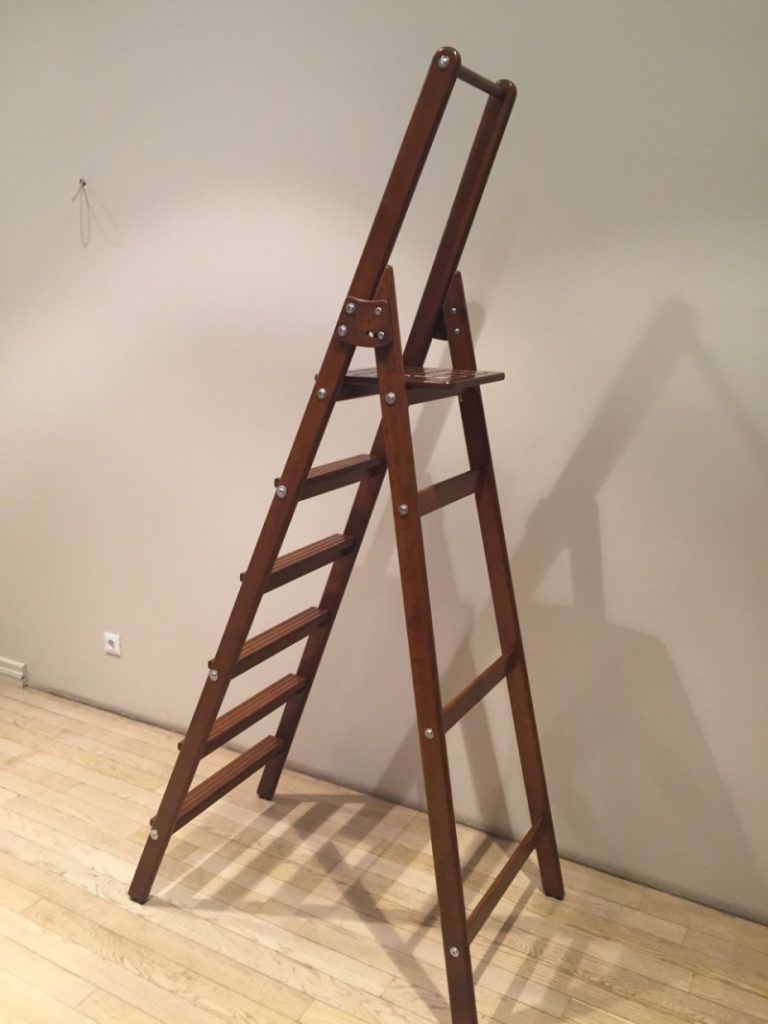
- a simple step-ladder from a bar;
- stepladder chair;
- multifunctional transforming ladder.
Simple stepladder from a bar
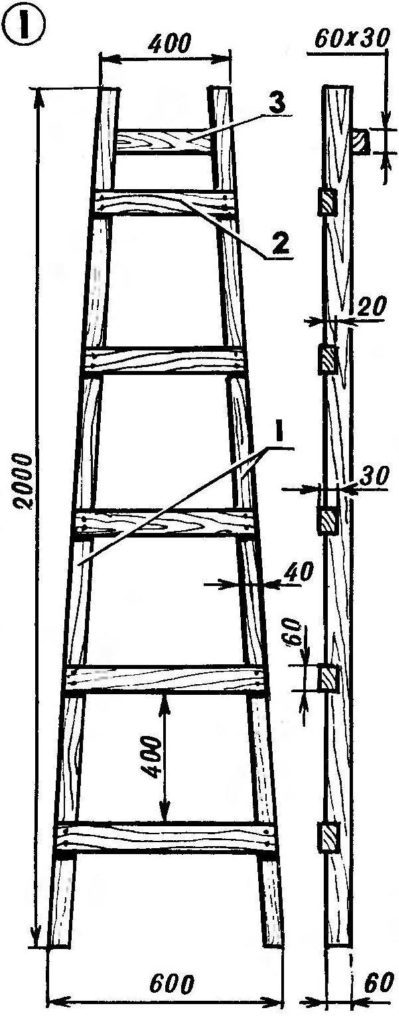
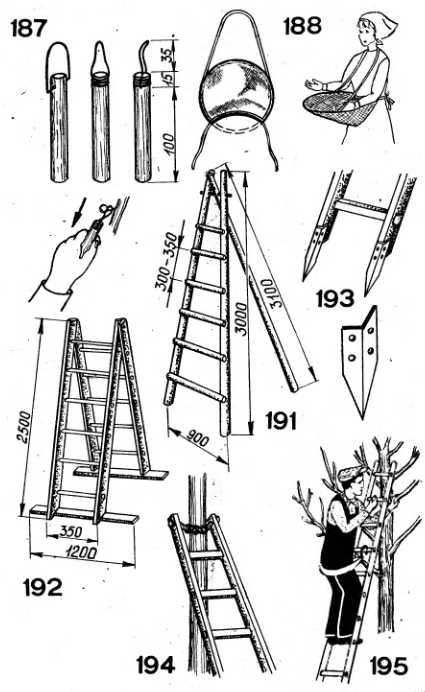
To make an ordinary garden staircase, you will need 4 beams 2 m long with a section of 60x40 mm for support posts, as well as about 14 meters of a beam with a section of 60x30 mm for steps and crossbars.
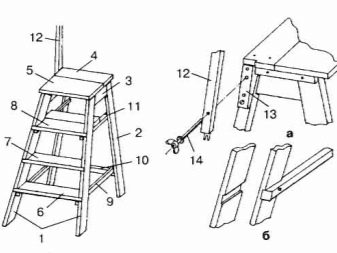
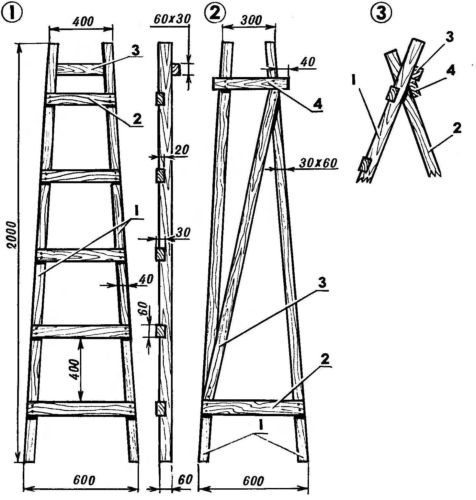 1 - support pillars; 2 - steps; 3 - crossbars and jib; 4 - limiter.
Steps and rungs should be of the following dimensions:
- 59 cm (2 units);
- 54.5 cm;
- 50 cm;
- 45.5 cm;
- 41 cm (3 units).
On the two support bars, markings should be made in those places where the steps will be attached. The lowest mark is 10 cm from the edge. The interval between the remaining marks is 40 cm.Then, taking into account the markings, five grooves are made with a depth of 1.5 cm.
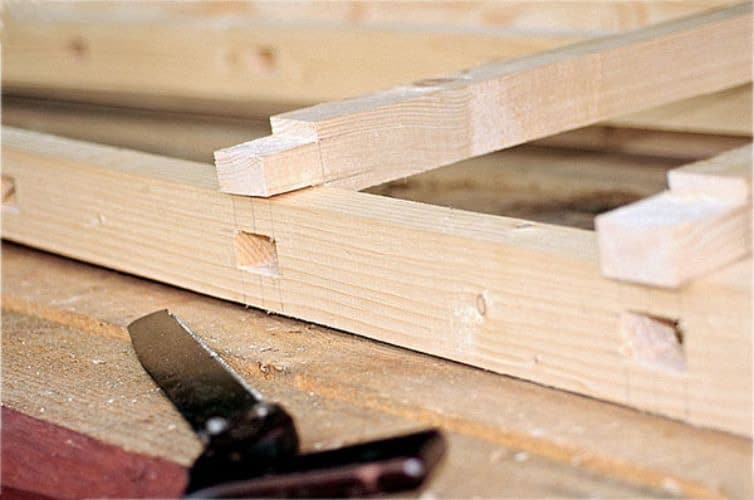
Having finished the preparatory work, we proceed to the assembly of the main part of the structure. To do this, we put the support posts with the grooves up and align them so that the distance between the upper edges is 40 cm, and between the lower ones - 60 cm. The steps are inserted into the grooves and fixed with self-tapping screws. On the reverse side, an additional crossbar is also attached.
In order for the ladder to stand, it is necessary to make a support. Since it has no steps, the support posts are interconnected by two crossbars: an upper and a lower one. The structure is additionally equipped with a jib
When making a support, it is important to observe the distance between the upper ends of the rack 30 cm
The final stage is the connection of the two parts. In relation to the main part, the support is placed so that its upper edges are between the last step and the additional crossbar.
For this design, no fasteners are needed from above. And the lower ends of the ladder can be easily moved to the required distance.
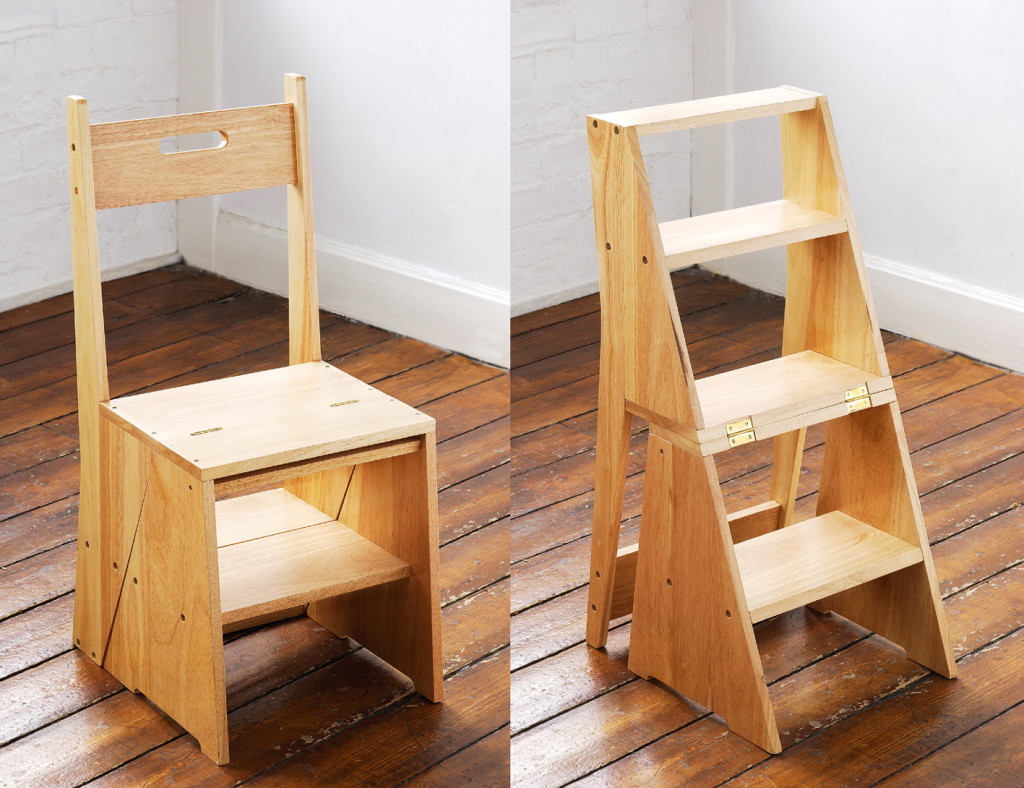
Stepladder chair
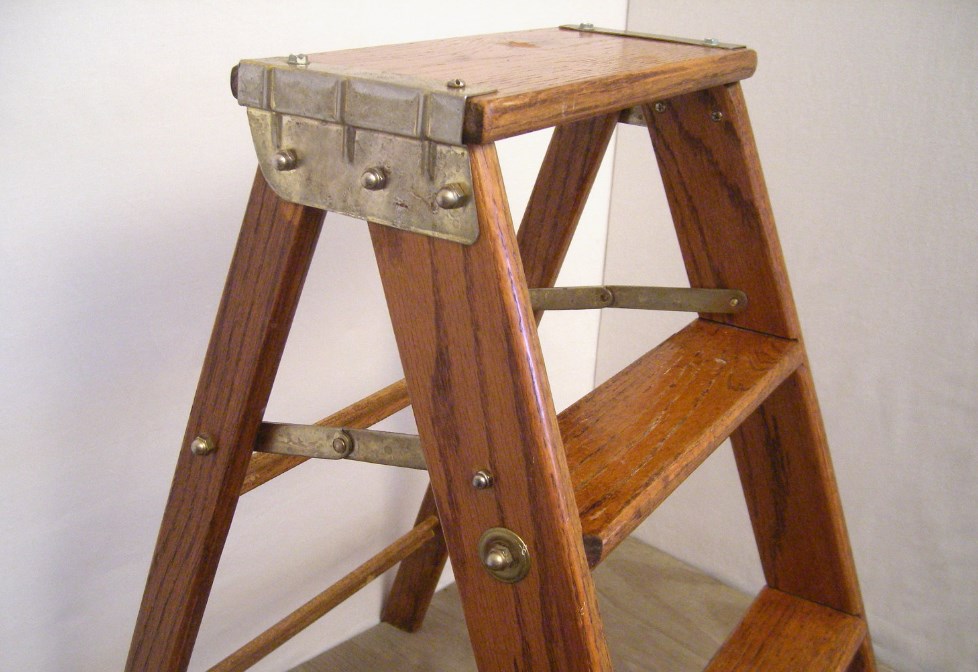
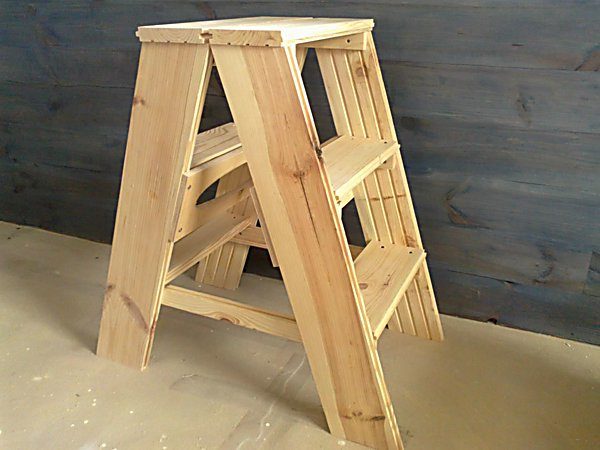
This type of ladder is very compact and does not require a lot of storage space. Due to its attractive appearance, it will perfectly fit for an element of the interior of your apartment.
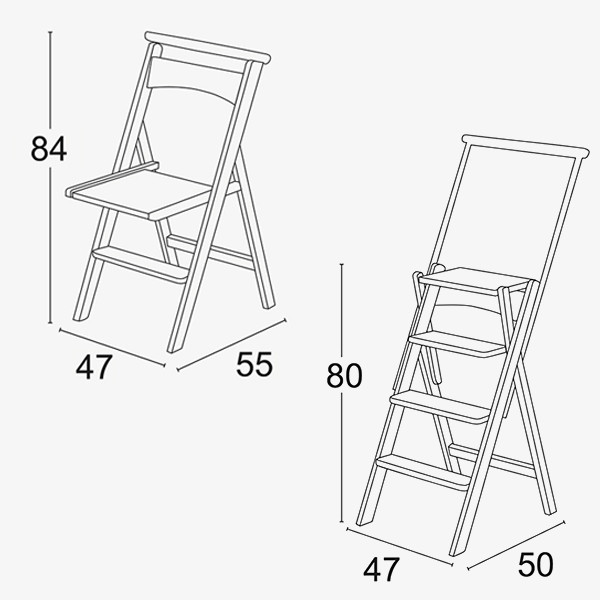
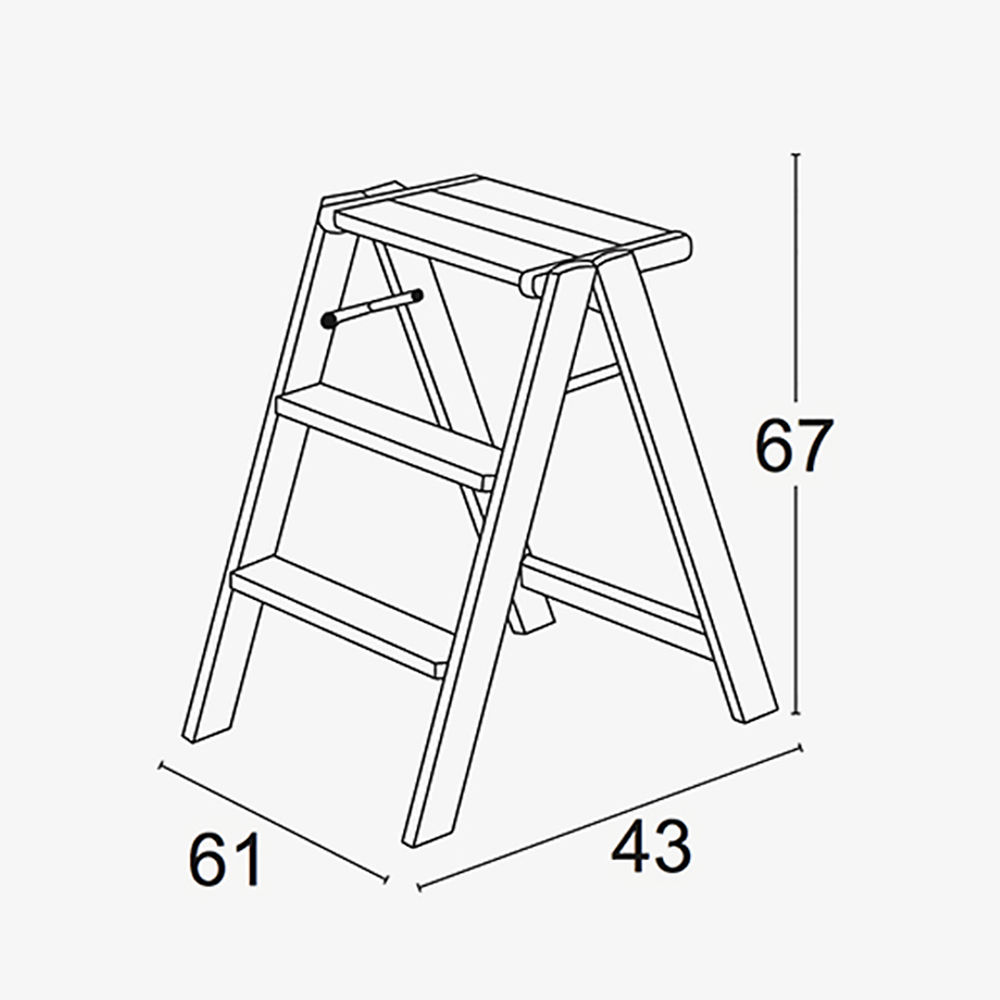
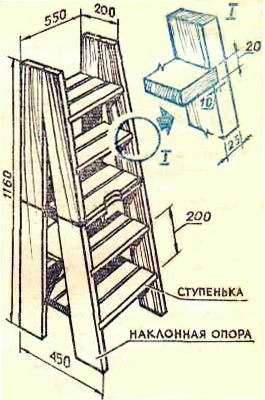
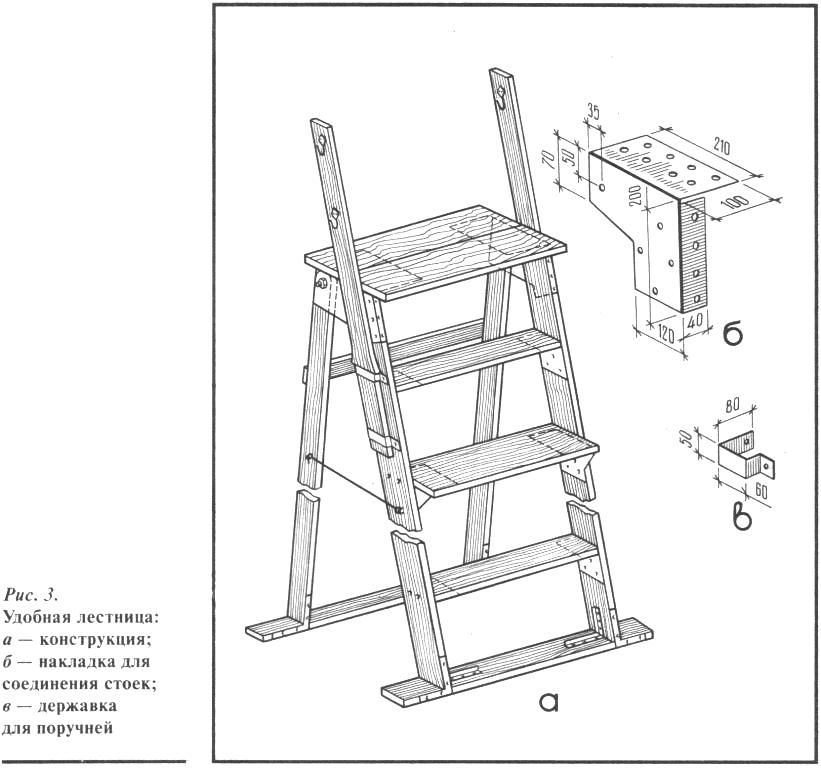
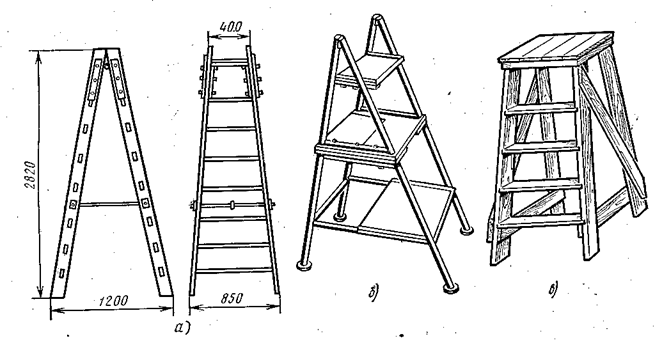
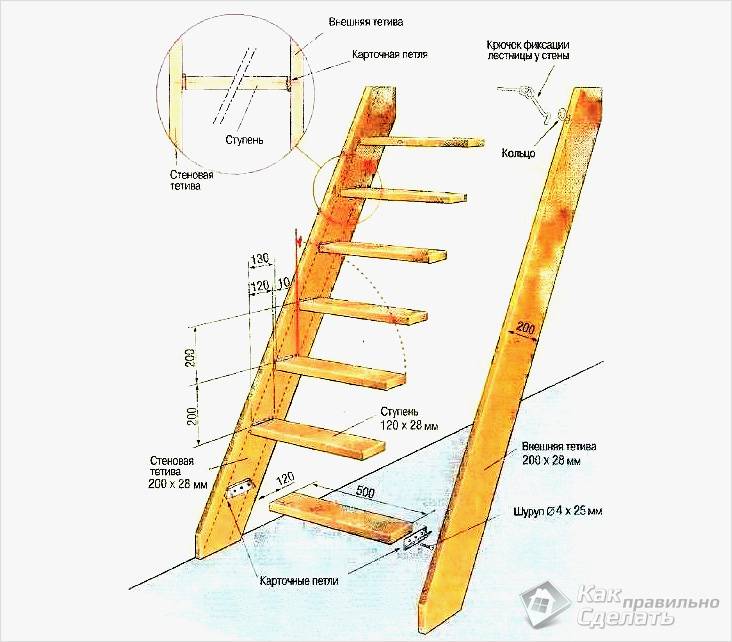
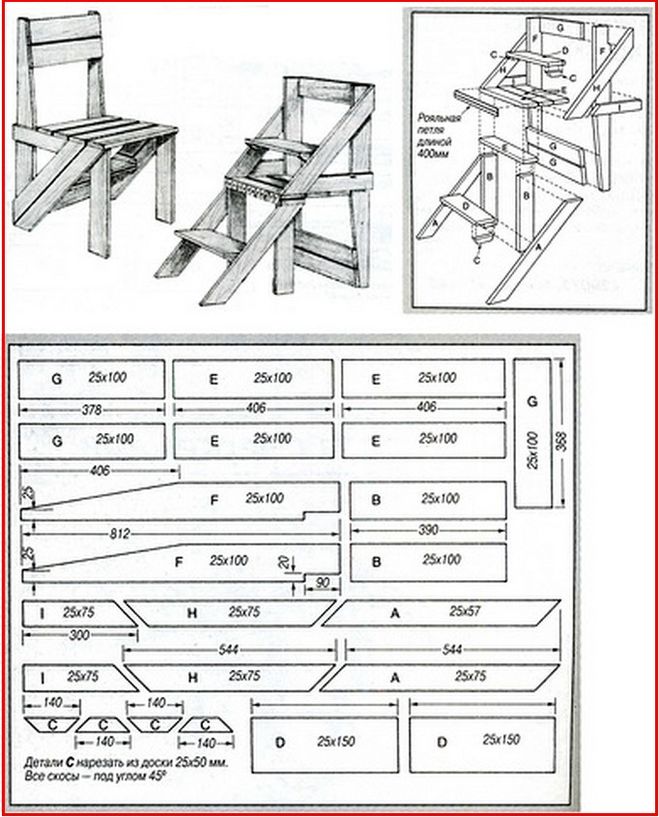 Tilting back version. General view and drawings.
When assembling the structure, you need to be extremely careful, observe all the dimensions indicated in the drawing. In correctly assembled structures, parts move freely and do not interfere with each other.
The wooden ladder stool can be equipped with an additional locking fastener that fixes the device in the desired position.
Multifunctional transforming ladder
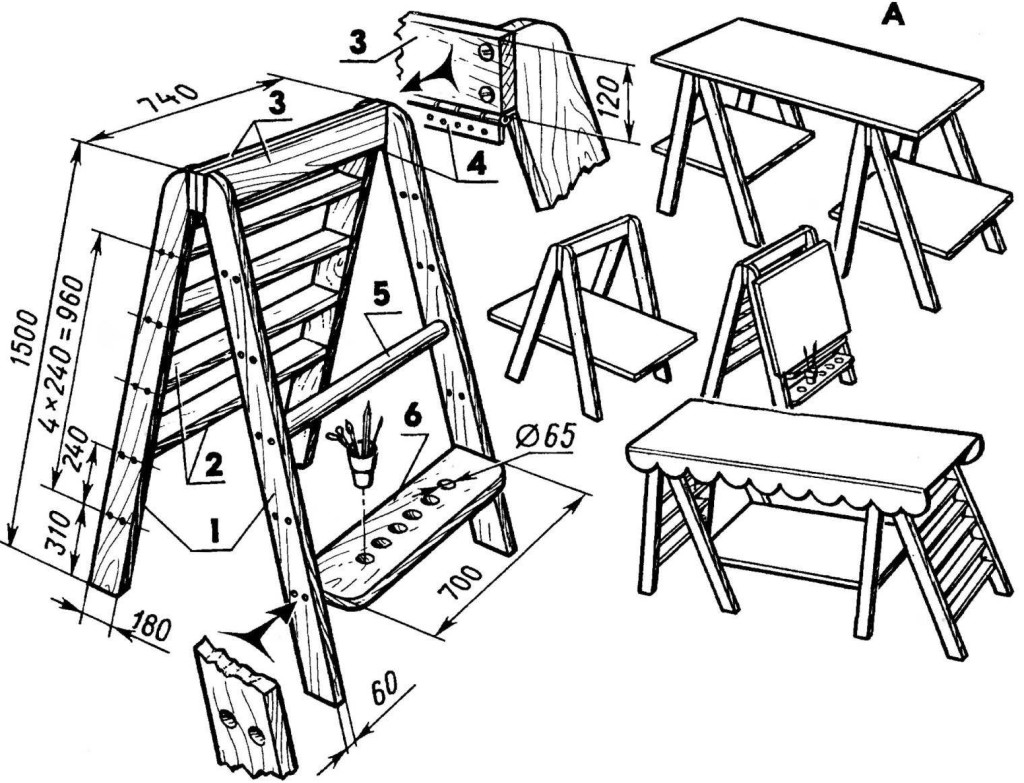
A design that, with a slight movement of the hand, turns from a stepladder into a table for eating, a gazebo, a bed. Such versatility will greatly facilitate life in the country.
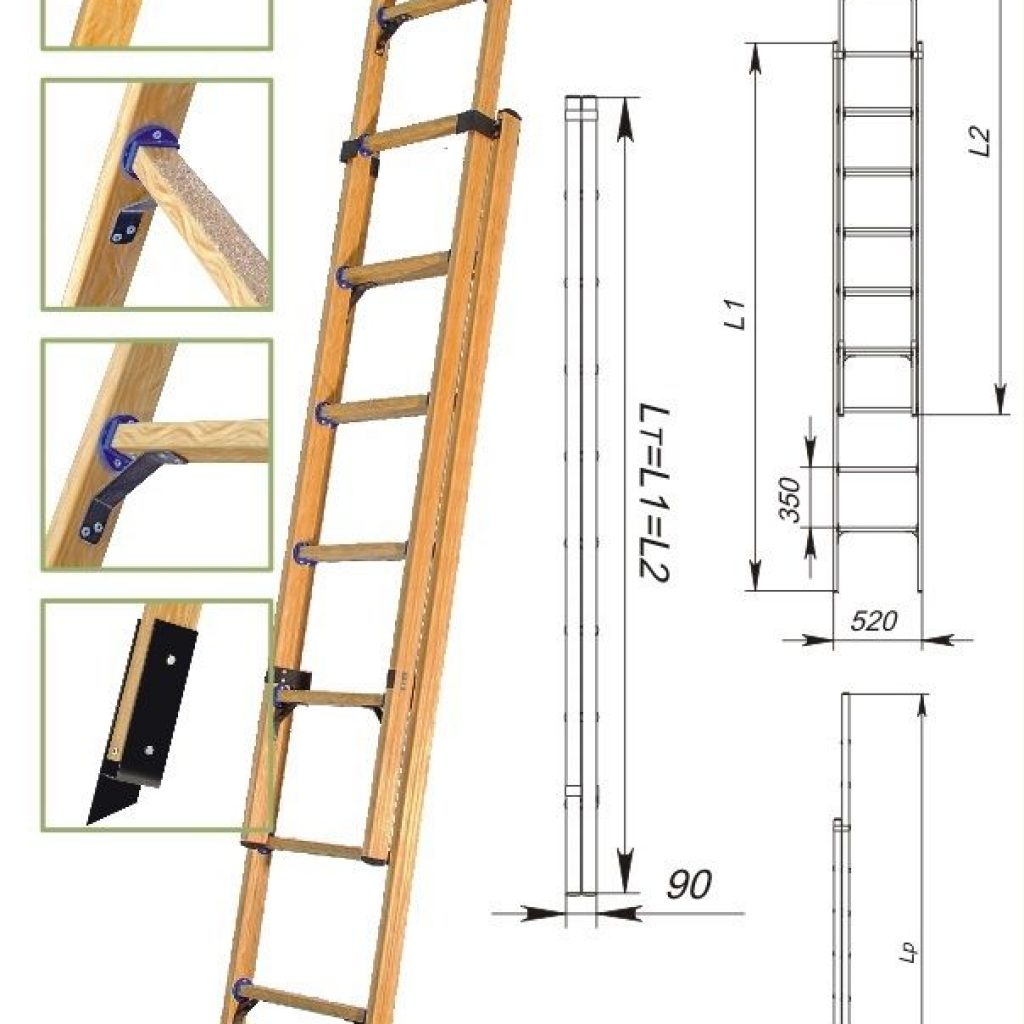
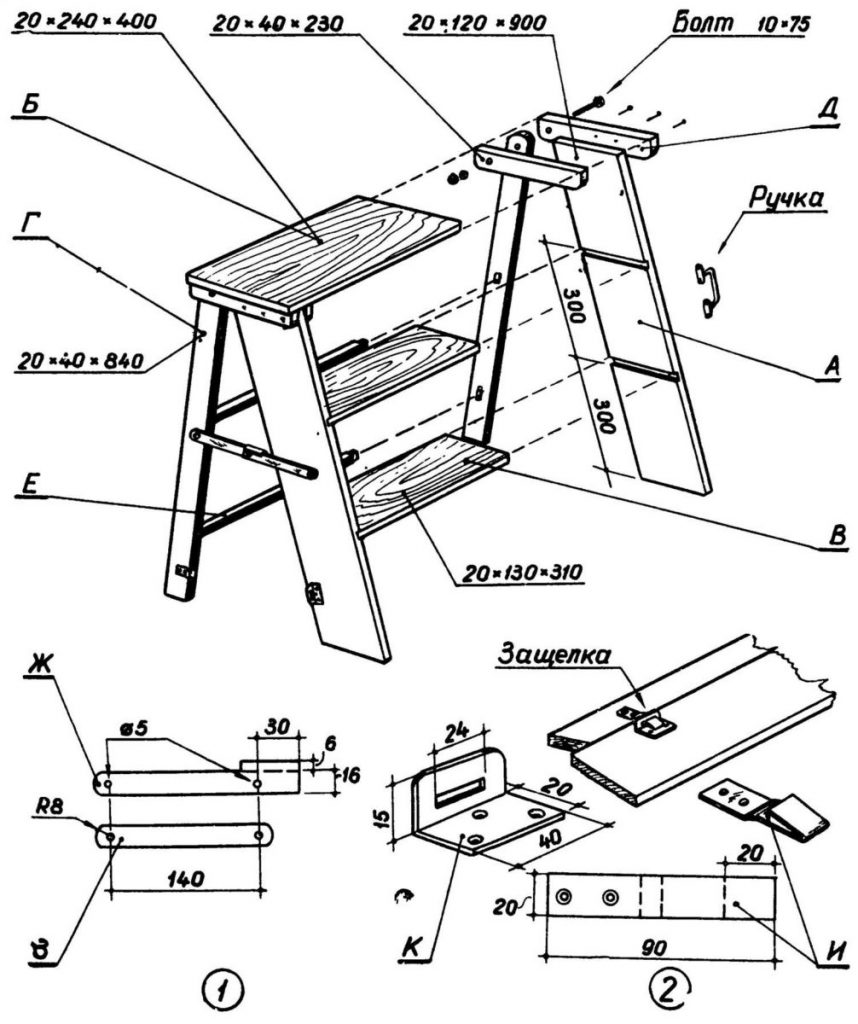
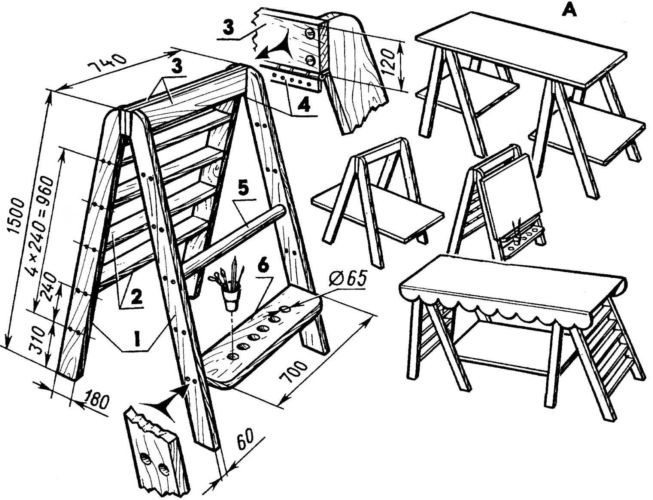 Transformer ladder scheme
For the manufacture of support racks, stepladders take boards 1.5 m long, 6 cm thick, 18 cm wide. The grooves for the steps are selected in them. The support is complemented by a crossbar, which can be rearranged into specially drilled additional holes.
A distinctive feature of the folding design is hinged connections. The edges of the supports are cut at the desired angle.From above to the ends, stop boards are attached, and the lower edges are connected by a piano loop.
The transformer can be used by adults and children. So, kids use it as a drawing stand. To fix the paper sheets, a plywood shield is provided in the structure.
The stepladder can be easily converted into a table by installing a plywood board for the table top. You can also make a gazebo or ironing board out of it.
How to assemble a garden stepladder
When the step supports are ready, they are laid parallel to each other and markings are made for future rungs. It is worth using a square at this stage to maintain an angle of 90 degrees. Steps are cut from the same profile or corner. When the crossbars are ready, the lower and upper parts are first spot welded, and then all the other elements. If all components are correctly connected and there is no need for correction, welds can be made. If the support section is planned without steps, two horizontally located crossbeams are welded, and one additionally diagonally. This is necessary to secure the supports relative to each other. It remains to fix the limiting cable in the middle of the march and weld a fragment of the profile or corner to the ends of the supports in the lower part. At the end, the garden structure is primed, after which a layer of paint is applied.
The electrician made a reliable assistant with his own hand - look at the video
Like a wooden step-ladder, it is quite easy to assemble a steel structure. Leave a comment and share your own best practices on how to make a simple step-ladder with your own hands.
Stepladder chair
Stepladders, like any other folding structures, have one indisputable advantage - they are convenient to store. When folded, the device can be placed in a closet or even simply hidden behind an interior door.
 The stepladder chair is compact and easy to install.
Still, some space is required to store traditional ladders. But modifications that fold into a stool or chair can be so compact that they will not take up space at all. But their height is also small. Making a step-ladder chair with your own hands from wood does not present any particular difficulties. You will need boards with a thickness of 45 mm and bars of 35 × 45 mm. From fasteners - screws or nails, as well as wooden pins.
 To completely save space, such a stepladder can be transformed into a chair.
The compact design will require careful attention to parts manufacturing and assembly. The drawings contain dimensions that must be adhered to. Otherwise, folding and unfolding the stepladder chair may become difficult or impossible.
 Stepladder chair drawing.
Details of the structure should not interfere with each other when driving. The two lower rungs, similar to a small chair, rotate on pins. When folded, they fit inside the stool. You can provide additional fasteners - a lock that fixes the structure in the unfolded state.
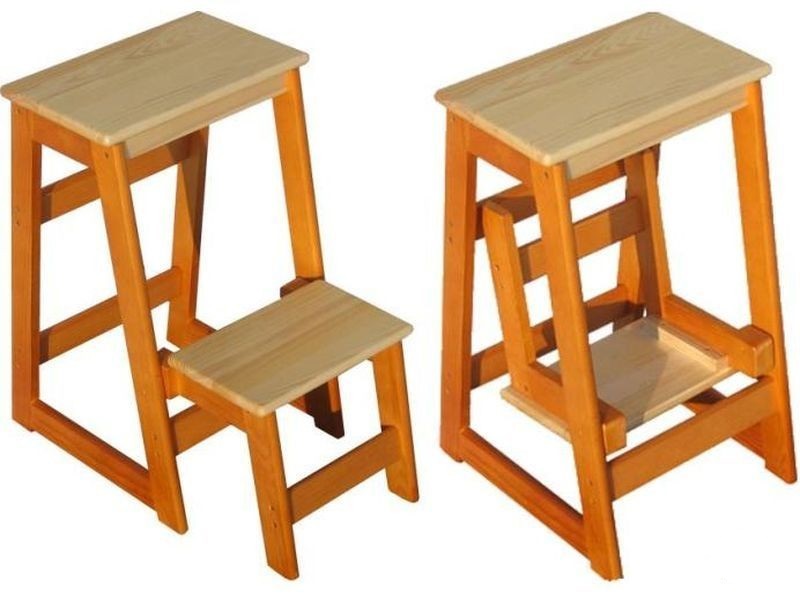 Stepladder chair in a harmonious state.
Making a wooden stepladder chair.
Multifunctional option
It happens that a stepladder, being an undoubtedly useful device, is idle for most of its "life". But you can build a stepladder with your own hands, the scope of which will be much wider than usual. A table, an easel, a gazebo, and a bed are what can be done with the structure described below.
 The stepladder table will serve both for eating and for doing housework.
So, for the manufacture of supports, one and a half meter boards are taken, 60 mm thick, 180 mm wide. Steps are also made of planks. In the supports, you need to choose the grooves for fastening the steps. The support is equipped with a crossbar, for the possibility of its rearrangement additional holes are drilled. A feature of this design is a hinge joint.The edges of the support boards are sawn off at the desired angles, the stop boards are screwed to the upper ends. The bottom edges of these boards are connected by a piano loop. With this design, the step-ladder does not need additional devices to protect its supports from moving. A piano loop with stop boards is guaranteed to keep the unfolded step-ladder in working position. The drawing of the staircase also contains schematic drawings of the structures obtained on its basis.
 Stepladder table drawing.
Step-by-step instructions for creating a classic step-ladder with your own hands
The classic model is familiar to every master
And no matter how sophisticated the store variations are, the classic model will always be ahead. After all, it is stable, with a comfortable focus, made for specific needs.

Materials:
- Wood 6 by 0.20 by 0.1 - 1 piece;
- Wood 3 by 0.20 by 0.1 - 1 piece;
- Corner - 2 pcs.;
- Plate - 2 pcs.;
- Screw - 2 pcs.;
- Nut - 2 pcs.;
- Self-tapping screw - 12 pcs.;
- Nail - 4 pcs.
Tool:
- A circular saw;
- Electric planer;
- Stationery knife;
- Electric drill;
- Hammer"
- Paint brush;
- Chisel;
- Mallet;
- Jigsaw;
- Roulette;
- Marker;
- PVA glue;
- Triangle;
- Dye.
Production technology:
- Using a saw, we cut the beams in half in the longitudinal direction. We process all the burrs with a plane and sandpaper and cut the wood across for the racks. From small pieces we cut the crossbars of the following length: 46, 49, 52, 54, 60, 63 and 66 cm. For an emphasis, we cut off 2 more crossbars;
Drawing:
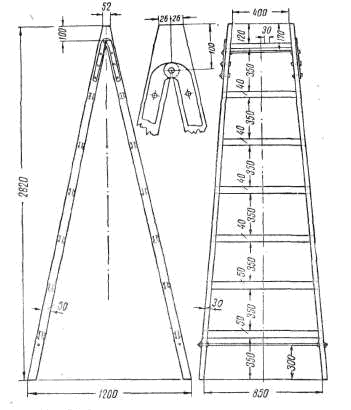
- On the widest side of the racks, we mark the places for cutting the grooves of 2.5-3.5 cm. The steps will be attached to them. The center of the rectangle to be drawn should be located at a distance of 20 cm from the top of the structure. Each next bar should be fastened in 33 cm increments. On the stop bars, the contours of the grooves should also be marked. From the top down, they should be located at a distance of 2.5 cm and 83 cm;
- Using a hammer, holes for the beams are hollowed out in the wood. The procedure is performed very carefully - so that the holes are even;
- On the boards of the largest and smallest lengths, places for future thorns are marked. Their length should be 6 cm. Cuts are made on all 4 sides with a hacksaw. A similar procedure is performed with wood from its ends, in the longitudinal direction. This is necessary in order to be able to cut the spikes deep into the structure;
- The lower and upper steps are inserted into the grooves, and are lightly grabbed with nails. The remaining boards are numbered for ease of installation, and grooves are cut on all other segments;
- On the stop of the ladder, 2 bars are inserted for fixing. The main thing is that there are no gaps, and the connection is as tight as possible. Hammered nails are removed, and a preliminary assembly of the structure is performed. If necessary, the attachment points are lightly tapped with a hammer;
- The structure is disassembled and painted. The marked ends are not painted;
- 6 mm holes are drilled in the places for installing the posts. in diameter. With their help, the steps will be fixed;
- With the help of a wood tool, 7 mm wooden pegs-dowels are cut. in section, which will give the structure strength;
- The staircase is going. At the same time, all elements are pre-coated with PVA glue;
- Plates and corners are mounted on the upper part of the structure, which are fixed with screws.
We recommend to read: Do-it-yourself stepladder chair.
Stages of work and their features
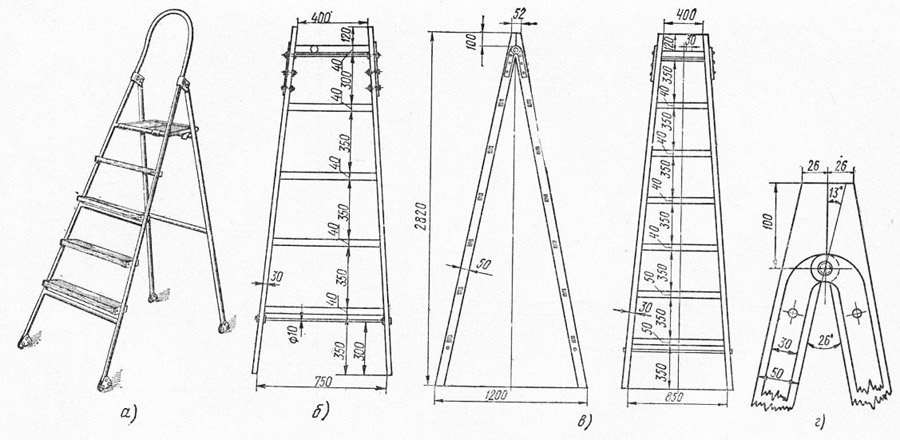
Diagram of a wooden stepladder.
Before you start making a stepladder, you should sketch out a rough sketch for making it. All dimensions must be put on it at once. Only a highly qualified master can afford to work without a sketch. Do not think that a stepladder with your own hands is an object that requires a superficial attitude towards itself.Firstly, the safety of the worker at height depends on him, and secondly, it is very convenient when you do not need to constantly measure the workpieces, you just need to look at the sketch.
Next, the wood is cut. You will need 4 blanks 175 cm long each. Basically, the length is determined by the height of the work performed: if a step-ladder is needed in the garden, then one should proceed from the size of the trees, but it is also impossible to climb it too high, other means will be needed. For work on the roof, a type of ladder is used, such as a ridge ladder. It is distinguished by the fact that the second half of the folding bed is thrown over the roof, and bars are nailed to the tops for stability.
Then ladder blanks are cut with a grinder. It is better to use a metal profile for this than round elements, again for the safety of the worker. The foot on a flat profile will be much more stable than on a narrow cylinder. The workpieces must be in the same quantity for both sides of the ladder - the factory ones are made only on one side, but this model will have two working ladders. This is convenient if the work requires two people or you need to approach hard-to-reach places at once.
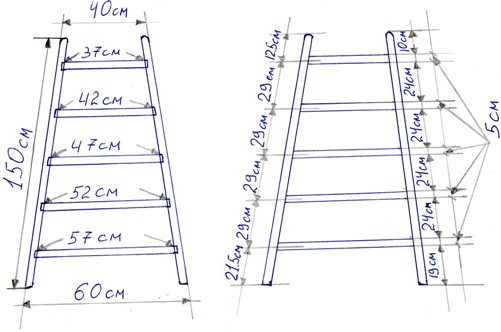
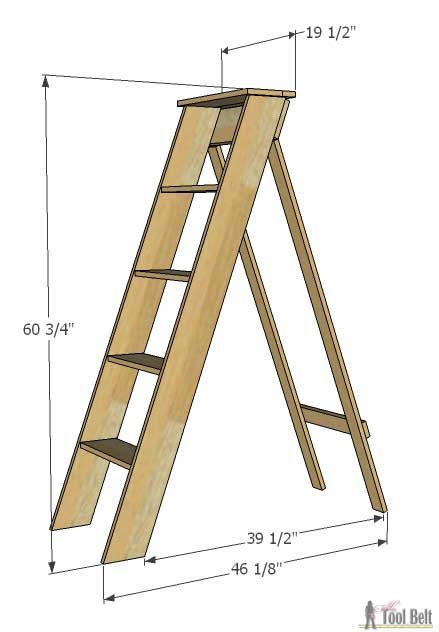
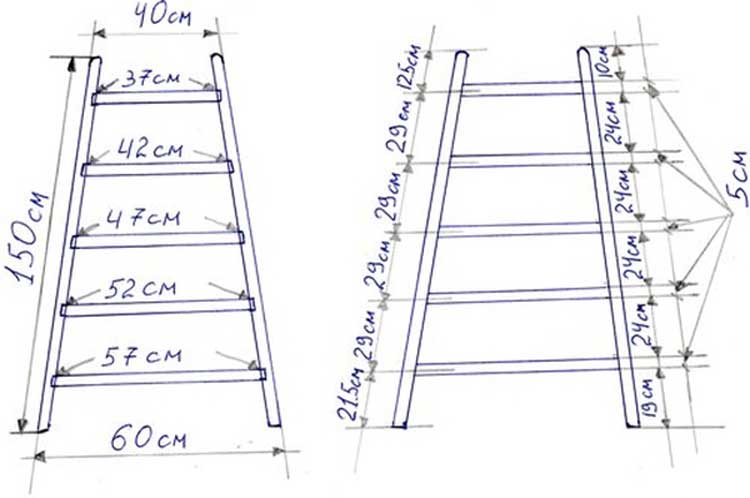
Stepladder drawing with dimensions.
The length of such elements depends on the distance between the long side rails. The upper ends should be 40 cm apart, and the lower ends - 60. You should get two blanks each with a length of 57, 52, 47, 42, and 37 cm. That is, the distance between the steps is approximately 27 cm.
Then, holes are drilled in long elements along the diameter of the steps, if the elements are round, and metal corners are fixed for flat ones. The drilling depth should not be less than 2 cm. In the same way, holes for the knitting needles are made somewhat lower. Then the structure is assembled without the use of bolts in order to see all the flaws and immediately fix it. All elements are processed, because the material can be damaged by mold or mildew.
Collect the stairs. To do this, epoxy glue is poured into the recesses, round steps are driven in with a wooden hammer. Then, with the help of fasteners, the spokes are mounted, which are tightened with nuts on both sides. Profile steps are fastened with a wrench. After assembly, the glue takes time, so the workpieces are set aside for a day. If the installation went without it, then it's time to start with the plates.
One part of the elements is attached to the tree, and then the metal ears of the structure are fastened together so that it can fold or unfold freely. Plates from the mechanism of an old sofa are perfect for such a case.
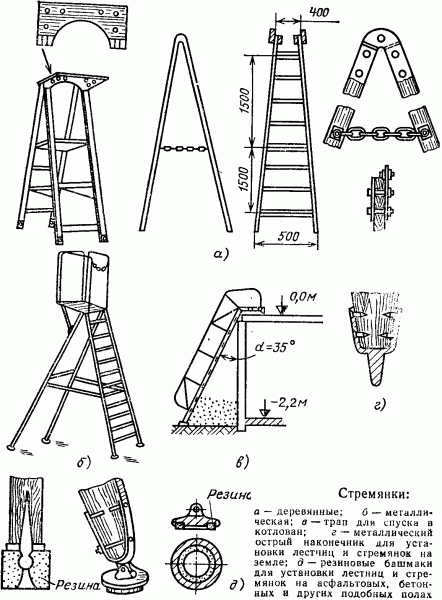
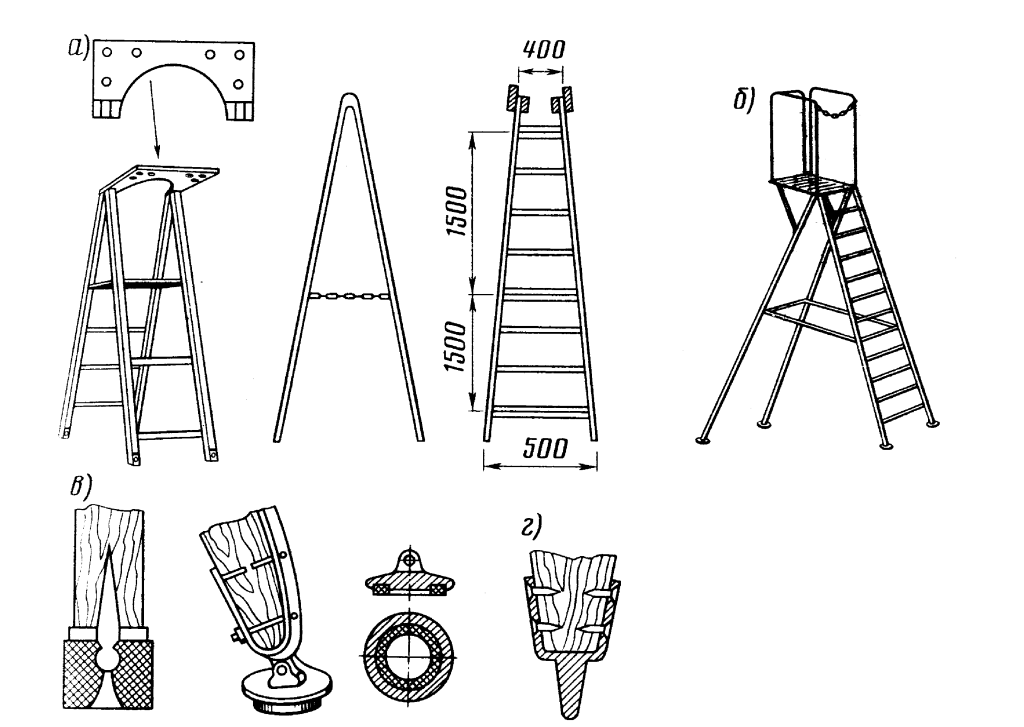
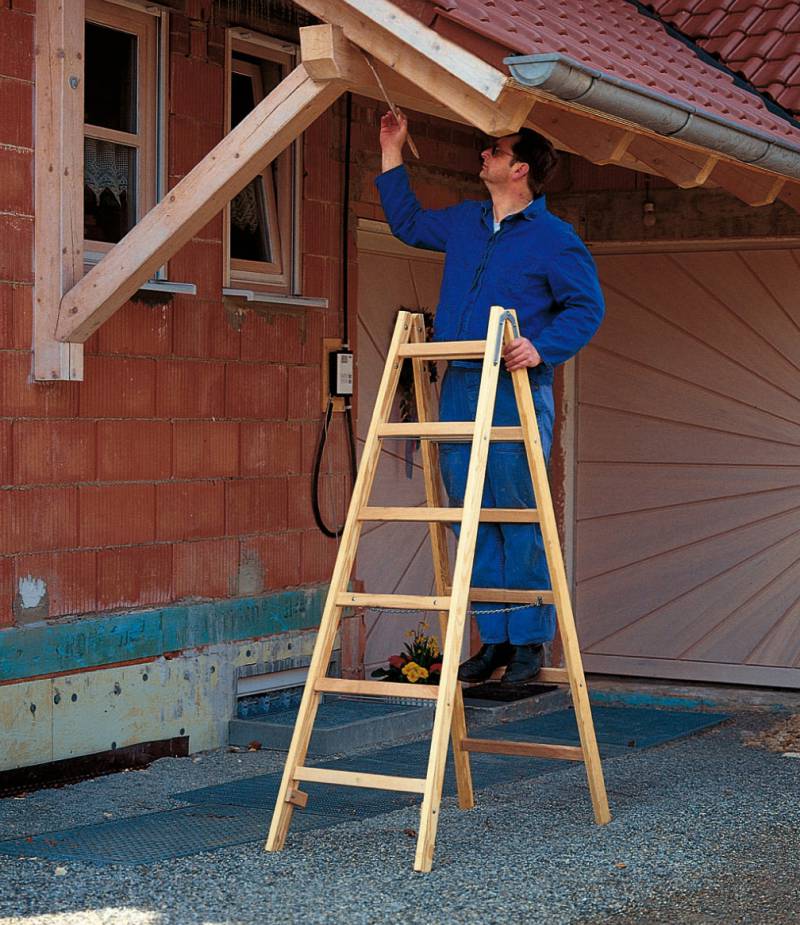
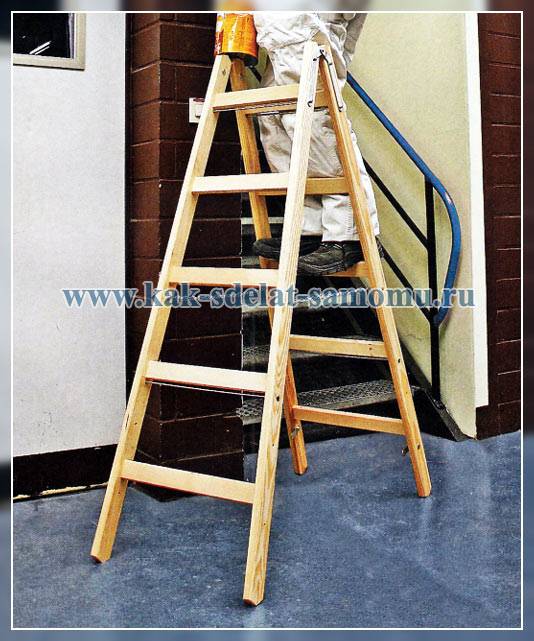
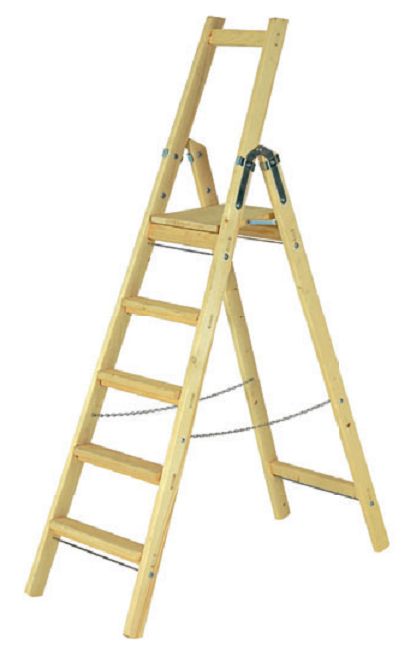
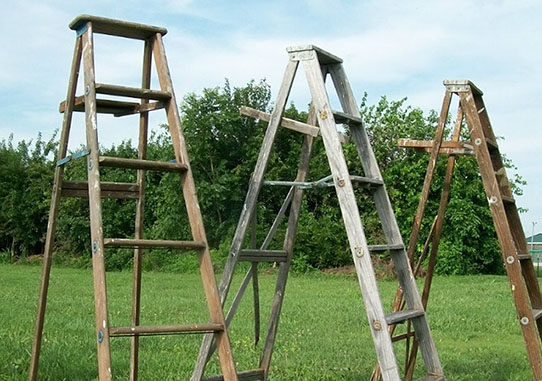
Types of stepladders.
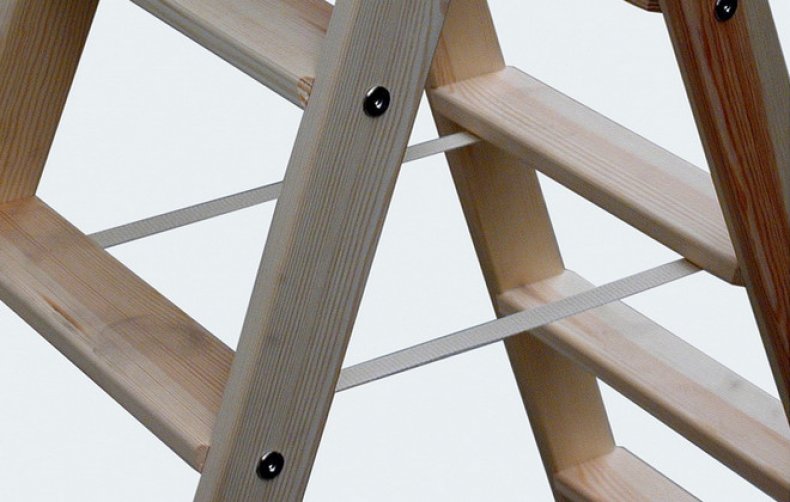
Next, you need to take care of your own safety - the metal chain is cut into two parts with scissors and screwed with the ends to opposite elements. It will not allow the ladder to decompose completely if the legs begin to slide over the surface. Naturally, this is done at the bottom of the stairs. At what distance - the owner himself will decide, but usually this is the length of the entire chain, that is, when unfolding the legs, they form a regular square with a side of 60 cm. It is advisable to "shoe" the legs, otherwise there is a risk that the ladder will slide on a particularly slippery or wet surface. Installation is over.
For storage, you can soak it with used machine oil so that the ladder intended for gardening will stand all winter untouched by mold or mildew.
Stepladder from a bar
A one-way climbing bar ladder is a simple enough structure to be made by a non-professional. It will consist of two parts - the main (ladder) and the support.
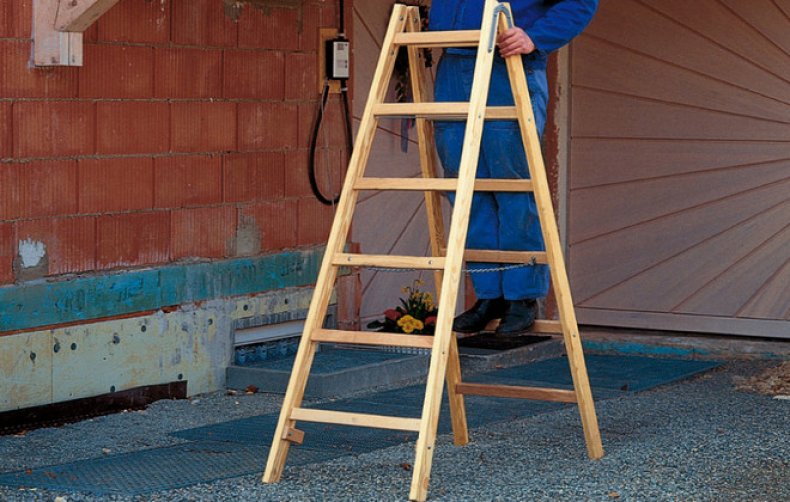
Stepladder diagram
We cut the existing timber into the required number of parts of the required length, namely:
- 200 cm for support legs - 4 pieces;
- 59 cm - 2 pieces;
- 54.5 cm - 1 piece;
- 50.0 cm - 1 piece;
- 45.5 cm - 1 piece;
- 41 cm - 3 pieces.
The resulting pieces of beams should be sanded.
Important! If such a ladder is to be used outdoors, it is better to treat it with an antiseptic.
Assembling the main part
We take two two-meter support legs and make the same markings on them for the five steps of our staircase. The bottom step should be at least 10 cm from the ends of the legs. The further distance between the steps is 40 cm.
We make grooves with a depth of 1.5-2 cm and dimensions of 5x2.5 cm in places where the chisel is marked. Then, at the ends of the bars for the steps, we also make narrowings of the same size with a chisel, which will fit into these grooves.
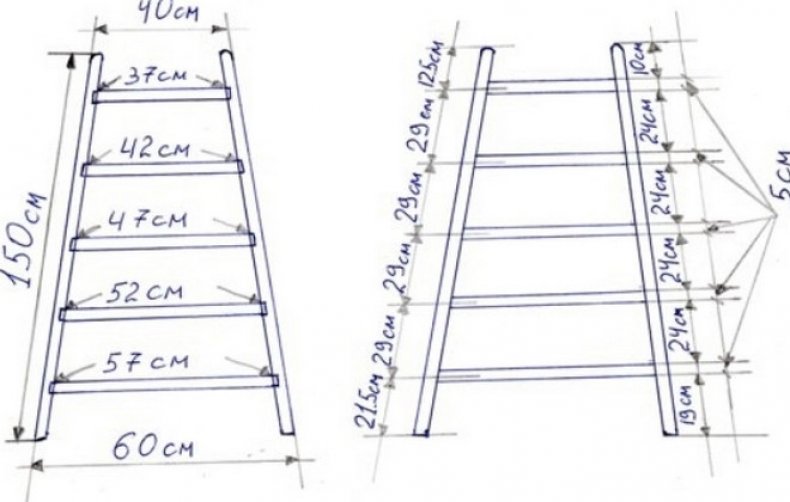
Since our staircase has a narrowing towards the top, all the ends of the steps are slightly beveled by a couple of millimeters. The steps are hammered into the grooves with a hammer or mallet. A little higher than the top step, an additional crossbar is applied and nailed
The steps are inserted into the grooves and fastened with self-tapping screws. The distance between the upper ends is 40 cm, and between the lower ends - 60 cm.
Strut assembly
The support is made from the remaining two-meter legs, only the upper (41 cm) and lower (59 cm) crossbars are stuffed on them. The crossbeams of the support and the additional crossbar of the stairs are made overhead, and not in a mortise way, so as not to interfere with the assembly of the structure.
Important! The distance between the lower ends is the same as that of the main part - 60 cm.And between the upper ends is slightly less - 30 cm
Therefore, the top step is somewhat shortened compared to the top step of the main part (staircase).
A jib is installed between the upper and lower crossbar, which is first measured and cut from the bar.
To arrange a summer cottage, find out how to insulate the basement of the foundation with your own hands, how to build a pool for a summer residence, how to choose garden sculptures, how to make a blind area at home, concrete paths, a decorative waterfall, a fountain, a flower bed of stones, rockery, a dry stream.
Screeds
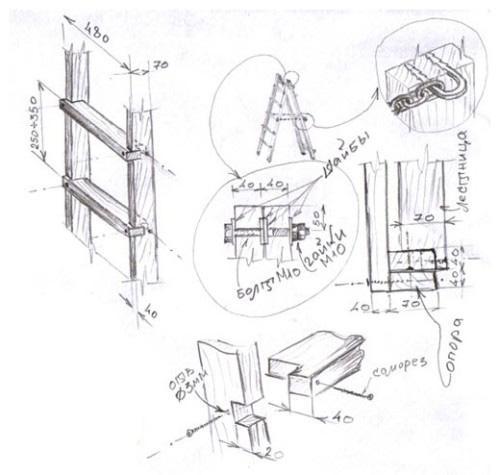
To connect the two parts of the structure, in the upper parts of the support legs, stepping back from the ends of the top at least 10 cm, drill holes of 8-10 mm (depending on the thickness of the stud).
Connect both parts with a hairpin, put on washers and tighten the nuts on the inner sides of the supports. Select the desired locking position of the two halves and add locknuts for better locking.
For ease of use, such a ladder can be supplemented with hooks on which you can hang tools or a bucket.
Preparation for making a ladder
A fold-out ladder may be needed for various purposes. If you are assembling a ladder for use in a garage, some kind of utility room or for a large house, then its dimensions should not be small. It should be borne in mind that a person should not only reach the top point he needs, but also be able to freely do the work. Accordingly, the first step is to calculate the height of the future structure.
The optimum height for an ordinary household step ladder is about 1.5 - 1.7 meters. Taking into account the average height of ceilings in houses and apartments, an adult will be able to reach the very top, even standing on the penultimate step.
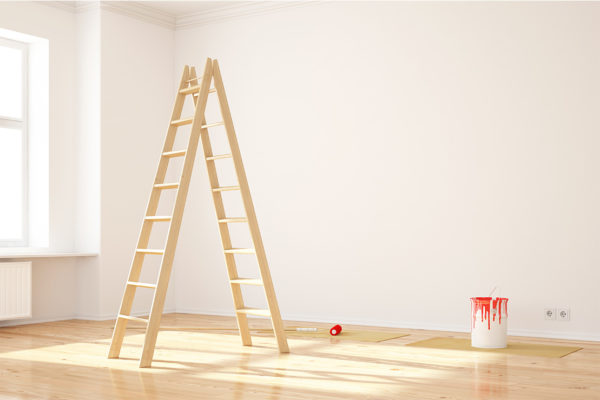
Do not forget to add the average height of a person to the height of the ladder.
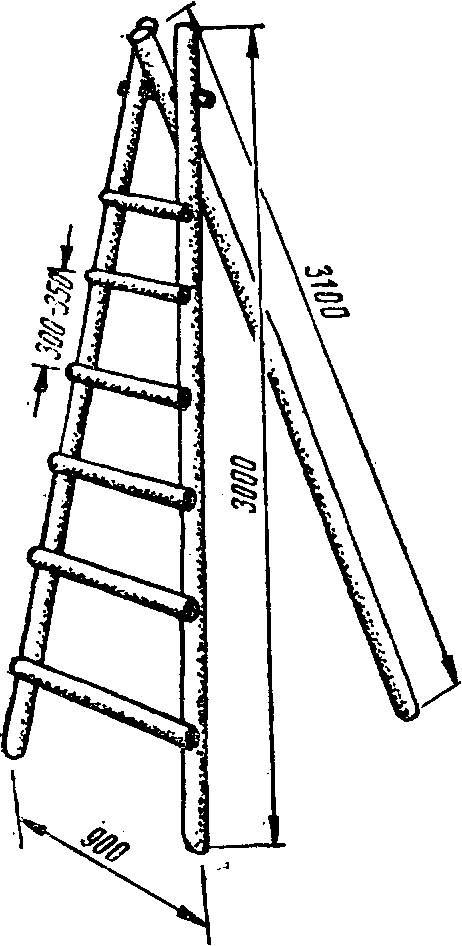
If you plan to stretch higher from the ladder - for example, to the tops of fruit trees or the roof of a private house, then the recommended height of the stairs should be from 2.5 to 3.5 meters. It is not advisable to make a longer step-ladder - the product will turn out to be cumbersome, and the overrun of materials will be a pretty penny.
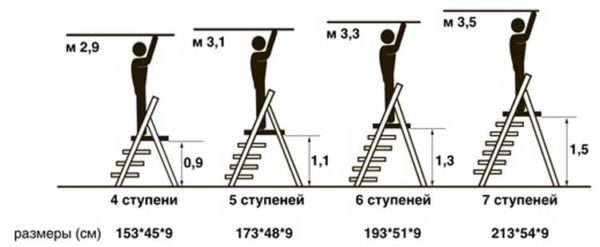
Examples of the height of the ladders and the number of steps in them
Another important parameter that needs to be calculated is the tread. A step is the width of one step. For ordinary stairs used in an apartment, the tread can be made within 25-30 centimeters. If the stepladder will be used for repairs, or harvesting or regular lifting and lowering of goods, it is better to increase the tread to 30-35 centimeters
Pay attention - at the step-ladder, the steps are needed not so much to climb them, but to perform some actions at a height, so the support should be as wide as possible
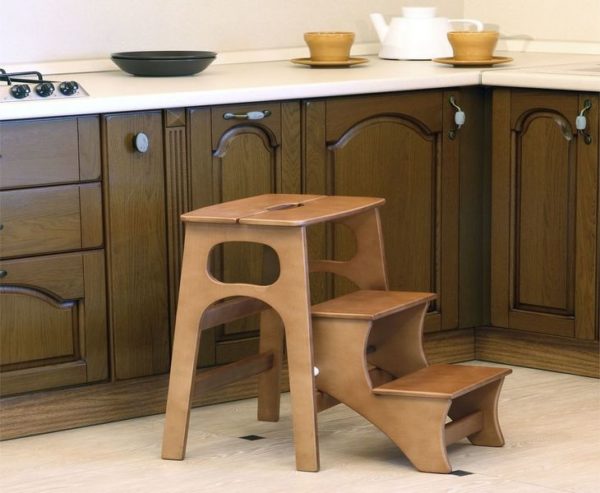
Mini stepladder with comfortable steps
As for the length of the steps, for a step-ladder it changes - the higher the step, the shorter it is. The classic design is assembled according to the truncated pyramid principle. We recommend making the longest steps about 55 centimeters long, and the top 35 centimeters. Such parameters will be enough to make it convenient to climb and descend the stairs.
The last nuance is the number of steps. You can decide on this on your own, so that it is specifically for you to be comfortable using the step-ladder. Usually, a distance of about 20-25 centimeters is observed between the steps. It is necessary to take into account the total height of the ladder and the angle at which its "legs" will move apart - the steepness. If the whole number of steps does not fit, then the interval between the penultimate step and the working platform must be reduced.
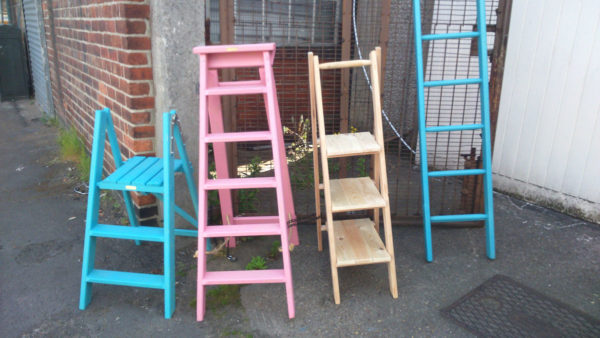
The final product should be convenient, first of all, for its owner
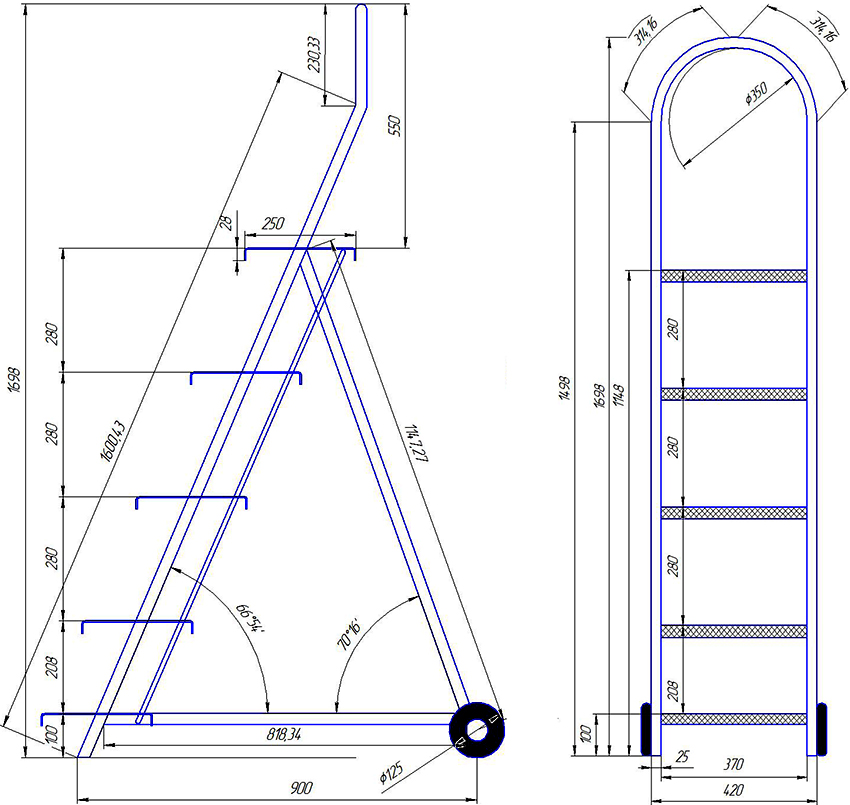
DIY metal ladders
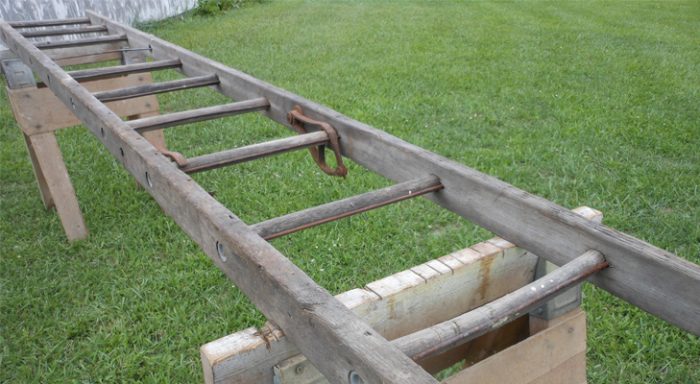
You can buy these stairs. Aluminum products are especially attractive. However, many owners do not like this solution to the problem for several reasons. It:
- A price that does not in any way correspond to the cost of such a simple design. Why spend a decent amount of money on something you can do yourself?
- "Wonderful" quality of purchased products. Very often there are unflattering reviews concerning the fragility of a light metal "remake".
They say that now commercial aluminum ladders do not stand up to criticism. They "learned" to do so that the products (all their elements) begin to deform after a year of operation, or even earlier.
Materials, tools
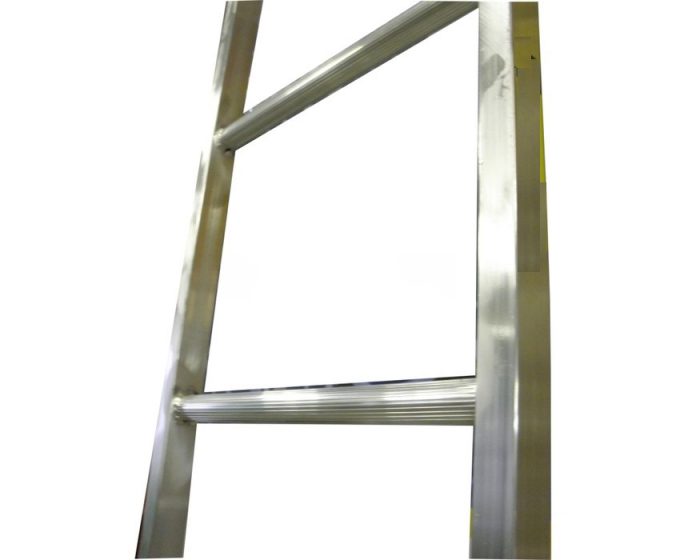
To create the most reliable structure, the master will need to purchase a profile pipe: for racks (20x40 mm) and for steps - round (30 mm). You will also need to prepare:
- grinder, powerful drill (900 W minimum);
- special crown for metal (30 mm);
- disks - grinding, wire;
- solvent: acetone, white spirit:
- primer: aerosol for metal;
- auto paint: acrylic, alkyd;
- marker, tape measure;
- hammer.
The last and most important piece of equipment is a welding machine. You will also need a strong rope, or plastic ties to temporarily fix the elements before welding.
Manufacturing of a metal structure
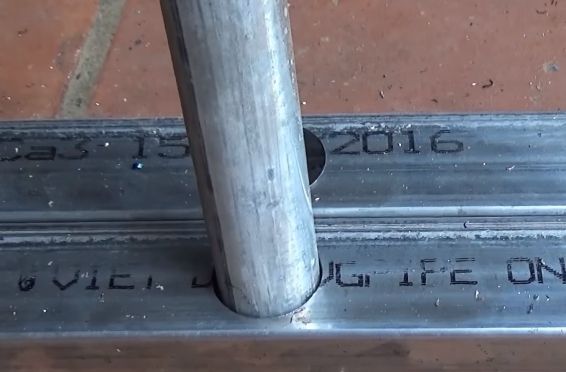
The process of "creating" a metal ladder follows the following scenario:
- First, the racks are marked. Two rectangular profiles are placed close to a flat surface. The elements are aligned to the bottom edge, then both profiles are marked with a marker at once.
- They make blanks. They are cut with a grinder so that the cuts are perfectly straight, without the slightest distortions. The supports are again laid close, then on them, again at the same time, the places for the installation of steps are marked. Precisely control the step between them.
- The mark should be in the center of the round bars. Then it is transferred to the middle of the shelf, measuring 20 mm from the edge. However, make sure that both pipes are aligned at the edge. At the points found, they put a bold cross, which should be clearly visible.
- The crown is fixed on a drill. The tool is positioned so that the drill is exactly on the cross. After passing through the metal, the tool is removed. Otherwise, it is easy to damage the opposite side of the profile. The rest of the holes are made in the same way.
- Proceed to marking pipes for crossbeams blanks. Then the profiles are securely fixed and cut, avoiding any distortions of the ends. Finished elements are sanded. Any burr can prevent the step from fitting into the hole in the rack.
- Proceed with the installation of steps. The first string is laid on the floor with the holes up, then pipe pieces are inserted along the entire length.A second rack is put on their installed ends. This operation will most likely require an assistant.
- To fix the ladder for welding, use a piece of rope or plastic ties. Then all the steps are welded to the profile bowstrings. They do not monitor the beauty, but the quality of the seam. The stronger it is, the more reliable the ladder will be.
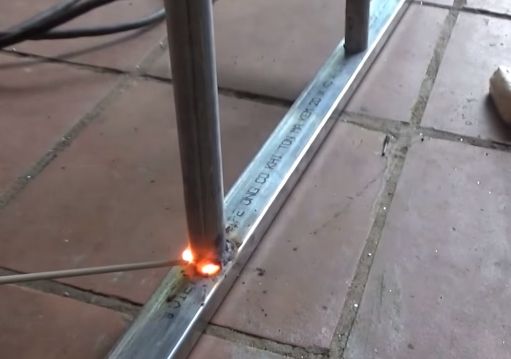
Finishing touches
The scale is knocked down with a hammer, then the semi-finished product is carefully polished. It is necessary to control the strength, as excessive zeal will only weaken the welded joint.
To rid the surfaces of any imperfections, sanding is completed with a wire disc. The last stages of work are solvent degreasing, surface treatment with a primer and painting with a spray can (2-3 layers).
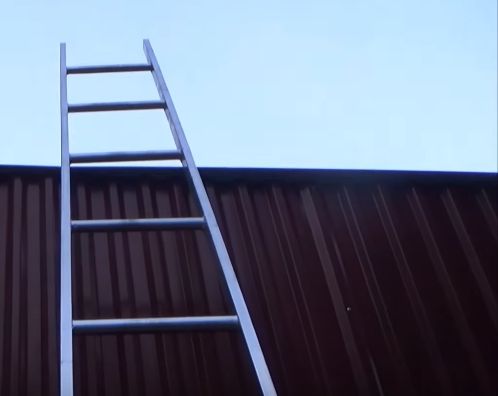
DIY wooden ladders are operations that do not require welding equipment, so they are more popular. If the master is familiar with welding, then it is better to make a super-reliable metal structure, which is not afraid of any "inhuman" conditions.
To get acquainted with all the stages of making a more popular and as simple as possible wooden "assistant", it will not be superfluous to take a look at this video tutorial:
Required tools and materials
Before we start talking about the necessary tools and materials, let's say that the list of necessary things will vary depending on which option you decided to implement. That is, it may happen that the materials needed to create a wooden version will be completely useless if a steel ladder or a step-ladder is made of polypropylene elements.

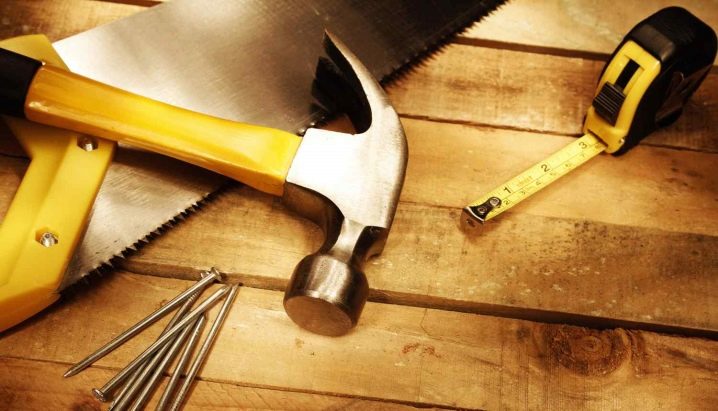
If it was decided to make a stepladder from wood, then to implement the idea we need a hacksaw for working with wood, which will have a teeth thickness of about 3 millimeters. In addition, you should have on hand a screwdriver, medium-grit emery, drills and a hammer. It should be said that conventional drills will not work. We need special ones for wood, with a diameter of 3 and 12 millimeters. Their feature is that the length of the part for work will be 0.5 centimeters. Self-tapping screws are used as fasteners and should also be made for wood. We also need 4 bolts of the M10 model, the length of which is 1.2 centimeters.

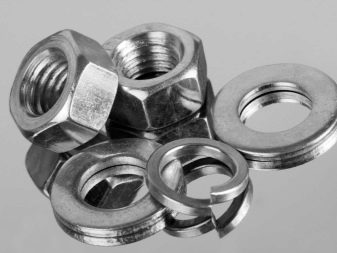
Before forming such a thing out of wood, special construction chains should be prepared with a length of at least half a meter, which will then turn out to be a kind of clamps. Each link should be made of 1.5-2 mm thick wire, and the length of the link itself should be no more than a centimeter. And you also need 4 semicircular brackets to fix the chain.
In the case of a different design, we need to have on hand:
- hammer;
- drill;
- tape measure for taking measurements;
- saw.
In addition, you will need wood blocks and so on. But also when implementing the metal version, you will need:
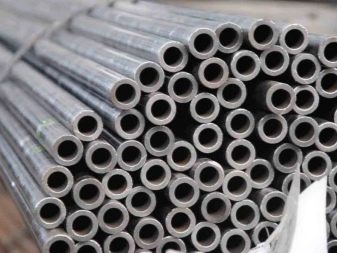
- metal profile;
- metal pipes;
- rubber pads for steps;
- loops;
- shoes;
- rubber feet;
- Bulgarian;
- welding;
- square;
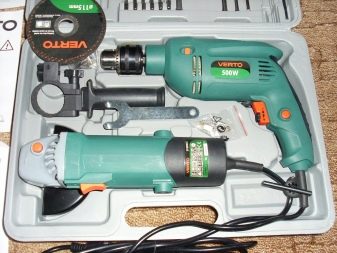
- electric drill;
- marker;
- fasteners-hardware;
- belts;
- tray.
And this can be found out when you have such a thing as blueprints in your hands.

