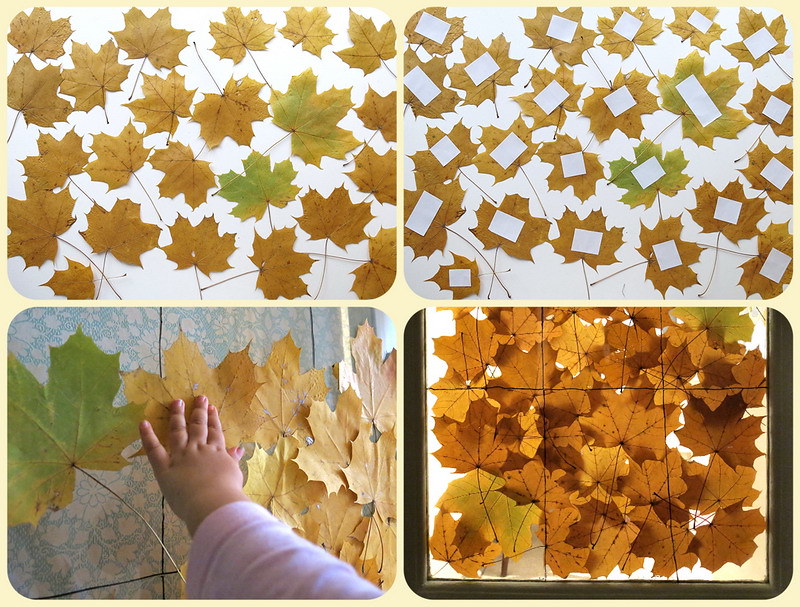
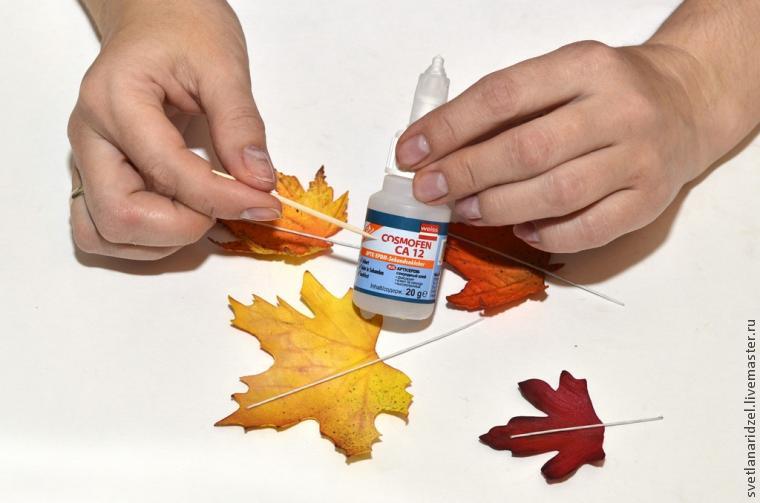
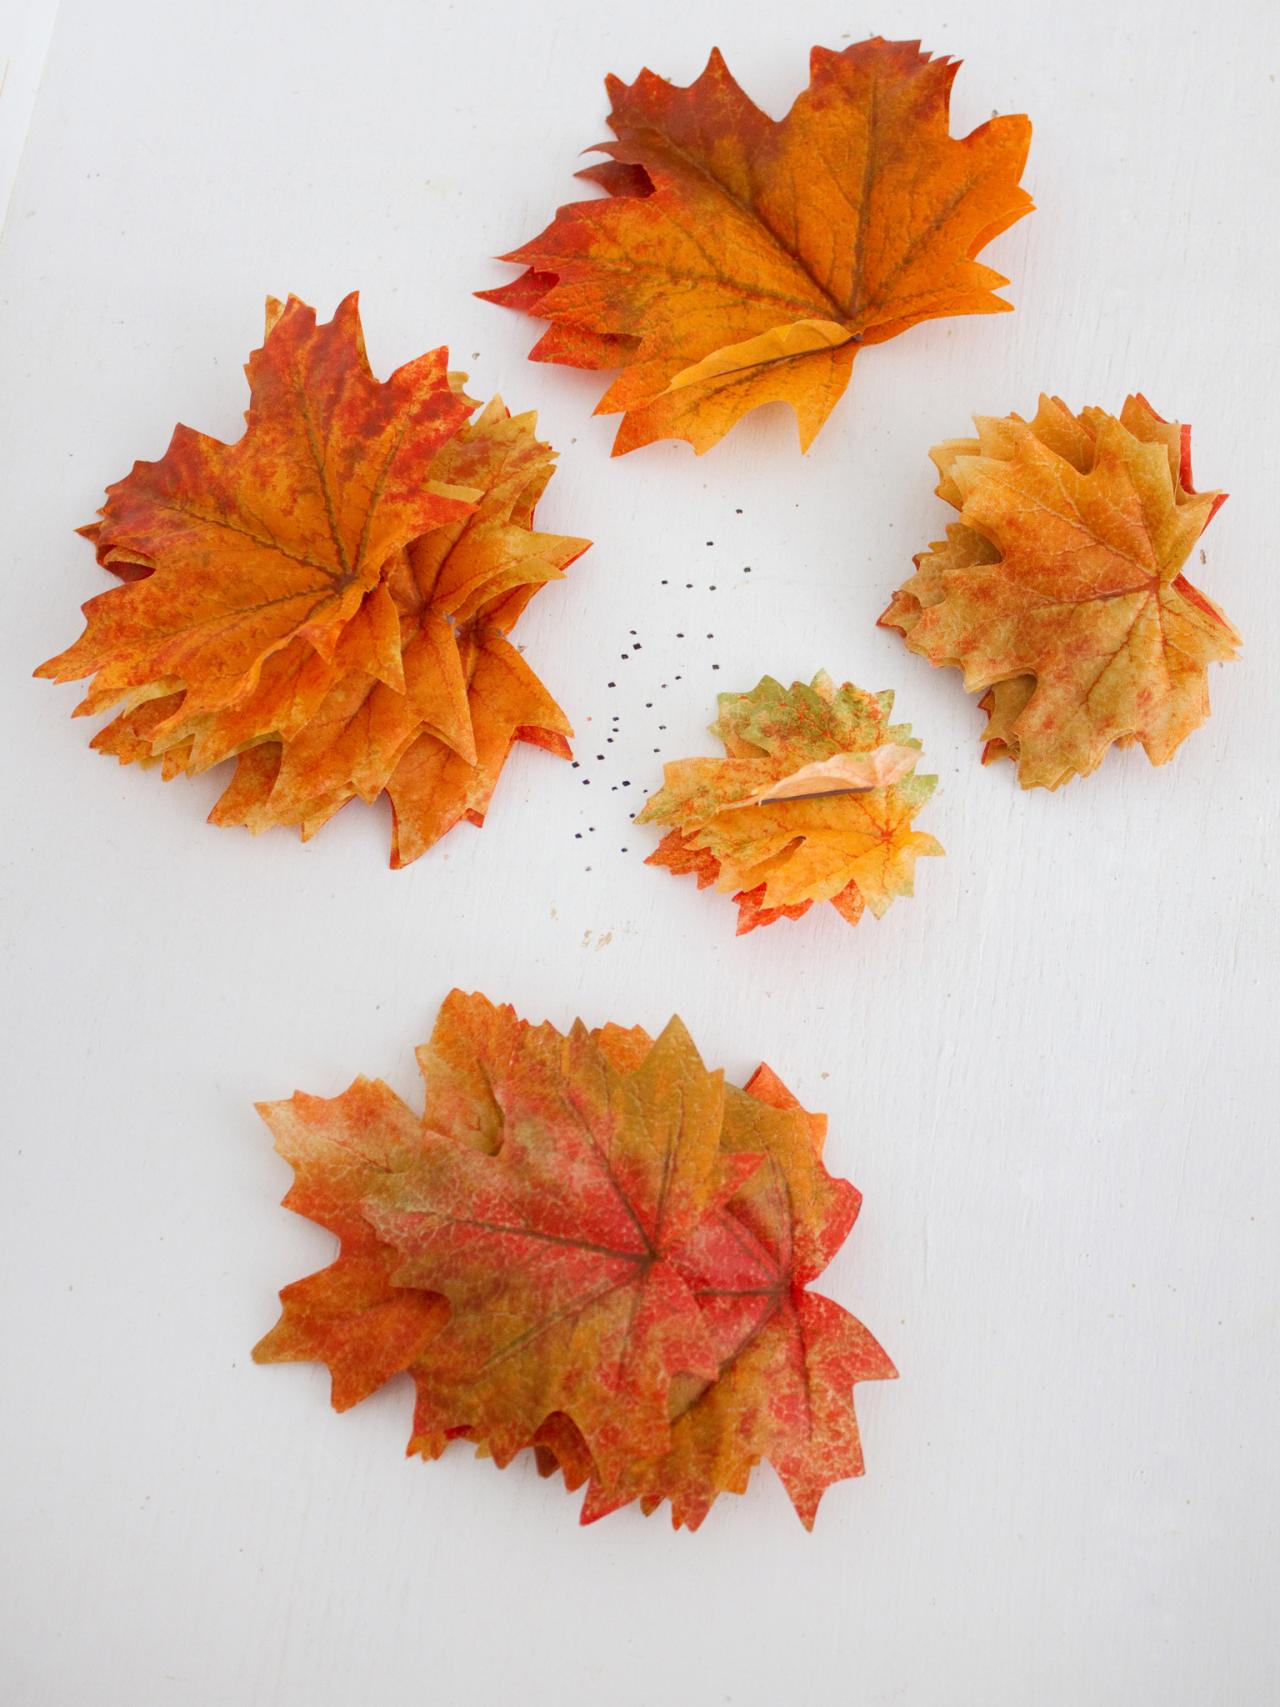
Vase
To make this craft, you will need:
- PVA glue;
- Leaves of different colors;
- An ordinary balloon.
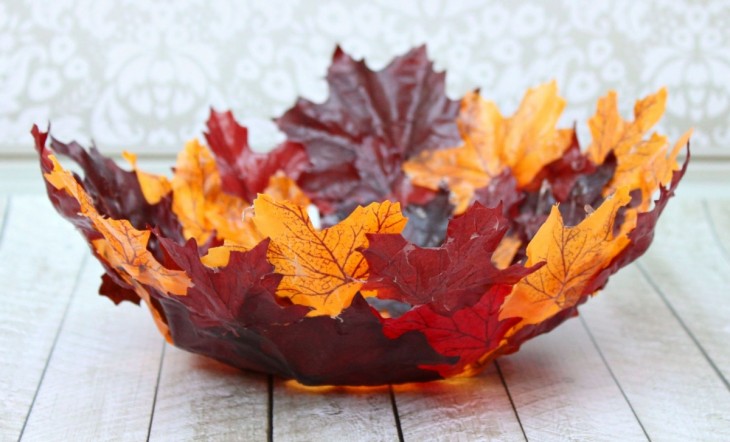
It is necessary to inflate the balloon to the desired vase size. Take glue, diluted half and half with water. Lubricate one half of the ball with glue.
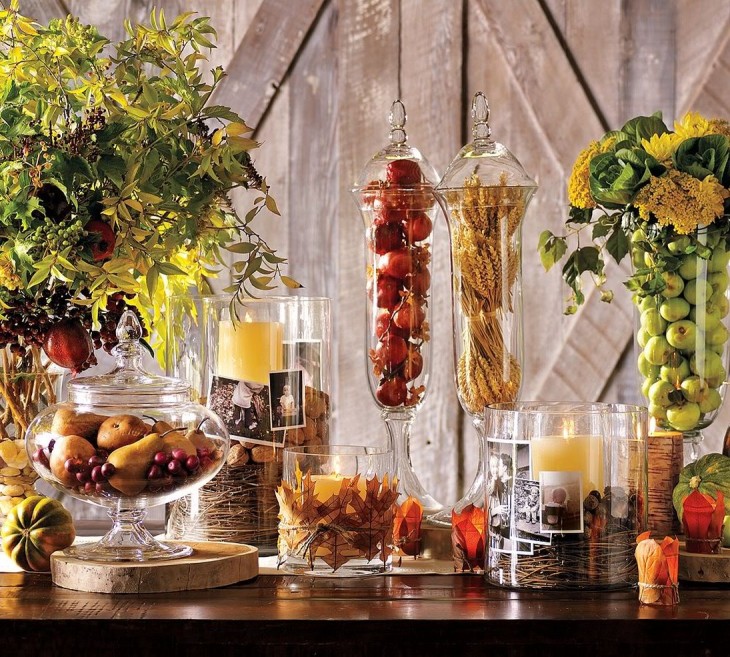
Each sheet must be properly glued and lubricated on top with another layer of mortar so that the upper layers of the sheets hold just as well. When you have glued the top layer, then it should also be greased with glue.

After that, remove the ball for a few days until it solidifies completely. When our fake is completely dry, you will need to burst the balloon. The leaf vase is usable. Making such work is not difficult, but very interesting, so it is good to do it with children.
Autumn leaves - DIY applications
Painting "Girl under an umbrella" from autumn leaves
In this master class, we will make autumn crafts - the application "Girl under an umbrella".
To make a picture, we need:
- white cardboard;
- glue gun;
- PVA glue or pencil;
- felt-tip pen in black;
- dry multicolored leaves;
- bark;
- scissors;
- dry blades of grass.
First we need to outline the silhouette of the girl under the umbrella. We draw it on white cardboard.
Now the silhouette needs to be completely painted over with black. And for this we will use a regular felt-tip pen. You can also use paints instead.
This completes the work with the drawings, and then we will glue the autumn leaves and tree bark.
Let's make a tree to the side of the girl. And to begin with, we cut the trunk out of the bark with scissors and then several branches. You shouldn't do a lot of branches. Three or four will be enough.
We glue the trunk and branches near the girl. It is better to glue these parts on hot glue. Regular glue will not hold the bark. The base for the tree is also ready for us.
Now you need to take multi-colored leaves. They must be pre-dried. And we break these pieces of paper into small parts. Make them different sizes and colors. The more colorful the autumn leaves are, the better.
We will form the crown from these small parts. And here you need to use PVA glue or a pencil. Lubricate a small part with glue. And sprinkle it abundantly with our torn leaves.
Then we glue the other part with glue and do the same thing. That is, we glue the leaves like this until the crown of the tree becomes fluffy and lush enough
It is important that there are as few gaps as possible.
At the bottom you need to glue the blades of grass. You can take small and thin elongated autumn leaves. And also fluffy blades of grass that grow everywhere are perfect here. They can be glued with hot glue.
Further from the crown down on both sides of the tree, you need to glue a little more leaves, which we crushed, so that it seemed that the leaves were falling from the tree into the grass. You do not need to glue many sheets of paper, so as not to clutter up the application.
With the help of the same hot glue, you can make a couple of drops on the umbrella, as if it had been wetted by rain.
The leaf applique is ready! It can be closed with glass, framed and hung on the wall.
Beautiful crafts from autumn leaves
Read how to make a slime here.
Recommended manufacturers
The most popular among consumers are building materials from German companies with a high reputation.
"Knauf"
The German company "KNAUF GIPS KG" was founded in 1932. The headquarters is located in Northern Bavaria (Iphofen city). The company is currently the world's leading manufacturer of gypsum-based building materials and components for work.

Volma
Russian manufacturer working on its own raw material base. The headquarters is in Volgograd.The leader in the production of gypsum boards, dry building mixtures in Russia and the countries of the Eurasian economic community.
Henkel
German chemical company specializing in the production of cleaning and adhesives. The headquarters is located in Dusseldorf. Subsidiaries operate in 70 countries, with a total of 340 enterprises.
Household recipes
There are many recipes for how to make high-quality wood glue with your own hands. To do this, you can purchase ready-made casein in powder form or get it at home. Put low-fat milk in a warm place for souring. When it is fermented, filter with cheesecloth and rinse the casein remaining as a result of this process in water and boil to remove fat. Then lay it out on paper, dry well and mix with borax (1 part borax to 10 parts casein) until the consistency of the dough. Dilute the resulting mass with water (2 parts) and apply the resulting glue immediately, since it hardens after 2 hours.
Photo of crafts from leaves

Note!


From autumn leaves, you can create all kinds of crafts, applications and even work in combined techniques. Children are interested in collecting leaves on their own for a walk, so that later they can be used for creativity. To make the application interesting, collect leaves of different sizes and shapes.
The leaves must be dried beforehand. This can be done in different ways, but the most optimal one is to put the leaves between the sheets of books for several days. If you need a quick method of drying, then the option with an iron will suit you. But be sure to place a sheet of paper between the sheet and the bottom of the iron.
Creating animals from leaves is the most favorite pastime of children. They are usually made on a light sheet of paper or cardboard. But you can pre-paint to draw a forest, field, sea - for each animal its own world.


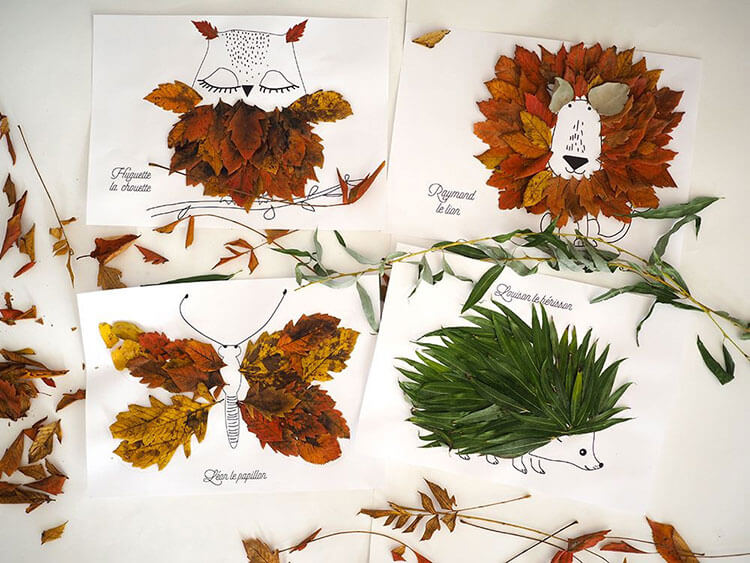
Applique bunny from leaves

To make such a hare, we need leaves from different trees: maple, linden, ash, birch.
First, glue a maple leaf for the body and a lime leaf for the head. Two birch leaves will be useful to us to make the cheeks of the bunny. Glue them to the bottom of the head.
Long ash leaves are good for ears. Use small leaves for the legs and collar of the bunny.
Muzzle details can be cut out of black paper. We glue all the parts with PVA glue.
Bunnies can be completely different, it all depends on the leaves that you have.

Leaves Applique: Owl
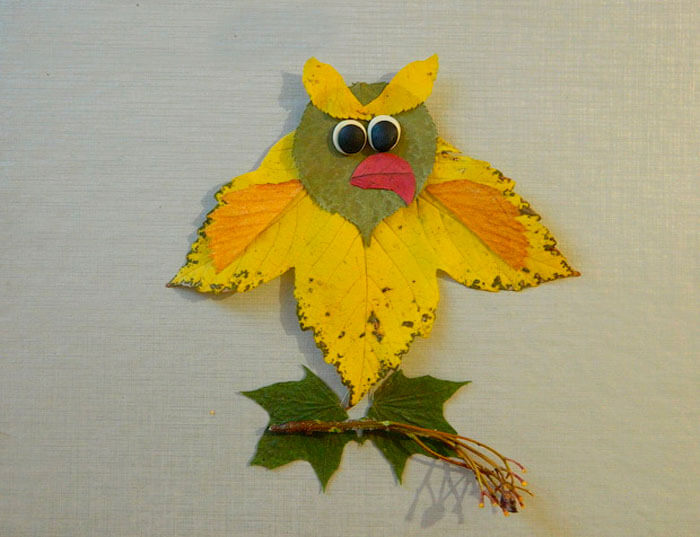
We will need:
- Leaves
- Cardboard
- Branch
- A bunch of rowan
- PVA glue
- Scissors
- Plasticine

For the body, we use a yellow sheet. If necessary, you can correct its shape with scissors.

Glue a green leaf of a smaller size as a head.
We make eyes from black and white plasticine and attach them to the head.
The mouth can be cut out of red cardboard or a red leaf if you find a suitable one.

Cut out the eyebrows from the yellow leaf. And two more leaves will be useful to us to make the legs of an owl
This is one of the options for how to make an owl. But there are many of them, because this bird is one of the most beloved.


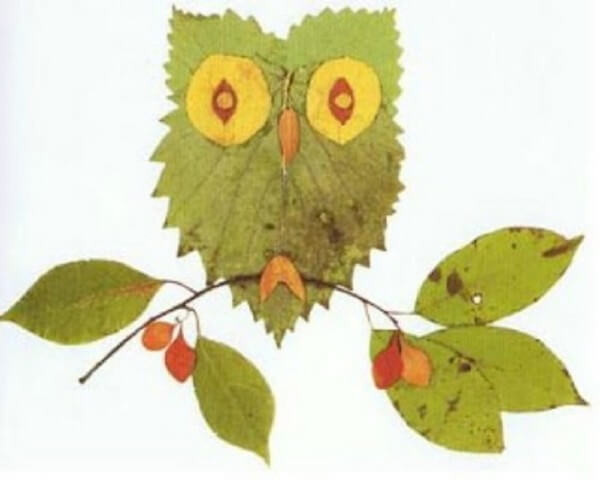
Autumn Leaves Applique: Fish
The marine world is no less interesting for small children than animals and birds. After all, they most often see him in pictures. Therefore, they like to draw and make applications with the image of the sea and its inhabitants. Knowing how to make a fish applique, you can create beautiful paintings on the marine theme.


We will need:
- A sheet of blue cardboard
- Leaves
- Scissors
- PVA glue
- Eyes
1. Glue the yellow sheet - the body of the fish - to the center of the sheet.
2. Glue two red leaves instead of the tail.

3. Cut a heart out of a red leaf, glue it like sponges.
4. Cut a part of the red leaf in half and glue it like fins to a fish.
5. Glue the eye

A variant of a fish with scales can be made from dry leaves of ash, birch, poplar.

We also need:
- Cardboard
- Scissors
- Markers
- Pencil
We draw the outline of the fish on cardboard and mark the place for the eye

The eye can be drawn with a felt-tip pen or cut out of colored paper.
Draws the mouth of a fish.
For the tail, we need to take two large leaves and glue so that one leaf slightly overlaps the lower one.
We glue two fins - above and below.
Now we make the scales. Small leaves of approximately the same size are suitable for them. We glue the first row of leaves, slightly stepping back from the eye. Each next row of scales should go a little on the previous one.

Autumn Leaves Appliques
Appliques are one of the simplest types of handicrafts made from dried leaves. Using leaves of different shapes and sizes, you can create real paintings, which will later become a decoration of your home. You can make a whole series of panels, united by a common theme. It can be animals, landscapes, etc. Several small master classes on making appliques in the form of an owl, a Firebird, a fish and a lion will be presented.
Owl
To make an owl applique, you will need:
- small leaves of brown tones (for this you can use oak, willow, birch);
- colored paper;
- a small twig of thuja;
- a sheet of cardboard;
- a bunch of rowan berries;
- any branch of a tree;
- glue.
Before starting work, leaves and berries must be dried. Once all the materials are ready, it's time to start the most important thing:
- Cut a cardboard owl along the outline.
- Birch or oak leaves will represent the ears and legs of an owl, glue them in the right places.
- Use long, narrow willow leaves for the feathers.
- Cut out the eyes and beak from colored paper and glue them.
- Glue your owl to a tree branch for a craft stand.
For additional decor, you can use moss or thuja twigs. You can also use mountain ash as owl paws. The product is ready.


Firebird
For the application with the Firebird you will need:
- paper;
- linden, birch and rosehip leaves;
- pumpkin seeds;
- thuja twigs.
And here's what the process itself looks like:
- A linden leaf is glued to the place where the bird's body will be.
- Birch leaf - head.
- Rosehip leaves are glued individually on the tail.
- An additional decoration of the tail will serve as whole branches of wild rose.
- Glue the birch leaves to the body, these will be the wings.
- Pumpkin seeds are used to make eyes, as well as decorations for the body and tail of the Firebird.
- The final stage is a tuft of a twig of a thuja or any other suitable plant.
The firebird is ready.

a lion
Children love different animals, so it will be especially interesting for them to make one of the familiar animals.
What you need for a lion cub:
- rounded yellow lime leaves;
- black felt-tip pen;
- ash seeds;
- horse chestnut (nuts);
- glue;
- small pine branch;
- scissors;
- a sheet of yellow paper;
- sheet of orange cardboard.
Having collected all the necessary material, it's time to start making crafts:
- Draw a lion's head on yellow paper or print the image on a printer, cut it along the contour.
- For the mane, use linden leaves by gluing them around the head.
- Draw a lion's nose and glue a chestnut in its place.
- The pine needles will go to the mustache.
- The ash seed will represent the tongue.
Once the craft is dry, it will be completely ready.

Small fish
What child doesn't know about a wish-granting goldfish? Making crafts with your own hands will be very entertaining for the kid.
To make a fish craft, you will need:
- dry leaves of quince and linden, brown and yellow, respectively;
- glue;
- marker;
- ash seeds;
- acorns;
- scissors for paper;
- sheet of blue paper.
How to do:
- Draw the outline of the fish on blue paper and cut it out.
- Make scales from linden leaves and glue them to the body of the fish.
- Use brown quince leaves to decorate the tail.
- Draw the outline of the fish's head with acorn caps.
That's it, the real goldfish is ready.

Colored leaves delight the eye every fall, falling to the ground. This beauty quickly fades under the rains, turning the leaves into a solid brown mass. However, there is a way to preserve the beauty and brightness of autumn leaves - dry them or skeletonize them and use them to make various gizmos from children's crafts to interior decorations. This activity will appeal to both children and adults.
Technique for creating masterpieces
It should be borne in mind that, in addition to the types of applications, there are also various techniques for their creation. Each of these techniques is interesting in its own way:
- Mosaic application. At the same time, figures of the desired shape are cut out of the leaves and laid in a certain order, like pieces of a puzzle. This can be done, for example, a seahorse, a crab or a butterfly. But it should be remembered that both the crab and the butterfly have the same parts in their structure. Therefore, at least two identical pieces are cut out of the foliage and laid out on the canvas in such a way that a symmetrical image is obtained.
- Bulk application. The autumn leaves are rubbed, a silhouette of a future picture is drawn on paper or cardboard, glue is applied and the resulting crumb is poured onto it. Moreover, the color of the sprinkling will correspond to the color of the grated sheet. You can also use black and green tea, sage leaves and other dried natural material to create bulk applications.
- Applique painting with graphics. To create it, a leaf is taken, glued to the base, and then the child comes up with and draws the plot with a simple pencil. Then the pencil sketch can be circled with a felt-tip pen. Very interesting works are obtained using gouache or watercolors. So, the baby makes a bird from the print of his palm, then draws the branches of a tree on which this bird-palm sits, and glues the foliage to them.
- Painting on leaves with gouache and oil. This technique requires strong and dense leaves. You can draw beautiful patterns, stripes and dots, eyes, nose and mouth on them. Then the painted sheets are applied with glue to the base, creating graphic patterns and whole pictures. So, you can make a background in the form of an aquarium and glue dry leaves painted in the form of fish on it. Another option is to draw the face of an animal on a leaf, then cut off the edge of the sheet with scissors so that ears are obtained. And now the fox, cat, owl are ready. And those who have artistic talent, with the help of paints, create whole pictures on the leaves of trees.
- Application from leaves on cardboard. Preschool children are very fond of this technique. An animal or bird, for example, a hedgehog or an owl, is cut out of cardboard and pasted over with dry leaves. You can, on the contrary, first draw a squirrel or other animal on cardboard, stick leaves on it and only then cut it out.
During this painstaking work, the development of fine motor skills of the hands occurs, the baby becomes more patient and calmer. And what satisfaction a little person will receive when he sees the result of his labors!
Leaf applications: senior kindergarten group
What else to do with children when rainy weather is at stake. In this case, a herbarium prepared in advance saves. In addition, the leaves are an ideal material for the creative development of a child and, moreover, the most affordable, since the leaves themselves fall under their feet in autumn. But if your herbarium is crumbled, then do not rush to throw away the torn leaves.
They can be used for a certain type of applique.
Break applique
Leaves for such a craft can be different in color and size. On the contrary, it is much more interesting to work with a variety of materials. Then the applications turn out to be bright and unusual.

Necessary materials:
- Cardboard
- PVA glue
- Brown plasticine
- Stack
- Rowan
- Leaves (crumb)
- Pencil
1. Roll up the trunk and branches of a tree from plasticine.
2. Glue on cardboard

Plasticine needs to be pressed against a sheet of cardboard to attach in this way. Stack cracks in the trunk.
3.Using a pencil, outline the borders of the crown.
4. Apply glue to the crown of the tree and cover with chopped leaves

5. Mark the ground with a pencil
6. Apply the edge to the ground
7. Sprinkle with chopped leaves.
8. Rowan berries can be glued to the crown of trees to simulate the autumn fruits of apples.
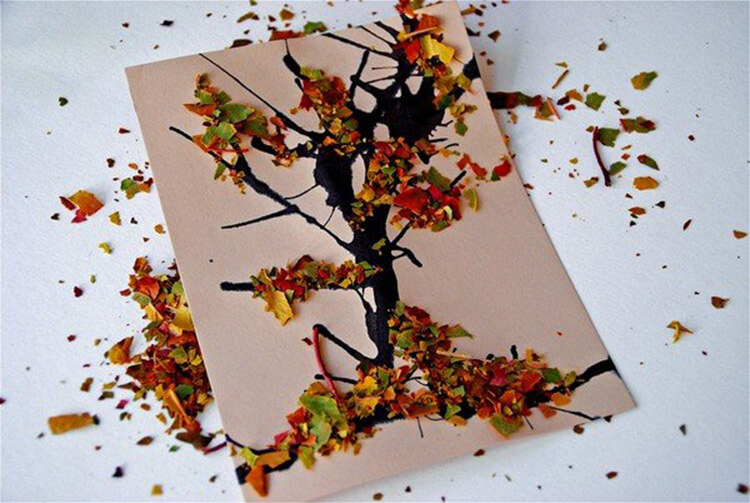

To make a tree that is then covered with leaves, you can use a template and print it.


Maple Leaf Crafts for Kids
Children are especially interested in making crafts from leaves on the theme of autumn with their own hands.
At first, they enthusiastically collect the leaves under their feet, then they will help you dry them by laying them out in a book. And then you can share your knowledge with them and show what can be created from the leaves of maple trees.
Maple leaf snail

We will need:
- Maple leaves
- Scissors
- Plasticine
- Scotch
- Eyes

- To make the base - the snail's body, take red plasticine and mold a sausage from it, so that one end is slightly thicker than the other.
- Make a cut at the thicker end and shape the cut halves to resemble the antennae of a snail.
- The body needs to be bent
- To use maple leaves for a snail house, cut cuttings with it.
- Fold the sheet to make a strip
- Twist the strip, starting at the narrowest part
- To make the house more voluminous, twist a few leaves in this way.
- Fasten the house to the torso from plasticine
- Attach plastic eyes and outline your mouth

We will need:
- Cardboard
- Steppler
- Scissors
- Glue
- Leaves
- Eyes

About 5-6 circles of different diameters must be cut out of cardboard.
On the leaves, remove the stems, except for two leaves. They will come in handy for turkey legs.
Attach each leaf to a cardboard circle
We stack the mugs one on top of the other using glue or a stapler
Glue a brown sheet to the back of the largest circle.
Cut out a triangle from a leaf to make a beak.
It must be glued in the center of the first sheet.
Attach your turkey's eyes.
With the help of colored paper and leaves, you can make a cheerful family of owls.
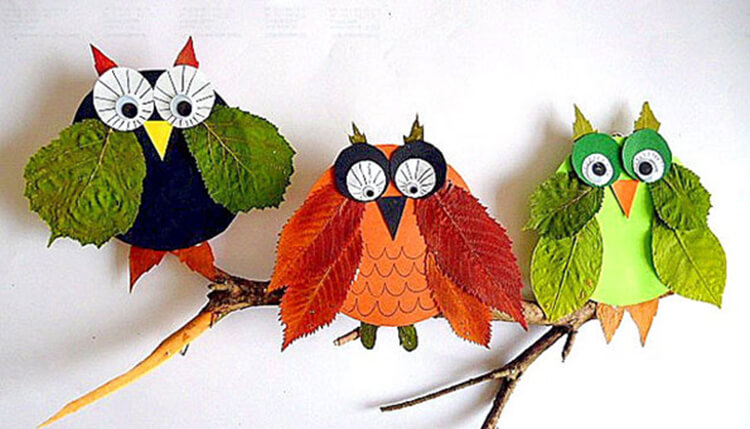
Craft options
Today, there are many options for crafts that have excellent decorative properties.
Topiary
Maple leaves are perfect for making topiary. For this, it is recommended to fix a stick in the pot. This is done using a plaster solution. Attach spherical foam rubber and stick the leaves into it. Berries, beads, ribbons are suitable as decor. A hot glycerin solution will help make the leaves stronger.

Bouquet
To make a beautiful bouquet, bend the maple leaves in half and roll them into a tight tube. Then make a rosebud out of it and fix its base with dense threads. Make the required number of roses and attach them to tree sticks.
Decorative autumn wreath
Bright fall leaves can be used to make a beautiful wreath. This will require flexible branches, dried foliage of various shades, red berries.
It is worth making a frame from the branches and fixing it securely with threads. Glue leaves and berries to the branches.

Vase of leaves
First you need to inflate the balloon and grease it with Vaseline. Fix the product motionless and glue the maple leaves. To make the vase durable, it is worth using several layers of material. Finally, coat the product with glue and leave to dry for 3 days. Burst the balloon and dispose of the residue.
Photo frame
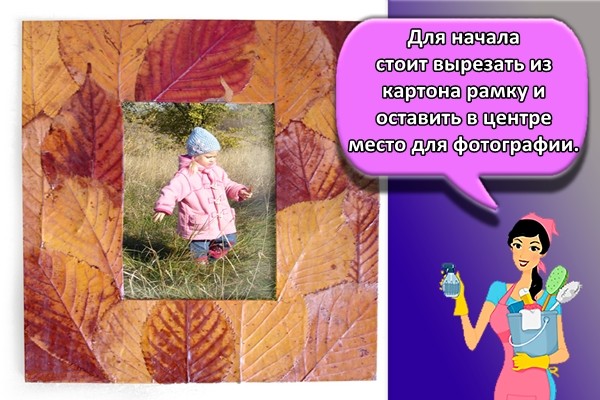
First, you need to cut a frame out of cardboard and leave a place for a photo in the center. Moisten the leaves in hot water and glue them in the frame. Wait until dry and paste in the center of the photo. It can be fixed with tape.
Autumn Leaves Appliques
To make a beautiful applique, it is worth using foliage of different sizes and shapes. A whole series of paintings looks interesting.
Owl
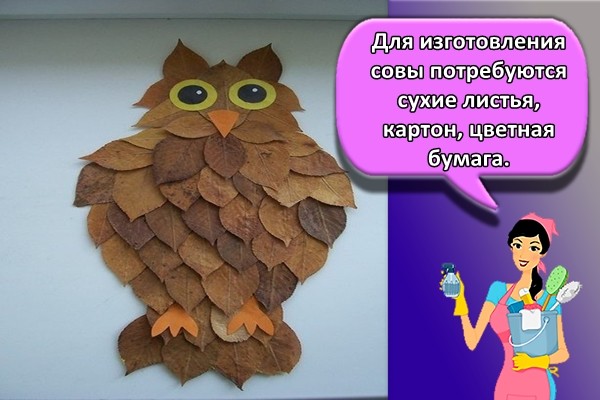
To make an owl, you will need dry leaves, cardboard, colored paper.To begin with, you should cut the bird out of cardboard. Then glue the leaves, which will represent the ears and paws. Willow leaves are suitable for feathers. The eyes and beak should be cut out of colored paper.
Firebird
To begin with, it is worth sticking a linden leaf - it will represent the body. The head should be made from a birch leaf. To get a beautiful tail, you should glue the rosehip leaves. Pumpkin seeds are used to make eyes and body jewelry. For a tuft, a branch of a thuja is suitable.
a lion
To begin with, it is worth depicting the head of a lion on yellow paper. To make a mane, stick on linden leaves. Then draw the nose and glue the chestnut. Pine needles are used for the mustache, and the ash seed is used for the tongue.

Small fish
First, you need to put an image of a fish on blue paper and cut it out. Make scales from linden leaves and glue to the body. Decorate the tail with brown quince leaves. Caps of acorns will help to outline the head.
Alphabet
For children who are just starting to learn letters, you can make an alphabet from autumn leaves. This will help your child learn the alphabet faster.

Stained glass
To begin with, you should cut off the required amount of self-adhesive and place with the sticky side up. Then place the hoop and leaves. Put another part of the film on top, press and smooth. Insert the outer part of the hoop and tighten. Get rid of excess film.
Garland
To begin with, the leaves should be peeled and dried by removing the cuttings. Spread the waxed paper on the table and fix the ends of the line with masking tape. Lay out the foliage and glue it to the fishing line. Once dry, the tape can be removed.

Ikebana
First, dry the aspen leaves. To create a workpiece, it is worth inflating the ball, lubricating it with an aqueous solution of PVA and wrapping it with threads. Then the ball should be deflated and pulled out. After that, make roses from aspen leaves and attach to a ball of threads. Use mountain ash and dried flowers as a decor.
Panel
This composition will require autumn leaves. You should also take a board, marker and glue. The foliage should be dried. Draw a maple leaf on the board and lay it out with dried material.
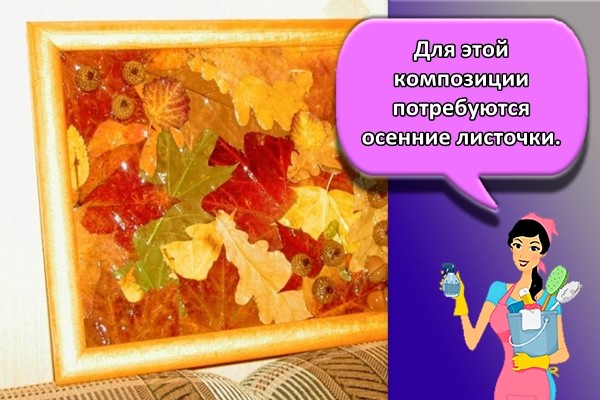
Collage
To do this, it is worth chopping the foliage, applying a tree trunk to the cardboard and painting it. Then treat the trunk and branches with glue and sprinkle with leaf crumbs.
Landscapes
To create an interesting landscape, you can take cardboard and make a picture using dry foliage. It is permissible to paint the background with watercolors.

Bouquet of flowers from leaves
You will need:
- autumn leaves of different colors (30-35 pieces)
- floristic wire
- green adhesive tape (scotch tape) or floral tape
- scissors.
1. Spread your leaves on a flat surface, one at a time, from small to large. Remove dust and dry them.
2. Use scissors to cut off the stems of the leaves.
3. Take a wire and cut it into small pieces, about 10 cm long. Each piece will be used for a separate sheet.
4. Take floral tape or regular duct tape (scotch tape) and cut or tear off several 5 cm pieces.
5. Take the second largest sheet and wire a hole in it 0.5 cm from the edge. Then bend the wire and twist it. This must be done carefully so as not to tear the sheet.
Back side view:
6. Use duct tape to wrap around the wire. The tape must be attached to the edge of the leaf and begin to gently wrap the wire.
7. To attach the wire to the smallest sheet, you need to twist it and only then insert the lower part of the wire into it.
Make a leg out of the wire to form the core of the flower.
Cover the wire with duct tape.
The core and petals are ready and can be connected.
8. Wrap the core with a second leaf and add a second leaf, a third, etc.
* Petals should not be tight. They can be bent back so that the flower was more luxuriant.
9. Keep the legs together. They can be screwed up a little to keep them in place.
When the leaves dry a little, you get this, even more beautiful, rose:
What glue is right
Manufacturers offer many varieties of adhesives suitable for gluing paper and cardboard. The composition of the funds is different, so they must be used correctly.
Glue stick
In children's creativity, this type of tool is often used. The advantage of the glue stick is that it:
- easy to use;
- economical in consumption;
- firmly glues different types of paper, cardboard, textiles.
The product does not stain the child's hands, it does not stain clothes.
A glue stick is used to temporarily fasten the sheets, to decorate the applique. Do not use the product for bulky crafts, since the parts will quickly move away from each other after drying.
PVA
This material is based on polyvinyl acetate, a substance with excellent adhesive properties. The harmless adhesive does not have a pungent odor. It is used for gluing natural material onto cardboard. During application with a thin layer of PVA, it does not deform the paper. Already after 3-4 minutes, the glue dries partially, leaving no stains. The product is left for a day under a press for better bonding. The convenience of applying strips of glue is noted, since the product is packaged in bottles with a nozzle.
Super glue
The adhesion force of the cyanoacrylate substance, which is used for the manufacture of the adhesive composition, is great. The viscous mass grabs instantly, so you should connect the parts of the object correctly immediately. Then it will be more difficult to correct the situation.
The disadvantage of the material is that when gluing, you can connect the skin of the fingers. Then it is difficult to wipe off the pieces of glue from it. And the product has a pungent smell, so it is better to deal with the connection in a ventilated area or in the fresh air.
Gum arabic
The glue composition is made from arabic gum diluted in water. Its advantages are that it:
- harmless to human health;
- has a high degree of adhesion;
- reliable and gives strength to the seams to be glued.
It is difficult to obtain ready-made glue. More often it is prepared independently by mixing 10 grams of gum in 20 milliliters of water.
Acrylic
A feature of acrylic adhesives is that they hold together even thick cardboard with high quality. They produce glue in tubes, hence the convenience of applying the product. But since the base in the material consists of water, a large amount of the applied substance leads to deformation of paper crafts.
Dextrin
Previously, a paste made from flour or potato starch was used to glue paper elements. Now, in the production of dextrin glue, they act on starch with high temperatures. Within 1.5 hours in a cabinet that is heated to 160 degrees, starch is split and converted into dextrin. The resulting substance is dissolved in water and a little glycerin is added. The product is used for gluing paper.
Spray adhesive
The new glue-spray was highly appreciated, because it is evenly sprayed from the can onto the sheet. At the same time, there are no marks on the hands, table, clothes. Quickly adhere when sprayed on fabrics, all types of paper.
Joiner
This type of glue is natural and differs in that it firmly adheres parts of the object.
It is important that the product is transparent. Long-term storage of a substance in a liquid state leads to the formation of mold inside the bottle
It is better to purchase the glue in the form of a brownish powder and dilute with water, slowly heating the mixture in a water bath. For 1 part of the substance, 2 parts of water are needed.
Photo glue
It is better to glue photographs into an album with rubber glue. Even after drying, if necessary, you can remove the photo, and clean the cardboard surface of the album with an eraser.
Felt for needlework: what you need to know about this material
Handicraft felt is a non-woven fabric made of fluff and soft wool. It is convenient to use it in needlework and interior decoration.You can cut the felt without fear that the edges will begin to crumble, and they will need to be processed.
The thickness of the decorative fabric can be from 1 to 5 mm. Felt is produced in different colors, density, there are options with an already applied adhesive base.
Felt has both front sides and can be made not only from natural fibers, but also from acrylic and polyester. Such material is resistant to bending, smaller volume, lightness. There are also combined compositions, when 50% synthetics are added to natural ingredients.
Most often, viscose felt fabric is used for appliqués on clothes. It is breathable, does not weigh down clothes and is highly durable.
When decorating a wardrobe with felt inserts, make sure that they do not fade before washing, otherwise indelible marks will remain after washing.
What glue is suitable for tree leaves
It is permissible to glue tree leaves on paper with different compositions. To achieve good results in this, it is worth choosing the right substance.

Starch paste
This substance is well suited for leaf applications. The adhesive is considered completely safe. It is allowed to be used by allergy sufferers. It has excellent adhesion properties and helps to adhere foliage to paper and cardboard.
The paste can be applied with a sponge or brush. To get rid of smudges, apply a dry sponge or tissue. As it dries, the substance acquires a transparent consistency.
PVA glue for applications
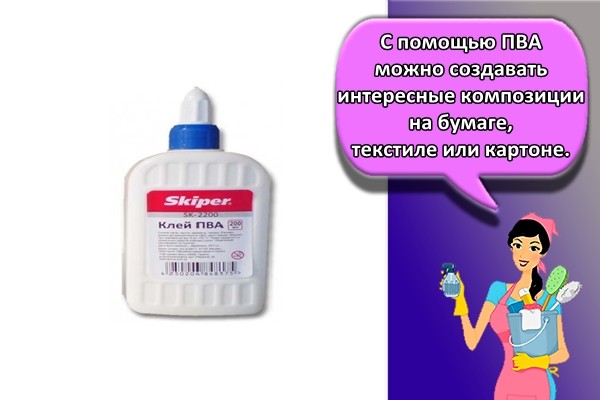
This is a popular formulation that can be used by children and adults. With PVA, you can create interesting compositions on paper, textiles or cardboard. After drying, the substance does not stain and does not acquire a yellow tint.
Transparent glue for decoupage
This substance combines the properties of glue and varnish. It is permissible to use it for the manufacture of voluminous crafts - vases, lamps and other items. After the substance dries, a protective layer appears on the craft. The composition fixes foliage well on glass or wood.
Hot glue
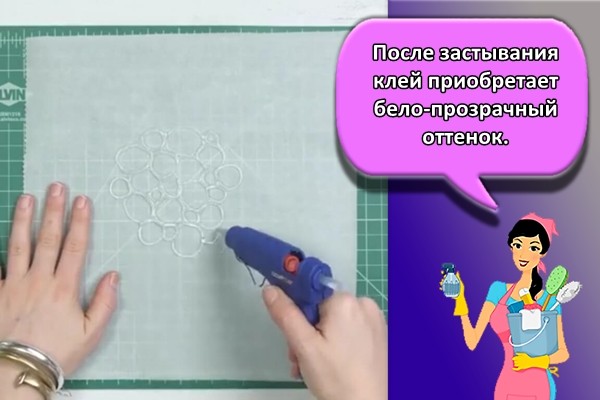
This tool is used for large autumn crafts. It poses a certain hazard when working. The glue gun can reach high temperatures and can cause burns. At the same time, it allows you to fix foliage on different materials. After solidification, the substance acquires a white-transparent shade. Therefore, they hide it inside the structure.
Super glue
This substance is often used by adult craftsmen. However, it poses a danger to children. The product has a pronounced odor and provokes allergies. If used carelessly, there is a danger of sticking fingers together. The composition dries quickly and sets easily.
Silicate
This substance has many advantages. It helps to hold parts securely and is cost effective. The substance dries quickly and can be easily washed off with water. When choosing a silicate glue, it is worth considering its consistency. The high-quality composition has a transparent texture and does not contain lumps or clots.

Glue stick
The most popular and affordable composition is considered to be glue in the form of a pencil. It is easy to use due to its compact capacity. The substance is characterized by a dense consistency, therefore it is spent very economically. With the help of the tool, it is possible to glue paper and cardboard, as well as textiles.
Simple crafts with skeletonized leaves
If your talents are not so great, try gluing painted skeletonized sheets to a glass or smooth ceramic vase and varnishing it carefully. Simple and very elegant!


(Click on the photo to enlarge)
If you feel confident, move on to the next lesson: making a butterfly.

(Click on the photo to enlarge)
We bend the leaves in half along the main vein, apply a drop of glue to the base of the sheet and glue it to the branch, then take the second sheet and glue it from below, and then go to the opposite side.
Good luck with your creativity!
- How to make slimes with your own hands. Video instruction for making slime
- Living leaves
- Pencil basket from a tin can
Discussion
(08/09/2018)
How do they do it? I have a current paper version on my mind, but it never happened
This is how much strength
(19/09/2017)
I also want to do this….
(13/09/2017)
Very nice! But how fragile it is ... How to bend it in half?
(06/11/2016)
Class! I love such things - so that I can do it myself and use it later with my daughter)
How to glue felt
To work with felt, you need to choose the adhesion component based on the characteristics of the base on which the decoration is attached.
To felt
Two elements of the same felt can be joined together with hot melt glue. In this case, the bonding agent can be in the form of gun cores or powder for bonding with an iron.
Before using the iron, check the heat resistance of the felt fabric in an inconspicuous area.
To use silicone rods, you need a heat gun. Such silicone quickly hardens, does not seep deep into the fibers, and provides a strong connection. Not suitable for large area parts, after cooling it is safe for children.
To cardboard
Glue felt to cardboard will help:
- PVA. But you need to remember that ordinary stationery PVA will not work. It is too runny and leaves yellow stains. Therefore, you need to choose the option marked PVA - MB and PVA - M.
- All Purpose. The composition contains synthetic resins that provide high adhesion and viscosity. Does not deform the base and does not shrink.
- Power is a particularly strong solution for joining felt with cardboard, wood, cork, rubber, glass, plastic. After curing, it retains its elasticity. Not destroyed by oils, acids, water.
To paper
To glue felt to paper, you need a compound that does not deform the paper and does not crack when the base is bent. Forms a colorless layer without greasy traces.
These solutions include:
- Universal Alleskleber. Produced in a 7 g tube, based on synthetic resins. Not soluble in water, gasoline, alkalis. Has a convenient dispenser for spot application.
- Kraft. Composition based on polyurethane. After drying, it does not shrink, does not crack, and is resistant to temperature extremes. Can be ironed at medium temperature.
To the fabric
For adhesion to other fabrics, the adhesion component must create a soft, flexible layer. Have a dense structure so as not to seep between the fibers, withstand several wash cycles. Suitable for this purpose:
- Fabric glue "Secunda". A special one-component textile composition, compatible with natural fabrics from cotton, wool, leather, and synthetic fabrics. Creates a transparent, waterproof, elastic seam, does not leave a hard crust after drying.
- "Textile Moment". Resistant to washing and detergents. Has adhesion to jeans, cotton, cloth, synthetics.


