How to propagate a fern at home - methods and rules
Ferns appeared on earth along with the most ancient animals. They have existed for millions of years and continue to grow and develop. This plant is successfully grown both in indoor living conditions and is planted in open ground for decorating a personal plot. Before planting a fern at home, it is recommended that you familiarize yourself with its varieties, and most importantly, with the methods of reproduction.
Content
- Fern types for home cultivation
- The choice of soil and container for growing
- Features of reproduction by spores
- Fern propagation by dividing the bush
- Lighting, humidity and temperature for the plant
- Fern watering and feeding
- All about plant transplant
- Diseases and pests, the fight against them
- Application in interior design
Fern types for home cultivation
Living conditions are not important for this evergreen plant - it exists perfectly in swamps and meadows, as well as in shady forests of a tropical climate. Some species can live only in a room, while others thrive in low temperatures, surviving the winter months in the ground.
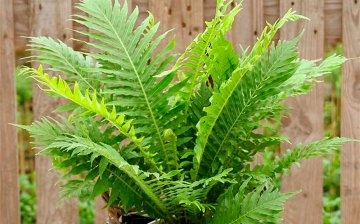
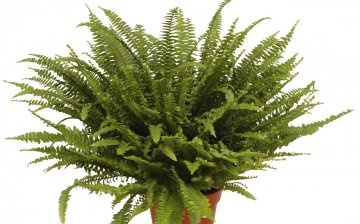
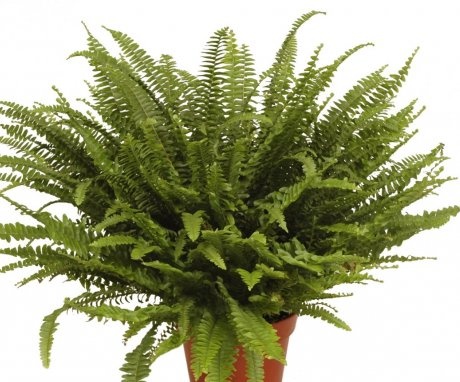
Any kind of fern consists of 2 structural parts - rhizomes and chic, openwork, striped deciduous plates.
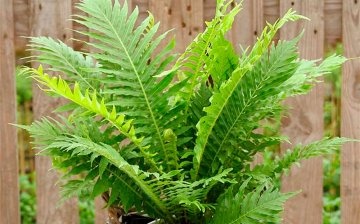
Most of the shrub species have dissected-feathery leaves, but some varieties are distinguished by accrete leaves, which can be of various shapes and specific sizes.
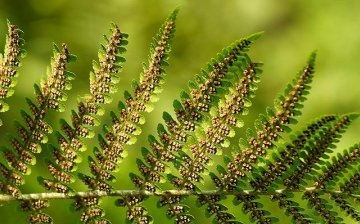
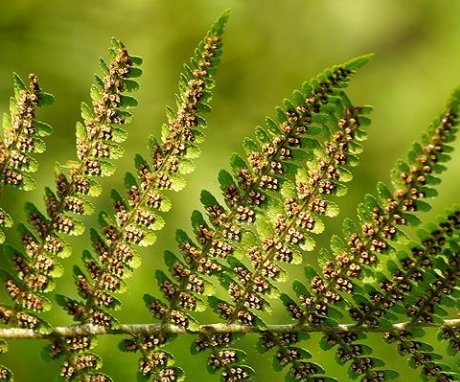
There are many legends where on the night of Ivan Kupala people go to look for and collect flowers of a mysterious fern. But no matter how hard they try to find the cherished color, it simply does not exist in nature. The fern does not give color, it does not form seeds and fruits, and the swelling of the scales on the underside of the leaf plate is the spores with which the wondrous plant reproduces.
There are not many varieties of ferns that can be grown at home. Among them are the most popular varieties:
| Views |
Plant features |
| Asplenium |
It requires partial shade and a humid climate. For home cultivation, such fern varieties from this line as bulbous, nesting and viviparous are suitable. |
| Blehnum |
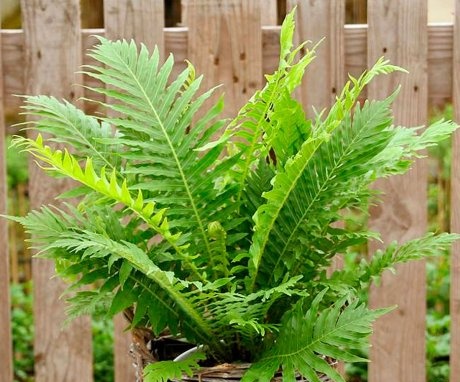
It has the property of reaching up to 1 m in height with its crown. At the same time, the hard leaf plates begin to resemble palm leaves outwardly. Suitable for cultivation are the Brazilian variety or the Humpbacked Blehnum. |
| Maidenhair |
The stems of the shrub are graceful, of fine structure, but distinguished by their strength. For the rapid growth of the bush, shade, high humidity and optimal air temperature are required. The best option for growing the variety would be a greenhouse or a special greenhouse. Among the species of this variety, Tender, Venus hair, Radi and Melkovolosisty prevail. |
| Nephrolepis |
Refuses to grow if other species of flora are nearby. It requires a lot of space and increased attention. Flying plants have a strongly dissected appearance, due to which the shrub receives an interesting openwork effect. |
| Davallia |
Differs in a thick root system. Thanks to this, the people called the plant hare or squirrel legs. |
| Centipede (Polypodium) |
The foliage of the bush is dissected, the rhizomes are located on the surface, which gives rise to the feeling of a creeping plant. Feels great in rooms with dry air. |
| Disconia |
In favorable conditions, it reaches 3 m. It is grown for the decoration of voluminous rooms. |
| Platerium |
The owner of large, bladed leaf plates. In appearance it resembles huge deer antlers. |
| Pellea | Unlike other fern varieties, it does not like moisture, prefers arid soils. In homes, you can find a green or round-leaved variety of shrubs. |
Therefore, before planting a plant on your site or in a pot, you should choose one of the varieties. Each of the types is distinguished by the originality and grace of the leaf plates.
The choice of soil and container for growing
In order for the planted sprout to take root perfectly, it is necessary to choose the optimal flowerpot and soil in which the plant will grow. The primer can be purchased in a specialized store, or you can make it yourself. But in order to sow spores into the ground, you should check that there are special components in the ground.
For the optimal composition of the soil substrate, the following list of ingredients will be required:
- River sand and brown peat. To combine a soil substrate, you will need 1 part of sand and 3 parts of peat.
- River sand and leafy earth are taken in identical proportions (1: 3).
- Leafy soil, river sand and peat in a ratio of 1: 1: 3, respectively.
For good rooting and rapid development of the root system, you can also use soil for violets. It contains the optimal amount of all the nutrients required for planting a young fern sprout.
It is imperative that the planting soil is loose, well permeable to nutrient oxygen and introduced moisture.
For planting spores, the soil requires specific preparation. Initially, the earth is sieved, all large stones and solid particles, various debris are removed from it. Experienced gardeners recommend disinfecting before rooting.
To do this, rinse the soil with a weak solution of Potassium Permanganate and put it in one layer on a baking sheet in the oven. The soil should be sterilized within a few hours. Only after that you can prepare the landing container. If the fern is propagated by spores, then for sowing you will need a shallow, rectangular pot made of plastic or glass.
When planting plant sprouts in ordinary peas, you can select any options. A clay container is perfect. It has the ability to absorb moisture. And as necessary, give it back to the soil. But you shouldn't overfill the flowerpot. This situation can provoke the development of a fungal infection, which is very problematic to be eliminated from a clay pot.
You can also use plastic containers for planting. But it must be remembered that it is very unstable and does not allow air to pass through. Therefore, it is worth choosing large pots, but so that they are half the total volume of the fern branches. And in order for the plant to receive a sufficient amount of air, it is worth loosening more often.
Features of reproduction by spores
Growing a plant with spores is a rather laborious and problematic way to get your own specimen. It is usually used by experienced breeders. The method is divided into several stages:
- Preparation of planting material - seeds can be purchased at a flower shop or in an online store. You can also collect spores yourself. They are collected from an adult plant, simultaneously with sporangia. The assembly is carried out at the moment when the sporangia acquire a brown tint. To make them fully ripe, immediately after harvesting, they are placed in a paper envelope or bag. After a short period of time, the spores mature and spill out on their own.
- Planting spores - drainage is laid out on the bottom in containers prepared in advance. The soil substrate is poured out from above, which is neatly leveled, compacted and moistened. After this, the spore is sown. Place the glass on top of the container. This is required to create a microclimate for the plant for the fastest germination.
- Care for sprouted seedlings - you need to adhere to +22 C, as well as humidify the air well. Before the appearance of the first true leaves, it is forbidden to disturb the resulting moss.
The entire process from the beginning of planting to the germination of deciduous plates takes about 2 months. Therefore, you need to be patient and endurance. The main thing is to follow optimal conditions during germination.
Fern propagation by dividing the bush
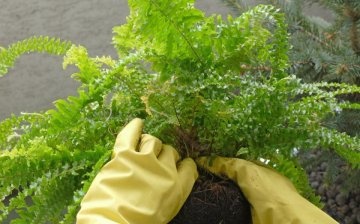
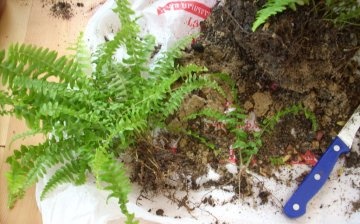
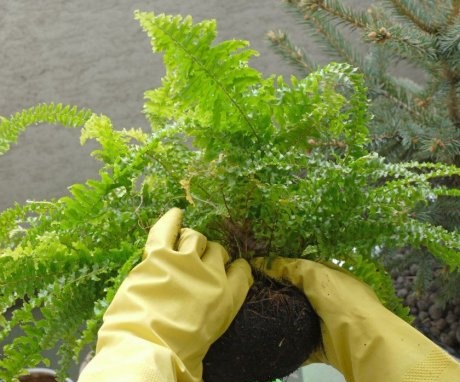
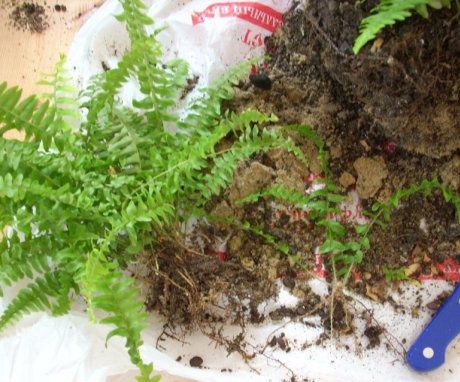
Dividing a shrub using this method is very easy. It is just right for those new to this business. The day before the procedure, you need to water the plant well. The next day, put the flowerpot on its side and roll it over the surface. This will make it possible for the earthen coma to move away from the walls of the flowerpot. After gently turn the flowerpot over and the fern will quickly leave its place of residence along with a whole lump of earth.
Now you need to inspect the entire plant. It is necessary to select equal parts of the shrub so that at least 2-3 full-fledged sockets, as well as a well-developed root system, remain on each side.
It is prohibited to divide a shrub that has one rosette.
This is due to the fact that a plant lacking rhizomes does not take root. The same can be said about rhizomes without growth buds. With a precise movement, a clod of earth is cut into equal parts. The resulting delenki are placed each in a separate flowerpot with new soil. Further growth of the shrub depends only on the care of the plant.
Lighting, humidity and temperature for the plant
In order for the shrub to develop quickly and build up the ground crown perfectly, it is recommended to adhere to certain requirements:
- Lighting - Ferns of any species require a lot of ambient light. The bush can live in the shade of other plants, but then its appearance will not be so bright, noble, and the shade will not be saturated. But at the same time, the direct rays of the luminary scorch the delicate petals of the plates. Therefore, it is recommended to choose such an arrangement for the flowerpot so that the sun's rays fall on the plant in the morning and in the evening, and the shrub remains in the shade in the midday heat.
- Temperature - the most suitable temperature for a fern to live - +16 .. + 23 C. In winter and summer, the degrees in the room where the plant is located, increase markedly. Therefore, it is worth spraying the area next to the bush. This will saturate the leaf plates with nutrient moisture. The minimum temperature at which a fern is able to survive is +5 C. A further decrease in degrees will only lead to the death of the bush.
- Humidity - spraying the plates must be carried out every day, especially in winter, when the room is overdried by heating devices. To increase the humidity, you need to take a small towel and wet it and place it on the battery.
The formed microclimate is not only suitable for the plant, it will also be favorable for people.
Fern watering and feeding
Fern watering is very important.For the introduction of nutrient moisture, it is necessary to prepare settled, slightly warm water. Distilled as well as pre-harvested rainwater is ideal. Tap fluid will not work. It contains harmful substances that provoke the formation of dark spots on the leaf plates.
In the summer, it is necessary to water much more often than in the winter time.
You should not wait for the coma to dry completely, it is worth watching when the soil dries up a little and re-add water, but so that there is no oversaturation and stagnation of water in the soil.
Top dressing is very important for the plant. It is necessary primarily when there is an intensive build-up of green mass in the spring-summer period. If the nutrients are completely absent or are introduced in the missing volume, then the plant first loses its color, and then completely dies.
Fertilizing, starting in spring, every week. For this are used complex fertilizers... The only thing to stop feeding from the end of October until the first days of February. During this period, the plant is at rest, therefore, not only fertilizers, but also watering are sharply reduced.
All about plant transplant
The plant is transplanted annually. This is due to the fact that the fern is a fairly large specimen of flora, so its root system within 12 months has time to completely fill all the free space in the flowerpot. The transplant is carried out by the transshipment method. This is the most gentle way to reduce trauma to the root system.
The process of transporting a plant to a new flowerpot should be carried out at the beginning of the growing season, in the first days of the coming spring. Otherwise, if the shrub is transplanted in the fall, then the fern will be sick for a long time, which can provoke the death of the bush.
For a transplant, a new land and a new flowerpot are taken.
The latter should be at least 3 cm smaller than the previous container. This is necessary so that the fern rhizomes have much further development. For transplanting in a day, it is also worth watering the plant as before reproduction of the shrub by the method of division. The next day, a clod of earth with a flower is safely removed from its habitat and transported to a new flowerpot, in which drainage is laid out in the first layer in advance, and then the earth is placed. After setting in the center of the plant, you can fill in fresh soil along the entire remaining perimeter and tamp it thoroughly. Be sure to water the plant abundantly after planting.
Diseases and pests, the fight against them
The fern is susceptible to disease, like any other indoor flower. In order to prevent the emergence of pathogenic bacteria and the invasion of parasites, it is worth following the conditions of care and constantly monitoring the condition of the plant.
The following diseases are distinguished, which most often affect the fern:
- Decay of the root system - initially the problem is reflected in the foliage, it begins to turn yellow, then turns brown. In order to prevent the formation of a fungal disease, it is necessary to correctly add the amount of nutrient moisture and prevent waterlogging.
- Gray rot - on any segment of the shrub, as well as on the soil substrate, there is a pile of gray plaque. To save the bush, you need to quarantine it, away from other plants from the collection. Remove all damaged parts. if possible, disinfect the soil and spray the branches with chemicals from mold.
- Anthracnose - Brown stains form at the ends of the leaf plates. All diseased leaves should be removed from the plant, and healthy treat with fungicide... In this situation, it is recommended to reduce the introduction of nutrient moisture somewhat, and also to remove the spraying for a while.
- Spotting on leaf blades - brown oozing spots form on the foliage.To save the pet, it is worth completely removing all affected areas, also reducing watering to a minimum and spraying with chemicals.
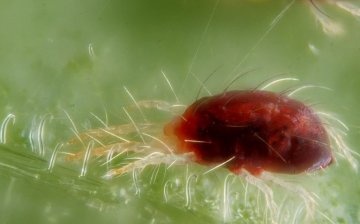
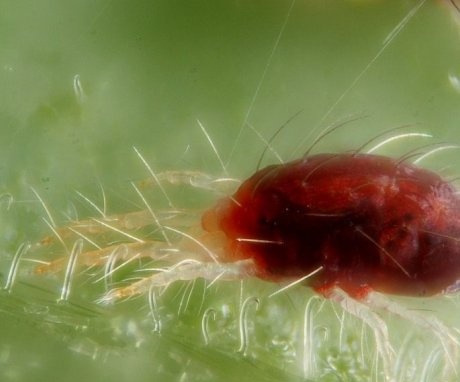
In addition to diseases, the plant is affected by pests. Such parasitic insects include whitefly, worm, spider mite, nematodes, thrips, aphids.
If the colonization of parasites is detected at the initial stages, then it is recommended to remove the pests by hand. If the pest population exceeds the permissible limits, then chemical preparations must be used.
Most often, all problems are formed due to improper care and lack of control over the plant. Therefore, it is recommended to monitor not only the amount of watering, but also the dryness in the house, as well as the introduction of nutrients.
Application in interior design
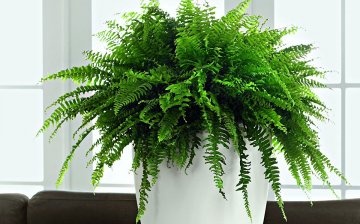
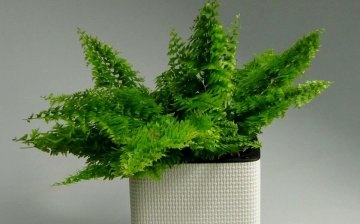
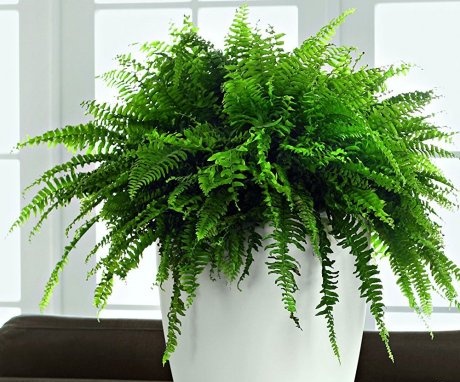
Growing fern at home allows you to give the room a specific tropical atmosphere. The shrub looks interesting when planting plants in hanging pots. In addition, installing a flowerpot on a shelf or stand fills the room with coziness.
Placing a fern at home always attracts guests of the room. The shrub becomes the highlight of every room. Additionally, the bush saturates the room with air, creates a favorable temperature balance. The plant disinfects the indoor air from dust and other harmful toxic substances. Its delicate leaves hide noise, improve a person's mood.
Therefore, people who grow an amazing mythical plant in their home are always cheerful, full of energy.
Thus, the Fern is an unpretentious plant that can be easily propagated. Various methods are used for the process of obtaining a second copy. In order for the bush to actively develop, certain care and maintenance manipulations are performed.
More information about growing indoor ferns can be found in the video:





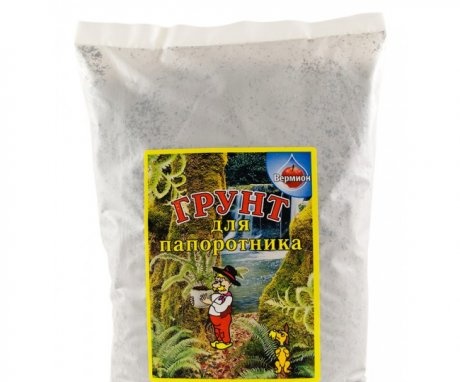
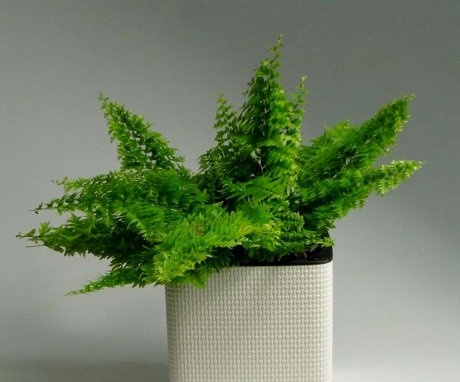
A beautiful and not capricious plant, but you still have to take care of it, we bought a special soil for fern in a flower shop when transplanting, the plant grew with renewed vigor before our eyes.
Fern roots grow very far. It is propagated by children. It is better to plant it in the spring as early as possible. In 2-3 years, it spreads over a whole clearing. It is not worth buying a large copy in the store for transplanting, it will not last long.
I have three push-button ferns (pellets) at home. Propagated them by dividing the bush of the mother plant. In the interior, they look interesting, with care, in general, no problems. They don't really like watering. I water as the soil dries up.