How to make an electric snow blower yourself
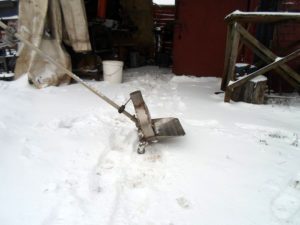
An electric snowblower is assembled with their own hands from a powerful grinder, a drill, and a motor from a washing machine is used. The most popular pulling device is the trimmer. For a home-made unit, an electric scooter with a flat bar and an engine with a power of more than 1 kW is used.
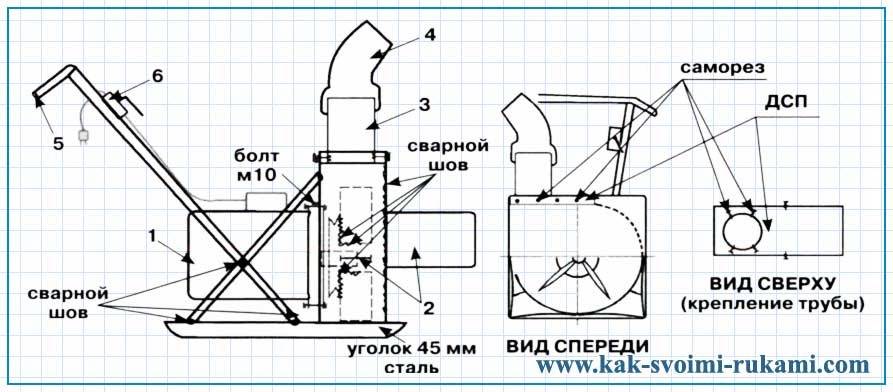
Electric snow blower drawings
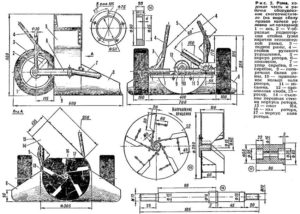
First, you need to find do-it-yourself drawings for a snowblower that show the rotor diagram. It is this unit that is working and the most difficult to manufacture. According to the drawing, it is also easier to make a homemade rotor snail.
Assembling the product
The creation of a homemade snow blower occurs in the following sequence:
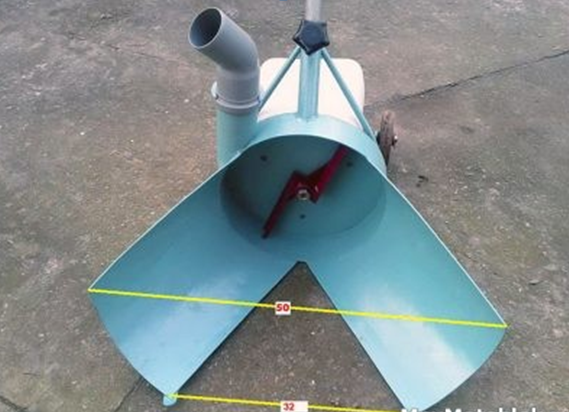
- The snail body is cut from a stainless beer barrel. With a grinder, a fragment is cut from the side of the bottom with a width of 150 mm. Having drawn two intersecting lines with a cross, at the bottom determine the center of the circle. At the point of intersection, a hole is drilled for the trimmer gear shaft.
- In a homemade snail, they determine where the top will be. A hole 100 mm wide is cut on the side board, a piece of pipe is welded. The length of the branch pipe must be sufficient for firmly fitting the discharge sleeve from a piece of PVC sewer pipe.
- Cutting a semicircle out of metal, weld 1/3 of the snail from the end. The plug is placed in the upper part so that the snow is directed by the air flow to the discharge arm.
- The blades of a homemade rotary fan are cut from steel. You should get 4 plates of the same size. It is desirable that they match even in weight. This will avoid imbalance in the rotating rotor. The plates are cross welded onto the metal disc trimmer blade.
- The assembly begins with the bolting of the electric scythe gearbox to the bottom of the barrel. An impeller is mounted on the shaft. They try to scroll so that the blades do not cling to the walls.
- For better snow grip, a homemade snow blower is equipped with a guide blade. The rectangular plate is welded perpendicular to the end of the snail, only from the bottom side. As the homemade snow blower moves forward from pushing forward, the guide vane will begin to grip the snow and feed onto the blades of the rotating rotor.
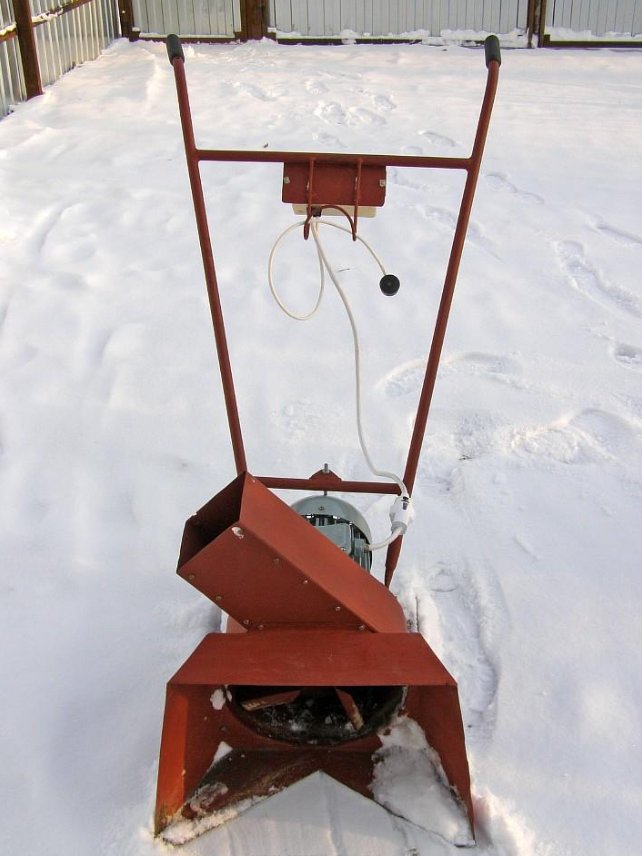
A homemade snow blower is put on skis. The cable is connected to an outlet, they try to start the engine. For control, they use their own electric scythe bar. In the video, a do-it-yourself snowblower:
Useful Tips
Finally, we present to your attention a few useful tips for the manufacture and operation of snow removal equipment; they will help your product to serve as long as possible without complaints and refusals:
- in order to avoid falling into the structure, in particular into its drive mechanism, ice fragments or stones, it is advisable to add specialized safety bolts or bushings to its composition;
- one of the main working elements of a snowplow is its bearings, which largely affect the durability of the product before failure; in this regard, you should carefully choose this structural element, controlling the quality of its performance;
- it is advisable to give preference to a belt rather than a rigid transmission for the simple reason that there is a high probability of jamming of movable structural elements as a result of ice or stones getting into them;
- snow removal equipment, designed on the basis of a walk-behind tractor, must be kept warm - by observing this simple rule, you will save yourself the trouble of wasting precious time and no less precious fuel to warm up the engine before starting to operate the device;
- do not forget about the need to periodically change the oil for the gear mechanism; in winter, the oil should be more liquid, since in conditions of low temperatures it can thicken quickly enough.
Features of the complete set
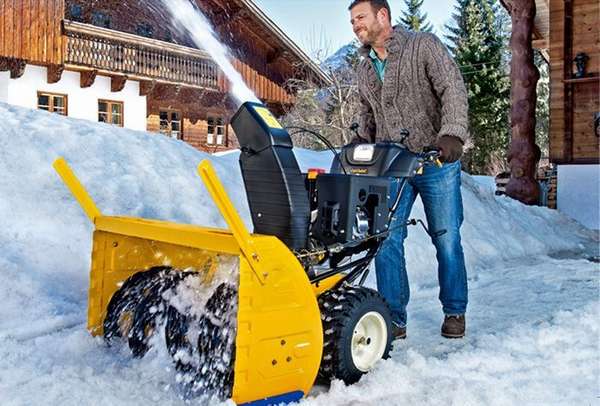
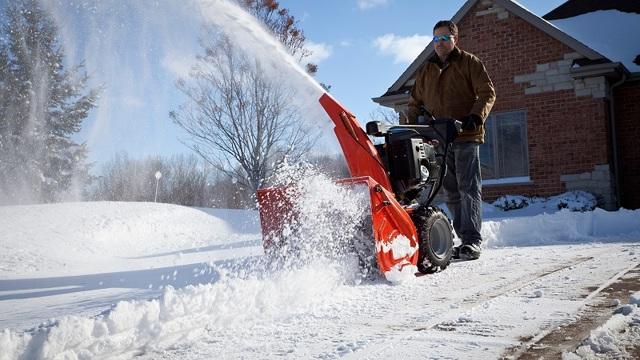
Snow blowers can be single-stage and two-stage.
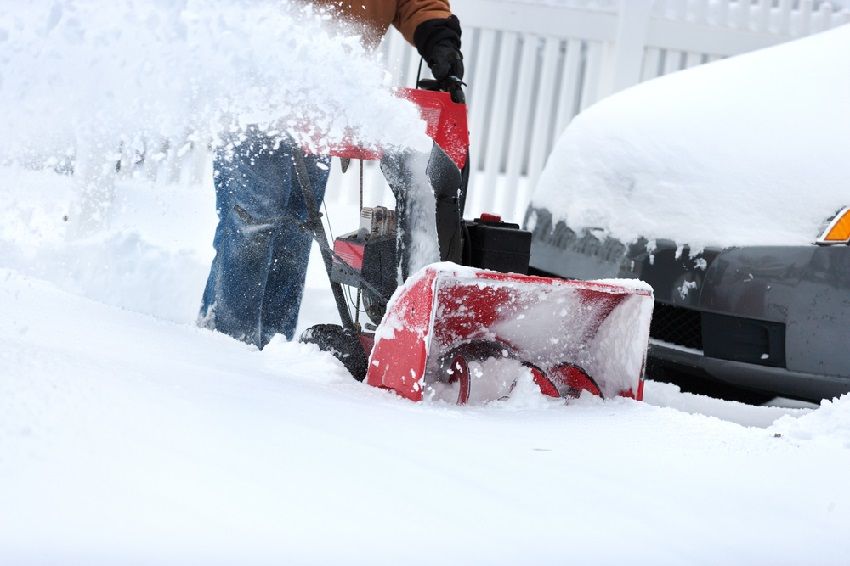
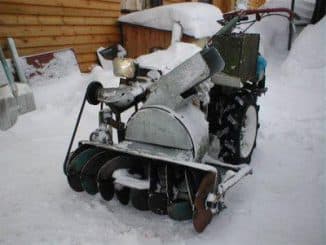
In single-stage snow blowers, thanks to the correct operation of the auger, the snow is collected and thrown at the required distance. In its shape, it is similar to the shaft of a food processor for chopping meat, or, as stated earlier, a corkscrew.
link
Basically, the rotor blade is plastic or metal.
For personal use, both single-stage and two-stage cleaning machines are ideal. Your choice should be based on the tasks that the unit will perform. If your city does not have such severe and snowy winters, feel free to design an auger machine.
For snowy cities, it is recommended to choose the second combination.
Snowblowers are also electric and gasoline.
Initially, you need to decide which snowblower you need - gasoline or electric? Here it is necessary to take into account the volume of future work, because if you are going to remove snow from the footpath and clear the path to the car, then it will be more profitable to build an eclectic model.
It is less maneuverable, but more accessible and profitable to operate.
If you nevertheless opted for an eclectic engine, pay attention to the fact that the classic electric cord, which is used in everyday life, will lose its technical features at sub-zero temperatures and may stop working. Therefore, we do not advise you to assemble this unit in your own garage from scrap materials, because later you will need a lot of money and effort to repair it.
Better get the Husqvarna electric snow blower, which is more expensive, but will last you more than one season.
Therefore, it is recommended to purchase special wires that will not "be afraid" of frost.
A gasoline unit is suitable if you will be cleaning a large area. As soon as you decide on the type of motor, you should stop on the basis for the future car - will this unit be built from scratch or will you take the old walk-behind tractor as its basis?
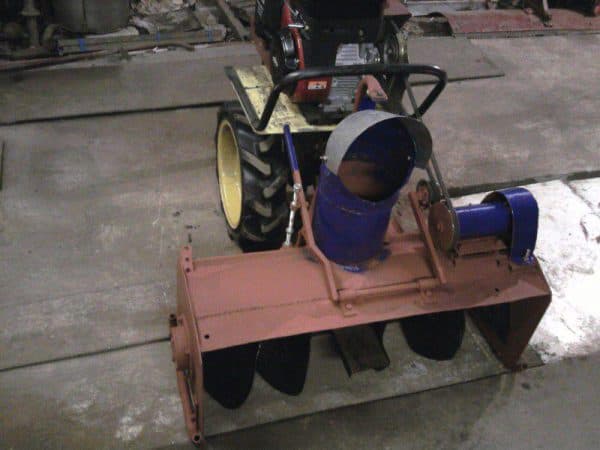
Petrol snow blower
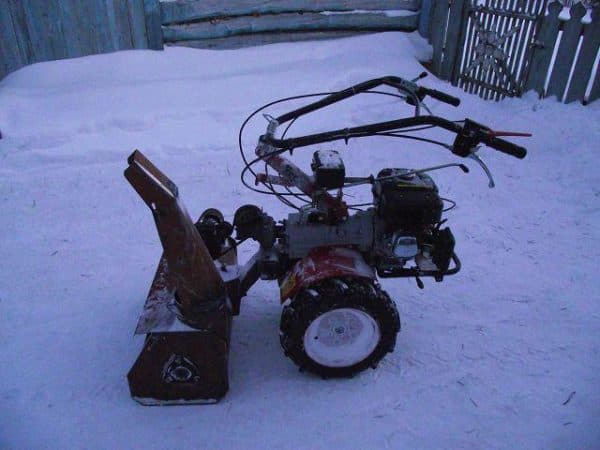
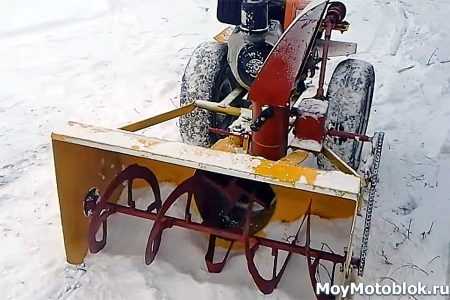
The second option greatly facilitates the task, because in order to turn this part into a snow blower, it is enough to make the front equipment of the mounted type, which will look like a bucket and auger and will rotate the blades that are mounted on the rotor, while clearing the snow.
Gasoline models are still considered more versatile, but the cost of their maintenance and the purchase price of parts are much higher. If this does not scare you, then feel free to click here and you can familiarize yourself with how to assemble a self-propelled gasoline snow blower with your own hands.
Calculate all the pros and cons and choose for yourself which type of motor will suit you best.
The manual snow blower is in great danger, large or small stones can get into the bucket, as a result of which, the engine may stop working. To prevent these unpleasant moments, the design of the unit must be equipped with safety bolts or bushings.
Thanks to them, the auger and rotor will be attached to the drive shaft. If the load is at their maximum, they will break, but the engine will remain intact.
DIY snow blower auger assembly
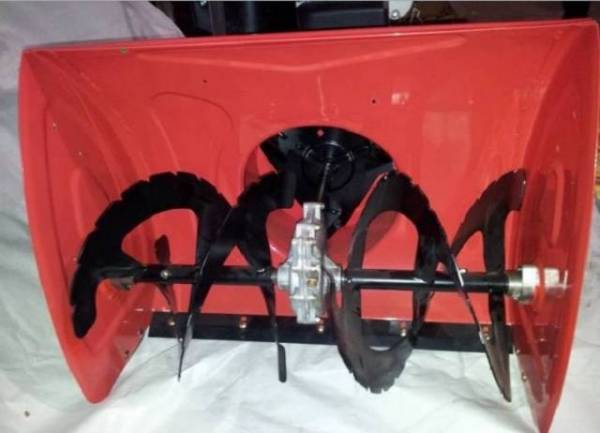
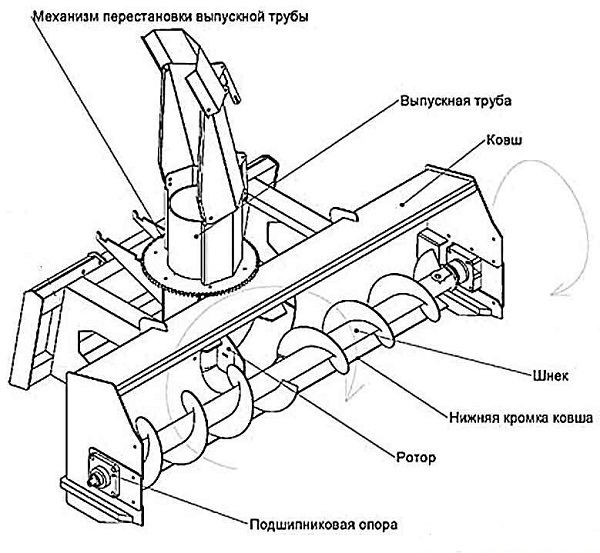
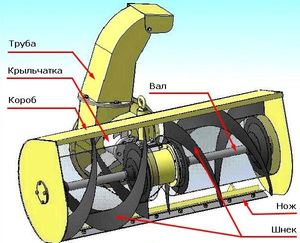 The main working element of the snow removal machine is the auger, which is the cutting ring blades that are attached to the drive shaft. A pipe about 90 cm in size is used in the role of a shaft. In the middle of the pipe, it is necessary to make a through hole, where a shovel will be installed in the future for feeding snow. During the rotation of the pipe (shaft), the blade will begin to throw off the snow.
Before making an auger for a snow blower with your own hands, you need to use ready-made drawings or develop a scheme according to which rings will start to be cut. The auger blades are made of sheet metal.For this, four discs are cut out of it, cut them and pulled out in the form of a coil. Then the prepared parts of the spiral are welded to the pipe, equally on each side.
Then, having recognized the center of the shaft, two blades are welded parallel to each other, which will begin to throw the snow. Steel spacers are welded on the sides of the pipe for fastening the screw structure. On the one hand, the spiral blades are fixed to the spacers, on the other, to the central blades.
Recommendation: When making a chainsaw auger for a snow blower, it is important that the turns of the steel spiral are at the same distance from the center and towards it. Otherwise, the device will vibrate very much.
During the manufacture of the auger body, its length must be left equal to the length of the shaft, taking into account the segment for the drive. Trunnions are welded to the sides of the shaft, with the help of which it is placed on the bearings. They are used in a closed design in order to prevent water and snow from entering. You can clearly get an idea of \ u200b \ u200bmaking an auger by watching a video of a homemade snow blower: making a snow blower with your own hands in this case will be much easier.
The manufacture of the auger body is started from the sidewalls. For this, two circles are cut from the metal, the size of which exceeds the section of the screw assembly by 5-7 cm. A metal sheet of the required size curved into a semicircle is welded to the side parts. In the middle of the side parts, holes are made where the auger mechanism is placed. Bearings are welded to the sidewalls from the outside. In the section of the pipe for the drive, a driven sprocket is attached by welding (an asterisk is suitable, for example, from a moped).
Then they begin to manufacture a snow deflector, which can be made from a pipe about a meter in size and with a cross section of 100 mm. In order to install a pipe in the auger body, a hole of the required diameter must be made, which must be located on the rear wall of the body. A snow thrower pipe is installed in this hole, bolted, and a box is placed on top.
The frame for the snowblower is made by welding profiled pipes into the frame. The strips for fixing the engine are connected to the transverse corners of the frame. It must be said that the power plant must move freely along the frame in order to be able to fix it in the required position. The handle is attached to the frame with the control removed.
Taking into account the type of relief, the frame of the snowblower is equipped with runners or wheels. Wheels can be installed for flat areas, and runners for uneven and bumpy surfaces. For runners, the base is made of bars, where plastic pads are attached for good sliding.
How to make a snowblower from a walk-behind tractor with your own hands - instructions with assembly drawings
In order to significantly reduce the time for reinstalling the motor, you should install quick-detachable fasteners on homemade vehicles.
You can create a harvesting unit on the TV-6 lathe. To make a snow blower for a walk-behind tractor with your own hands, it is recommended to adhere to the drawings.
Drawing 1
and instructions:
- A box is made of iron sheets, the ends of which are bent into the likeness of skis.
- A shaft is made from the pipe, at least 5 cm thick.
- In the box, a grip is welded, made of two welded bent plates in a U-shaped way. Both plates must not be rotated 180 degrees in relation to each other.
- The auger is made by hand from a conveyor belt (1.5 m in length and 10 mm in thickness). With a jigsaw, 4 rings are cut from the tape (diameter = 28cm). If there is no jigsaw available, then you can replace it with a special board with two screws screwed into it.
- Such a plank is used in the form of a compass - rotations in a circle. With this manufacturing method, high-quality rings are obtained.
-
In a casing made of galvanized iron, make a hole opposite the spreader and install a pipe in it. This pipe will serve as a snow spreader. Holders on both sides of the spreader are welded to the pipe.
- A gear or pulley must be installed above the auger drive shaft (the choice depends on the drive. The auger is welded to the finished plates, two rings on each side). The rings on one side are cut and welded to the beginning of the other end.
- One side of the workpiece is welded to the gripping blade, and the other end, reinforced with a strip of steel, is welded to the shaft at a distance of 5-10 cm from the free end.
- Choosing a screw drive.
- It can be either chain or belt. A belt drive should be used if the engine has a pulley and if the auger jams during operation, the belt will slip safely.
- The gripper body should be 2 - 3 centimeters larger than the pulley. In this case, the pulley will not cling to the body, but a small gap between them will remain.
- To prevent the auger from breaking, it must be equipped with a spare pin that breaks off in the event of a jammed auger.
- A round hole is made behind the gripper, into which a bent pipe of the required gauge is inserted and welded.
- Check that the distance between the gripper blades and the back wall of the box is minimal.
- Fasten glasses on the sides of the box.
- It is better to create glasses from AMgb aluminum and fasten them to the car with MB bolts. Be sure to tighten the bolts with nuts.
-
The shaft rotates in bearings located in glasses. He should look out of the box at a distance of 5 - 10 cm.
- The swivel gutter can be made from a sewer pipe (diameter 160 mm). A gutter is attached to this pipe, which sets the direction for the snow. This chute is attached to the body of a pipe located on the auger with the same size.
- The diameter of the chute should be larger than the width of the auger plate, which is responsible for the discharge of the snow mass.
- An asterisk is welded to the end of the shaft to change speeds.
- The sprocket and shaft are connected to the walk-behind tractor using a chain.
- The rotor is connected to the front wall of the body by means of rivets with a diameter of 4 mm. If skis are installed on the unit, then wooden blocks can be installed under them. Or screw on the plastic strips.
- Make a frame from steel corners (50 * 50 cm). Angles measuring 25 * 25 mm are attached to the transversely installed corners. The power unit is attached to them.
- The handle of the machine is bolted to the longitudinal corners.
- After the assembly is completed, the snow blower walk-behind tractor can be spray painted.
From the drawings below, you can assemble both an independent snow blower machine and a nozzle for a walk-behind tractor.
Drawing 2
Drawing 3
Drawing 4
In the national economy, working machines "Neva" are often found.
The drawing of creating a snow blower with your own hands on the "Neva" walk-behind tractor is as follows:
Drawing 5
Construction # 2 - rotary snow blower "Blizzard"
This device, which is quite simple in design, can be made in any workshop equipped with a lathe and a welding machine. The snow collector, designed by Penza craftsmen, showed itself well even in rather difficult snow conditions.
The design of the device is based on: an engine with a built-in muffler, a gas tank and a cable for controlling the throttle valve.

All components of the device can be purchased in the store or taken from the same bike
To begin with, you need to make a rotor on a lathe on the basis of a corresponding workpiece from an electric motor part. Outwardly, it looks like a steel disc d = 290 mm and 2 mm thick. The disk, connected with the hub by means of bolts, forms a structure, to which 5 blades are already attached by welding. To increase the efficiency of the mechanism, the blades are additionally reinforced with stiffeners on the reverse side.
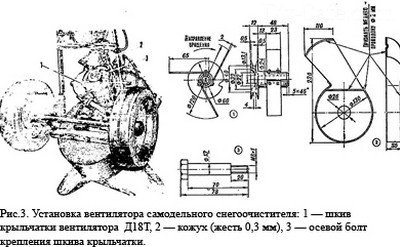
The motor cooling system works on the principle of a fan, the blades of which are made of duralumin and fixed on the pulley to start the motor
The fan is protected by a soldered casing located on the crankcase cover. To improve the quality of cooling, the cylinder head is placed at an angle of 90 degrees.
The shaft is mounted on the rotor housing on four ball bearings arranged in pairs. It is fixed to the body with a steel retaining ring and bolts. The rotor body itself is pressed against the frame using a special bracket, which partially captures the pressure ring.
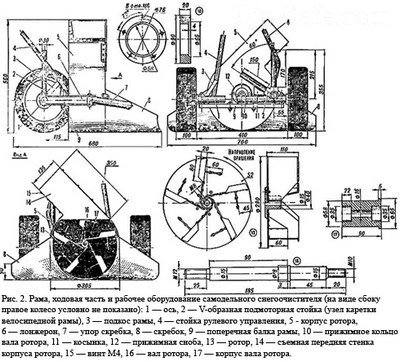
Assembly diagrams of the main elements of the "Vyuga" snowblower
Removable elements of the machine are the aluminum wall of the rotor housing and the scrapers placed along the frame.
A significant advantage of a home-made snowblower is the ability to adjust the working width by changing the scrapers. At the height and quality characteristics of the unit. The weight of the structure does not exceed 18 kg, which makes it possible to use it for women, and the range of snow throwing is about 8 meters.
How to make a snow blower with your own hands
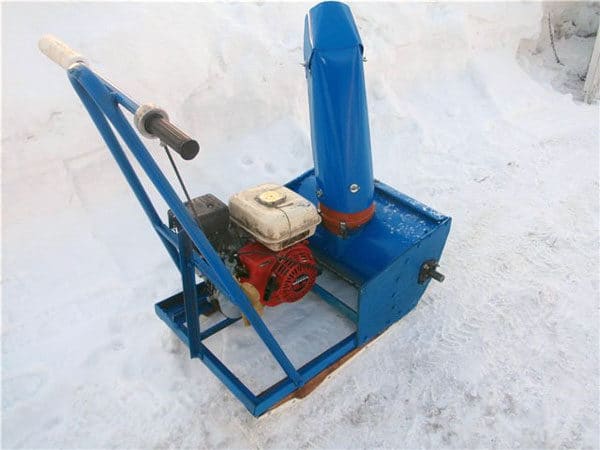
Manual the snowplow consists of such mandatory elements: a wheel frame (a control handle is attached to it), an engine, a fuel tank (if the machine is with an internal combustion engine), a snow bucket or a blade with guides (skis) and a snow pipe. It is worth considering that the future snow blower is based on a lightweight and durable platform at the same time.
How to make a snow blower from a walk-behind tractor
In winter, the walk-behind tractor can be used for snow removal. The easiest way to assemble a snow blower is with a custom factory snow blower attachment. However, skilled craftsmen advise not to spend too much on a factory nozzle, but to assemble a snowplow for a walk-behind tractor with your own hands from available materials and spare parts. There are three options for snow plow attachments to the walk-behind tractor.

The first option is hard rotating brushes, which are well suited for recent snowfall, as well as for places where there is a possibility of damage to the decorative surface of the sites. Such brushes are mounted under the canopy of the rotating auger; the width of their capture reaches 1 m. It is also possible to adjust the angle of capture in three directions: forward, left, right.
The second version of a snow thrower for a walk-behind tractor is a hanging shovel with knives, suitable for already stale snow. Such an attachment is attached to the towing device with a universal hitch. The bottom of the shovel is covered with rubber to prevent damage to the surface and the shovel itself. Such a snowplow works on the principle of a mini-bulldozer: it loosens a layer of snow, captures it and moves it to the dump. The capture width also reaches 1 m at a time.
However, the most effective snow plow attachment to the walk-behind tractor is a rotary snow thrower. The main design elements of this nozzle are a conventional paddlewheel auger. As it rotates, it grabs the snow, which is moved upward with the help of the wheel. Passing through a special funnel, the snow is thrown far beyond the site. This is the most productive version of the nozzle, allowing you to capture a mass of snow up to 25 cm thick

Now we will consider step-by-step recommendations on how to make snow-removing motoblocks with a rotary attachment with our own hands. The design is a metal body with a screw shaft inside. You can use a ready-made screw shaft or make one yourself.
So, bearings No. 203 are used to rotate the auger shaft. The housings for the auger are made of aluminum and are attached to the sides of the snow blower with bolts that must be tightened with nuts. The drum in which the rotor is spinning can be made from an aluminum boiler of 20 liters: it must be attached to the front wall of the body using rivets with a diameter of 4 mm.
The rotor for the snow blower is driven through a system of adapters by means of the rear power take-off shaft of the walk-behind tractor. If the snowplow attachment was purchased ready-made, then such adapters are included with it. If the nozzle is made by hand, you need to purchase them additionally.
You also need to make a twisting mechanism that would be transmitted from the walk-behind tractor to the snow blower. For this, the A-100 belt and the pulley intended for it are suitable. Thus, with the help of a V-belt connection, the torque is transmitted from the engine to the shaft of the walk-behind tractor, connected to the shaft of the snow-clearing nozzle.
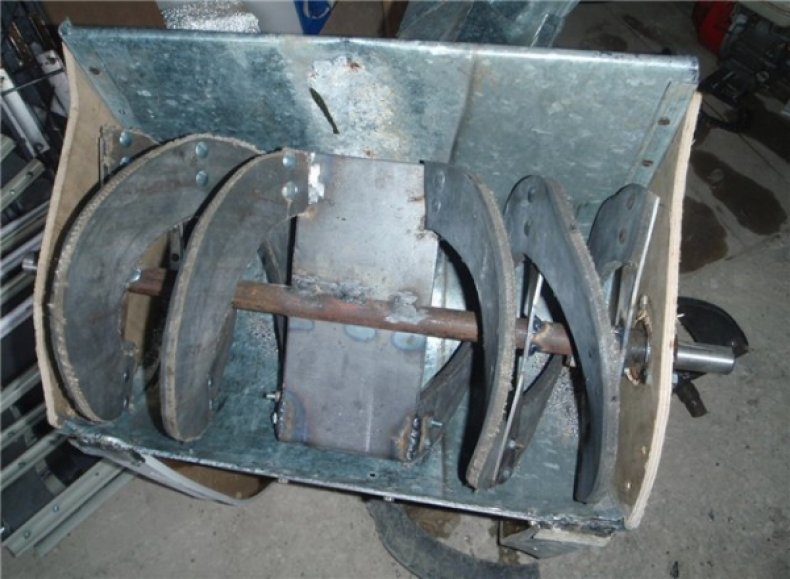
Important! Bearings should be chosen only closed, it is necessary to exclude the ingress of snow into them
DIY snowblower: making auger and frame
Let us now consider how to make an auger, a frame, as well as additional accessories required for a self-assembled snow blower.
To do this, you need to prepare:
sheet metal or iron box for the manufacture of the auger and its body;
steel corner 50x50 mm for the frame - 2 pcs.;
plywood 10 mm thick for side parts;
metal pipe for the handle of the snow blower (0.5 inch diameter);
¾ ”pipe for auger shaft.
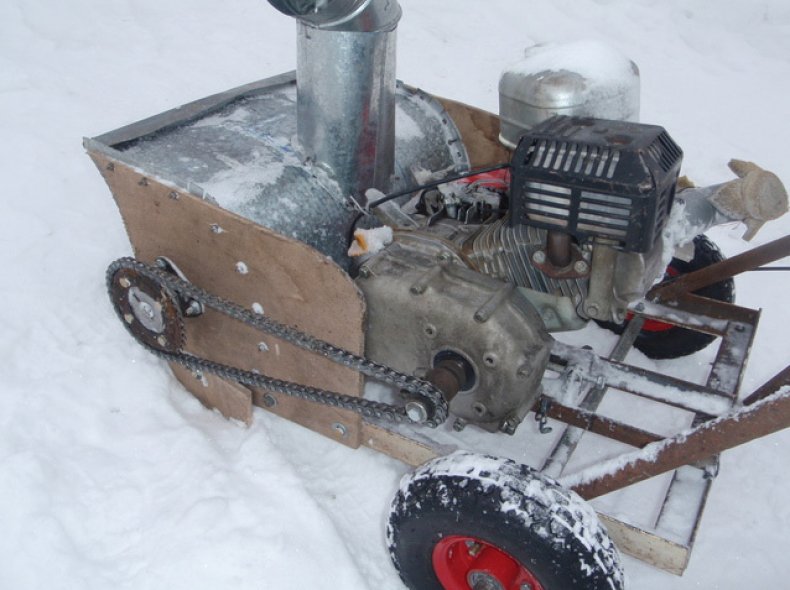
Since the auger will rotate in self-aligning bearings # 205, these also need to be placed on the pipe. A piece of plastic pipe with a diameter of 160 mm is suitable for throwing snow, which is fixed on a pipe of the same diameter and placed directly on the auger body.
To make your own auger for a snow blower, you need:
cut 4 discs from the prepared iron;
cut the discs in half and bend each in a spiral;
weld four disc blanks in a spiral on a pipe, on one side and on the other;
put bearings on the ends of the pipe.

The machine is now ready for use.
Necessary materials
To make a homemade snow blower yourself, you need not only basic knowledge in welding and turning, but also some tools, which are quite difficult to do without.
Here's a list of what we'll need:
- Wrenches of various diameters.
- Bolts and nuts (it is better to collect all available ones to make it easier to navigate in the future).
- Electric drill.
- Bulgarian.
- Screwdrivers of all types and sizes that are available.
- Pliers, vices and pliers.
- Normal hammer and file.
- Various chains.
- Welding machine.

Metal pipe for gutter
With regards to materials, we need a metal profile pipe with a cross section of 20 by 40 mm. A profile corner with the same parameters is also suitable for the frame base.
Snowplow device and diagram
Before you start designing a machine, you need to prepare calculations and drawings. Preparation will be easier to carry out if a clear idea of the visual image, the principle of the unit and its functioning appears in the head.
How does a snow blower with auger attachment work:
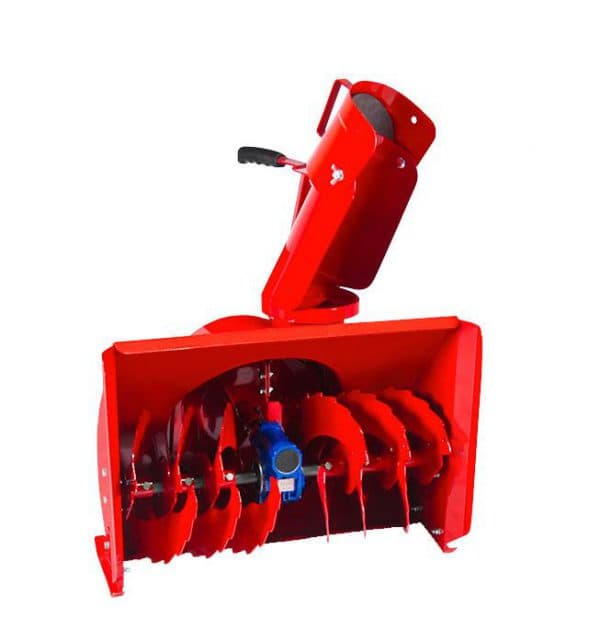
Scheme 1
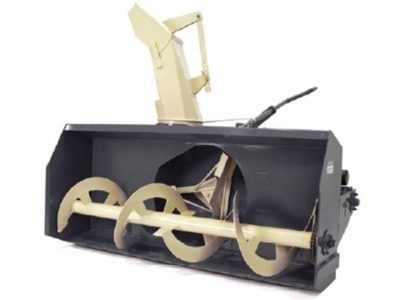
The front of the cleaner consists of a huge bucket with a funnel that collects large amounts of snow. Inside there are two conveyor screws - this is an auger (see here how to make it yourself), which move the accumulated mass into the pump. Each screw is made up of blades that rotate around the screw.
As soon as the engine is running, the blades begin to rotate. Each spin cuts sharp notches into the snow, then a second sharp blade replaces it.
Rotating conveyors and screws perform the following main functions:
- crushing snow;
- add it to the pump.
The conveyors have a trick - they are located at an angle to the pump, which allows the snow to be brought to the pump. With the help of the rapid rotation of the screw, the snow mass is pulled out at a high speed and carried by the air pressure over a long distance.
A scoring plate is attached to the bottom of the "shovel".
If an air-cooled electric motor is included in the structure of the universal apparatus, then the air intake must be protected from accidental contact of the electrical part with wet snow.

Scheme 2
Simulation preparation scheme:
- Buy, or use the available, walk-behind tractor engine. For example, Honda brands (requirements: 6.5 liters per second; auto transmission; gear ratio);
- Prepare a plastic pipe, mainly sewer, with a diameter equal to 16 cm;
- Roofing iron is needed;
- Plywood (10 mm thick) is useful;
- Half-inch pipe;
- Steel corner;
- Take the pipe ѕ inch;
- The steel plate should be 120 * 270mm;
- Hole drilling jig;
- Rear wheel axle.
- Check sleeve bearings against pipe size. If the pipe is wider than the inner ring, then it can be turned on the machine.
The total width of the home-made machine is approximately 65 cm (working width is 50 cm), which is convenient for storage.
More complete information on the following videos:


