Types of snow blowers for the home
There are many variations of snowplow designs for a country house or summer cottage. Regardless of their appearance and size, they are all divided into several types.
By engine type:
- Electrical;
- Gasoline.

Snow blower for home
By design option:
- Screw machines (divided into single-stage and two-stage);
- Rotary machines.
Electrical
The choice of the power plant for the winter assistant is influenced by:
- The amount of snow usually falling in the region;
- The area of the territory to be cleaned;
- The presence of an old engine of the required type and components for it.
The electric snow plow is compact, but it cannot be heavily loaded with work. Its power will be enough for tidying up a small yard or paths next to the dacha and the garden. In addition, the electric homemade product will be tied to the living space due to the outlets.
Among the advantages of such a motor:
- Silence;
- Low maintenance requirements;
- No gasoline costs;
- Environmental friendliness.
Important! For such units, special accessories are required. For example, a cable that is not afraid of subzero temperatures, waterproofing materials to protect the motor from snow and moisture
Gasoline
It is more expensive to maintain a gasoline engine. He needs high-quality fuel, oil, the engine will need to be constantly serviced. A do-it-yourself snow blower with an internal combustion engine makes loud noises during operation and emits a large amount of exhaust gases. Among its advantages:
- This design is powerful and can handle a lot of work in a short time;
- Mobility. The snow blower will work even away from living quarters or garage.
- No obstructing power cord, etc.

Petrol snow blowers
Auger
Regardless of the type of motor, the design of the unit can be either auger or rotary. The summer resident decides which one to choose.
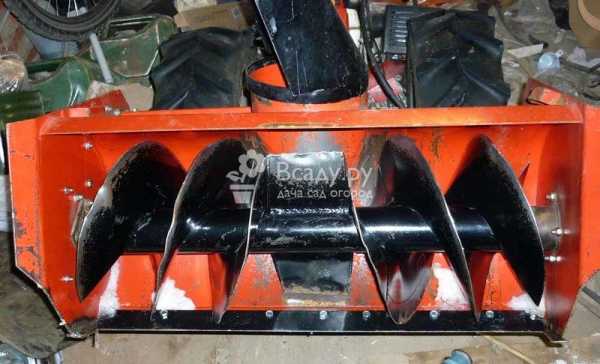
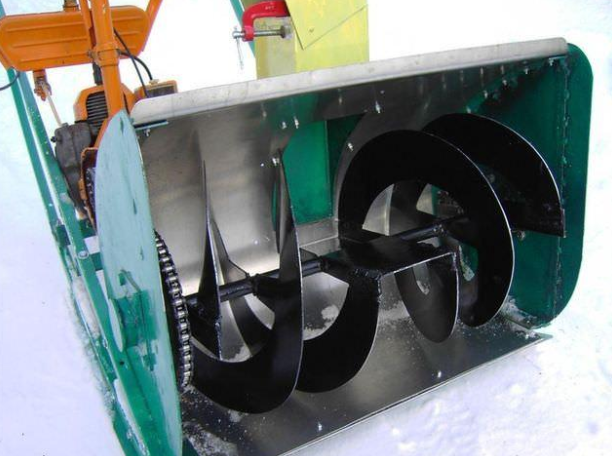
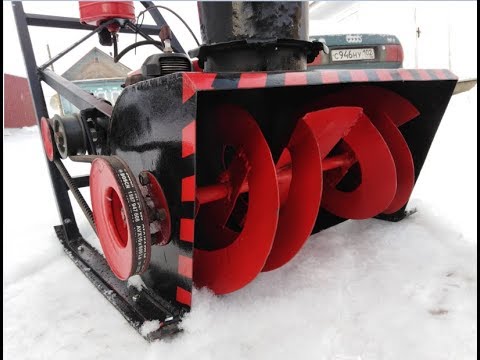
Interesting! The auger snow blower device is based on such a working element as an auger (an axis on which screw knives or conveyors are located). This part resembles a corkscrew or a screw spare part for a conventional meat grinder. The auger is located directly in the bucket, which shovels the snow. The element has two functions. First, the blades break the snow into small particles. Second, they mix the snow mass into a pipe, from which it subsequently flies out to the side.
As soon as the motor starts up, the screw blades of the auger begin to rotate. If we recall the school physics course, then we can understand that knives convert rotational energy into linear energy. Thus, they effortlessly push the ice or snow mass towards the pipe. Screw aggregates are manufactured in two types:
- Single stage;
- Two-stage.
Single-stage cleaners are simple and easy to manufacture. The main thing here is to correctly execute the auger. It is he who is the main working element. It sits under the bucket, shovels up the snow and pushes it towards the exit hole.
On a note! Two-stage sweepers have two stages before the snow is sent down the chimney to exit. In addition to the auger located in the dump, there is another working element - the rotor. It is a rotating impeller. The snow crushed by the auger falls into the rotating rotor blades. There it crumbles, gets accelerated and flies through the pipe away from the track being cleaned.
Rotary
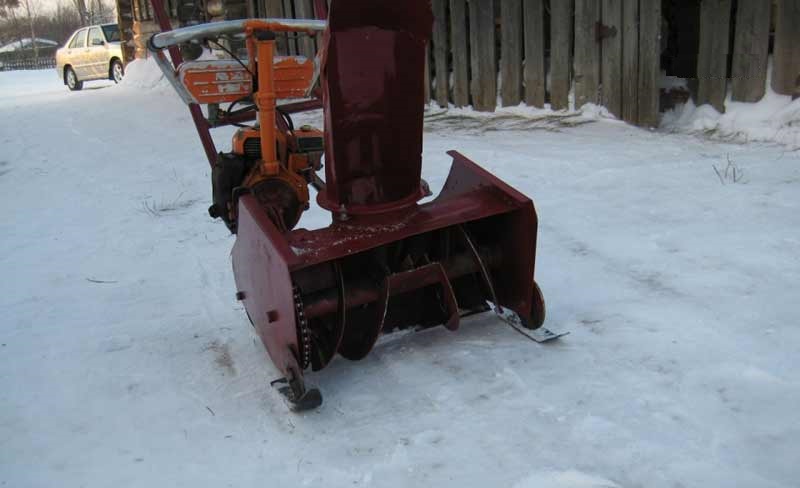
A rotary snow blower with your own hands is also easy to make.At the heart of its design is a rotating rotor, on which snow immediately falls. A shovel with rounded side edges is provided for feeding the snow mass. The rotor grinds the snow and throws it out through the sleeve outlet. Such a unit is sometimes made without an engine. In this case, the rotor with a shovel and a sleeve is installed on an MTZ walk-behind tractor. Also, a mini tractor, LuAZ, etc. are suitable as a driving force.

Rotary snow blowers for home
How to make an ice screw from a trimmer?
Manufacturing a motor-drill from a trimmer consists of two stages - assembling a gearbox and creating an auger. Each of them must be treated with great responsibility, since the serviceability and efficiency of home-made equipment depends on it.
Type selection and assembly of a gearbox for a motor-drill
The first stage in the manufacture of a motor-drill from a trimmer is to select and assemble a reliable gearbox. All gearboxes are divided into several types. Depending on the initial direction of movement of the working part, the following types of gearboxes are distinguished:
- mechanisms in which the built-in output shaft moves in the direction of the clock hand;
- gearboxes in which the output shaft moves counterclockwise;
- reversible mechanisms;
A homemade trimmer drill is best equipped with a reversible gearbox. It will make it possible to freely remove the drill working body in case of jamming in the ground or ice.
To manufacture a reversible gearbox, you will need to prepare:
- serviceable worm shaft;
- durable body;
- 2 pairs of bearings and bevel gears;
- output metal shaft.
In addition to the preliminary preparation of the elements, the manufacturer of the motor-drill will need a diagram. It must indicate the exact dimensions of all parts and mechanisms used.
After studying the diagram, you can start making the gearbox.
The procedure should look like this:
- First, you need to connect the output shaft of the motor and the worm shaft of the motor drill used;
- Next, you need to install a flexible or rigid coupling. The first option is suitable for an engine that generates strong vibrations. In this case, the flexible coupling will effectively damp the vibrations created by the crankshaft of the motor and the working body of the motor-drill;
- Then you will need to connect the worm shaft and 2-row gear. The lower part of the latter must be pre-equipped with straight teeth;
- During the manufacture of the gearbox, a hole must be left between its parts for the smooth introduction of lubricant;
- In the end, it remains to adjust the angular speed of the mechanism. To do this, you will need to select and match gears with suitable dimensions.
As a result of the actions taken, the manufacturer will receive a reliable 1-speed gearbox with the most simple device. The mechanism will stably transfer the force from the trimmer ICE shaft to the motor-drill working body shaft under any operating conditions.
Self-made auger
To assemble an ice screw from a mower, the manufacturer will definitely need a screw mechanism. It has the shape of a screw and is used in a device for cutting soil or ice with subsequent preparation of holes. To make the simplest auger, the manufacturer will need to study the drawings of the mechanism. Compliance with them will make it possible to assemble an effective and hardy knot that can successfully withstand heavy loads.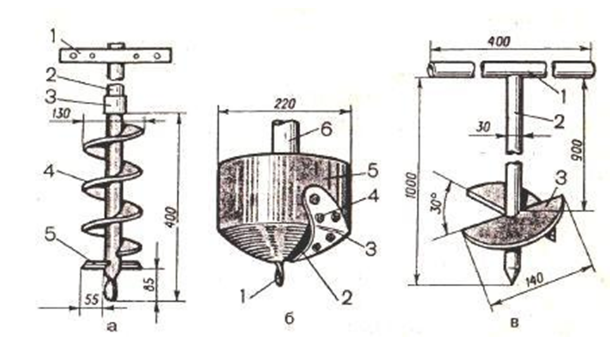
In addition to studying the drawings, you will also need to prepare the following elements:
- pointed metal blade, curved in the form of a screw;
- metal core;
- steel tip.
If the motor-drill will be used to make holes in hard rocky soils, then the metal for assembling the auger will need to be pre-hardened. This will prevent the metal from deforming during drilling.
Snow trimmer attachment
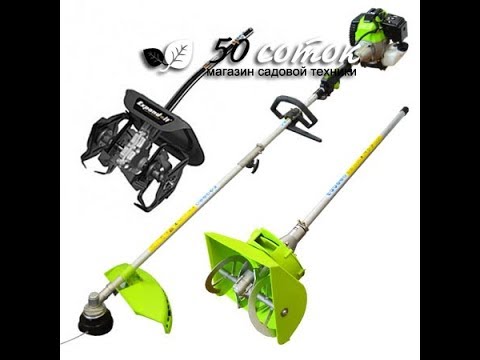
Some manufacturers of household and semi-professional trimmers offer special small-sized attachments, the main function of which is to clean small areas from freshly fallen snow.
The main advantage of the snow blower attachment is its ease of installation and removal. To install the device, you need to remove the trimmer cutters, and also disconnect the bar, which houses the drive shaft. Instead of a rod, a nozzle shaft is attached. During trimmer operation, the motor generates torque, which is transmitted through the drive shaft to the attachment auger. The mechanism collects snow and throws it aside, at a distance of up to 2 m.
The snow blower attachment does not require any special maintenance. All that is needed from the operator is to timely clean the auger from snow and dirt before sending the device for long-term storage. Otherwise, corrosion will quickly develop on the metal rod of the nozzle.
The only drawback of the trimmer snow blower is the short throwing distance and the inability to adjust the throwing side. However, the fixture can be modified by installing a homemade waste chute on it with the ability to turn it.
How to decide on a design?
Before starting to design a snow trimmer with your own hands, it makes sense to study the market offer. The fact is that a home-made unit, without a careful calculation of the motor power and without the proper skills of the user, may not last long, due to the discrepancy between the power and weight of the required tasks. You also need to have and be able to read the blueprints to make a homemade snow trimmer.
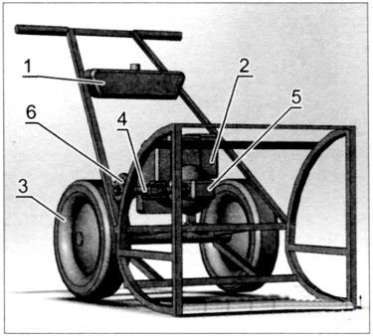
A much simpler way out of the situation, in this case, is to find a ready-made solution. The snow trimmer attachment can save you. They are freely sold on the Internet, they are usually called "snow blower attachments" and allow you to use a device specially designed for this purpose, which will be designed for your brushcutter. There is also a practice of attaching a trimmer to a certain metal frame, turning it into a kind of motoblock on a wheel drive. In this case, the trimmer will only act as a motor that drives the rotor. We will not dwell in detail on the description of the creation of a metal frame, we will only say that it must be strong enough and heavy, which means it must be made of a steel corner or pipe.
Which trimmer should you choose?
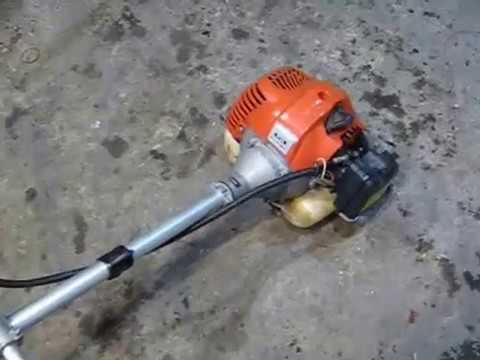
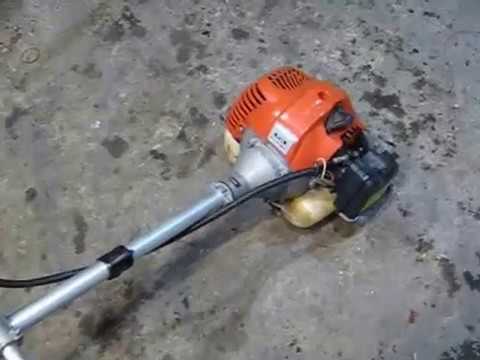
To make a snow blower, you need a fairly powerful unit. It can be made from an electric trimmer or a petrol cutter. The latter is often preferred. The reason for this is the technical characteristics of the former. The electric motor of such a device is designed for certain power loads. Inappropriate use can lead to its early failure.
The gasoline engine, due to its design, can operate under a wide range of loads.
An important role is played by the design of the boom, the hand-held mower, designed to transmit torque. Some of them are curved tubes. In such "Arcs" transmission is carried out by means of a flexible cable. This engineering solution is not suitable for using the unit for snow removal. The cable transmission will not cope with the load, which will increase significantly during the removal of snow.
A suitable trimmer design option would be one that provides a direct transfer of torque from the engine to the working unit.
In such modifications, the driving energy is transmitted through the propeller shaft. It is significantly ahead of the cable equivalent in terms of technical indicators.
You can use a wheeled lawn mower to make a snow blower. A model equipped with two wheels and a rotating working element located in the front of it will do. A mower of suitable configuration is shown in the photo below.
The four wheel model is not suitable for converting into a snow blower.
Grinder - grinder snow blower
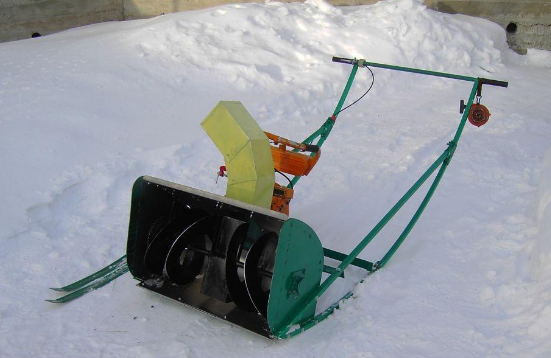
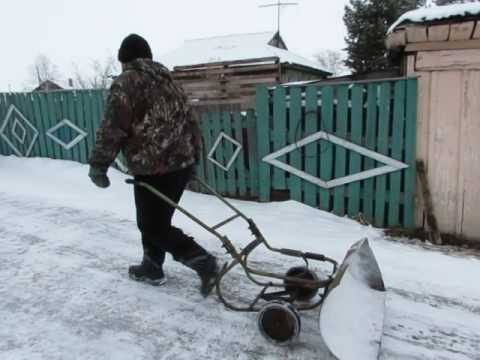
A snow blower from a grinder is made on the basis of a wooden sled, to which the rest of the mechanism is attached. The design includes: a deflector, a rotor and its casing. A shovel-shaped sheet of steel is attached to the front. The grinder plays the role of a drive, and is responsible for the rotation of the blades.
The principle of operation of this device is very similar to the mechanical snow blower, which we will discuss here.
What and from what to make
For assembly, you will need plywood, 20 mm thick, from which the sled and handle will be made. Sheet metal, 1–1.5 mm, is useful for making the main parts of the apparatus and the shovel. Small thickness metal tube. Semi-automatic welding machine. Drill, jigsaw and some hand tools.
Parts and assembly
Let's start by making the base. We cut out two workpieces measuring 610 by 100 mm with a jigsaw, cut one of the edges at 45 degrees. You will need two pieces of plywood, measuring 370 x 50 mm, to join them.
Another detail, 370 by 100, in which a semicircle is cut to fit the body. The runners are ready, let's start creating the handle
From the same plywood sheet we make two bars 50 mm wide and long for the operator's height.
Note that the handle will be at an angle to the runners. Its length can be measured experimentally.
Strong fastening of the handle will be provided by two more bars - a brace of the same width. Their length depends on the angle of inclination of the handle.
This article contains helpful tips on which chainsaw to choose.
Before purchasing a Buhler tractor, you should carefully read its technical characteristics, which are located here
We make a scraper. Iron sheet 570 mm long and 150 mm wide. We bend it so that we get a shovel, with a base size of 370 mm, an initial side height of 100 mm and an opposite side of 570 mm.
Let's start making the main parts. We cut out a strip of metal with a length of 330 mm and a width of 250 mm. We fold the resulting workpiece into a ring. We fix it with spot welding. We make the bottom for the learned pipe and weld it in place.
Now you need to make 2 holes. One will be in the center of the bottom. Its diameter should be equal to the protruding part of the grinder gearbox cover. Another hole is located on the side. Its dimensions are 150 by 200 mm.
We make a deflector, which is responsible for the direction of the ejection. It consists of a 420 x 150 mm rectangular plate and two triangular side supports. The long side of the triangle is 420 mm and the height is 150 mm. At its base, you will have to cut out a semicircle for a snug fit to the body.
The rotor will look like a disc with welded blades. Its diameter is 300 mm. You will also need to cut out 4 blades in the form of a right-angled triangle, with a height of 100 mm and a base size of 277 mm. Drill a 23 mm hole in the center of the disc.
It is better to order a rotor in a lathe. If there are the slightest errors in the calculations, the increased vibration will quickly ruin the gearbox.
- We collect the base. We fasten the runners together with the help of prepared bars. We fasten it with self-tapping screws, one in the middle, the second at the end with a saw cut. We use the same hardware to attach the handles and struts. We attach a metal pipe from above, connecting both handles.
- We fix the blade to the flat ends of the runners. To increase the strength, we use bolts and nuts.
- We attach the deflector by spot welding, above the side opening of the body.
- We attach the grinder to the body using the elongated gearbox bolts. An additional mount would be appropriate. It is made from thin strips of metal. We bend it into a half ring, put it on the tool, and weld it to the bottom of the case.
We put on the rotor on the grinder's seat washer and tighten the clamping nut.
We weld two corners to the body on each side. We fasten them, in turn, to the runners so that the body fits snugly on the front bar.
All parts of the resulting snow blower should be painted. This will help extend their lifespan. As you may have already noticed, as a result, you will get an aggregate of impressive size, but if you are the owner of a small area, then it is better to concentrate on assembling a mini snow blower with your own hands, because it is much easier to assemble it, and after use, lay it in the far corner of the garage.
Assembling the cultivator
If there is a summer cottage or just a plot of land, then the cultivator will help facilitate soil cultivation. Traditionally, a hoe is used for these purposes, but working with it takes a lot of time and effort. Using a cultivator will reduce labor costs and the whole process will take less time. Factory-made equipment is expensive, therefore, with limited funds, the question of self-assembly of the cultivator arises. For this, both petrol trimmers and electric trimmers are suitable.
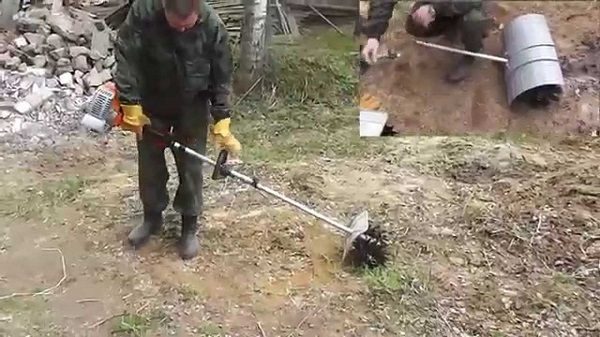
To create the simplest piece of equipment, you should stock up on the following tools and materials:
- grinder with a set of discs (suitable diameter - 125 mm) for metal;
- drill with drills of various diameters;
- welding machine;
- electrodes;
- jigsaw or hacksaw for metal;
- emery machine with two abrasive wheels of different grain size;
- a functioning gasoline trimmer;
- pitchfork;
- a steel tube suitable in diameter for the brushcutter shaft;
- hand tools: wrenches, hammer, pliers, punch, tape measure and marker;
- a sheet of metal with a thickness of 3 to 5 mm and dimensions of at least 10 * 10 cm.
The manufacturing process begins with the working part. For this purpose, the curved rods of the garden pitchfork will serve. Their recommended length is from 10 to 15 cm - this is enough to loosen the soil.
The working nozzle is manufactured in the following sequence:
- the forks are flattened to a width of 1 cm;
- on emery, using a circle with a fine abrasive, cutters are sharpened;
- using a jigsaw, cut a circle with a diameter of 10 cm from the metal;
- process it on an emery machine until it reaches an almost ideal shape;
- at regular intervals, prepared cutters are welded to the metal circle (the recommended amount is 3).
With more than 3 pieces, the number of cutters, the load on the equipment greatly increases.
The next step is to attach a weeding cutter to the trimmer. The process is greatly simplified in the presence of a reverse thread located at the end of the brushcutter shaft, onto which the manufactured working part is simply screwed. To do this, a tube with a nut is pre-welded to the mill.
If you have locksmith experience and skills as a welder, it is quite easy to convert a trimmer into a cultivator. The financial costs are insignificant. If an electric scythe is used in the work, then you will need to think about an extension cord so that it reaches all over the treated area.
How to make?
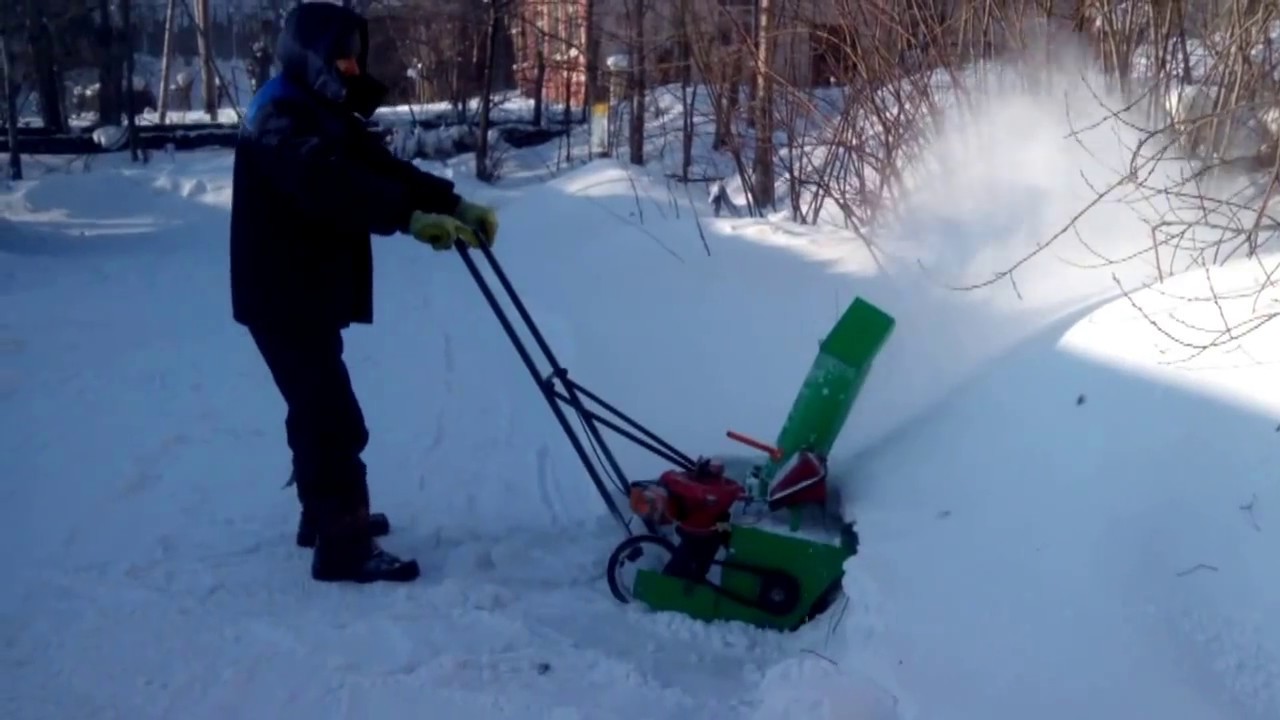
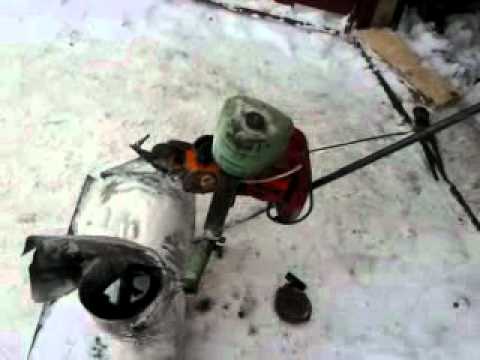
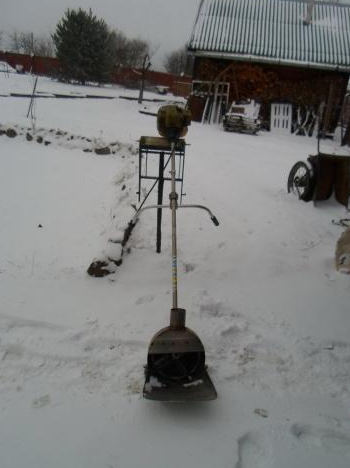
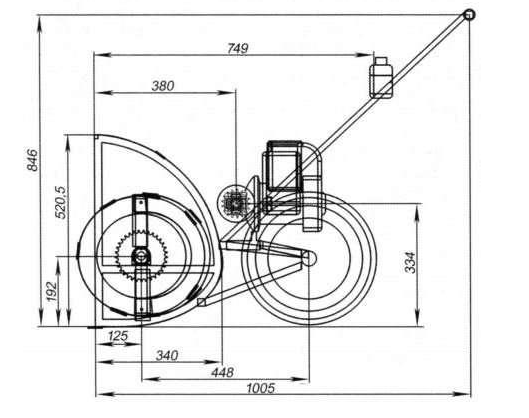
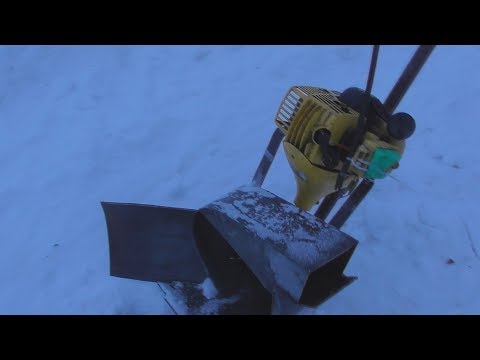
Making a snow blower from a petrol trimmer with your own hands does not imply reworking the design of the mower, but comes down to making a nozzle. Let's consider an example of the simplest design of this removable element for a gasoline trimmer.
Before starting the workflow, it is necessary to draw up the corresponding drawings. They must take into account the dimensions of all parts and how they are connected to each other.
Drum body manufacturing
The drum body is a metal cylinder with a diameter greater than its height. The size of the diameter and height of this "Box" determines the amount of snow that will be thrown to the side. The body should not be too large as this could overload the trimmer motor.
The drum is made by cutting out a circle of the required diameter from a sheet of metal and welding a rim to it. This collar can be made from the same sheet metal by cutting a tape from it, the length of which is equal to the circumference of the circle.Welding is carried out in a pointwise way to avoid deformation of the workpieces due to the high heating temperature. After tacking the parts by welding to one point, the side is bent along the edge of the circle, the point fastening is repeated. As a result, you should get a kind of round "Bowl" with a side.
Its optimal diameter is 30 cm, and the height of the side is from 5 to 8 cm.
A hole is drilled in the center of the bottom of the "Bowl", which is intended for attaching the drum to the housing of the gearbox for transferring rotation to the trimmer shaft. The hole diameter is several units larger than the shaft diameter - their contact is excluded. The drum is permanently attached to the gearbox. To do this, elongated nuts are welded to the gearbox housing or the fixing holes in the gearbox itself, if any, are used. In the bottom of the drum, holes are drilled, located opposite the equipped fasteners on the gearbox. By aligning the holes with the mounting points on the gearbox, you can screw the drum to the trimmer head.
To keep the drum body firmly on the trimmer, a stop is welded to the back of the first. This element is a jumper connecting the drum with the tube-body of the spit cardan. The jumper is attached to the tube with a clamp.
Screw making
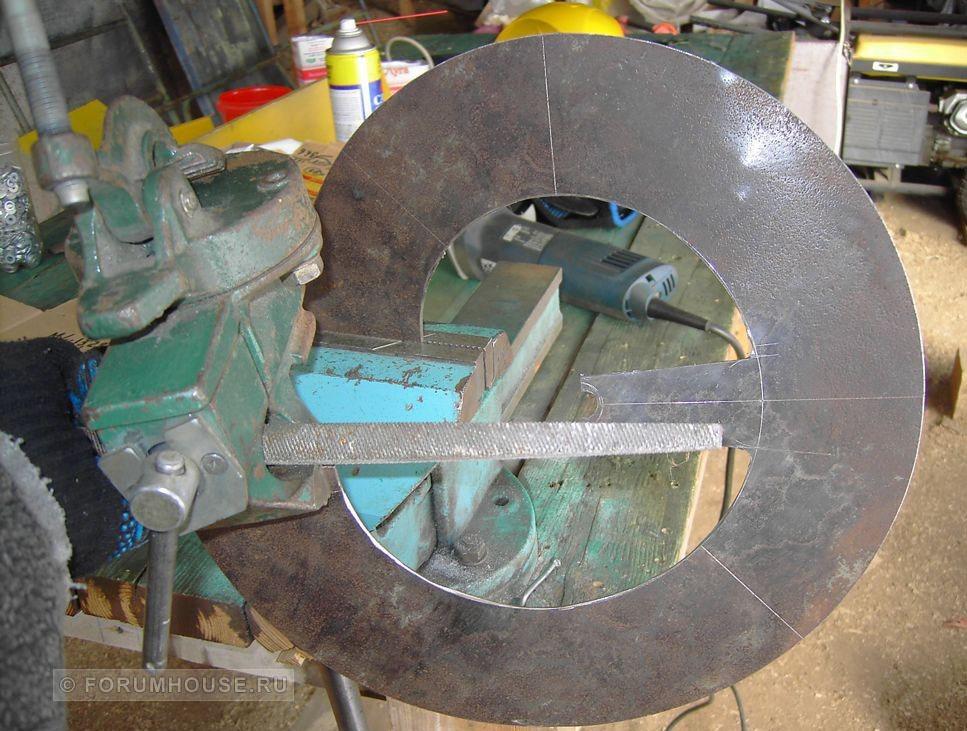
A disc is cut out of a sheet of metal, the diameter of which is 2 cm less than the diameter of the drum. A hole is drilled in the center of the disc with a diameter equal to the diameter of the trimmer shaft + 0.5 mm. 4 blades are welded to the disk with an edge. Their arrangement is criss-cross.
The blades should not touch each other in the center, leaving a free hole in the disc.
Disk with blades - the propeller rotating on the shaft should not come into contact with the bottom of the drum body. To do this, first a nut is screwed onto the shaft, then a disk is put on, which is fixed with another nut. The height of the first nut must be sufficient so that, resting on it, the screw is not far enough from the bottom of the drum and the heads of the bolts that attach it to the gearbox.
In the upper part of the drum (from the side of the trimmer motor), a hole with a diameter equal to the diameter of the snow pipe is cut. This pipe is welded to the edges of the hole and the weld seam is carefully welded. The snow deflector must be directed away from the machine operator. The optimal angle of inclination of the pipe is selected, depending on the characteristics of the terrain on which the snow will be removed. It must be sufficient for the snow jet to reach the desired length.
Front end and bucket
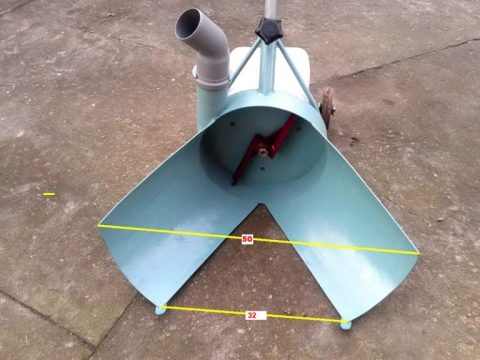
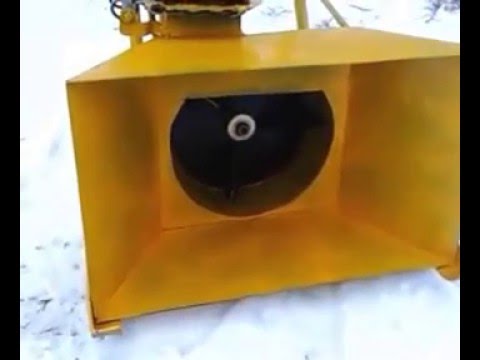
The front part of the drum body is half covered with a metal plate. Its fasteners must provide for the possibility of installation / removal. This is necessary in order to be able to periodically clean the drum from frozen snow and to remove the nozzle from the trimmer. To do this, "ears" with holes are welded to the drum body through which the face plate can be bolted. Holes must also be made in it, located opposite the "ears" of the drum.
The bucket, designed for picking up snow masses and feeding them to the screw, is made of the same metal as the rest of the parts. It is a scoop plate welded / bolted to the bottom of the snow plow body. Its leading edge must be sharpened unilaterally. This is necessary to improve penetration into frozen snow.
Other homemade options
Thanks to the economical and reliable engine, the trimmer is the basis for many other homemade products. Below we will briefly describe the possible options and provide video instructions for their implementation.
Converting a trimmer to a chainsaw
A gasoline brushcutter can also make a chainsaw. To translate the rationalization idea into reality, you will need old device models. All details will be taken from them. The video below shows the result.
Converting the trimmer into a gasoline saw consists in installing this part from the brushcutter instead of its own engine on it.
Making a snowmobile for children
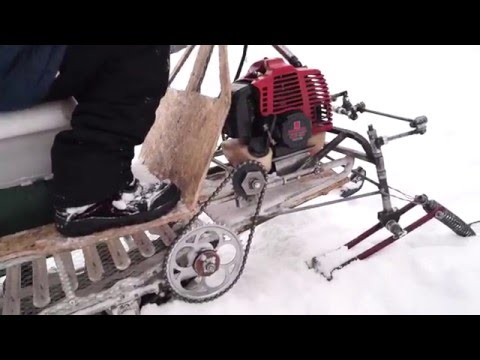
The trimmer can also be converted into a snowmobile. The process consists of installing the engine on a structure equipped with skis. Due to the insufficient power of the motors available on the brushcutters, the created independent technique is capable of transporting only a relatively small weight. She also moves on relatively flat terrain. This homemade product will serve as an interesting and useful toy for children.

The videos below show some possible options for homemade equipment:
DIYers have come up with many different ways to adapt the motor from the trimmer to the snowmobile. Here, the limitations are associated with personal imagination and the existing list of unnecessary devices and techniques that can be used to create homemade snowmobiles.
Motobur
Motor-scythes can be converted into a motor-drill, which will also be used as an ice-screw if necessary. As a result, construction work will be accelerated and will require less labor. With a motor-drill, recesses are made for the posts of fences, a foundation made of piles and for the erection of other structures.

Scooter
In addition to the bike, the scooter engine is also installed on the scooter. The assembly principle is similar to the creation of a motorbike, only the design features of the scooter are taken into account.
The video below shows an airplane, the engine of which is taken from a gasoline spit.
Having at your disposal an old worker and an unnecessary trimmer, you can make various technical devices with your own hands, not only those discussed above. Your own imagination will tell you different options. But, creating any device, you should remember that it would be safe for the people around and using it.
A garden trimmer is a tool with which the owners of summer cottages, cottages and country houses take care of the grass lawn. But often home craftsmen are looking for another use for a hand-held mower due to the impossibility of using it for its intended purpose. These can be situations when a garden tool is out of order, or if it is much cheaper to buy it and convert it into another device than to buy a factory-made product. What and how can be made from a grass trimmer, and will be discussed in our material.
What trimmer can you make a snow blower
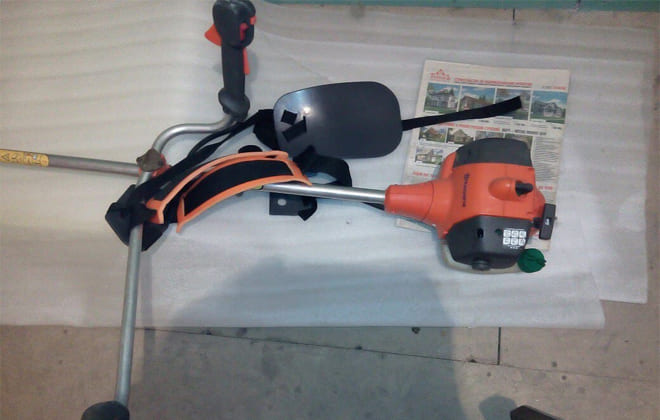
If the farm has a petrol or electric scythe, there is no need to rejoice in advance and rush to re-equip it. It is not always possible to make a homemade snow blower from a trimmer due to the design features of the unit:
First, look at the power. A weak engine will warm up quickly, it needs rest more often, the snow will be thrown over a short distance. For a snow blower, it is best to consider a trimmer with a minimum power of 1.6 kW.
With such data, a homemade snowplow will throw snow 3 m.
Secondly, they pay attention to the design of the trimmer bar. If it is bent, then you shouldn't even try to use the unit for conversion.
The torque in such rods is transmitted through a flexible cable. The mechanism is very weak and will not be suitable for normal rotation of the snow thrower impeller. The snow blower can only be assembled from a trimmer with a straight bar.
If all these brushcutters meet the requirements, they take a tool, look for drawings, start to modernize the unit with their own hands.
Interesting: Electric and petrol mulching lawn mowers and their characteristics
How to make a boat motor
To make a motor boat out of a rubber boat, it is enough to mount an engine from a lawn mower into it. For manufacturing you will need:
- trimmer reducer - 3 HP power;
- sheet steel - 2 mm thick;
- clamp;
- welding machine, grinder, drill;
- fasteners.
First, the bent shaft is reworked and a screw is made. Then a switch is installed in the engine instead of a plastic lining and the shaft is fixed.
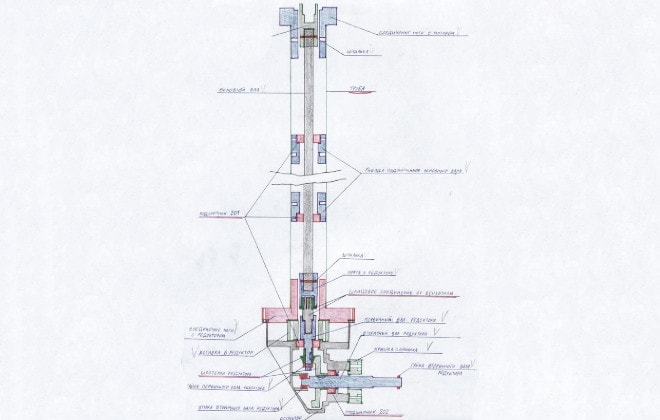
- To remake a bent shaft, take a cylindrical nut with a thread inside. The height of the nut should be 2 cm. Unscrew the nuts and bolts.They have a non-standard thread, so they are retained.
- Then the nut is removed from the rod and the shaft is pulled out. A sleeve located on one side of the boom is sheared off and the protector is pulled out.
- Instead of a metal pipe, a duralumin model is used. Its diameter should be less than the diameter of the sleeve. The pipe is bored a little and a bronze sleeve is inserted into it. The sleeve is pressed along the groove with a hammer so as not to spoil it.
- To install the protector into the bar, cut or grind it to the desired diameter.
- The flexible shaft is replaced with a steel bar. It is connected to the motor shaft, then a screw is screwed onto the shaft. All are fixed with a nut.
- The bar with the inner shaft is fixed with adapters on the engine.
The screw is made of duralumin with 2 or 3 blades. You will need material about 30 mm wide and 10 mm long. The material is annealed, then the angle of inclination of the propeller blades is adjusted with pliers. It should be about 10 mm.
snow blower from trimmer.
| Trimmer snow blower. |
|
|
|
||||||||||
| SNOW-BLOWERS from TRIMMER with your own hands / DIY !!! |
|
|
|
||||||||||
| Homemade Trimmer Snow Blower (Part 1) |
|
|
|
||||||||||
| Homemade trimmer snow blower at work (Part 2) |
|
|
|
||||||||||
| Petrol trimmer Groser T 1 |
|
|
|
||||||||||
| Chainsaw snow blower "Ural 2T Electron" |
|
|
|
||||||||||
| Snowplow miracle shovel |
|
|
|
||||||||||
| Snow blower brushcutter |
|
Click to view |
|
||||||||||
| How I did it, mistakes. Snow blower model 2. |
|
|
|
||||||||||
| Blower attachment for brushcutter (trimmer). Blower for motokosa (trimmer). |
|
|
|
||||||||||
| Trimmer snow blower. |
|
Click to view |
|
||||||||||
| Cool homemade trimmer. |
|
|
|
||||||||||
| And yet I DID IT !!! THE SNOW-CLEANER to the walk-behind tractor with OWN HANDS. |
|
|
|
||||||||||
| Homemade shovel to remove snow Uploaded by Gennady Yukhnovets |
|
|
|
||||||||||
| Eternal fishing line for a petrol cutter, weight 410 grams .... Experiment No. 1 |
|
|
|
||||||||||
| WHAT CAN BE MADE FROM A CONVENTIONAL 200 LITER BARREL! Amazing idea! |
|
|
|
||||||||||
| Installing the engine on the bike | Assembling the MOTAX Lampa motorcycle |
|
|
|
||||||||||
| Comparison of two snow blowers for 15 and 30 thousand rubles. |
|
|
|
||||||||||
| Cleaning snow with a tire // From city to village |
|
|
|
||||||||||
| Free rope for lawn trimmer / DIY rope for lawn trimmer |
|
|
|
||||||||||
| Make yourself such a nozzle !!! |
|
|
|
||||||||||
| # 37 Eternal trimmer line # 2. Solution found !!! |
|
|
|
||||||||||
| Homemade Snow Harvester |
|
|
|
||||||||||
| Homemade snow blower from calm |
|
|
|
||||||||||
| Life hacks with a trimmer |
|
|
|
||||||||||
| How easy is it to clean the snow? Review of cordless snow blowers and shovels // FORUMHOUSE |
|
|
|
||||||||||
| Homemade chainsaw snow blower |
|
|
|
||||||||||
| Brush Husqvarna 327LDx |
|
|
|
||||||||||
| Benzokos! |
|
|
|
||||||||||
| snowmobile from trimmer 2 |
|
|
|
||||||||||
| snowmobile from trimmer 2 |
|
Click to view |
|
||||||||||
| snowmobile from trimmer 2 |
|
Click to view |
|
||||||||||
| snowmobile from trimmer 2 |
|
Click to view |
|
||||||||||
| snowmobile from trimmer 2 |
|
Click to view |
|
||||||||||
| snowmobile from trimmer 2 |
|
Click to view |
|
||||||||||
| snowmobile from trimmer 2 |
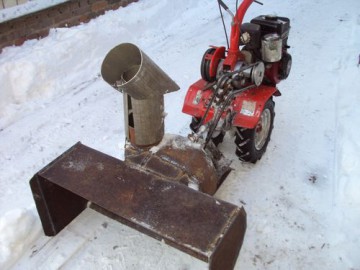
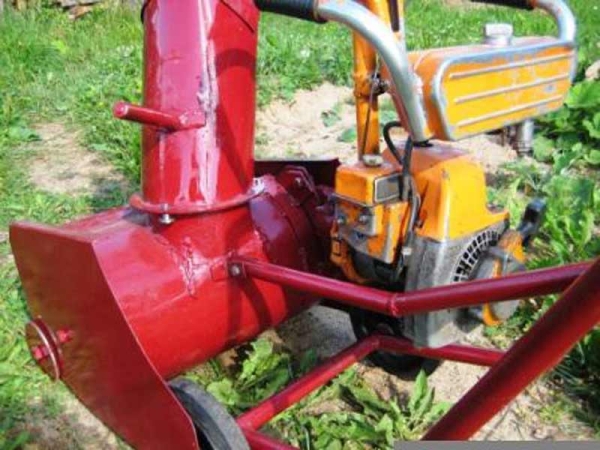
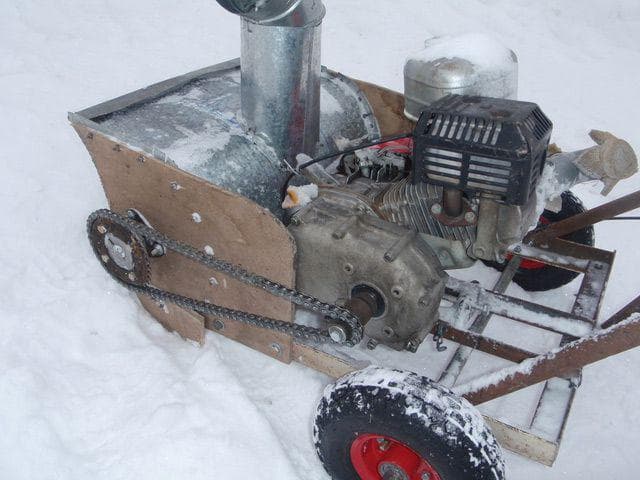
Parts and materials
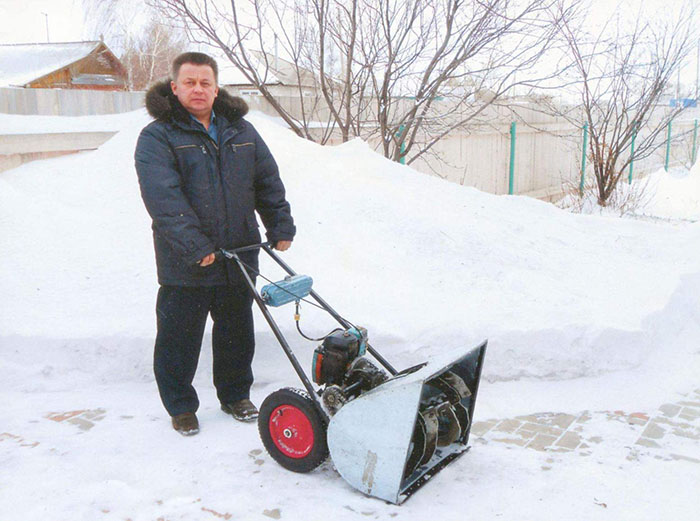
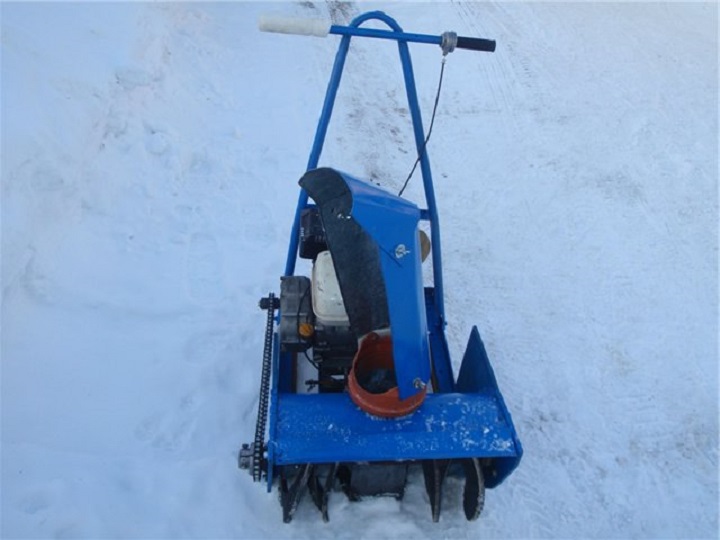
If you decide to make attachments for snow removal equipment yourself, we recommend that you find the nearest collection point for black and non-ferrous scrap metal.
At such collection points, you can find various units from decommissioned equipment that are suitable for a homemade snow blower.
The cost of these units will be hundreds of times less than new ones and tens of times less than used ones.
They might need repairs though.
Therefore, we recommend checking all units before purchasing.
Here is a list of the main parts and materials for making a homemade snow blower with your own hands, which can be purchased at collection points:
- corners for creating a frame;
- metal for hull plating;
- metal to create a bucket or snow receiver;
- metal for the screw mechanism;
- snow thrower rotor;
- pulleys of various sizes;
- gears of various sizes;
- reducers;
- chain or belt drives;
- fastening elements;
- bolts and nuts.


















 Click to view
 Click to view
 Click to view
 Click to view
 Click to view
 Click to view
 Click to view
 Click to view
 Click to view
 Click to view
 Click to view
 Click to view
 Click to view
 Click to view
 Click to view
 Click to view
 Click to view
 Click to view
 Click to view
 Click to view
 Click to view
 Click to view
 Click to view
 Click to view
 Click to view
 Click to view
 Click to view
 Click to view