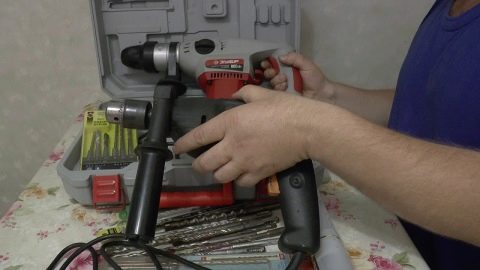
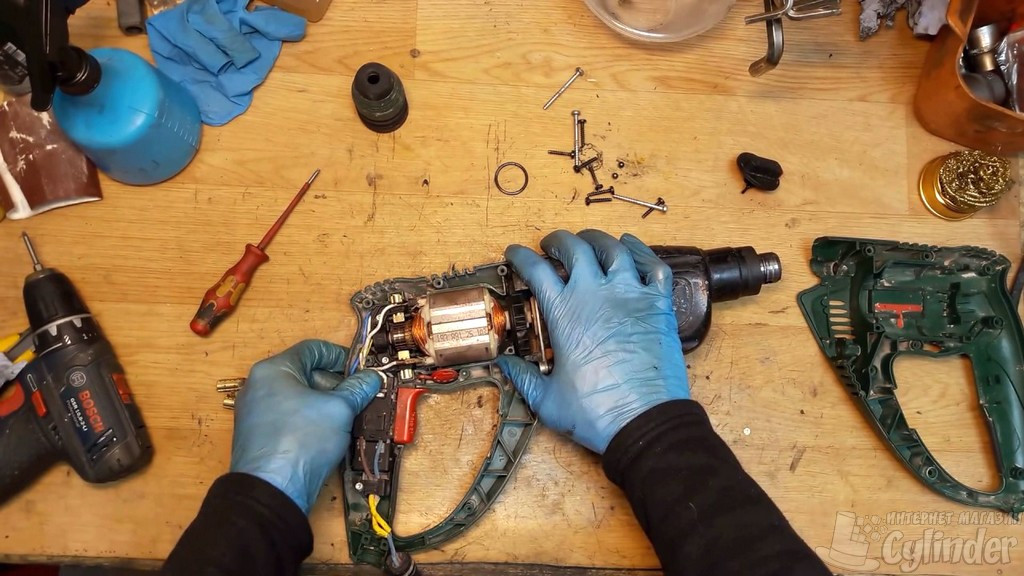
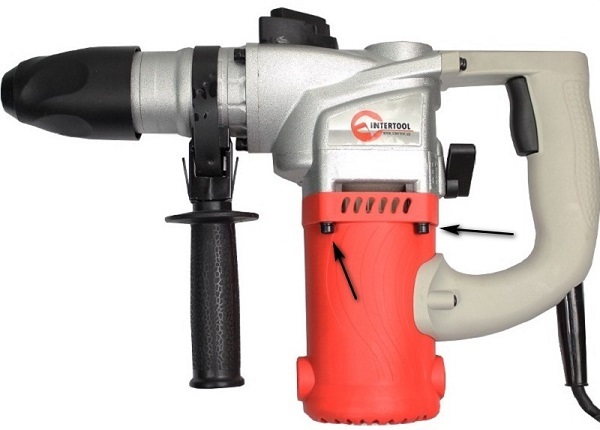
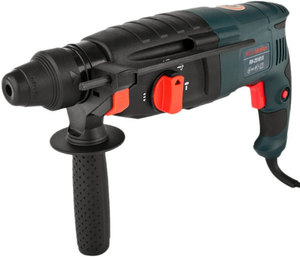
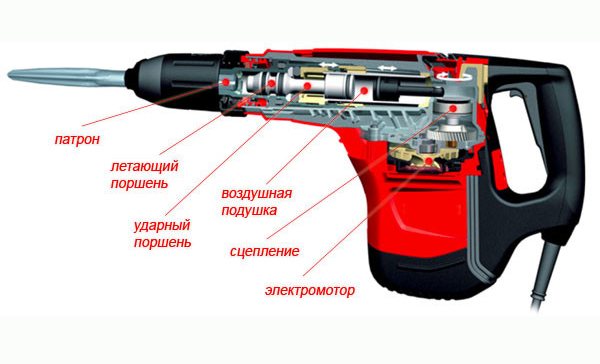
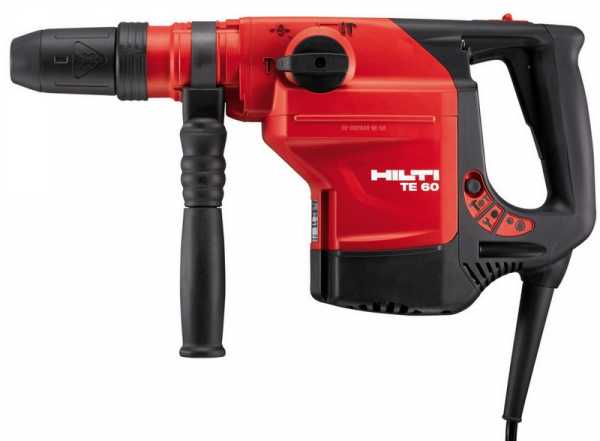
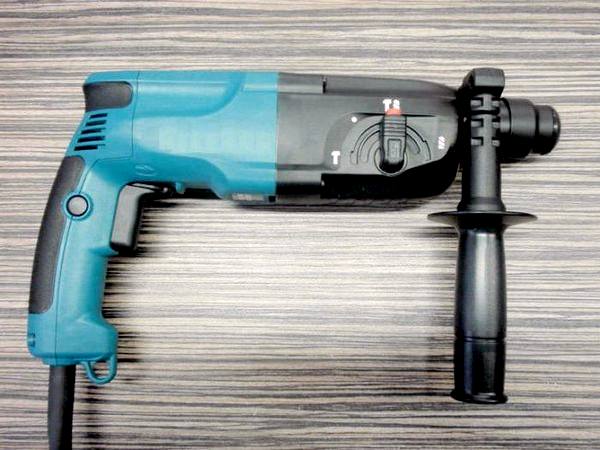
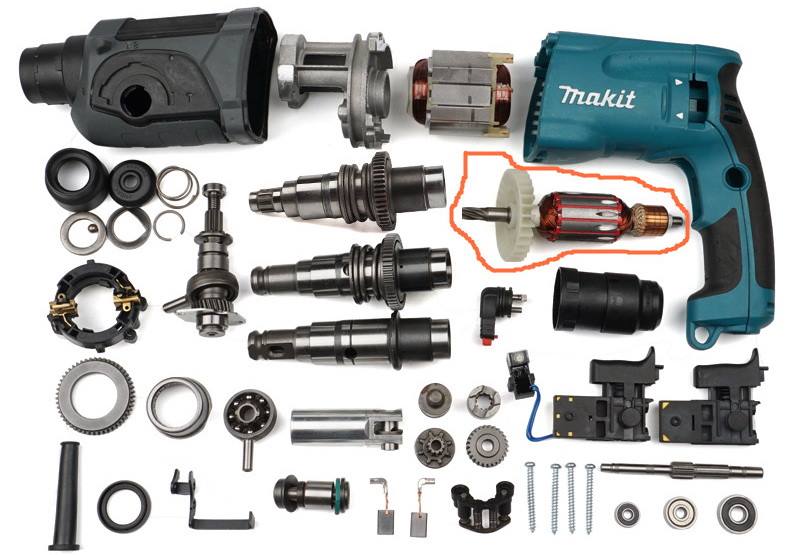
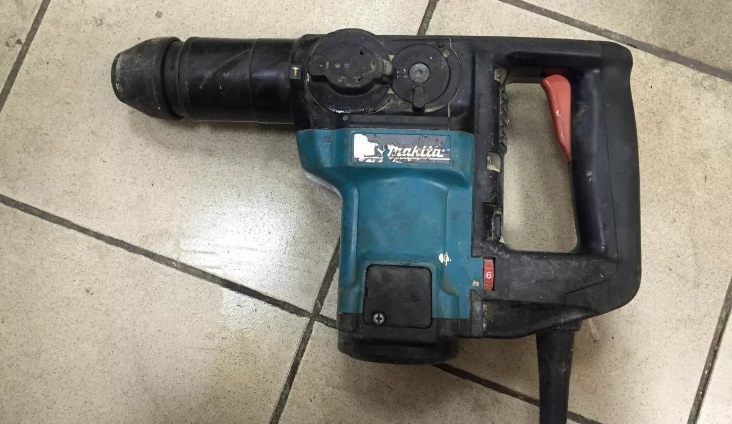
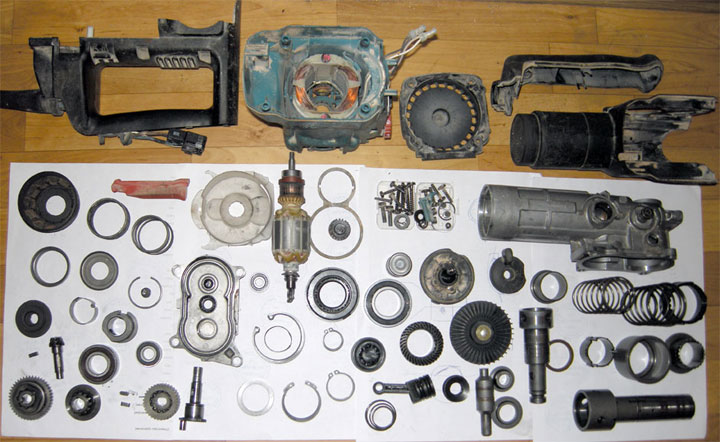
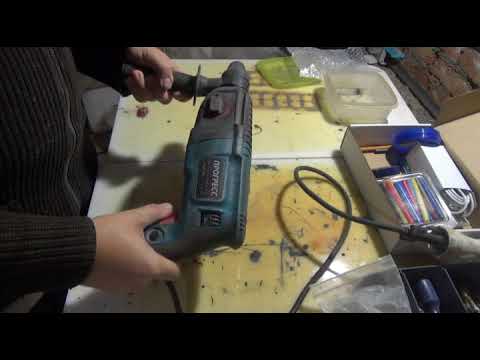
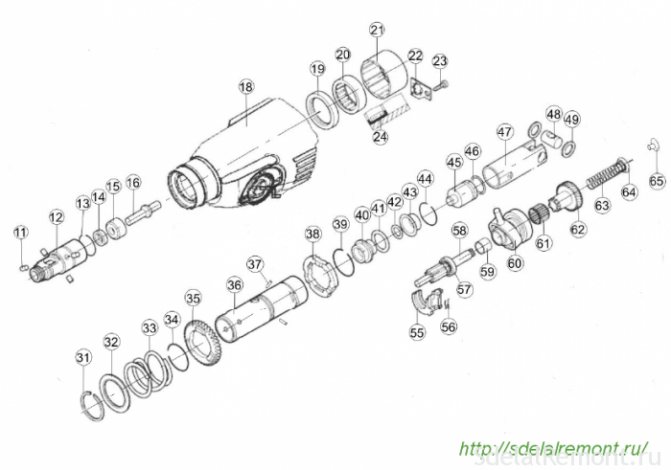
How to disassemble a hammer drill or drill?
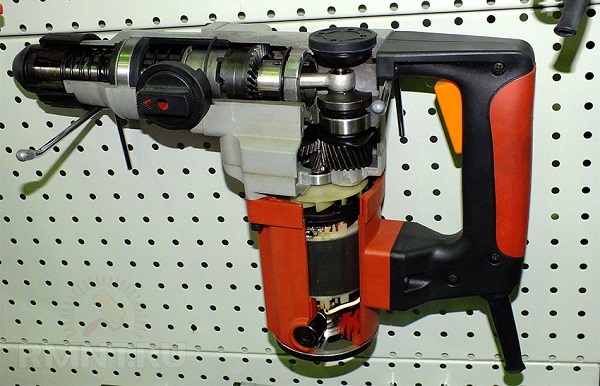
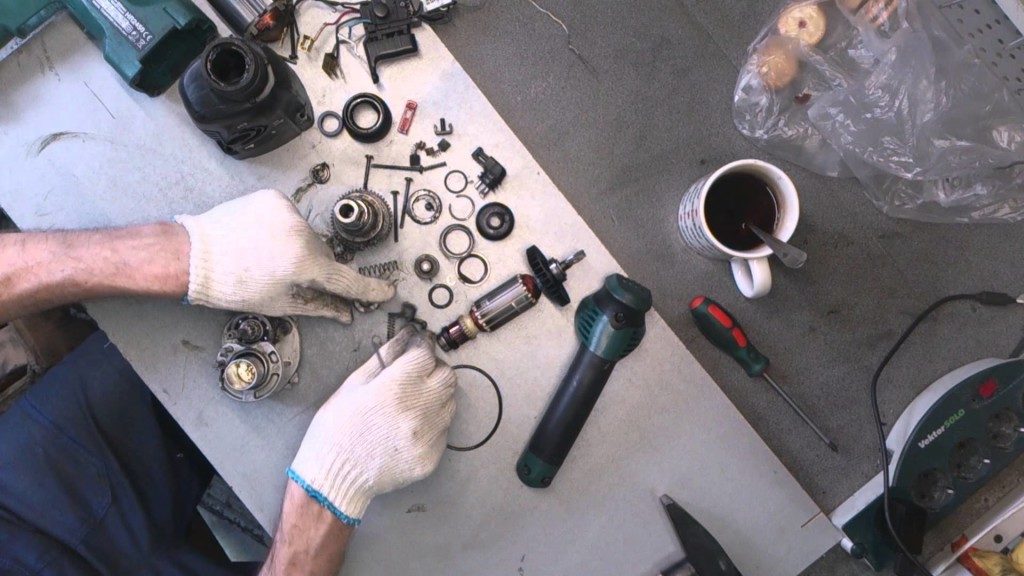
In order to repair a hammer drill, you need to know how and in what order to disassemble the device.
Many may wonder what this is for. The answer is quite simple: if you disassemble the tool into its components and find a breakdown of one of the parts, then you can purchase a new one and replace the spare part. Most may also think that it is much better and faster to take the tool to the appropriate service, and the repair will be done for you. However, first of all, it will take a lot of time to bring and take the tool, which is extremely wasteful with a limited time frame; in addition, it is a waste of extra money for repairs. Thus, by carrying out repairs yourself, you can save money and time for repairs.
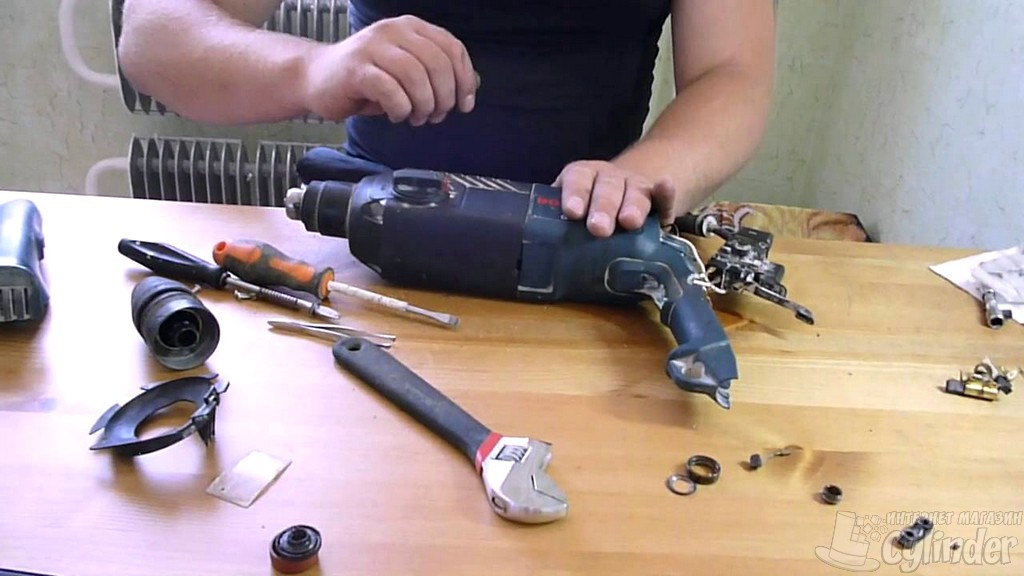
Disassembly instructions:
- You need to start work from the top node. First, the rubber tip is removed, then the washer, at the end - the spring and the ball.
- After removing the ball, you can start unscrewing the screws that hold the body. Next, the overlay on the handle is removed (if available). Only after the work done are the starter wires disconnected.
- It is necessary to remove the brush holder.
- At this stage, you need to separate the gearbox and housing before a gap forms. Through this gap, the switch will be removed.
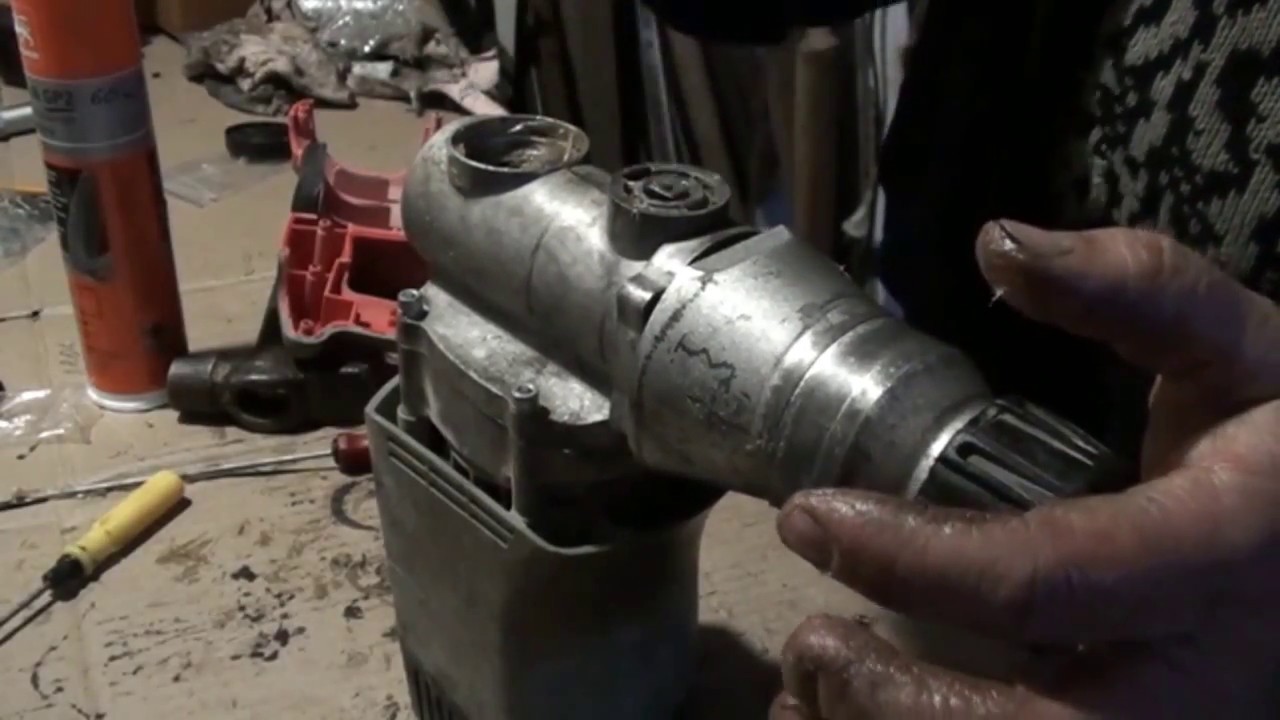
- At the final stage, the punch body is placed vertically and fixed in one position with a vice. All parts and spare parts are carefully removed from it.
Unremoved dirt can further interfere with the stable operation of the rock drill.
Mechanical breakdowns
When repairing an electric rock drill, there is often a need to disassemble it. But before you start it, you need to make sure once again that the problems have arisen precisely in the mechanical part of the device. We will analyze in detail what problems are encountered and how they can be eliminated
Gearbox malfunctions
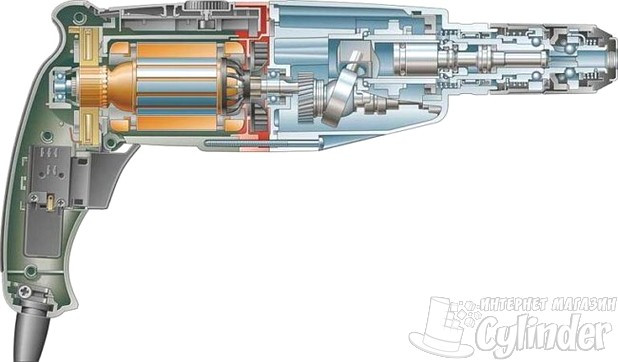
Untimely maintenance, poorly performed repairs, operation of the hammer drill in extreme modes can lead to the fact that any part that is part of this mechanism can fail. To identify defects in the gearbox, it is necessary to disassemble it, rinse the parts and then carry out a thorough inspection.
Gearbox replacement
Revealed damaged parts must be replaced with new ones. Then assemble the gearbox, of course, you need to put grease into it. By the way, the brand of lubricant should be indicated in the operating manual.
Cartridge malfunction
If the nozzle does not enter the working position, then most likely the reason lies in the cartridge. To eliminate this defect, there is no need to disassemble the tool. As a rule, interference with the installation of the nozzle consists in the fact that any debris has got into the chuck.
Defective mode switch
To identify malfunctions in the mode switching device, the punch will still have to be disassembled. In principle, a defect can be identified by a careful examination of the switching mechanism.
Mode switch repair
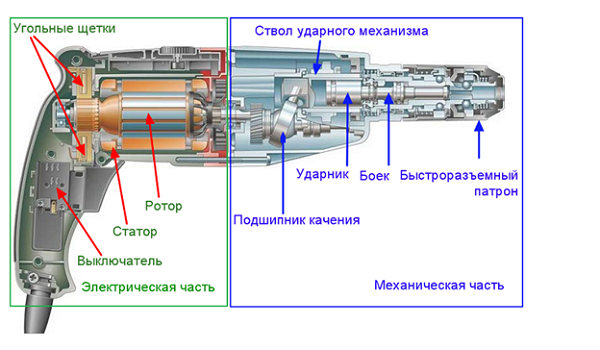
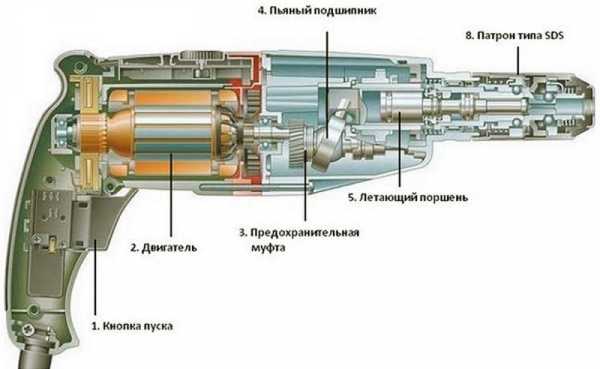
In principle, the main components are listed, in which breakdowns most often occur and require repair. Meanwhile, there are several more types of defects that can arise for various reasons. For example, there is no impact hammer mode. That is, the drill rotates together with the chuck, but does not have an impact on the working surface. The most common cause, in this case, is a floating bearing.Damage to the steel striker may be another cause of this malfunction. In both cases, replacement of the defective part is required.
It is not uncommon for the engine to run when the tool is turned on, but the chuck does not rotate. This happens most often because the gearbox is stuck. By the way, keep the hammer turned on for a long time, it is unacceptable when the chuck is inoperative, the motor winding may burn out. The hammer drill will have to be disassembled and defects in the gearbox removed. They can be caused either by damage to the gears or by debris falling into it.
Another defect is that the chuck cannot fix the drill. This problem can arise with a tool that has been in use for a long time. The cause of this problem lies in the wear of the retainer housing mount.
Possible malfunctions and ways to eliminate them
Malfunctions can also be of two types: related to the electrical part of the hammer drill and mechanical failures.
Electrical malfunctions
The device does not turn on.
This could be due to a broken wire. Very often the cord breaks near the handle itself.
Remedy.
Replace the entire cable or shorten part of it at the point where the break occurred. If the rupture occurs somewhere in the middle, strip it of insulation, connect the parts, carefully insulate the cord.
Poor contact of the elements of the trigger.
Such damage can occur due to oxidation or burnout of the contacts.
Remedy.
Clean the elements or replace them with new ones.
Damage to the extinguishing mechanism.
From a heavy load, parts of this mechanism simply burn out.
Remedy.
can connect the motor directly
Burnout of UUD. There are no options - you need to change the mechanism.
Broken winding. Such a breakdown is unlikely to be fixed by yourself. Need to rewind.
Sparks are visible inside.
Sparks can be caused by the brushes not fitting snugly against the armature. Such a malfunction occurs for two reasons: wear of the brushes or as a result of moisture getting inside the brush body, it is damp.
Remedy.
Insert new brushes or dry them and clean them with a fine-grained sandpaper.
Sparks appear.
This may also indicate oxidation of the armature due to moisture ingress.
Remedy.
Clean anchor
It is important to do this procedure carefully so as not to damage the winding. An eraser or cotton swab moistened with alcohol is best for this.
Smoke came out of the punch.
Remedy.
Visually inspect all elements. If the problem is in the brushes, replace it, in case of a motor jam, eliminate the malfunction (below there is a description for mechanical damage).
Mechanical faults
With mechanical damage it is a little more difficult: the hammer drill consists of many parts, so it may not be possible to immediately establish the cause of the breakdown. The main thing is to carefully visually inspect all the details, and after identifying a breakdown, carefully eliminate it. Here are the main possible damages that you can fix yourself.
The device turns on, but does not hammer.
- Switch. Most devices are equipped with mode switches. This mechanism is susceptible to breakdowns. If the hammer drill stops hammering, most likely the reason is the worn out fingers of the switch. During operation, they constantly come into contact with rotating parts and this leads to wear.
- The branch of the retainer has broken, holding it in the gearbox housing, which contributes to spontaneous switching of modes. You can not change the retainer, if you are not confused by this problem, the punch will still work.
Remedy.
Replace switch. But if there is no suitable switch, and the work cannot be stopped, then you can turn the worn part 180 degrees and you can continue working.
Cartridge. This part of the mechanism is subject to the greatest stress, which can lead to its breakdown.If this happens to the cartridge, then it should be replaced. The only thing that can extend the service life is preventive maintenance: washing from dust with gasoline, cleaning from dirt, etc.
Compressor ring and striker. Their breakdown can occur due to heavy loads. With strong pressing, the striker stroke decreases, which leads to a malfunction. In the event of a breakdown, there is only one way out - to change.
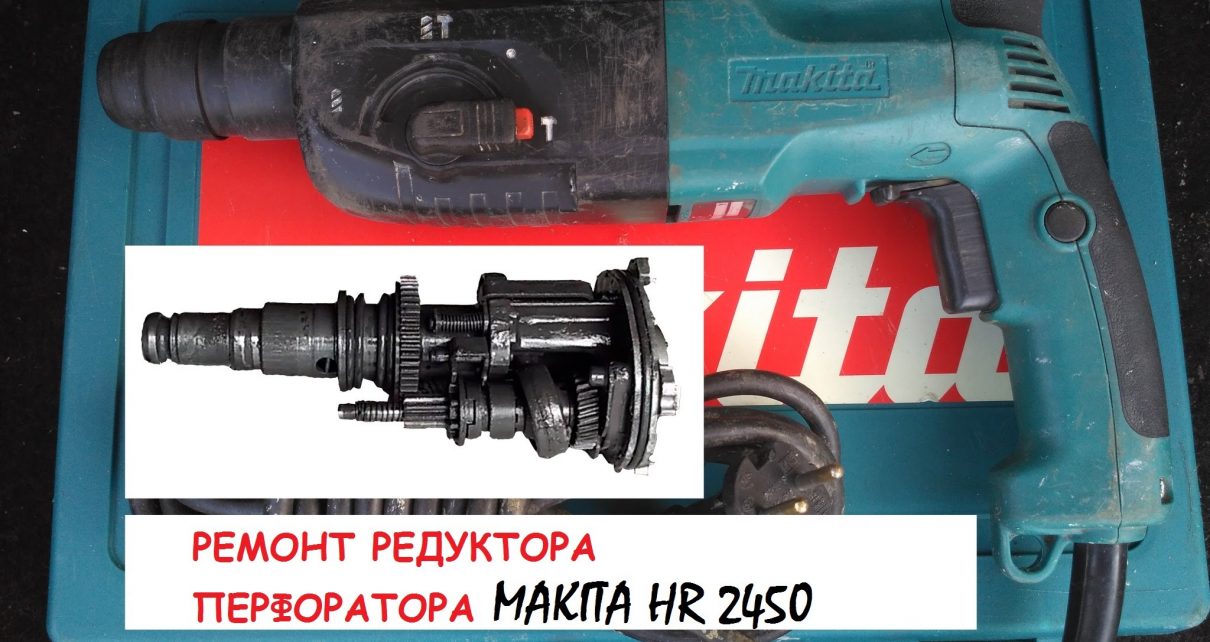
Reducer. If the gearbox fails, you need to carefully disassemble it and check all the parts one by one. The most vulnerable point of the gearbox is the bearing. First of all, we check its integrity. We change it if necessary. If it is intact, the reason may be in the footprint. It can work out and poorly hold the bearing. In this case, you will have to change the punch body itself. Reducer gears may become unusable. Visually, they are easy to identify, but you won't be able to fix them - you have to change them.
Oil leak. In the event of a leak (it should be noted that this happens very rarely), the oil seal should be replaced. It is located in the neck of the body.
Dirt can also interfere with operation. This is evidenced by a crackling or grinding sound. To avoid this problem, regularly clean and lubricate the inside of the rock drill.
It is important to use only one type of grease, the same one used before.
Replacing buttons and brushes
It is quite easy to change the brushes in the hammer drill, the channels for them in some models are brought out and closed with plugs for access without disassembling the tool. Otherwise, you just have to remove the body of the electric motor part of the tool and carefully inspect the manifold assembly. The seats of the brushes are located inside or near the plastic racks that hold the rear bearing plug, two wires go to them. The mechanism for attaching and pressing the brushes varies from model to model.
In most cases, removing the brushes requires only pulling out two metal tabs with pliers, unscrewing a couple of screws, or unfastening the clip springs. During periodic inspection of the brushes, it is recommended to remove and check for chips, clean the seating grooves from dust and dirt. Be careful not to confuse the left brush with the right one; observe their original position when installing. As a rule, brushes are lapped at an individual angle, changing which either requires lapping again, or will lead to the destruction of the graphite element.
When replacing worn-out brushes, it is only important to select the correct size and cross-section, and then grind the brushes by running the engine for 2-3 minutes without load in no impact mode. Now almost every hammer drill is equipped with a set of interchangeable brushes, but a replacement can also be found by the remnants of those that have already worked.
Mounts: what they are + (Video)
The clamping mechanism is attached to the drill shaft using the following methods:
- threaded connection;
- conical connection.
An additional locking screw is often used in the design of a threaded connection, shown in the photo below. With its help, the reliability of fixing the cartridge is ensured.
Chuck, wrench and locking screw for threaded connection
Threaded connection is provided by means of identical threads on the tool shaft and in the bore of the clamping mechanism. The type of thread used in this connection plays a significant role, and they are metric and inch. The thread used on the drill is indicated using a special abbreviation, which looks like:
"1.5-15 M13x1.2"
The abbreviation stands for the following:
| Designation | Decoding |
| 1,5-15 | The first digits of the abbreviation indicate the minimum and maximum diameter of the drills that can be used to clamp with this chuck. |
| M13 | The letter designation indicates the use of a metric type of thread, and the number "13" is its diameter in mm |
| 1,2 | Lead designation in mm |
If the tool uses inch thread markings, the abbreviation is UNF. In modern models of drills, an inch type of thread is used, since the choice of clamping mechanisms with an inch thread is much more extensive.
For reliable fastening of the clamping mechanism, the shaft is equipped with a locking screw, which has a left-hand thread. Therefore, unscrewing the chuck removal screw is carried out in the clockwise direction.
A less common method is to fasten the chuck using a clamping mechanism based on the use of a Morse taper. In this case, the shaft is in the shape of a cone, and the clamping mechanism is equipped with a similar shape in the inner bore. The fastening of the mechanism occurs under the influence of the force fitting of the device onto the structure of the shaft of the electric motor of the tool. Such mechanisms are marked with the following abbreviations: B10, B12, B18, etc.
Key Chuck for Taper Drill (Marking)
The letter designation indicates the marking of the cone, and the digital designation is the diameter of the tool shank. The conical connection is as follows, shown in the photo below.
Chuck Taper Connectors
The conical fastening method is more reliable, since it can withstand higher power loads than the first connection option. In addition, it is easy to use: easy to remove and just as easy to slide onto the shaft.
Finding out how to fix the cartridge
In order to find out how to fix the chuck on the drill, it is necessary to conduct an external examination. Experts at first glance determine the moment, and for inexperienced craftsmen there is a marking by which one can judge the method of fixing the cartridge to the drill. Examples of markings for tapered and threaded connections are described above.
Troubleshooting
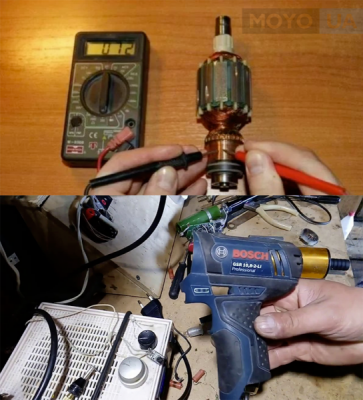
When starting to inspect a punch, they usually start with the power cord and plug. To begin with, it is enough to examine it. For a more accurate diagnosis, use an automotive or household ammeter or multimeter.
If a fault is identified in the cord, it is replaced entirely by picking up or buying a new one, with a wiring cross-section corresponding to the power consumption of the device.
If it was found that the cord is not damaged, proceed to diagnostics of the internal structure of the instrument. The main malfunctions of a punching tool are divided into:
- failures in mechanical assemblies and components;
- failures in the electro-dynamic "stuffing".
Mechanical failures
If the sound of the engine rotation is heard, but the device does not perform its functions, this means that problems are observed in the operation of the mechanical "filling" of the tool:
- the impact is not transferred to the cartridge or to the attachment, i.e. stopped hitting and the blow was gone;
- rotation of the axis is blocked;
- hollows, but does not twist;
- works only in one position;
- the nozzle slips in the chuck clamps or, conversely, gets jammed after work.
Electrical failures
When the device is plugged into the network, but when the start button is pressed, the engine does not respond or starts to malfunction, overheating or strange extraneous sounds - the perforator may malfunction in its power unit:
- a humming sound is heard, but the rotor axis does not rotate;
- crackling and sparks are observed on graphite brushes;
- the body heats up or melts, and you smell burning from the inside;
- does not turn on;
- when the tool is rotated, corrosive fumes and black smoke are emitted from the engine.
In order to repair the power unit, the master requires careful observance of safety precautions. Before removing the casing and starting the disassembly of the propulsion unit, the perforator must be completely de-energized and check whether there is any residual stress on it.
Can I repair it myself?
If no breakdowns are visible during a visual inspection of the perforator, then the next step is to disassemble it.
It all depends on how serious the breakdown is and whether you have certain skills to fix the malfunction of the hammer drill. If we are talking about an old tool that has been serving for a long time and is not of particular value to the user, then you can try and find problems yourself. In addition, if the breakdown is visible visually and there is an idea of what needs to be done with the tool, then self-repair also takes place.
If the hammer drill model is more modern, purchased relatively recently, and costs a lot of money, then it is not always recommended to take on the job yourself, as you can make it even worse. If during the initial inspection no visible faults were found, then it is not recommended to carry out further repairs. Only users with experience and technical skill can repair.
Identifying faults
As noted, some problems can be identified immediately. The main thing is to understand in which part of the puncher the problem was formed.
If you understand that the problem is in the electrical part, then be careful. Check that the hammer drill is de-energized, otherwise the repair of such a tool is dangerous not only for itself, but also for your health.
When the hammer drill refuses to turn on, the breakdown is electrical and you should check for broken wires. In this case, first determine where exactly the wire broke, then replace it or shorten it at the break.
If the perforator is too loaded, then the extinguishing mechanism may burn out. Then you will have to replace all burnt parts.
If there is something sparkling inside, then most likely the problem is with the brushes. They either do not fit tightly to the anchor, or moisture got there and they began to oxidize. Then the optimal solution would be to replace them.
If the water has already hit the anchor, then you will have to carefully dry everything, but so as not to spoil the winding as well. To do this, use a cotton swab and alcohol.
An additional sign of problems with brushes is the appearance of smoke. This means that these devices are worn out, and the wires are in contact with the anchor. In this case, the brushes should be replaced with new ones.
In addition, smoke can mean that there is a malfunction in the motor - it sticks, heats up, and smoke appears from this. Malfunctions in the mechanical part are in most cases determined by ear. Noise and grinding noise are the main symptoms of a problem in this part of the hammer drill. Fixing troubles here is much easier and safer for your health.
The most common sign that a problem has occurred is a decrease in productivity. Often it is because of the breakdown of the switch that the hammer drill stops hammering. It is worth replacing the power button for further work.
Another possible reason for the deterioration of the level of performance can be the contamination of the device. To correct the problem, the instrument must be cleaned and lubricated.
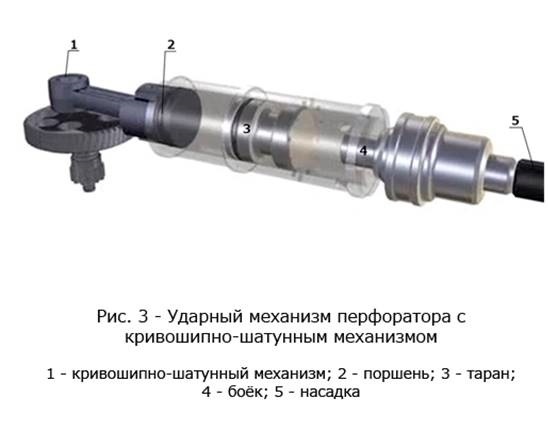
In addition, problems often arise with the striking mechanism itself. But in order to determine the exact cause, it is necessary to examine the entire part, since the problem can be both in the drill and in the small iron ball inside the chuck. Therefore, to repair the percussion mechanism, one should look for the cause in the entire mechanical part of the device.
The main causes of breakdowns of the hammer drill
The main difference between the rotary hammer and many other construction power tools is work in a very dusty environment. Its motor is cooled by a fan. The cooling air contains many dust particles, which, penetrating into the tool, rub against the armature and stator, which leads to their rapid wear. To prolong the life of these elements, it is necessary to periodically clean them from dust.
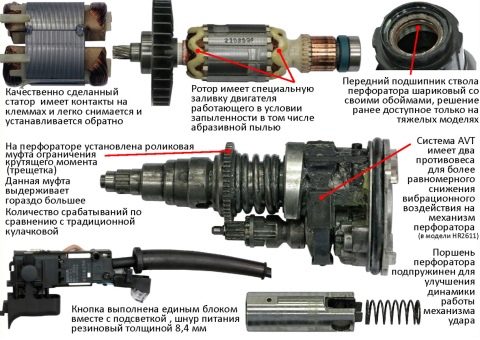
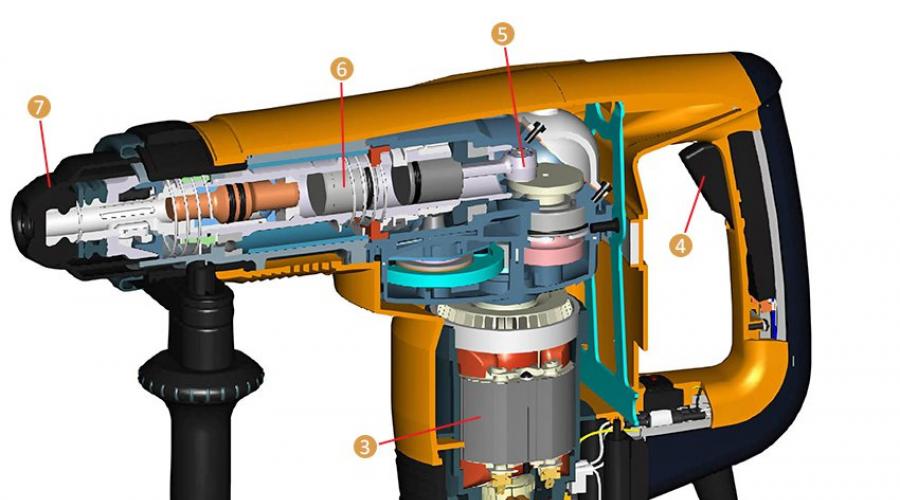
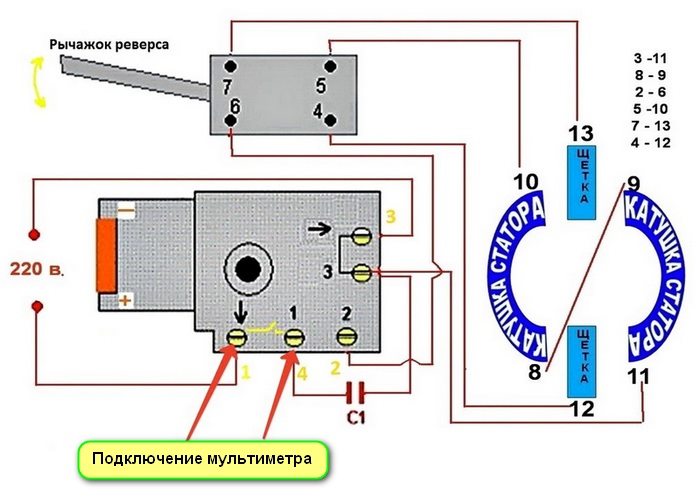
Figure 3. Stator diagram.
Another frequent breakdown of the tool is associated with the mechanism for switching operating modes (rotation, fight, rotation with a fight).Therefore, if your hammer drill does not turn on, for example, the rotation mode, then you should disassemble the tool and visually check the switching mechanism.
Quite often, breakdowns of a hammer drill are associated with the chuck, because it is subjected to heavy loads during operation. You can save your equipment from such damage by periodically cleaning the cartridge from dust and dirt with a rag soaked in gasoline.
Replacing the main components of the punch
Replacement of key elements is best done before the part becomes unusable. This protects the instrument from more severe damage, which is more expensive and time-consuming to fix. Most often, you have to replace:
- bearings;
- start buttons;
- brushes;
- cartridge.
How to change bearings
If, during a routine inspection, grease drips are noticeable on the bearing, it cracks or crunches when turned by hand, this means that it is time to replace it. The bearing is dismantled using a special puller consisting of a screw part and a device for gripping the bearing sleeve housing. Tightening the threads creates a force that pulls the bearing off the shaft.
The puller is driven by the rotation of the threaded rod
Installation of a new bearing at the workplace is done with a rubber or wooden hammer packing
When installing, it is important to avoid misalignment of the bearing axis relative to the shaft axis. Part is lubricated after installation
How the start button changes
To replace the start button, you must remove the cover that covers the electrical equipment of the rock drill. Then you should disconnect the contacts of the conductors connected to it, and pull the button body out of the seat. Install a new button in this place, connect the contacts and assemble everything in the reverse order.
The button turns on the motor and adjusts its speed
How to remove and replace brushes
Replacing the carbon brushes of the collector is carried out with an electrical screwdriver. If you unscrew the lid, you will get access to the brushes. Each part is removed one by one from the sockets of the brush holder. In some models, the device of the pressure mechanism is different, as a rule, it is a spiral spring, which must be removed during replacement.
To remove the brushes, bend the spiral spring
How to replace the cartridge
In most cases, the cartridge can be repaired. If the wear of individual parts has exceeded the permissible limits or if the rubber boot and plastic skirt are damaged, it is advisable to replace the entire chuck.
Replacing the punch cartridge is done with a screwdriver
The procedure for replacing the cartridge is clear from the above procedure for disassembling the hammer drill.
Daily care and storage
In order for the tool to properly serve the master for many years, during operation it is recommended:
run the device "idle" before starting work
If the perforator shows signs of a breakdown, work is stopped and diagnostics are started.
After completing the work, take care of the cleanliness of the perforator - it is important to remember electrical appliances "do not like" water, cleaning is carried out with a vacuum cleaner and rags.
If the hammer drill works in cold weather or is moved indoors from the street, do not start it right away. Let the nodes "warm up" and thaw the grease.
Carry the hammer drill in a special box or suitcase (usually included) to avoid dust and debris.
Thus, if you follow the objective precautions and operating rules of the hammer drill, it will last a long time and without breakdowns. If the trouble nevertheless happened - the proposed advice of the masters will help determine the essence of the problem and eliminate the breakdown in a timely manner.
How to disassemble a puncher
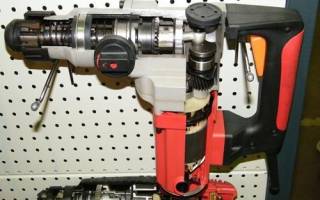
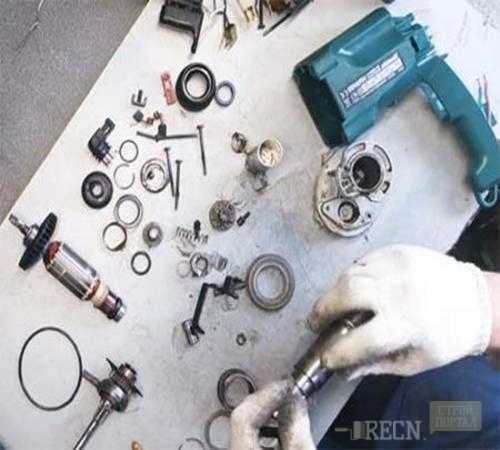
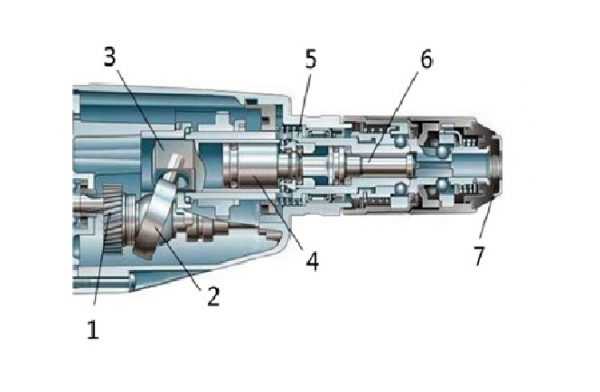
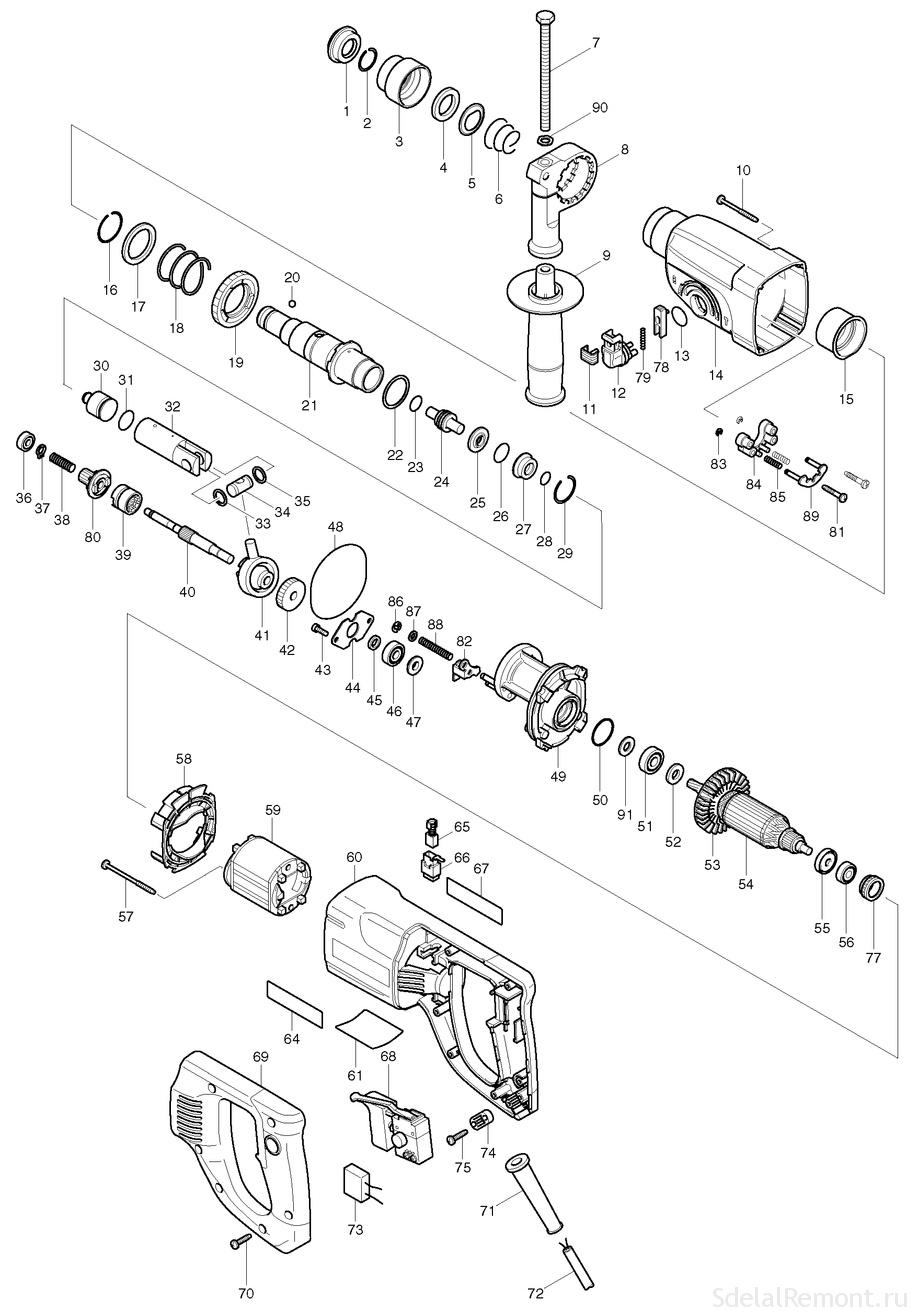
Disassemble the rotary hammer sequentially. Inspect all parts carefully. Even if you are looking for a problem in one node, you can find damaged parts in other nodes.When disassembling the tool, clean the body from dust and dirty grease.
How to disassemble a cartridge and remove a jammed rig
Start by disassembling the chuck so that it does not interfere with the removal of the gear housing.
-
Remove rubber boot 1, retaining ring 2 and plastic boot 3.
-
Further, be careful, as there is a ball in the grooves of the sleeve under the fixing washer 4. He can pop out.
- Carefully remove washer 4, retaining plate 5, spring 6 and ball 7. Depending on the chuck model, there may also be rings, washers and balls.
If the drill or other equipment cannot be pulled out of the chuck, there are two options for solving this problem:
- clamp the rig in a vice. Slightly shaking the punch, pull it towards you;
- clamp the punch in a vise through the rubber gaskets so as not to damage the plastic case. Clamp the end of the rig with a gas wrench. Tap the wrench with a hammer in the direction of the rig axis.
The second option is used as a last resort. If after a few blows the drill or chisel cannot be pulled out, stop. You could damage the hammer drill. Disassemble the chuck and gearbox. Use a punch to punch out the rig. After this procedure, you will most likely need to replace the flare sleeve. To avoid this problem in the future, lubricate the end of the rig.
How to remove the mode switch
In some models of perforators, the switch is removed by turning to the extreme right position, in others - to the extreme left. Consider the extreme right position.
-
Put the mode switch on. If there is no impact mode, into impact with drilling.
- Press the button in the switch and rotate it just below the hit until it clicks.
-
Pull towards you, pry with a screwdriver and remove.
Disassembly of the electrical part of the puncher
- Unscrew and remove the back cover.
- Unscrew the bolts securing the power cord.
-
Remove the button and wires from their slots.
- Disconnect the wires from the stator.
- Unscrew the bolts of the brush holders and remove the brushes.
- Remove dust from the case.
- Remove the bolts connecting the electrical housing to the gearbox housing. Separate both housings with a screwdriver.
- The rotor is connected to the gearbox through the shaft and can be easily removed from it. Remove the bearings from the armature with a puller.
- Remove the air intake from the electrical box.
- Unscrew the stator from the housing. Take a piece of wood and gently knock on the edges of the case, and the stator will begin to come out.
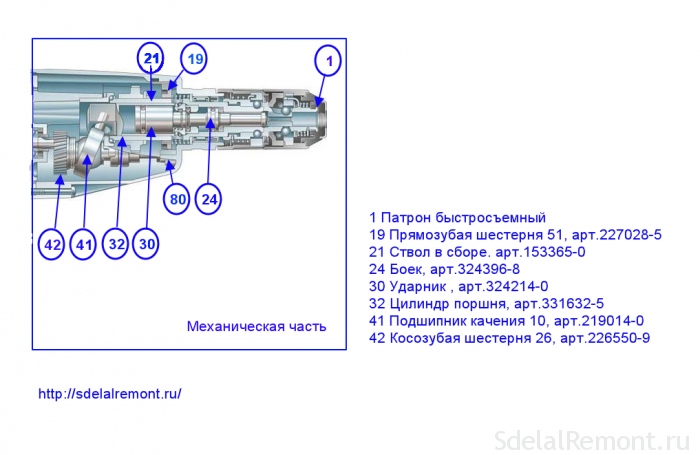
Analysis of the mechanical part of the hammer drill
-
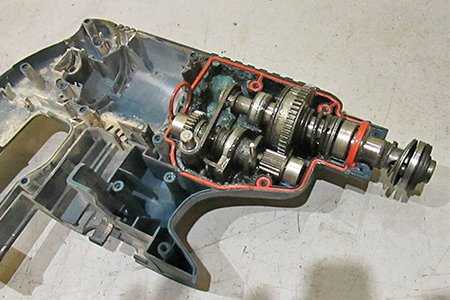
Remove the plastic housing of the gearbox. You will see an aluminum case with a drunk bearing inserted into it, an intermediate shaft, a bushing.
- Thoroughly clean the plastic housing of the gearbox as it contains pieces of a broken bearing. Take the magnet and go through all the holes to remove all the balls and metal debris. Wipe off grease completely. Pieces of the plastic separator may remain in it.
- Remove the intermediate shaft from the drunk bearing.
-
To dismantle the helical gear, remove the circlip and bearing with a special puller.
-
To remove the spur gear, you need to remove the circlip and spring at the other end of the shaft.
-
Remove the sleeve from the sleeve.
- Remove the sleeve from the aluminum housing.
-
There is a striker inside the sleeve. It is pulled out with a bent rigid wire.

