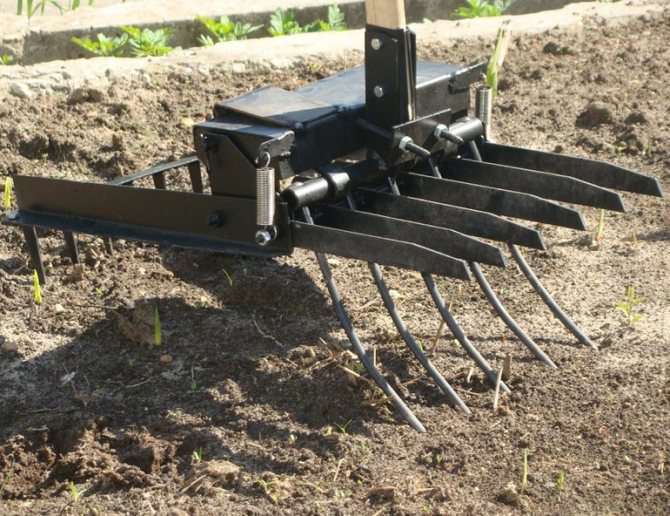
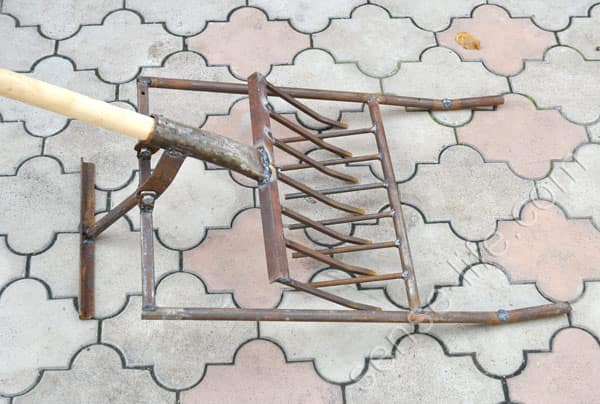
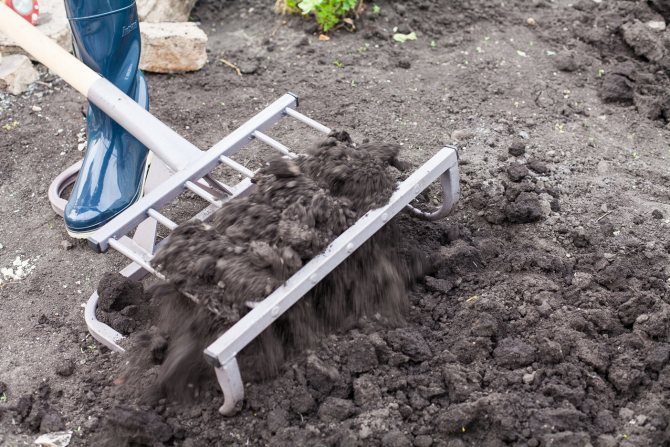
Economical option from one segment
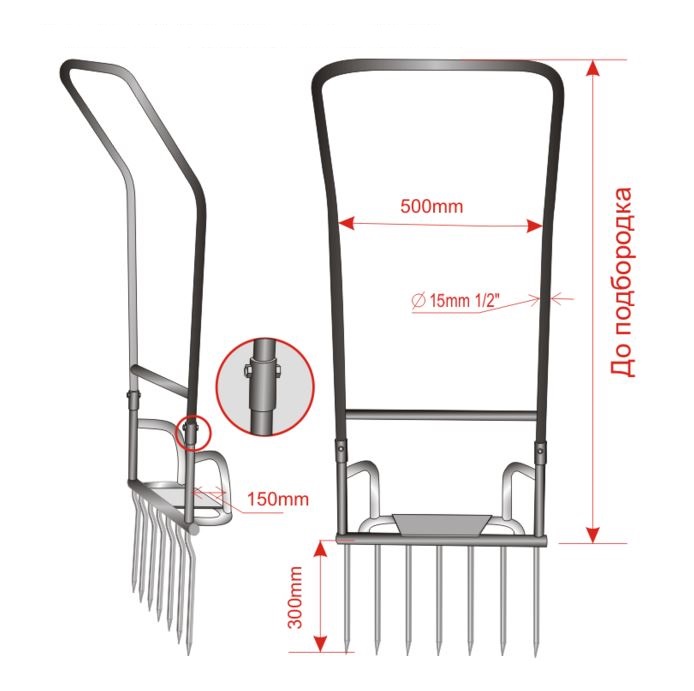
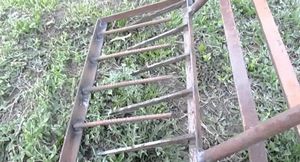
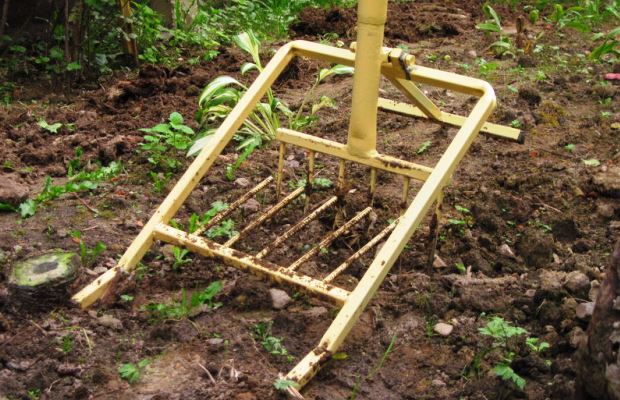
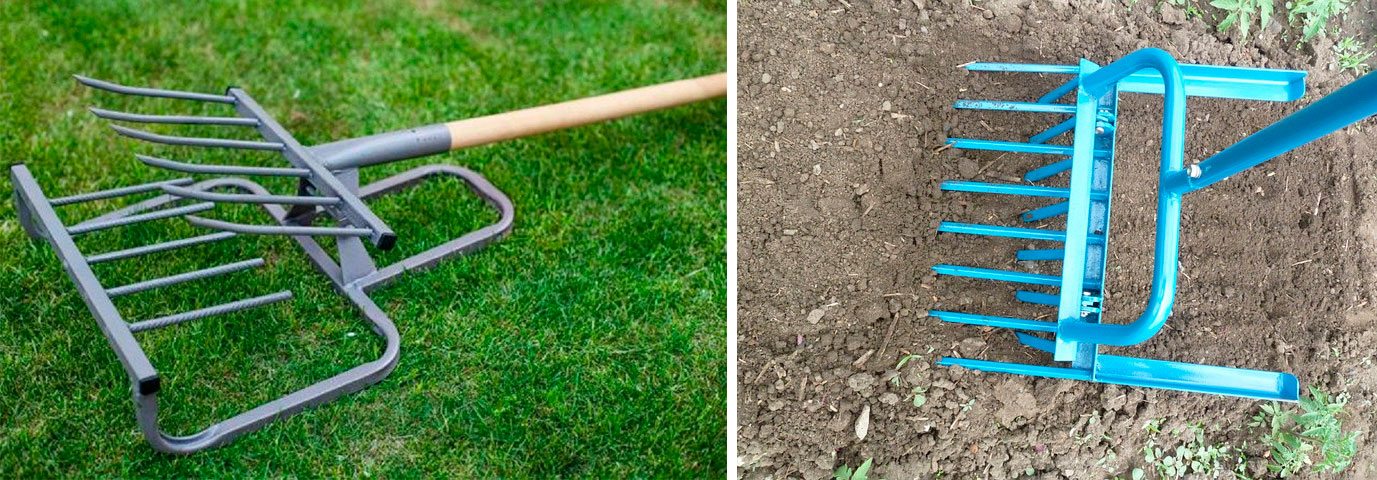
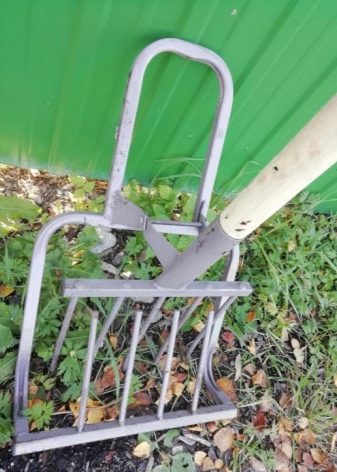
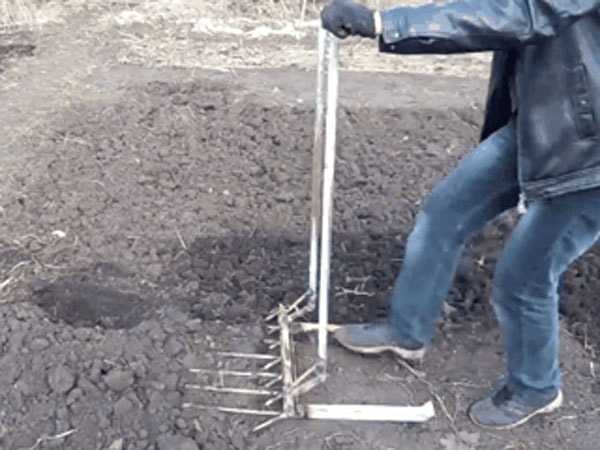
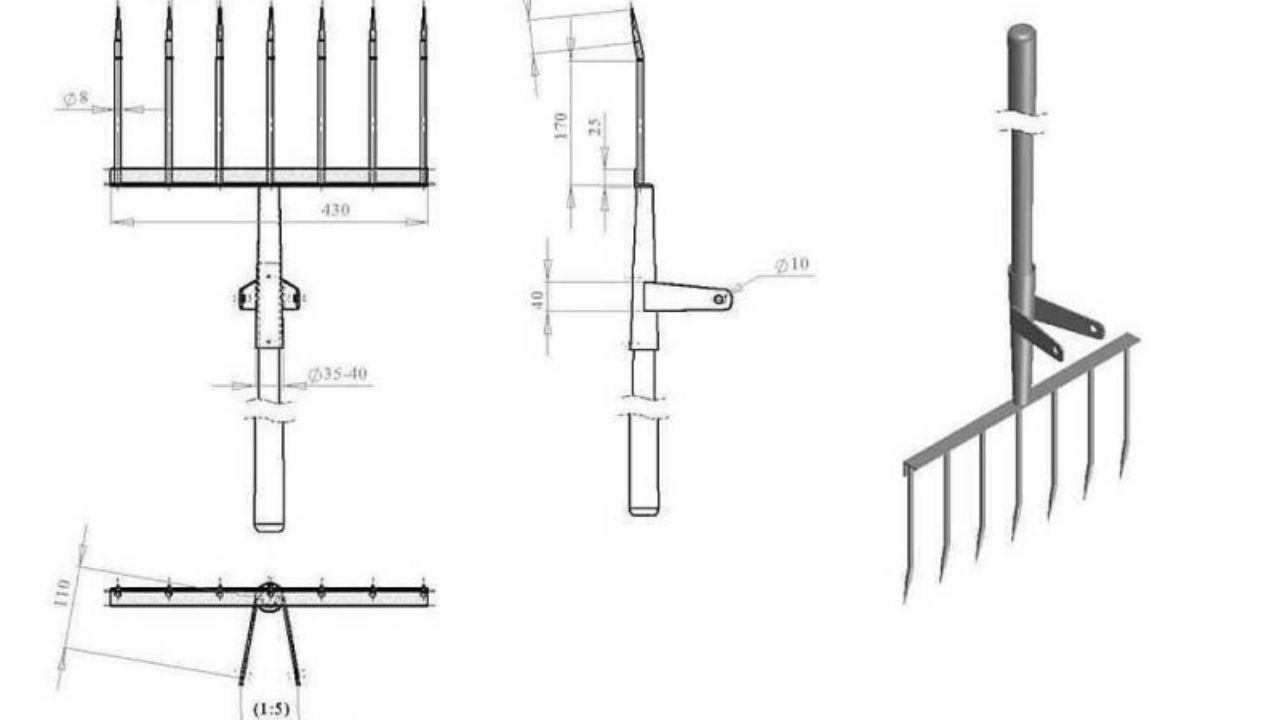
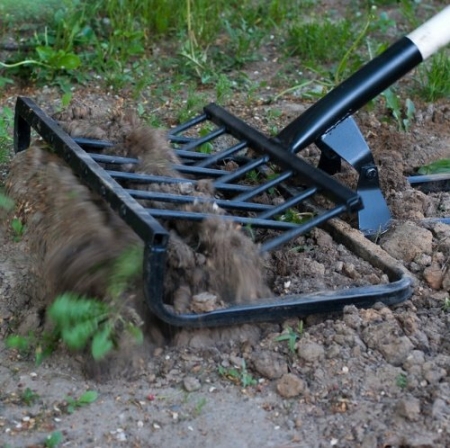
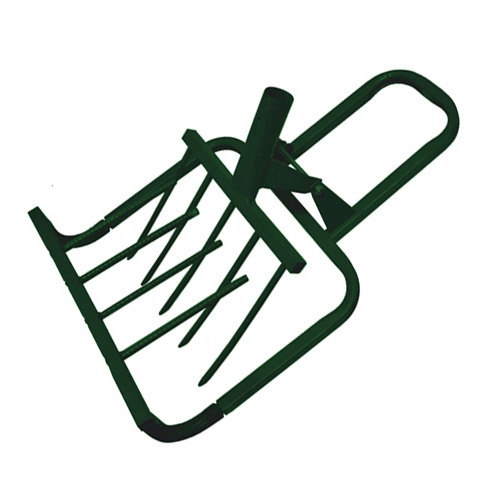
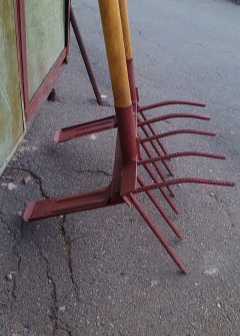
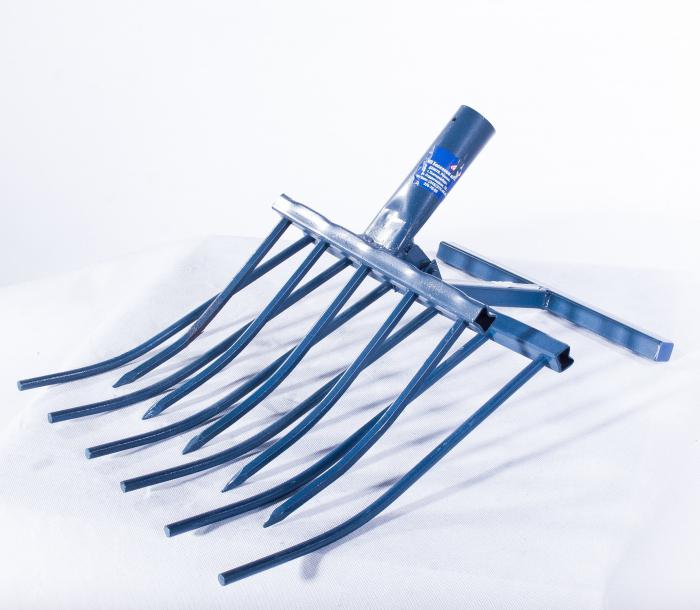
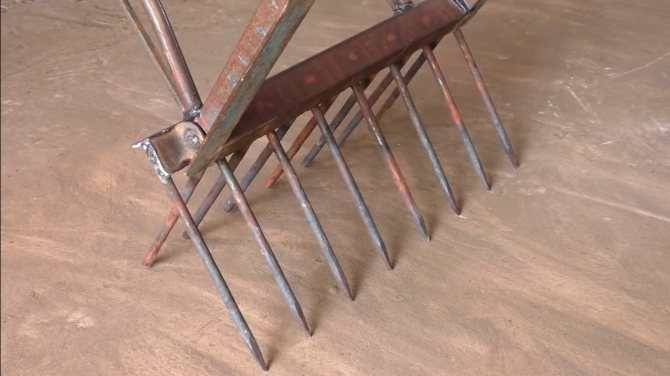
This design consists of only one fork rail. There is no hinge mechanism, the soil is loosened only due to spilling through the teeth. The removal of the stop determines the efficiency of the work.
The shorter it is, the easier it is to dig. But at the same time, the step of advancement decreases. The compromise size is 150-200 mm, depending on your fitness. Such a structure can be made in one day off. At the same time, working with him will save you several dozen free days. However, this shape requires more effort than a two-piece shovel.
Important! Each miracle shovel is created individually. If it will be used by several people - the tool must be adjustable.
An important condition is the complex shape of the teeth. They should be folded as shown in the drawing. This makes digging easier as it ensures the correct distribution of forces. A single-segment shovel does not produce full-fledged active loosening, after digging it is necessary to walk on the ground with a rake.
To increase the efficiency of processing, a more complex device can be made, consisting of two parts.
Revealed merits miracle shovel Mole
First, let's talk about the advantages we noted:
- We immediately noticed its advantage over a conventional bayonet shovel - this is a significant reduction in the load on the back, arms and legs. Back load is minimal. The back and legs do not hurt after work and the next day. You get less tired than working with an ordinary shovel.
- You need to get used to working with a miracle shovel, which happens very quickly. And then it turns out to dig much faster than a conventional shovel.
- We noticed a significant difference in the amount of work performed and the time spent on it. Labor productivity turned out to be several times higher and the amount of dug land turned out to be larger.
- The grip of a miracle shovel is several times wider than that of an ordinary one and, thanks to this, more land is processed in one movement, which increases the processing area. But, at the same time, the condition of the soil and its density play an important role.
- In the process of digging, you do not turn the earth over, but simply loosen it to the depth of the pitchfork.
- Thanks to the unusual design of the shovel, the earth is simultaneously digging and loosening, clods of earth are immediately broken between the teeth, keeping the fertile soil layer in place. In this case, the roots of the weeds are not cut, as with an ordinary shovel, but rise to the surface. Then they can be safely collected with a rake. Although, for convenience, we immediately collected the weeds by hand in a separate bucket. And before planting the seeds, we additionally passed the land with a hand cultivator and a rake.
- Digging with such a shovel, earthworms are not damaged, which is further beneficial for the soil.
Constructions
In addition to the option that is shown above (under the name "Tornado", "Excavator" or "Plowman"), there are several more options for the designs of the miracle shovel under different names.

Assembly drawing of the miracle shovel
Soil cultivator without front stop
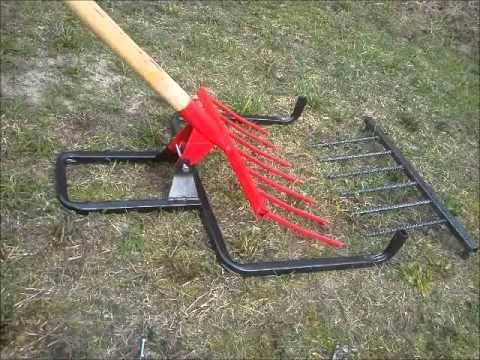
This design also has working and support forks, but does not have a front stop. Therefore, it is less bulky, weighs a little less. But the front stop provides increased stability when working. And the drag weight is not that important.
The handle is attached to the working forks, the back stop is welded to the comb of the second forks. Both of these structures are movably interconnected (even door hinges can be used).

Ripper miracle shovel for easy tillage
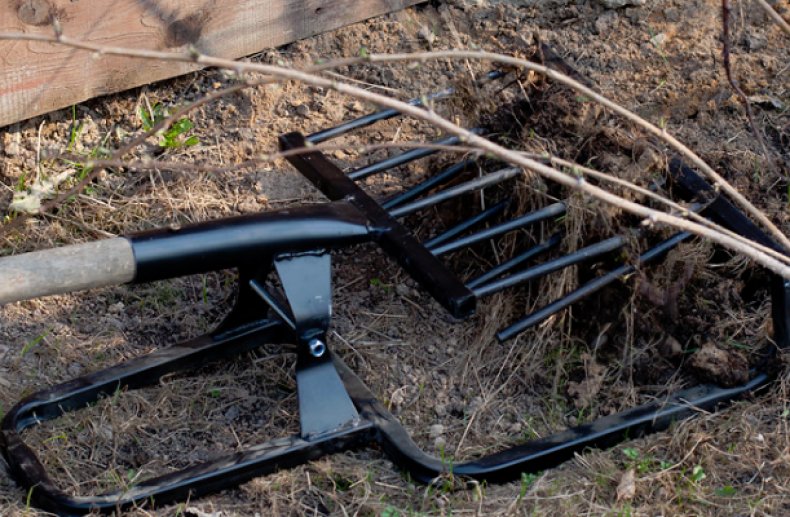
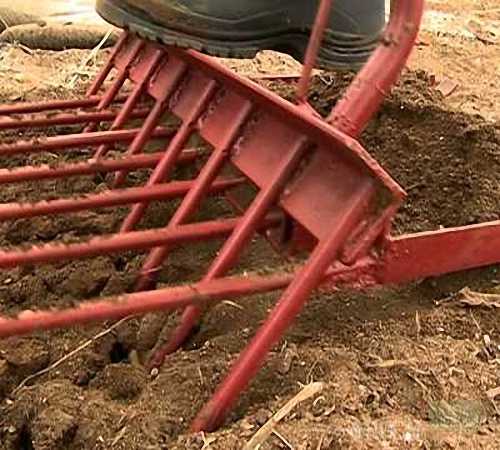
The photo shows one of the implementations, which is made on the basis of a corner and a round pipe. When working, they drive the pins into the ground by pressing on the crossbar, and not on the stop, as in most models.
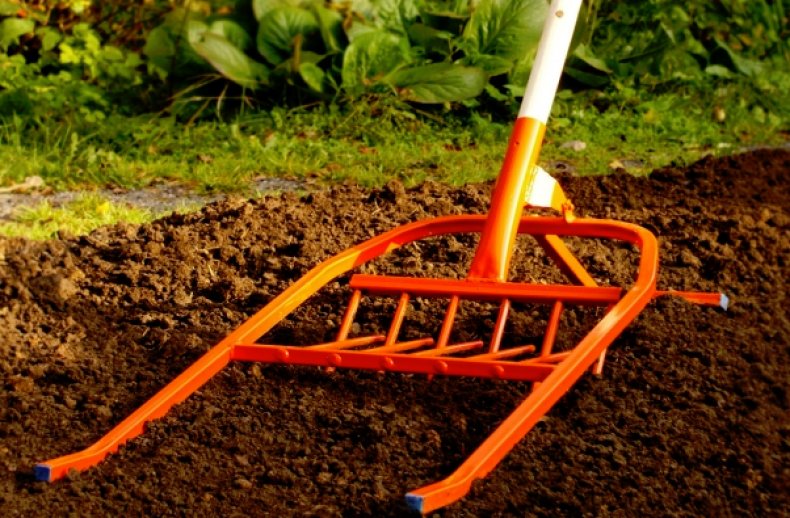
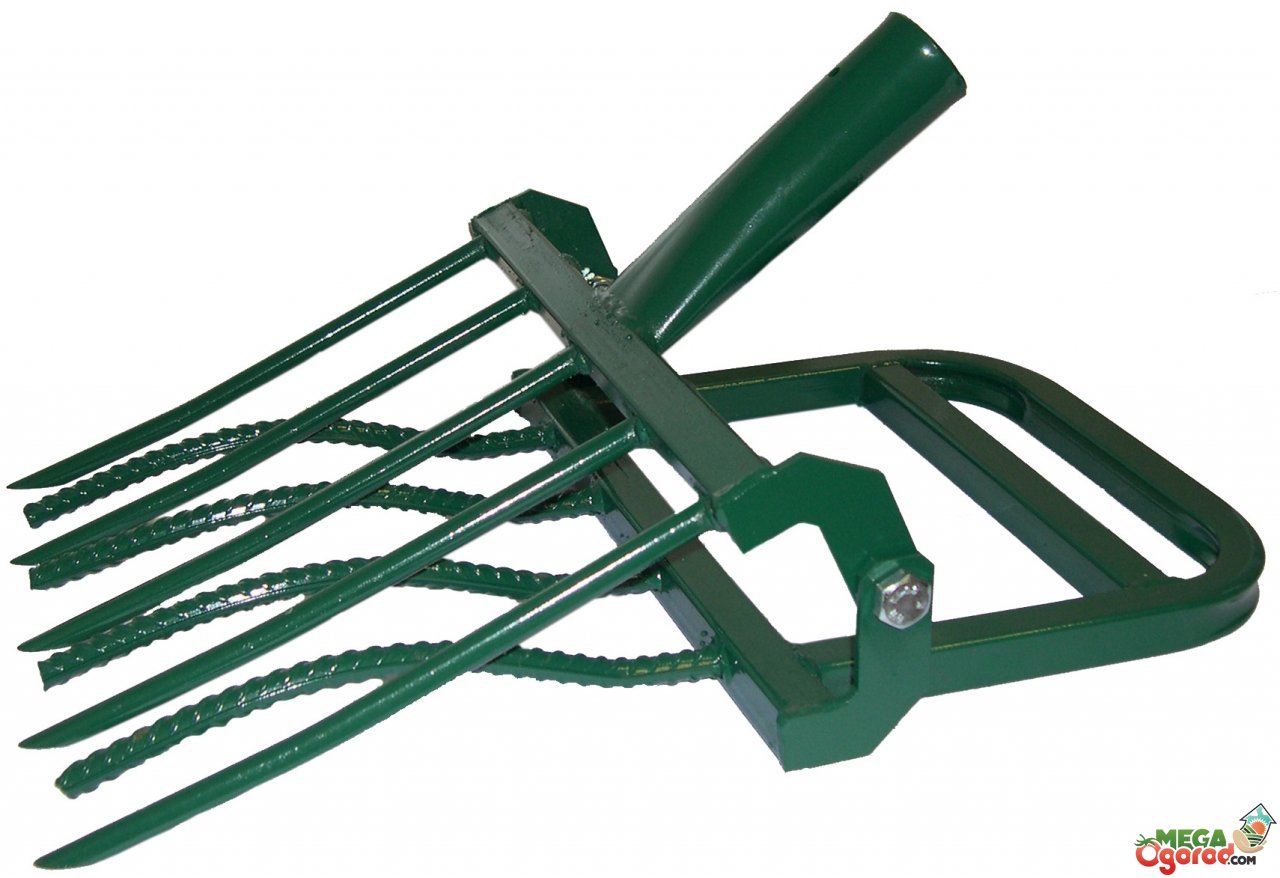
The Digger version is essentially a wide forks with a stop for easier eversion and a high, powerful handle.
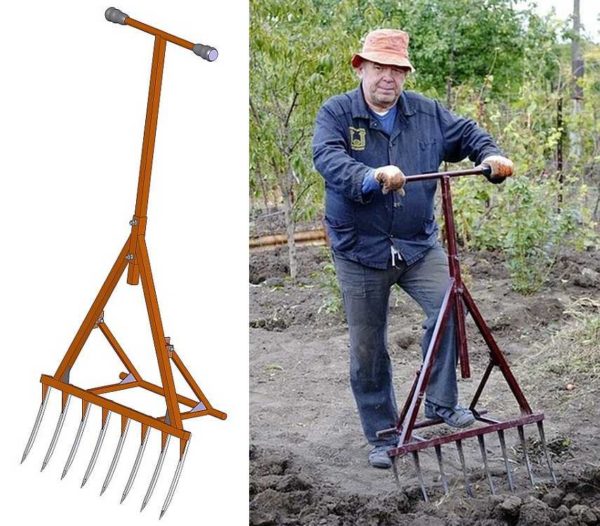
Miracle shovel "Digger"
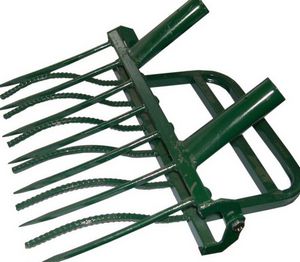
The peculiarity of this design is the stop and the adjustable handle. It is fixed with two bolts, matched to the height of the working person.
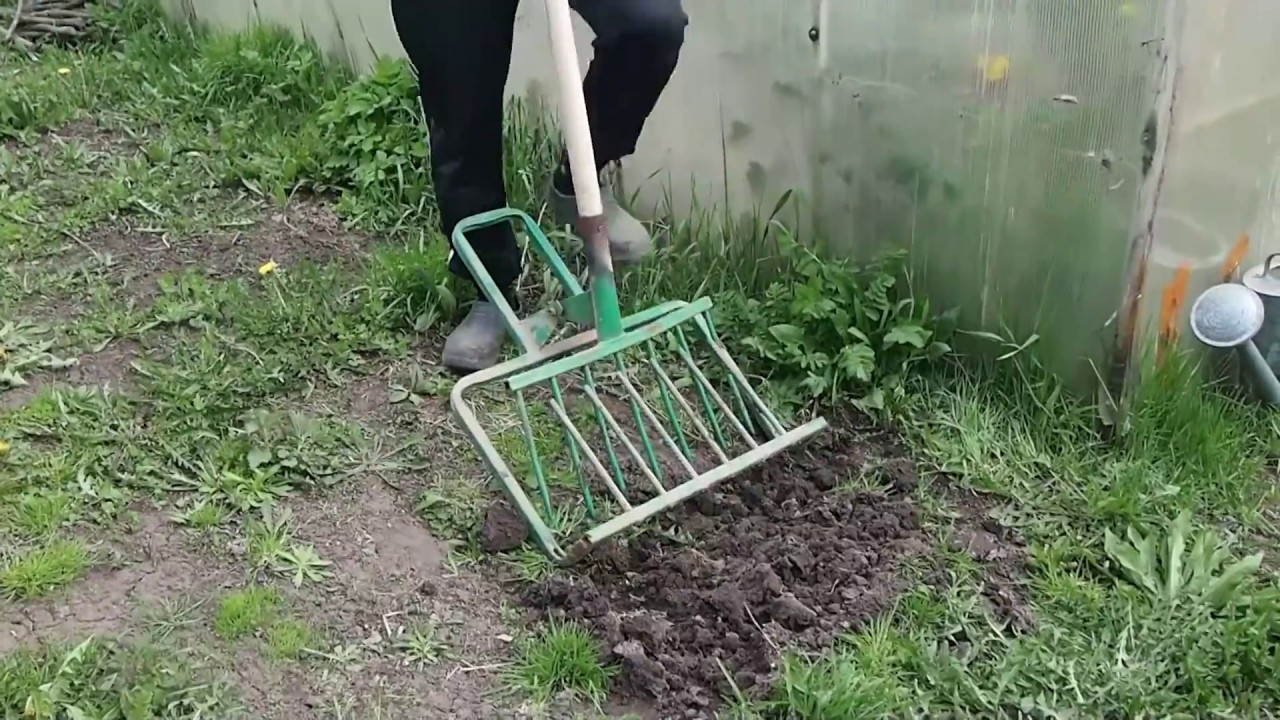
The emphasis is not stationary, but movable. It is fixed to the frame. When the pins are immersed in the ground, they press on it with their foot, then, without removing the leg, they turn it out by pressing the handle of the pitchfork out of the ground.
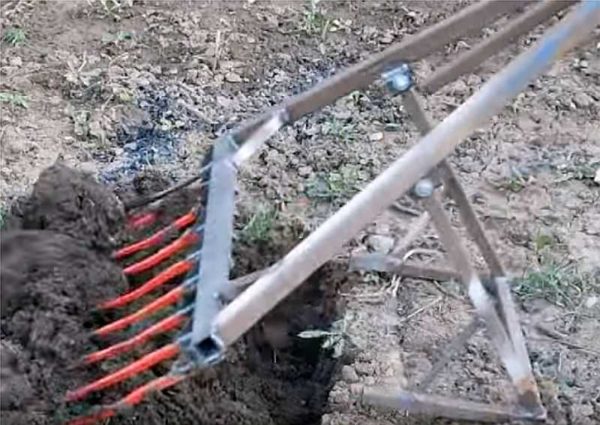
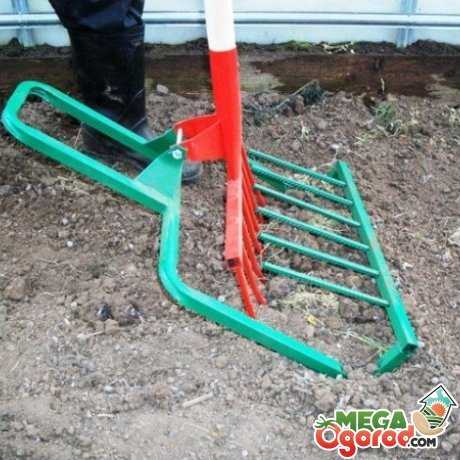
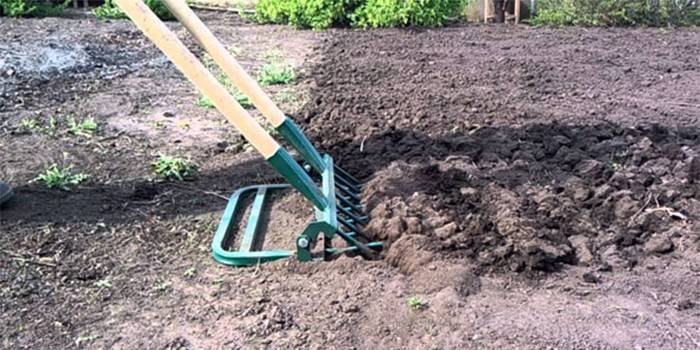
Digger in action
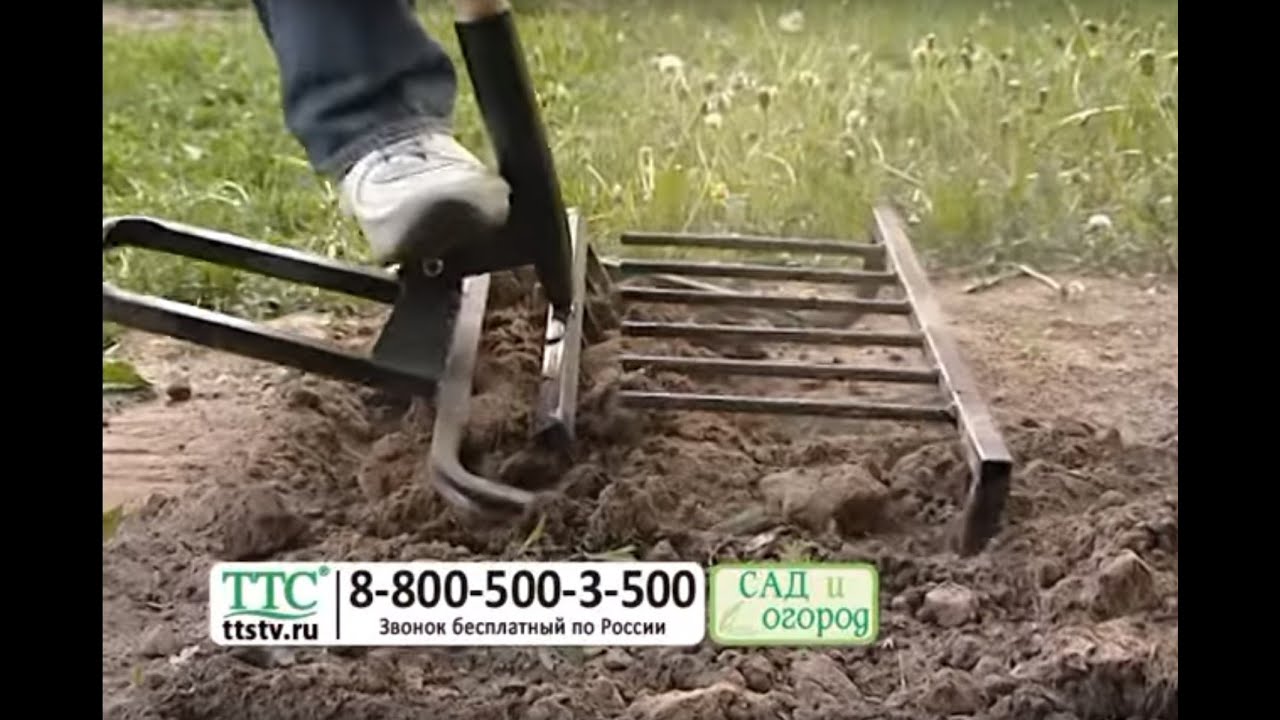
Physical activity during work is low, work is progressing quickly. But this miracle shovel will not work for hard and lumpy soils: it does not crush the soil. She, under her own weight, is pressed through the pitchfork. But this is possible only on loose soils. On clay or black soil, it is better to have a second comb with pins.
How to make a miracle digger, see the next video.
This design of the miracle shovel is slightly different from the previous one. The stops in it are rounded, the handle is arched, but the basis of the structure is the same. Some drawback - there is no way to adjust the handle, but otherwise everything is the same - a movable stop and working forks.

Two options called "Legkokop". The simplest ripper for the garden, garden and cottage
It is difficult to say whether this variation is better or worse. It would be possible to evaluate only by comparing the work of both copies on the same site.
If you watch the following video, you will see that you can dig with such a miracle shovel not only loose soils, but also heavy ones.
And the second thing you can pay attention to - after all, for such a soil it is better to have a second comb of pins, against which you can crush the inverted clods.
Here it is: a miracle of technology
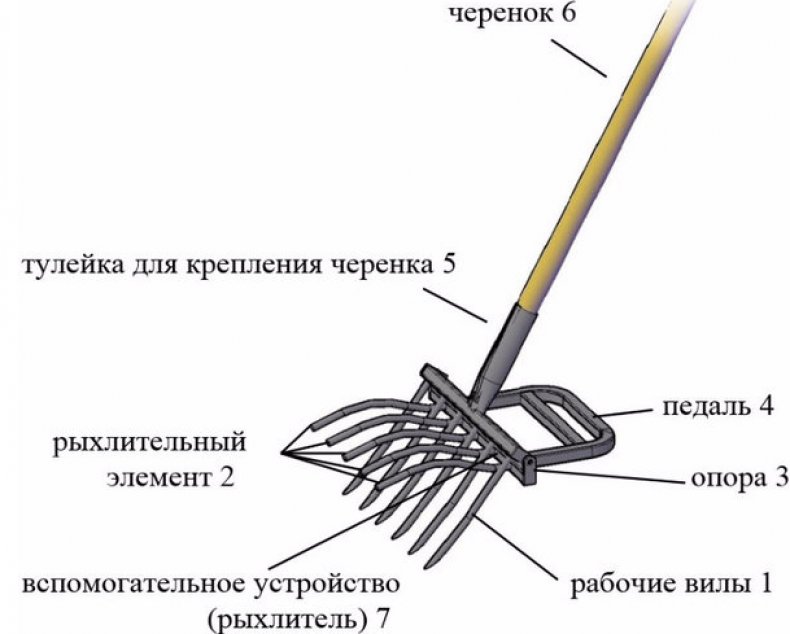
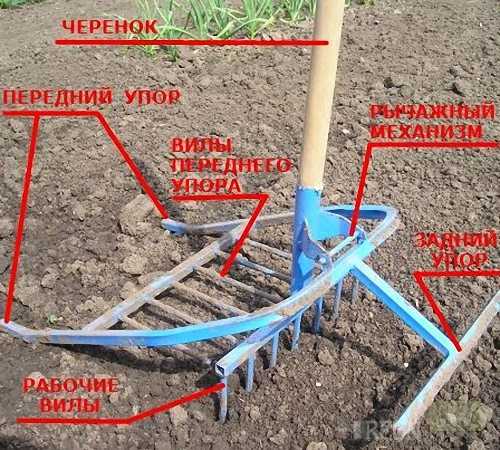
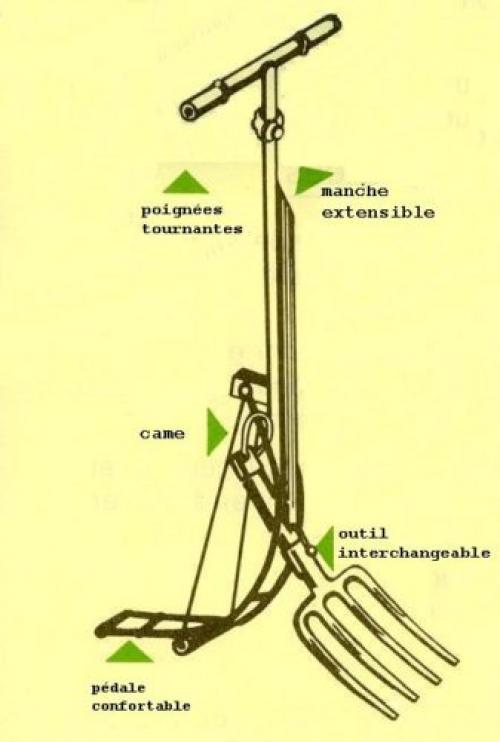
The above tool is a combination of a ripper and a common fork. Such a shovel works on the principle of a lever. Its main details are:
- stalk;
- front and back rest;
- fasteners;
- ripper pitchfork;
- forks for digging.
If you just look at such a device, you will not immediately say how to handle it. Therefore, it is difficult to describe it. If you read user reviews, the miracle shovel becomes an understandable tool, and it is clear that there is absolutely nothing complicated about this unit. The main part of it is the traditional pitchfork, to which we are all accustomed. A handle is attached to them, and from different sides there is a rear stop mechanism. Another pitchfork is in the front. They, together with the main "brothers" converge in the castle. Their main purpose is to break up clods of earth. If the soil on the site is compacted or clayey, then this process is quite in demand. A front stop mechanism is attached to the ripper. Thanks to him, the shovel is stable, and the whole device resembles scissors: they crush large earth clods into small lumps. They, in turn, are fairly easy to level using an ordinary gardening rake.
The miracle shovel is mainly used on large plots of land, but it can also be used on small areas. The miracle shovel, a photo of which can be viewed in our article, speeds up the digging process and makes this process much more convenient.

Features and differences
It would be more correct to say that the miracle shovel is more likely not a shovel in the literal sense of the word, but a soil ripper. Since with its help, they do not dig the earth, but thoroughly loosen it. Most often, such a tool consists of two, in very rare cases - one, strips on which the pins are located. Some models are supplemented with a backgauge, which makes digging heavy earth easier. Visually, the shovel-ripper resembles more double forks.
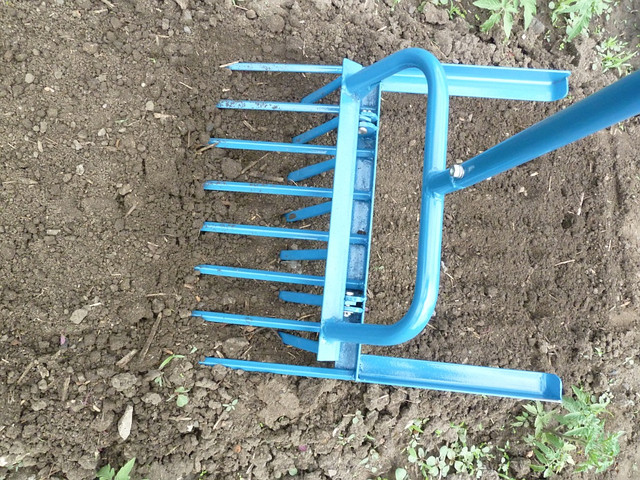
Miracle shovel
What can
The shovel pitchfork has great functionality. When performing work in the garden, a super-shovel can immediately replace:
- Rake;
- Pitchfork;
- Sheep;
- Manure spreader;
- Digger for potatoes.
This is not just a tool change, but also a significant reduction in labor. With the help of a miracle shovel, you can not only dig up the ground to a given depth, but also level its surface.This tedious process becomes quick and easy. Replaces a similar shovel and cultivator.
With this tool, you can dig up potatoes without damaging the roots, collect foliage and perform many gardening and gardening activities.
Important! When working with such a shovel, only the arms and legs are involved, and not the back, since you do not need to bend often, bending over and straightening
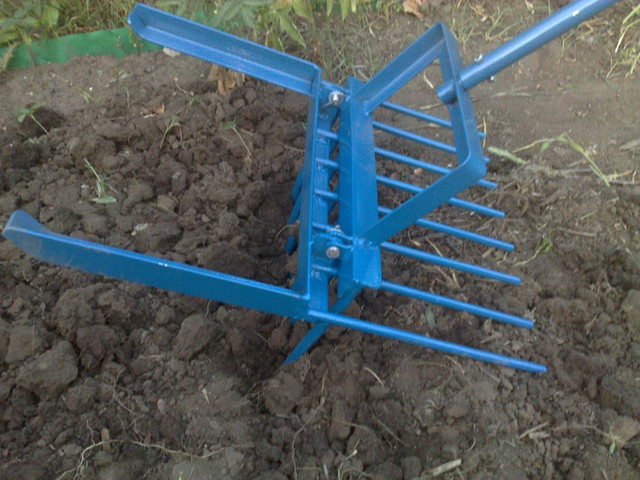
You can use the miracle shovel exclusively on previously cultivated land.
You can use the miracle shovel only on the previously cultivated land, it is not able to cope with virgin soil.
Advantages and disadvantages
The most important advantage of a smart shovel is that it makes it easier to dig the ground. The next advantage is that after working with such a shovel, a person feels less tired than after working with a traditional one.
Also, many people choose such a tool due to the fact that the time for processing the garden is significantly reduced.
Minus one - the large weight of the device. But it does not need to be constantly lifted like a bayonet. The super-shovel is simply dragged along the surface of the earth while digging.
On a note. You need to lift it two times: when you install it at the beginning of the row and when you finish work.
How to work
The use of a miracle shovel for digging the earth gives a lot of advantages when digging: the back does not get tired, the creation of beds is much faster.

The digging process consists of simple manipulations.
During operation, the earth is located between the stop and the forks, it turns out that at the same time the soil is dug up and loosened.
The digging process consists in simple manipulations: first, the pitchfork is stuck into the ground, then the black is lowered. Remove the shovel after each lowering. Similarly, repeat the movement from row to row.
Digging and digging a vegetable garden is now much easier and faster.
On a note. The tool is suitable for everyone, both women and the elderly can cope with such manipulations.
Various tool options
There are fixtures that, although arranged in a similar way, have important design differences. Further on they are described in more detail.
Soil cultivator without front stop
There is no front stop in this type of design. The clod breaking grid is made without a front bar. This slightly reduces the weight of the mole ripper shovel. However, since there is no need to lift the shovel off the ground during operation, this does not provide a significant advantage.

Soil cultivator without front stop
Digger
This option differs from the classic one in that it does not have a front grill. The tool handle is also made in a different way.
The digger consists of the following parts:
- It uses a pen made in the shape of the letter "T". Therefore, in the process of work, the shovel is not held as usual. Hold the instrument by the horizontal bars with your hands. This helps to increase the force of pressure on the soil when working. In addition, such a handle is usually made of metal. It can slide up or down. After finding a comfortable position, the handle is bolted.
- The pitchfork is attached to the handle at two ends, and not at the central part, as in the classic version.
- A stop attached to the back of the tool is more powerful than usual.
The disadvantage of this design is that soil crushing is not provided.

Digger
Easycop
This option can be considered the simplest design. For her, a rectangular metal frame had to be invented, to which a pitchfork was attached, looking down. The stop, made rectangular, is attached horizontally. The front grill is missing.
On a note. Despite its simple design, this kind of miracle shovel is an effective digging tool.
Archimedes' shovel
It bears little resemblance to the classic version.The difference, in particular, is that here, for digging, not a pitchfork, but a bayonet shovel is used. However, the inventor applied a similar principle here: the rule of leverage. This is an invention of Vladimir Kolybelin from the city of Kovrov, Vladimir region.
The Archimedes' shovel is arranged in this way:
- It has two shafts: long and short.
- The tool blade is attached to a short shaft.
- All parts are connected in one piece by the bracket. With its help, a short shaft with a shovel in the middle is connected to a long handle and can be rotated.
When working, the tool is stuck into the ground, the long handle is slightly shifted forward. Then they step on the short part, and, taking into account the law of the lever and the length of the arm, the shovel will lift the ground.
Important! Although the arhimedova shovel saves effort compared to conventional tools, it is difficult to use on heavy clay soils
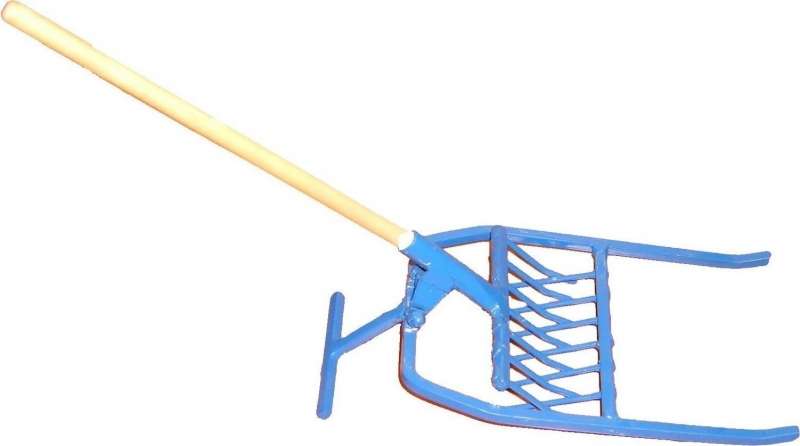
Archimedes' shovel
Design features
By their design, miracle shovels can vary. These instruments have various names. You can often find shovels called "Plowman", "Tornado", "Excavator" and many others. Each of them has its own characteristics, but the constructive principle of operation is the same in all cases.
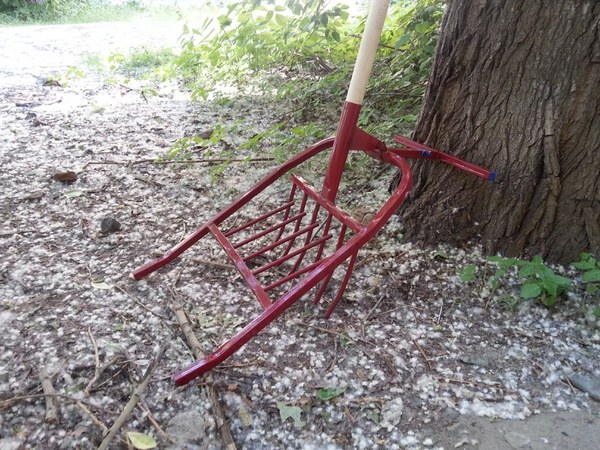
Plowman
Ripper without front stop
A similar device is similar to everyone else. The basis is the supporting and working elements, represented by the forks, but this clever shovel does not have a front stop. This is precisely its design feature. Such structures are lighter and less overall.
But this is not very important when working, while the lack of a front stop makes it less stable.
Such devices consist of two main elements:
- Working forks, to which the handle is welded.
- Forks for support, to the comb of which the backgauge is fixed using welding.
Digger
This variety is represented by wider forks that are connected to a stop. A powerful comfortable handle complements the entire structure. Features of this design are the presence of a stop and an adjustable handle. The stop in the shovel and digger is also movable. After the structure is immersed in the ground, the support is pressed with a foot and the contents of the bed with roots are turned inside out. Why is the tool turned out and rearranged.
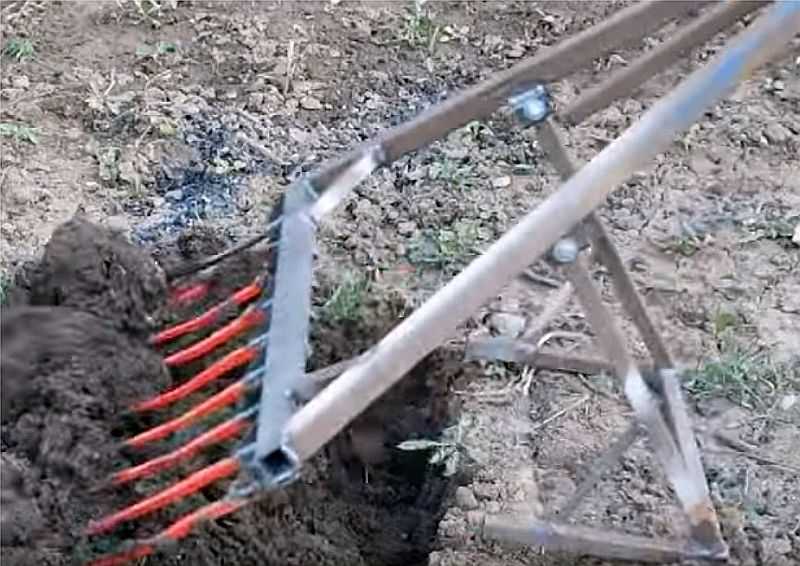
Digger
On a note. It is easy to work with such a device, so the digging process is faster. But this miracle device is not capable of crushing the soil, so it should not be used for heavy and lumpy areas.
Easycop
The device is distinguished by a rounded stop and a handle that is not adjustable. The forks for digging are made in a similar way, and the principle of operation is the same. This is a fairly lightweight structure that will help you quickly dig up the ground. To understand which of the devices is better, you can only try both options in practice.
Here it is: a miracle of technology
The above tool is a combination of a ripper and a common fork. Such a shovel works on the principle of a lever. Its main details are:
- stalk;
- front and back rest;
- fasteners;
- ripper pitchfork;
- forks for digging.
If you just look at such a device, you will not immediately say how to handle it. Therefore, it is difficult to describe it. If you read user reviews, the miracle shovel becomes an understandable tool, and it is clear that there is absolutely nothing complicated about this unit. The main part of it is the traditional pitchfork, to which we are all accustomed. A handle is attached to them, and from different sides there is a rear stop mechanism. Another pitchfork is in the front. They, along with the main "brothers9raquo; converge into a castle. Their main purpose is to break up clods of earth. If the soil on the site is compacted or clayey, then this process is quite in demand. A front stop mechanism is attached to the ripper. Thanks to him, the shovel is stable, and the whole device resembles scissors: they crush large earth clods into small lumps.They, in turn, are fairly easy to level using an ordinary gardening rake.
The miracle shovel is mainly used on large plots of land, but it can also be used on small areas. The miracle shovel, a photo of which can be viewed in our article, speeds up the digging process and makes this process much more convenient.
Miracle shovel for digging earth with your own hands
Miracle shovel with your own hands, you will find its drawings in our article. You've probably already heard about such a device for summer residents as a miracle shovel. If you have not heard, or do not quite understand what this is about. This is an invention that is designed to significantly facilitate work in the garden. Of course, with age, it does not become easier to work, after work the back, arms and legs begin to ache, and you want to rest, but what if there is a lot of work, and there are fewer desires or opportunities? In such cases, the miracle of a shovel comes to the rescue, let's figure it out with the drawings and make it with our own hands at home.
So, what is this device like? This is the support frame to which the two rippers are attached, the main ripper and the secondary ripper. The main ripper is a kind of fork tip, and the secondary frame, with pins, these pins must pass between the fork tips. And there is also a support with which it will be easier for you to dig, because you will use the shovel as a lever, and part of the effort will go to this support.
The principle of the shovel for the lazy is simple and ingenious. When you start shoveling, you insert the support frame into the ground, thus securing it with your foot. Further, we drive the tips similar to the villas into the ground, and with the help of an auxiliary frame, the rising earth itself breaks into small breasts. And so we move on the site further and further, without spending much effort.
What other benefits will you experience with such a lazy shovel.
- You do not have to bend over, which significantly relieves tension from your back.
- No force is required to lift the soil on the bayonet of the shovel as it is supported.
- There is no need to break large pieces of earth, an additional frame will take care of this.
- The wide shovel line allows you to dig up the area faster.
Miracle shovel photo
Of course, you can buy such a shovel for the lazy in a store, it will cost more than an ordinary one, and this is understandable. Therefore, if you know how to work with a welding machine, or have acquaintances or friends who can help you, try to make a miracle shovel with your own hands, we will provide you with the drawings.
How to make a miracle shovel with your own hands
- File for metal.
- Drill for metal.
- Welding.
- Steel frame or pipe, corner.
- Armature.
- Metal handle.
- The first step is to bend a corner, or pipe, to make a frame for support. You need to bend it with the letter P. Legs should be about 80 centimeters long, and the crossbar about 38 centimeters.
- Now you need to make a bar that will stand across. In this bar, every five centimeters with a drill, you need to drill holes, and in them we mount reinforcing bars, about 20 centimeters in length, and using a welding machine you need to weld them.
- Now we need to make the main ripper, for this we need a pipe that will be 5 centimeters less than the transverse one, and just like in the previous case, we drill holes and insert reinforcement into them.
- Now we need to make ears to attach hinges to them that will hold the structure, we can make it from a pipe.
Such a design will be reliable, but you should not rush into all work with a miracle shovel, otherwise you can break it, you should not plow too dry soil, take care of the tool and it will repay you with a long service. Next, we bring to your attention the promised drawings of the miracle of a shovel that you will make with your own hands.
How to work with a shovel
In order to dig up the ground, you need to stand with your back in the direction in which you are going to move.
In order to use this tool, you need to do the following:
- Stick the shovel into the ground. If it is difficult to do this due to the density of the soil, you need to step on a metal stop.
- After the shovel has entered the ground, the shaft must be tilted back without lifting it off the ground. In this case, the ground, which is hooked by the pitchfork, will pass through the grate and crumble.
- Then the shovel, without lifting it up, is pushed back and again immersed in the ground.
This process is repeated until the entire section has been completed.
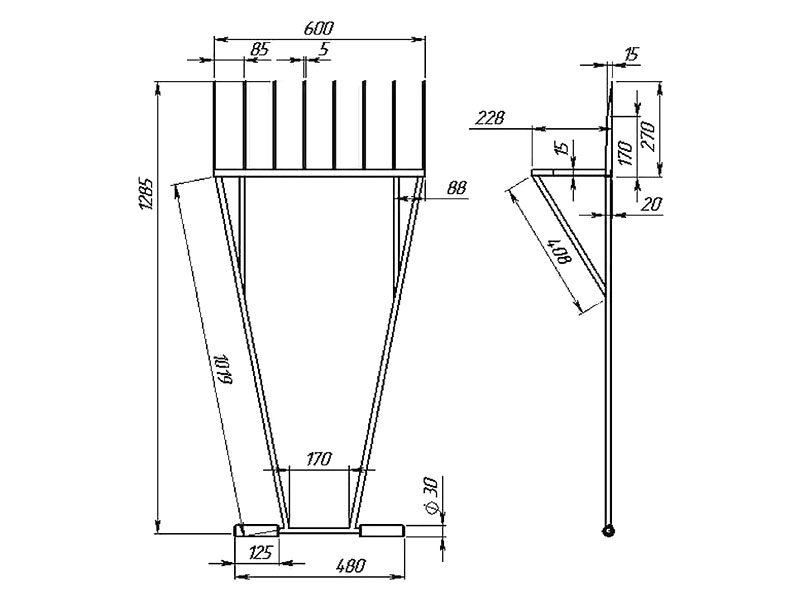
Miracle do-it-yourself shovel drawings and dimensions
The two-segment homemade miracle shovel is a real breakthrough in small suburban mechanization. The design has been improved and modernized for decades. There are features for the work of a man or a woman, the models were optimized for different soils. However, the concept remains the same. Two halves with teeth, between which the soil is ground. Digging takes place with the ease only a pitchfork can do.
General view of the structure and components:
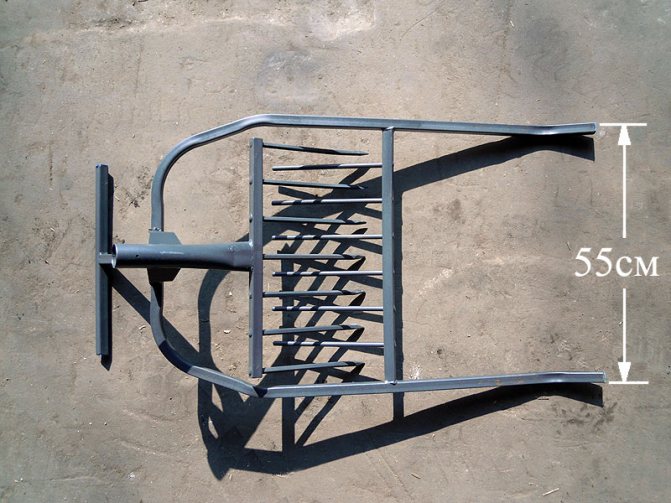
- The total width of the frame should not exceed 50 cm. The width of the working area is 40 cm. Otherwise, the efficiency will not increase (due to the capture of a larger area), but, on the contrary, will decrease due to a sharp loss of the processing rate. The length of the handle (handle) is selected individually. The top slice (which can be fitted with a “T” bar) should be just below your chin;
- The front stop (1) is made from a professional pipe, although you can use a regular tap. It's just that the profile with the same strength will be lighter. After welding the cross member for securing the secondary forks (2), this element becomes a kind of frame around which the entire structure is assembled;
- The bracket for the back stop (3) is welded to the frame at an angle of 100 ° - 110 °. The stop can be welded to the bed without a bracket, but then the device will take up more space during transportation and storage. The "T" shape saves material and facilitates construction. Although many do-it-yourselfers make a backgauge in the shape of an inverted "P". This element must be strong and rigid, since during operation it is on it that the entire weight of the processed soil falls. The width of the stop should be slightly larger than the working area of the forks;
- The working forks (4) are an independent element that is attached to the bed using the bracket (5). The docking unit must be made of a durable channel or steel sheet with a thickness of at least 3 mm. Bearings are optional, a threaded rod is sufficient. This part must have a strength class of at least 9, since it experiences a high shear load;
- The working fork teeth (6) are bent upwards at an angle of 150 ° for effective crushing of the butt of the earth. The distance between the teeth of the working and secondary forks is the same, the number of workers is one more. Secondary teeth run between the workers in the middle of the gap. This efficient design grinds the ground like a cultivator;
- A shovel handle is inserted into the pipe section that makes up the frame for the bracket. There is a variant of the "U" shaped handle, with a transverse bar, which you hold with both hands. However, the design turns out to be cumbersome, it is better to leave such a handle for a one-segment miracle of a shovel. If necessary, you can weld a shaped adapter from the "T" pipe, and install a crossbar at the end of the handle;
This shovel is easily adjustable for different users. Depending on your height, several cuttings of various lengths are selected. The physical strength of the "plowman" is also taken into account. The length of the back stop (3) regulates the force and speed of the section.
With a short stop, it is easier to work, but the cutting time increases. The long "leg" of the stop will take more strength, but the digging speed will also double.
All connections of the elements are carried out using electric welding. The seams are welded along the entire length, since the effort during work will be great. The teeth can be hardened after installation.To do this, they are heated red-hot with a gas burner, and dipped in a bucket of alkaline water.
For all its advantages, like any other tool, our super shovel also has a number of significant disadvantages that you need to know about before starting to manufacture it. Namely:
- The miracle shovel is not an absolutely universal tool. She cannot dig up virgin soil or stony soil. However, if your garden is used for many seasons, using this device you will save time and energy. And you will finish the most difficult sections with an ordinary shovel;
- It is also impossible to dig up clay, calcareous and dry soil. The shovel teeth will simply deteriorate;
- And since manufacturing will require a welding machine, corners, metal and other tools, it can be assumed that the manufacture of such a product is not quick and affordable, which means this is another drawback of this product.
There are a great many modifications and methods of making a super shovel. Here, as they say, who is in what is much. In this video, a detailed example of making such a shovel with your own hands.
To share with friends:
What can a miracle shovel
This tool provides additional opportunities for the farmer.
The miracle shovel provides the summer resident with the following advantages:
- When digging the earth with its help, much less effort is required compared to using a conventional tool.
- The quality of soil loosening during such processing increases. If lumps are formed, then during operation they break into pieces.
- Some designs have a back stop. In the process of digging the soil, you can step on it to help yourself immerse the tool in dense and heavy ground.
- If there are roots of weeds in the ground, then the lazy shovel will get them out as a whole, and not cut them into pieces.
- This tool is useful for digging up potatoes.
- The digging speed is much higher than in the usual way.

Miracle shovel
In appearance, the excavator shovel resembles a pitchfork with additional details.
It includes the following parts:
- The shaft for which a person holds the instrument.
- Metal forks with teeth about the same length as conventional forks, but about twice as wide. They usually have 6 to 8 teeth.
- A backward-facing metal stop is attached to the forks. When the miracle shovel is immersed in the ground, you can put pressure on it with your weight, so that the tool goes into dense ground more easily. It also serves as a stop when turning the shovel out of the ground.
- In the forward direction, a horizontal grate is attached, set so that the forks, as they rise, pass through it. With this movement, clods of earth find themselves between the forks and the grate, as a result, crumble into small pieces.
Here is a description of the typical structure of the Krotchel shovel. In practice, several different variants of its design are used.

Garden ripper "KROTCHEL"
What is different and what can
To be precise, this is not a shovel, but a ripper, since it not only digs, but also breaks up clods. The miracle shovel consists of two (sometimes one) slats with pins, movably connected. Some models also have a backgauge - for easier digging of dense, heavy soil. So it actually looks more like a double pitchfork (see photo below).
Miracle shovel and its components
It is clear from the figure that this tool does not have a shovel as such, but the differences from the classic bayonet shovel do not end there. She also has a handle much higher - it should reach your shoulder. It is also convenient if there is a crossbar at its top - you can act with two hands.
The miracle shovel performs three operations at once:
- loosens the soil;
- breaks clods;
- “Extracts” the roots of weeds, without tearing or cutting them (in any case, damaging them much less);
- easily digs root crops - you can dig carrots, potatoes, etc.
But its main advantage is that it greatly facilitates digging the earth, and the main load falls not on the back, as when using a conventional bayonet shovel, but on the legs (to drive the working forks into the ground) and on the hands (to turn the forks out of the ground). The back during work is in an upright position and is almost unloaded.
Another version of the miracle shovel
The only drawback of this tool is the weight. It is indeed much larger than that of a bayonet. But the super shovel can be rearranged, it does not need to be lifted. Rather, it is raised only a few times: when it is set on the ground at the beginning of the row. Then, by pulling the handle, it is simply overtightened.
There is another very attractive moment in using a miracle shovel - the garden is digging at least twice as fast. This is due to the wider working part - up to 50-60 cm. With little physical activity, this is very good.
How to work
Although this construction is not particularly complicated, working with it has its own peculiarities. Firstly, you need to start from the far edge of the bed, then move backward, gradually dragging the pitchfork back. Well, the general procedure is as follows:
- Grasping the handle, put the miracle shovel, support it on the front ripper.
- Stick a pitchfork into the ground. Drive them so that the backgauge touches the ground. If the ground is hard, compact, additional force may be needed - push your foot against the front forks bar.
- Pull the handle towards you. With this movement, the forks will begin to move upward. As they rise, they pass through the forks of the front stop, breaking the lumps.
- Drag the device back a little, repeat all actions (plug in, press, pull the handle).
In reality, everything is very simple. It is worth trying a couple of times and then everything is repeated “automatically”.
Summarize
With the help of a miracle shovel for digging the earth, we calmly and without unnecessary stress dug the earth under the planting and put it in order! They even managed to dig up the ground under the apple trees without damaging its roots.
It really makes the work much easier if the soil is not very heavy and there are no stones (bricks).
We really liked the miracle shovel Mole. Despite the identified shortcomings, she has become an irreplaceable helper for us.
We wrote this review based on our real experience. We still have to dig up an almost virgin piece of land, let's see how she copes with it.
The use of such a shovel greatly facilitates the hard work of cultivating the land.
We are happy to recommend it to all gardeners and gardeners, just choose the right one. We hope our review of the miracle shovel will help you in making the right choice.
And from the point of view of a useful gift for your relatives or friends, this is a great option!
What other gardening tools you may need at the dacha, read here.
But before you dig and plant something, you need to think about where and what. Perhaps the article Planning a site will be useful to you.
When copying an active link to the source is required.

