Work rules
Working with the level is not particularly difficult. We offer you the simplest algorithm for using these measuring instruments, which will allow you, even without any special experience, to obtain the most accurate data and determine even the slightest deviations from the horizontal.
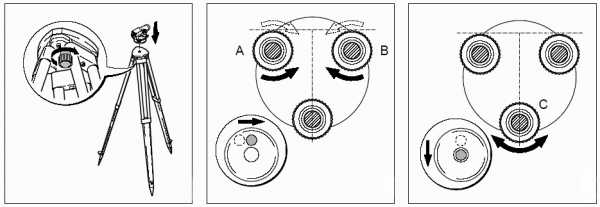
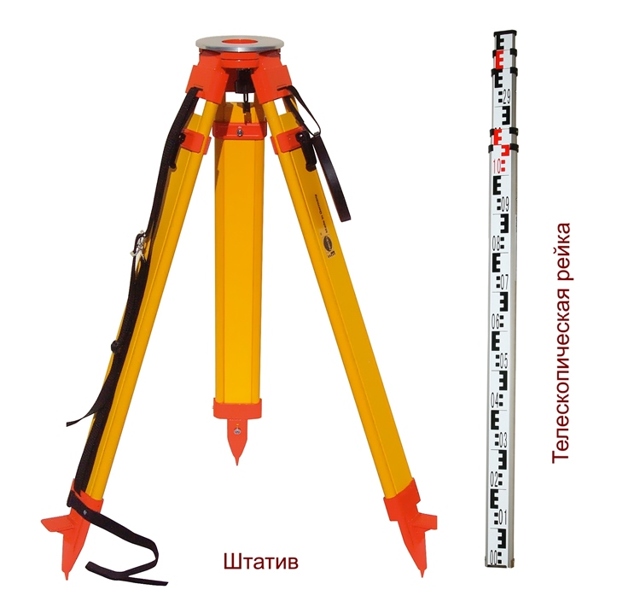
- It is necessary to correctly set the tripod, for which the fastening screws on the legs are loosened, the level is installed horizontally on a fixed plane, while the measuring device should be at chest level. Fasten the screws and fix the legs.
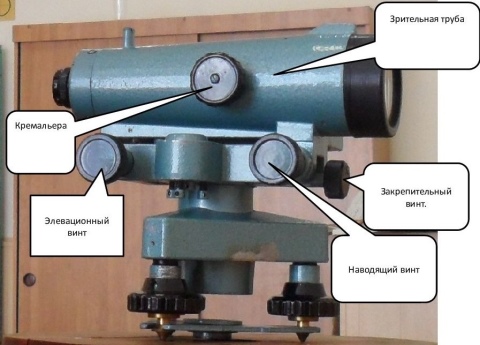
- A telescope is mounted on a tripod, which is fixed with a fixing screw.
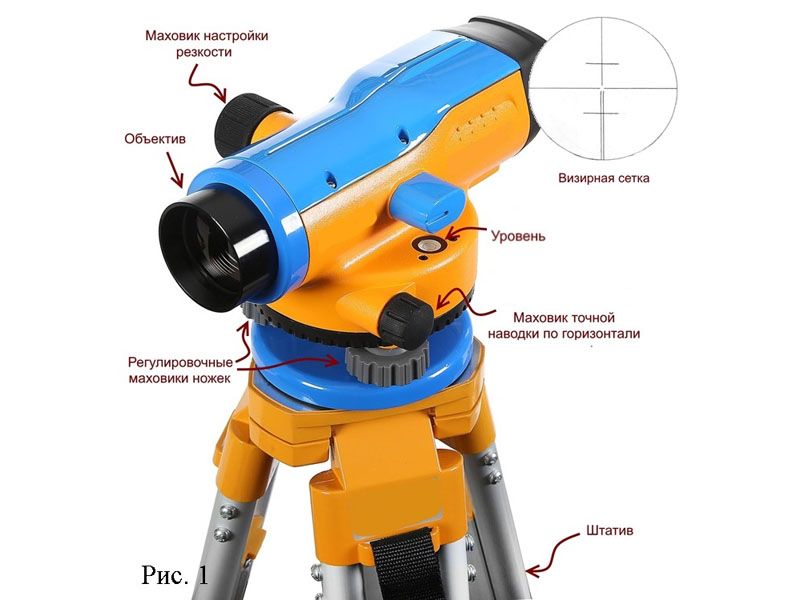
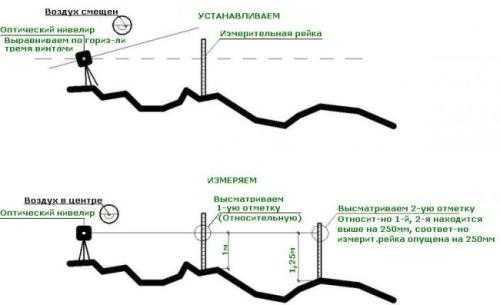
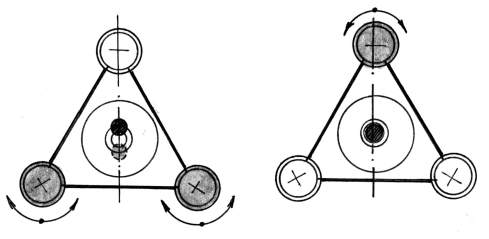
- The level is brought to a horizontal position, for which three adjusting screws are rotated and the air bubble is set in the central position on the round screen in the viewfinder.
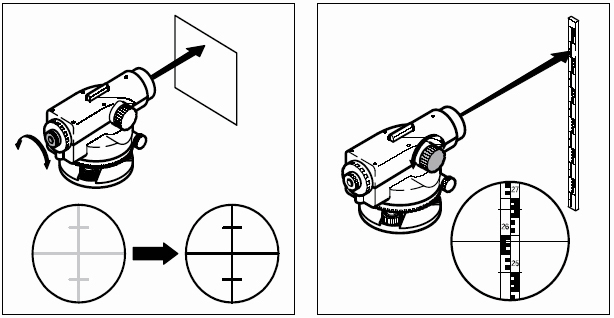
- Focusing and optics adjustment in progress. The eyepiece should be adjusted to suit the operator's vision. To do this, the device is aimed at a large illuminated object, after which, by rotating the ring on the eyepiece, a clear image is achieved.
- To work, you need two geodetic rods, which can be 3 or 5 meters long. The slats are lined in millimeters on one side and in centimeters on the other. They can be made of telescopic plastic or aluminum and folding wood.
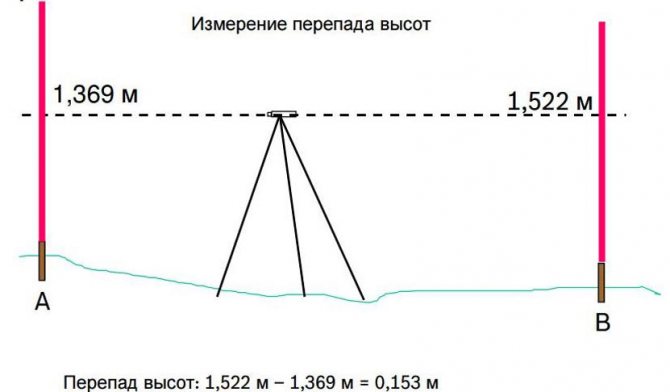
- Height alignment. The survey rod is installed as close as possible to the point to be measured and aligned. In the eyepiece, it will be possible to observe the middle line of the grid, the data from which are recorded on paper or electronic media. Next, similar measurements are carried out with other points, the area along which the alignment will be performed is determined, and based on the calculations obtained, it will be possible to provide the most accurate and perfectly straight line.
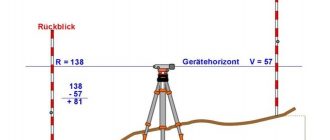
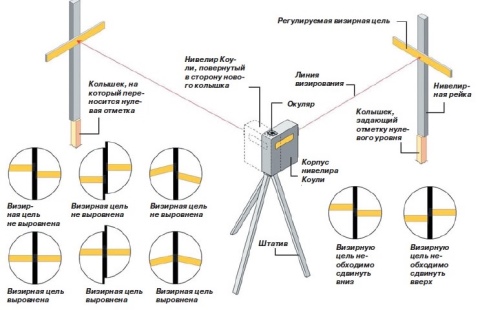
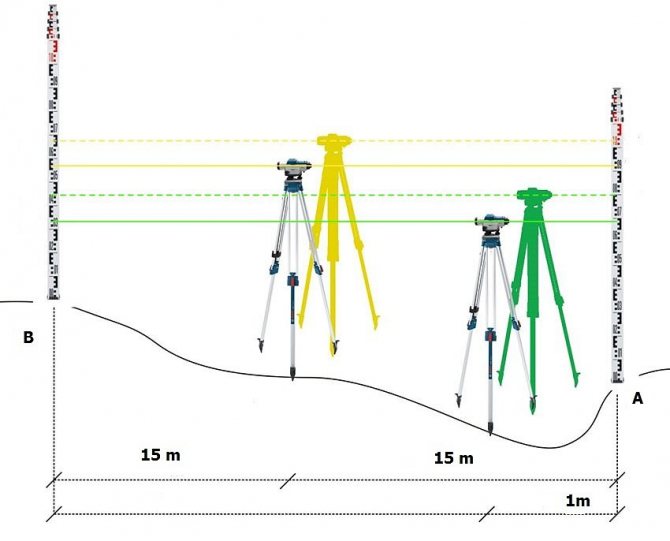
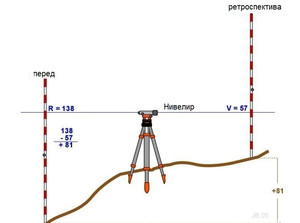
- Centerline alignment will give you the most accurate data possible. It is necessary to choose a place where all the points would be visible, through which you need to build a perfectly flat horizontal line. The level is installed in such a way that the nearest point is at least 5 meters. The rail is positioned in front of the instrument, and the second measuring rail is positioned at the back. The backsheet will be needed for marking, and the baseline on the front will help you calculate the height. The device initially aims at the backsight, records the values by strokes, after which it focuses on the main staff and records the data on the red side.
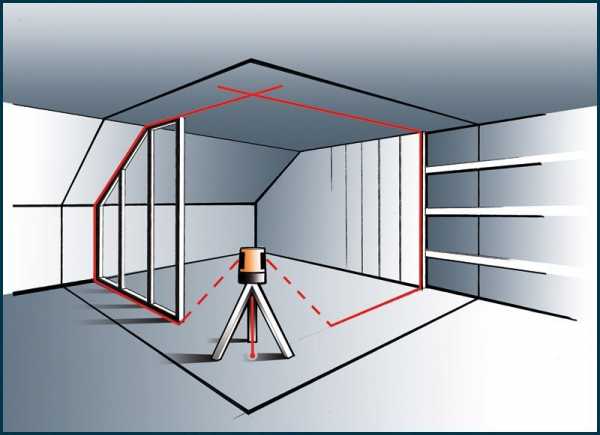
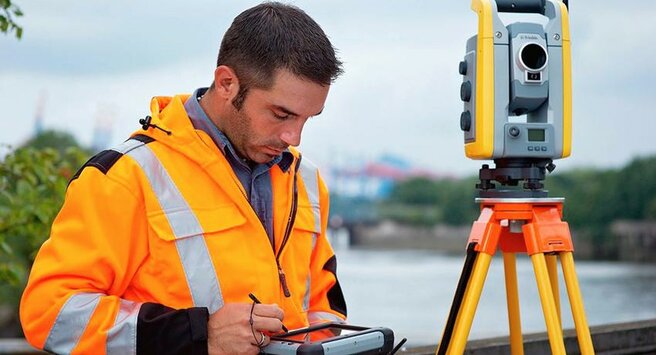
 Modern laser and electronic devices can significantly simplify calculations. All information and all data are calculated by automation, after which they are presented to the user in a readable form. Each of us can cope with the use of such electronic and laser devices, even if he does not have the relevant work experience.
Levels are fairly easy-to-use devices that allow you to obtain geodetic data and determine the ideal geometry and horizontal plane. The use of such devices is not difficult, especially when used for measuring laser and electronic levels.
Operating rules
The new level must be checked for accuracy - all working mechanisms and optics must function in the device. To ensure that the accuracy of measurements and angles is not distorted over time, the device must be handled carefully:
- do not drop, do not hit, do not expose to mechanical stress;
- use only in accordance with the attached instructions and the manufacturer's recommendations;
- store equipment in a protective case.
After a certain period of time, the optics must be sent for verification and calibration to specialized centers. The frequency of maintenance is specified in the level's passport.
Working with a laser level
Before starting work on marking or measuring objects, you need to prepare a workplace:
- Check the battery charge or insert batteries (depending on the type of level).
- There should be no obstacles in the path of the beam - refraction from any objects will give a significant measurement error.
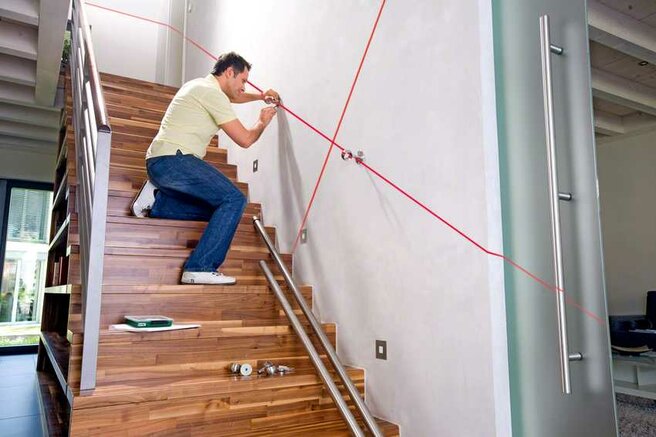
- For work, the level is installed on a tripod, exposed on a level platform and carefully centered. To use self-leveling devices, this is not necessary, but in general, you can use a thick or any portable stand.
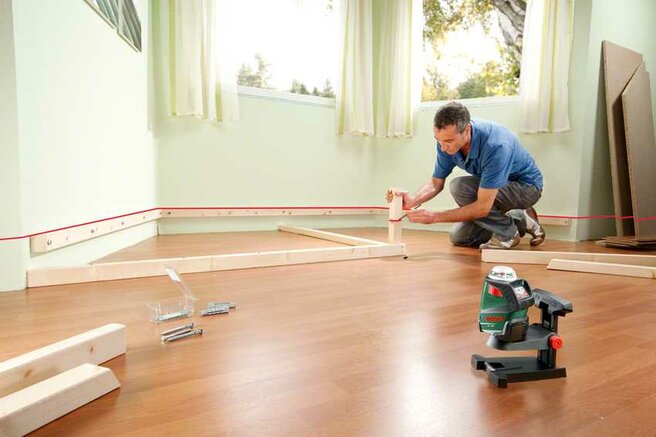
When the preparatory work has been done, you can proceed directly to the markup.
Further, if necessary, you should prepare additional devices:
- rail with markings, a wooden long board is also suitable;
- the laser beam receiver makes it much easier to work with the device on a sunny day;
- glasses (optional, but very convenient attribute of the surveyor).
How to use the level when marking the foundation
We pass directly to the marking work on the land plot.
- First of all, we set an orientation line, the location of which is easy to determine: it usually lies parallel to the road or the fence of the site at the distance specified in the project. Let's mark the line AB, where the letters are pegs with a string stretched between them.
- Further, the beam direction function is required from the level. We install and center the device over the peg A, set the angle to 90 ° and set off with the rail and the signal catcher in the direction of the end of the line perpendicular to AB, which rests on point A. At a given distance along the rail, we catch the perpendicular point, put the peg.
- In the same way, we set the fourth point.
- Pull the string between the installed pegs. The perimeter of the contour is ready.
- The internal walls are marked in the same way.
The pegs can be placed as guidelines for the installation of rags - wooden fences and beacons, the support posts of which are located on the design line of the foundation or wall (outside the perimeter at the extension). In this case, the horizon of the control racks is checked with a level, and the perimeter of the structure is transferred to the terrain with the help of a tape measure and twine.
Control of existing structures
The pegs can be set manually by measuring the sides geometrically without instruments. In this case, you should check their orientation and evenness of the corners, again with a level. In this case, you need a rotary device.
- Install the tripod away from all control points (in our case, the corners). It should be remembered that the distance should not exceed the distance allowed in the technical documentation for the device.
- We turn on the signal laser and go with the signal detector and the rail to the control points.
- We set the rail to a vertical position at any point and catch the beam, make a mark on the rail.
- We repeat the same action at each point.
- Checking the distance between the serifs. For large construction, a small range of height differences is applicable; for private construction, a difference of no more than 1 cm per 10 meters of a wall or foundation is allowed.
An illustrative process is presented in the video:
Errors that are allowed when using an optical level
For beginners who are starting to work with the level for the first time, it is important to take into account some features:
It is important to ensure the safety of the device. Although it is protected by various types of coatings, it is sensitive to shocks and shocks.
In order to completely eliminate device errors, it is worth making sure that all fasteners and parts are in working order and function properly.
Don't miss the chance to use additional tripods and mounts. This will keep the device safe even in the event of a sudden gust of wind.
Do not completely trust the data specified in the instructions. It is worth checking the capabilities of the device yourself. If you are buying a non-new device, it is better to have it checked in a specialized institution.
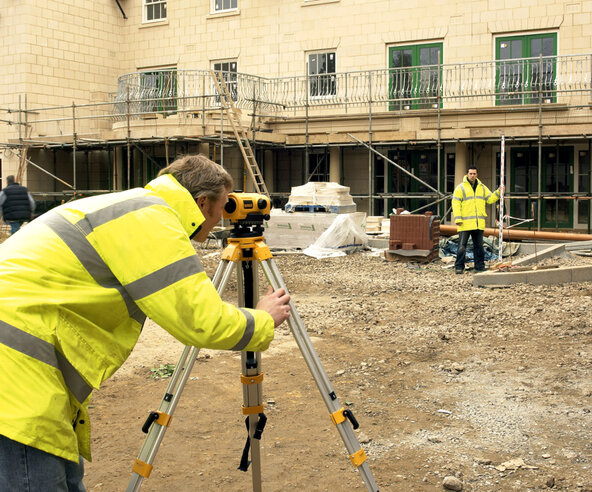
Do not forget that when working with the level, you definitely need a partner.
And during the installation of the rail, it must stand exactly on the surface to avoid distortions. Even if it is a ravine or a hole, the ruler should rest against the bottom.
Do not overheat the device. This can affect the accuracy of the measurements.
How to use the level - step by step diagram
Step 1: Setting up the tripod
The fastening screws on all three tripod legs must be loosened, after which each support is extended to the required length (this length can be different, because the level is often installed on rough terrain). The top of the tripod should be in a horizontal position, and then tighten the fixing screws on all three legs. Most of the devices are supplied with smooth corrective mounts on each "tripod leg", they are used to fine-tune the horizontal position of the upper platform.
Step 2: Mounting the level
The leveling pipe itself is mounted on a tripod with a few fixing screws, after which the level sensors have to work. By turning the adjusting screws, it is necessary to achieve an exact, central position of the bubble levels relative to the lines drawn on them. For convenience, first put the bubble in one "window", not paying attention to the other. Then the second level is adjusted, already tracking the position of the first, observing how it changes as it is installed. By gradually adjusting the position of the device, they achieve its exact horizontal position on the installation site.
Step 3: Focusing the optical-mechanical assembly
Before working with the optical level, it is necessary to adjust the eyepiece of the aligned telescope to the operator's vision. As you know, the acuity of the eyes of different people is different, even if they all do not wear glasses. Focusing a standard level is done as follows. The device is aimed at a well-lit and rather large object and operate with the settings until the thread mesh is displayed on this object as clearly as possible. Then this operation is repeated on rails installed in other, already less illuminated places. Experimenting with focusing on subjects with different illumination will help with further measurements.
Step 4: measure and record observations
With the instrument set horizontally accurately, aligned and focused, we proceed to the engineering survey. Two slats should be placed in front and behind our device. The front one will show the value of the measured height, the back one will calibrate the values. First, the level is aimed at the black side of the back staff, after focusing, the value is recorded along the middle and rangefinder lines. Then they focus on the front (main) staff, and the average value along its red side is fixed. This method is called centerline leveling, it is characterized by high accuracy of results and the convenience of multiple measurements.

Hello everyone, in the article how to use the level consider why this device is needed at a construction site and how to work with it.
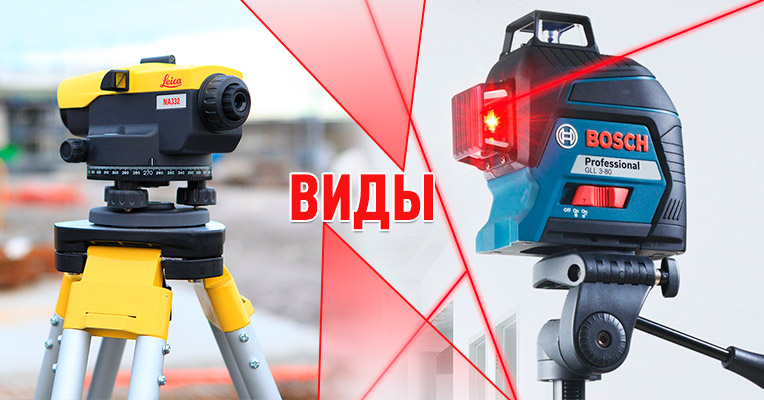
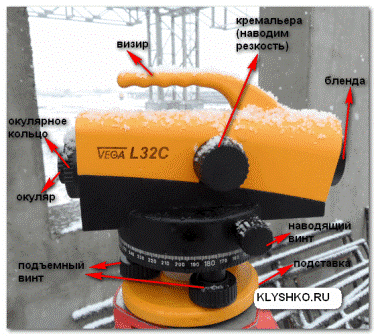 A level is a device for setting out or determining heights, checking the evenness of the surface by determining one point above another horizontal beam. Levels are divided into laser and optical levels, and in terms of measurement accuracy, into precise and high-precision.
Throughout my working practice, I rarely used laser levels, and then only indoors. At the construction site, they mainly work only with optical levels.
The advantages of a laser level over an optical level are that one person can work with it. Two people work with the optical level, one takes readings, the other puts the staff at the shooting points.
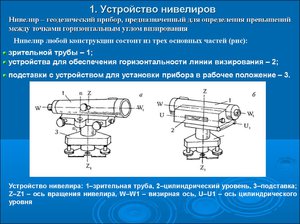
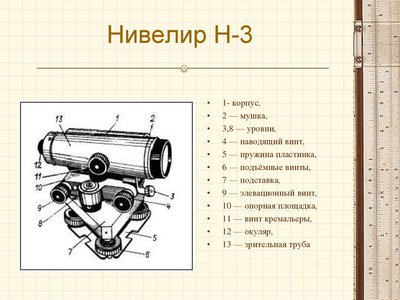
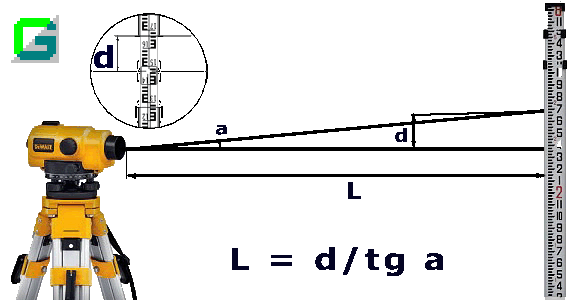
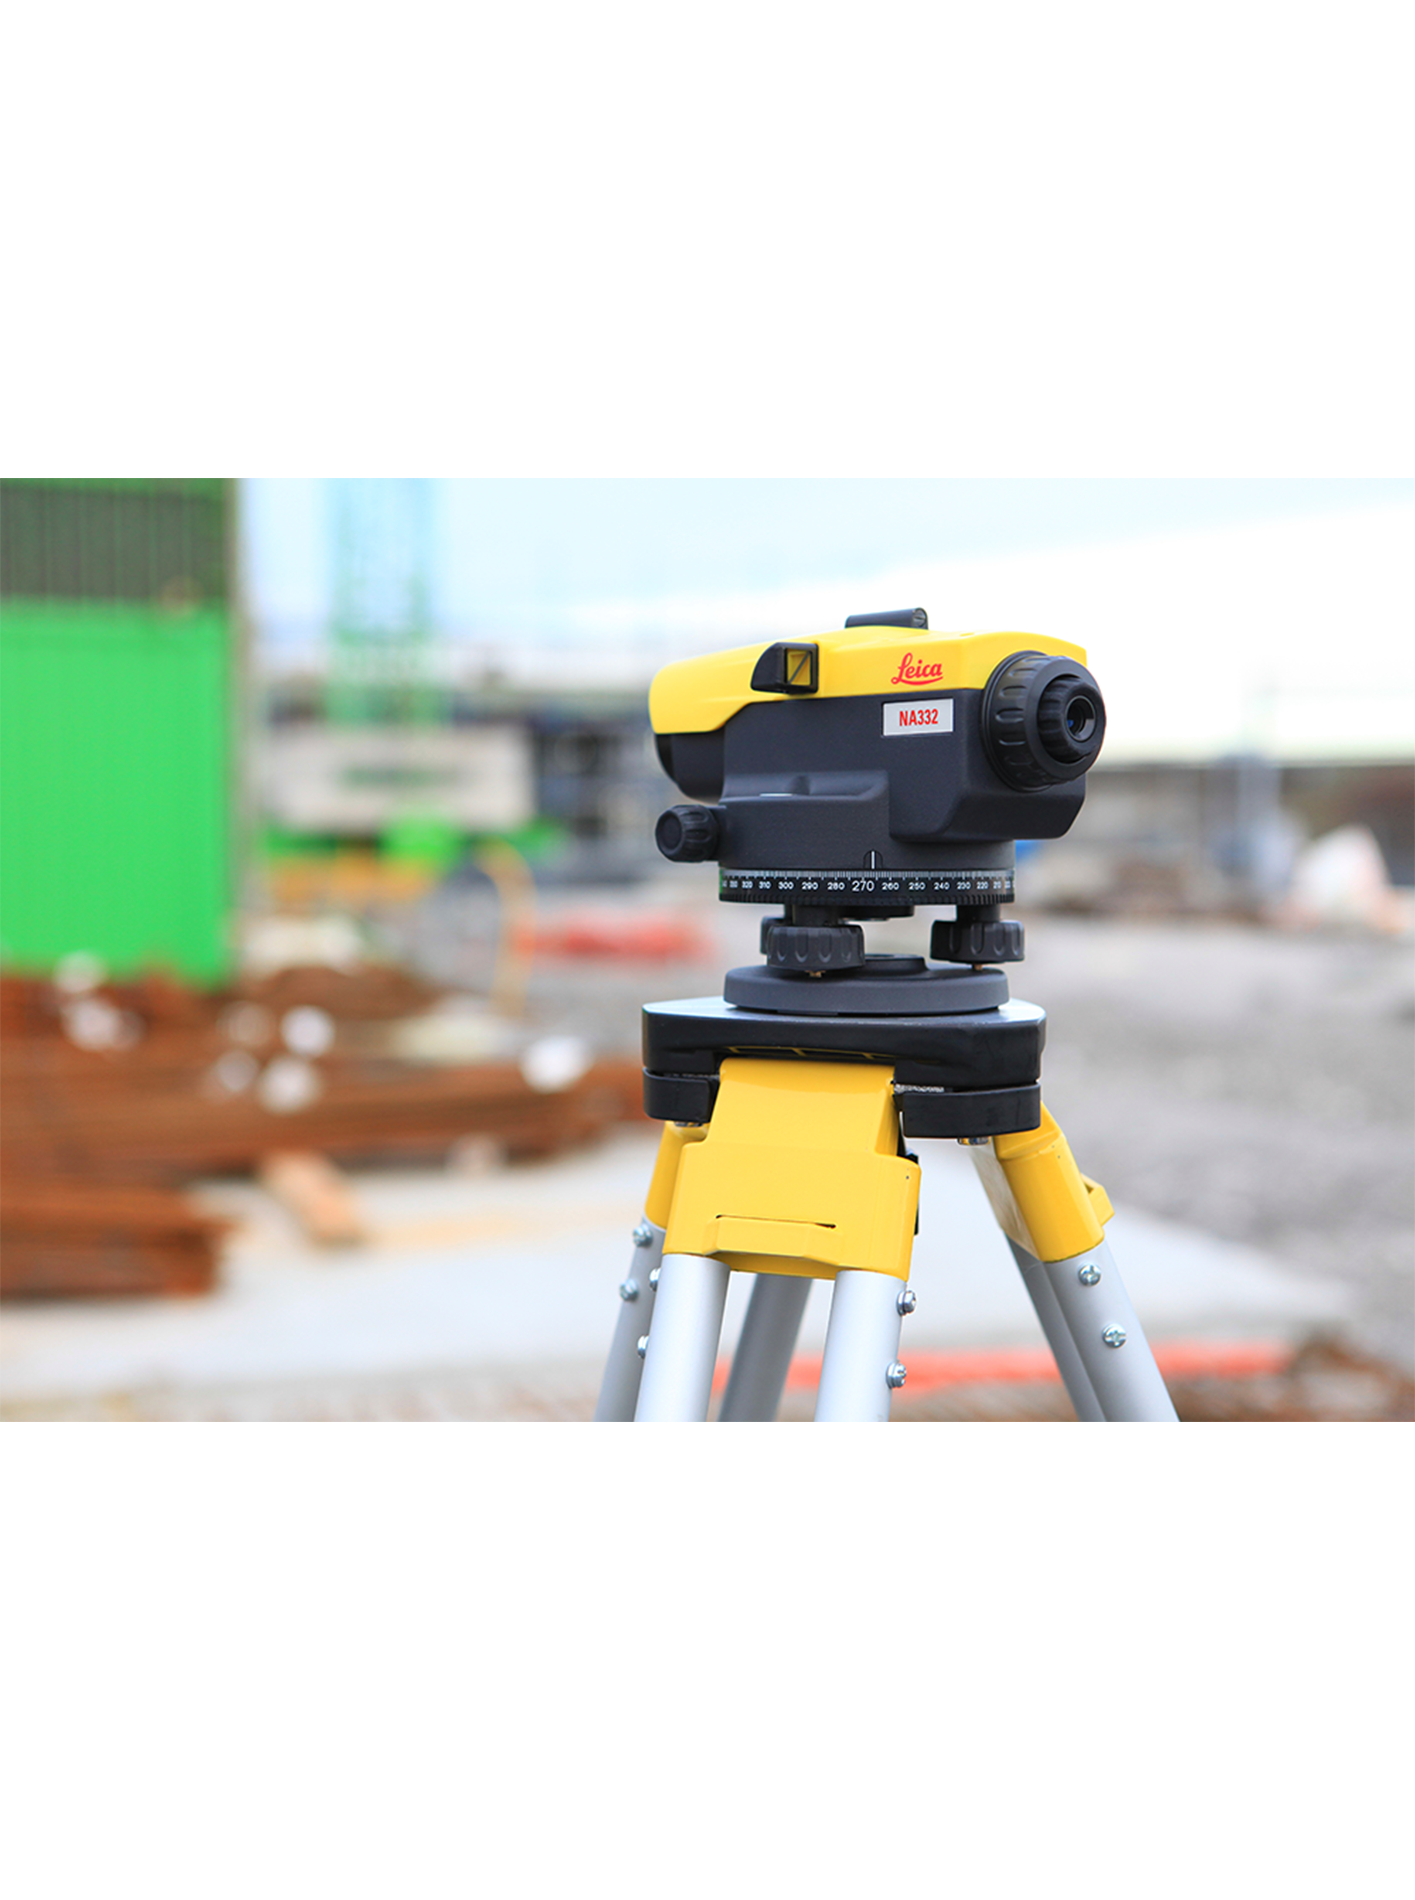
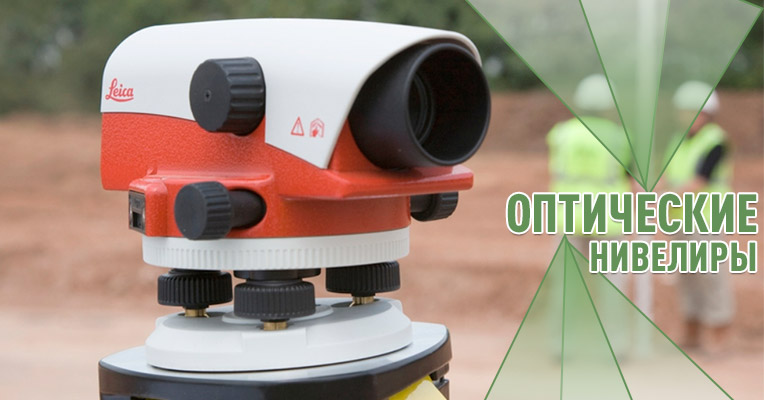
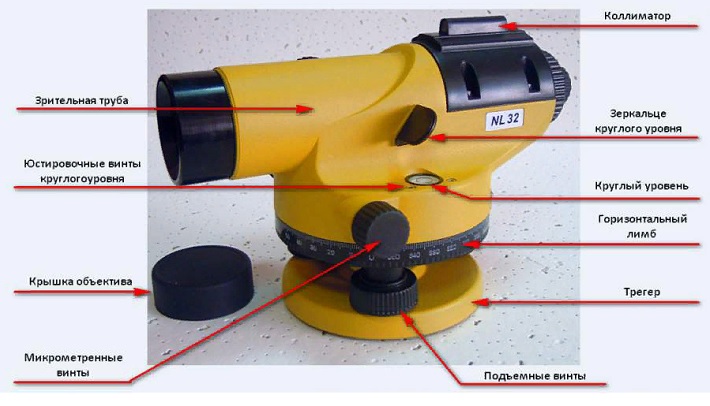
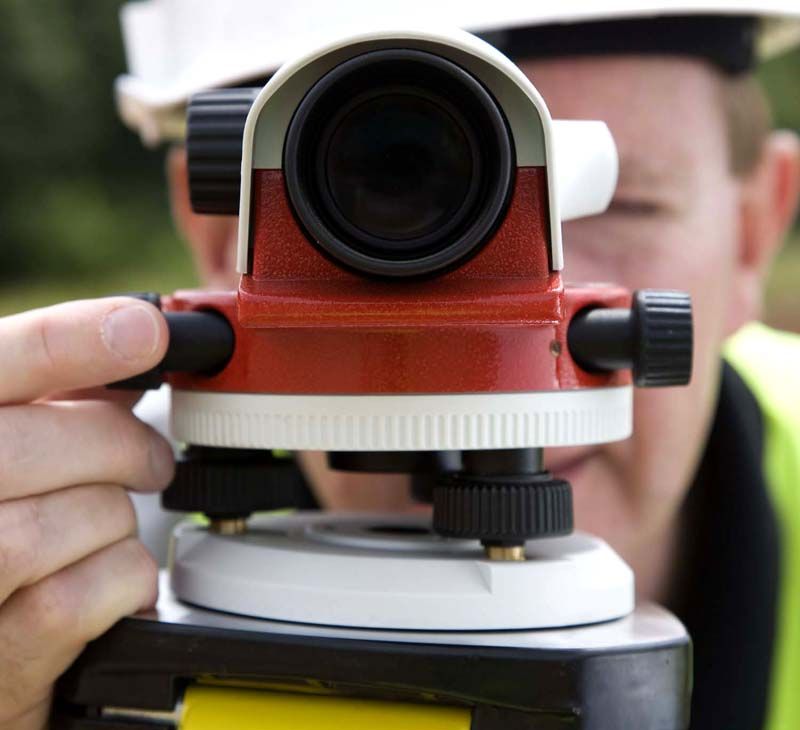
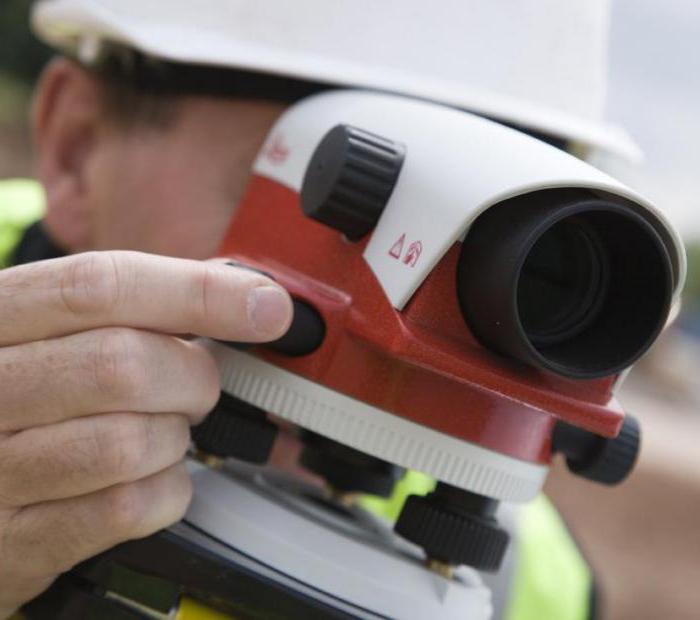
The optical level consists of a telescope, a cylindrical level, a telescope support with three lifting screws - a trigger.
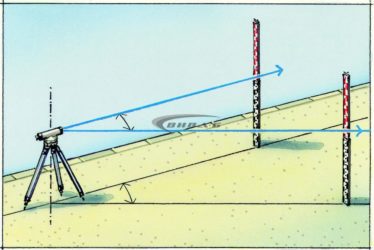
At a construction site, the level is the main device for measuring heights, starting with the production of earth, concrete and some types of finishing work. Working with the level begins from the very beginning of the construction of the object.

Leveling during the construction of a mini-football field
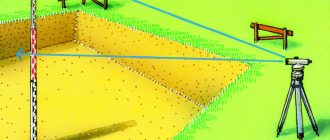
The construction of facilities on the site begins with surveyors. If you are building your home, you start with geodesic stakeout, building axes and elevations. The next step is to calculate the depth of the pit, for the manufacture of foundations and here you cannot do without a level.
Or you need to make even concrete floors or screed. Floor planning begins with leveling the base, which can be crushed stone or sand, depending on the project.
One cubic meter of concrete on the market today costs about 5,000 rubles, and if the base is poorly planned with sand and a concrete slab is poured with an overrun of 2-3 centimeters, then it will be financially costly.
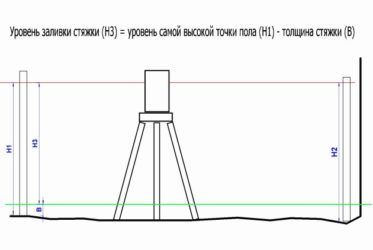
For 500 square meters, the overconsumption of concrete is 500 m2 x0.03 m = 15m3, these will be unaccounted for costs. To avoid such losses, it is imperative to do leveling survey at all stages of foundation preparation.
General recommendations for the use of devices
Before proceeding with the main work activities, you should consider the measures to ensure the safety of the device. First of all, the case must be protected from water, dirt, dust and physical shock. As a rule, the construction of building levels has multi-level dust and moisture protection insulation, but this may not be enough. For example, in heavy rain, even models with a protection class above IP54 cannot be used without an additional shell. The same applies to the threat of direct sunlight. Temporary overheating of the equipment may not disable it, but it will affect the accuracy of measurements.
How to work with the level if frost or hot weather outside and a surface cover does not help? Initially, it is worth making sure that the device is, in principle, suitable for operation at a particular temperature regime. Typically, models from large manufacturers can be used with an average range of -10 to 25 ° C. But in this case, it is necessary to adhere to certain operating rules. For example, optical models are sensitive to temperature changes. After taking measurements, the device should be brought into a warm room and warmed up in a complete case for about 30 minutes.
Step-by-step photo instructions for leveling with an optical device
For correct installation and adjustment of the optical level, we need: the level itself, a tripod and a measuring rod.
How to set up a tripod
The main task when setting up a tripod is to maintain the correct level of the base.
| Illustration | Description of action |
 |
We take out the tripod, fold back the clips, and extend the legs of the tripod to the desired height. Each of the three legs, thanks to special sliding sliders, extends and is tightly fixed at the required height, and the difference can be both significant and negligible. We fix the height by clamping the clips. |
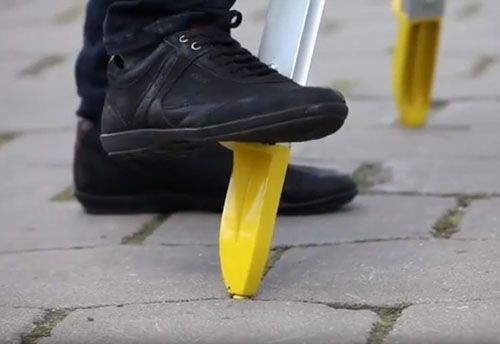 |
In order for the tripod to be fixed as firmly as possible in the ground, we need to press a special footrest with our foot. |
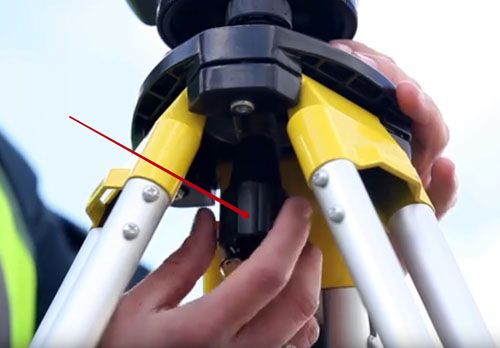 |
We take the level out of the box, put it on a tripod and fix it on the base using a special fixing screw. |
This design allows you to install the level on a tripod evenly, firmly and stably even on a bumpy surface.
Installation and adjustment of the level
Illustration
Description of action
To align the level, we rotate it so that two lifting screws are to the right and left of the device, and the third is on the front of it.
Turning the two side screws in opposite directions, we achieve that the "bubble" of air is on the central axis of the level mark.
And now we begin to rotate the screw located on the front of the level, and move the air bubble already in the vertical level of the device
When setting up each subsequent bubble level, pay attention to how the previous one behaves.
Adjusting the focus of the instrument
Before starting to work with the device, it is necessary to correctly set the focusing of the optics. Each person adjusts it to their own vision. The stages are as follows:
| Illustration | Description of action |
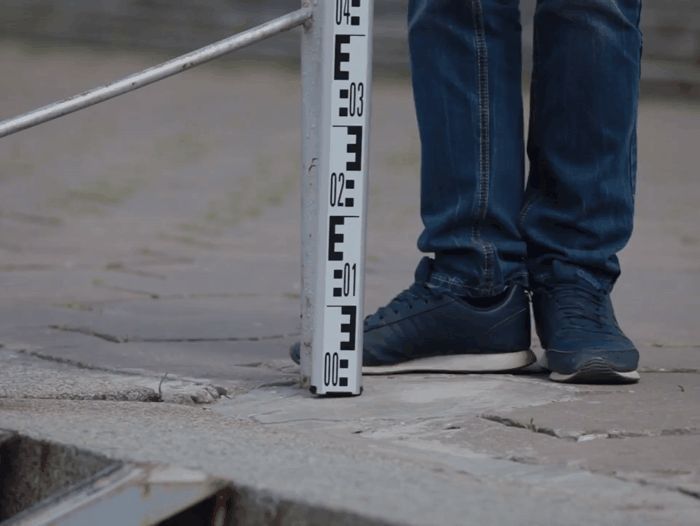 |
We ask your partner to stand with the staff at the first point to be measured. When taking measurements, the staff must be kept strictly vertical. To do this, we focus on the bubble level, which comes with the level. |
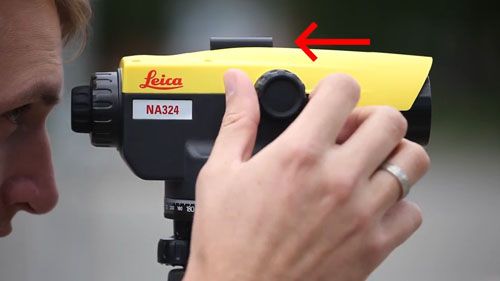 |
And now, with the help of the collimator, which is located in the upper part of the level, we aim at it. |
Measuring and holding values
When the instrument is positioned accurately enough, focused and leveled, you can proceed to measure the data and record it.
| Illustration | Description of action |
 |
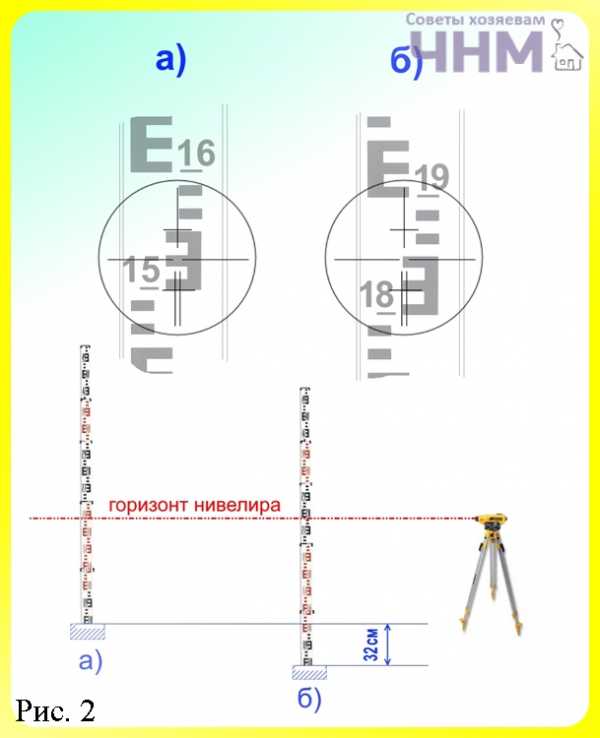
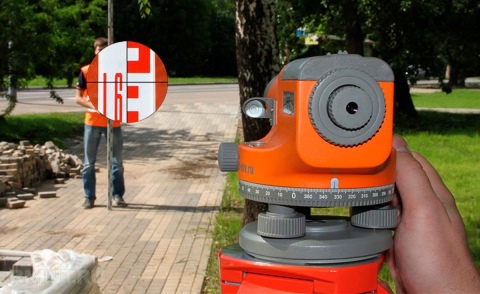
We adjust the level until the checkers are clearly visible to us. We look where the horizontal strip of threads is depicted on the rail. This is our first rake count. |
 |
We fix the data. |
 |
After that, we measure the next point according to the same principle as the first. We write down the data and compare the indicators. Thus, we know exactly which point is higher and which is lower and by how much. |
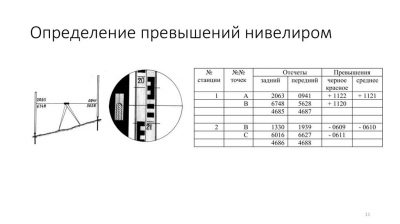
18.5. PROCEDURE FOR MEASURING EXCEEDINGS WITH THE HELP OF A LEVEL
To determine the heights of points on objects of forestry and landscape gardening, technical leveling is used. For the production of technical leveling, precise and technical levels are used (models N-3, N-10 and their modifications), as well as checker-type leveling rods. Technical leveling is performed mainly by the method from the middle with unequal shoulders of no more than 10 m. rods should not exceed 100 m, and with good visibility –150 m. 3.
Reiki, in the general case, are placed only on fixed points (benchmarks, pegs, crutches, shoes, etc.), between which the excess is determined. Reiki on the ground is installed only when shooting relief.
Rice. 18.13. Leveling shoe and leveling crutch
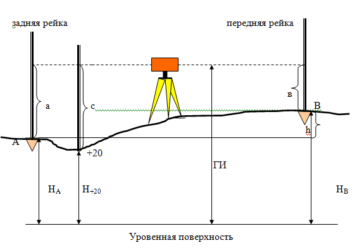
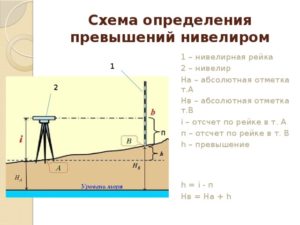
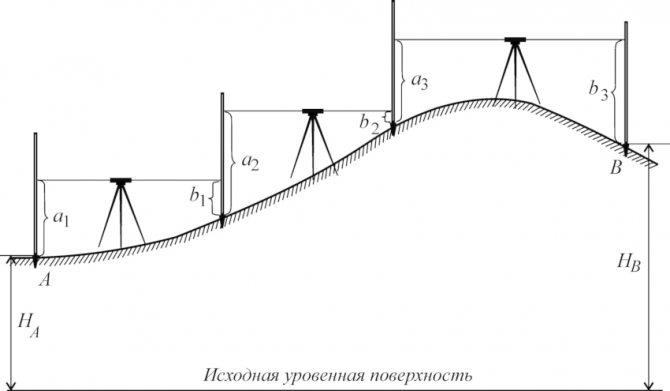
Work at the station is performed in the following sequence (Fig. 18.4):
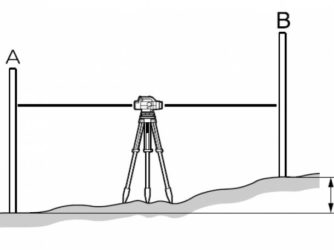
- leveling rods are installed on the connecting points A and B, and a level is placed in the middle between them and brought into working position with the help of lifting screws, setting the bubble of the circular level to the zero point;
- direct the telescope of the level to the back rail (point A) and take a reading along the black side (Zchern);
- direct the telescope of the level to the front staff (point B) and take readings first along the black side (Pchern), and then along the red side (Pcr);
- again direct the telescope of the level to the back rail and remove the reading along the red side (Зкр);
- if there are intermediate points (C and D) between the tie points A and B, then a back rail is sequentially installed on them and readings are taken only on the black side (with black and d black). Before each reading on the rail, it is necessary to bring the sighting axis of the telescope of the level to a horizontal position using a bubble of a cylindrical level or a compensator;
- to control the measurements, the differences of the zeros of the front and rear rails (Pkr - Pchern) and (Zkr - Zchern) are calculated. The discrepancy between the differences of the zeros of the bars in absolute value should not exceed 5 mm;
- at each station, the excess is calculated twice on the black and red sides of the rails: h black = З black - P black; h cr = W cr - P cr.The discrepancy between these excesses should not be more than ± 5 mm;
- the height of the foresight point (B) is calculated through the average elevation
h Wed = (h black + h cr) / 2.
according to the formula
HV = HA + h Wed;
- the heights of the intermediate points (C and D) are calculated by the formulas
GN = NA + Z black, NWITH = GN - s, ND = GN - d.
The accuracy of technical leveling at the station is characterized by a maximum error of ± 10 mm or ± 50 mm per 1 km of leveling.
Class IV leveling Class IV leveling is used to create a high-altitude survey network (survey justification) for topographic surveys of the area. For leveling class IV, precise levels (models H-3, H-3K or their modifications) and checker bars are used. The distance at the station from the device to the rails should not exceed 100 m, and the unequal arms should not be more than 5 m.
The procedure for working at the station when leveling class IV is the same as for technical leveling, with the exception of controlling the distances to the rails, which is determined with a thread rangefinder using readings on the upper rangefinder thread when observing the black sides of the rear and front rails.
The discrepancy between the elevations on the black and red sides of the rails at the station should not exceed ± 5 mm. Leveling accuracy class IV is higher than technical leveling and is ± 20 mm per 1 km of leveling course.
Bosch level GLL 3-80 Professional and other popular models
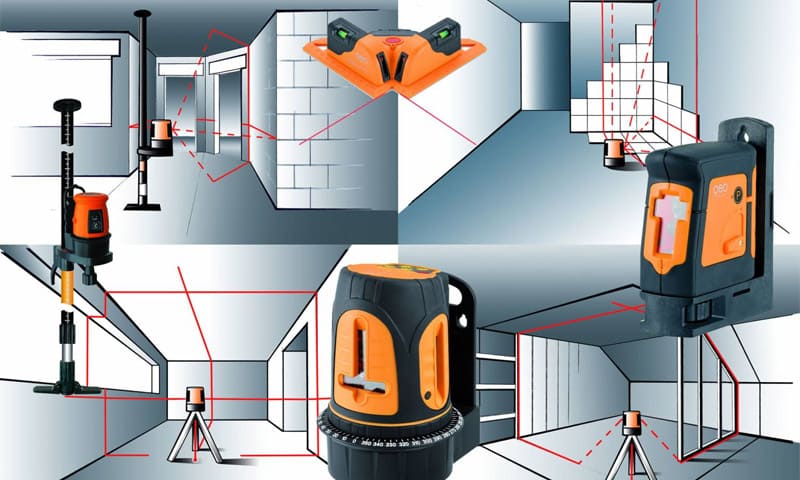
Today there are many devices that are designed to take measurements on the ground or indoors. Some of them are more effective, which is achieved due to the quality of the components. Consider which devices of this type are worth purchasing.
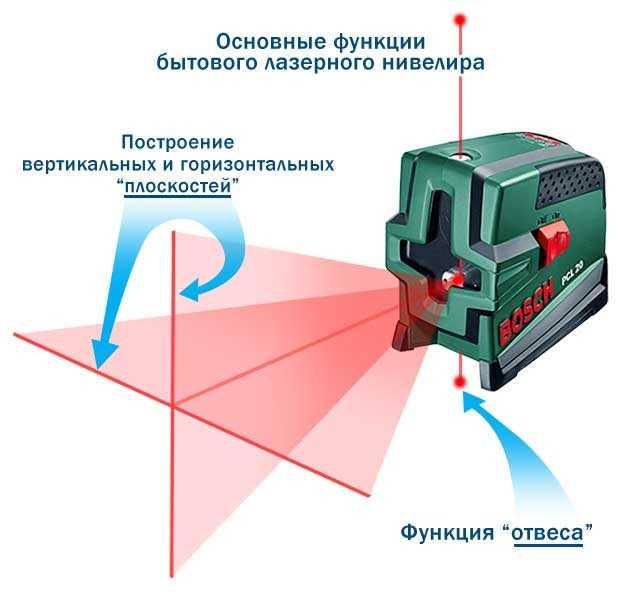
The most functional device is the GLL 3-80 Professional laser level, manufactured by the renowned German company Bosch. A similar device is used indoors. The error of the device is extremely small. Deviations are practically not observed even at a distance of up to 10 m.It should be said that there are special receivers with which you can increase the radius of the instrument to 60 m.

Laser level GLL 3-80 Professional is the most functional device
The device is powered by batteries. If you use the device without interruption, then the charge will last only 4 hours. Therefore, it is worthwhile to provide additional sets of batteries in advance. Such a tool is equipped with a holder, thanks to which its position is adjusted.
Level GLL 3-80 Professional can be used for household and professional purposes. There are special magnetic-type holders on the tool body. Among other things, the device has an automatic adjustment function, which allows it to be aligned.
Among the optical levels, it is worth highlighting the H-05 level, which belongs to the high-precision category. This device is professional, it is designed to calculate the difference in points when performing a variety of engineering and geodetic works. When using such a device, it should be understood that it requires certain knowledge and skills from the operator. The device requires a special rail equipped with a half-centimeter scale.
There are several companies that produce reliable and durable equipment. For example, in today's market, there are often various level models made by DeWALT. High-quality fixtures are also realized by Stabila.

Devices manufactured by DeWALT are of excellent quality.
How to use a laser level: common mistakes when using the device
Many people who use this device for the first time may encounter certain difficulties that will lead to inaccurate calculations. Let's consider what mistakes are most often encountered when using levels for construction purposes.
First of all, care should be taken to ensure that the instrument is in complete safety. Of course, modern models of levels are resistant to many adverse environmental factors, but they are susceptible to mechanical stress (shock). It should also be understood that the reliability of a device is not always price dependent. Lasers require more careful maintenance.

Overheating of the level can adversely affect measurement accuracy.
The stability of the device is a very important point. If we take this factor without due seriousness, then not only will the final measurement result be inaccurate, but the device itself may suffer. Repairing the level is not cheap, so it is not recommended to turn a blind eye to the basic rules of its operation.
The installation of the instrument rail must be carried out in such a way that it is clearly on the surface. This will eliminate the possibility of skewing. Finally, under no circumstances should the instrument be allowed to overheat. This will negatively affect the measurement accuracy.
Thus, levels are indispensable devices for determining the height of objects. The data obtained is used for the construction of buildings. Household laser models can be used for various purposes when it is required to calculate the exact location of building elements.

