Types of hillers and their characteristics
There are 4 types of hillers:
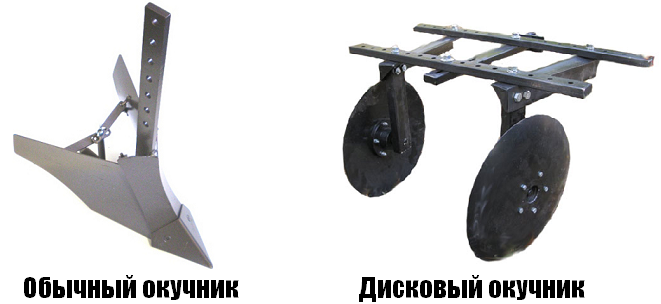
- Lister type;
- Disk type;
- Propeller type;
- With variable working width.
Lister type hiller
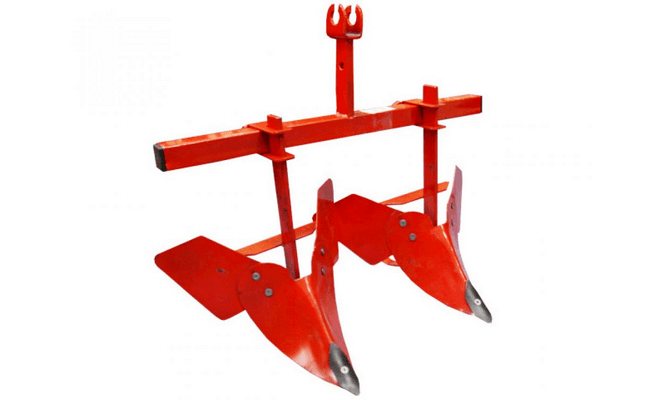
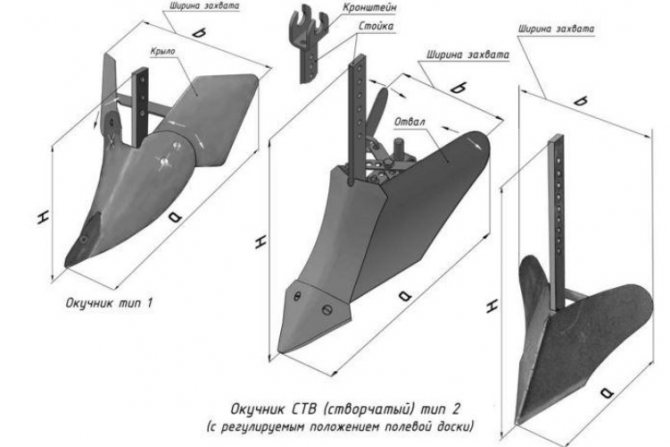
The lister type hiller is characterized by a constant coverage width. This device itself is a weapon with two fixed wings. Since the size of the working width in this view cannot be changed, it becomes inconvenient to work with. You have to adapt the furrow width to the hiller, and not vice versa.
Typically, the standard working width for growers is 25–30 cm, which is completely inconvenient when growing potatoes (for planting tubers, a width of 60 cm is usually taken). Therefore, it is not suitable for all gardening and planting work.
Another characteristic feature of this type is that it is not suitable for any walk-behind tractor. It can only be used with light multi-cultivators weighing up to 30 kg and with a capacity of no more than 3.5 horsepower. In order not to overload the multicultivator, a thin stand is installed on it. If you work at great depths, or if the soil suddenly turns out to be too dense, the tine will simply bend, and thus protect the multicultivator from overloading. Therefore, in no case should the rack be reinforced. It was made this way on purpose.
The big advantage of the Lister type hiller is its small size, which is very convenient for transportation. But at the same time it is necessary to take into account the fact that with high soil moisture, it will begin to stick, which will create great inconveniences in the work.
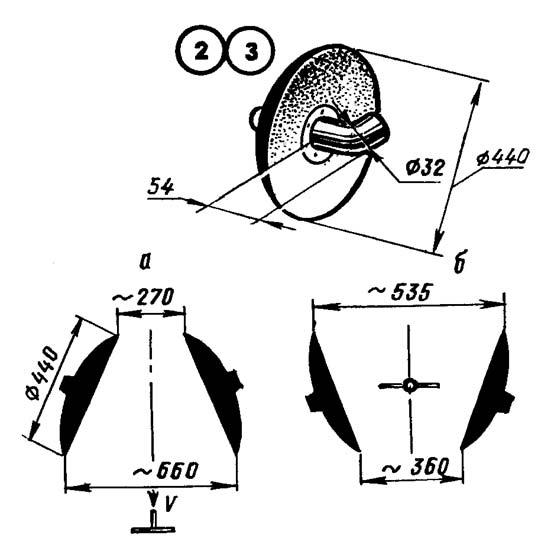
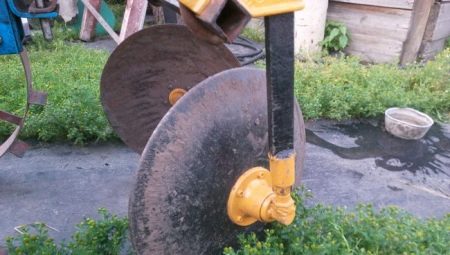
Disc type hiller
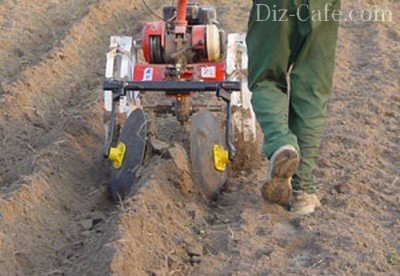
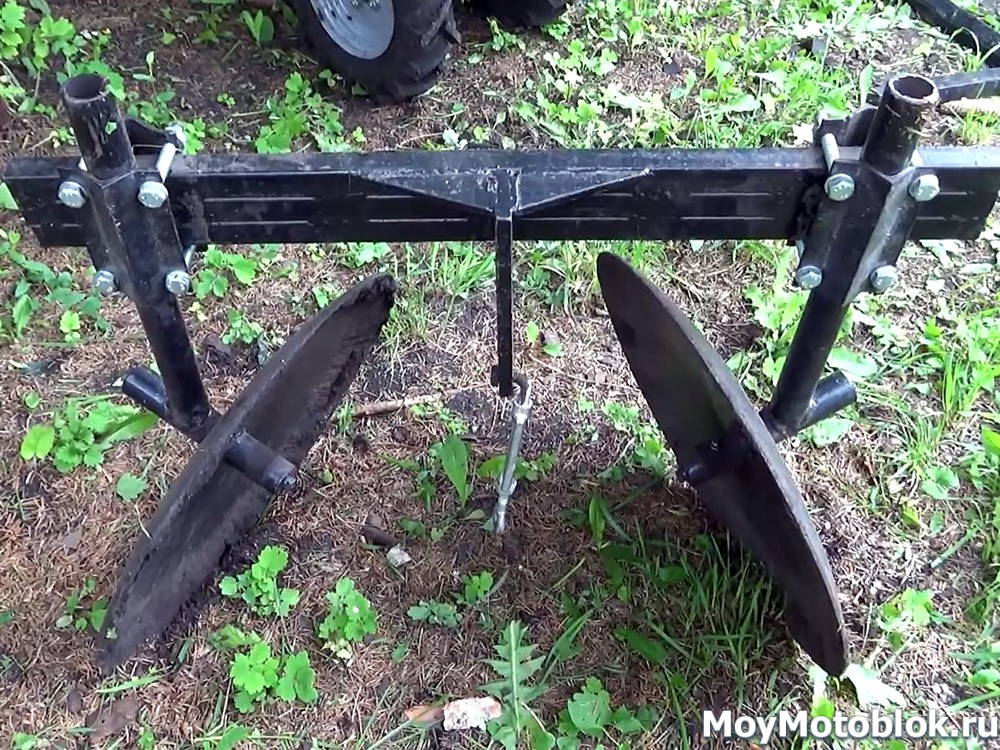
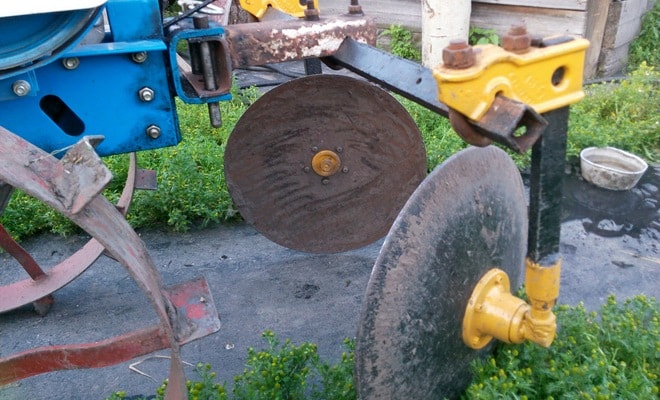
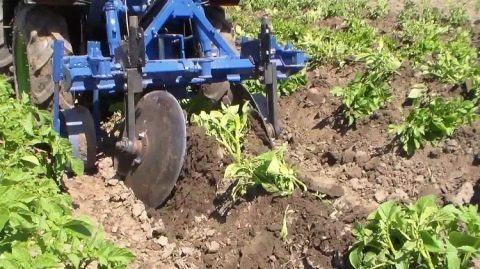
This type of construction has several advantages over other types. It fits perfectly with the walk-behind tractor. When digging at a reduced speed of the walk-behind tractor, the power of the tool itself increases significantly. This fact facilitates the work of the person who took up hilling. It will be much easier for him to cultivate the soil than with the same lister species. This is the most popular type of hinged structure for a walk-behind tractor among farmers. The adjustment is very simple and straightforward. Its popularity is due to its relatively low cost and ease of use. And the ridges from the soil are much higher than those made with the help of other types of hiller.
Another advantage of the disc type is that it can be used not only during planting, but also during the period of active plant growth. Potatoes grown with the disc tiller will give good germination and a bountiful harvest.
Propeller-type hillers
Propeller-type hillers, or, as they are also called, rotary, are intended only for certain types of cultivators and motoblocks, namely for those with 2 forward gears. In second gear, with an increase in power, it will be possible not only to loosen the soil, but also to throw it from the row spacing into the beds themselves. The basic principle of operation of this hiller is that it grinds the soil, as it were, throwing out weeds and any debris from it. And only after cleaning the soil and loosening it, hilling itself will occur. For potatoes, this is just the optimal solution.
Another important point when buying a propeller-type hiller is to check with the seller if there are 2 forward gears. By default, the seller will think that just 2 gears are needed - rear and front.
Hillers with variable working width
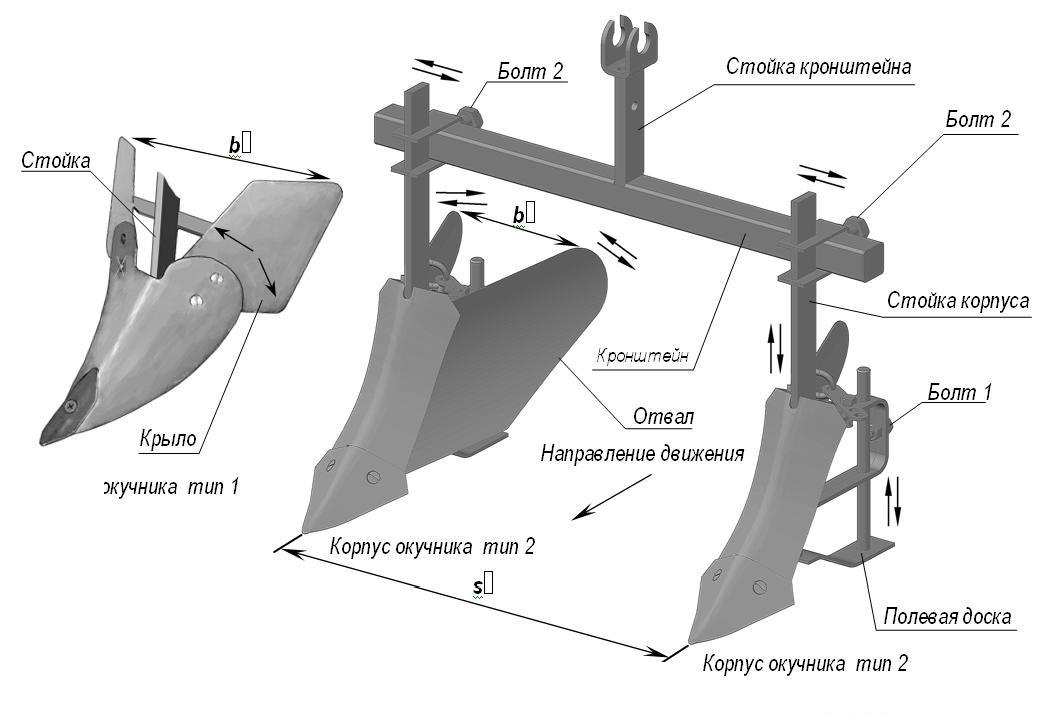
They are very convenient in terms of the fact that in this mechanism you can adjust the position of the wings.With this property, this type of hiller can be used to work with any crop and for any size of beds. Such models are very popular and in demand. Also, this type of construction has a stronger and wider strut. The fenders can be adjusted to whatever width is needed in a particular case.
The disadvantage is that by throwing the ground in both directions, it brings a part back into the furrow. Thus, it turns out that some of the engine power is wasted work. For heavier walk-behind tractors, this moment will not matter, but for lighter types of walk-behind tractors, this is quite sensitive. After such an energy-intensive work, arms and back get very tired. After cultivating a small plot of a potato field, there will be no more strength for anything.
Types of hillers
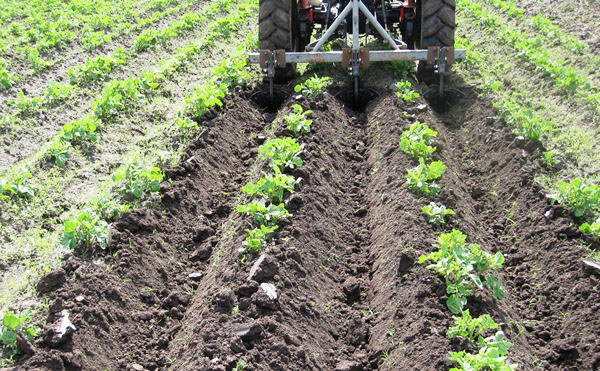
The easiest way is to loosen the soil between the rows with a hoe or hoe and add soil under the bushes, forming mounds. But it is much more convenient to form ridges with a manual potato hiller. By hanging such a device on a walk-behind tractor or an electric cultivator, you can quickly process even fairly large areas.
In specialized stores, a variety of models of hillers are sold, each of them has its own principle of operation. When choosing a tool for yourself, you need to take into account the size of the area to be processed, and if there is a walk-behind tractor or other unit - the brand and characteristics.
Depending on the principle of work, hillers are:
- disk;
- plow.
According to the device of the working element, the hillers are classified as follows:
- models with a constant working width (distance between discs or plowshares);
- models with adjustable working width.
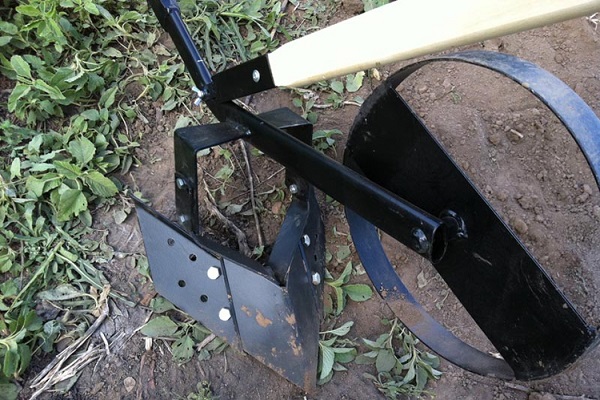
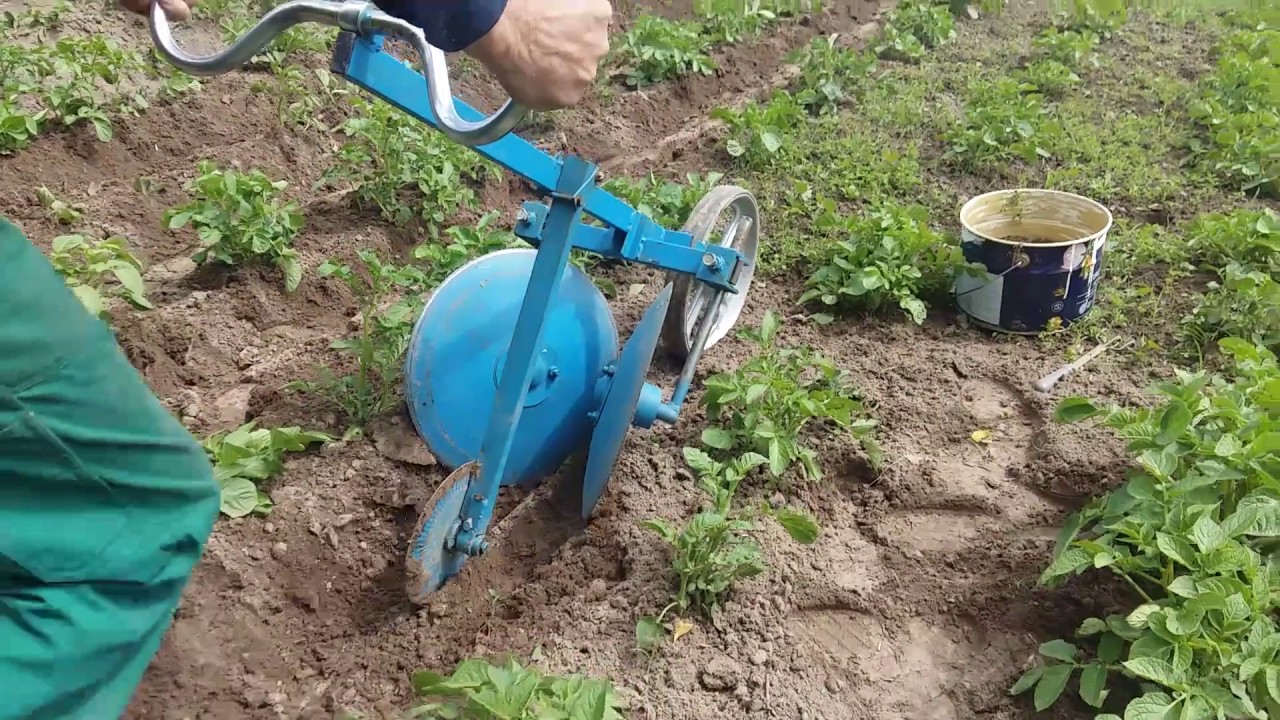
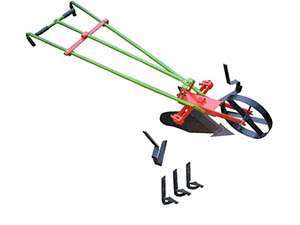
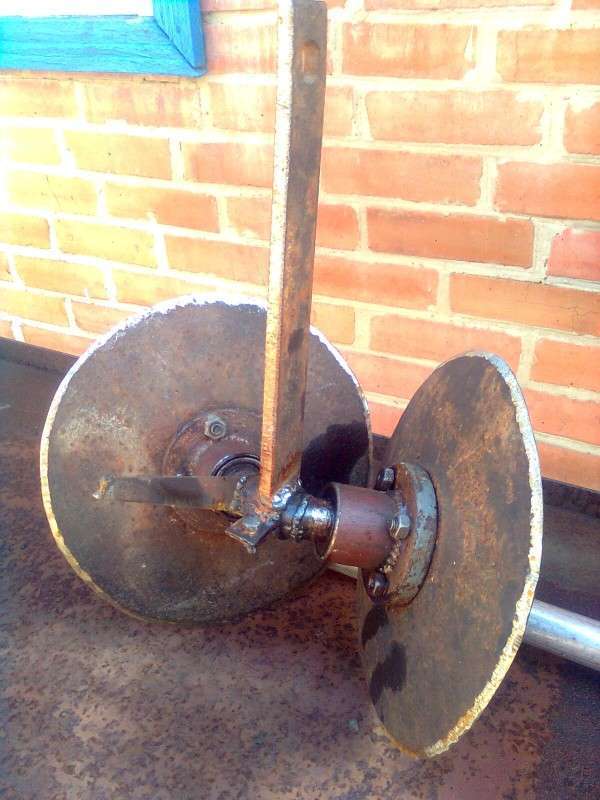
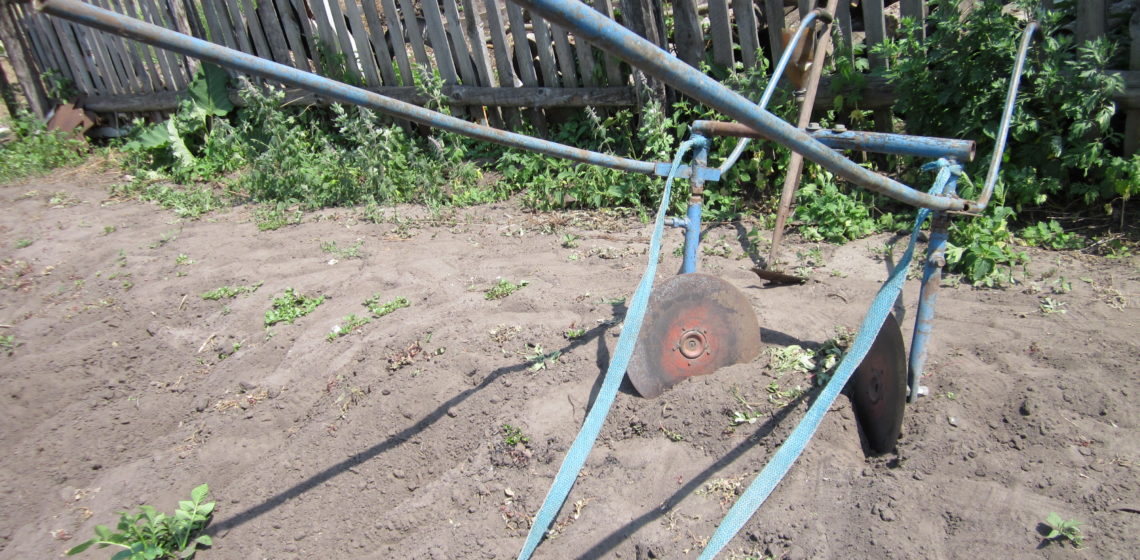
Fig. 1 and Fig. 2 show manual hillers. These models are usually equipped with one working element and comfortable handles (for two people to work together).
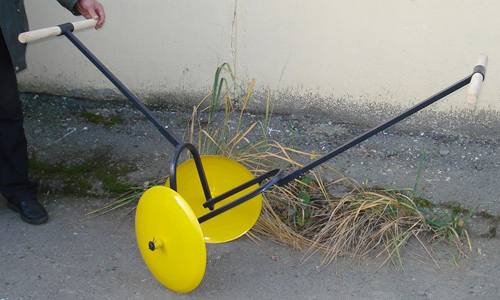
Fig 1. Disk hiller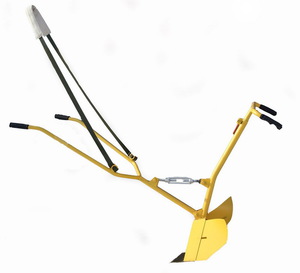
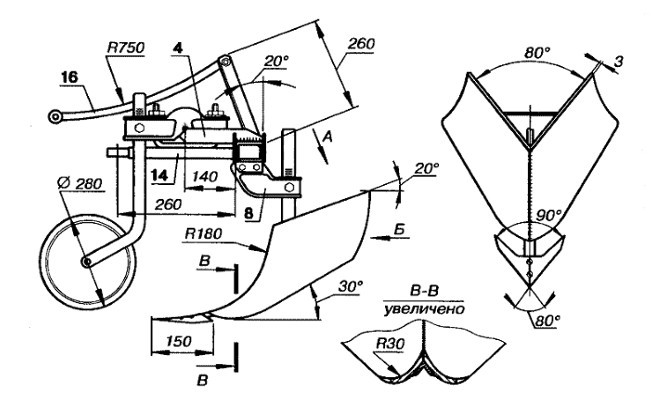
Fig 2. Plow with adjustable angle of attack
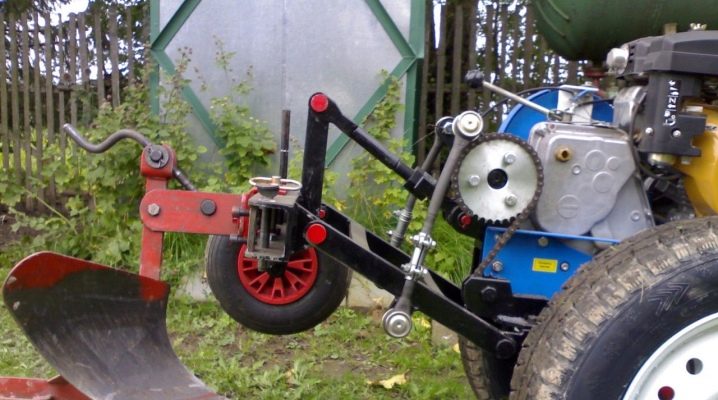
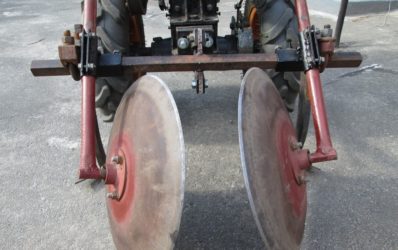
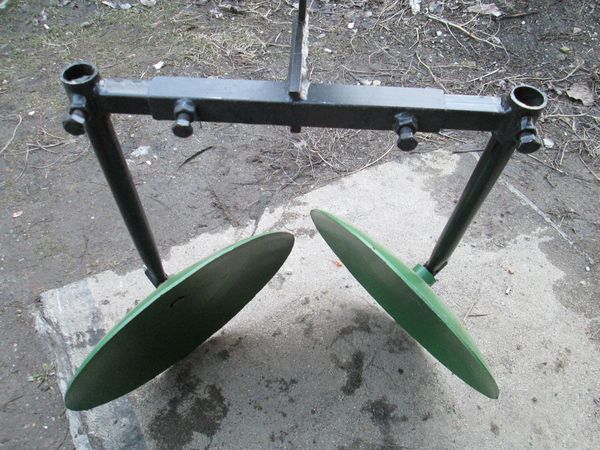
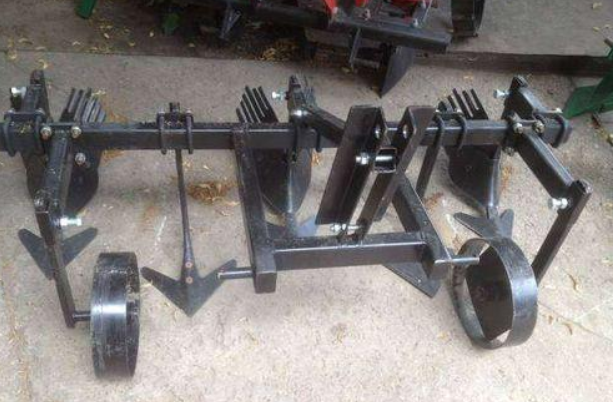
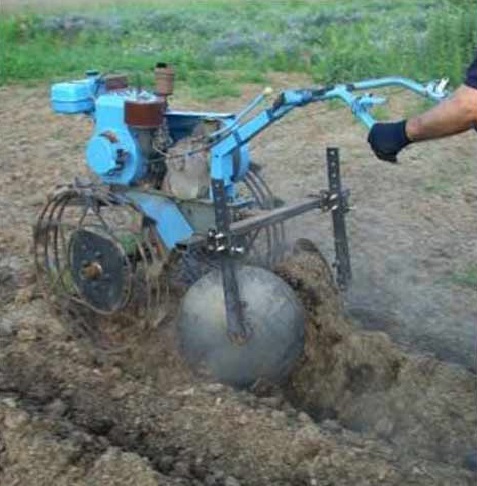
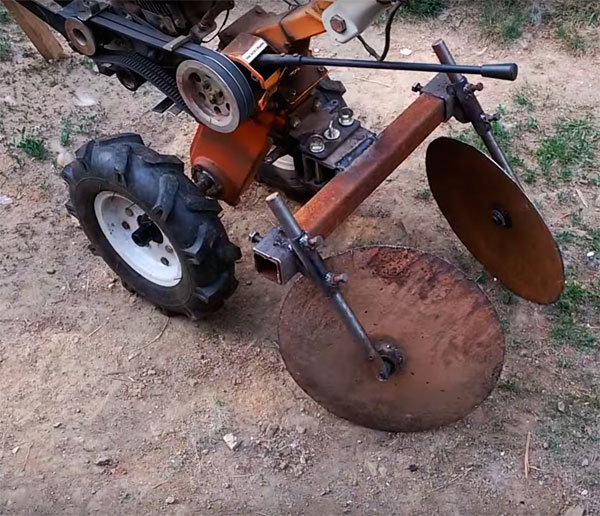
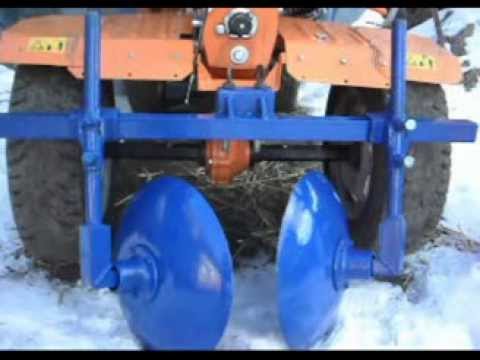
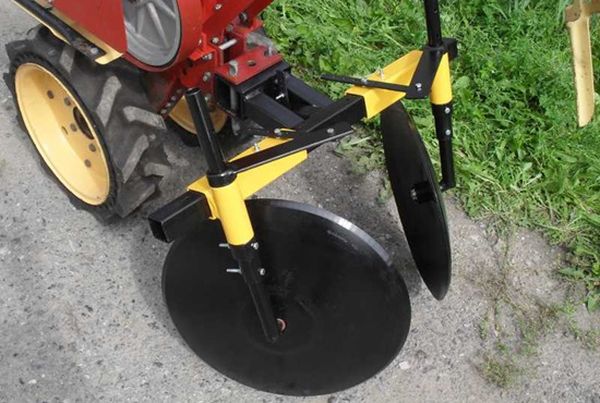
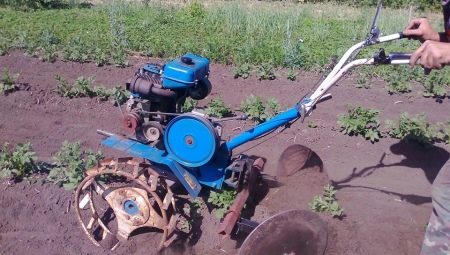
Fig. 3 shows a mounted disc device with a connecting unit to a moto-cultivator or mini-tractor. Such hillers can have one or several pairs of discs (or several plows) mounted on a special beam. The number of working elements depends on the power of the machine.
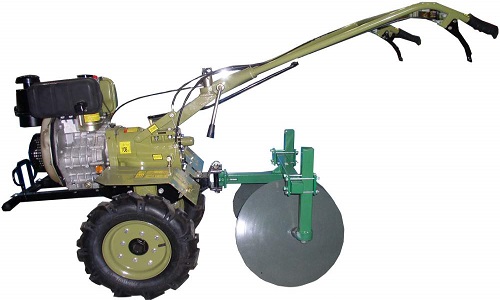
Fig 3. Motoblock with disc hiller and adjustable working width
Recommendations for use
Even if you make the hiller correctly, you need to learn how to use it. Assembling the structure with your own hands, you need to conduct trial testing on the site. The quality of functioning depends on some points: what is the state of the soil, climatic conditions and weather on the day of plowing, literacy of settings, sharpening of elements.
Configure empirically:
- You need to walk the product on ordinary soil in order to adjust the level of the angle of the elements, the depth of their immersion in the ground.
- It should be much smaller in relation to the plow.
- The clarity of the pace of accomplishment of the assigned task excludes such moments as scattering of land to the sides, deterioration of the appearance of the created furrows.
Attention! It is forbidden to turn on the equipment if there are animals and children nearby. It is strictly forbidden to leave the included equipment unattended or to operate it in a faulty condition.
All this can bring disastrous consequences.
It is not difficult to make a disc hiller for a walk-behind tractor with your own hands
It is important to competently approach the process, prepare materials and tools. It is advisable to have an assistant nearby so that it is convenient to fasten the parts
The finished structure will amaze you with its operational properties and technical characteristics.
How to make a simple do-it-yourself hiller for a walk-behind tractor: drawings and videos
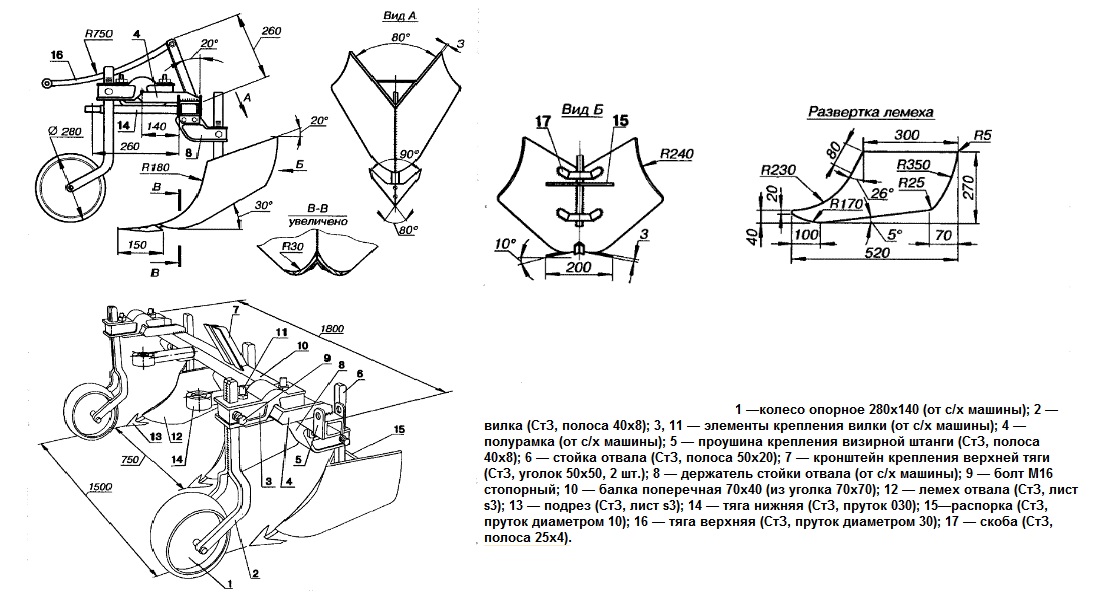
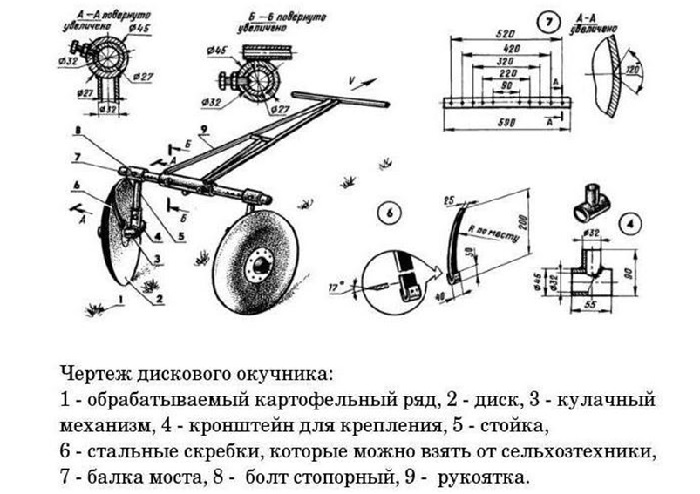
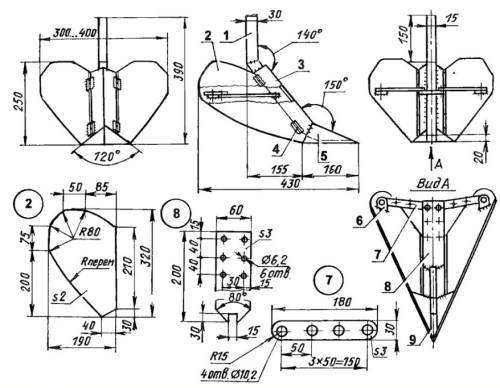
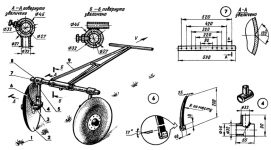
For work, you need to prepare welding equipment, a hammer, a vice, a grinder for metal, a pencil, fasteners for expanding the sidewalls, a drill with a drill for metal (drilling machine), a sheet of metal 2 or 3 mm, a hacksaw and other tools and materials.For the manufacture of parts, use the dimensions indicated in the drawings in the photo:
I. Preparation of hiller parts
At this stage, you need to make a drawing of all the parts and transfer them to paper or fabric. If you have a piece of waterproofing material or dense agrospan left in your garage, then it can become an excellent basis for preparing parts, instead of paper. The outlined templates must be cut out, attached to the metal and outlined with a pencil. Lay out the workpieces on the sheet so that there are fewer clippings when cutting them - this will help save metal. Now you need to cut parts from the sheet using a grinder.
II. Bending of parts and welding of the body
The two halves of the front part of the hiller are welded first. To do this, they need to be bent so that the radii of the workpieces coincide. Bending is performed with a hammer and anvil. The parts of the front part are welded with a continuous seam on the front side and at several points for strength - on the inside of the corner. The seam is overwritten with a grinder or a file.
What is the best way to make the front part of the hiller?
The spout for the front part of the hiller can be made as a separate piece in the form of a metal triangle. The bending of a triangle can be performed by placing a metal plate under the bottom (with an edge to the bend), or by holding the triangle in a vise up to the bend line. The part is bent with a hammer to the desired angle. The sock is then welded to the front.
In the photo we see a detailed description of the size of a simple wedge-shaped hiller for a walk-behind tractor. If you have a grinder with a disc for metal and welding equipment, then you can easily translate this drawing into reality
The hiller's wings must be bent with an anvil and a hammer. The bending lines of the right and left parts must match each other. The detail should approximately correspond to the drawing that you see in the photo
Both wings of the hiller bend in the same way as shown in the photo. The sides can be welded to the front thoroughly or fixed with hinges and bolts. The latter option allows you to adjust the width of the row to be hilled. To create the moveable version, you need to weld four lugs on the inside of each edge of the front. And, accordingly, there are two ears along the edges of the butt parts of each wing. Connect the parts with bolts. The lugs or hinges can be replaced with bolted nuts. A corner 50, about 18 cm long, is welded to the top of the nuts. The corner is cut at an angle of 45 degrees. To fix the selected wingspan (row width), weld the loops to the inside of the blades. In the hinges, first insert the strips with holes for the bolt, which will fix the wings to the rack.
III. Final assembly
Next, we need to make a sole for the hiller, side strips with holes for adjusting the blades and a central stand, which will also connect the nozzle to the walk-behind tractor. The center post must be made of 10 mm metal. If you want to adjust not only the width, but also the hilling height, then you can weld a U-shaped strip with holes to the inner corner of the central part (see photo and video).
A "shoe" - a bolt-adjustable stand will pass through the end part of the strip. All parts are welded and cleaned with a file or grinder. Fastening to the walk-behind tractor is performed based on ready-made locks on the equipment itself.
Preparation for work
The effectiveness of attachments to the walk-behind tractor directly depends on the correctness of their operation. There is nothing difficult in using them, but there are a number of points that it is useful to familiarize yourself with before hilling or performing other work using the device.
Customization
Setting up a hiller for a walk-behind tractor, like all the features of the operation of this device, is described in detail in any manual for summer residents, and it is not difficult to master them even for a beginner.However, there are always nuances that cannot be foreseen on paper. First of all, individual adjustment is necessary because each individual case has its own volume of factors, soil characteristics, weather, design and quality of sharpening of the working parts of the device, and so on.
The technical characteristics of the unit itself play an important role. Therefore, before the first departure to the beds, it makes sense to test the device on virgin soil with the same soil characteristics. Making such test passes, it is possible to feel the peculiarities of the "behavior" of the technique, to work out the angle of inclination, to adjust the depth and speed of movement.
Use special attachments on the walk-behind tractor for hilling potatoes
Adjustment
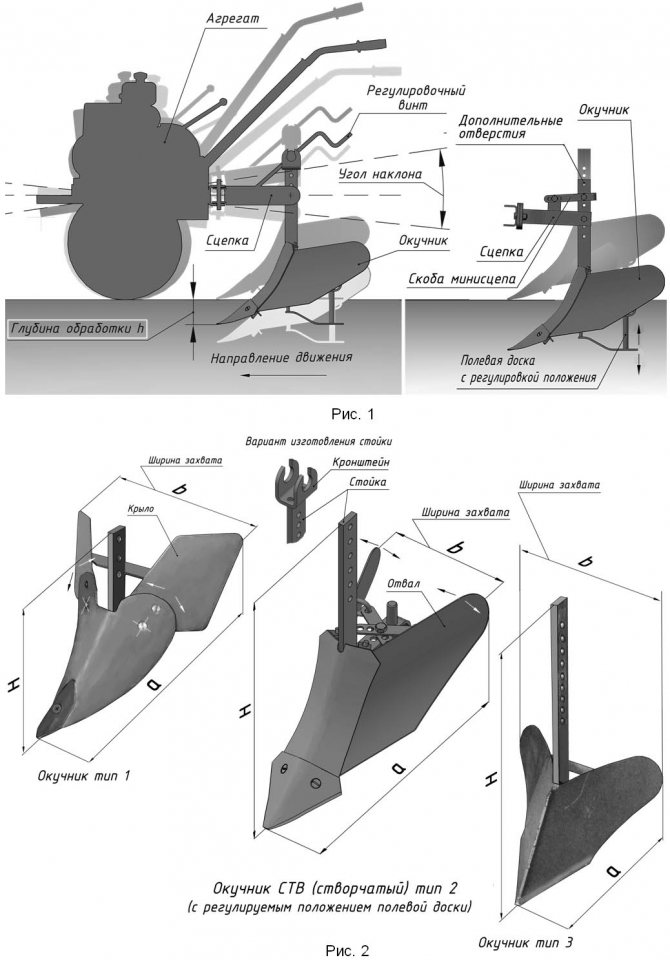
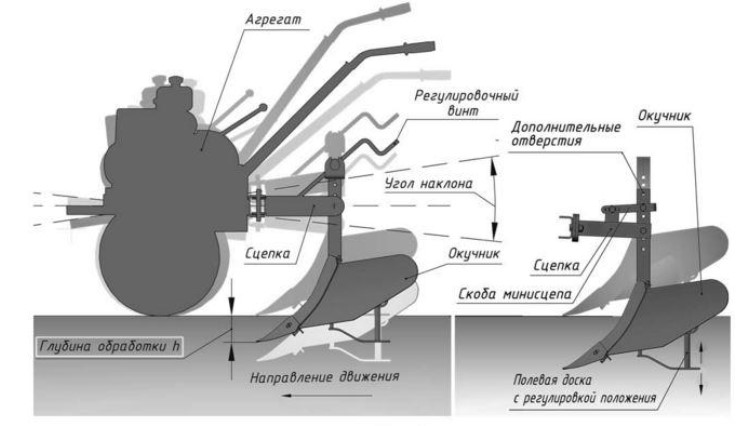
The adjusted device provides, first of all, the accuracy of its direction relative to the strip. Before setting up the disc hiller, position the machine parallel to the furrows with the desired angle of inclination and bed width. Pre-determined work parameters will ensure its efficiency.
The tilt angle is adjusted using a special screw device that tilts the device relative to the unit. The angle also determines the plowing depth. In addition, additional adjustment is carried out with the help of the holes for the mountings of the hiller. If an adjustable attachment is used, the furrow width must be set at this stage.
The lower parts of the discs move apart from 40 to 70 cm, depending on the width of the given row. In addition, when adjusting the width, you must also follow the angle of inclination - the adjustable parts must be absolutely symmetrical. Next, the unit is installed on the site in such a way that the furrow runs exactly between the discs. The passage is carried out along the aisle without touching the plants.
Installation
Now let's figure out how to install a hiller on a walk-behind tractor. First of all, a hiller with a frame is mounted: the stand of the device is inserted into the lock and fixed with two bolts. A hitch is attached to the assembled device (the same as for the plow). The resulting structure is connected to the walk-behind tractor. The angle of inclination of the hitch in the direction of travel is regulated by means of the hitch screw.

