Step-by-step assembly instructions
After drawing up a drawing of the future design and preparing the necessary units and materials, you can proceed to the assembly of a mechanical cleaver. It is best to use the ready-made instructions and carry out the work in strict accordance with the plan.
- Using an angle grinder, metal corners and profile pipes are cut into pieces required for making the bed.
-
A rectangular overlap of the table top and the bottom shelf are cut out of a metal sheet with a thickness of 4 - 5 mm.
- Using a welding machine, the parts of the upper and lower frames are connected, after which the legs are welded to them.
-
In the mobile version, axles are welded to the bed, on which the wheels are installed.
- Mount the countertop and shelf.
- Assemble the support frame of the electric motor and attach it to the bed.
- An electric motor is mounted, a drive pulley is installed on its shaft.
-
The assembly of the working shaft of the cone is assembled, for which the bearings are pressed into the housings. After that, the shaft is mounted and the pulleys are installed. The assembly is attached to the bed with bolts and nuts, after having drilled holes in the table top. After assembly, the main shaft should rotate easily. Pulleys can be installed on a keyed connection or fastened with side screws, having previously made grooves on the shaft.
-
Install the belts and check the straightness of their trajectory. If necessary, the shaft with the supports is shifted by drilling a couple of additional holes. When rotating, there should be no radial and axial beats, otherwise the belts will constantly fly off and wear out quickly.
- By means of a keyed connection, a screw cone is installed on the drive shaft, after which it is fastened with screws. During operation, the cone can get stuck in the wood so that it can only be removed by reverse rotation. Since it is problematic to organize the reverse in this design, you will have to turn the wedge with a gas wrench. You can avoid slipping it by making flats on the protruding part of the shaft.
-
Install the divider.
- Carry out electrical connections - mount a magnetic starter, RCD, wiring.
-
Start the machine and check it in action.
After testing, all parts of the wood splitter are cleaned of rust, treated with a rust converter, primed and painted.
Review of the most popular models for chopping wood
You can buy a tool for splitting firewood in specialized stores of special equipment or household goods. Usually they are not brought in large quantities, so it is better to speak with a store representative in advance to find out if the device is in stock.


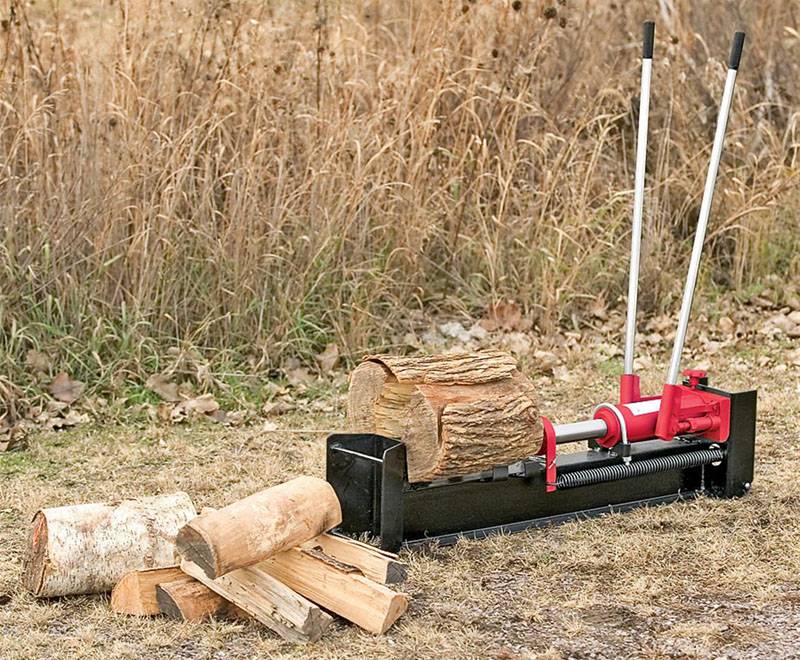
Most often, Russian consumers praise the Logmaster brand special tools.
Logmaster log splitter
The wood splitters in this series are distinguished by their high build quality and amazing performance.
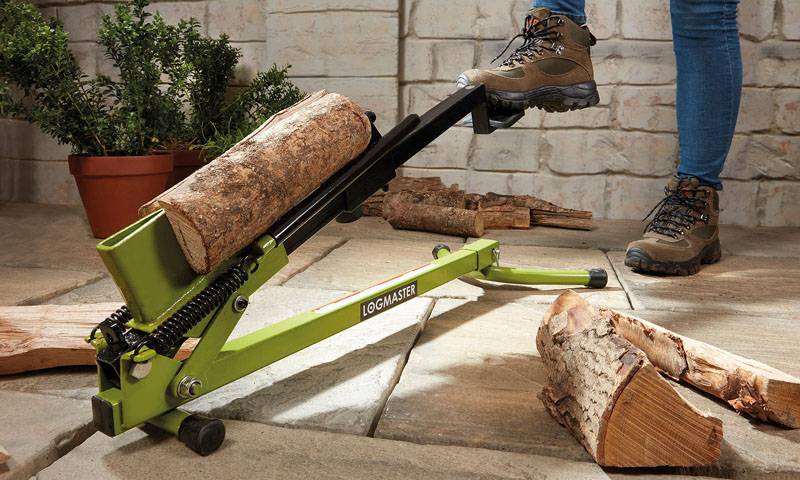 Lightweight, compact, convenient - the wood splitter, invented by the American engineer James Clifford, is considered the standard of such machines.
Lightweight, compact, convenient - the wood splitter, invented by the American engineer James Clifford, is considered the standard of such machines.
Briefly about the characteristics:
- weight - 9.5 kg;
- drive type - foot;
- working force - 1200 kg;
- price - from 4,000 rubles.
Logmaster log splitter
Mechanical wood splitter ZIGZAG from Yardworks
Mechanical wood splitter ZIGZAG is one of the lightest mechanisms for splitting wood. Provides quick and easy splitting of logs without an ax. Pressing the foot pedal on the steel wedge creates a pressure of 1200 kg. Dimensions of the processed log: diameter up to 25 mm, length 45 mm. The cost of such a model is 4900 rubles.
 The Yardworks ZIGZAG log splitter is a simple and convenient tool that you just need to have in the country.
Mechanical wood splitter ZIGZAG from Yardworks
Homemade Screw Cone Log Splitter
The screw log splitter (we mentioned it earlier) can be vertical and horizontal. It differs from the usual wood splitters in the shape of the saw tool. This is not a blade, but a cone. There are no special operating conditions for such a wood splitter. Such a system does not care if there are knots in the log. They are equally quick to cope with wood of different configuration and quality.
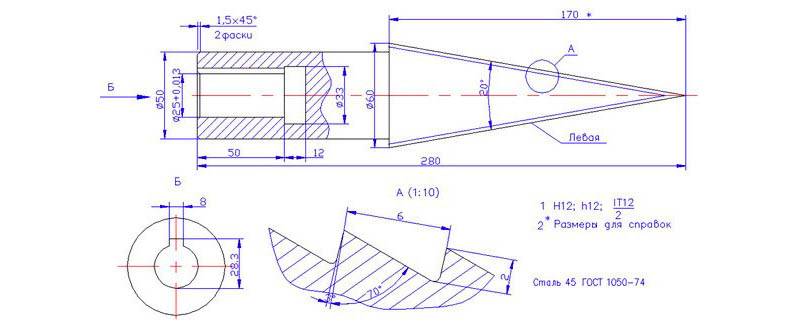 Diagram of a cone for a wood splitter
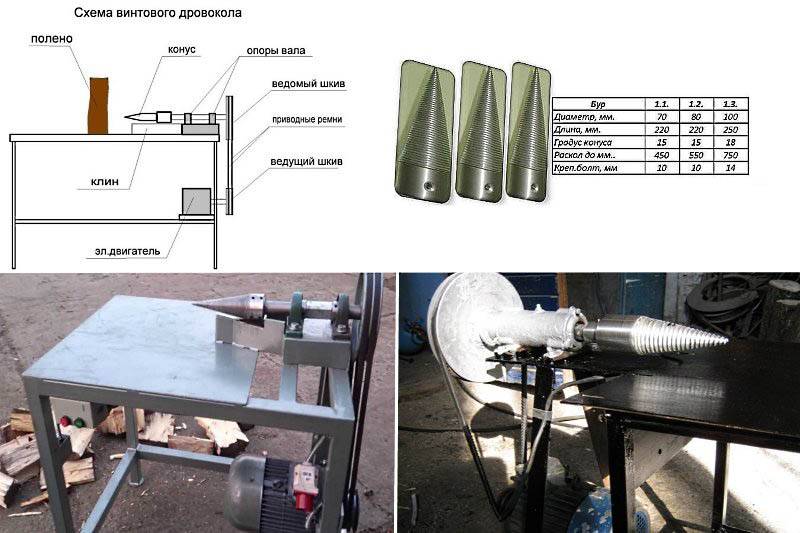 Screw machine diagram
Such devices are considered to be among the safest. In addition, such a mechanism does not require a powerful motor, which is definitely a plus. Power of 3 kW will be enough to ensure uninterrupted operation.
The cone splitter is not so sensitive to the diameter of the log
The most important thing here is to place it correctly under the cone, exactly in the center of the cut. Previous Gardening EquipmentTo the Gardener's Bailout: The Benefits of a 2-in-1 Tool for Harvesting Potatoes and Leaves
The next Gardening equipment5 unusual devices that simplify summer cottage life
Previous Gardening EquipmentTo the Gardener's Bailout: The Benefits of a 2-in-1 Tool for Harvesting Potatoes and Leaves
The next Gardening equipment5 unusual devices that simplify summer cottage life
Spring log splitter. Step-by-step manufacturing instructions
First, prepare all the necessary tools - in our case, these are:
- grinder (as well as stripping and cutting discs for it);
- tools for marking and measuring;
- a welding machine (fortunately, today's inverter machines weigh a little, are easy to use and allow you to get neat welds).
Also prepare the following consumables:
- shock absorber from a car;
- channels;
- steel pipes (with a diameter of 4 cm to 7 cm);
- profile pipe 3x6 cm (4x6 cm);
- bushing from a car suspension (worn out is allowed);
- rail (30-40 cm);
- corner;
- I-beam (No 12-16).
Step 1. First, prepare a sketch of the future structure. If possible, you can use a special engineering design program that allows you to work out all the details. Here is a rough diagram of the future wood splitter.
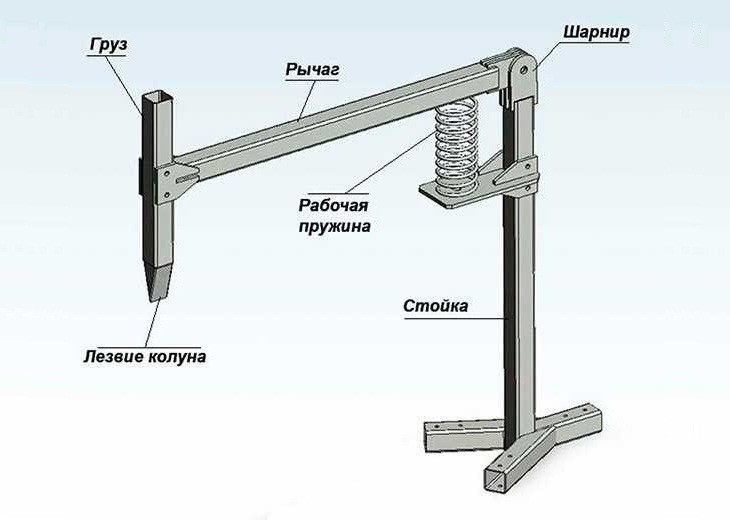
An approximate diagram of a spring wood splitter with your own hands
Step 2. Make a support from a channel, weld a stand to it (it is better to make the latter from an I-beam, which is characterized by high rigidity; such a stand will be difficult to bend even with prolonged loads). For greater stability, weld the jibs to the base. Also, make additional stops from the pipes to prevent the possible fall of the wood splitter.
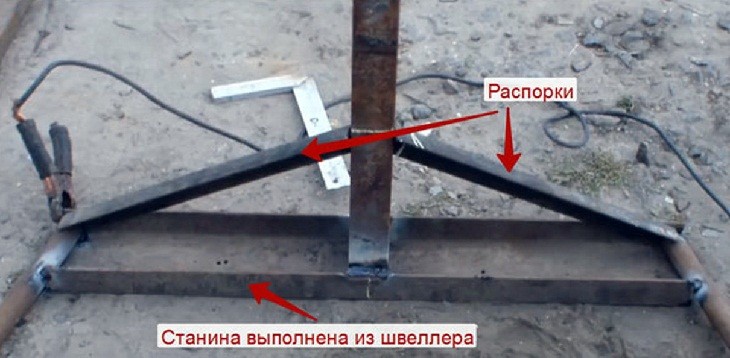
Support of the future wood splitter
Step 3. Take the channel and cut out the spring support. Cut a square hole in the support to keep the element securely in place on the upright.

Spring support
Step 4. As for the height of the support, it depends on the length of the spring used. Also focus on the height of the entire structure and how convenient it will be to use it. So, it is most convenient to lift the load when it is at the height of the belt (it will rise slightly above the chest).
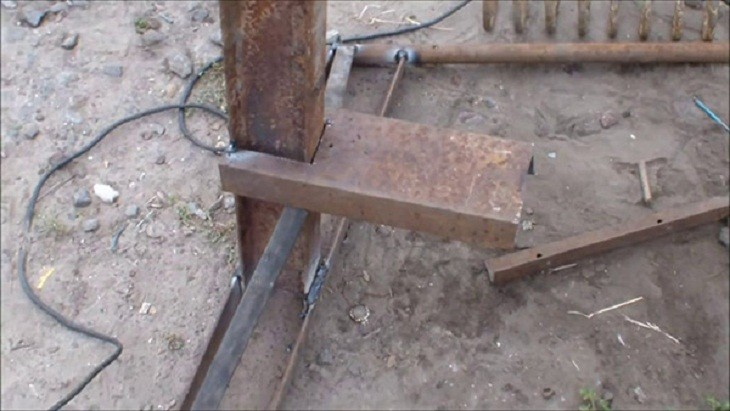
The height of the support is determined
Step 5. Make the jibs necessary to hold the support out of the corners. Due to this, the supporting surface will not move when the device is dynamically loaded.
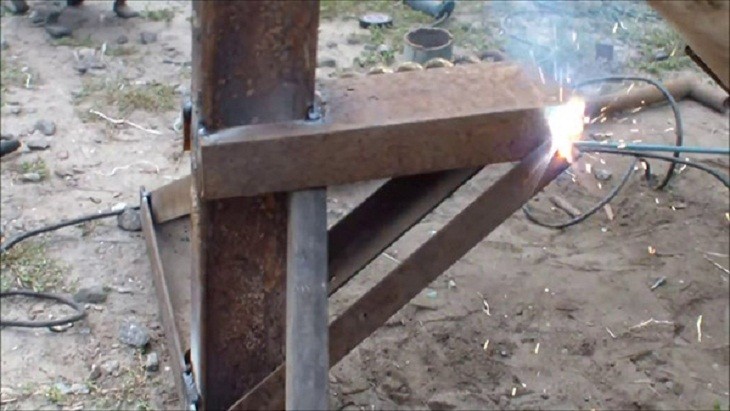
Beads from the corners
Step 6. Make a cylindrical retainer to hold the bottom of the spring, which requires a small piece of pipe. When choosing the diameter of the pipe, be guided by the inner diameter of the spring so that it does not move during operation.
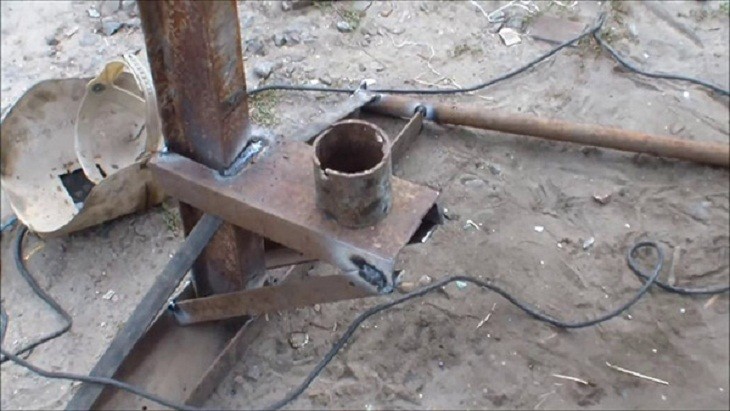
Cylindrical spring retainer
Step 7. Make a slot in the upper part of the rack, install the bushing there, and then weld the last
In this case, it is important to maintain perpendicularity in relation to the rack.Also make sure the hub axle is parallel to the ground.
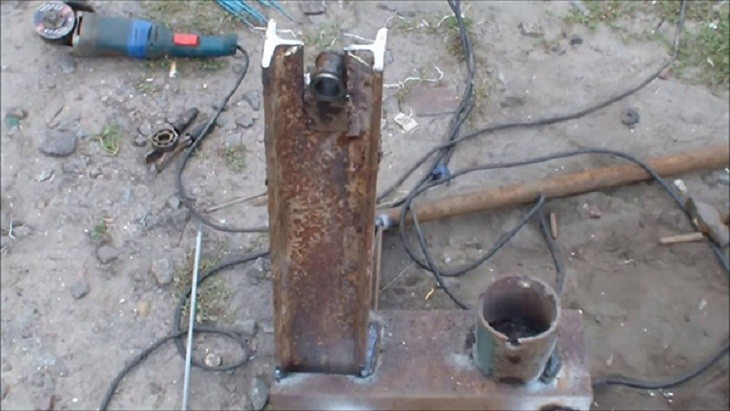
The hub axis must be parallel to the ground
Step 8. Install the shaft into the bushing. Weld to it a rocker from a channel, at the bottom of which install a small piece of pipe. This tube is needed to fix the top of the spring.
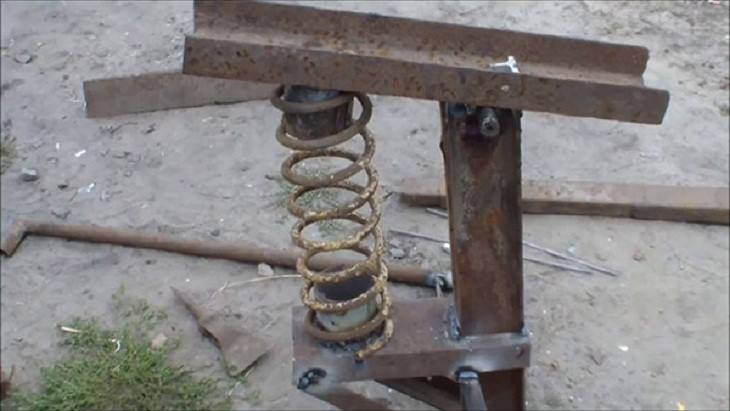
Channel beam rocker
Step 9. Cut through a "window" in the rocker, the dimensions of which depend on the dimensions of the rack itself. This will allow the rocker arm to move freely.
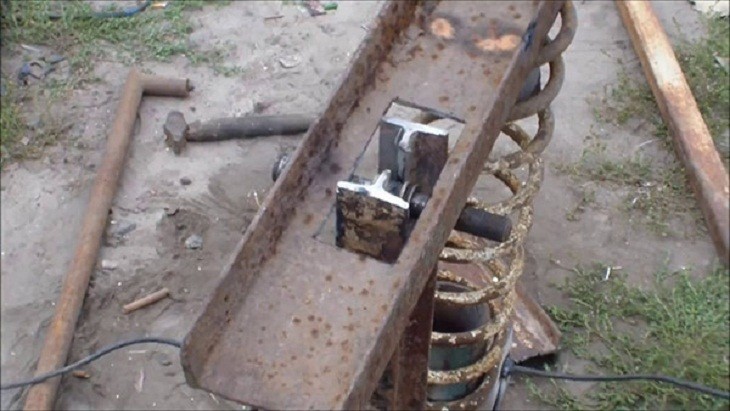
"Window" in the yoke
Step 10. Weld the profile tube to the rocker arm, place the chisel at one end. By the way, chisels are made of solid U9 or U10 carbon steel, and therefore the element will last a long time. Then, during operation, the chisel can be easily sharpened using a grinder and a sharpening wheel.

Chisel at the end of the profile pipe
Step 11. Our log splitter is almost ready. Weld a piece of rail above the chisel, which will act as a load. Also weld on the handle to make it easier to use the wood splitter. It is advisable to put rubber elements on them - they will dampen vibrations.
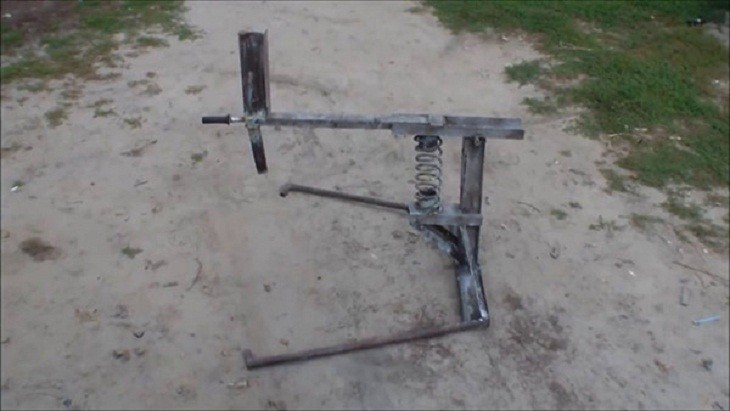
For convenience, a handle is installed on the wood splitter
Step 12. Check the operability of the wood splitter. Lay the block and, holding it with one hand, lift the cleaver and strike.
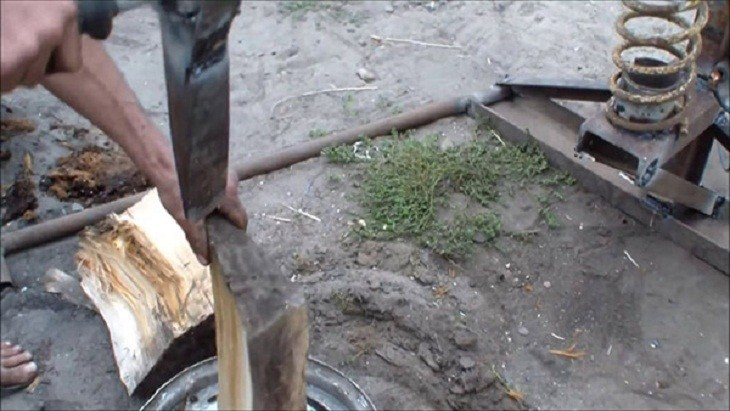
Cleaver strikes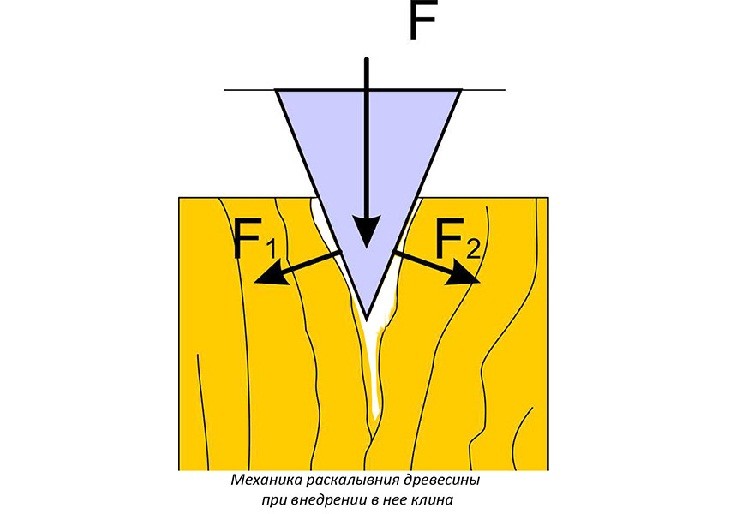
The mechanics of splitting wood when a cleaver is introduced into it
Step 13. The cleaver will go down, as a result of which the block will split. If it splits completely, then the chisel will go further, but will hit the wooden support, and therefore will not be blunt.
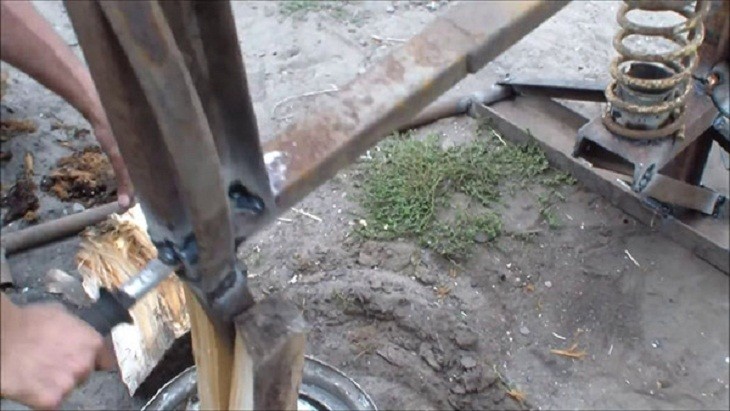
Splitting firewood with a spring wood splitter
Theoretical Foundations of Heating Engineering - Combustion of Solid Fuel
To make it easier to set fire to a tree, it must be split into relatively small fragments. After splitting the logs into separate logs, the surface of contact of the combustible material with air is increased. As a result, instantaneous heat transfer inside the furnace increases in proportion to the combustion area. Therefore, the procedure for chopping wood is a technique that allows you to increase the efficiency of fuel use.
Attention! Firewood chopped into logs is placed in woodpiles. They dry out in them.
The moisture inside the wood evaporates intensively. The apparent heat of combustion increases, since there is no need to waste energy on evaporation of the liquid located in the intercellular space.
In heat engineering, the following concepts have been introduced to characterize fuel:
- Gross calorific value, which refers to the total heat generated by the combustion of a particular type of fuel.
- Net calorific value - the actual amount of heat, which takes into account the energy consumption for heating the fuel, removing ingredients from it during combustion that are not involved in the process itself.
Therefore, drying wood is a technique that improves the performance of a fuel cell. Pre-crushing increases the efficiency of drying firewood, and later also combustion in a furnace or other device for burning solid fuel.
Do-it-yourself wood splitter according to drawings, manufacturing instructions, wood splitter with an engine from a washing machine
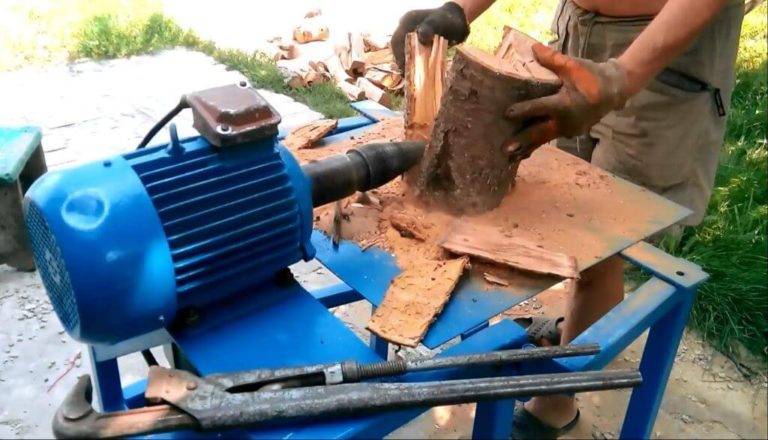
A do-it-yourself wood splitter is a mechanism designed to facilitate the process of splitting large logs for heating a stove or fireplace. The attractiveness of the tool is expressed in the fact that anyone can make a wood splitter on their own from inexpensive materials.
Device classifications
The design has many classifying factors. Wood splitters are distinguished by:
- the sphere of exploitation (private use, large enterprises);
- tree bookmarking method (vertical, horizontal, mixed);
- engine type (electric, gasoline, tractor-driven, combined);
- method of transportation (mobile and stationary);
- the principle of operation (hydraulic and screw (conical)).
Homemade wood splitters are most often equipped with an electric or gasoline engine. The rest of the parameters are individual and are selected for personal needs. For everyone who racks their brains with the question: "How to make a wood splitter with your own hands?" we will provide assembly instructions for the hydraulic and screw unit.
DIY hydraulic log splitter
Most often, the hydraulic system for the operation of the device is borrowed from the tractor. An electric motor driven by a tractor or gasoline can also be used. The hydraulic wood splitter includes the following accessories:
- bed;
- pump;
- container for oil;
- motor;
- hydraulic cylinder with stop;
- blade;
- distributor.
Making a wood splitter with your own hands with drawings, photos and instructions will not be difficult for people who are at least a little versed in the mechanics of a hydraulic installation.
For convenience, we will show a drawing of the mechanism and put together a short assembly guide.
Hydraulic wood splitter assembly instructions:
- We fix the hydraulic jack on the bed.
- At the other end, a wedge-shaped blade is mounted, which will allow you to work with logs of different volume and length.
- In the middle of the structure, we have a platform for stacking logs. When interacting with the handle of the jack, the stop will press the wood towards the wedge knife, which will successfully split it.
- After splitting, the springs will return the stop to the starting position.
Such a device is not distinguished by its high speed of work, however, whatever one may say, it is much easier than chopping wood with an ax.
DIY screw (conical) wood splitter
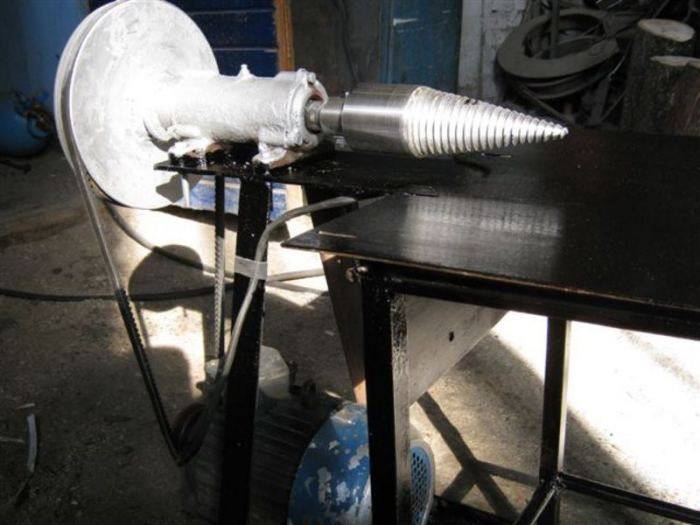
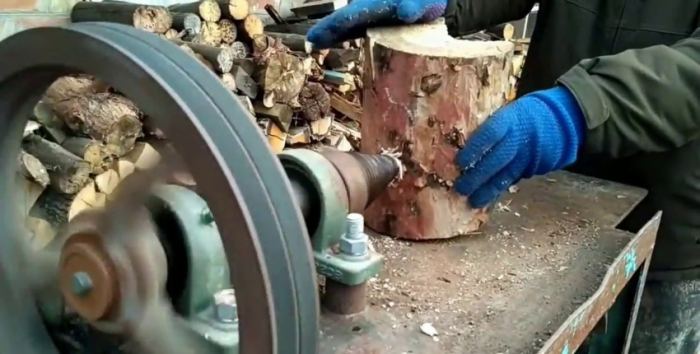
The principle of operation of this type of wood splitter lies in the property of a rotating metal cone to split logs, due to the existing thread on the surface.
It is one of the most common wood splitting tools. It is not only easy to use, but also easy to assemble with your own hands.
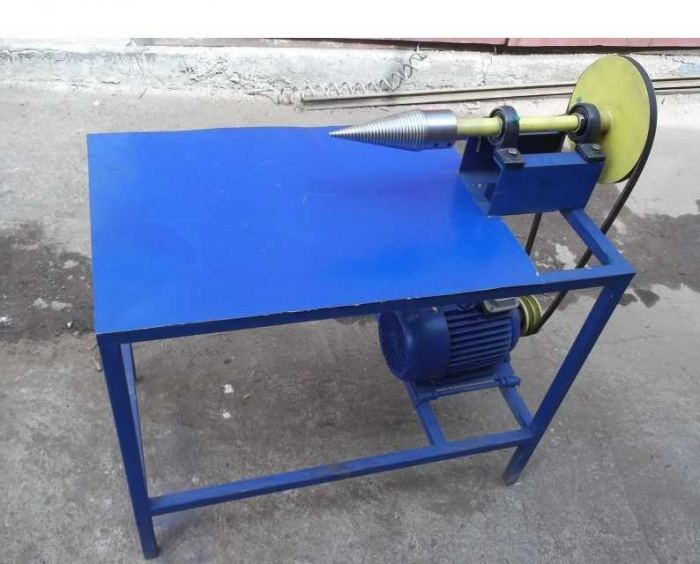
Instructions for assembling a screw log splitter with a cone-shaped splitter:
- Decide on the power source of our unit. The example drawing shows an electric motor.
- It is necessary to select the correct cone. Depending on the dimensions of the device and the logs to be split.
- Make a plan of the location of all elements of the device on the desktop.
- Make the bases for the entire structure. The working platform looks like a steel table with a fixed splitter shaft.
- Weld a kind of keel to the table to avoid log particles getting under the rotating device.
- Attach the power supports for installation and place the cleaver in its working position.
- Connect the motor. The device is ready for use!
The principle of operation of the cone wood splitter
The power unit (in our case: the electric motor) gives the rotary motion to the cone. You should carefully bring the log and press gently towards the cleaver. The cone cuts smoothly into the structure of the tree and splits it in half.
A screw wood splitter with a washing machine motor is the most convenient and functional option for home use.
In addition, it is possible to avoid the cost of purchasing a new engine. It can be used by removing it from an old washing machine.
Operating principle
The principle of this mechanism is simple. The vehicle spring holds the wood splitter beam in its original position. A chock is installed under the wedge of the wood splitter, which needs to be split. The "operator" of the wood splitter abruptly presses the handle, moving it down. Under the influence of a person's muscular strength, multiplied by the weight of the weighting agent, the wedge splits the chock in half.After that, the handle is released, the beam, under the action of the spring, returns to its original position.

Simple wood splitters with a manual drive of one manpower are much more effective than a conventional ax or even a cleaver, but still not productive enough.

Spring log splitter
If you modify the above-described mechanical wood splitter, you can make a smaller device, while requiring less physical strength when working with it. For this purpose, a spring is attached to the frame, one abutting against the crossbar, which also serves as an attachment for the cleaver.
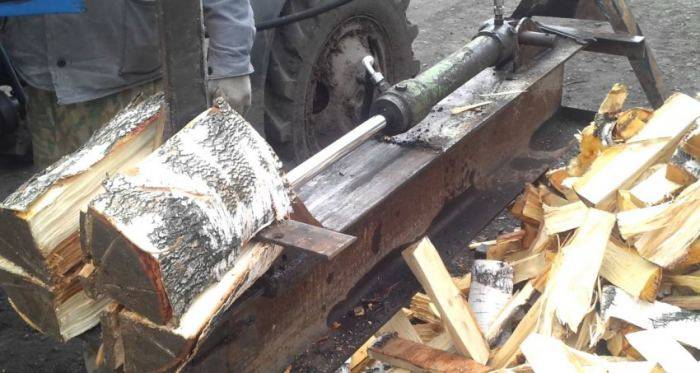
The principle of operation is similar to the previous device, except that the load after the log is split is damped by a spring. The main task is to select a stop and a spring so that with the least effort the greatest result is obtained. For the convenience of adjusting the effort, the emphasis is made movable.
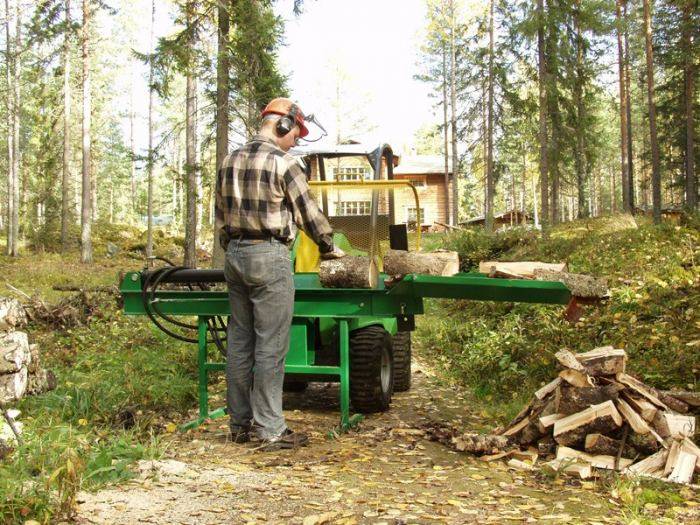
The height of such a wood splitter should be at least 80 cm. True, at this height, it must be installed on a platform or work in a bent position.
It is more reasonable to calculate the height of the wood splitter for your build; for this, the height of the bed is calculated as follows - a convenient height for the location of the log plus the maximum possible height of the split logs. In this case, it will be necessary to bend only to place the logs on the stand.
Electric wood splitters
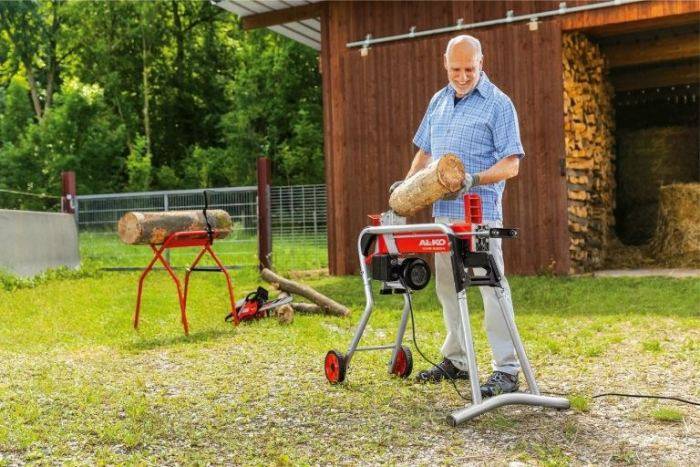
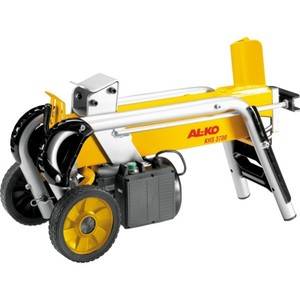 A manual mechanical wood splitter, although it makes wood harvesting easier, still requires noticeable costs of physical labor. The use of an electric motor or an engine from a walk-behind tractor will help to make the process even easier. There are several different designs of such wood splitter. But making a device with your own hands according to this scheme is already more difficult. In addition to the ability to work with a welding machine, a minimum knowledge of electrical and mechanics will come in handy.
Screw (conical)
Some of the most popular types of electric breakers are conical and screw. They differ only in the presence of a thread on the piercing cone or its absence.
Manufacturing recommendations:
- Taper and thread options. The process of splitting firewood is much easier, if a thread is applied to the surface of the cone, then the cone itself enters the block, splitting it. The most difficult thing is to correctly cut the threads on the cone. With access to a lathe and experience with it, you can make this part yourself. Otherwise, you will have to order it. It has been experimentally established that the optimal parameters for the thread are as follows: a pitch of 7 millimeters with a depth of 3 mm. The depth of the hole for landing on the motor gearbox shaft should be at least 7 cm.If there is already a ready-made threaded cone, making this wood splitter with your own hands will not take much time.
- Electric motor and gearbox. An electric motor of sufficient power from 2 kW or more is required, while the rotation speed is from 250 to 600 rpm. When the shaft rotation speed is less than 250 rpm. the splitting is slow, and at more than 500 - you can not hold the log in your hands. If you are lucky enough to find an engine with suitable parameters, you can fit an already made cone onto its shaft. If the speed is higher, you will have to use a reduction gear or use a chain / belt drive to reduce the speed. Chain drives make a lot of noise, require lubrication, and sometimes it is difficult to find the sprockets needed for them. It is better to double the belt drive. This will reduce the frequency of slippage.
- Where to locate the motor. If, nevertheless, it was necessary to turn on the gear in the design, then the engine will be more conveniently positioned from below, and the screw cleaver itself should be installed at a level selected taking into account its height in order to work with a tilt. It is better to fix the splitting screw itself at a height of 8 to 12 centimeters above the working surface. In this case, even small logs will not turn.
Hydraulic cleaver
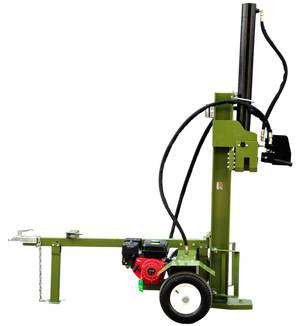 Homemade hydraulic wood splitter - the most powerful. But it also costs more and is difficult to manufacture.In addition to the base, electric motor, transmission and cutting elements, you will also need a sufficiently powerful hydraulic cylinder (like in a jack), and such cylinders are not cheap. In addition, a hydraulic fluid tank and pump are required.
The hydraulic wood splitting machine works with great effort and requires metal up to 10 millimeters thick to assemble it. The power it develops is enough to break a block of wood into 8 logs in one go. Therefore, it is advisable to make the piercing element of the structure in the form of an asterisk.
Rack-mounted unit
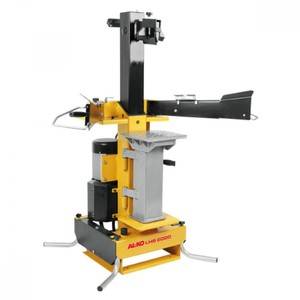 The principle of operation is similar to a hydraulic log splitter, but the gear rack, which is part of the worm gear, plays the role of the piston of the hydraulic cylinder. The stop fixed at the end of the rail pushes the chock through the cleaver, fixed on the bed motionlessly. Also, when making a rack and pinion wood splitter with your own hands, you may need a gearbox or a reduction gear.
If for the manufacture of ordinary wood splitters there are enough available materials and the ability to work with welding and a grinder, then to assemble a screw, hydraulic or rack and pinion wood splitter, you will need turner skills, knowledge of mechanics, electricians, the ability to make calculations and build drawings in all details, and the search for some components will be difficult ...
General points
To ensure the normal storage of firewood in the woodshed, they should be properly prepared. Wood is stored in the form of logs, which are obtained from chopped blocks. If you bought wood in the form of long logs, which is very profitable, then in order to be able to store the wood, they should be cleaned of branches and twigs, cut into logs, and they should already be chopped into more or less uniform logs.
At the same time, it is necessary to saw the logs into logs of the same length, so that they not only fit into the shed, oven, but also fold into a neat pile. In a well-assembled woodpile, the wood dries better, since it is well ventilated.
During the cut, the easiest way is to prepare a wooden stick, a branch and use it to check the size of the next block, or mark the entire log with a chainsaw for preparing firewood on a tape measure at once, and then start cutting. For the convenience of cutting logs, you should prepare goats, stands of the original type, since it is inconvenient to cut wood on the ground.
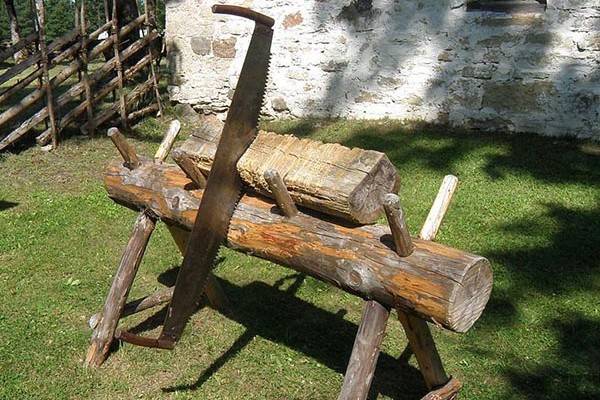
Previously, two-handed saws were used to cut logs on gantries.
After the logs of about the same size are prepared, you can start splitting them. The classical splitting of firewood involves the use of an ax or a cleaver, but there is also an alternative, mechanical option, when the wood is split with a special machine, a wood splitter. It is worth noting that working with an ax is very laborious, so the use of a special machine not only speeds up, but also facilitates the work.
If you live in a house that is heated exclusively by firewood, if you have a bathhouse, then to simplify and facilitate the process of preparing firewood, you should definitely consider purchasing a wood splitter. This device will facilitate the annual winter logging activities for the next year. By the way, the system is so simple that you can do it yourself.
If there is no wood splitter, you will have to chop wood into logs with an ax. If you also lack experience and dexterity in this matter, then this occupation will be very dangerous for you, so we decided to give some recommendations for such work.
The simplest mechanical wood splitter
The unit is very similar, both in appearance and in principle of operation, with a well crane. The difference is that a cleaver with handles is attached instead of a bucket.Racks with a crossbar are connected using hinges, the disadvantage is that the connection will often have to be lubricated.
The principle of operation of the wood splitter is simple - the chock is placed on a stand, the lever is jerked down, the cleaver, under the action of force and gravity, picks up speed and splits the log. The process is repeated, getting thinner and thinner logs.
The design has some disadvantages. Firstly, to stop the cleaver after he splits the log, you have to make an effort. Secondly, the device is rather bulky - a long lever is required to reduce the applied force.
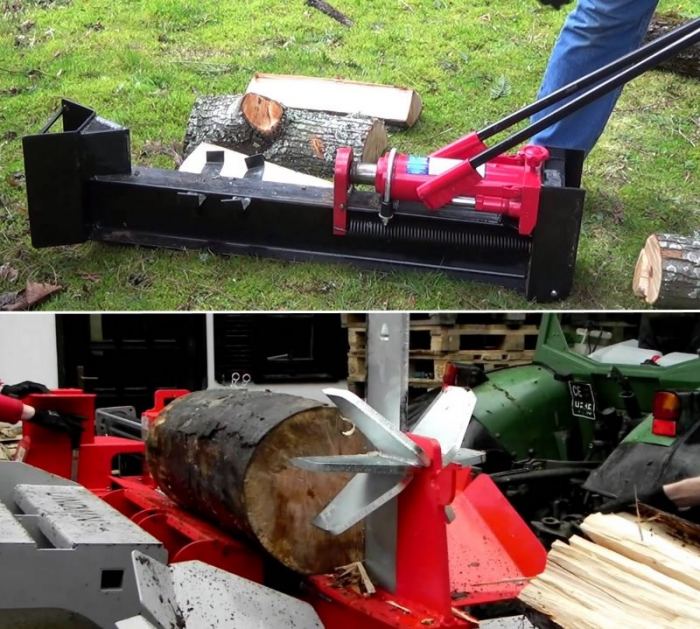
Despite the disadvantages, such a device greatly simplifies the process of splitting firewood. In order for it to work as it should, it is required to weight the cola with a blank welded to it, or a pipe filled with concrete.
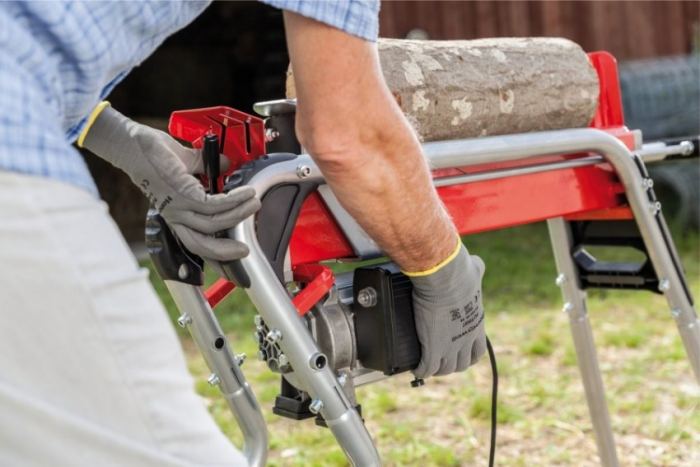
Using an ax
First of all, you should prepare your workplace and tools. As a pedestal for logs, a so-called deck is usually used, a larger log, about half a meter high. Such a stand will stand steadily on the ground, and it will be easy to hoist a suitable block of similar or smaller diameter on it.
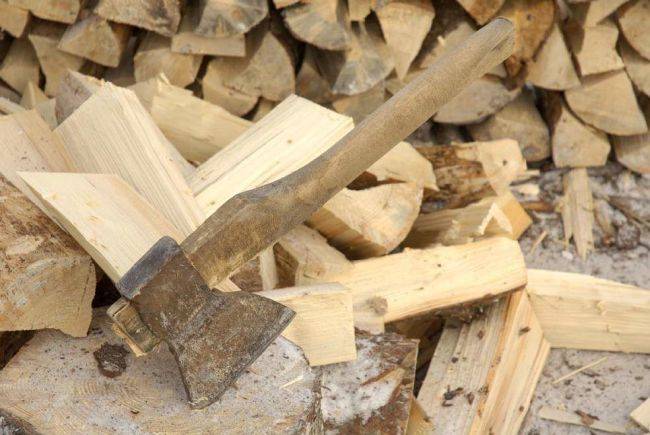
Carrying out work on logging
There are some expert recommendations for choosing a stand:
- You should choose a part of a log from a large tree with dense wood, for example, oak. The dense wood will not allow it to immediately split when hit by an ax, which will inevitably happen.
- It is desirable that a large number of knots are present on the deck. The knots make the wood inside the tree even denser.
- Long and strong knots do not need to be sawed off, it will be convenient for them to hold a deck-stand when rearranging from place to place.
A good deck will allow you to chop the entire wood into neat, small pieces of wood. Small logs dry better, they burn well and are conveniently located in the oven, and when burned, they do not leave large coals. That is why the logs are split into small pieces.
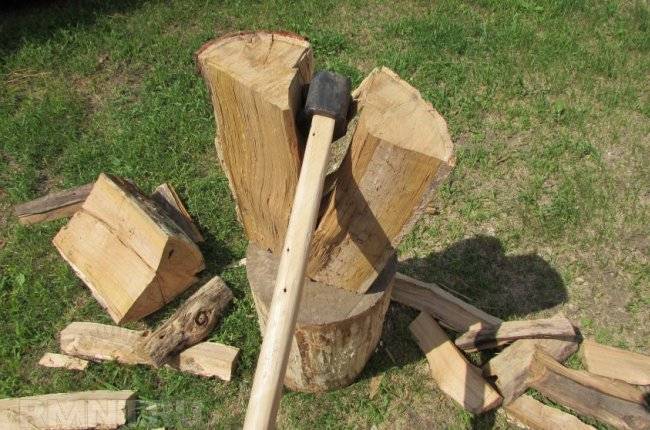
Convenient stand for splitting logs
Installed on a stand, a small block of wood splits from the blow of a special splitting ax. You will also need a regular ax to remove knots from logs. It is believed that forged cleavers are best at work, although they are not so much inferior in their characteristics to cast options. Good cleavers must be seasoned. It is quite simple to check it, you need to click on it and listen to the sound. A voiced one says that the instrument is good, and a voiceless one confirms insufficient quality.
The length of the splitting ax and its weight, as well as the shape of the handle, are selected individually. The criterion is very simple, it should be comfortable to hold the tool in your hands, a confident grip will allow you to work with high quality for a long time, because we have to prick a huge number of blocks of the most different sizes.
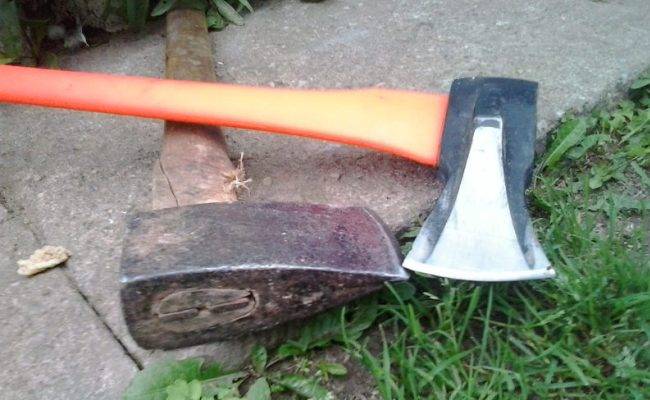
Cleaver options with wooden and plastic handles
A block with a diameter of 12-15 centimeters is considered optimal for splitting, since 4 excellent logs will be obtained from it. Large and strong logs are also broken with a cleaver, while stakes made of wood or iron are used to split wood. Experienced woodcutters can chop wood with one simple ax, without resorting to various tricks.
For beginners, they can give the following guidelines:
To try on the blow, you should move away from the block at a distance of outstretched straight arms. From here it will be easier to get to the required place of the block, while not breaking the ax and not injuring yourself. The legs should be set shoulder-width apart, and the knees should be relaxed so that you can spring, increasing the force of the blow of the ax
Then you raise the cleaver in front of you and, with a sharp movement, lower it down onto the block.
Pay attention to the end cracks of smooth logs without knots, they should be used to simplify the work, getting into them with an ax. If a piece of log has twigs, try to prick past them.
If it is impossible to ignore the knots, choose the thickest and prick along them.
If, after the blow, the ax is stuck, you can hit it on the butt with a sledgehammer, or raise the cleaver along with the block, turn it over and hit the deck with the butt. In this case, the second option requires a certain amount of physical training, since even swinging an ax is not so easy, but here you need to lift it together with a piece of log.
Large logs are inconvenient to split in half, so it is worth breaking off logs of the desired size from their edges. After you've cut the block well enough, chop it in half.
Chopping firewood is difficult enough, so if the volume of the forest is large, spread the work over several days. You should not continue wielding an ax when your hands are already filled with lead and cannot really control its movements. By the way, systematic physical work for some time will allow you to tighten your shape and the general tone of the body.
The wood splits well on a frosty day.
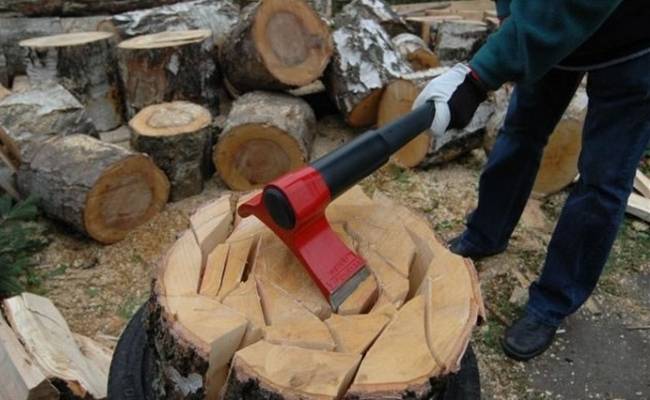
The original way of splitting a large block of wood
As you carry out the splitting of wood, you will certainly gain the necessary experience by splitting the block into blocks and smaller pieces. After you have split the entire wood, it should be placed in a prepared woodshed for drying.
Tools and materials
To make a blade, you will need the following:
- Bulgarian. Preparing the blade of an old ax or spring requires chipping and shaping. This can be done with an ordinary hacksaw, but the labor costs will be disproportionate. A cutting wheel is required for the grinder. Since you will have to work with spring steel, it is better to use a diamond-coated disc.
- Abrasives. The metal finishing will have to be done manually. You can use an engraver with diamond tips and stones. If not, sandpaper, files and files will do.
- Hacksaw. To make an ax, you need a hand saw. Wedging and trimming are easier to do on machine tools, but regular hand tools will work as well.
- Welding machine.

The following are used as the basis for the chopping part:
- Old ax. You can buy them at a flea market or in a metal bin. Old Soviet axes are made of good steel, which does not chip from a miss on a log.
- Spring. Spring steel has a high carbon content. Practically does not chip, is able to withstand constant shock loads. At the same time, it is easy to heat treatment. A device for chopping wood with your own hands from a spring is appropriate, since the shape of the blade can be selected according to your own requirements.
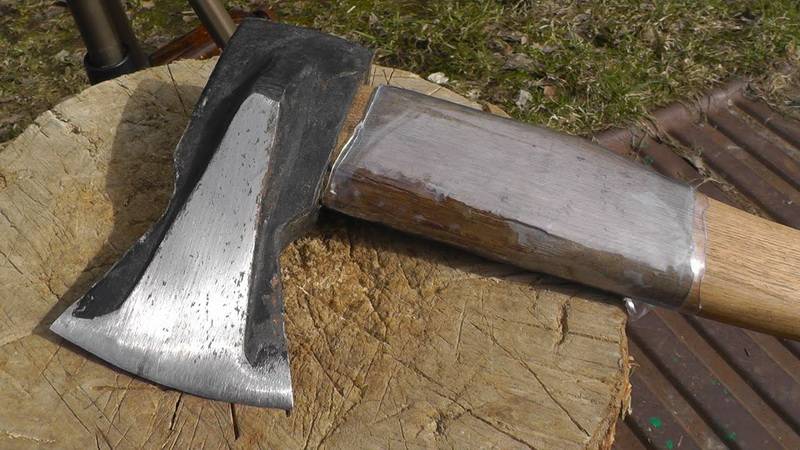
The hatchet must be made of hardwood. Soft pine, spruce, fir and larch will not work. It is possible to choose:
- Oak. You can take the same log that will be pricked. Oak is hard, cheap and affordable.
- Beech. The wood is inexpensive, but beautiful. It has a porous structure, so it is easy to saw, but keeps its shape well.
- Birch. The birch is hard, but wood choppers must be impregnated with linseed or tung oil.
- Nut.
