Properties and features of ceramic pipes
Ceramic products have properties that distinguish them favorably from all pipes that are used in chimney systems:
- ease of use. Thanks to the smooth walls of the pipe, fumes and soot layers do not collect inside it, which eliminates unnecessary care;
- durability. Such a pipe can last more than 30 years, as it is resistant to corrosion and sudden temperature changes. This effect is achieved by treating the product with an expanded clay concrete mixture or a special composition of mirror steel;
- resistance to mechanical damage;
- ease of processing. The ceramic pipe is easily cut, drilled and the quality of the product does not suffer;
- absolute waterproofness;
- immunity to chemicals. This product is not afraid of fluorine compounds, solvents, chlorine and other chemicals;
- security. Another advantage of ceramic chimneys is fire resistance, therefore, in the event of a soot ignition, the flame will not spread;
- accumulate heat well;
- ease of installation work, which reduces the likelihood of shortcomings and errors;
- good traction thanks to the smooth surface. You will not have such problems as room smoke;
- nice value. Ceramics is not a very expensive material; buying such a chimney, you get the perfect price-performance ratio.
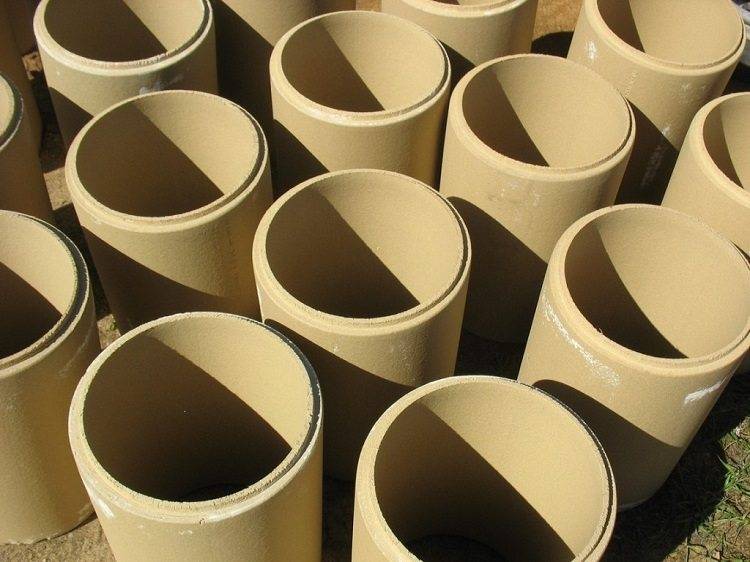
Ceramic pipes are one of the best materials for a chimney.
Helpful installation tips
One of the main rules for installing ceramic chimneys: only whole elements are suitable for installation. The presence of chips, cracks or any other damage is unacceptable. Do not try to seal the damaged area with sealant or anything similar.
This is a dangerous solution, since damage hidden inside the structure can fail at any time and cause a fire.
Therefore, each element must be checked at the time of purchase, as well as immediately before installation. If even slight damage is found, a replacement should be made. The base for the adapter must be perfectly flat and horizontal.
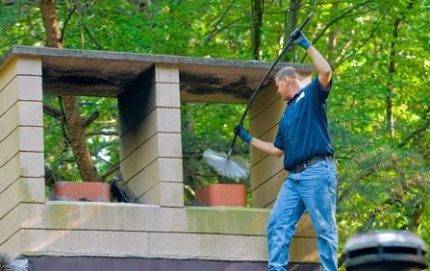
The ceramic chimney must be serviced regularly twice a year: inspected, cleaned of soot and check the draft level
Maintenance of this type of chimney is not difficult. It is necessary to check the presence of traction, clean the pipes from soot, control the integrity of all structural elements.
Usually, these operations are performed twice a year, but if there is reason to doubt the normal functioning of the chimney, maintenance activities can be performed unscheduled. Although with proper installation, problems with such structures practically do not arise.
Requirements for ceramic chimneys
In addition to the foundation, most of the technical requirements for installing a ceramic chimney practically do not differ from those that apply to metal structures. Requirements relate to the method of installation, insulation and arrangement of the outer part of the chimney, which rises above the roof.
The key point in arranging a ceramic chimney is the correct thickness of the pipe. It must be suitable for the type of furnace equipment and the operating temperature during operation.
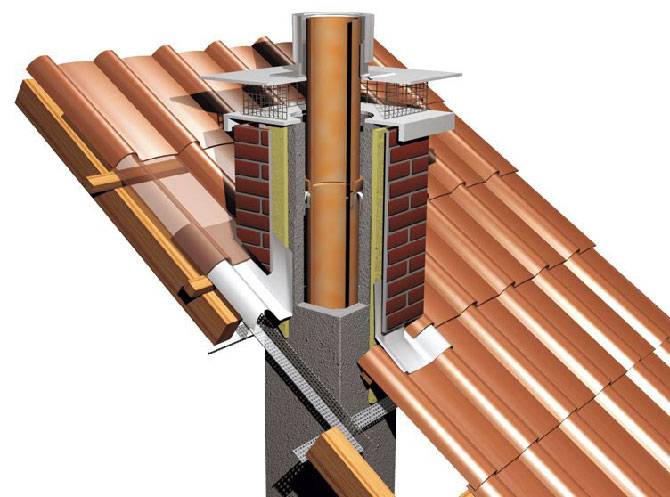
Since ceramics tend to absorb and transfer a large amount of heat, it will heat up to dangerous values on contact with hot exhaust gases. Therefore, in order to comply with fire safety standards, it is necessary to select the appropriate thickness and diameter of the ceramic pipe.
It is advisable to use the method of chimney arrangement recommended by the boiler manufacturer.
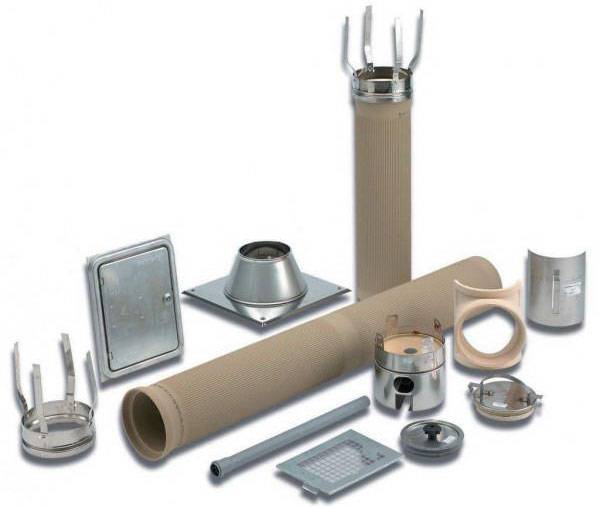
Warming is another important point in the arrangement of a ceramic chimney.Just like metal pipes, ceramics need to be insulated when passing through unheated rooms or when going outside. In places where the pipe passes through living quarters (room, kitchen), it is not necessary to insulate it.
Ordinary basalt or mineral wool and clinker bricks can serve as insulation. It is a material that is optimal in terms of cost and performance and is resistant to high temperatures.
In addition to fire safety, it is worth taking care of the main task of the chimney - good draft. This aerodynamic phenomenon largely depends on the correct positioning of the tube. As in the case of a metal chimney pipe, it is advisable to bring the ceramic structure as close to the roof ridge as possible.
If this is not possible, it is necessary to comply with the requirements for the height of the chimney head:
The pipe should not be lower than 30 cm if the pipe is relatively close to the ridge. If the distance from it is more than 1.5 m, the height should be increased to 50 cm.
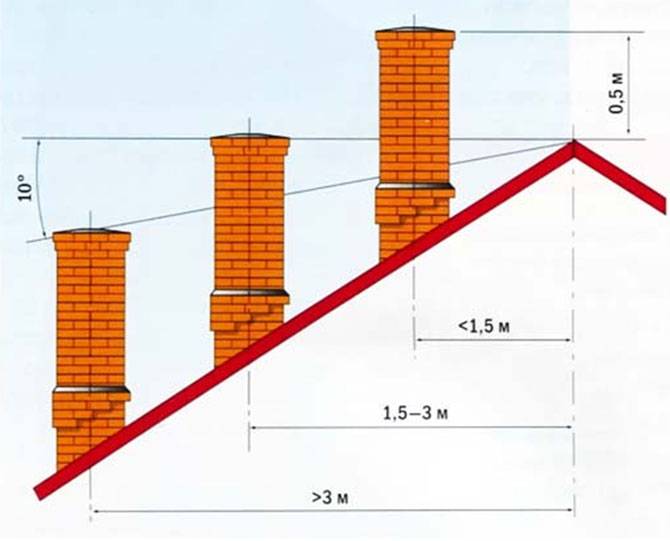
If the distance between the ridge and the chimney is from 1.5 to 3 m, then its height must be designed in a special way. An imaginary horizontal line leading from the ridge to the roof arch at an angle of 10 degrees should run tangentially through the chimney head.
Peculiarities
It is unreasonable to approach chimney pipes with the same measurement as for water, gas or drainage pipes. None of these types of communications are faced with the same heating as smoke channels. Accordingly, the difference between the temperature of the moving gas stream and the temperature of the outside air is also large. This automatically excludes the very idea of using polymeric materials and other easily flammable substances. But the thermal conductivity of the material used should be maximum so that it does not overheat.
A very important circumstance is protection from the wind. Even a small in height (5 m) chimney experiences significant loads from the movement of air masses
And the windage of higher structures increases as they "grow" in an arithmetic progression. This means that among non-combustible materials, you will have to choose only those with high strength. But strong structures have a significant mass, and they will have to be fixed thoroughly.
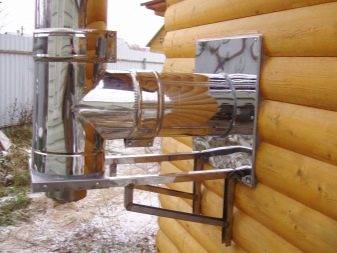
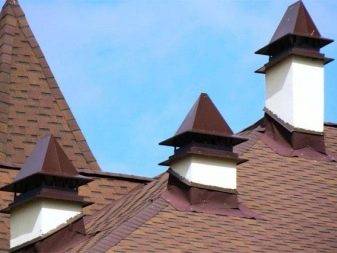
Of the other nuances that will have to be taken into account when choosing and installing, special attention is paid to:
- construction time and complexity;
- chimney duct geometry;
- composition of flue gases, their quantity, speed and heating;
- the intensity of use of the boiler (furnace);
- the cost of the structure used;
- the need to attract specialists or the ability to do without them.
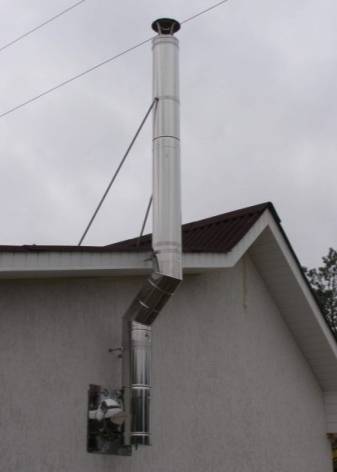
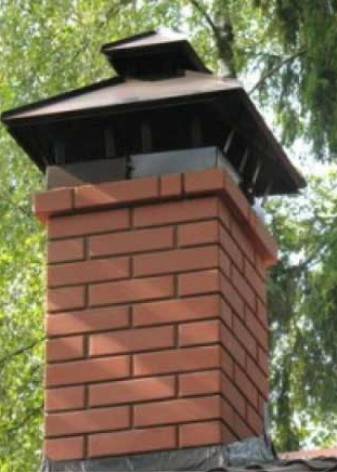
Building a BBQ Chimney
In a country house, a question may arise with the construction, the choice of materials and size for the chimney, not only for the fireplace, but also for the barbecue. The construction of a chimney must necessarily be thought out, the first step will always be a drawing of its plan on paper.
The simplest solution for building a barbecue chimney is to use cement mortar and reinforcing metal bars. The chimney frame is bent and then welded from metal rods. The metal frame is cemented, entangled with a mesh. The solution is applied to the rods from the inside and outside. After the cement mortar has hardened, the chimney is coated from the inside with refractory clay. The arch is formed after the solution has hardened in the chimney; a plywood template is required for it.
The drying time of the cement mortar used in the construction of a barbecue and a chimney for it is 3-4 days. Until that time, it is impossible to kindle a fire in the furnace, otherwise the walls of the structure will crack and the barbecue will be unsuitable for further use.
The question of how to make a chimney for a fireplace is decided taking into account all the requirements for technology and safety. If they are violated, not only the efficiency of the fireplace is under threat, but also the vital activity of all people in the heated room.Therefore, the best option for those who do not have proper experience in the construction of such structures is to contact the specialists who have been proven in this matter.
No. 4. Chimney from asbestos-cement pipe
A couple of decades ago, asbestos-cement pipes were widely used for arranging chimneys. Actually, initially they were not intended for such purposes, which is easy to see by studying their performance. Of the advantages of the material, only its low price, but there are much more disadvantages:
- the material can withstand temperatures up to 300C, and often this is not enough. Such a pipe can be used only at the maximum distance from the firebox, where the smoke passes already cooled;
- on a rough surface, soot quickly accumulates, which tends to catch fire. But if a brick chimney can easily cope with this, then the chimney from the asbestos-cement pipe may simply explode;
- instability against condensation, which contains aggressive chemicals. Moreover, condensate is able to be absorbed into the pipe, destroying it and deteriorating its appearance;
- heavy weight and complex installation;
- leakage of joints.
It is possible to use an asbestos-cement pipe for a chimney only if you are sure that the installation will be done correctly, as well as subject to regular cleaning of the chimney, but it is still better to pay attention to other options
Installation example of a steel chimney
Before making a steel chimney for a fireplace, some preparatory work needs to be done. First you need to install a fireplace insert. If special legs are not provided, you should make such a support yourself from metal, fireclay bricks, stone, etc. The distance from the firebox to the wall should be 150 mm, taking into account that the thickness of the thermal insulation layer will be 50 mm.
After the position of the firebox is determined, you should arm yourself with a plumb line and determine the axis of the outlet of the firebox smoke collector. The axis of the chimney must be completely aligned with it. Now it should be noted the projection of the firebox on the adjoining wall, as well as on the floor. If the firebox is located on a metal support, the support should be covered with a layer of fireproof paint. Pieces of brick should be placed under the legs of the support so that its position corresponds to the level of the floor covering. A good idea for this kind of support is the adjustable legs.
It is possible to begin work on the installation of the chimney only after the firebox is placed in the place intended for it, and its position is carefully verified vertically and horizontally, and then fixed with a metal corner.
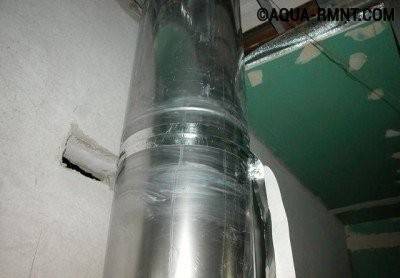
After the connection of the elements of the steel chimney for the fireplace with sealant and rivets is completed, the connection is wrapped with aluminum tape
Now you can start installing the chimney. First, seal all internal seams of the chimney with sealant. Then they begin to assemble its elements from the bottom up. A double layer of sealant is applied in a circle to the joints of the individual elements of the chimney. First, the inner contour is connected, and then the outer one. In this case, the upper element of the inner contour must go inside the lower element, and not vice versa. This will prevent condensation from entering the insulation. The outer contour is fixed with rivets, then the joints and rivets are glued with aluminum tape. In this case, it is necessary to ensure that the joints of the chimney elements do not fall under the thickness of the ceiling.
The correct fastening of the chimney deserves special attention. To fix the pipe, the outer contour is compressed with a special clamp, which is fixed with rivets. Then the clamp is fixed to the floor using a special angle and fixing bolts. In this case, the main weight of the chimney chimney should not fall on the base of the fireplace insert, but on the clamps and corners fixed to the ceilings.
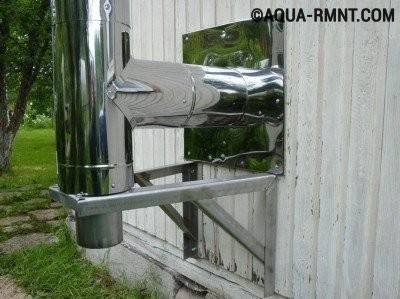
After the connection of the elements of the steel chimney for the fireplace with sealant and rivets is completed, the connection is wrapped with aluminum tape
When attaching a steel chimney, take into account the possibility of thermal expansion of the metal when heated. To compensate for this process, a special flexible element should be installed at the bottom of the first section of the chimney chimney. If such a part is absent, it is necessary to provide for a play of about 1-1.5 cm when fixing the clamps at the corners to ensure the structure can move during thermal expansion. If the chimney circuit is rigidly fixed, then during operation the lower section of the structure will be squeezed down, which can lead to damage to the equipment.
As they say, it is better to see once than hear a hundred times. Therefore, we provide a video with useful tips from an experienced stove-maker:
Ceramic chimney device
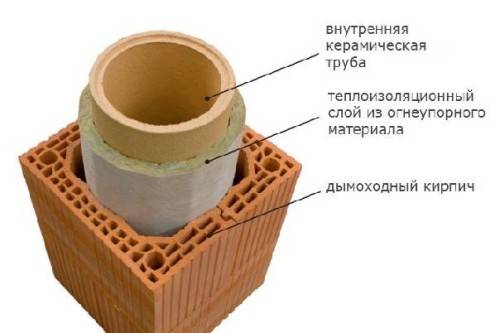
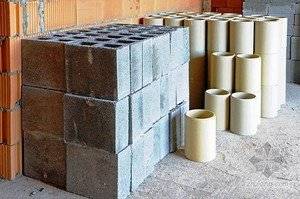 The ceramic chimney, as already mentioned, is a composite structure that includes:
- ceramic chimney;
- insulation layer or air gap;
- outer layer of expanded clay concrete.
Such a serious design is due to a number of factors. First, the ceramic pipe that forms the chimney is very fragile and needs support. Secondly, it has a high thermal conductivity, which is why it requires reliable thermal insulation.
The pipe itself is made of circular cross-section, length from 30 cm to 1 m. Its inner walls are smooth, while on the outer, roughness and minor defects are allowed, which do not affect the integrity of the structure. The pipes are connected by means of a lock, which is a thinning in the outer diameter from one edge and an expansion of the inner diameter from the other
It is extremely important that they docked strictly along the same central axis.
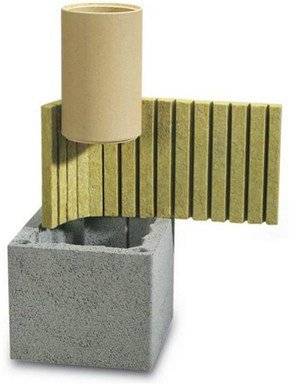
The outer shell is made of expanded clay concrete in the form of a square with a radial cavity inside. The height of the block depends on the manufacturer, as well as the shape of the inner cavity. It is also provided for either direct contact of the separate parts of the block to the pipe, or there is room for a heater, which is connected by means of metal jumpers. They are attached to the outer shell and provide a secure support for the ceramic pipe.
In blocks of expanded clay concrete, a prerequisite is the presence of a special hole for laying the reinforcement, which allows to ensure maximum strength and stability of the entire structure, which is especially important in the lower and upper parts of the chimney. For insulation, you can use a layer of basalt wool or an air gap
The latter is used in chimneys with a return air supply to an insulated combustion chamber or in chimney systems with a maximum temperature of up to + 450 ° C. If the temperature exceeds this figure or it is necessary to provide better thermal insulation, basalt wool is used, which is sold in the form of dense pressed plates, along which grooves are made so that they can be rolled
For insulation, you can use a layer of basalt wool or an air gap. The latter is used in chimneys with a return air supply to an insulated combustion chamber or in chimney systems with a maximum temperature of up to + 450 ° C. If the temperature exceeds this figure or it is necessary to provide better thermal insulation, basalt wool is used, which is sold in the form of dense pressed slabs, along which grooves are made so that they can be rolled.
Ceramic chimneys: advantages and disadvantages
Why brick chimneys are losing popularity
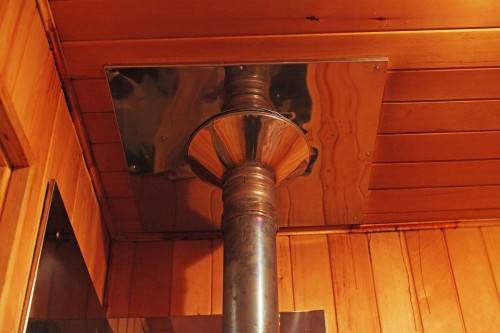
The most common types of chimneys in our country are brick. In simple words, it is a pipe made of bricks. Then they just plaster it. However, this pipe has many disadvantages.So, the structure of the brickwork makes it difficult for the free passage of air flows, due to which traction is lost in the system, which is especially noticeable in the operation of heating devices in windy or cloudy weather.
Also, the heterogeneity of such a pipe, and we know that over time, gaps can form between the bricks in the masonry, can cause carbon monoxide leakage, which usually leads to tragedy. Another disadvantage of brick chimneys is their heavy weight and complexity of installation.
The brickwork for the chimney must have a massive foundation, as it weighs quite heavily. Installation of such a structure is usually carried out only by high-class bricklayers. This type of work takes a lot of time. During operation, due to the rough structure of the chimney, soot can accumulate in it, especially from burning coal. The brick chimney must be constantly cleaned of it, because, otherwise, it can cause a fire, leading to a fire.
Recently, galvanized and ceramic systems are replacing brick chimneys. We will talk about the latter below.
Advantages and disadvantages of ceramic chimneys
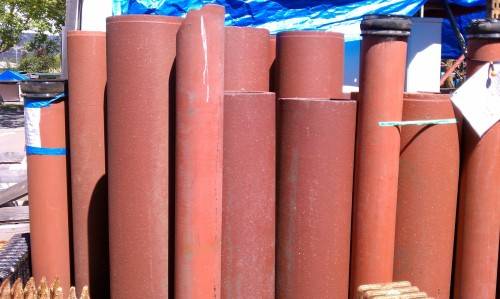
Ceramic pipes for the construction of a chimney of a heating device, be it a boiler, a gas water heater or a fireplace, have been used in European countries for a long time. In our country, the fashion for such systems came relatively recently. Compared to brick chimneys, such systems have a number of advantages:
Absolutely smooth inner surface of ceramic pipes. It is covered with a special fireproof glaze, from which it becomes completely smooth, which prevents the occurrence of turbulence and, as a result, improves traction.
Long period between service. Such pipes do not need to be cleaned often, as soot practically does not form on them. They, unlike brick chimneys, should not be coated with lime.
High resistance to temperature extremes
This property is especially important for solid fuel and combination boilers, in which fuels with different flue gas temperatures can be fired. Also, such units may not work constantly, which is the reason for frequent changes in the temperature of the chimney.
Ceramic pipes are not afraid of corrosion and other chemical reactions.
High material strength.
Ease of installation
Chimneys made of ceramic pipes are installed rather quickly. Ceramics are easy to cut and grind well. It is not difficult to drill a hole in such pipes. All these factors significantly reduce the time and cost of installing such chimney systems.
Of the shortcomings, only their cost can be distinguished. However, given the positive aspects that appear when using such chimneys, this disadvantage is leveled. One of the most popular on the market are Schiedel ceramic chimneys, which are durable and high performance.
Chimney installation
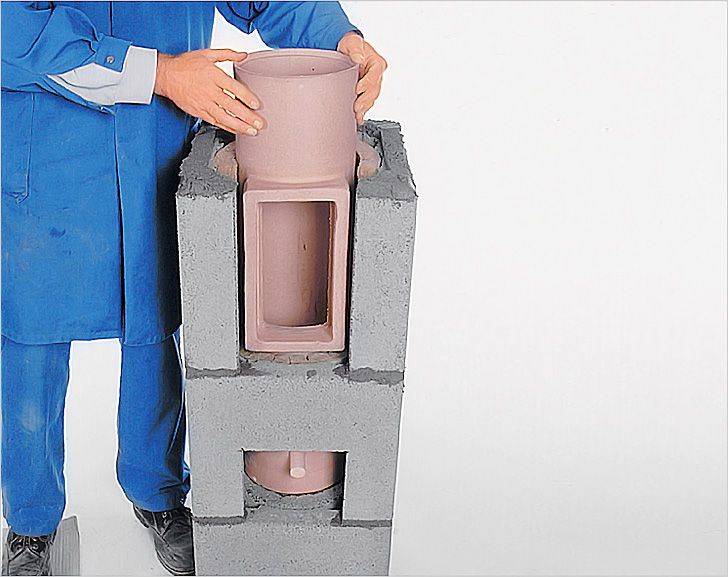 Installation work
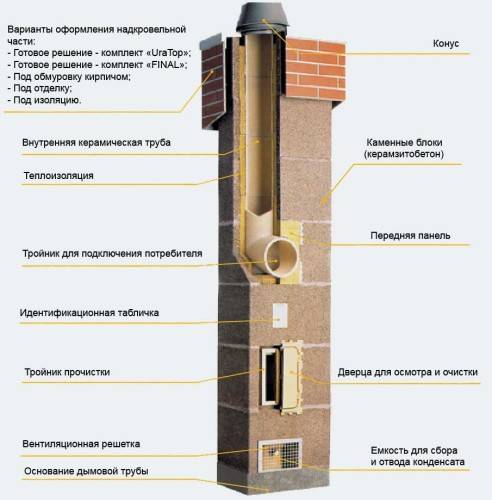
Manufacturers release a structure completely ready for assembly, it includes:
- ceramic blocks, including tees for cleaning and connecting to a heater;
- condensate container;
- a frame made of blocks with holes for reinforcement;
- mineral insulation.
The top of the chimney is protected from precipitation by a special cone. An air intake grill is installed at the bottom of the structure. When choosing the sequence of installing the modules and the size of the pipe, take into account that the joints of individual sections should not fall on the overlap aisles.
The significant weight of the chimney requires a separate foundation. Its dimensions exceed the diameter of the chimney by 10 cm in each direction. The concrete base must be level, its horizontal position is checked by the level. To ensure a flat surface, you can lay porcelain stoneware tiles. The base of the pipe, especially those exceeding 7–8 m, must be strictly level. Next, waterproofing is performed from a roll of material, folded in two layers.The first concrete block is laid on the foundation, cement mortar is used under it.
 Use of sealant when joining chimney pipes
A special sealant is used to connect the sections of the ceramic pipe. It is made independently from the dry mixture included in the kit and water, the ratio of 7: 1 is maintained. Mixing takes place in a warm room at +20 degrees, the composition must be used for 1–1.5 hours until it hardens.
A container for draining condensate is installed in the first block, a section of a pipe with a hole for cleaning is attached to it with the help of a sealant. This module is wrapped with basalt wool. Each subsequent module is inserted into the previous one and fastened with a prepared solution. Excess composition protruding onto the pipe surface is wiped off with a damp sponge. Outside the ceramic pipe, a frame of concrete blocks is brought out, connected with a cement-sand mortar. If necessary, holes are cut into them for individual sizes of tees. The straight part is made from blocks without holes.
The third module is a tee for connecting a heater. It is closed with a special front insert. After the straight section, a damper is installed.
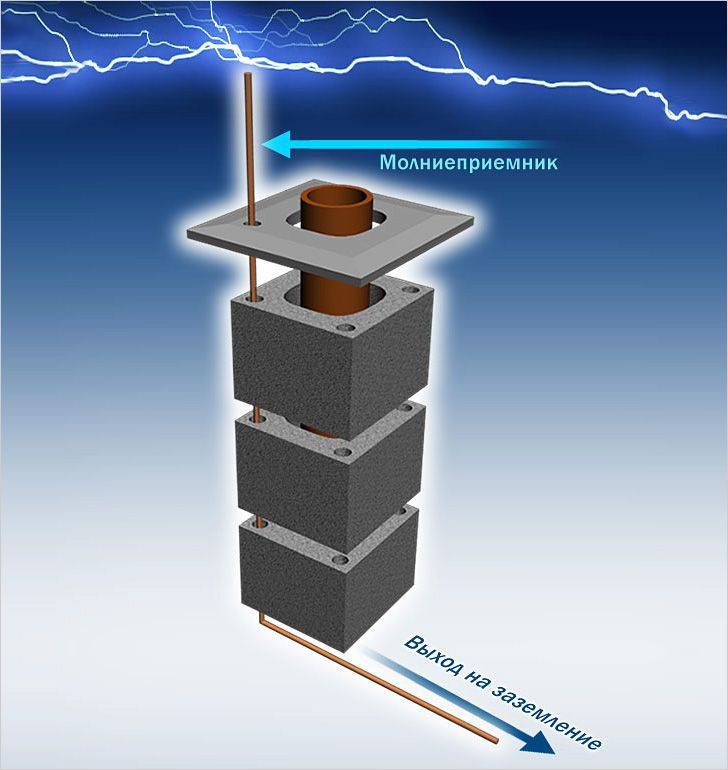 The chimney can be used as a lightning rod
It is important to keep the horizontal and vertical level when installing the units. To give the structure stability and rigidity, it is reinforced with iron bars
Holes in the corners of the blocks are prepared for metal reinforcement, 1.5 m sections are pushed into them and filled with cement mortar.
After installing the chimney, the revision tee is closed with a door, and a ventilation grill is installed in the lower block. The air entering through it will move inside the channel and reduce the temperature. The ceramic chimney is installed without a concrete frame, but in this case, the pipe is fastened with clamps every meter. In an unheated attic, it is insulated with a layer of basalt wool.
Places of passage through the floor and attic are fenced with a box and insulated with basalt wool
Particular attention is paid to the safety of installing a ceramic chimney in a wooden house. Its location is provided 25 cm from the wooden wall
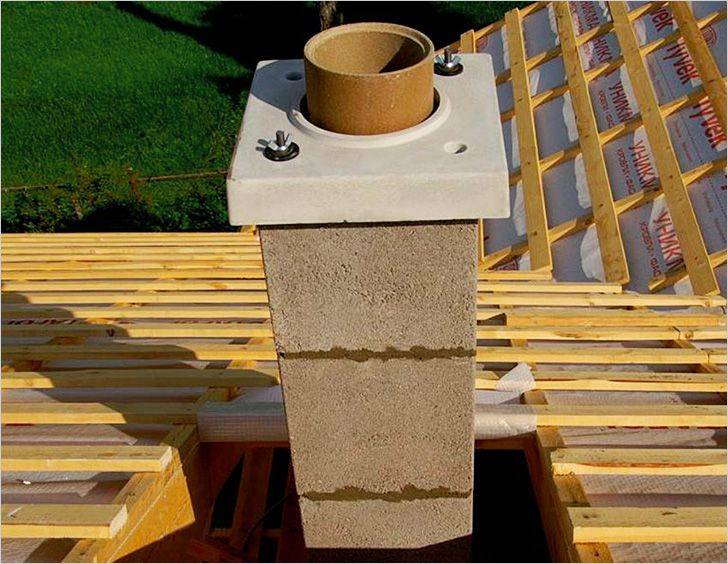 Completion of the installation of the ceramic chimney
The final part of the chimney, located on the roof, ends with a concrete cover plate and a metal protective cone. The outer finish of the chimney is made of tiles or other material to the taste of the owners of the house.
Chimney installation
The main difficulty in installing a ceramic chimney is due to the fact that the structure always includes steel elements - an inlet pipe, a cleaning door, and sometimes also a gate, wall mounting brackets and clamps. Since steel has a higher coefficient of thermal expansion than ceramics, joints should be made with a gap of 2–5 mm, using asbestos cord or elastic heat-resistant sealant (Fischer DFS GR, PENOSIL 1500 ° C, etc.) to seal the joints.
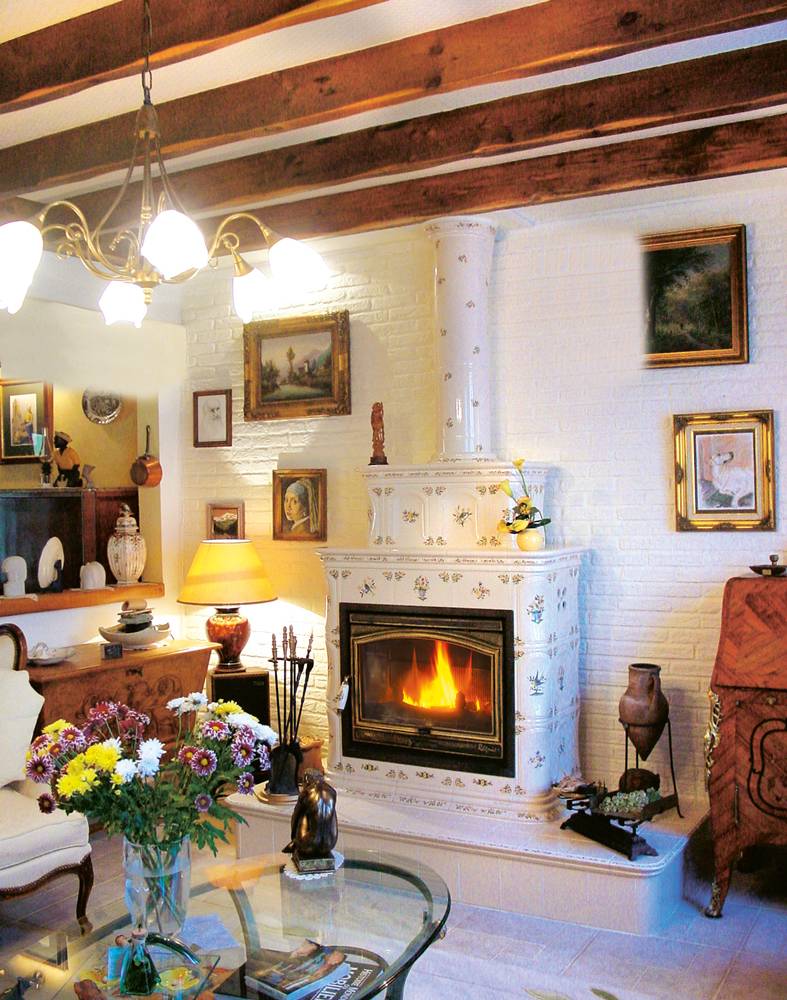
Tiled stoves and fireplaces are often equipped with a mounted ceramic chimney, which not only serves as an interior decoration, but also allows more efficient use of the heat from the appliance. Photo: Godin
During installation, pottery pipes are glued with a special silicate glue. In this case, it is necessary to carefully remove excess working solution, especially from the inner surface of the channel, which must be perfectly smooth, otherwise the pipe will quickly become clogged with soot. The concrete casing modules are laid on cement glue. Since the height of the elements is small, it is necessary to constantly monitor the verticality of the chimney using a plumb line or a laser level.
Finally, it is very important to correctly select and carefully install the head, consisting of a cover plate (usually concrete) and a metal deflector umbrella. The plate must tightly close the gap between the working channel and the casing
After all, if the insulation in the upper part of the pipe becomes damp, the draft will deteriorate sharply (it may even overturn) and the amount of condensate will increase. An improperly made baffle can also cause traction problems. In this regard, it is better to purchase a head from the manufacturer of the chimney, even if it will cost more than one made on site or ordered from a third-party workshop.
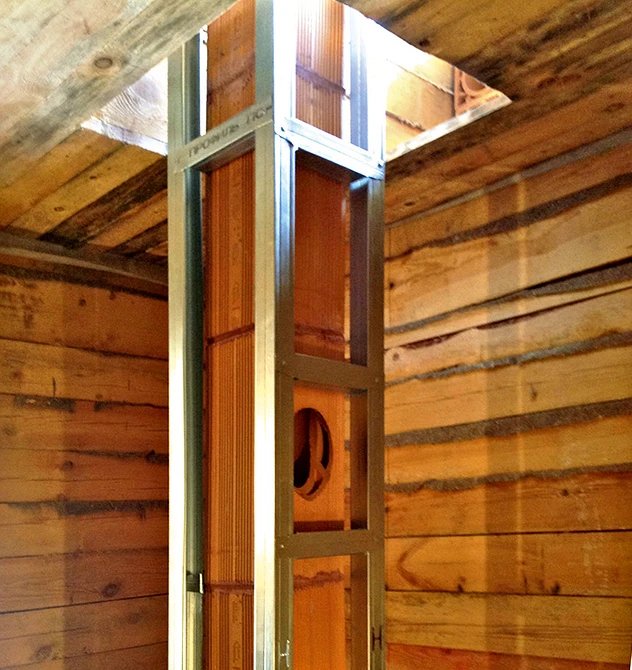
When laying a chimney from ceramic modules, you can assemble a frame casing. Its base is made of galvanized steel profiles. Photo: "Motive Force"
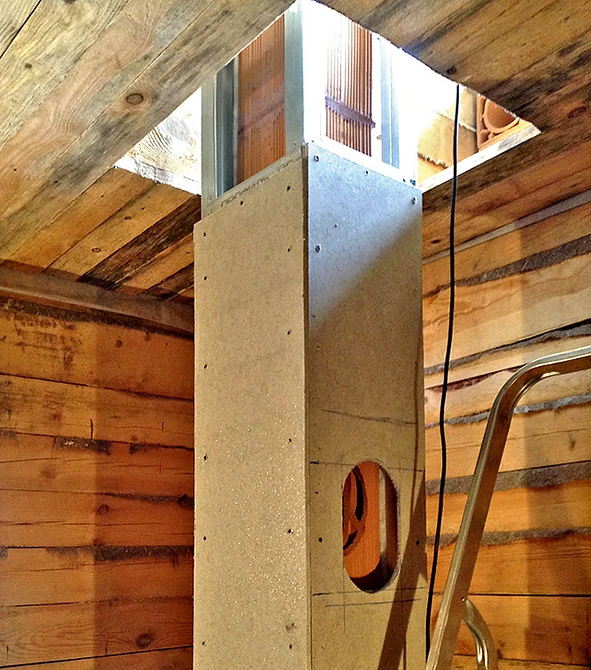
For cladding, non-combustible sheet material is used (flammability class NG), for example, glass-cement sheets
When passing overlappings, observe safe distances from wooden beams and floorings
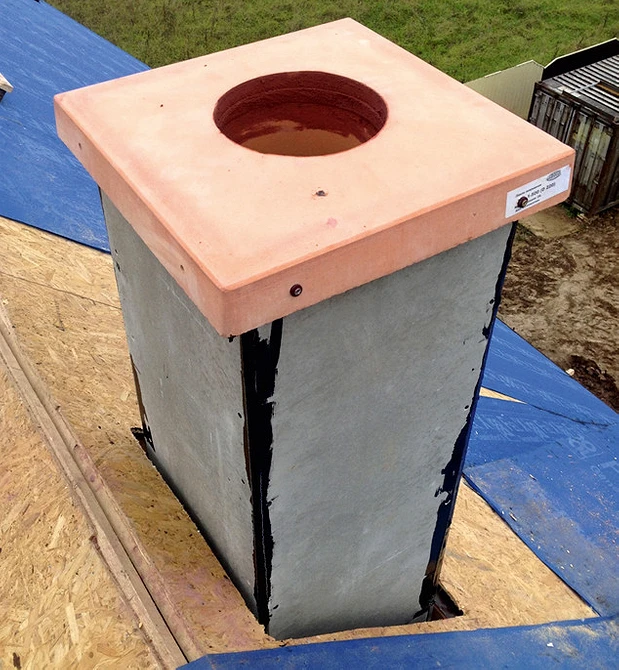
The pipe head is formed using a ceramic cover plate, on which a steel deflector umbrella is mounted
Cost of ceramic chimney systems
|
System name |
EFFE2 ULTRA |
ECOTON S-block |
TONA TEC |
Schiedel UNI |
Schiedel KERASTAR |
| Type of |
From all-ceramic modules |
Insulated, with a concrete casing |
Insulated, with a concrete casing |
Insulated, with a concrete casing |
Insulated, with stainless steel casing |
|
price, rub. |
From 3800 (excluding the cost of additional insulation) |
From 7300 |
From 11 000 |
From 10 200 |
From 13 000 |
Chimney design
A chimney made of ceramic pipes includes three key parts:
- Ceramic installations, which are produced directly for this type of construction;
- Special thermal insulation;
- Supporting system made of lightweight concrete.
The whole structure can be divided into several zones: the base of the chimney; container where condensate will accumulate; a tee for cleaning and inspecting the condition of the chimney and a tee for connecting the boiler and furnace.
The siphon, designed to drain condensate, is made at least 15 cm high and 10 cm from the level of the blocking liquid. The total height of the entire structure must be at least 5 meters. The higher it is, the more powerful the chimney draft will be.
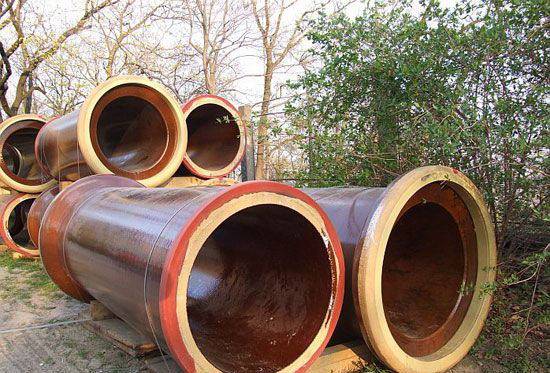
Certain requirements are imposed on this design:
- If the roof of the building is flat, then the pipe will rise above it by at least 1.5 m;
- It should be half a meter higher than the parapet or ridge;
- The angle to the horizon should be strictly 10 degrees;
- From the grate to the chimney mouth, the chimney height is at least 5 meters.
The design of such a chimney is much more complicated than a direct-flow system.
A completely reliable chimney made of a ceramic pipe includes the following elements:
- A brick or concrete shell designed to dissipate heat;
- A casing for thermal insulation, due to which all fire safety requirements are met, especially in those places where the chimney will come into contact with the wooden structures of the building;
- Ceramic tube of the required diameter, which is manufactured in compliance with all technical requirements.
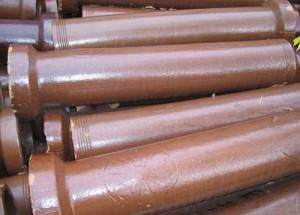
No. 3. Ceramic chimney pipe
Ceramic chimney pipes are considered the most versatile, and among their main advantages:
- durability;
- resistance to aggressive media and corrosion;
- soot does not linger on the inner smooth surface, making it easier to care for the pipe;
- high heat-absorbing characteristics;
- resistance to high temperatures. For solid fuel boilers, ceramic pipes are used that can withstand up to 650C and are resistant to a sharp increase in temperature when soot ignites. For gas boilers, you can use pipes that can withstand up to 450C, are designed to work in a wet state and have condensate drains.
For the installation of a ceramic chimney, a separate channel is required. The shell is equipped with special concrete blocks with voids. A layer of mineral wool insulation is placed around the pipe to protect adjacent structures from excessive heat and reduce condensation. Both the pipe and the insulation are capable of absorbing water, so they need to provide adequate ventilation. It is created due to the presence of vertical air channels between the insulation and concrete blocks. By the way, concrete blocks also have channels for placing reinforcement in them. Be sure to reinforce that part of the chimney that goes out into the street.
To expand the scope of use of ceramic chimneys, they are produced in a steel case, as well as in the form of rectangular elements. The former do not require the arrangement of the foundation and the creation of special channels, the latter can be used for the reconstruction of brick chimneys.
Why is ceramics better than bricks?
These are materials that differ in structure and properties. Ceramics are brittle, deformed under the influence of shock loading. But brick pipes have many more disadvantages. Despite the fact that they look quite strong, over time, during operation, the inner brick surface begins to collapse due to the constant negative influence of moisture. Ceramic products are free from this disadvantage. They have smooth inner walls, the material is characterized by high density. Other differences:
- ceramics are not subject to the negative effects of high temperatures;
- multilayer chimney functions more efficiently due to its complex design;
- ceramics are resistant to aggressive substances that are formed during combustion, and when interacting with moisture, their transformation is activated, which leads to the appearance of acids;
- multilayer pipes require less maintenance when compared with brick counterparts.
Detailed step-by-step instructions for installing a chimney
- Preparatory stage. Here, it is first determined exactly where the oven will be connected. A foundation is laid under it and directly under the chimney itself. It must be solid so that the stove and chimney evenly sink under their own weight. The foundation does not have to be made too deep, since it will be located in an underground room, where it will not be too cold during the winter months. It is taken out to the level of the finished floor, where it is leveled with cement mortar. After it has completely dried, a module with a gadfly is placed on it, to which a boiler or stove will be connected - a groove is installed in it for draining condensate;
- Chimney connection. Here you will have to prepare a special solution that is resistant to acids. To do this, take seven parts of a special powder for one part of water. You can knead only at a temperature not lower than +20 degrees, and you need to use it within an hour and a half. It is used when joining elements, all joints are subsequently wiped with a damp sponge to remove excess solution. In this case, all internal seams will be smooth, which will prevent the formation of soot;
- Chimney lining. Builders recommend sheathing such a structure using cement-bonded particle boards. The insulation boards are placed prior to the installation of the ceramic structures. Much attention is paid to areas where the chimney will pass through ceilings or partitions, where special thermal insulation is made. In its capacity, a fire-resistant material can act, which is laid between the ceiling and the chimney. Between it and the overlap, a distance of 15 cm or slightly more must be observed;
- Securing the system. To make the structure as strong as possible, make its reinforcement. This is best done with steel rods that are 10 mm in diameter.They are placed in specially made holes and filled with liquid cements. It can also be reinforced from the outside with steel corners and metal tape;
- Chimney decoration on the roof of the house. You can do this with red bricks, tiles, concrete and other materials - the main thing is that they are not flammable.
Installation of a ceramic chimney
Preliminary work
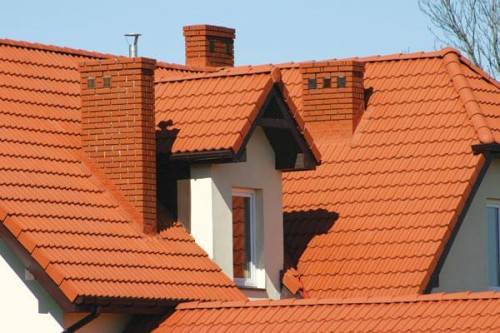
So how do you build a ceramic chimney? Most manufacturers of such systems supply the kit with detailed installation instructions, which detail step-by-step installation, the necessary materials and parameters.
Before installing a chimney, you must consider several factors:
- the power of the heater and the type of fuel used,
- the configuration of the roof and floor slabs.
Usually this chimney consists of the following main elements:
- Foundation. The base for the chimney is poured separately. Although it should not be as massive as when installing a brick structure, it is still impossible to do without it. An exception can be a massive solid foundation on which the whole house stands. In this case, the chimney is mounted directly on it.
- Condensate collector. This is a container in which moisture will be collected, formed from the temperature difference inside and outside the pipe.
- Chimney shaft. It is made from special blocks made of lightweight concrete. In some cases, during installation, it is additionally reinforced with fittings.
- Pipe sections. The ceramic chimney pipe is sold in sections. At one end of each section, a coupling is installed, thanks to which the pipes are connected into one system.
Chimney installation
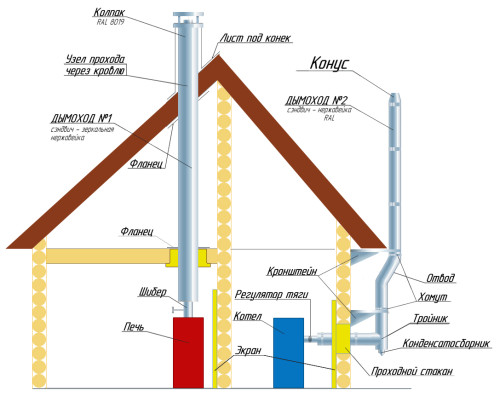
Work order:
We begin work on pouring the foundation. At the place of installation of the chimneys, we place the reinforcement of reinforcement, formwork and fill the base. For this we use cement 400 and sand in a ratio of 1: 4.
After the foundation has cooled down, we lay a layer of waterproofing on it. It is better to use roofing material or rubemast as it.
The first block is installed on the waterproofing, inside which a condensate collector is mounted. It is insulated from the block walls with a layer of mineral wool.
Further, a protective grill is installed on the block with a condensate collector, and on it the next block, inside which the first section of the chimney is located. Ceramic pipes are mounted on a special sealant, which will have to ensure the tightness of the structure in order to avoid gas leaks.
Next, we put the next block, inside which a tee is installed. Tee - a piece of pipe into which the outlet of the heater will be connected.
Next, we mount the chimney to the roof slope
The main point to which you should pay attention is the strict verticality of the pipe. Therefore, we check each block and the installed section of the structure for verticality with a level.
When installing the chimney shaft, the blocks are reinforced with reinforcement
As a rule, they are provided with holes in the corners, into which the reinforcement is inserted and poured with concrete. Thanks to this, the supports do not move away from the axis and receive additional strength.
An inspection hole is made on the roof in the chimney shaft through which the necessary work will be carried out. If a chimney made of ceramic pipes is installed in an already finished shaft, this must be done from top to bottom. For this, an assembly winch is mounted at the top of the structure, thanks to which the master gradually lowers the chimney. A special cuff is attached to each section of the pipe, the spacing of which is installed horizontally, thereby controlling the verticality of the chimney.
The chimney is assembled in the same order as in the first example. First, a condensate collector is installed, then a pipe, a tee, etc.
When the condensate collector has already fallen into place, we cut off the last pipe so that it protrudes above the edge of the shaft by a little more than 1800 mm. Next, the head of the mine and the cone of the pipe are installed.
An important point: after connecting each section of the pipe and lowering it into the shaft, the chimney is cleaned with a special cleaning rod.
As you can see, ceramic chimneys are an excellent solution for heating appliances in private cottages. With their correct installation and operation, the service life of such systems is measured in decades.
