What is the principle of the fireplace
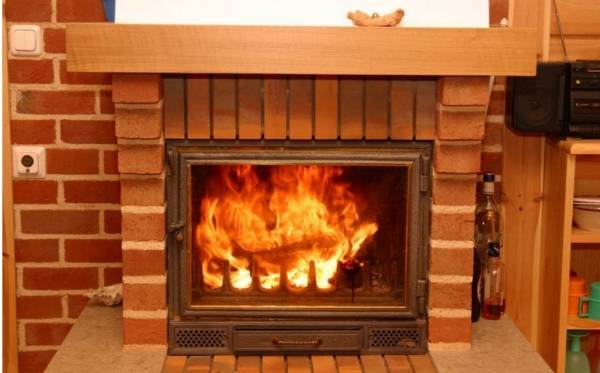
Before you start creating it, it is worth knowing how the fireplace works and how the process of its work takes place. The principle is simple and practically does not distinguish a fireplace from an ordinary stove, except that the firebox, in which the firewood is located, is provided open.
Components of a home fireplace:
• firebox;
• chimney;
• firebox;
• refractory base;
• blew;
• hood.
Additional elements include inlet and outlet openings, grilles in the decompression and convection chambers, floor and wall insulation along the entire length of the chimney.
The chimney runs along the entire height of the room, having a slightly curved shape to slow down the release of smoke, and also so that melt and rain water does not get into it, so that the wind does not blow out. But, despite this, its main difference from a simple stove, which is also its main drawback, should be called the fact that only about 20% of the heat remains in the room. Everything else is drawn into the chimney. Therefore, apart from the decorative purpose of the fireplace, it is difficult to imagine in modern practical living conditions. Unfortunately, the fireplace is not intended for daily use.
Also, the heating provided by the fireplace cannot be called uniform. Opposite the firebox, in the immediate vicinity, you can sit, but the sides heat up weakly and for a long time. The only exceptions are specimens with a deeper design, designed for a large amount of firewood. But, having set a goal, to build a fireplace in the house on your own, you should take into account your wishes and carefully calculate everything.
Do-it-yourself fireplace rules
Before assembling a fireplace correctly, so that it is as reliable and durable as possible, you need to take into account a number of rules aimed at achieving these goals:
- When arranging a brick fireplace, you need to create a separate foundation for it;
- The working part of the firebox can only be made of fireclay bricks, which should not come into contact with ordinary bricks;
- When installing the door and ash pan, you need to lay an asbestos cord and leave a small gap required for thermal expansion of metal elements;
- The inner part of the firebox does not require plastering;
- The rear wall of the firebox should preferably be placed at a slight angle.
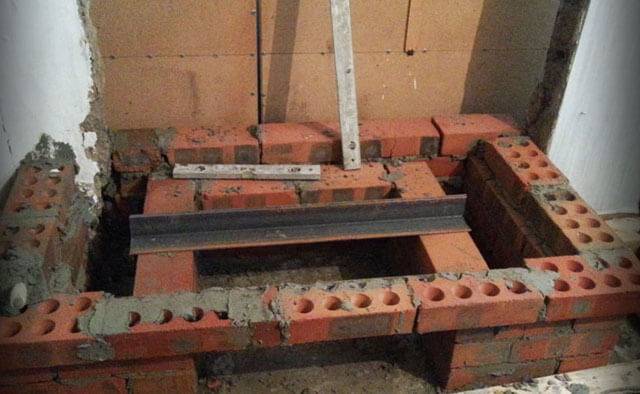
A separate item is the fire safety rules, the observance of which reduces the risk of a fire to a minimum:
- Along the entire length of the flue duct, special cuts should be installed to increase the degree of fire safety;
- When placing the fireplace in close proximity to the wall, it is imperative to lay a layer of refractory material with a thickness of at least 20-25 mm between them;
- When installing the fireplace on a wooden floor, it is necessary to lay a metal sheet or ceramic coating under the structure so that they protrude beyond the fireplace perimeter by at least 30-35 mm;
- At the point where the pipe passes through the floor or ceiling, a 15-cm layer of heat-insulating heat-resistant material must be mounted;
- Only one own chimney can be used for the fireplace.
The operation of the fireplace is also carried out according to certain rules:
- It is strongly not recommended to heat the fireplace to the maximum temperature;
- For normal operation, the fireplace must be regularly cleaned from soot and ash;
- All flammable objects must be at least 70 cm away from the fireplace;
- Only the type of fuel for which the design was designed can be used in the fireplace.
Fireplace design
When we build brick fireplaces, the first step is to create a project that displays all the required dimensions of the structure and its parameters:
- Drawing creation. At this stage, a place is usually selected for installing the fireplace and its dimensions are calculated.When these parameters are known, fireplaces with a detailed description must be depicted on paper, observing the scale and affixing all dimensions. Of course, the drawing should also take into account the competent conduct of the chimney through all the ceilings, as well as the location of the blower and the design of the firebox.
- Preparation of tools and materials. Serious variability of materials is possible only when they are selected for cladding. So, finishing can be done using red ceramic bricks or decorative tiles. In this example, the first option will be considered.
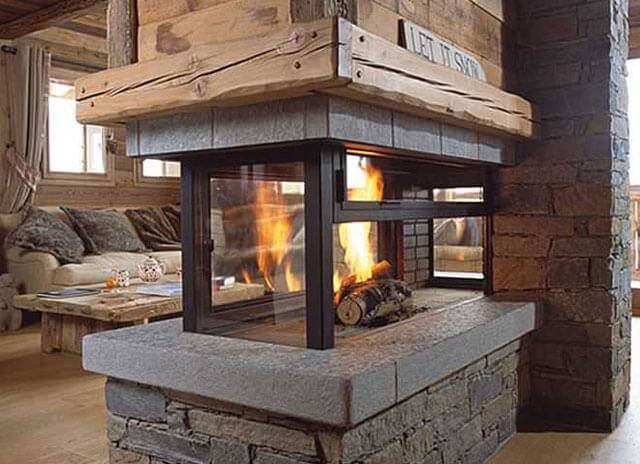
A set of materials for laying a fireplace with the specified parameters is as follows:
- Fireclay bricks of the brand not lower than M200 for the formation of the firebox;
- Red ceramic bricks in the amount of 250 pieces (it is advisable to take with a margin of about 10%);
- Materials for pouring foundations and brickwork (cement, sifted sand, gravel and water);
- Waterproofing material for laying the foundation;
- Smooth formwork boards;
- Grate;
- Metal door;
- Damper;
- Blown;
- Metal wire and rods required for the reinforcement of the structure;
- Wire 0.8 mm thick for dressings;
- Asbestos cord.
Before you make a fireplace in the house with your own hands, you need to prepare the following set of tools:
- Master OK;
- Roulette and marker;
- An even rule;
- Bulgarian;
- Level, plumb line and square;
- Construction stapler;
- Bayonet and shovel;
- Construction mixer or drill with an appropriate attachment;
- Rubber hammer for leveling brickwork;
- Conventional formwork hammer.
Fireplace mortar
It is easier to purchase a clay-sand mortar for laying a fireplace ready-to-use, the mixtures are packed in 20-25 kg kraft bags, their composition is balanced, you just need to seal it with water. It should be borne in mind that kiln mixtures have different heat resistance. Often, the fireplace is heated with a higher intensity than the stove, so its firebox must be folded on a heat-resistant composition.
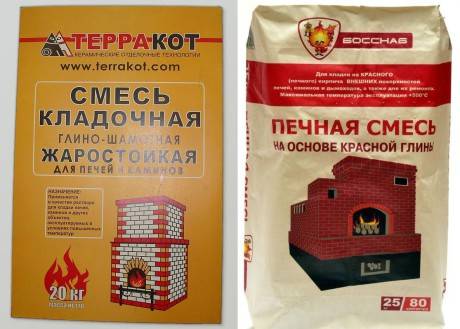
On the left is a heat-resistant mixture with the addition of chamotte, on which the entire fireplace can be laid out or, in order to save, only its firebox. On the right is a furnace composition suitable for laying the fireplace body outside the firebox and chimney within the attic
You can prepare a clay-sand masonry mortar yourself. For this, oily clay and washed, without impurities, seeded sand with a particle size of 0.2-1.5 mm are used. It is not so easy to choose the optimal composition of the mortar for laying the fireplace, with an excess of clay it will be prone to cracking and too fluid, with a shortage it will be fragile and low plastic. Clay is chosen as pure as possible, with a minimum sand content, and is kept for a long time in the open air. The ideal option is blue clay, red is also suitable. Before preparing the solution, it is soaked for several days and, if necessary, filtered through a sieve, removing pebbles.
The proportion in which clay is mixed with sand, depending on the fat content of the first, is from 1: 1 to 1: 3, the exact ratio of the components must be determined locally, guided by traditional control methods. One of the control methods: a layer of mortar with a thickness of no more than 5 cm is placed on the brick, another brick must be placed on top and pressed. After two minutes, lift the upper brick, if the lower one holds, the mortar is normal. It must be borne in mind that an excess of clay is less dangerous than a lack of it.
Another method to obtain a high-quality clay-sand mortar is to purchase at the factory where the fired brick was purchased, the required amount of raw materials for its production, or raw brick. Not all, but very many enterprises sell such "semi-finished products". The raw material is easy to soak, the similarity of the composition of the brick and mortar will ensure the strength of the masonry.
Pouring the foundation
To pour the foundation base under the fireplace - the stove will need the following materials and tools:

Proportions for cement grade m400
- roulette;
- Bulgarian;
- welding machine;
- hammer + nails;
- board;
- fittings;
- cement (grade M400).
The first thing to do is the edged board formwork. It must be securely installed and have a height of 8–10 cm. The reinforcing rod is laid in 19 cm increments, after which perpendicular rows of rods are laid. The joints of the rods must be tacked by welding.
The solution must be poured in two stages. The first one assumes a layer of concrete of 4 cm, then it is necessary to lay the crate, then the last layer is poured, the height of which should be about 6 cm.
So that the finished foundation does not contain voids, the solution is plowed a little with a free rod.
After that, the foundation must be left alone. Its drying time can vary from 15 to 18 days, depending on the conditions of location.
Preparatory work
The first step is to equip the foundation, on which the durability and reliability of the fireplace depends. The foundation for the fireplace must be separate - the building shrinks somewhat, so the installed heating unit may deform. When creating a foundation in an already operated house, it is imperative to take into account all roofing elements that may interfere with the future structure or affect the installation process.
It is much easier to equip the foundation even before the house is built - all work will be reduced to performing the following sequence of operations:
- First, you need to dig a pit, the depth of which is equal to or greater than the depth of freezing of the soil;
- Next, the formwork is installed, and the bottom of the pit is filled with a mixture of crushed stone and sand;
- The next step is to install the selected waterproofing material;
- The foundation is reinforced with metal rods and poured with mortar to the mark, which is located at the height of two bricks below the floor level;
- The poured foundation must be left until completely solidified (this usually takes about three weeks).
If the foundation is poured from scratch, then there will be no special problems with it. A completely different matter is the creation of a foundation in an already built house, for which you will need to disassemble part of the floor in the place where the fireplace will be installed.

The process of work looks like this - first you need to mark the base of the fireplace on the floor and make indents of about 20 cm in each direction. The floor covering is cut along the marked lines with the help of a grinder. When this operation is completed, you can start extracting the bare soil and performing the algorithm described above.
When the base of the fireplace is brought up to the floor level, the gap between the stone and the floor covering must be decorated. In addition, after each stage of work, it is advisable to carry out cleaning, and immediately before making a fireplace in the house, the room should be covered with plastic wrap to minimize the amount of dirt on the floor and furniture.
After creating the foundation, you can start work to ensure fire safety. If we make a fireplace located near the walls with our own hands, it is necessary to protect each of them from the effects of high temperatures. Asbestos sheets are usually used for these purposes, but ceramic tiles are also a good option.
The last stage of the preparatory work is bringing the purchased brick into working condition. The brick used must be assembled, sorted by size, and a small number of bricks that will be used in the near future must be moistened so that they will not take moisture from the solution.
Masonry
 Fireplace device diagram
After making sure that the foundation solution has finally hardened, you can start laying the fireplace:
On the top of the foundation, apply a cement-sand mortar with a layer of about 2 cm and lay a layer of brick on it. Check the levelness of the surface.
 Initial stage of construction
Apply a second coat of mortar and lay another row of bricks.
Lay two layers of roofing material on top (as waterproofing).
Arrangement of formwork Prepare a cement-clay-sand mortar for laying a fireplace: for one part of cement (grade 150), 8-9 parts of sand (by volume) are taken, everything is mixed, after which clay pulp (slip) is carefully added to the mixture. Consumption of sand and clay (by volume) is approximately the same. For lintels, the content of cement and sand changes to 1: 5 or 1: 6. It is not recommended to increase the content of cement in the solution, since the main binder in it is clay.
In exact accordance with the masonry scheme you have chosen, start laying out the fireplace. For its front surface, choose a brick of the same color, size, with right angles and edges. Make the seams strictly the same size, keeping them vertical and horizontal. Shape the seams (recessed or concave) with jointing
Pay particular attention to laying out a symmetrical lintel above the fireplace opening (in some cases, it is recommended to use formwork).
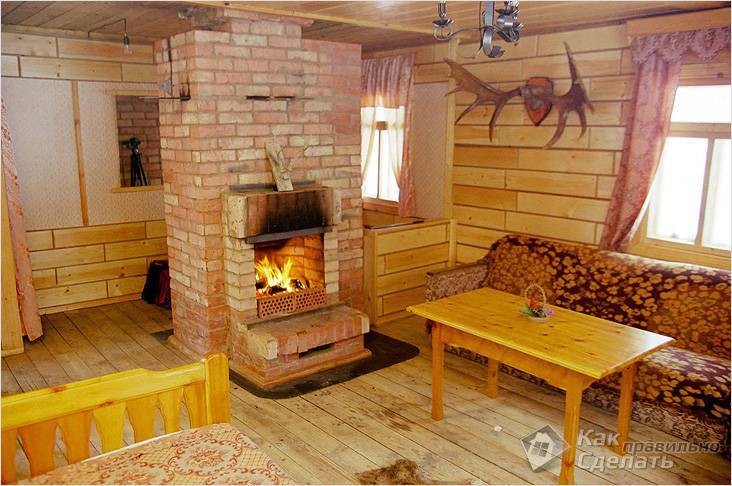 Fireplace in a country house
- Since it can be difficult to fold the fireplace for the very first time, and sometimes the masonry does not look beautiful, the finished fireplace can be plastered.
- The chimney should be laid out on a mud-sand mortar followed by plastering. In the places of intersection with combustible elements of the floor, a fire cut is performed.
Masonry technology in the construction of a brick fireplace
We will assume that the foundation of the fireplace has already been built, poured with strong concrete and will withstand the weight of the structure.
- The concrete surface should be waterproofed with an inexpensive cement-polymer coating mixture (for example, CeresitCR 65), smearing it twice with a brush or a spatula.
- If the fireplace is adjacent to a wall made of combustible material, a fire protection must be installed.
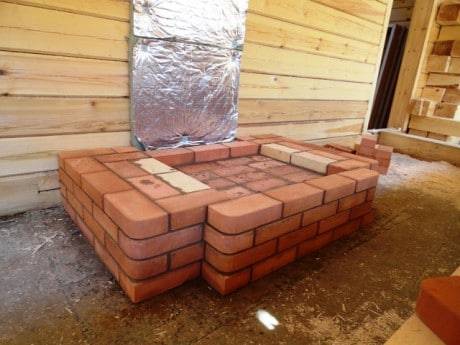
An inexpensive and effective option for fire-prevention cutting of a fireplace and a wooden wall is a slab of basalt wool (at least 5 cm thick), covered with reflective foil from the side of the fireplace
Preparation of clay-sand mortar. When making your own, the clay should be soaked in advance. Water is added to the finished mixture before starting work in accordance with the instructions.
The brick should be soaked - immersed in a trough of water for a few minutes. If this is not done, the masonry mortar may dry out too quickly and not gain the required strength.
In addition, the wet brick can be displaced if necessary, which is important when the fireplace is laid out by a not very experienced craftsman.
The first row is laid out, it should be as even as possible, the horizontal level of the level should be carefully controlled. If you "missed" the foundation a little, the first row can be laid out on a cement-sand mortar, so it is easier to fix the flaws of the base.
Further, the laying of the fireplace is carried out in strict accordance with the ordinal plans
We recommend laying out each subsequent row first dry, only after that on the solution. If the fireplace is large, the cord is pulled; for the small size of the structure, control with a level and a square is sufficient.
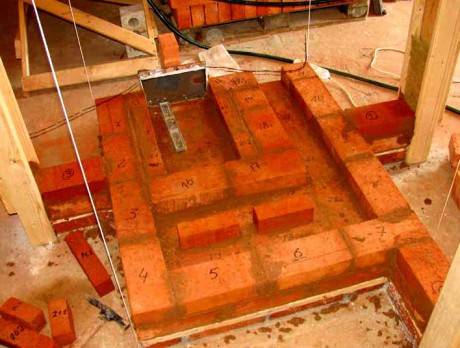
If there is more than one brick in a row that needs to be split or sawn, we recommend that, when laying out dry, all the elements are numbered, both solid and fitted in size. The numbering should be duplicated on the ordinal plan.
Vertical seams of bricks should not be located one above the other; the need for bandaging should be taken into account even when drawing up drawings.

Laying begins with corner elements, strictly controlling the observance of the horizontal level between them
Excess mortar is removed with a trowel, the seams are sewn, the contaminated bricks are wiped with a wet cloth.
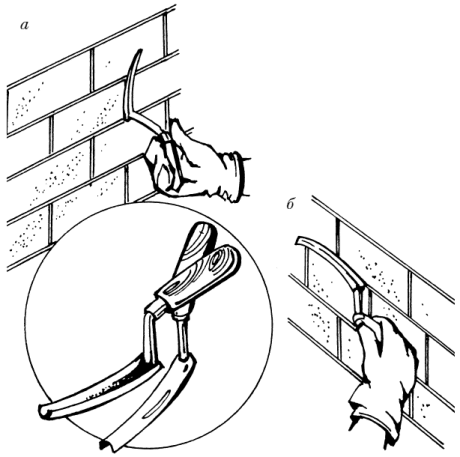
The shape of the joint determines the profile of the joint, concave, convex or rectangular

Another way to make a neat seam is to lay bricks along the guides.
Take a closer look at the photo: from the outside, a square metal profile is inserted into the seam, after a few minutes it is removed.
It is not necessary to lay more than 8-10 rows in height in one shift.

Stages of building a fireplace
Pay attention to how the arched lintel is assembled above the firebox - according to a pre-installed wooden template
Choosing a place to build a fireplace
The dimensions of this type of stove are tied to the volume of the rooms in which they are arranged. For example, the area of a fireplace insert for rooms with a volume of up to 70 cubic meters should be 1:50 or 1:70, i.e. from 0.2 to 0.4 m2. The parameters of the firebox opening are determined as follows: the ratio of height and width should be 2: 3, i.e. with an area of 0.2, 0.3 or 0.4 m2, the furnace hole (portal) will have the following dimensions - in the first case 36x45 cm, in the second - 44x67 cm and in the third - 52x77 cm The ratio of the depth of the furnace to its height should be in the range from 1: 2 to 2: 3, these parameters are very important, because non-observance of these proportions in the direction of increasing the depth of the firebox will reduce heat transfer, and if it decreases, the fireplace will begin to smoke the room. The size of the depth of the fuel chamber must be maintained in the following proportions: with a total area of the firebox equal to 0.2 m2 - the depth should be from 18 to 24 cm, equal to 0.3 m2 - from 22 to 30 cm and equal to 0.4 m2 - from 26 up to 35 cm.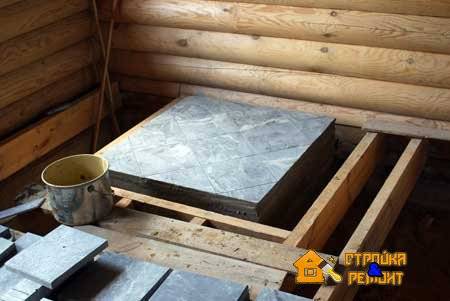
Types of fireplaces
Wood-burning fireplaces are a simple stove, its firebox is open and looks more like a niche in the wall. The room is heated by radiation of heat energy, while the heat transfer of the fireplace is low - it is equal to 10-20%, other heat is drawn into the chimney. In cold winters, you should not rely on the fireplace alone for heating, it will not be enough.
The fuel chamber of the fireplace (the fuel burns in it) should be wide, but not deep, the walls (side and top) are made with expansion (collapse) towards the heated room (at an angle of 45o-60o). This design will allow you to direct more heat energy into the room.
The fireplace can be placed outside the wall, built into a brick wall (its thickness should be at least two bricks) or attached to the wall. The fireplace, due to its design, significantly improves the ventilation of the room, but it is not able to accumulate and evenly give off heat. The greatest amount of heat is generated directly in front of the fuel chamber.
Fireplace brick
Full-bodied ceramic bricks are a traditional material for stoves; provided that the fireplace is well-fired, the whole fireplace can be laid out of it. Depending on the production technology, one of the brick spoons can be fired more than the other. The side of the brick, which has a smoother surface and a darker color, is oriented towards the fire. For greater reliability and if the quality of the ceramics leaves much to be desired, it is better to use fireclay refractory bricks for the hearth, walls and the upper part of the furnace, it will withstand high temperatures without problems.
Please note: ceramic and fireclay bricks have different coefficients of thermal expansion and, in order to avoid cracks in the masonry, they cannot be tied together. If the brick is cut by hand, all the elements, including the halves, are counted as whole
You can also cut bricks by installing a ceramic cutting disc on an angle grinder or paving slab cutting machine, in which case the cut will be perfect and there will be no waste
If the brick is cut by hand, all the elements, including the halves, are counted as whole. You can also cut bricks by installing a ceramic cutting disc on an angle grinder or paving slab cutting machine, in which case the cut will be perfect and there will be no waste.
