Connection procedure
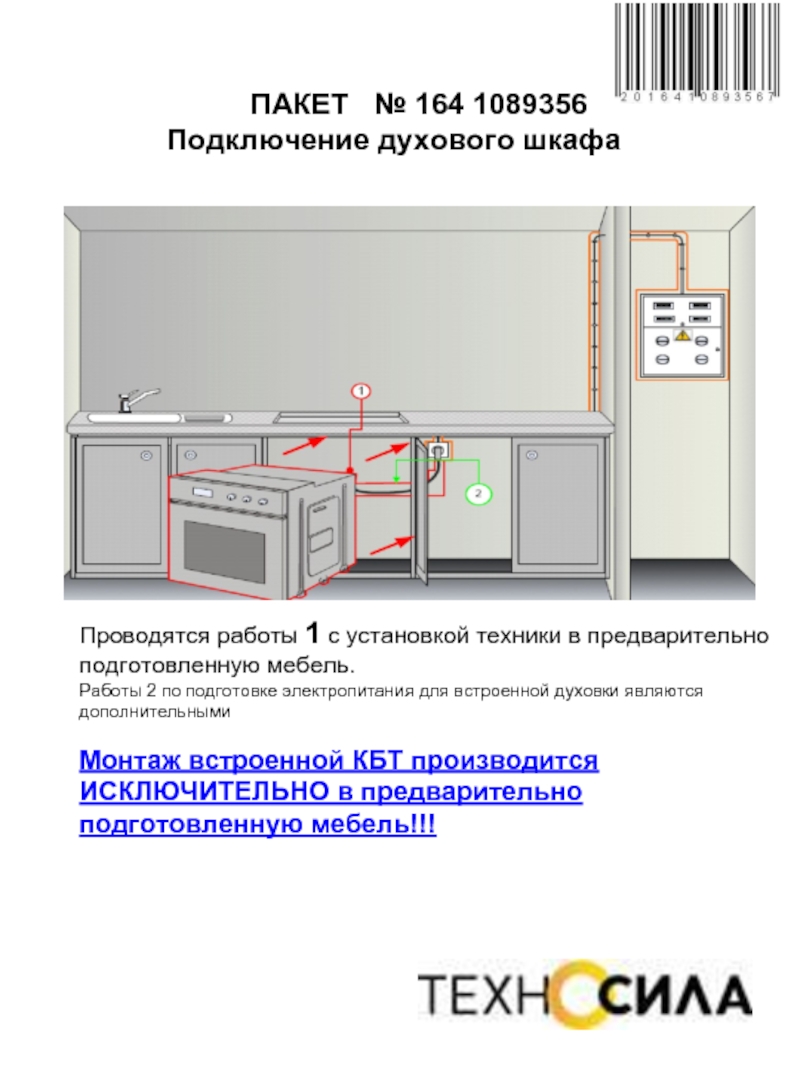
Regardless of the type of device, the oven is connected in several stages:
You need to evaluate the existing wiring. The oven can only be connected if:
- Good physical condition.
- The cross-section of the conductors is not less than the required one.
- The line has a circuit breaker or at least a switch. They are needed to de-energize equipment in an emergency.
If the existing wiring does not meet the requirements, it is necessary to lay a new route from the panel to the proposed installation location of the oven. On this line, you will need to install an automatic machine of a suitable value. We will talk more about the cross-section of wires and the ratings of the machines for them later.
What to do
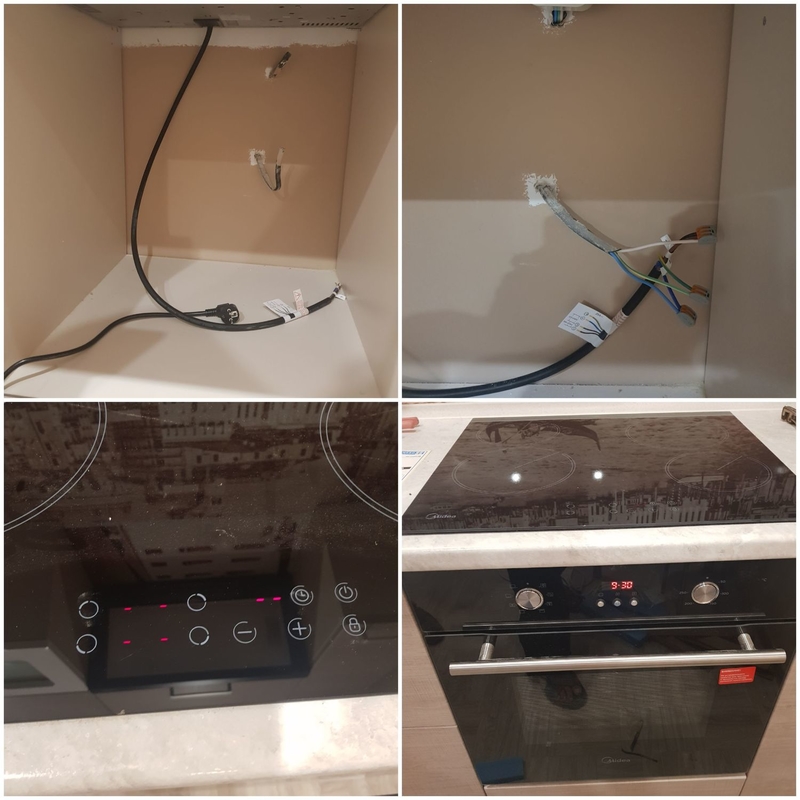
First you need to prepare the oven for connecting to the mains. The oven may have a power cord. Sometimes it ends with a three-prong (grounded) plug, sometimes there is no plug. Depending on the connection method, you can install a plug on the cord, or you can do without it. You can even change the cord - it doesn't even affect the warranty.
It's all about which connection method you choose. You can - traditional through a three-pin socket with a plug. You can have one that is not so convenient, but is considered more correct. Through the terminal block. Depending on the chosen connection method, connect the electrical wires (more on this below).
In some cases, the power cord with a plug is already connected to the oven.
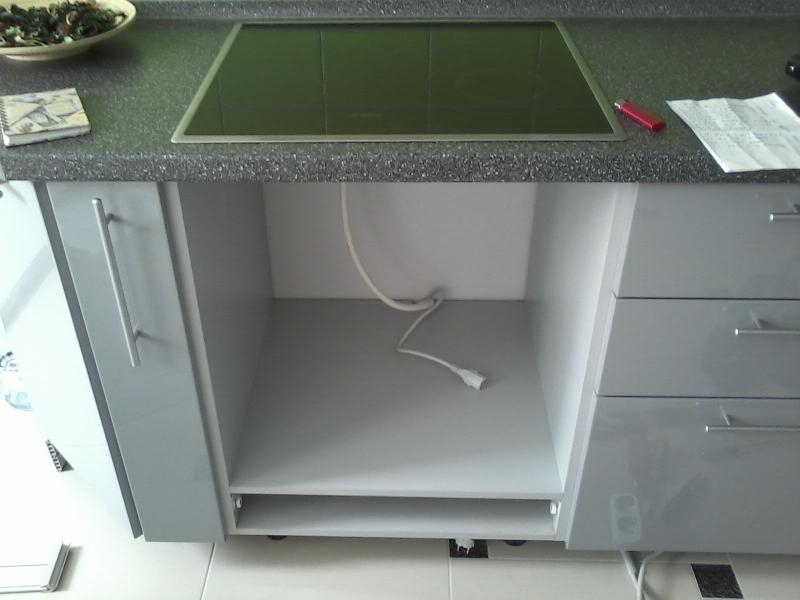
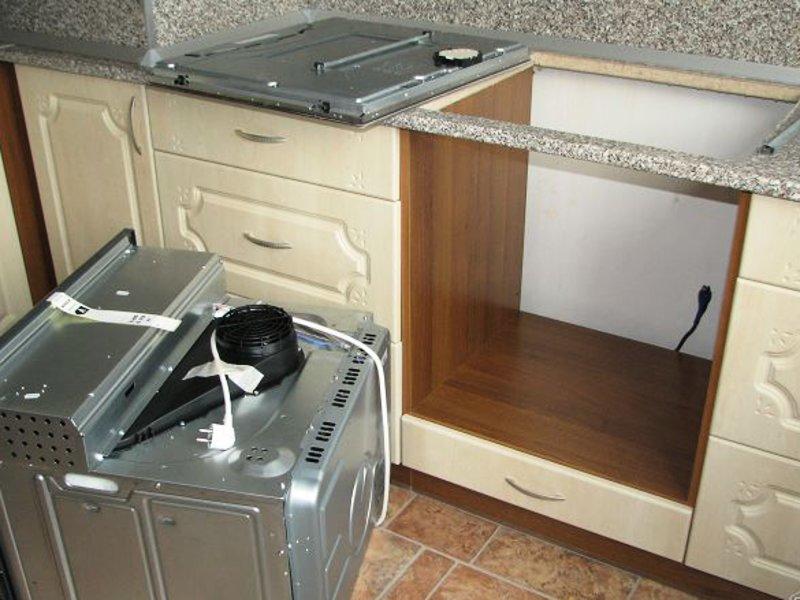
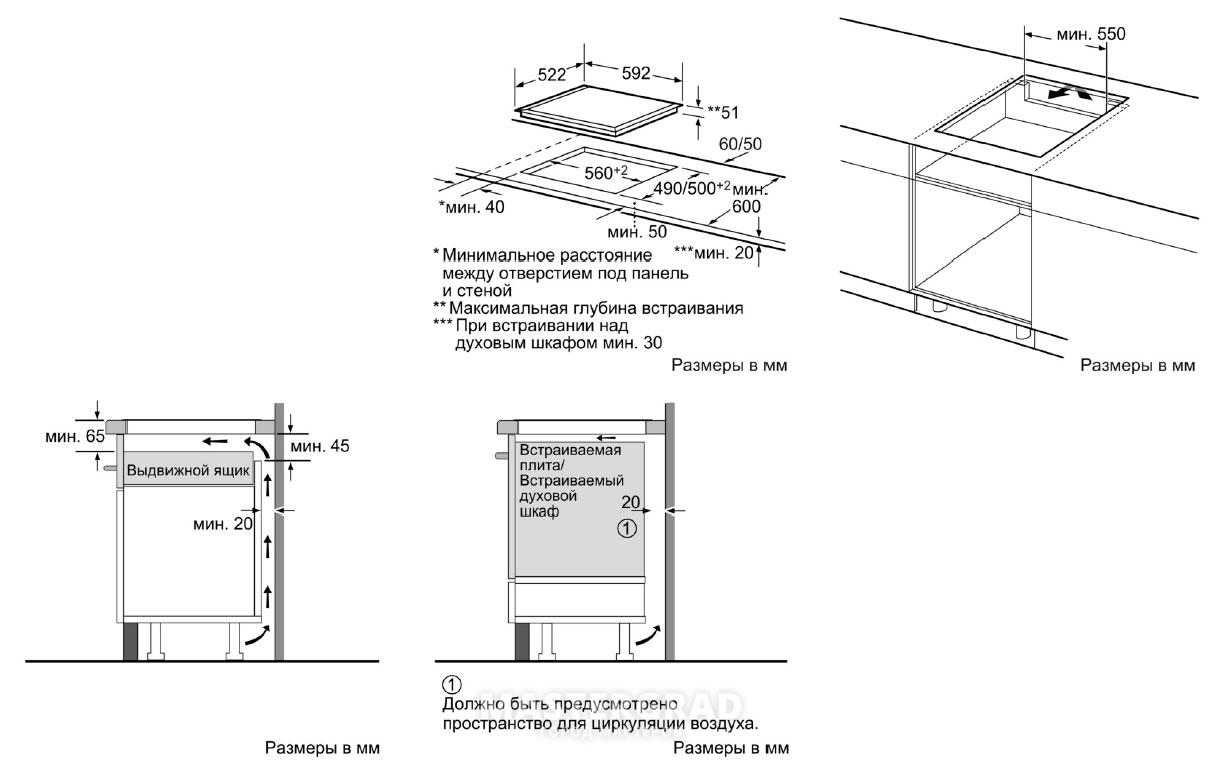
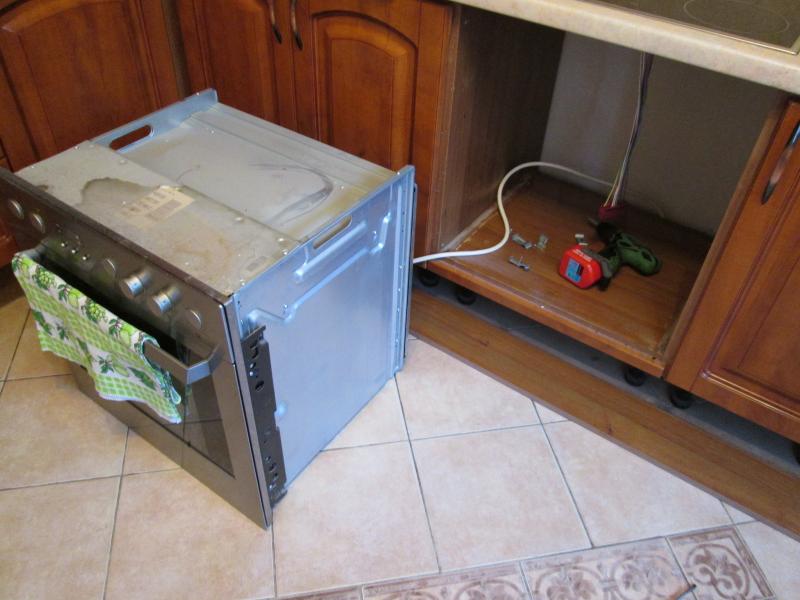
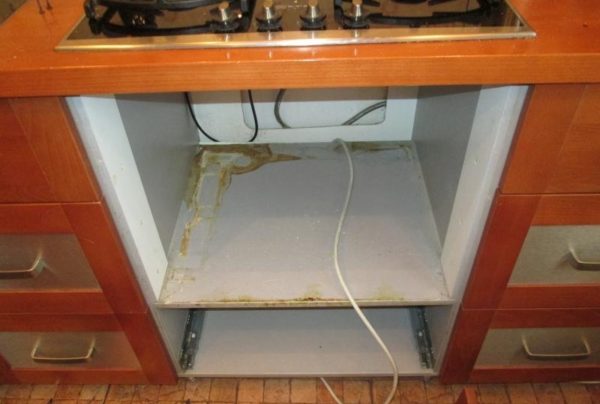
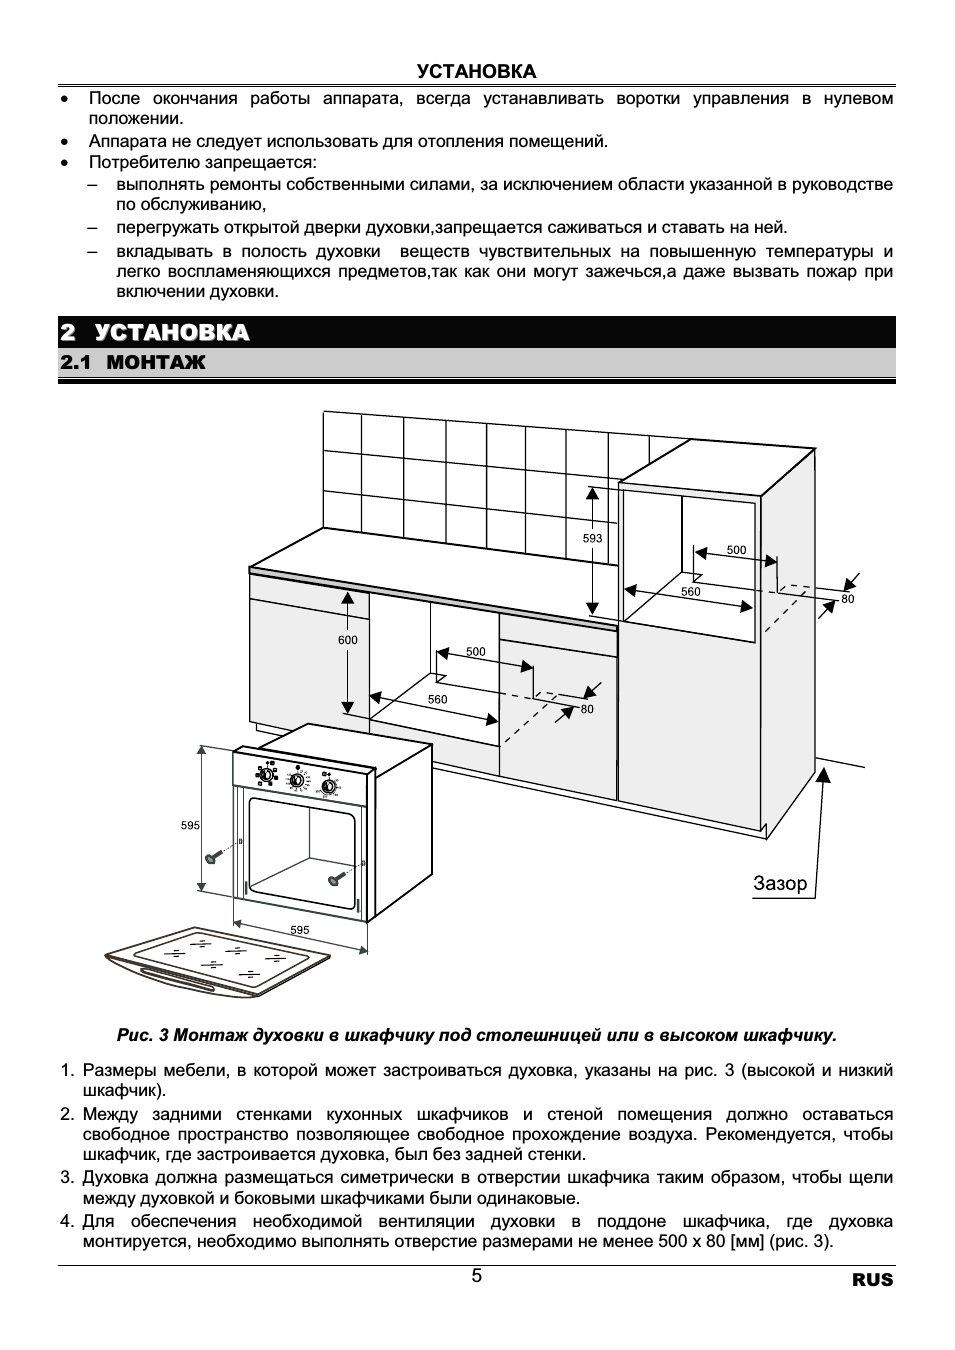
Prepare a place for installing a built-in oven. Manufacturers usually recommend that cool air flows from the back and bottom for ventilation. If the furniture has a back wall, a hole is made in it or even cut out as much as possible
To ensure the flow of air from the bottom, you can put pads on the sides several centimeters high (it is important that there is also an air gap at the top between the oven and the worktop. In addition, the side racks of the cabinet must be adjusted to the size of the oven - it must be fixed to the sides with screws.
The built-in oven is installed in place, we check the verticality and horizontalness of the installation with a building level, if necessary, we correct
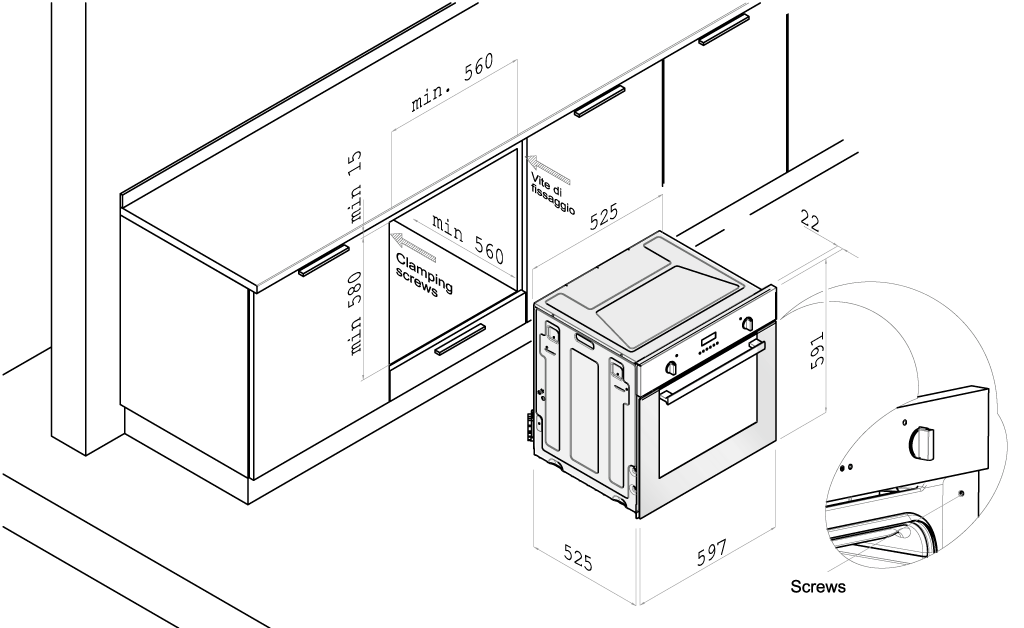
We open the door, there are holes on the side plates, we install screws in them that will hold the oven in place. So that when screwing in the screws, the walls of the furniture do not break, first make a hole using a drill with a diameter slightly smaller than the diameter of the self-tapping screw.
This, in fact, is all. The oven has already been connected, but not everyone fully understands some of the nuances and, most likely, there are a lot of questions about the electrical part. Let's talk about them further.
Possible problems
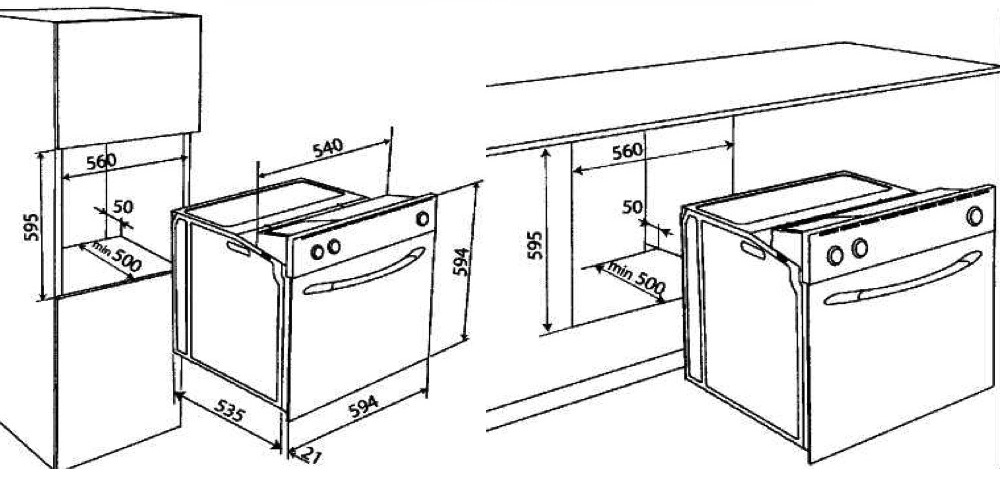
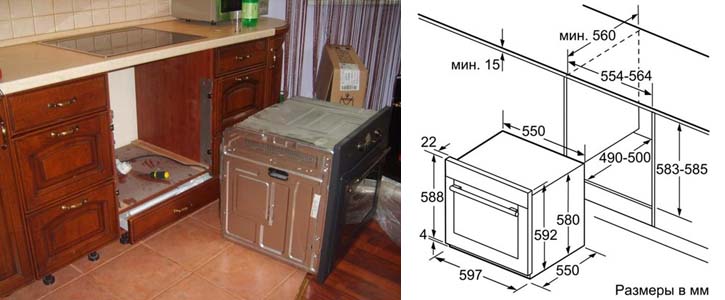
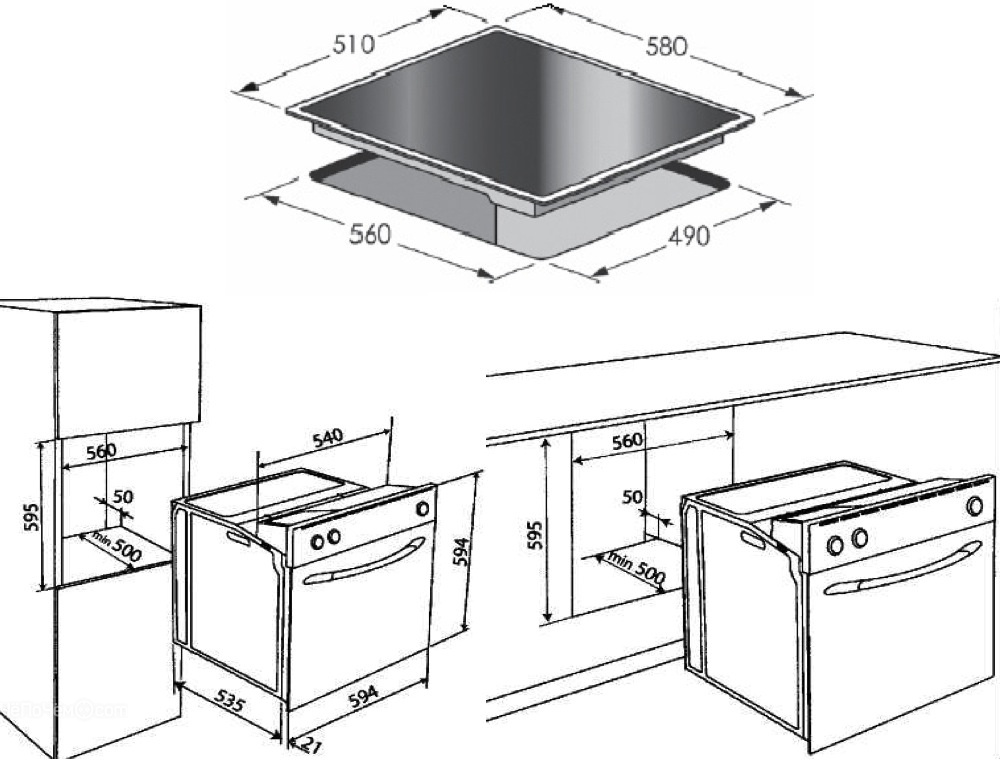
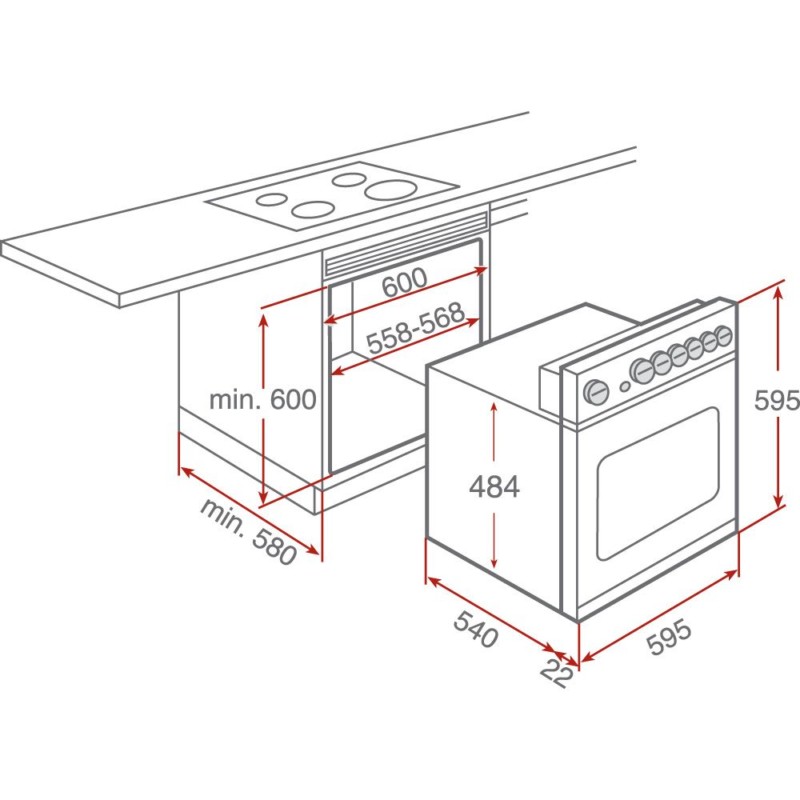
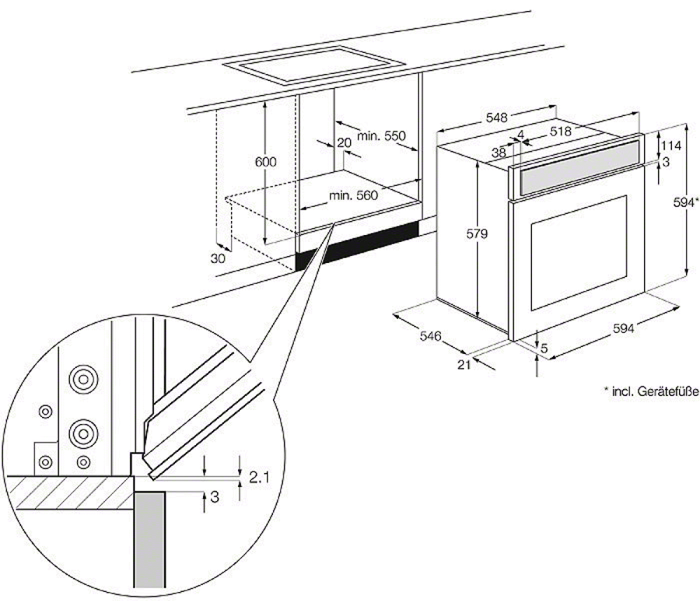
The main problem with the installation during installation is the height of the oven. At the same time, the strict dimensions of the niches seem to correspond to the parameters of technology, but in fact, ovens with handles may not fit into niches with a height of 598 mm. If the oven has a front control panel, a recess of at least 600 mm is required for it.
The design of the oven should not be changed if:
- the device is under warranty service;
- you don't understand anything about electrical engineering.
If during the warranty period you decide to return an unsuitable device back, you will be accepted. However, the following cases will be considered an exception by the warranty service personnel.
- Traces of autopsy attempts. These can be removed seals, cut bolts, and other signs.
- Components or mechanical parts of the device managed to damage the rodents that you may have in your home.
- When transporting the device, the manufacturer's recommendations were not followed.
- Unsuitable voltage parameters have caused damage to the electrical part of the device. The critical limits are usually indicated by the manufacturer in the instructions.
Instrument door hinges, power regulators, elements responsible for heating, igniting, thermostat, rubber bands, rods, holding springs - all these are elements that often become a problem for home appliances owners. If a cracked power regulator does not interfere with the performance of the equipment, but only causes discomfort, then a broken heating element will complicate the use of the oven.
You can continue to use your oven comfortably only after completing the renovation. It is permissible to make minor repairs yourself. After all, original spare parts for common branded devices are by no means a shortage. For complex repairs, it is better to call the master at home or take your equipment to the nearest workshop.
Installing the oven
Before installing and connecting it, you need to carefully study all the nuances of installing the machine, assess your capabilities and, if necessary, use the help of highly qualified specialists. Connecting an electric oven to the mains or gas to a gas source, you must start by preparing a niche for its future location.
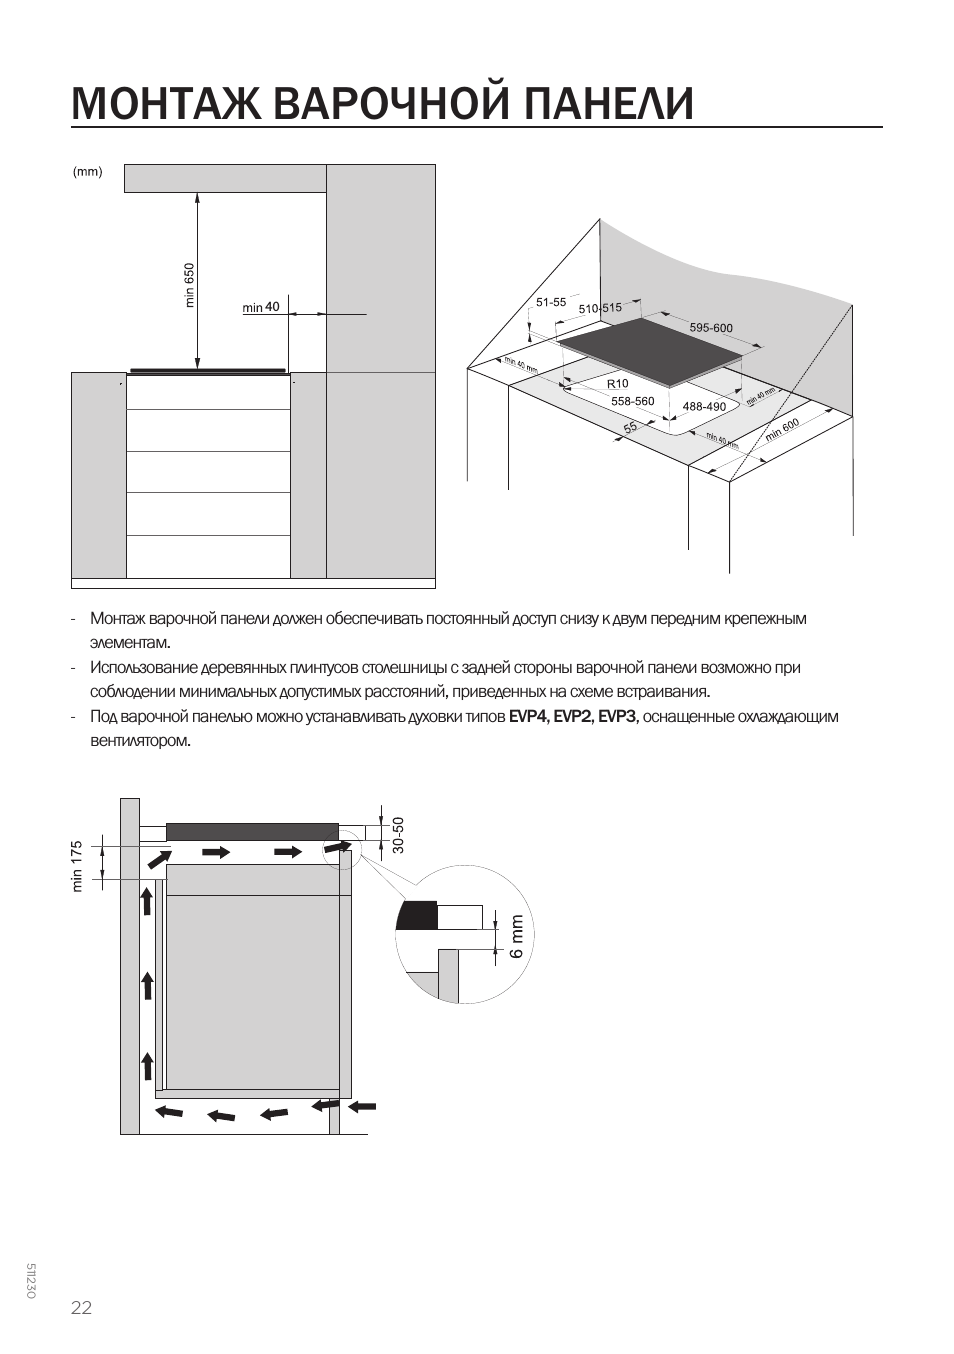
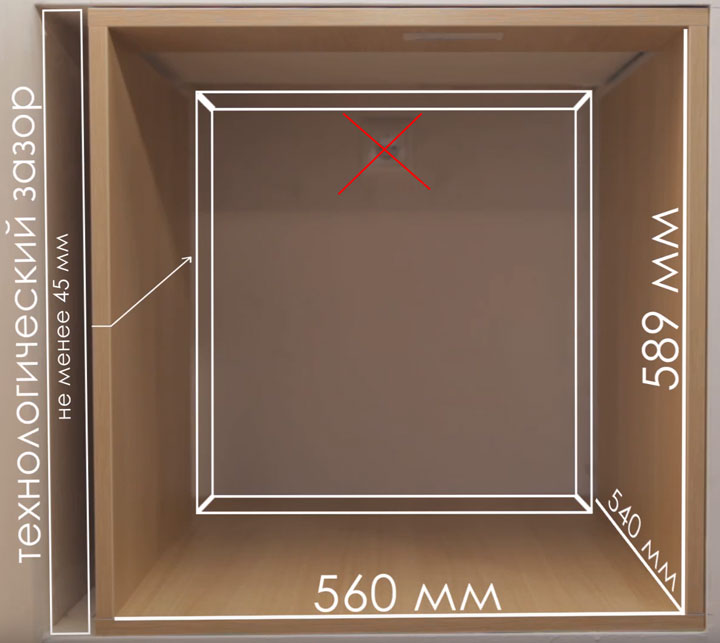
The connection of the electric oven will be correct if the following distances are taken into account during installation:
- 40 mm - from the back wall;
- 50 mm - from the left and right edges;
- 90 mm - from the bottom of the oven.
It is very important that there are no distortions, as the equipment will quickly break down due to improperly distributed heat. For the correct execution of work on the installation of the oven, you need a level
There is also a risk that wooden furniture can smolder, which in turn can lead to a real fire.
If you decide to connect on your own, then it is important to study all the nuances associated with embedding into one or another furniture. Remember that the connection of the built-in oven directly depends on the version of the hob and on the material of the kitchen set.
Preparatory work
For the manufacture of furniture, it is desirable to have a workshop. You can use a large table in a free room. Provide an outlet within walking distance for connecting a power tool and stock up on an extension cord. Arrange the lighting of the workplace correctly.
If you are going to make a closet in a non-residential area, then take care of heating in winter and forced ventilation in hot summer. Large window openings will save energy consumption during the daytime. A workbench equipped with stops, sockets, vices and clamps will be a good help for assembling the cabinet.
Oven socket
 Many people have a question, is it possible to connect an electric oven from an existing conventional outlet, which was previously installed in the kitchen for a kettle, microwave, etc.?
It is possible, the main thing is that at the same time 3 conditions are met:
the oven must be no more than 3.5 kW
the socket is connected with a three-core copper cable from the shield with a cross-section of at least 2.5 mm2
in the electrical panel, replace a conventional machine with a thermal release with a differential machine with a rated current of no more than 16A

When replacing the only machine for sockets with a differential 16A and connecting the oven through it, it will practically not be possible to use other electrical appliances while the oven is running and food is being prepared.
Here, you yourself will have to make a choice, either in favor of saving (not laying new wiring, a separate outlet, etc.), or in favor of comfort and convenience.It is not recommended to leave a conventional modular automatic machine without protection against leakage currents in the panel when connecting the oven to an old outlet.
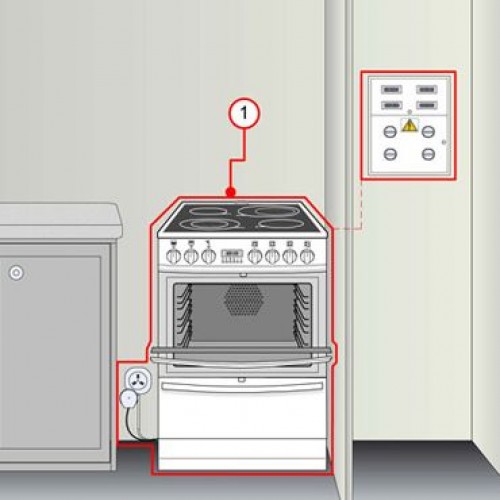
The installation height of a new socket under the oven should be no more than 90 cm from the floor. Although it is also often placed at the level of the legs of the kitchen.
The most important thing here is ease of use. For safety reasons, when wet cleaning and wiping the oven with a wet rag, it must be disconnected from the power supply.
And it is not always convenient to climb under the very bottom of the kitchen to pull out the plug every time. In addition, possible situations such as water leakage and flooding of the kitchen must be taken into account here. Therefore, 5-10 cm above the floor, the outlet should still be raised.
The main requirement for the location of the socket is not to place it directly behind the oven. You can install it on the left, right, or as mentioned above - under it, directly near the floor.
Another safety point when installing the outlet: if a gas supply passes nearby, for example, to the hob (for example, you have a gas, not electric), then the outlet should be at least 60 cm away from it.
When you have decided on the location of the outlet, you need to connect it.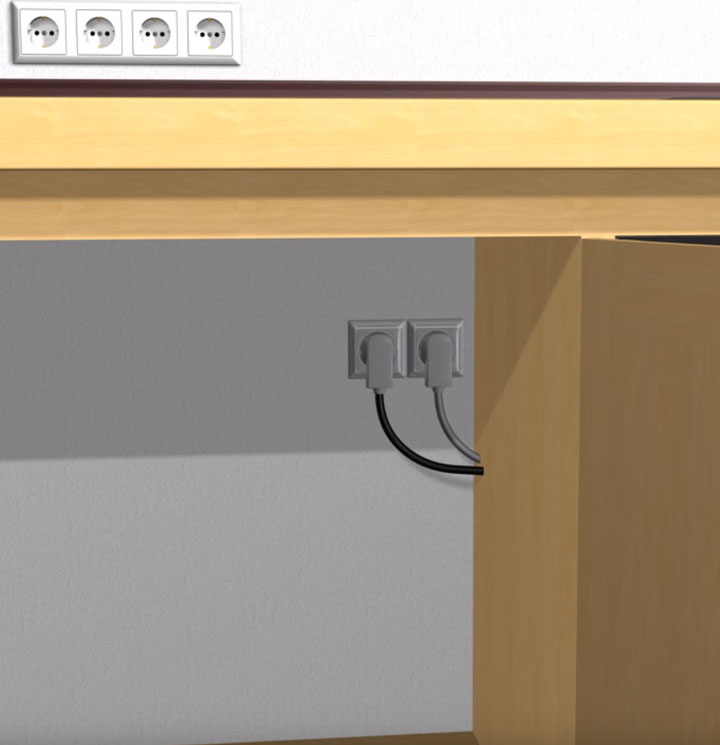
Connect the phase and zero core of the cable to the extreme contacts of the socket
In this case, it does not matter at all where the phase will be located, and where zero is on the right or left. Connect the grounding conductor (yellow-green) to the grounding terminal (usually middle)
Replace the frame or decorative cover.
Varieties of ovens
Having made the decision to purchase an oven, be sure to familiarize yourself with the rules for installing it yourself. Another important point preceding the installation process is choosing from a huge range of models offered in stores exactly the one that will fully satisfy all your requirements.
To make the right choice, you must first of all study what types all ovens are divided into. According to the installation method, ovens are divided into built-in and freestanding (independent).
Built-in ovens are installed directly in the kitchen unit, while stand-alone ovens can be installed separately from other pieces of furniture. And also ovens have different heating methods:
- A gas oven can be connected in any kitchen, however, all installation work will need to be entrusted to specialists, and not to do it yourself, otherwise there may be a risk of disruption of the gas supply system of the whole house. These appliances have burner nozzles located at the bottom of the oven. In this regard, the heating of the products occurs from the bottom. This type of equipment has a reliable gas control system, thanks to which it is absolutely safe to use it.
- An oven of a different type - you can connect an electric one with your own hands. It is much easier to install than gas models. In addition, this technique is equipped with various additional functions that greatly simplify its operation. Electric ovens create the temperature conditions required for cooking much faster. Since the food is heated from all sides at once.
Types of devices
Built-in ovens are of two types: dependent and independent. The first ones are installed together with the hob. The latter are mounted independently of it as separate devices installed anywhere.
The devices are connected to an electrical network or to a gas pipe. If the electric oven can be installed with your own hands, then to connect the gas one you need to call a gas worker. The oven can be installed in two ways:
- Under the countertop. A hob will be installed on top.
- Above the countertop. Installation is carried out separately from the hob in a place convenient for the hostess.In this case, it is easier to keep an eye on the oven, but to mount the device, you will need a cabinet with a niche of a suitable size.
Regardless of where the oven will be installed, a place must be prepared for it in the kitchen furniture. To fulfill this condition, you can first purchase furniture, and then choose a suitable oven for it in the same salon. You can do the opposite - first buy an oven, and then, when ordering kitchen furniture, indicate the dimensions of the niche for its placement.
Step-by-step instructions for assembling the oven cabinet
When the pieces of the curbstone are cut, start making the cabinet:
- Glue the ends of the parts that will be visible with end tape using an iron.
- On the sidewalls, mark the holes for confirms and dowels.
- Drill the dowel seats with a drill.
- Use a confirmation drill to make sockets at the joints of the side posts with the horizontal panels.
- Fasten the retractable ball consoles to the sidewalls.
- Screw in the confirmations with the knob, connecting all the fragments into a single body.
- Close the caps of the Euro screws with plastic plugs.
- On the back of the cabinet, nail the MDF plank into the drawer compartment with nails.
- Screw the legs to the bottom of the cabinet.
We prepare the side walls We mark the fastening lines and drill holes for the bottom of the drawer Expose the drawer guide Fix the drawer guides We drill holes for the legs We fasten the drawer legs with an indent of 5 cm from the edges on the screws 3.5x16 mm. We put the bottom on the edge, align the side with it and screw the side walls. We insert the partition on which the oven will stand. The curbstone is almost ready.
Connecting the oven plug
If the oven comes with a factory plug, then it may not be collapsible, but solid cast. And then cutting it off entails the loss of the guarantee, be careful in this matter.
And it is simply not profitable to guess which plug is needed for the manufacturer.
You clean the wire from the oven, crimp it with NSHV tips and pass it through the plug body. You put the phase and zero (usually these are gray = brown and blue conductors) on the extreme contacts of the plug.
Again, no matter where it is, phasing does not matter here. Green-yellow grounding conductor - to the middle contact. To prevent the wire from dangling inside, fix it with a clamping clamp and twist the plug body.
Important note: when connecting wires to the plug, never rely only on the colors of the insulation of the wires. Be sure to unscrew the cover of the terminal block on the electric oven and check where which wiring is running (the correct connection to the terminals is described below)
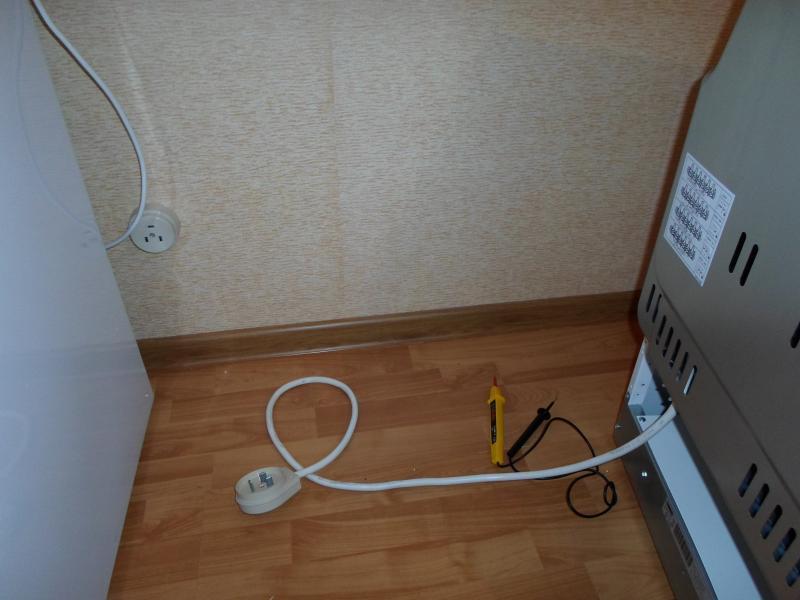
When, for some reason, there is no access to the terminals, or there is a warranty seal, use an ordinary Chinese multimeter tester. The grounding conductor must be connected to the oven body.
And therefore, when connecting the probes in the insulation measurement mode to the core and to the case, a sound signal should be heard or zero should be displayed on the display. That is, the resistance R = 0 Ohm. Thus, you will find "ground", the remaining two wires will be phase and zero.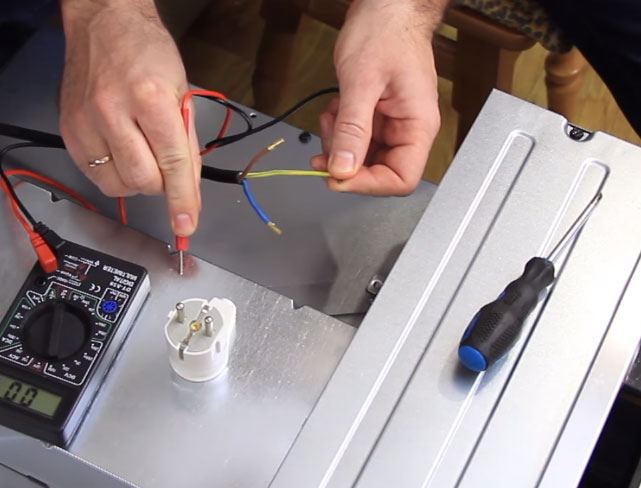
What should be a cabinet for a built-in oven
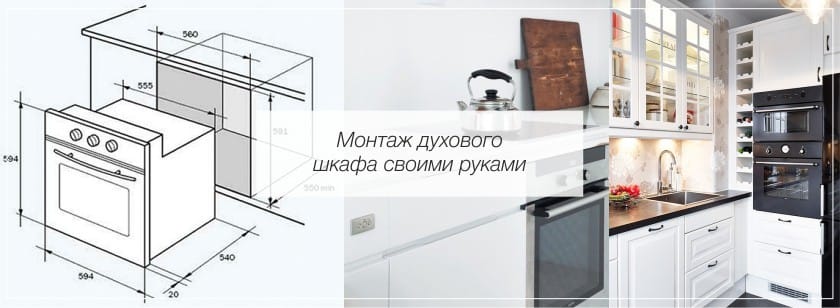
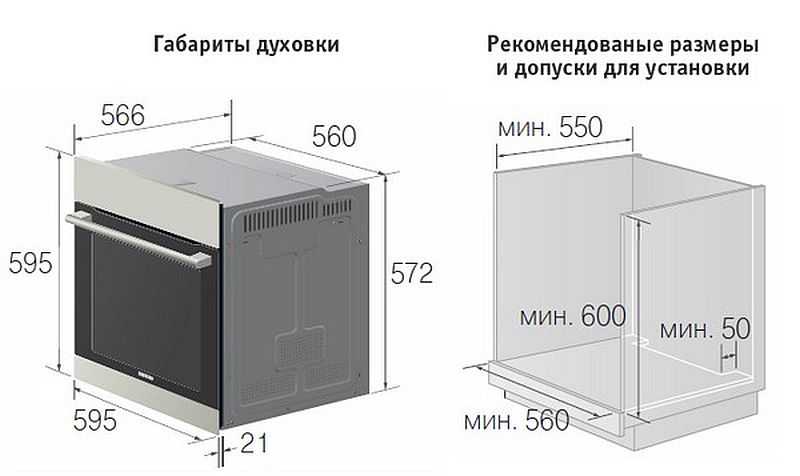
All electric ovens are manufactured according to the same standard and are of similar dimensions. Regardless of the manufacturer, they are designed to be built into a cabinet or cabinet with a width of 600 mm.
The opening for the oven in height should also be 600 millimeters (taking into account the body strip, which is shifted downward relative to the upper edge of the side by 10 millimeters).
The depth of the box is designed in accordance with the dimensions of the countertop for which it is designed. A standard tabletop has a width (in our case, depth) 600 millimeters. This means, taking into account the gaps, the depth of the box will be in the range of 450-550 millimeters.
A detailed drawing of a box for an oven with the internal dimensions of a niche for installation is usually contained in the instructions for the oven itself.
Using the values given above, the total height of the box is selected. The selection of this height contains "all the salt" of the calculation of this box.
The fact is that if the total height of the kitchen is less than a certain size, then it will be impossible to install a drawer in the opening located between the two lower horizons of the box. It will be too narrow and therefore non-functional. And this is not a rational use of the free space of the box.
Well, it will not work to design a very high box either, since the increase in the height of the lower modules of the kitchen unit above the norm is the cause of the inconvenience associated with its use (when the countertop is too high from the floor, it is inconvenient to work on it).
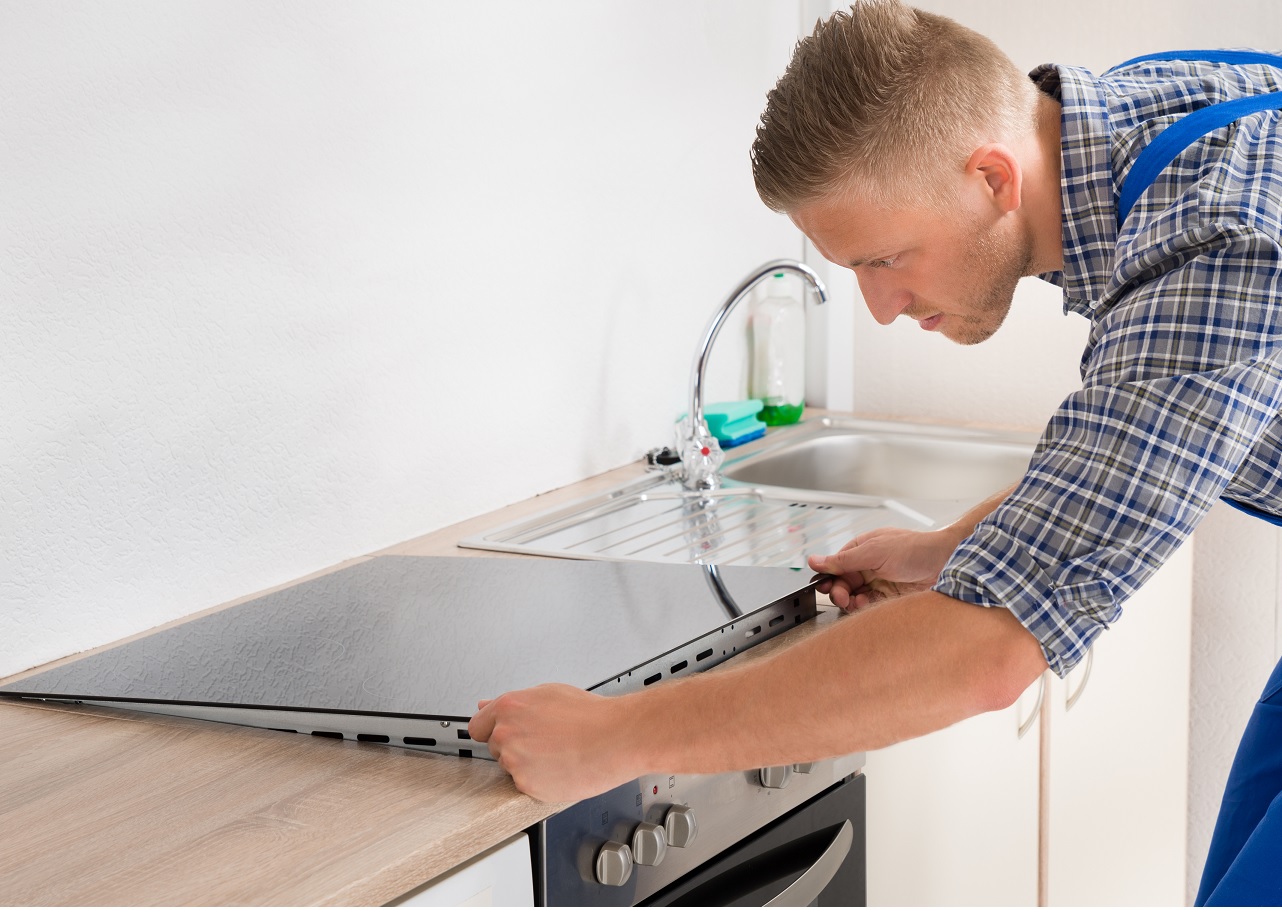
Worktop installation instructions
- Place the bottom of the hob on the top surface of the worktop and trace around it with a pencil.
- Drill several holes along the edge of the marking so that they do not go outside the outline. They are needed for the starting movement of the jigsaw file.
- Use a jigsaw to cut the opening for the cooking console.
- Install the table top on top of the dowels at the ends of the sidewalls. Do not forget to pre-grease the wooden dowels with PVA glue.
We make markings based on the parameters of the plate We use a square, tape measure and a pencil To avoid damaging the base of the cabinet, we put pieces of plates under the table top during cutting We use a pen drill to mark holes in the corners We set the drill not evenly into the corner, but a little further, so as not to drill a hole behind the outline of the template Remove the shavings The corners are marked, take a jigsaw Cut with a jigsaw from corner to corner The opening for the hob is ready, now we process the ends with silicone or sealant
Installation of an electrical cabinet
When installing the built-in oven, you must observe safety precautions and install everything strictly according to the instructions. First, the posting is checked, which must meet the following conditions:
- have resistance of the required value;
- its cross-section must correspond to the power of the oven.
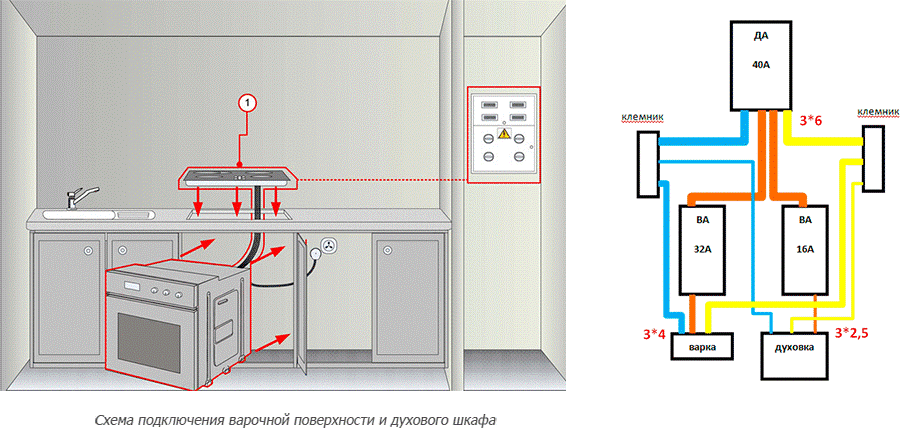
It is also necessary to check the presence of a grounding system, a ground wire and a protective circuit breaker that is triggered in case of overloads and malfunctions of the oven. The automatic shutdown must be triggered when the current exceeds a certain value. It is selected depending on the oven model.
To ensure the safe operation of the oven, a powerful copper wire is used for connection. Due to the high consumption of electricity, it is better that the device is connected through a separate branch of the wiring. To connect to the network, you need to install a special outlet designed for its power. You also need to follow the following connection rules:
- do not connect the wires on the twist;
- do not use a connection of wires made of different materials (for example, aluminum and copper);
- use screw terminal blocks for joining;
- connect the device to the switchboard through a separate machine.
After installation, the inner surface of the oven must be thoroughly rinsed, then turn on the cabinet at maximum power and ignite for 30 minutes. When it cools down, wipe the inner surface with a damp cloth. The oven can then be used.
Installation of the residual current device
Before connecting the cable, make sure that it is capable of withstanding the current load.
The power settings are important to consider in determining the heating speed and efficiency and the amount of energy consumed. But this factor will also affect the characteristics of the connection:
- With a furnace power of 3.5 kW, a three-core copper cable with a cross section of 2.5 square meters is used.
- For electric ovens with a capacity of over 3.5 kW, a 4 square meter rail will be used.cross section.
Important! The electrical connection to the fuse box is only possible after checking the correct installation and connection of the oven.
What socket is needed for the oven
If you are going to connect the oven through an outlet installed on a dedicated line, the question immediately arises: where it should be installed. Here's the problem. The socket and plug, in this case, are power-driven, but they look, to put it mildly, "not very" and it is unaesthetic to place them above the working surface.
Therefore, they are looking for a hidden method of installation. This is where the problem arises: you need to find such a place so that it is easy to turn on / off the equipment, and that it is safe (to exclude the possibility of water, dust, dirt, mechanical damage). There are several options for solving the problem:
If the kitchen unit has a plinth, install it behind the oven, a few centimeters above floor level. Not the best option. There are many disadvantages. The first is difficult access. To turn off / turn on the oven from the network, you will almost have to lie down on the floor, sticking your hand up to the wall.
Second, there is a high likelihood of contamination. Grease and dirt accumulate in the kitchen, even under furniture. They will definitely be on the outlet, which worsens contact, reduces electrical safety.
If there is a free space between the top of the oven and the worktop, it can be used to install the sockets. Good option for dependent equipment. It must be plugged into a single outlet.
The option is "so-so" from the point of view of the availability of connection - to turn on / off from the network, you need to raise the hob. If it is necessary to connect an independent oven, this option does not work at all.
Install the socket behind the oven at a level of 50-80 cm from the floor. Paired with a long cord (at least 120 cm), it can be pulled out and turned off. This is exactly what Bosch recommends to do. But, this option is more than controversial. Considering that the oven is bolted to the side walls of the cabinet, disconnecting from the electricity will still be a quest.
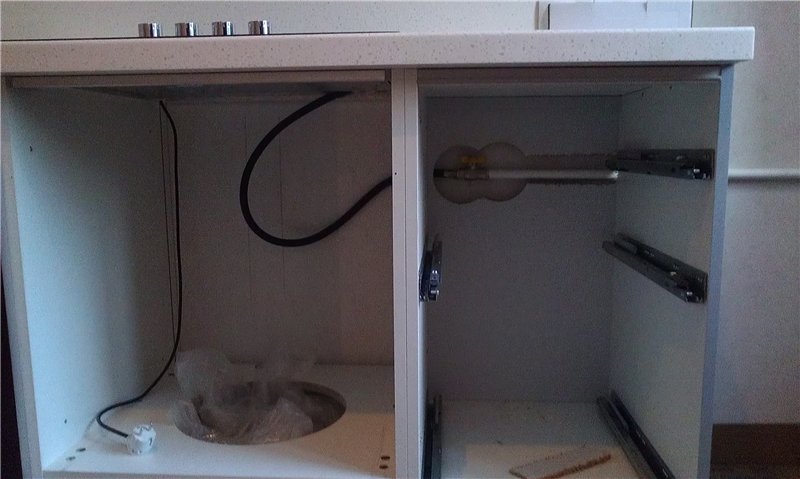
Install the socket in the area of the adjacent cabinet by sawing a hole in its back wall. The method is not bad, the access is normal, and everything is fine with security. The only negative is that there are not always lockers nearby. It happens that this is a refrigerator or other equipment.
A few words about choosing a socket and plug. If you put a machine for 16 A, it makes sense to supply wiring devices with the same rating. This guarantees long-term and trouble-free operation without burning the contacts and melting the body.
Installing the terminal block
Connecting household appliances through the terminal block is considered more reliable. The contact here is provided by the clamping screws, which is more reliable than when connected through a plug and socket. The disadvantage of this connection is the relative difficulty in opening the circuit.
We'll have to remove the cover, unscrew the bolts that hold the wires, pull them out. Therefore, they use it only if there is a circuit breaker on the line. Moreover, it is desirable that it be bipolar and break both phase and neutral at once.
A three-pin shoe becomes perfect in a square one. If you need to connect the oven to a three-phase network, an oblong model will need to be placed under the five-pin block.
Option for installing the terminal block for connecting the oven
The box can be fixed to the wall surface. This option is suitable if the wiring is pulled after the repair is completed. If the cable is laid in a groove, it makes sense to drown the box into the wall.
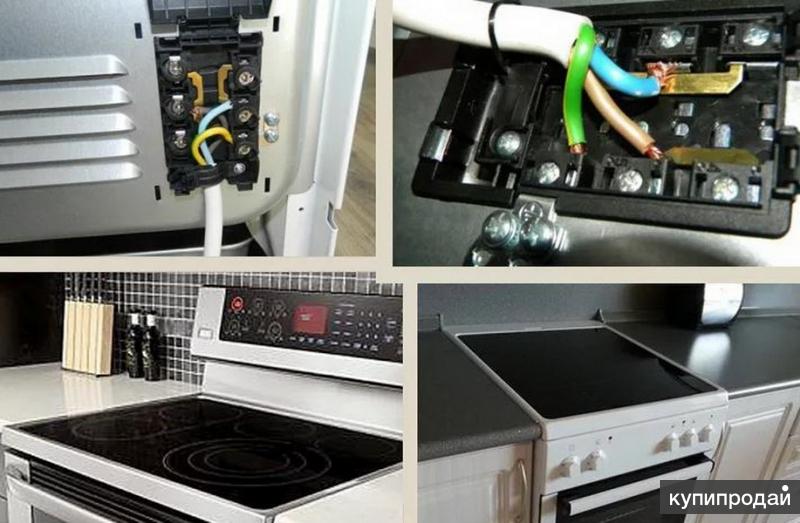
When connecting, it will be necessary to insert the stripped wires from the insulation under the metal plates, tighten the contact with the clamping bolts (screwdriver). In this case, you need to make a decent effort - so that the contact is good.
Please note that when connecting, do not mix up the wires.The phase wire from the oven must be opposite the phase wire that came from the shield, neutral (zero) - strictly opposite to zero, ground - opposite the ground
It is important. be careful
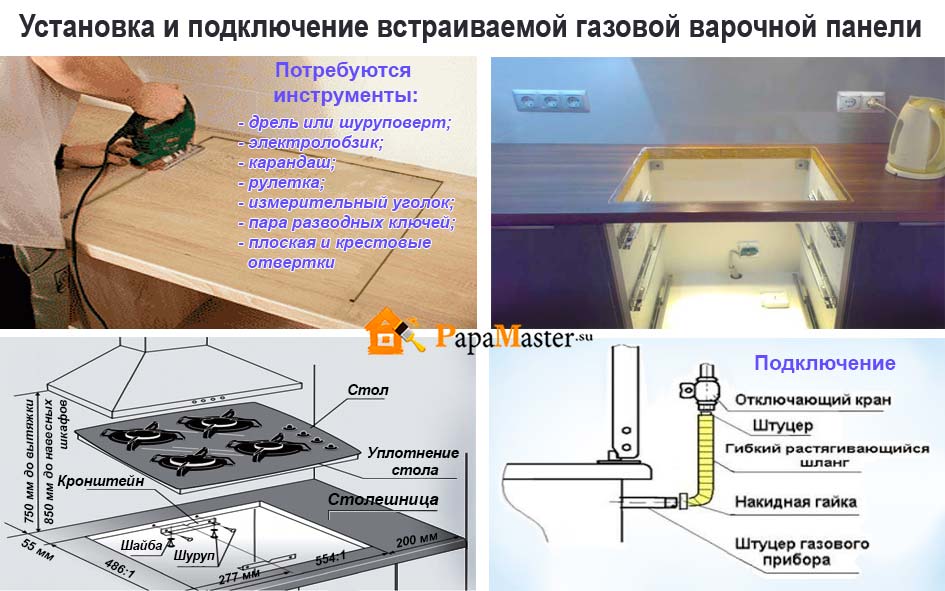
Installation diagram of gas ovens
You can install the oven with your own hands with a gas pipeline using a flexible hose. Careful sealing of joints with a special valve and outlet fittings is observed
Please note that this work is recommended for gas service workers. Moreover, without their personal intervention, it is not allowed to connect the furnace to the gas pipeline.
Gas supply equipment is connected directly to the connecting part of the pipeline. This is done using a special gas wrench. The end of the pipe is widened in order to connect the assembled pipeline. The other end connects the outlet valve located in the wall. Using a wrench, each end of the pipe is tightened.
Integration into "Albra"
To begin with, you need to figure out what the Albru kitchen is. This is an extremely optimized version of the kitchen set with a minimum set of accessories. Moreover, the manufacturer subjected everything that could be optimized. And the dimensions of the modules, and the finish, and the main materials of manufacture. Can an oven be built into the Albra? This is theoretically possible, but under certain conditions. It has already been said that there are compact ovens for which it is still worth using niches of standard sizes. But in this case, the modular compartments are initially small in size, which makes it possible to organically build mini-ovens into them. And if there may be no problems with fitting in size, then the ability of the headset to withstand the loads during operation of the oven is in doubt. The fact is that "Albra" gets a lot of criticism just in terms of its low strength resource - weak chipboard panels can hardly support even a small device by weight. And this is not to mention the possible thermal effects that can harm the poorly protected surface finish of the headset.
Oven selection criteria
To be able to please yourself and your loved ones with delicious dishes, you need a properly selected kitchen equipment. First of all, we are talking about the oven, because, as a rule, it creates real culinary masterpieces.
Most modern ovens are independent appliances. They have their own control system and their operation has nothing to do with the operation of other kitchen appliances. For many users, this is a huge advantage, because such an oven can be placed anywhere in the kitchen at the most convenient height for you.
There is an alternative option - a dependent oven. Such a device comes with a hob, and has a control panel located on the front surface of the oven. If you initially plan to buy one or another kitchen set, then buying this set is a real chance for you to save money, because it will be much cheaper than the oven and hob purchased separately. In addition, the elements of the set are usually made in the same style and are compatible in equipment design.
The choice of a built-in electric oven primarily depends on the size of the room you have. Most people still own incredibly tiny kitchens where there is a struggle for every inch of space. And since the kitchen must have all the necessary equipment, then something needs to be sacrificed, in this case, the size of the oven.

