How to make a bench out of wood and metal
If you are not interested in a classic wooden bench, you can experiment a little using different materials. For example, wood and metal go together pretty well with each other.

In addition to the fact that such a structure looks great on the site (especially if the frame is painted black), it is also more durable and resistant to heavy loads.

If you are interested in learning how to make a do-it-yourself bench from wood and metal, then you will find detailed information in our review. But in general, there is nothing complicated here.
First of all, it will be necessary to determine the size of the structure, and then cut the blanks from the professional pipe.
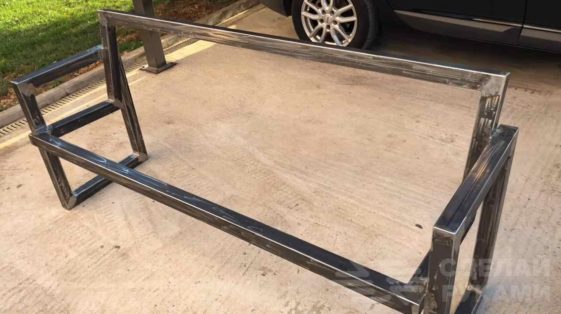
We weld two side pieces in the shape of a square (they will act as legs). Then we weld the main part of the frame, and put everything together.
Saw off to the size of the board, and sheathe the frame with them. Previously, all metal elements must be painted. We cover the wood with varnish, and the first layer can be made from mineral oil.
Simpler designs of benches for summer cottages and gardens can be made of metal and wood.
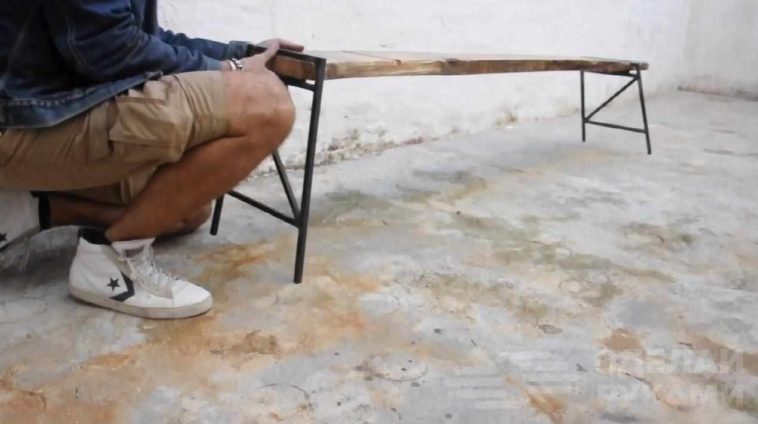
For example, you can weld legs from a square bar or reinforcement, which then need to be put on a piece of board sawn to size (this will be a bench seat).
In general, there are many options for how to make a country bench with a wooden back with your own hands. How do you like this option, for example?

The frame in this case is made of a profile pipe, and the seat and backrest are made of boards.
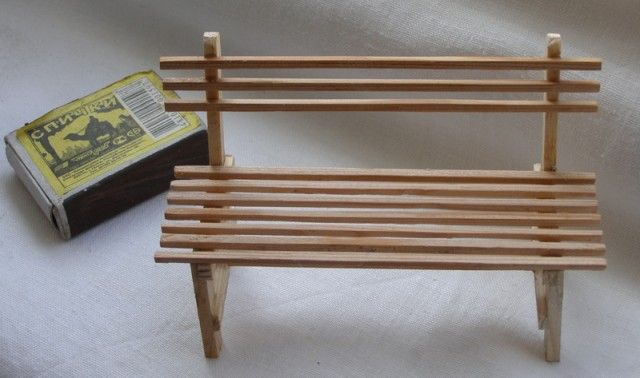
For a more interesting look, you can use not solid shields, as in previous versions, but wooden slats, screwing them to the metal frame with a certain gap.
For details on how to make a wooden bench from a metal frame and boards, read our article. This option is suitable for those who value simplicity and convenience.
Preparatory activities
Having decided to build a bench with a backrest with your own hands, be sure to decide how it will look. First, create an image in your head and then transfer it to paper.
In fact, such a seemingly simple structure requires careful thought over every detail:
- how many support legs to place the seating position;
- what angle of inclination to choose for the back;
- how to determine the main parameters of the bench (length and width of the bench);
- how best to attach the back and seat;
- for how many tourists it is intended for;
- a collapsible or stationary option to prefer;
- how high from the ground or other surface to install the bench, etc.
Depending on all of the above parameters, we make our final choice and proceed to a schematic or accurate depiction of the bench.
Optimal dimensions
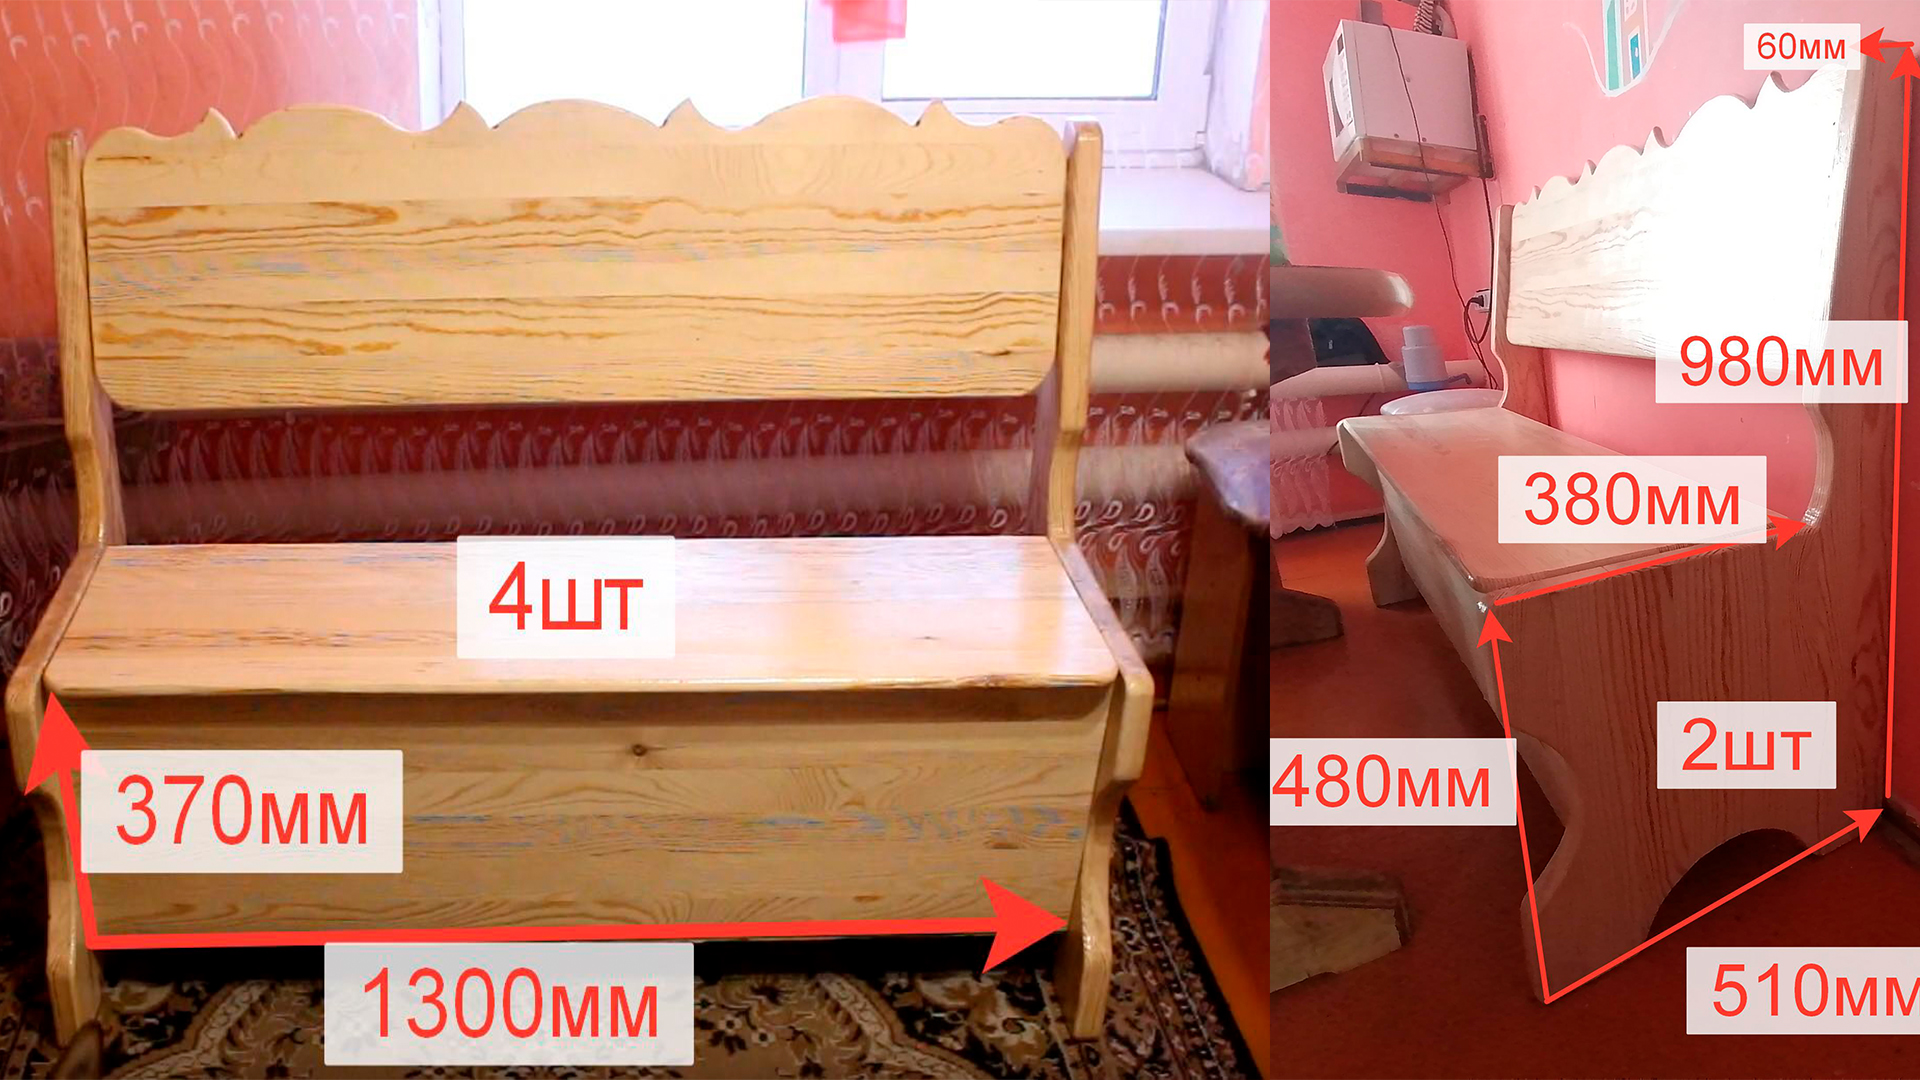
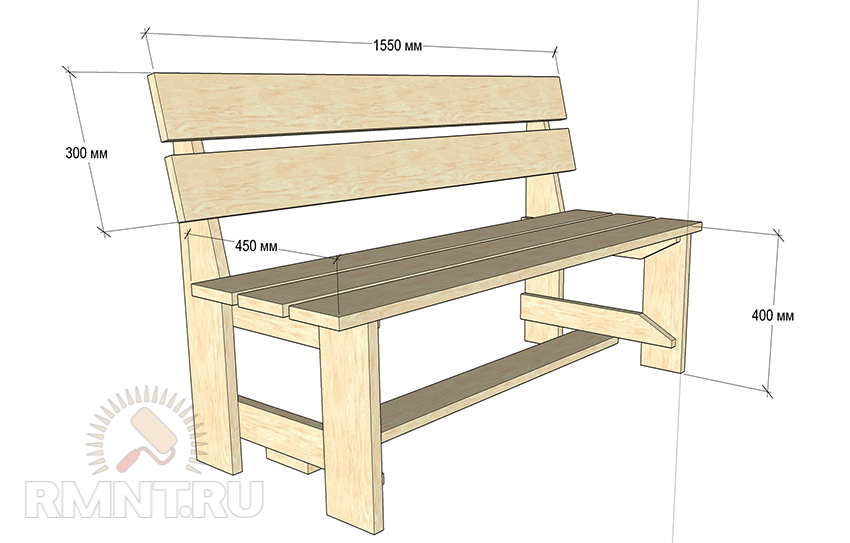
It is not so difficult to determine the size of the bench; it is necessary to proceed from the standard parameters for one person. For one resting, a bench length of 500 mm is enough, a seat width is 45 cm. Accordingly, for three sitting on a bench, it is necessary to make a seat of at least one and a half meters.
Back height - 90 centimeters - will be comfortable for people, both small and tall. The backrest angle is up to twenty degrees, but this parameter may vary depending on the design.
When choosing sizes, keep in mind that very long benches need additional "props", since a seating area that can accommodate more than four people can bend and break at the most inopportune moment.
Drawings, diagrams and sketches
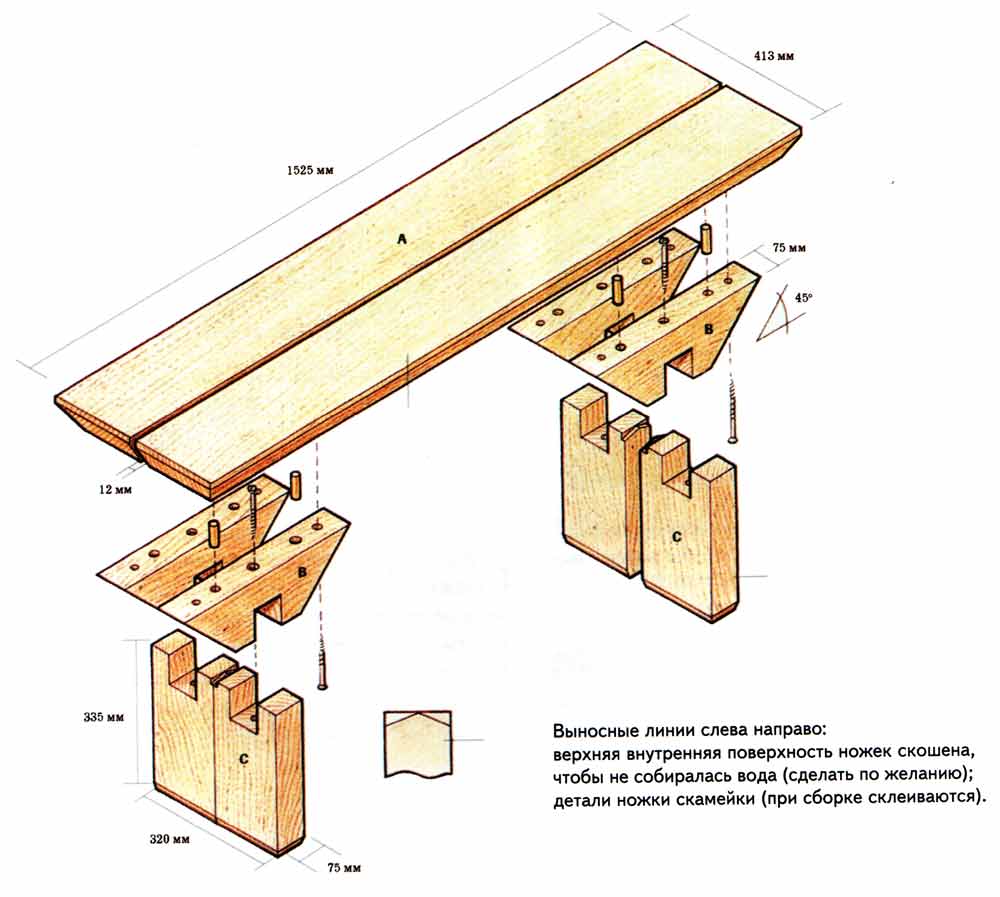
So that the process of creating a bench is not a matter of "eyeball", it is best to build your own drawings or use ready-made ones from the Internet.
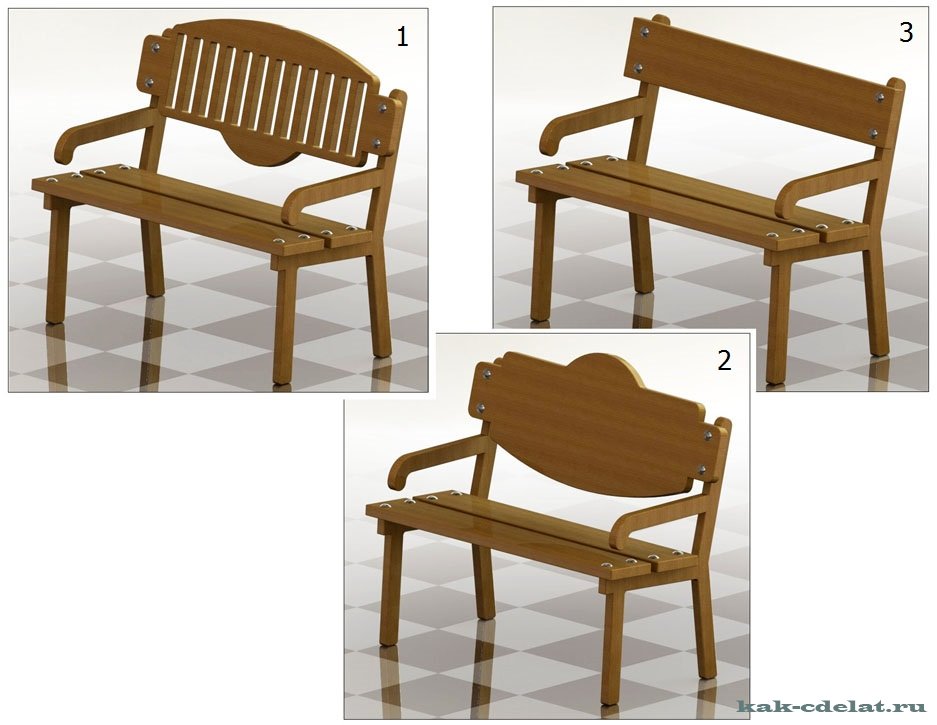
Options for drawings of benches with a back
Tilt angle
A bench with a backrest can have a right angle at the junction of the backrest and seat. But for sure, many will say that such a shop is not very convenient for rest. You can use it, but with additional accessories - pillows that fill the free space between the pelvic bones and the back of a person.
If the bench has an angle of inclination of 45 degrees, then this structure will more resemble a couch, since in this case it will not work to sit with support on the back.
Optimally for an ordinary person, a backrest tilt of 18–20 ° is suitable, such a place for rest will be comfortable and will not cause any inconvenience.
Useful Tips
When determining the dimensions of the bench, do not forget also about the main characteristics that should be inherent in this structure:
- convenience;
- functionality;
- security;
- resistance to climate change;
- ease of care.
As a preparatory work, the question of the installation site of the future structure should be worked out. It is undesirable to put the bench in an open space not protected from the sun and wind. A person will feel more comfortable if there is a reliable and strong tree or shrubs behind the bench. It is good to provide that road dust and fumes do not reach the resting place.
A good option is to install a bench where a beautiful landscape will open to your eyes, so that rest is combined with natural relaxation (for example, near a natural or near an artificial reservoir).
Step-by-step workshop on making a bench with a back
We chose a semicircular bench with a back. This bench will perfectly accommodate several people for a good conversation, an outdoor picnic, or sitting around a safe fire.
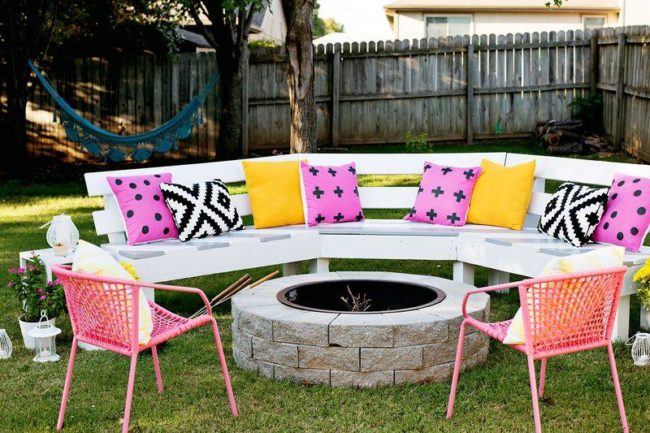
A joint rest on this bench will please all your friends and relatives.
What we need to build such a product:
- timber and board - for seats and backs with dimensions of 25 x 150 mm; for legs - 100 by 100 mm; for the construction of the frame - 50 by 150 mm;
- screws 60 mm and 150 mm long (for turnkey constructions) made of stainless steel;
- dye.
Focusing on a schematic sketch, we saw off wooden blanks of the required size and proceed to assembly.
Stage 1. We knock off the frame of the future bench. We start with the assembly of the longest elements, we constantly monitor the assembly process by measuring with a tape measure.
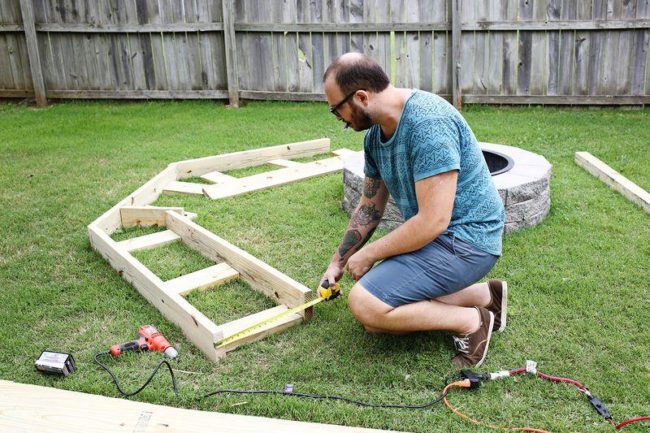
Do not forget to check the correct assembly with a tape measure.
Stage 2. We strengthen the rigidity of the structure - we attach the lintels.
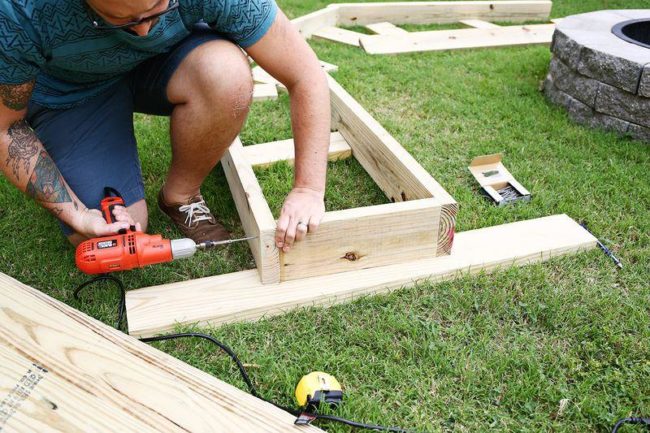
Don't be lazy and make enough crossbars
In order to avoid distortions of the future bench when assembling on the ground, put additional boards under the wooden beams.
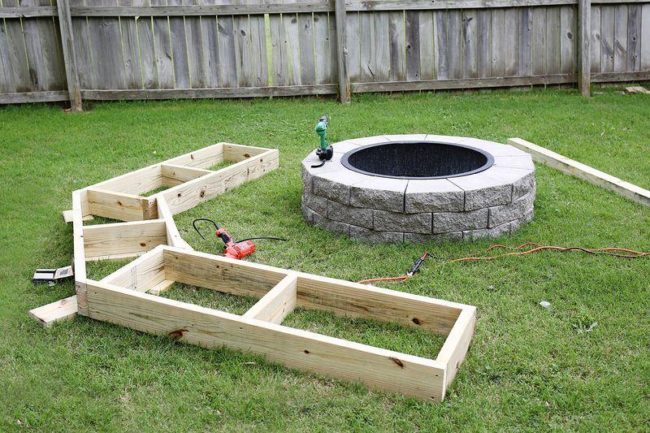
The photo shows how to put the boards under the frame to avoid distortions
Stage 3. Saw off the legs and screw them to the frame. At this stage, you will need an assistant to hold the frame. After installing the legs, place the bench and check the levelness and stability of the bench. Level the bench if necessary - saw off a little from the legs. Be very careful at this point and try to place the bench on a flat surface!
Stage 4. "Fitting" of the backrests. Saw off the boards of the required length and try them on to the seat at an angle of 20 degrees.
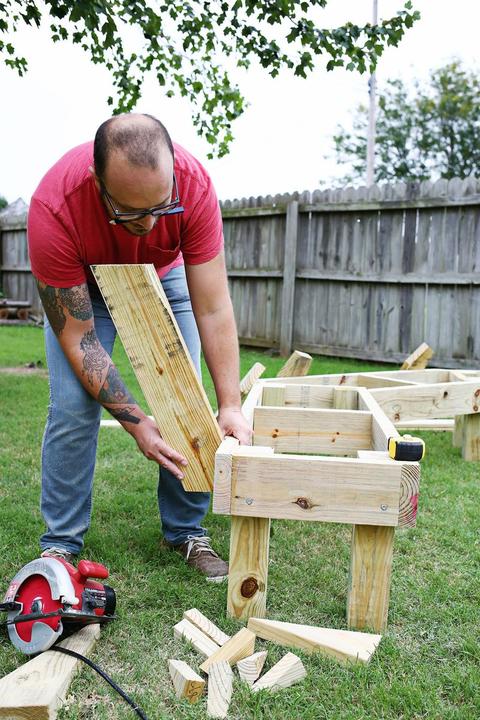
When measuring, be careful and observe the selected angle of inclination.
Stage 5. Seat trim. Choose the longest section of the bench and saw off the board to the desired length. Gradually laying the board behind the board, we "sew up" the entire space of the seat. You can leave small gaps between the boards, or you can attach boards close to each other.
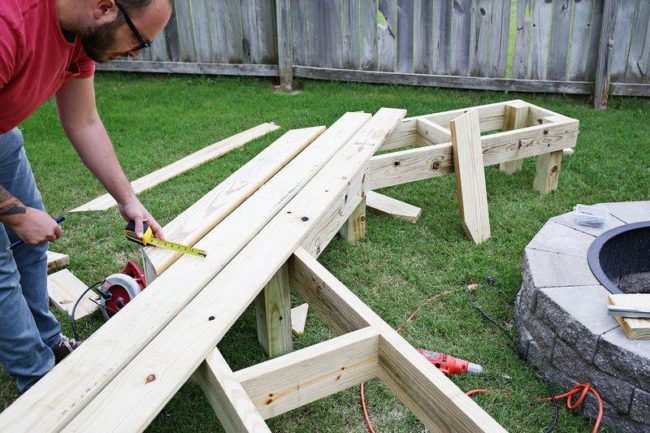
When stacking boards, try to be consistent in the direction you choose.
During work, try to maintain the direction of laying the boards, such a structure will look more beautiful and neat.
We fix the boards with a screwdriver or manually using screws with a special anti-corrosion impregnation.
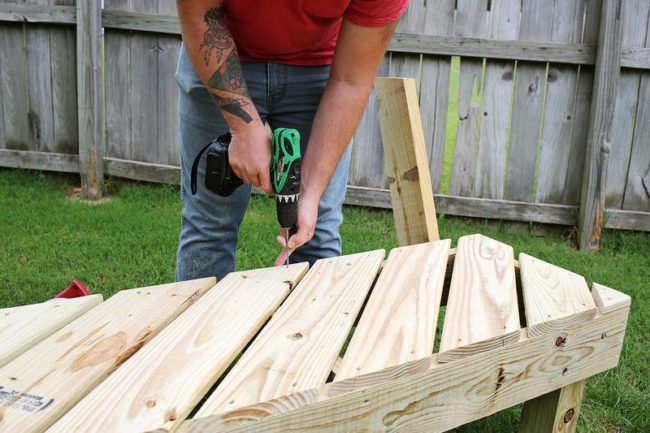
Use specially treated screws to create a solid structure
Stage 6. Fastening the backrest supports.Using the turnkey screws, we put the support boards for the backs.
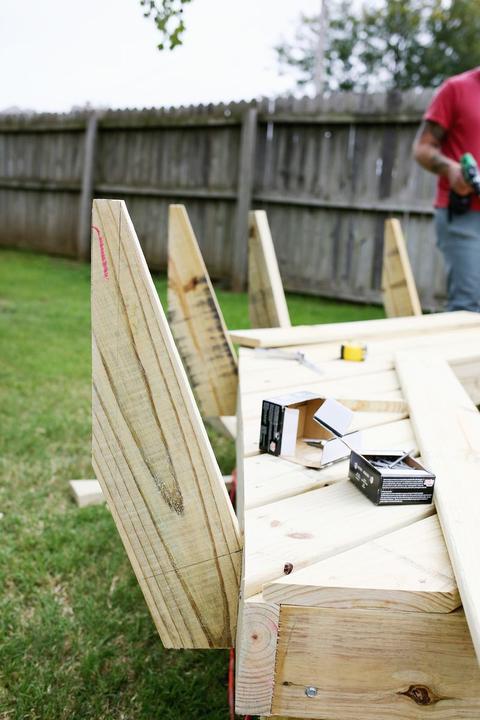
Help someone close to you to help you at this stage.
Stage 7. Installation of boards on the supporting parts of the backs. Docking the boards will work out correctly if you use the well-known rule "measure seven times - cut one."

Smooth fastening of the boards will help preserve the beauty of the entire product
Stage 8. Final. All that remains is to sand all the boards and cover them with a protective agent. As an antiseptic, you can use special varnishes, impregnations, paints.

To paint a product is to refine it and lengthen its service life.
A detailed master class on making a bench can be viewed in the video.
Assembling a wooden bench
First of all, now you need to cut the existing boards. Usually, if the board is fifteen centimeters wide, you need three of them for the seat and the same for the back. The length of the board depends only on the size of the bench you need.
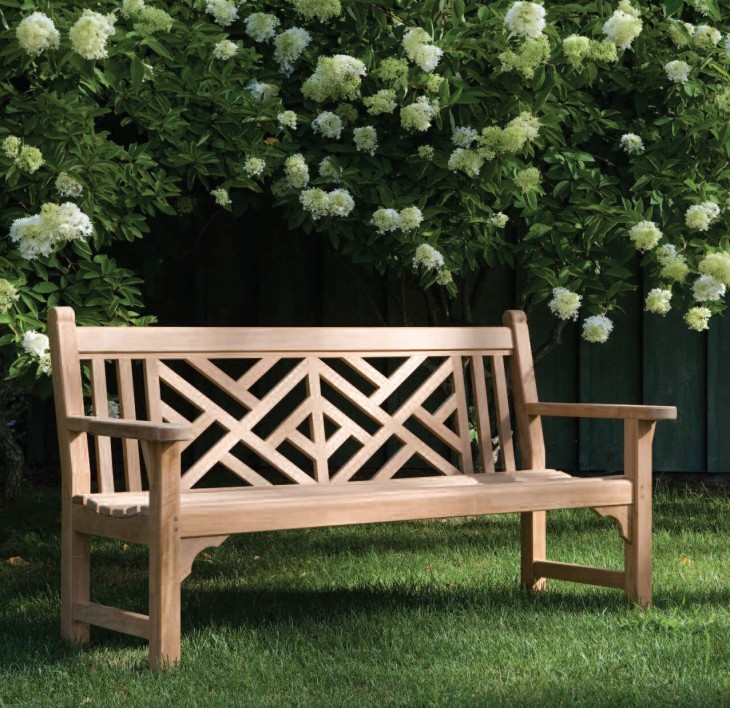
Next, you need to cut out the legs. The rear legs, on which the back will be attached, should be approximately twice as high as the front ones - it will be optimal to take 70 and 30 centimeters. The front and rear legs need to be connected, for this you will need two more slats.
We go further - we need four bars that will connect all the legs, and will become the basis for sitting. For the rigidity of the structure, you need to add another bar that will connect the cross bars that hold the front and rear legs at the bottom.
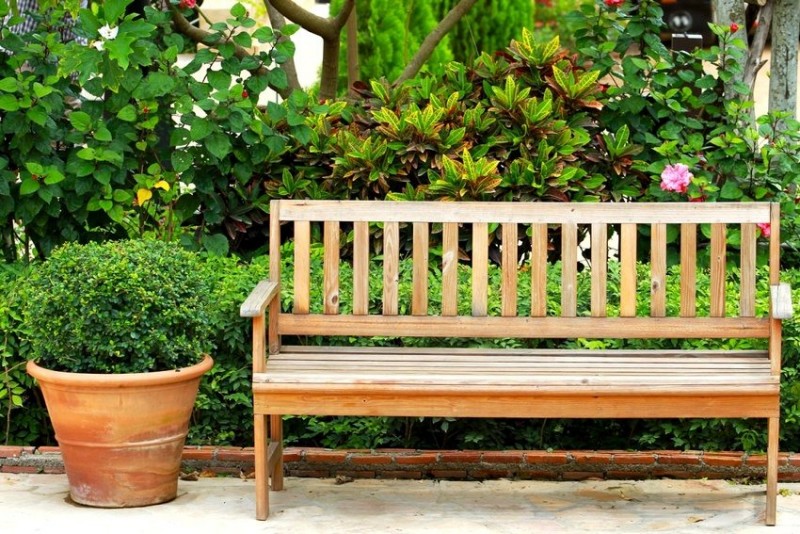
The resulting structure must be carefully sanded, smoothed out all corners, and then soaked with an antiseptic. After the latter has completely dried, you can cover the structure with varnish or paint. If you put such a bench in a gazebo, then you can put pillows or a blanket on it, for cool evenings.
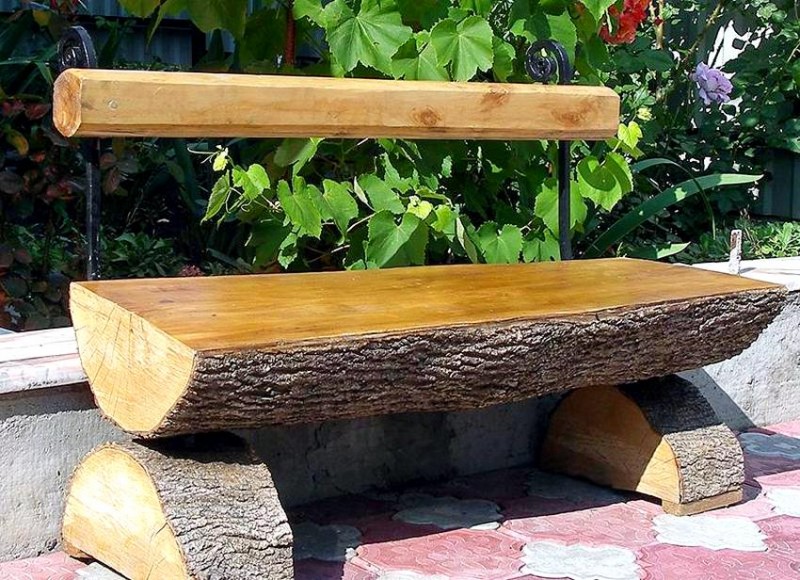
Armrests can be added if desired. This is best done at the design stage. This is done very simply by increasing the distance between the front and rear legs, while the front legs must be made higher so that they rise to the level of future armrests. Next, you need to install the armrests, and also carry out their processing.
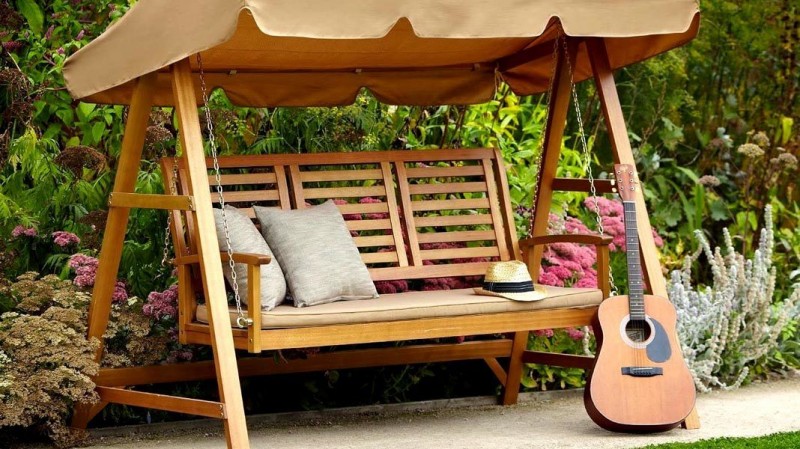
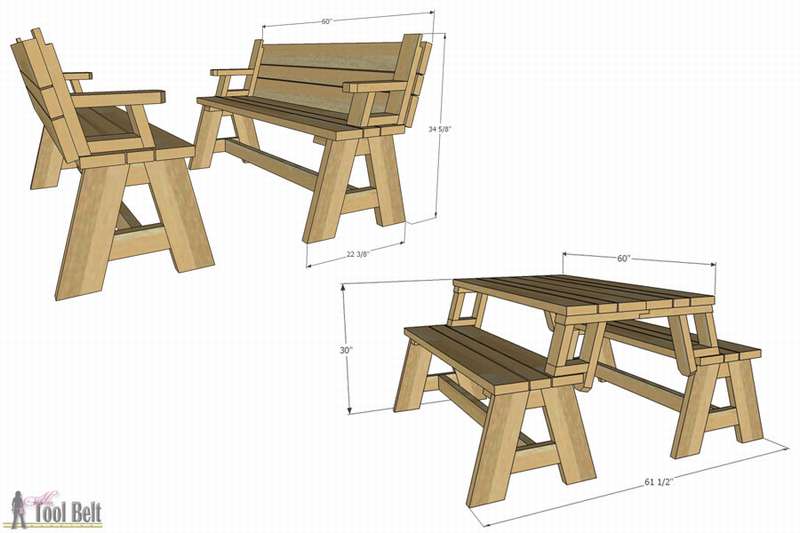
Naturally, designs can be much more complicated and interesting - angular, with a small storage box, folding, using metal, without it, and many other options. In any case, making a shop with your own hands is not difficult, and very interesting, and it will be especially pleasing to the eye, because you made it yourself.
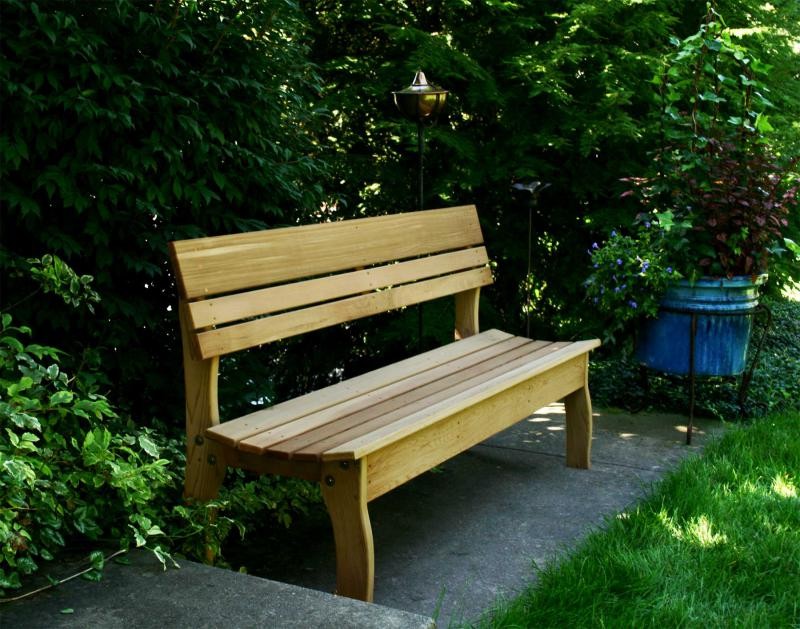
How to make a children's bench and table
Do you want to please your children? Check out step-by-step photos of how to make an interesting zebra bench. Designed with mini movie projector, you can sync with mobile phone, USB and memory stick to enlarge pictures on the wall.
Search for a photo on the Internet and use free image mirroring software. You need an image to be able to look in both directions. And a small tip. Make two at the same time so they are the same size. You can use a large sheet of brown paper pasted on the wall. Enlarge the image until you get the size you want. In general, you better read all the details on the site, this is a very interesting way to make a children's bench with your own hands.
For this bench, you can make such a children's desktop. True, this is not a new table, but a converted one from the old one. Although, what's the difference. You can do something similar too if you find an old desk with a drawer.
Remove the top, measure the length, and cut a piece of plywood to fill in the gap. Then saw off the excess pieces so that the table is divided into several sections. Remove all corners with a router to make it more child-friendly.
All details can be found in the instructions. Of course, you are unlikely to find exactly the same old table, but the idea is clear.You just need to make a lifting table, and underneath it are storage compartments. Well, and other useful things, for example, as in this case, a drawing board.
DIY soft bench
Instructions with step-by-step photos on how to make a soft bench from scratch.
Isn't she beautiful? Place a bench in the dining room to provide plenty of extra seating. Also, a soft bench will look great in the bedroom, in any capacity - a sofa or a coffee table. The options are endless!
The bench will fit any corner of your home because you can choose the length for this design yourself.
It's an easy project, in fact, everything can be done in a weekend! All the work is to make the frame, attach the boards for the seat, secure the soft filler and wrap it with fabric. Yes, even screw the legs, even a beginner can do it!
Additional information on materials, detailed step-by-step instructions and useful tips - all this can be found on the website of this project, the link is under the gallery.
How to make a bench in an hour
Do you want to know how to make a nice bench for your home in just an hour? The step-by-step photos show this. Although it is not clear what to do here for an hour. All the work is to screw on the metal legs of the studs and use a stapler to fix the fabric on the board for the seat.
There are several things that make this bench very fast and easy to assemble, and a lot of it has to do with materials.
To make a bench in less than an hour, you should have a ready-made board cut to the desired size and metal legs, pay attention, only two feet (instead of four), which also reduces assembly time
Do-it-yourself shop for home
If you prefer a farm-style design, then this simple home bench is perfect for your decor. You can put it in your bedroom, kitchen, hallway or porch ... the possibilities are endless!
For this project a 5 x 30 cm pine board was used with a length of 2.5 m, although you can use any type of wood, this is not essential. Bench dimensions: length 72 cm, width 23 cm and height 48 cm.
When you buy boards, don't miss the first one you see. Take some time to do your exam. Look for splits, deformations, and other imperfections. Be demanding as long as you pay money.
How to make a bench for the house with your own hands, look at the step-by-step photos. For convenience, you can first make a template out of cardboard, with which you can make markings on the board.
Block benches
Here are several options for block benches.
First example. This project can be called a classic, you have probably seen many similar photos of a bench made of blocks on the Internet. The model is attractive for its simplicity and reliability, and no skills are required for manufacturing at all - just take it and assemble it. Although, if you do not want to buy ready-made boards, you will have to make them yourself.
So what you need:
- Fourteen Standard Through Hole Concrete Blocks (Different Blocks)
- Six bars, or three if you want without a back. The thickness and length are at your discretion, depending on the conceived design.
Tools: saw, level, pencil, etc.
Liquid glue
You probably won't need instructions, everything is simple here, especially since everything is shown in step-by-step photos. Place the lower two rows of blocks vertically, glue them together. Upper blocks with a hole to the sides. Then glue the backrest blocks. Put in the bars and enjoy your new bench.
Bench from blocks and beams
Example two. Here is another version of a bench made of blocks, it differs only in the arrangement of concrete blocks. Although heavy, the bench is easy to make and doesn't take long.
The manufacturing process is practically the same as in the previous example.
A few tips.
- If there is no woodworking equipment, it is better to cut the bars for the bench in the workshop, turn it out, it will be cheaper.
- Build a bench next to where it will be placed. Once assembled, the blocks are very heavy.
- If glue leaks out through the seams, wipe it off quickly with a damp cloth.
- Paint all sides of the cinder block structures with exterior paint. Apply a generous amount of paint so that it penetrates into the hidden parts of the concrete blocks, and then clean off any excess paint.
- Let the painted blocks dry overnight before assembling the bench.
- Slide the block structures closer together until the bars protrude about 5-8 cm at each end.
- Add flowers and pillows.
The third example, a bench made of blocks and beams along the fence. If you have a similar situation, then you need to divide the length of the fence so that each bench runs in a segment, in this case about 1.3 m wide. Thus, one bench needed two supports plus one support in the middle. The other needs two supports in the middle.
For each support, you need four regular 20x20x40cm double blocks and 1 piece single block. 20x20x20 cm. You will also need wooden blocks long enough to fit through the supports at the end of the bench. The design is assembled simply and quickly, you will understand by looking at the step-by-step photos. If you need more information, link to the site below the gallery.
And one more very simple example.
You will need 12 blocks, 4 planks and liquid nails.
The most time consuming part of the project is leveling the site. When you align, set the blocks, glue, insert the boards and that's it, a solid and functional bench is ready.
Street bench made of blocks
This is a more solid structure, 75 blocks were used for the manufacture. How to lay blocks, perhaps, instructions are not needed. You can lay out a bench from blocks according to the scheme, as shown in the photo.
It will probably be a little more difficult to make a good seat.
- To do this, you will find a suitable board or thick plywood sheet.
- Then cut the foam to fit the board, cut the batting to wrap around the board and hold it together.
- Cut the fabric to wrap around the entire seat and add a bunch of staples. This is not difficult.
Of course, you can choose your own version of how to make a harness. The task becomes more difficult if the bench is in the open air.
You can make a solid bench from blocks.
If you are interested, you can read the instructions on the website.
Well, if you really don't want to strain at all, here's the easiest option for you, how to make a bench out of concrete blocks.
The hardest part is getting the blocks straight.
Then find a suitable board and glue it to the block.
You can make the bench longer by assembling the two supports, as shown in the photo, but the rectangular shape is much stronger.
Finishing tips
When the bench is assembled and installed, it is necessary to “bring it to mind”. Painting, varnishing, processing with special impregnation are the simplest finishing methods. You should not neglect these methods, because such simple actions will help not only improve the appearance of the product, but also increase the service life.
Any, even the simplest design of a bench with a back, can be transformed beyond recognition if you use decorative elements.
Here are some ideas:
The use of forged items. Carved metal jewelry looks stylish, beautiful and does not require special care, except for painting or anti-corrosion treatment.
Installation next to the bench or directly on it figurines of animals, fairy creatures, etc.
If the bench is often used by smokers, then it would be useful to install an urn made in the same style next to the bench. It will be not only useful, but also beautiful, turning a single shop into a small architectural ensemble.
The structure above the bench is a canopy made of metal, wooden structures, along which climbing plants and flowers can be thrown.
Installing vases with flowers near the shop will help not only decorate the space of the resting place, but also become one of the elements of relaxation.
Lighting of the place to rest. This can be done using stationary lights or portable illumination. Evening gatherings on such a bench will become pleasant and especially memorable.
"Equipment" benches with soft pillows, mattresses
The vibrant colors of these textile elements will attract the attention of others and give the seating space extra coziness and comfort.
Ideas for decorating benches with backs: examples in the photo
Having built a bench with a backrest with your own hands, you will get an excellent structure for gatherings with friends, a way to relax in the fresh air and a beautiful decorative element of your suburban area.
What stone for the bath is better to choose Sandbox with a lid with your own hands: everything ingenious is simple
Views: 5 383 Heading: Construction and repair
Cinder block bench
Benches can be very original, while, in many cases, such benches are much easier to make than traditional designs. One of the most interesting ideas, for me personally, is a cinder block shop.

Many summer residents often think about how to make a shop for a summer residence on their own, but at the same time, so that the process itself is not very difficult. Here is your answer.
For a cinder block shop, you will need quite a few materials, some of which will immediately be ready-made parts, if not all.

First of all, you need a cinder block, preferably without damage and defects. Its amount depends on the design of the shop, and therefore we will return to this a little later.
The cinder block will be used as a base, supports. We will sit on wooden beams, the dimensions of which depend on the size of the hole on the cinder block.

The size and height of the bench depends entirely on how much cinder block you are willing to use.


This is not the end of the work, because we still need to install the seat.

In order for the structure to be more monolithic, and the bar does not move from side to side, from below, on each side, in front of the entrance to the cinder block and at the exit from it, screw a small self-tapping screw into it. Such a simple life hack will help get rid of unpleasant seat movements.

Then comes the time of decoration, design and convenience. The cinder block can be left as it is, but it will be more interesting to paint it in some color, preferably bright and fresh.

The timber should also be varnished or painted so that it does not deteriorate on the street and is not afraid of moisture.

Depending on the place in which such a bench is located, you can put flat cushions on it, purely for convenience in use.

Types and features of benches designs
The classic design of the bench is the seat, back and supports. It can be supplemented by armrests, a built-in table, a canopy from rain and sun, and much more. The form can be simple, minimalistic or of unprecedented beauty and complexity, the main thing is that it harmoniously complements the surrounding space and is comfortable for relaxation.
The idea of what the shop will be like depends on the following points:
- Placement area:
- in the garden, near the house (they decorate the territory, have a mostly stationary, comfortable shape);
- terrace (lightweight form, convenient for tea drinking and socializing);
- barbecue or recreation area (the form must be designed for a certain number of people);
- near water (bench material resistant to corrosion and decay);
- The place of installation is permanent or the bench needs to be moved, brought in / out;
- Shape: rectilinear, round, semicircle, angular, curved;
- Production material: wood, metal, stone / concrete, combination of materials.
At home, at the dacha, improvised materials, used things, such as a bed, a door, a wardrobe, pallets (pallets), chairs, logs, driftwood, cinder block and much more, often become the material for constructing a bench.The result is original, interesting objects in a vintage or rustic style. Pallets and furniture made from them have become an "unplowed field" for ideas, a fairly common creative material.

An old bed becomes a decorative bench
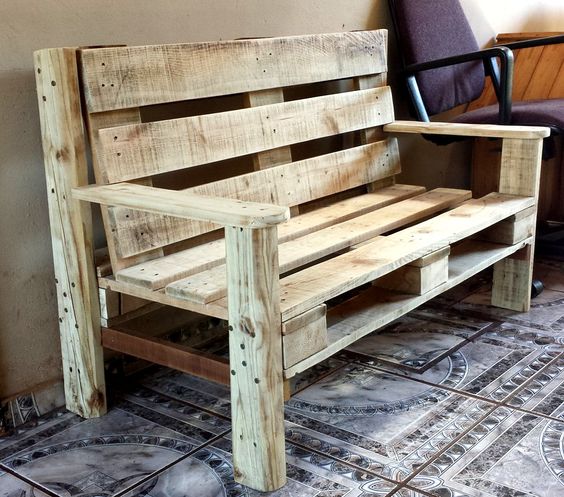
Pallets - a source of ideas
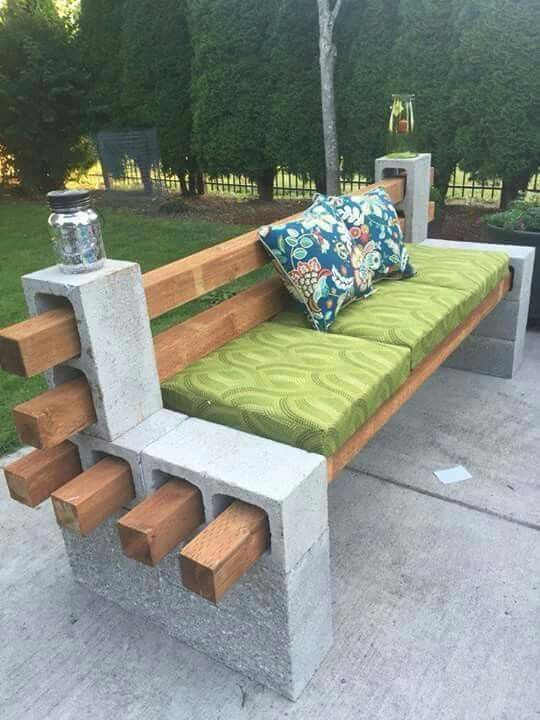
Combination of materials
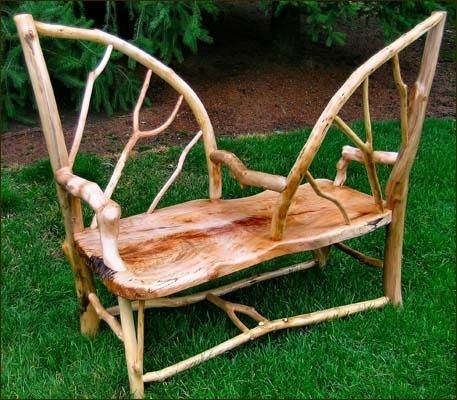
Rustic style

The headboard from the old bed is applied

Two chairs converted into a bench for the home
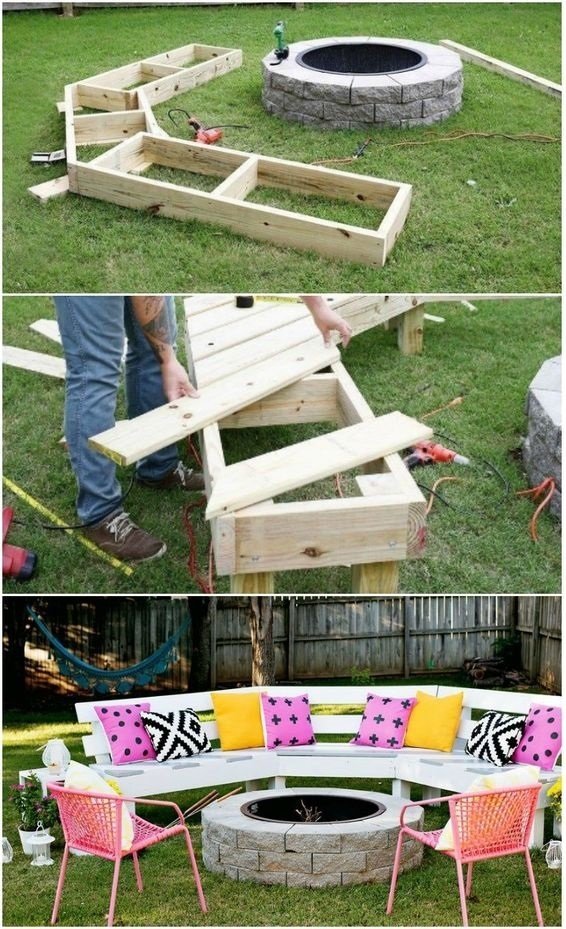
B-B-Q
Useful elements can be included in the design of the bench, for example, the seat can be made folding, and the wired space under it can be adapted as a storage capacity. A folding table will be useful, as part of the design of a bench or a shoe rack under the bench seat in the hallway.
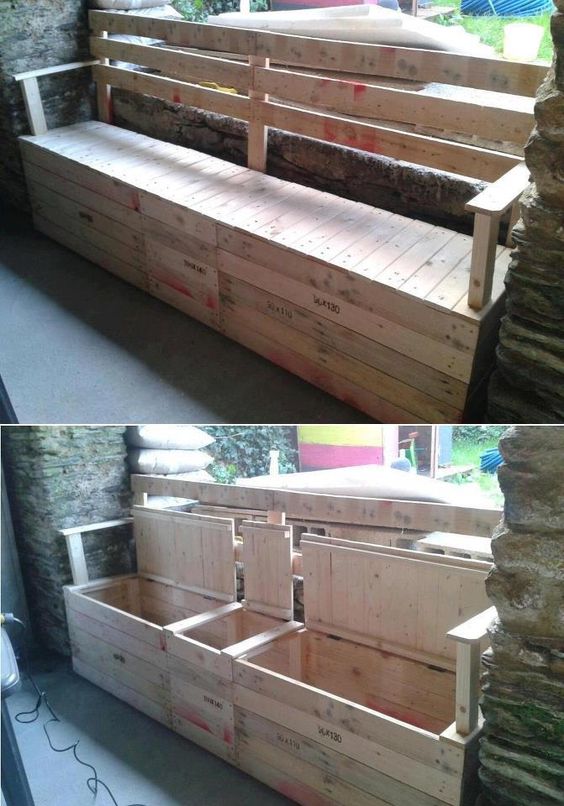
Storage tank device
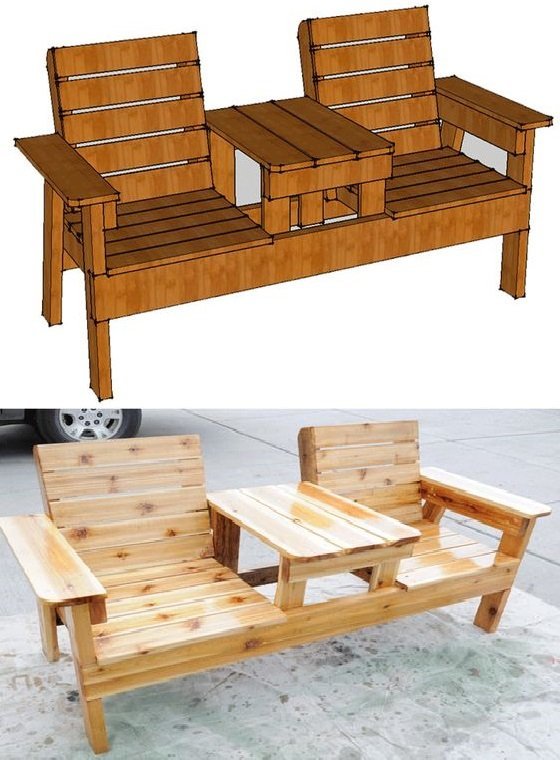
Double bench
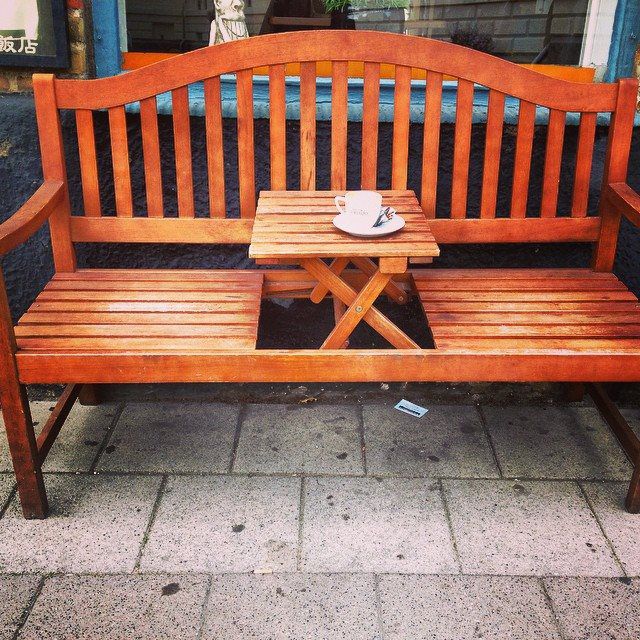
Convenient design for the terrace
Home bench
An example of making a wooden bench for a house with a lined stained-glass wooden top. Will look great at the dining table, at the foot of your bed, in the hallway, or anywhere else where a little extra space is needed.
Such a model can often be found in furniture stores, however, more often with metal legs. But this version, with wooden legs, has its advantages, the manufacturing process is simpler and cheaper. The legs for this bench have been slightly modified to make a solid rectangle with a modern frame design. Assembling the frame and legs is not difficult, everything is shown schematically in step-by-step photos. More interesting is the process of making the top of the bench.
The top is lined with planks that are attached to a sheet of plywood, and plywood is the most expensive part of this project. You can replace plywood with a less expensive option. The width of the planks does not really matter (75 mm wide planks were used here). When the planks are made, the bulk will be 24 cm in length with 45 degree cuts at each end. Start with the planks that form a point at one end of the center of the plywood and attach with glue and nails. Continue cutting planks to fill in the bulk of the countertop using glue and nails.
Trim the end pieces to fit and fill the top. Cutting tip: Measure the length of adjacent pieces to get the length of the new piece to be cut. For example, on the tops, the long side is 24 cm, the short side will be the same as the long side on the small corner piece. Attach these pieces with glue and cut off the entire top piece as needed.
For more information, visit the site using the link.
Stylish bench for home
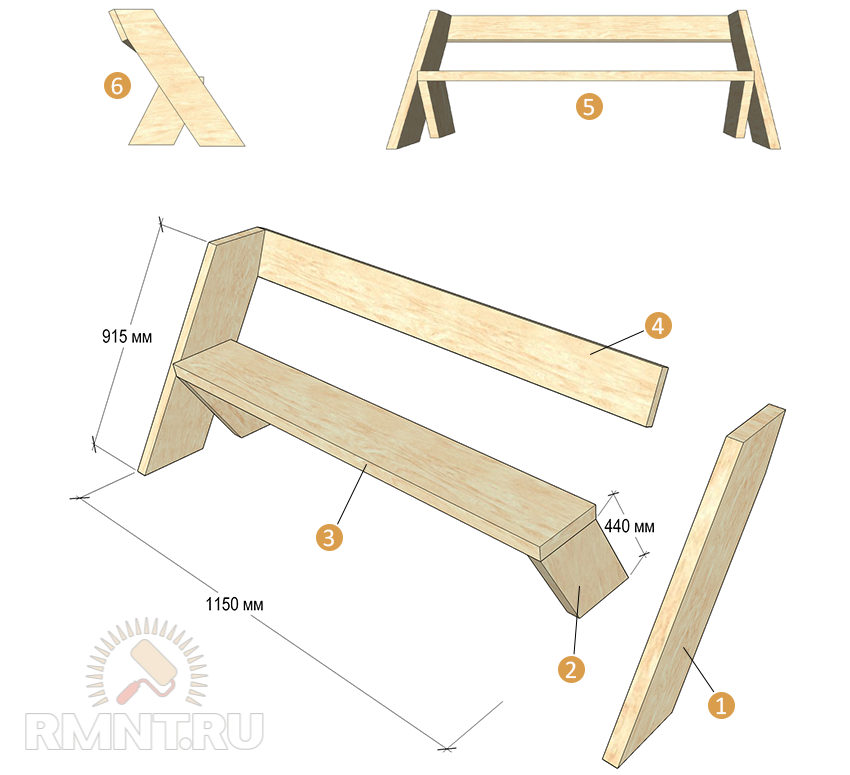
Check out how to make a beautiful modern triangular-legged bench for your home. Looks very stylish, doesn't it? Even if you don't have the skills and tools required to make such beautiful furniture, you can simply use the basic structure of the bench (read: these stunning triangular legs) as inspiration and try to replicate the basic shape using inexpensive pine boards and this tutorial. Step-by-step photographs with drawings, as well as a detailed description of the process on the author's website, will help you with this.
Art bench
This stencil French bench can decorate the look of your room.
It will look great anywhere, whether you use it for storing things and shoes in the hallway or just put it in the hall as a stylish piece of furniture.
Here you will find detailed step-by-step photos, and you can also read on the website how to make a beautiful screen printing for the top of the bench.
Idea # 3 - Long chairs
Photos of a bench made of elongated chairs will definitely interest DIY enthusiasts. An original product in the form of a sofa with graceful railings can be made following the algorithm:
- Find four old unclaimed chairs with a back;
- Remove the front parts from two products;
- For the rest, it is necessary to saw off the front legs, leaving the seat itself intact;
- We carry out the necessary actions with the material: removing the coating, grinding, polishing;
- From the end face of the chairs without legs and from the edges of the removed parts, we drill holes into which we insert dowels greased with glue;
- We assemble the bench by inserting details from the first chairs into the main elements, continuing the overall structure;
- We fix the assembly with self-tapping screws;
- On top, put a board equal in length and width or fastened segments, glued with carpentry glue;
- We prime, paint, treat with wood stain and varnish.

You can also simplify the process by using only two chairs, from which the front legs are removed, and the remaining parts are securely fastened to each other.

How to make a wooden bench with a backrest with your own hands
Material calculation and required tools
To set up a wooden bench, we need:
- Wooden boards -3 pieces (length - 5 meters, thickness - 40 millimeters);
- Self-tapping screws - screws;
- High-quality antiseptic against fungus and parasites;
- Salt fire retardant impregnation;
- Water repellent varnish or custom wood paint;
- Drill;
- Bulgarian;
- Sander;
- Hand saw, gasoline or electric saw;
- Screwdriver.
Step-by-step assembly instructions
Before you start making a wooden portable bench, you need to saw the boards into certain elements:
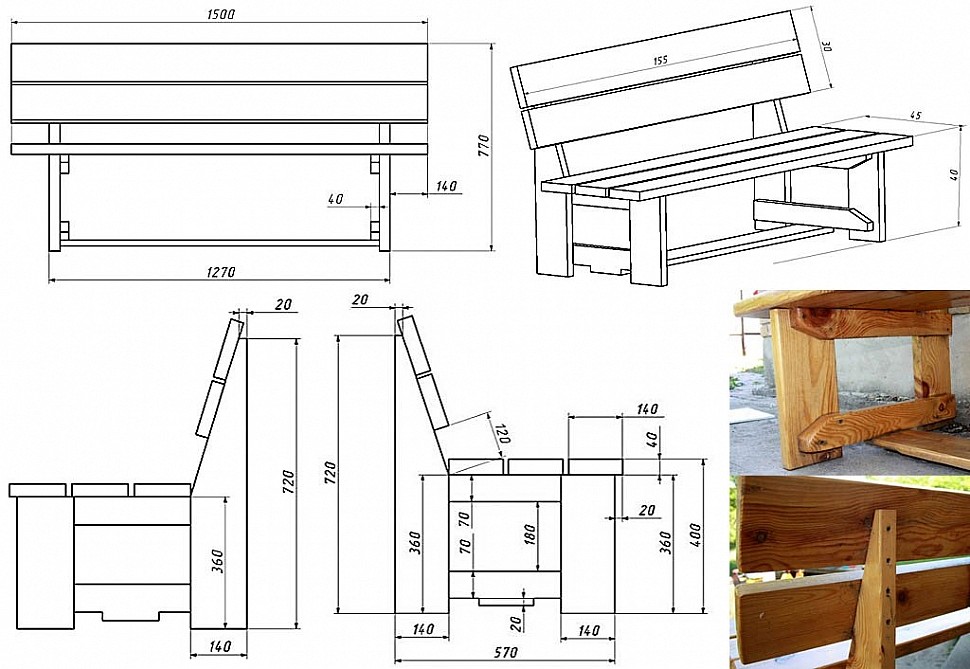
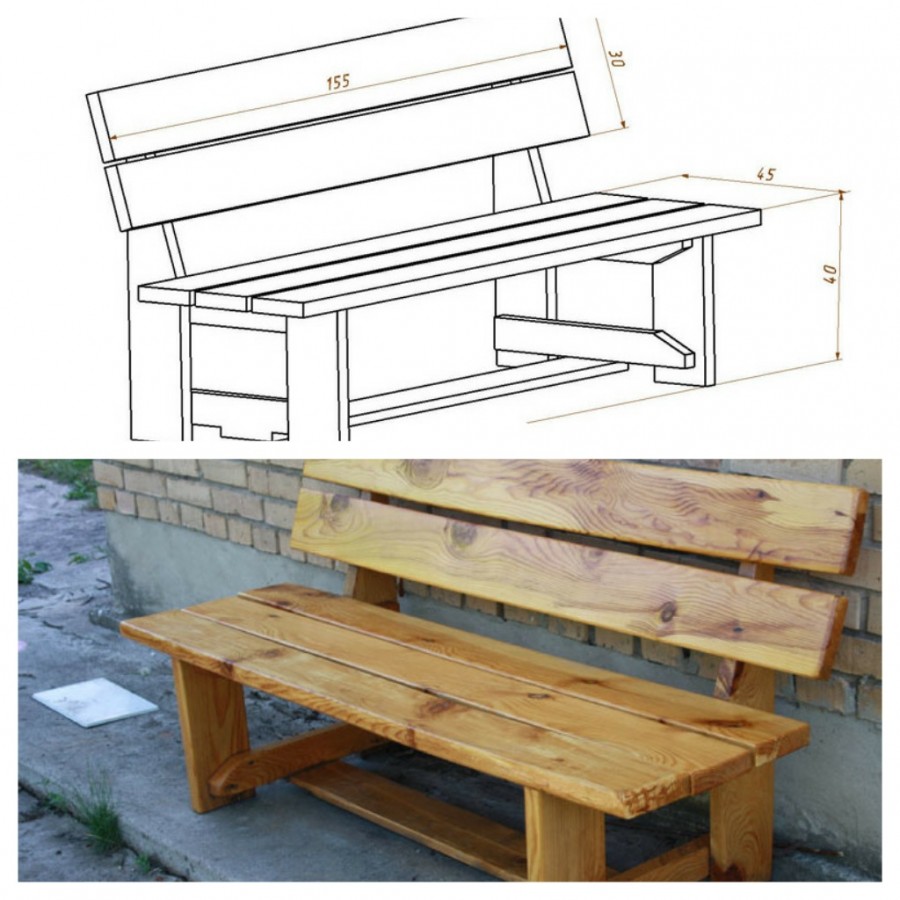
- For the seat and backrest, we need six slats measuring 1500x140 mm;
- Two high legs for the backrest measuring 720x140 mm;
- Two front supporting structures (pairs) with dimensions 360x140 mm;
- Four bars - mounts for the seat and legs measuring 520x70 mm;
-
One board for frame rigidity 120x140 mm in size.
-
All prepared boards must be sanded, smoothed all the side parts and soaked them well with an antiseptic. Then leave to dry completely.
-
We mark the height of the bench 40 cm. Starting from the very middle at the top of the elements of the longest legs that will hold the back, it is necessary to make an oblique cut at a slight angle of about 20 °. Then all the corners of the bars must be cut down and sanded on both sides. In this case, the back will have an inclined shape. The cuts must be strictly the same, otherwise the bench will end up skewed and will have an unattractive appearance, and it will be uncomfortable to sit on it.
-
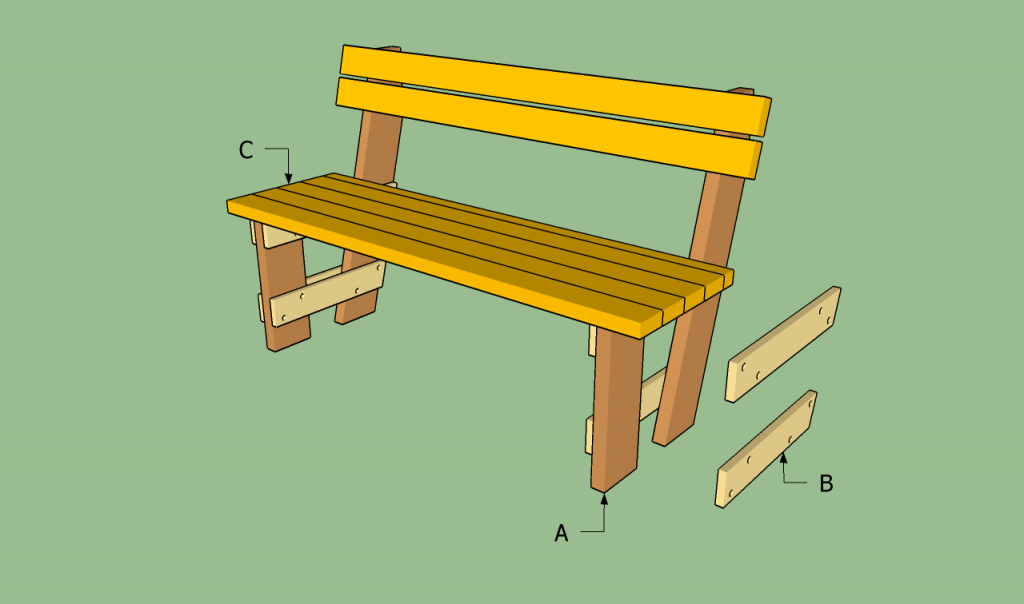
We collect the legs of the bench. The distance between the legs should be about 28 cm. The front (front) and rear wooden bench pairs for support from the invisible inner side must be fastened using prepared bars and self-tapping screws. We connect the legs with a bar, which we cut to the entire width of the structure - by 50 cm. It is best to do the strapping double - above and below.
-
In order to protect self-tapping screws and screws from premature corrosion, it is necessary to pre-drill the necessary holes and slightly deepen their heads into the board.
-
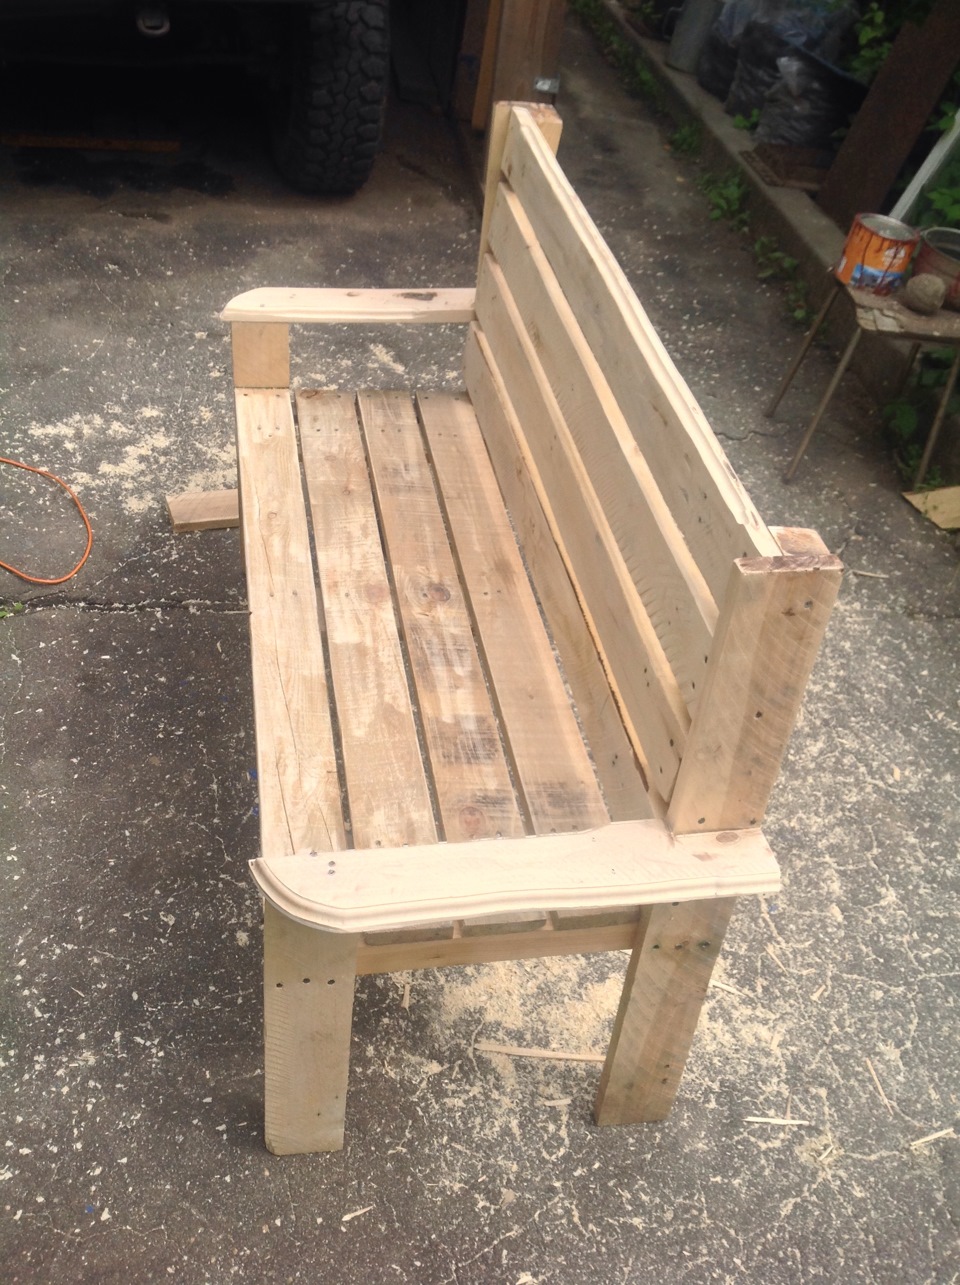
On the frame of the bench, as shown in the drawing, at certain intervals (1 or 2 cm) we nail or fasten the strips. Three slats will go for the seat and two boards for the back. After all the elements are filled, it is necessary to check the correctness and evenness of the entire structure with the level. For greater reliability, stability and rigidity, the legs at the bottom are knocked down with slats on both sides. It is advisable to leave gaps of several centimeters between the slats for better air circulation and drainage. We fix the back (the first bar) at a distance of 20 cm from the seat, and the second at a distance of 38 cm from the seat.
-
The design of the bench must be strengthened and for this it is necessary to make the lower strapping of the legs. To do this, take two beams 1.5 meters long and screw them to the front and rear legs of the bench frame.
Shop decoration
After the completion of all carpentry work, the bench must be completely treated with a fire retardant and then covered with waterproof varnish in several layers or with ordinary oil paint.
If you want to make the bench more aesthetically pleasing and design beautiful, you can simply saw the boards lengthwise and then fill them diagonally, crosswise or with a herringbone pattern.
Designing a comfortable bench with a back
Let's begin our consideration of the design with the support legs. Often they have a P or X-shape, their stability has been verified by experience. The form can also be solid (wooden beams, stone slabs), cast (formed from cast iron or concrete, the back goes into supports), in the form of legs, curved from metal or forged elements.
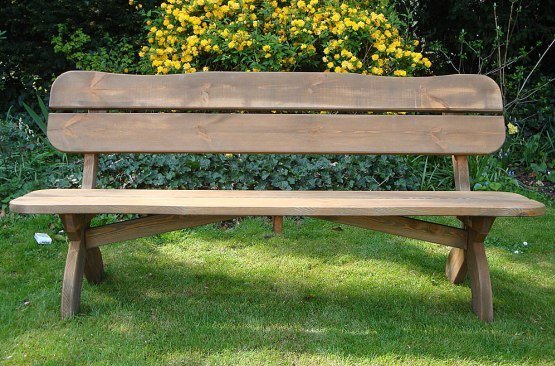
Bench
A seat is a part of a bench that must be comfortable and resistant to stress. It is made solid or at intervals (wooden blocks, metal pipes, rods). The solid seat is comfortable, however, it must be provided that water does not stagnate on it after precipitation. The edges of the seat must be rounded so as not to injure the legs. The optimal length is 1500 mm, the width is 400–450 mm, the length of one seat is 480 mm (of course, all sizes are selected individually). There are designs where a seat with a backrest is made in one line (the backrest smoothly passes into the seat by bending), such benches are comfortable, often found in city parks, their supports are cast from cast iron or concrete, you can repeat this shape from wood or bend from a profile pipe ...
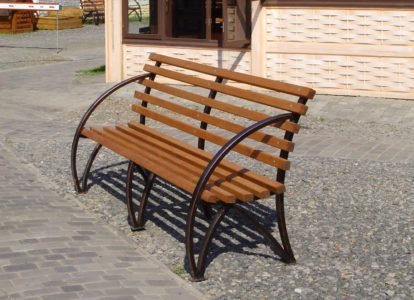
Combination of wood and metal
A significant part in the convenience of the bench is assigned to the distance from the seat to the ground (floor) level, it should be 400-450 mm. It is necessary that the feet touch the base.
The back makes the bench an object of long rest, it allows you to relax not only the leg muscles, but also the back muscles. An important role here is played by the angle of inclination relative to the seat and the height of the backrest. Based on human physiology, 10–20 degrees is considered the most comfortable. the angle of deflection of the back from the perpendicular, height from 360 mm (since the human spine has an S-shaped bend, the height of the back is divided into two parts: 180–240 mm to the fulcrum - the place where the back does not fit and + another 180–240 mm - segment of touch to the back). The back should not be massive and outweigh the bottom of the structure.
Too much clearance between backrest and seat

