Peculiarities
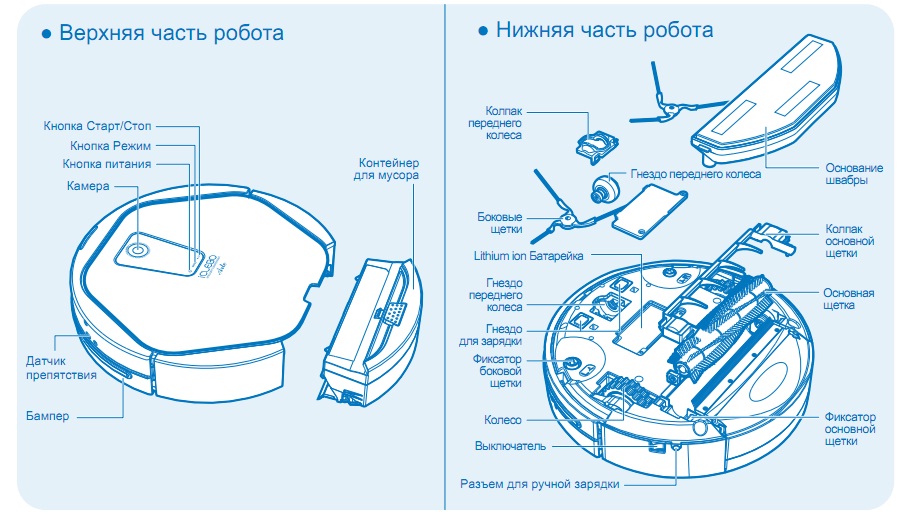
The shape of the robot is round (rarely semicircular), flat. The average values of the diameter are 28-35 cm, the height is 9-13 cm. The front part is marked with a shock-resistant bumper equipped with a shock-absorbing device and control sensors. Other sensors are installed along the perimeter of the hull to monitor the working process. As part of the control, the parameters of approach / removal to surrounding objects / obstacles are monitored. The environment is scanned to adjust the orientation in space.


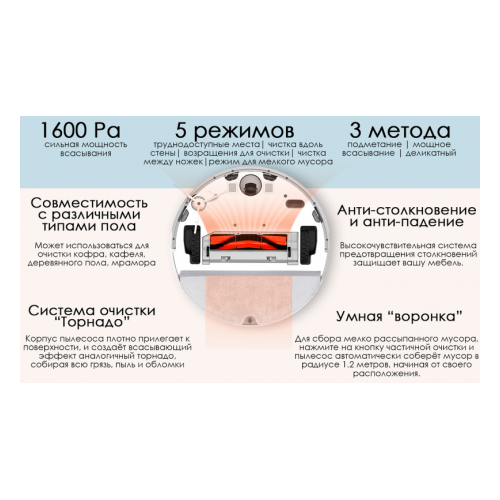
Each specific device is marked by the presence of an individual package of functions - software and design. Their list may include:
- height detection (prevents falling from stairs);
- memorizing the trajectory of movement (increases the efficiency of cleaning, reduces the time spent on it);
- wi-fi module (allows programming and remote control via smartphone);
- turbo brush (increases the coefficient of suction of debris);
- the function of carrying out wet cleaning (the presence of a water tank and fasteners for a cloth napkin, which is included in the basic package of the model equipped with this function).

Doesn't see the base
Why can't the robot vacuum cleaner see the base? There are several common reasons:
- The protective films from the sensors have not been removed after purchase. Carefully inspect the base and body of the device, remove all shipping films.
- The base is not installed correctly. Usually, manufacturers demand to free up space around, leaving at least half a meter free around the parking lot.
- The base is not supplied with electricity. There is no light in the apartment, the socket is broken, the power adapter cable is damaged, due to which the electronics do not give signals, and the robot vacuum cleaner does not go to the base. Be sure to plug the base into a working outlet.
The robot vacuum cleaner does not find the base and rolls aimlessly around the apartment. Look for reviews or testimonials from other users - perhaps your model is not famous for its orientation in space and the best way to help it, bringing it closer to the parking lot.
If you have a device with mapping, it may get lost after being carried in your hands to another room, for example, a bath or a balcony. Take it back.
Xiaomi Mi RoboRock S50 Robot Vacuum Cleaner Parts List.

Water tank

Wet cleaning module

Dock station

Power cable

1 - Protective panel of the container for dust
2 - Button for opening the container for dust
3 - Filter
Main device
- Slow flashing: waiting for connection;
- Fast flashing: in the process of connecting;
- Steady light: Wi-Fi is already connected.

1 - Wi-Fi indicator
2 - Reset button
3 - Speaker
4 - Ventilation holes
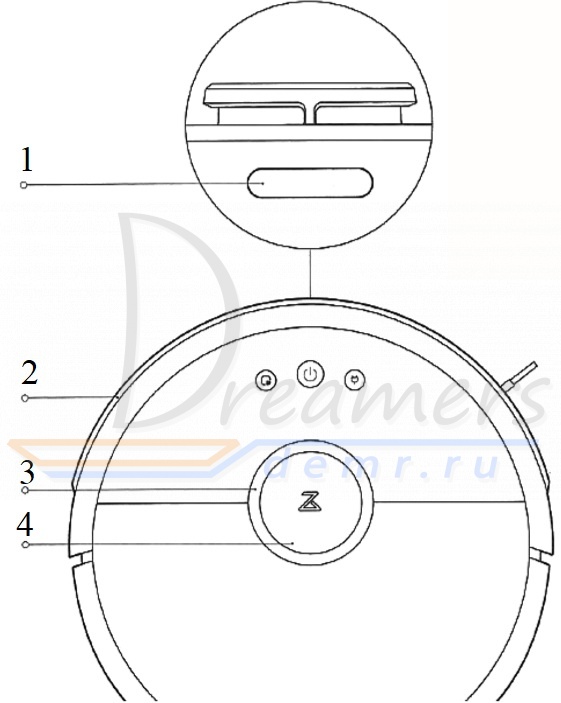
1 - Docking station return sensor
2 - the collision sensor (bumper)
3 - Laser sensor rangefinder
4 - Laser pressure sensor

1 - Sensor for determining the distance from the walls
2 - Fall sensors
3 - Wheel
4 - Side brushes
5 - The main wheels
6 - Main brush
7 - the Protective panel of the main brush
Wet cleaning module

1 - the cover of the water tank
2 - Filters
3 - Connector for installing the attachment
4 - Clamps of the module for wet cleaning
5 - Tank for water (tank)
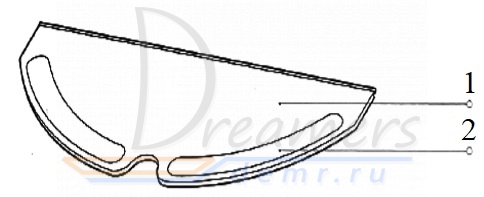
1 - Nozzle for wet cleaning
2 - Area of attachment of the nozzle for wet cleaning
Malfunctions and remedies
The robot vacuum cleaner, being a technologically complex device, is prone to malfunctions. Their names may vary depending on the model of the vacuum cleaner and its package of functions. Routine service or repair work should be performed by the supplier, his representative or other qualified person.In some cases, the repair of a robot vacuum cleaner can be done at home.

Consider the options for faults.
Not charging
Within the framework of this problem, the following symptoms may be observed: a rapid discharge of the battery, there is no charge when the vacuum cleaner is connected to the station, the presence of signs of charge when it is actually absent. Solutions: identify the problem and outline the criteria for its elimination. The problem of charging the vacuum cleaner may be associated with a damaged battery, a malfunction of the base station, a software error in the firmware, or a violation of operating rules related to observing network parameters and others.

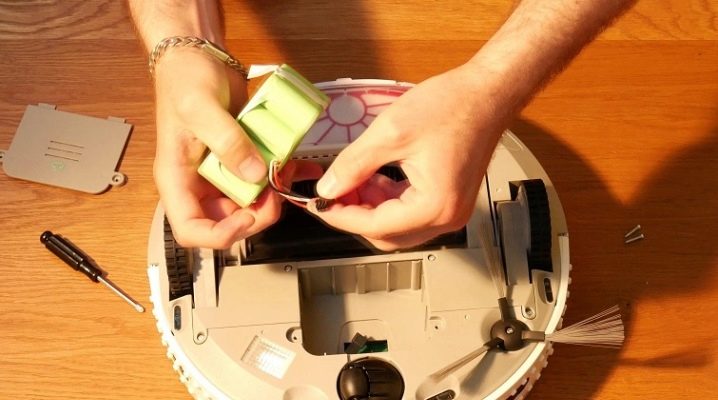
A worn out battery cannot be repaired. It must be replaced immediately. A lithium-ion battery that does not hold an eclectic charge is not only functionally obsolete, but is subject to increased danger (there is a risk of spontaneous combustion / explosion). The breakdown of the base station can be caused by several factors: voltage drops in the network, software failure, structural damage, deterioration of the state of contact nodes.
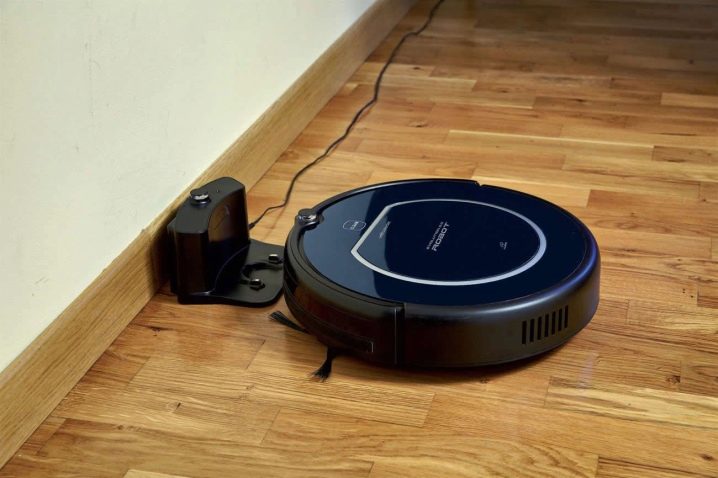
Power surges in the network can provoke the failure of some blocks of the "base" microcircuit. As a result, fuses, resistors, varistors and other parts burn out. Repair of this malfunction is carried out by replacing the control board of the "station". It is not recommended to make self-repair of the affected areas of the microcircuit - non-observance of electrical standards can lead to a negative impact on the vacuum cleaner itself during charging.

System errors
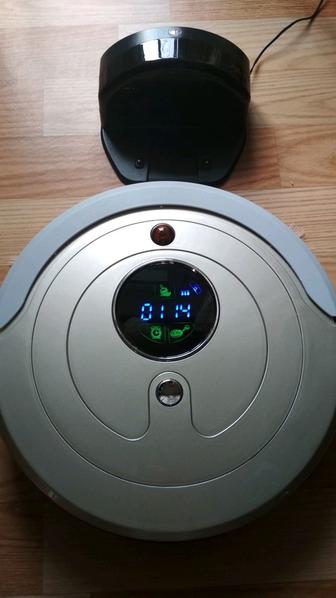
Some cleaning robots are equipped with a display that shows characters representing the commands entered and the error codes that have occurred. The meaning of the error codes is described in the technical documentation accompanying the specific model of the vacuum cleaner.
- E1 and E2. Left or Right Wheel Malfunction - Check for stopper / blocking factors. Clean the wheel space from debris and foreign objects;
- E4. Means that the body of the vacuum cleaner is raised above the floor level more than it should be. The reason is hitting an insurmountable obstacle. The solution is to install the device on a flat, clean surface, restart the unit if necessary;
- E 5 and E6. Problem with obstacle sensors located in the body and front bumper of the device. The way to correct the malfunction is to clean the surfaces of the sensors from contamination. If the problem persists, send the device for repair to the service center to replace the faulty sensors;
- E7 and E8. Indication of a problem associated with the operation of the side (screw brushes) or the main brush (if such is provided by the design of the vacuum cleaner). Check the brushes for foreign objects in the perimeter of their rotation. If detected, delete. Reboot the vacuum cleaner if necessary.
- E9. The body of the vacuum cleaner is stuck, preventing further movement. The solution is to change the location of the device.
- E10. The power switch turns off - turn it on.
Destructive malfunctions
The work of a "smart" vacuum cleaner may be interrupted due to internal malfunctions, which are caused by physical damage to certain parts of the mechanism. These breakdowns can be expressed by the following signs.
The motor hums or does not rotate. This can be caused by a malfunction of one or both of the motor armature bearings. In most cases, the engine noise is increased by high pollution of the filter element. In this case, the passage of air through the filters decreases, which increases the load on the engine. Maintenance or repair work should be done immediately.


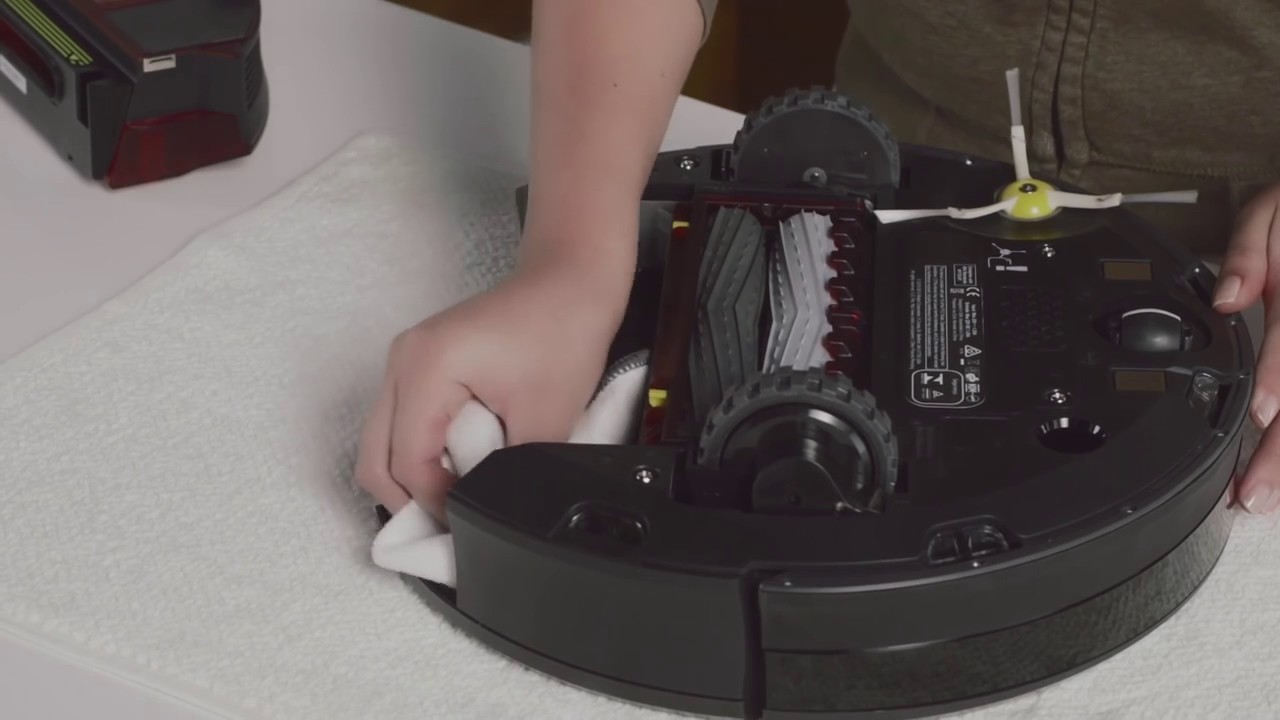
To learn how to disassemble and clean the robot vacuum cleaner, see the video below.
Orientation problems
The orientation of the robot vacuum cleaner in space is based on the functioning of the navigation unit. In budget models, it usually consists of side obstacle sensors and anti-fall sensors.In more expensive models, navigation is carried out thanks to laser rangefinders and the work of the built-in camera. These elements tend to fail, after which often the robot vacuum cleaner does not see obstacles, twitches, stops in the middle of the room, works for half an hour and leaves for the base, drives only in a circle in one place, backs away, etc.

When the device constantly drives in a circle in one place and does not orient itself at all in space, this may mean a malfunction of the side obstacle sensors.

If the device stops abruptly during operation and beeps, then the matter may be in the failure of the battery, the failure of the navigation unit, or in a simple entanglement in wires and other foreign objects on the floor.
A malfunction in the form of the fact that the robot vacuum cleaner simply goes backwards during cleaning, or goes back and turns off, can be eliminated by removing the front wheel and cleaning it from dirt. The case may also be in the sensors that need to be cleaned of dust, or replace faulty LEDs. If this did not help you, and the vacuum cleaner also only travels backwards, the problem is probably in the circuit board of the device.
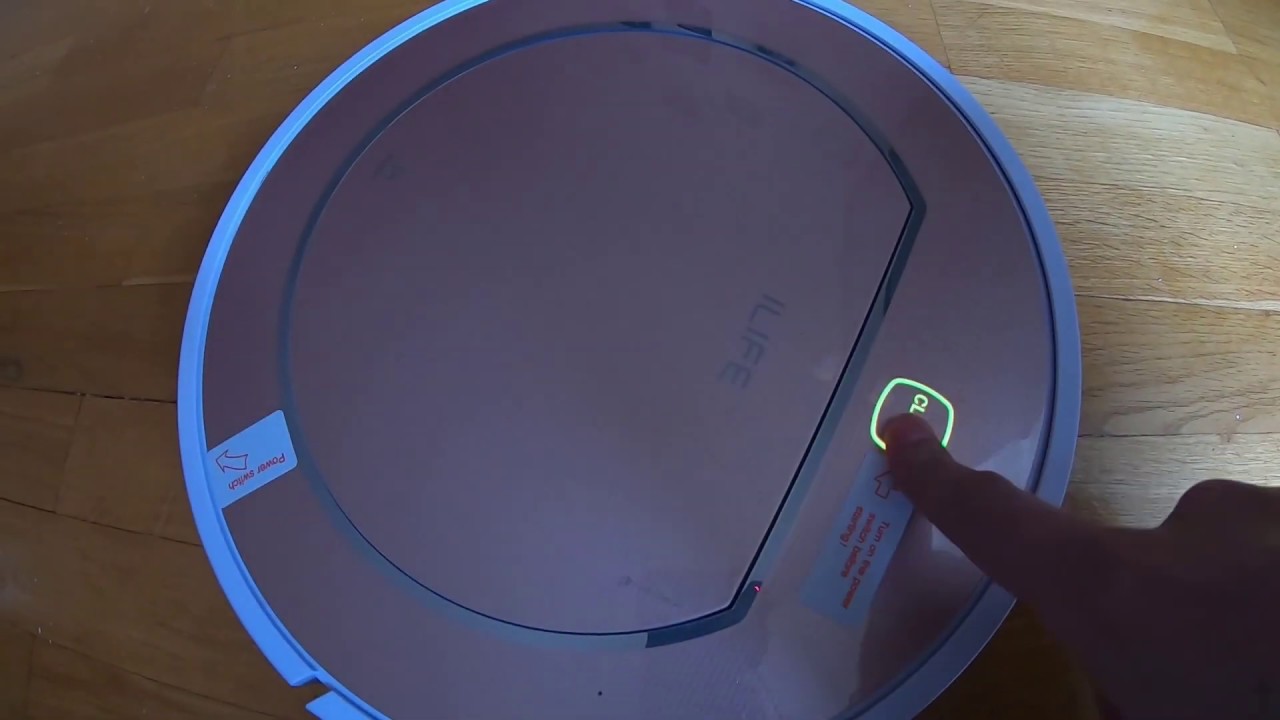
Also, the reason may be a poor-quality assembly. For example, at the plant some screw was not twisted, as a result of which it got into the mechanism and contributed to the overheating of the motors. The video below clearly shows how to repair the iLife Robot Vacuum Cleaner if it backs up and turns off:
The black floor is the weak point of most automated cleaning robots. Almost every user can hear that their robot vacuum cleaner does not work on the black floor and does not see dark furniture, it constantly bumps into it. Also, the minimum number of products is able to navigate in the dark. This feature of smart vacuum cleaners cannot be called a breakdown; rather, it is more a disadvantage of all robotic devices.
A robot vacuum cleaner is an electrical appliance that belongs to the class of household devices. The vacuum cleaner is equipped with an intelligent control system and is designed for automatic cleaning of premises. We will tell you all about the repair of robotic vacuum cleaners.


Panda Robot Bugs
Sensor Fault Codes:
| Code | Possible reasons | Solution |
| E000 | No malfunctions | — |
| E001 | Left Height Sensor Problems | It is necessary to clean the sensors of the Panda robot with a dry cloth |
| E002 | Upper Left Height Sensor Problems | |
| E004 | Upper Right Height Sensor Problems | |
| E008 | Right Height Sensor Problems | |
| E00F | Breakage of all height sensors | |
| E010 | Breakage of the left infrared sensor | The glass inserts on the protective bumper need to be cleaned |
| E020 | Breakage of the right infrared sensor | |
| E040 | Broken front left infrared sensor | |
| E080 | Broken front right infrared sensor | |
| E0F0 | Breakage of all infrared sensors | |
| E100 | Left Crash Sensor Problems | Inspect the protective bumper of the robot vacuum cleaner |
| E200 | Problems with the right collision sensor | |
| E400 | The left wheel has no contact with the surface | It is required to install the robot on a flat surface |
| E800 | The right wheel has no contact with the surface |
Fault codes of the robot vacuum cleaner motor:
| Code | Possible reasons | Solution |
| L000 | No malfunctions | — |
| L001 | Overloading the right wheel | It is necessary to check if the wheel is blocked. |
| L002 | Left wheel overload | |
| L004 | Overloading the right brush | It is necessary to check if the brush is blocked. |
| L008 | Overload of the left brush | |
| L010 | Overloading the cooling system | It is necessary to check if the fan is blocked. |
Error symptoms
As you know, products from Xiaomi are easy to use, so it's easy to understand about the problem. Firstly, a red light will flash on the vacuum cleaner, and secondly, a loud sound signal will sound. Failure notification can be activated in case of:
- Damping height sensors, positioning and obstacle detection.
- Stopping the rotation of the rear or front wheels of the vacuum cleaner, or their hovering in the air.
- Damage to the internal components of a household appliance (boards, microcircuits, mechanisms, battery).
Example of error indication
False signals are often triggered when dust simply adheres to the sensors. In such a situation, they must be cleaned using a napkin or soft cloth. It is also possible that a lot of dust or hair has accumulated on the brushes of the vacuum cleaner. It is enough to remove the debris and the device will return to working condition.
IClebo Robot Vacuum Cleaner Error Codes
Display message
Cause
Solution option
C1
The wheel is up
You need to move the vacuum cleaner to a flat surface
C2
Floor sensor malfunction
C3
Dust bag malfunction
Make sure that the dust container is installed in the device and securely fixed
C4
Wheel overload
The wheel is impeded by accumulated debris, hair, wool, it needs to be cleaned
C5
Brush overload
Stuck debris impedes the normal operation of the brush; cleaning is required
C6
Suction module overload
It is necessary to clean the dust container, replace the filter if necessary
C7 / CA in new motherboards
Internal system error / problem in the navigation module (camera)
Turn off the Aiklebo robot vacuum cleaner by switching the power key to Off, and then turn on the device again by pressing the On button
If problem persists, contact service
C8
Front wheel odometer malfunction, wheel not touching the floor
It is required to remove the front roller and pay attention to the location of the magnetic disk on its axis: it should be with a notch outward. If it is installed with the reverse side, then you should get it and install it correctly.
Also, clean the wheel, or replace it if it is significantly damaged. To replace the odometer, you need to contact the service department
The brush does not spin
The vast majority of robot vacuum cleaners are equipped with one or two side brushes. And some models have a turbo brush. It is not surprising that one of the types of malfunctions is precisely the breakdown of the brushes. If your side brush does not work, or the turbo brush does not rotate, then most likely they are simply clogged with dirt, dust and wound up too much wool and hair. For the same reason, the device may fail one wheel, or both wheels at the same time. Therefore, the brooms and wheels must be carefully disconnected from time to time and thoroughly cleaned. If you notice that the device makes too much noise during operation, then most likely you have installed the brushes incorrectly.

The reason why the brush does not spin
If, after cleaning, the left brush or the right brush still does not work, then the problem is much more serious. It is possible that the side brush motor has broken down, or the gearbox has broken. In this case, we recommend that you contact a specialist and do not try to fix the malfunction yourself.
The video below clearly shows what to do if the brushes on the iRobot Roomba are not spinning:
Correction of the most common errors
Usually, to fix the problem, it is enough to follow the recommendations that are given in the Mi-Home application. However, as practice shows, some failures do not disappear after following these tips. Such cases will be considered below.
Battery error (code 13)
If it was not possible to fix the problem in the standard way, then we suggest that you familiarize yourself with an alternative solution to the problem. Note that you need the following tools: a Phillips and flathead screwdriver, a multimeter, a soldering iron (preferably with a small tip) and several 18650 batteries. As for batteries, those installed in portable chargers (PowerBank) are perfect. Ideally, they should be 2600mAh, but minor deviations are allowed.
So, be patient and proceed to the instructions:
- Unscrew the 6 screws on the case, and then detach the small and main brush.
- Remove the battery, which is orange by default.
Removing the battery from the vacuum cleaner
- Measure the output voltage. It should be about 15-16 V, but it may not be at all.
- Disassemble the battery by gently prying it open with a spatula or the tip of a screwdriver. The board (BMS) is located on top, so we slowly take out all the cans. They are glued to a sealant, which can be difficult.
- Measure the voltage in all banks with a multimeter. It should be in the range of 3.7-4.2 V. If the banks have a deviation from the norm, then we remember their location.
We measure the voltage in the banks
Cut off the damaged cans, but leave room for future soldering.
Solder new jars, paying attention to their polarity.
Measure the total battery voltage. If it is in the range of 15-16 V, then put the battery in the vacuum cleaner and tighten the screws .. At the end, put the robot vacuum cleaner on charge and make sure that the error does not appear anymore
Finally, put the robot vacuum cleaner on charge and make sure that the error no longer appears.
Creaking sounds during cleaning
The second most common problem is the appearance of squeaking sounds during cleaning. The symptoms of this error are as follows: strong heating of the part holding the turbo brush; dust on wheels and brushes. Extraneous sounds appear due to the fact that dust or hair is wound on the rotation shaft. Of course, you can try to remove the garbage with a needle, but as practice shows, this method is ineffective. Better to use the following guide:
- Turn the vacuum over and detach the bottom cover. To remove the protection, carefully remove the side brush and the front wheel (it simply pulls up).
Disconnect the brush
Disconnect the turbo brush module.
Carefully remove the diaphragm, unscrew the connector and bend the left mount (located on the opposite side of the mechanism). Lift the left side and point it slightly forward. Then slide the shaft to the left and slowly pull it out
Please note that it is absolutely impossible to bend both ears at the same time!
Unscrew the gear assembly with the motor and remove the top cover.
Now clean, lubricate the desired part with silicone grease and put it back in place. Then collect everything according to the instructions in the reverse order.
Introduction to the Xiaomi Mi RoboRock S50 Robot Vacuum Cleaner.
Main device

1. - Partial cleaning
2. - Cleaning / On / Off
3. - Charging
4 - Ring-shaped indicator
5 - Button to open the top panel of the vacuum cleaner
Partial cleaning
- Press the button to enable the partial cleaning function of the Xiaomi Mi RoboRock S50 Robot Vacuum Cleaner
Cleaning the room / switching off and on the device
- Press the button to activate the cleaning function.
- Press and hold the button to turn the device on or off.
Ring indicator
- White color: charge level> 20%;
- Red: charge level
- Flashing indicator: in recharge mode or in on mode;
- Fast flashing red: malfunction.
Charger
- Press the button to recharge.
Note: during cleaning, charging or partial cleaning, press any button to pause the device.
Reset Wi-Fi Settings Press and hold the Clean and Charge buttons at the same time for 3 seconds

