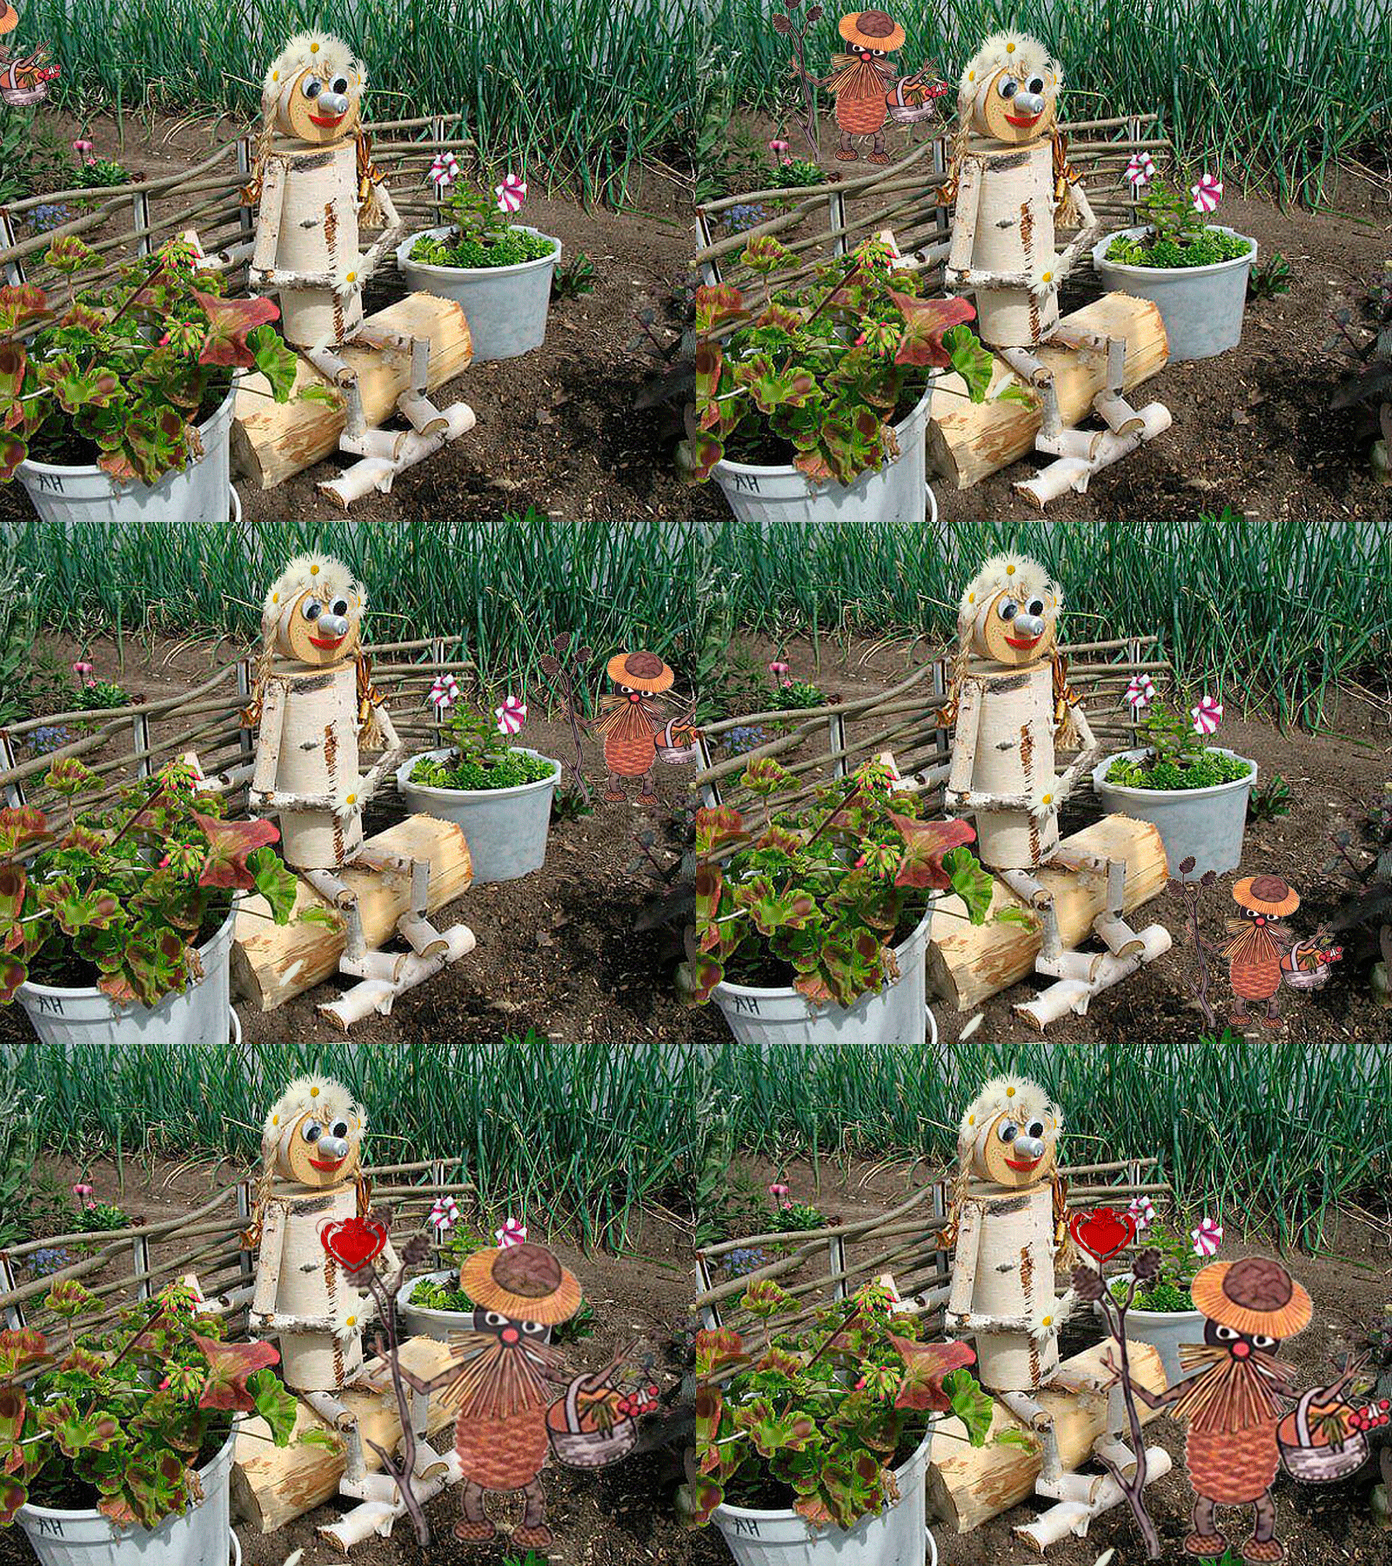
Ideas for a summer residence and a garden with your own hands. Race track.
You will need:
- sand and cement (2 bags)
- fine wire mesh
- black cement paint or colored (black) cement (if you want to paint the race track black)
- old tire from a motorcycle
- several small plants
- shovel
- white paint (if desired) to paint the dividing line.
1. Dig a shallow trench for the future track. The depth of the trench is about 10 cm.
2. To decorate the road with a "bridge" from an old tire, you need to dig a small hole and bury the tire about halfway into it.
3. Prepare a mortar of cement and sand and pour it into the trench. Instead of cement, you can use black painted tiles, bricks or boards.
4. Optional: to make a safety barrier, you can use polyurethane tubes or just plywood. Attach the barrier to one or more sides of the road.
* You can add other elements to the road: flags, animals, soldiers.
Crafts for the garden with your own hands from improvised material
I am sure you are trying to give your site or yard area beauty on your own from improvised means.
But progress does not stand still, and with the arrival of each new season, there are more interesting ideas for transforming things into unique creations.

Let's take a look at a small piece of these methods:
For example, funny little people from old flower pots.
In large shopping centers, it is very often during the winter period that such pots are sold at a very large discount, and that is when I buy to the fullest. And then inspiration hits me and I start to create.

Or pots made of concrete, which are easy enough to form on your own.
It is very convenient to use tin baking dishes. Or plastic toys for children.

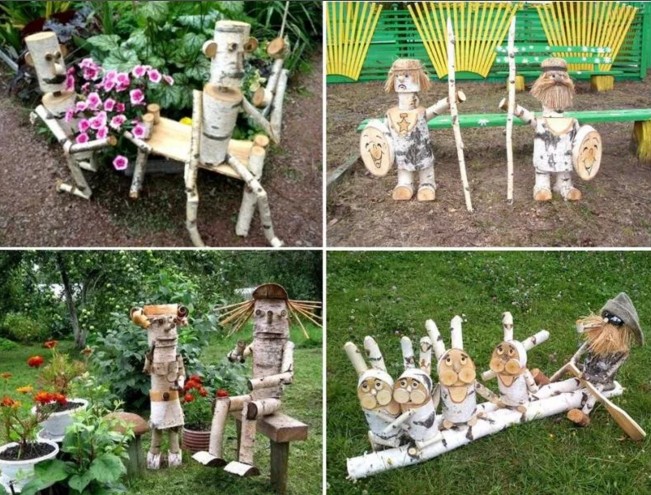
Unique flower beds made of logs or old brick and stone.
See if you have such garbage in your household and feel free to start up his business.

Suspended mini gardens from bird cages. Once it is worth working hard during their construction, and then for many years to observe its development, only occasionally pouring clean water.

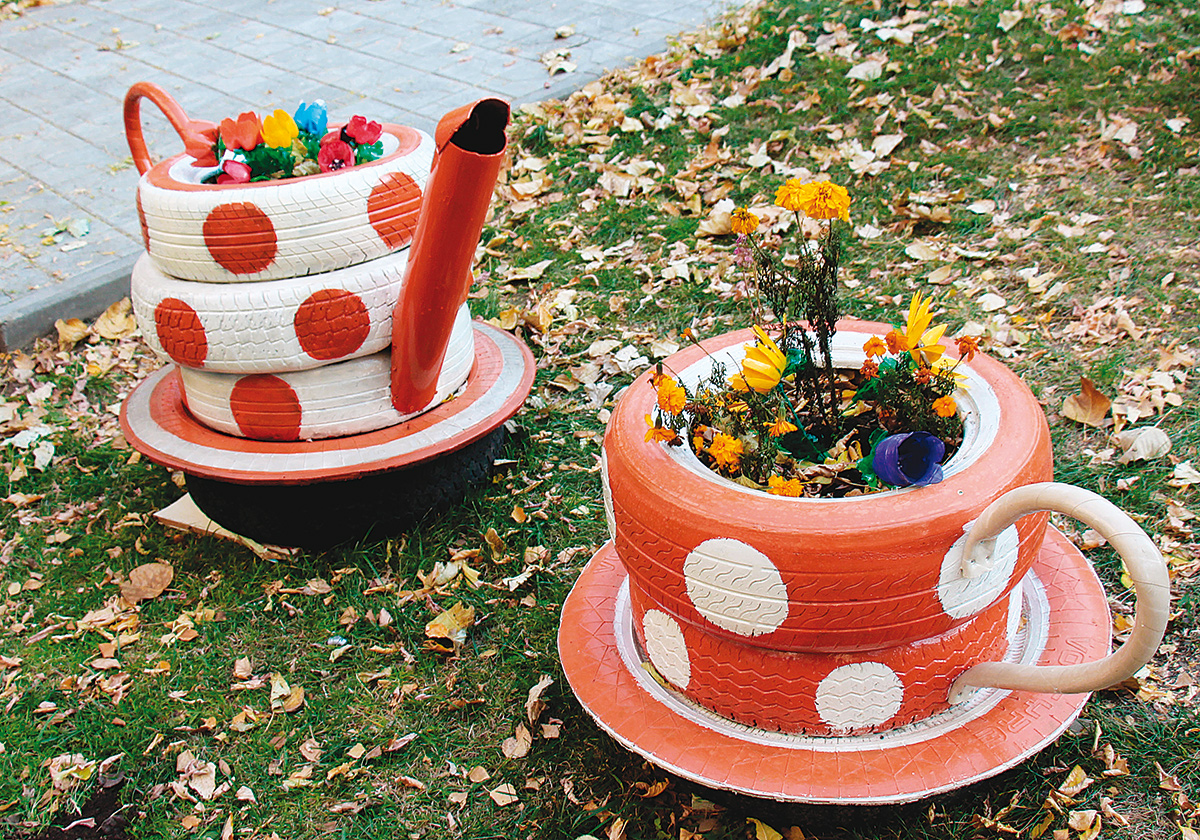
A bright flower bed of tires will bring unusualness and some kind of fabulousness to the land.

See how many product options can be folded from ordinary car tires.

My favorite topic. Outdoor furniture, sometimes it turns out to be more beautiful and original home. And you only need a few pallets, spray paint cans and your imagination.

If you don't want colorful furniture, use calm and warm colors, like the photo below.

And also at the dacha to bring down a mini-bar for get-togethers with friends on a comfortable table from a construction tub.

Now we will consider the options for using the water tank, which, especially in the summer period, is not collected in a mental amount.
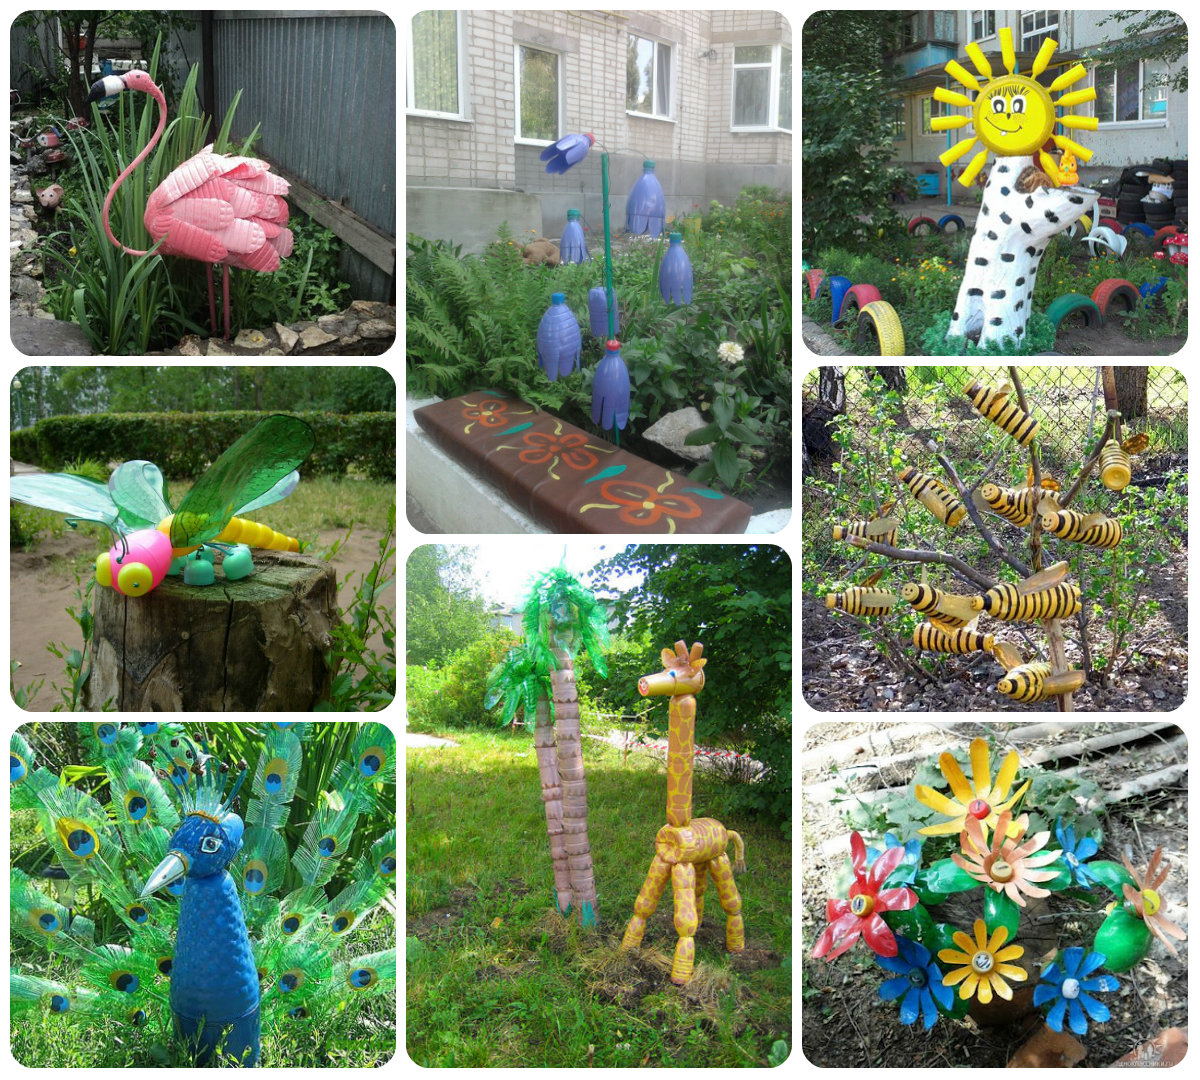
There are flamingos and beautiful swans, with palms and giraffes, only a small part of the animals.

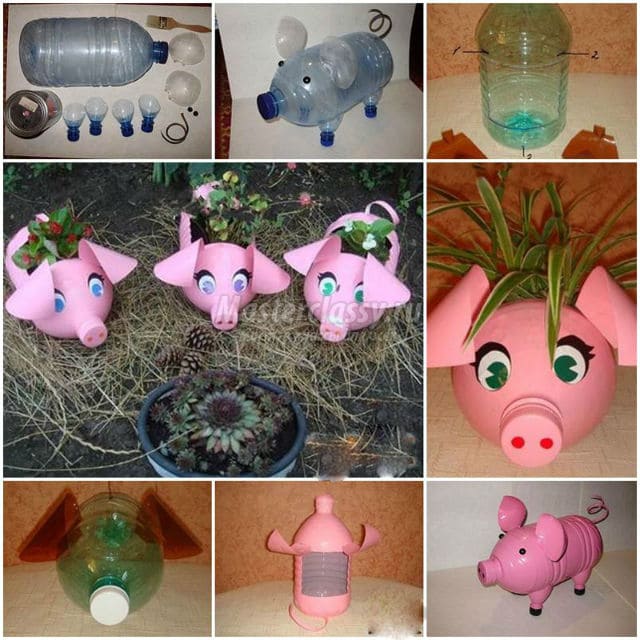
And it is also imperative to cook a pink pig, we remember that the symbol prevails now.
Look what an original steam locomotive with trailers came up with to knock down from ordinary logs. And how beautiful flowers grow in them.

Or highlight the construction of paths as a separate topic, here bottles, mosaics, logs and even sheets of burdock made of concrete can be used.

In a word, there are a lot of ideas, the main thing is to have a desire and territory that must be expressed in a unique reality.
Hanger for keys
Surely, many are familiar with the situation when you have to raise the whole family to find the keys. Indeed, often people do not burden themselves with the purchase of special small shelves for storing keys and other small things.

And since the key is a rather small item, it is easy to lose it among larger items. To get rid of the need to constantly search for keys, many keep them in their purses.


Its main feature is that outwardly it will resemble a product decorated with brickwork.

We will tell you how to make a craft in the form of a housekeeper from available tools in stages. But first, let's consider what tools and materials are needed to create it: a thick sheet of cardboard or plywood, thick napkins, hooks, glue, varnish, paints.

We use old tires

Used tires are a common material, you can find it in large quantities, and in completely different sizes. But what to make of them, besides the well-known swans and flower beds? Take an example from the Korean master Yong Ho Ji, his works are impressive and delightful. Gorgeous animals with a clear structure of each muscle are made from ordinary wooden frame and old tires. Of course, this is aerobatics, but we also recommend that you move away from platitudes and conventions. Use more bright colors and cheerful ideas, because even the simplest can be brilliant.

Crafts for the garden with your own hands from cardboard and paper
I want to start a paper theme with such characters familiar to us from childhood. It is not difficult to glue them together, the main thing is to stock up on napkins of the desired shade and create for yourself for pleasure.

We are building a new train for our children

And a maze. By the way, I like making them figures out of cardboard, when children get tired of playing with them, we just throw them away and invent new toys.

Funny cardboard animals peeking out from behind the bushes bring their own flavor to the site.

Be sure, until the harvest is ripe, make bright accents on the site. Thick paper pumpkin is a great solution.

And come up with a wonderful paper composition in a wooden gazebo.
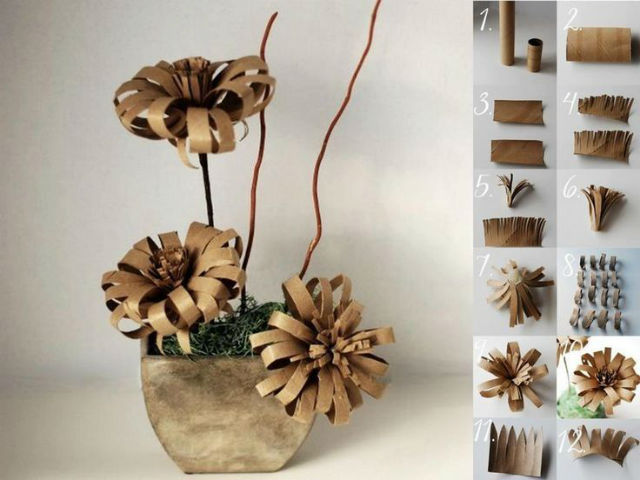
Or hang bright flowers around the perimeter of the summer cottage.

We decorate the doors of the house with such a composition of cardboard tubes of different diameters.

Mini paper front gardens give the feeling of the presence of fabulous, little people who are about to look out from under the leaves.
Resting place decoration
In summer, when you come to the dacha, you don't want to hunchback in the garden, but to relax in the fresh air. Therefore, the more comfortable and beautiful you arrange a place for rest on the site, the more pleasant it will be to be there.

You can place a lot of things in the recreation area, for example, your own pond. It is not difficult to make it, it is enough to dig a hole in size, cover it with material that does not allow water to pass through (polyethylene will do), and beautifully decorate it with stones on the sides, then fill it with water - the pond is ready!
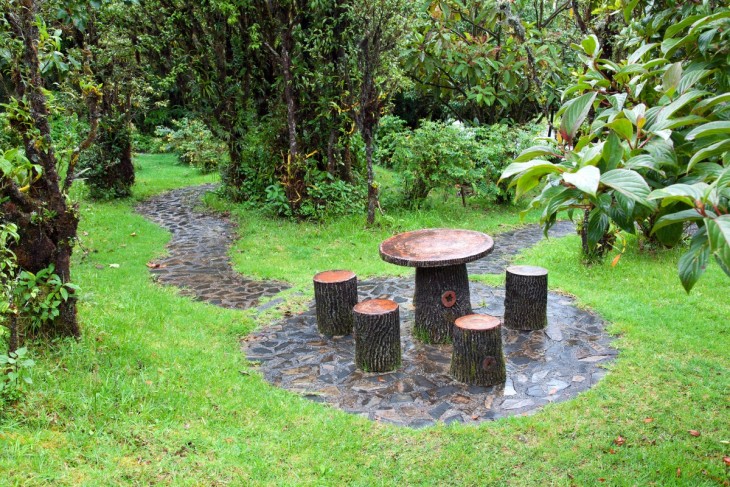


Some people prefer outdoor activities. For them, the installation of sports equipment at the dacha will be very much to their liking - you can put a horizontal bar, bars and rings - we will get a mini-gym in the fresh air.

How to decorate your site depends only on you. With a lot of imagination and due perseverance, the suburban area is quite capable of even becoming a "hobbit hole" by John Tolkien! Or another fabulous corner, good luck!

DIY DIY Instructions
Let's take a closer look at the example of crafts from plastic bags - a kite, which kids like so much. For manufacturing, you need to prepare:
- 2 bags with polyethylene;
- 2 skewers;
- Scotch;
- black marker;
- scissors;
- line that can be seen with strong threads.
The process of creating a masterpiece:
Straighten the bag and place the skewers on it, as if in a cross, but the longitudinal one should be a third higher, from the middle. Now, using a marker, you need to draw lines that connect the ends of the skewers.
Then, it is advisable to cut out the shape that turned out. Sticky tape sticks the skewers to the bag.
From the second plastic bag, you need to cut a piece, 4-5 cm wide, of any length - for the snake's tail.It is possible to make a tail from several short pieces of bags, having previously combined them with tape. After that, the tail should be tied to the lower half of the flying kite.
At the end, you need to make a hole in the place where the skewers intersect, and securely tie the fishing line there. Ready!
Decoration of suburban areas
The site is organized according to the general concept or by zones of use. Decoration, arrangement will give the site a unique look, beauty, emphasize its peculiarity. By use, the operation zones are subdivided:
- to the residential area and adjacent territory;
- leisure area;
- play area;
- territory of outbuildings;
- gardening area.

After the construction of buildings, outbuildings at the dacha, the era of landscaping and interior decoration of buildings begins. For the external arrangement of the territory, work on the equipment of paths is common. Equipped with the latest building materials, equipment or improvised means.

During the construction of paths, improvised means are used: rubble, pieces of concrete tiles, plastic bottles, elements of paving slabs, cut ends of logs, concrete, gravel, brick chips. The path paved with pieces of concrete slabs, round logs, paving slabs looks great. On tracks, these elements are stacked at a step distance. The spaces between them are covered with gravel or brick chips.

Crafts from cones with your own hands - features of work, ideas for decor, New Year's decorations, photo gallery of products
How to make a keychain with your own hands - many workshops and creative photo ideas
Unnecessary newspapers
Among the improvised means for children's crafts, let's pay attention to old newspapers. They are perfect for making various gizmos using the papier-mâché technique.
To do this, finely torn pieces of paper are soaked in water, and then applied to the prepared surface using glue.

After drying, the sample is removed from the mold, processed and painted. This creates wall plates, cute figurines, masks, and more for home decor.


The same techniques and schemes are used. But paper is softer and more creative. And the resulting products, coated with stain and varnish, can last for more than one year. And you can weave different things: from baskets and panels to boxes for linen and even furniture items.
DIY gifts
Small, beautifully wrapped gifts or tokens can also be made quickly using the materials at hand in any home.
Piggy bank
A piggy bank in the form of a symbol of this year can be presented not only to a child. Adults often do not know what to do with the heavy trifle accumulated in their wallet; such a thing will also come in handy for them.

Piggy bank
It is made from a plastic bottle, corks and colored paper or a piece of cloth.
| Stages of work | Description |
|---|---|
|
1 |
Save everything you need for the craft. |
|
2 |
Carefully cut the bottle in about half. |
|
3 |
Lubricate the inside of the neck half with glue and insert the other half into it. Paint five bottle caps pink. One of them will be a patch, the rest will be legs. Cut the ears out of the paper. |
|
4 |
Glue a strip of colored paper or fabric around the pig's body, masking the joint. Then glue the cork legs and ears. Eyes can be made of paper or small buttons. Draw a patch. |
You can make a slit in the back of the pig, or you can throw small change inside by simply unscrewing the patch-lid.
Keychains made of plastic
From plastic containers in which cakes, salads and other goodies are sold, very interesting crafts are obtained: key rings, fridge magnets, figurines for painting with stained glass paints and even pendants and other decorations.

Plastic containers marked with the number 6
Step 1. We print on a printer or find suitable pictures in books and magazines.
Step 2. Cut out the bottom of the container, put it on the picture and outline it with a permanent marker, drawing all the details. You can translate a picture directly from your computer monitor.

Cut out the bottom of the container

Putting plastic on the sketch

We circle

You can make several key fobs at the same time
Step 3. Cut out the picture along the contour.
Step 4. We turn on the oven and heat it up to 150 degrees.
Step 5. We cover the baking sheet with foil or parchment and put the cut blanks on it. They will immediately begin to shrink, decreasing in size and deforming.

Oven blank
Step 6. As soon as the figures begin to straighten again, we take them out of the oven, put them on a flat surface and finally level them, pressing them against it.

Billets after baking

The plastic is strong enough
Step 7. With a needle heated on a fire, we make holes in the figures, if we want to make key rings out of them. Or we glue small magnets.

The hole can be made with a heated needle

Ready keychain
Gift box
Beautiful packaging is as important as the gift itself. But the finished boxes sometimes cost more than what is in them. You should not spend money on them, because you can make beautiful packaging for small gifts with your own hands in just a few minutes.

Gift box
All you need to make it is colored cardboard and a beautiful ribbon.
Step 1. We make a drawing of the box in accordance with the parameters of the gift. This scheme can be used for boxes of any size, changing the length and width of the bottom, the height of the sidewalls.

Drawing
Step 2. We transfer the drawing to cardboard in real scale and cut it along the contour. On one part of the lid, we cut out or punch a figured hole with a hole punch.

Blank cut out of cardboard
Step 3. We apply a ruler to the places of the folds and draw along them with the blunt side of a knife or a knitting needle so that they turn out without creases. We cut the wings of the sides to the line of the bottom of the box. In the bottom with a clerical knife, cut two semicircles.

Bending the workpiece
Step 4. We glue the wings from the inside to the sidewalls.

Assembling the box
Step 5. We pass the tape through the slots at the bottom of the box.

Ribbon threaded
Step 6. We put the gift in the box, thread the ends of the ribbon into the figured hole and tie it with a bow on the lid.

Beautiful gift box
The second life of plastic containers
The best crafts for the garden with their own hands are made by those craftsmen who, along with creativity, combine care for nature.

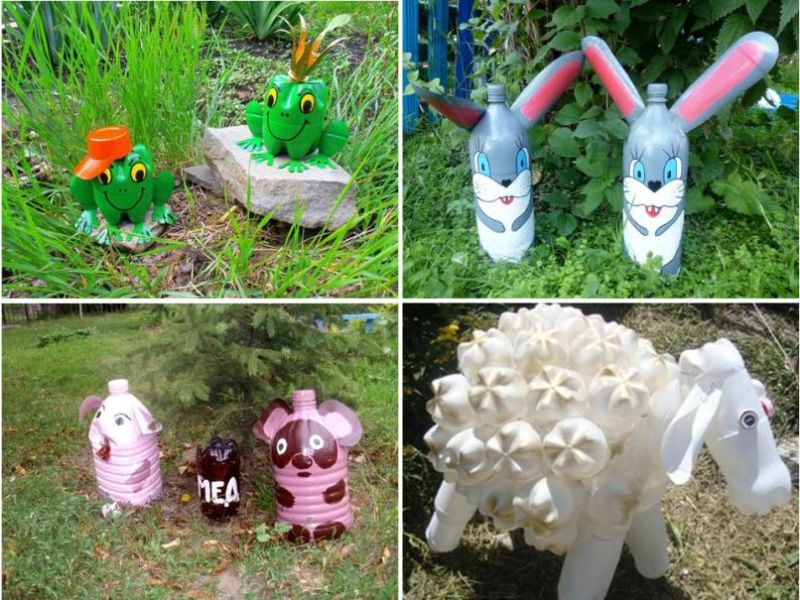
From faceless plastic, which is often just lying underfoot, you can create animals and birds, flowers and useful decorations like lanterns, flower pots or chests for storing small equipment.

Crafts from bottles are a good way to create a children's corner in the country or designate a recreation area. The simplest options are:
- cut off one of the sides of large five-liter bottles - the resulting blank can be stylized as a train or piglet, and plants can be planted inside;
- collect the trunk from brown bottles with a volume of 1.5 liters, and make palm leaves from green bottles;
- white and blue soft drink containers (0.5 l), cut in half, suitable for making flowers. The buds are made from the top by trimming the plastic in the form of petals.

Large sculptures, such as snowmen, are collected from a large number of bottles and even small houses are built. In the latter case, containers filled with sand are used instead of bricks. The resulting structure can be used for household needs or given to children for games.

Unusual gazebo chandelier
First of all, you need to make a shape for the lamp. One of the options is to inflate a balloon, glue it with threads. When everything dries out, pierce the ball, remove it from the left hole through which the wire with the light bulb will be inserted.

Now you need to cut flowers of different shapes from plastic bottles.After that, they can be painted, but can be left transparent.

Then, we glue the blanks onto a thread ball, so that there are a minimum of gaps. Insert the lamp and glue the hole. Everything, a beautiful chandelier for the gazebo is ready.


We have offered you some options, but it all depends on your imagination. Perhaps you will create something that no one else has. Good luck in this exciting activity!

Decor from improvised means
A small vertical garden can be easily made using cut pieces of plastic pipe or gutter. They will need to be attached one above the other to a vertical surface. This placement will allow them to form a natural floral wall.

A novelty in landscape design is a funny hanging garden made of ornamental plants, made of buckets unnecessary in the household. A suitable container must be painted in any saturated colors, with the help of hooks, hang along the perimeter of the territory fence and plant flowers.

You can update the gazebo by nailing wooden boxes in the form of shelves to its walls, and placing a composition of plants on them.

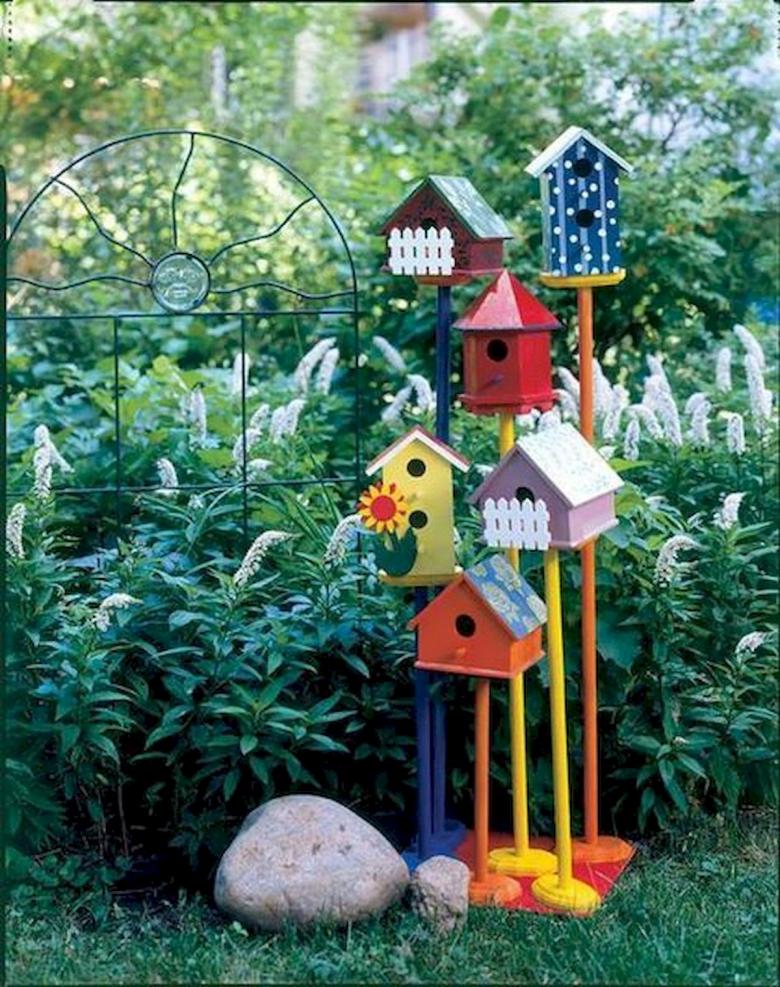
You can give the flower garden an unusual look by decorating its edges with painted flower pots, on which it is allowed to assign both the function of a fence and a living border. And to mark the border of the flower bed, it is appropriate to use branches and tree cuts.

We equip the leisure area
The arrangement of this zone must be approached carefully, thoughtfully. This place provides a rest for family members from the bustle of the outside, everyday difficulties, everyday worries. Equipped taking into account the tastes and desires of the household.

An equipped summer gazebo with a table, chairs (armchairs, benches), a platform looks good. The structure entwined with climbing plants looks nice. This will give shade on a hot day, add coziness. External decoration is allowed to be decorated with crafts made of plaster, clay or metal.


Swings installed for adults and children look comfortable close up. Hammocks suspended in the shade of trees, armchairs with cushions. Manufacturing on the shoulder of every man.

A well-equipped home pond or stream looks harmonious. The equipment depends on the natural landscape, technical and financial capabilities. The natural reservoir is beautifully decorated with quarry, stone boulders. In the absence of such a natural gift, the pond can be equipped independently.

The outer walls are decorated, following the example of a natural reservoir. The presence of water is imitated by painted plastic or pebbles. In the pond and nearby, it is appropriate to place figurines of reptiles and water birds made of stones, plastic bottles, gypsum, clay.

In the zone, it is reasonable to equip a place for a barbecue, a cauldron. They are made from scrap materials: an old barrel, a metal box, a sewing machine, etc.

Lighting is also important. In the evening, the old-style lanterns look attractive

Crafts for landscape design
In the country, in the courtyard of the house or in the garden, stone crafts look especially beautiful. They have a decorative function and are used with benefit. You can give some options for their use in landscape design:
- Arrangement of flower beds. With the help of stone, curbs are formed, an alpine slide is built, terraces and ledges are erected. Depending on the type of plant, individual large boulders or compositions of stones of different sizes can be used.
- Arrangement of decorative reservoirs. The water resistance of the stone allows you to use it for the bottom and walls of any reservoirs and water sources. Garden stone crafts in the form of fountains are especially popular. A rather original solution is a waterfall. In this case, different options are possible. One of the easiest ways is to form a ledge. At the top of the stone wall, the stone lies horizontally and protrudes from the wall. Another option is a cascade, when several ledges are made at different heights.
- Animal crafts.Stylized stone sculptures of animals make the design more original. Such crafts of various sizes are installed - horses, bears, deer, swans, herons, storks, etc. They are often made of stone and wood. Shown is a stone bird, where a combination of twigs and stone is used
- Flowerpots. Flowerpot-shaped stone crafts allow you to create a small flower bed anywhere. They can be round, rectangular, polygonal, or unusual in shape. The connection of stones can be provided with a cement-sand mortar. The flowerpot can have the color of a natural stone or be painted in the desired color.
- Stone plants. Most often, simple but bright imitations of various plants are used. It is very easy to place a stone "mycelium" on the site. The legs are white oblong stones, and the caps are horizontally laid flat pebbles, which are painted in the desired color. A family of fly agarics looks beautiful. And also cacti. Three or four stones painted green are bonded together to form a specific shape. The thorns can be glued on. These figurines look best in separate pots.
The most common use of stone in landscaping is the arrangement of paths and areas. Usually flat pebbles are used, and the coating can be formed by a large stone or in the form of a backfill of a layer of small pebbles.
Hanger for keys
Materials used:
- plywood;
- wooden lath;
- screw hooks;
- hooks for hanging on the wall;
- white stain.

Crafts for the house from improvised means: housekeeper
Progress:
- You need to take a piece of plywood that is necessary in size, mark it out with a pencil and cut out the resulting figure using a saw or a circular circle.
- Cut out a rectangle from the rail to which the key hooks will be screwed.
- Make sure that the dimensions of the plywood and the batten fit together and then the strip is glued to the plywood with glue. To do this, you need to grease the plywood and the rail with glue, attach to each other and squeeze them with a vice (if they are not there, you can put something heavy on top). Remove excess glue with a damp cloth.
- After the glue dries, the front part must be sanded with sandpaper. It is also helpful to slightly round the edges of the rail.
- The next step will be painting with white water stain. Depending on the stain, you need to apply 2 or 3 coats. After drying, the future hanger should have a snow-white color.
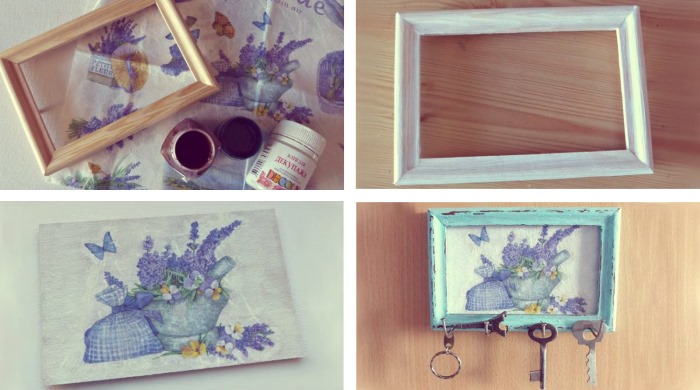
Crafts for the house from improvised means: housekeeper
- You need to choose a location for mounting the key hooks. It is best to mark up with a ruler and a pencil.
- To ensure that the rail does not crack when the hook is screwed in, a hole in the rail should be drilled in advance. After that, you can mount the hooks.
- Hooks must be attached to the back wall on which the hanger will hang. You can make them yourself or buy them in a store.
After that, it remains to choose a good location and attach the resulting key hanger to the wall. If you wish, you can put a photo of your loved ones on it or a list of future purchases in the store.
Crafts for the garden from scrap materials
Newbies in the world of hand-made should not immediately start working on complex structures.
Pay attention to what can be made from scrap materials. For example, we propose to create unusual pumpkin figurines for the garden.
They look very cute, so be sure that they will definitely not be left without the attention of your guests and relatives.

In the process, you will need the following:
- pumpkins;
- Matt lacquer;
- polymer clay or salt dough, gypsum;
- glue gun;
- dye;
- brushes;
- pencil.

We clean the pumpkins from pollution and cover with the first coat of paint. For a denser and more uniform color, apply a few more layers.
If you do not have a pumpkin of a suitable shape, then you can make the same blank using plaster.

Using a pencil, apply a pattern to a plaster blank or pumpkin.

Gradually, using different shades, paint all the figures. It is best to do them in the same style, but at the same time in different colors. Due to this, they look more original.

Using polymer clay or salted dough, we make a chicken head. We connect the parts together with a glue gun.

Paint the eyes with black and white paint. When all the paint is dry, apply one coat of matte varnish. The original garden figures are ready. You can safely decorate the territory with them.

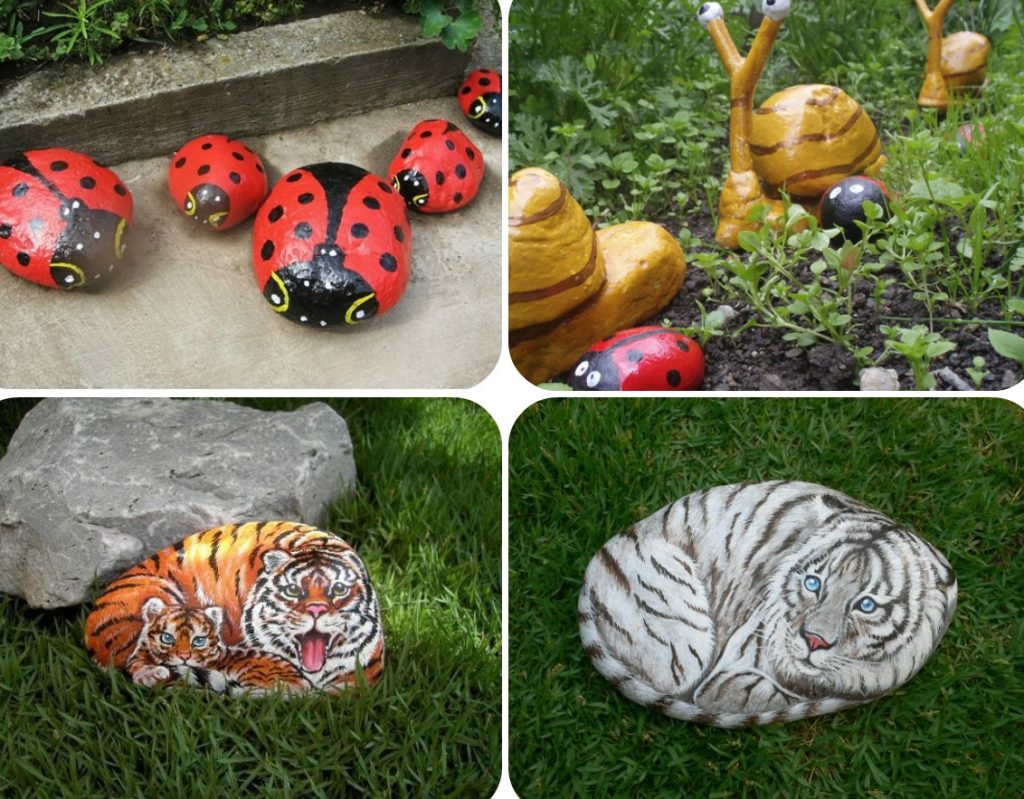
By the way, to create such a decor, you can use not only pumpkins or gypsum, but also simple stones that are in every yard. It is enough just to clean them of dust and apply the original drawing. They look no less interesting.


Old, unnecessary plastic bottles can also be used to create functional decor such as bird feeders. This is especially true for the fall-winter season.

Necessary materials:
- plastic bottle and plate;
- bird feed;
- drill;
- bolt and washer;
- ribbon.

Place the bottle cap in the center of the plastic plate and make a hole in them. We connect the parts together with a bolt and a washer.

We make a small hole at the bottom of the bottle and thread the ribbon inside. We tie it on the back so that the feeder can be hung on a tree.

We fill the bottle with food and close it with a lid and a plate. We turn it over and the result is an original, but at the same time very simple feeder.

In fact, plastic bottles are suitable for creating a wide variety of functional and decorative items.


DIY ideas for giving (photo instruction). Support for climbing plants.
Such a support should be made where it can be leaned against a fence or wall. This is especially useful when there is little free space.
If desired, you can make two supports.
You will need:
- tall branches (about your height or taller)
- twine
- scissors or knife (to cut the string).
1. Lay your branches on the ground and distribute them so that there is approximately the same distance between them.
2. To two opposite branches, begin tying the remaining branches using twine.
3. When the frame is finished, start tying the string. Tie a knot on one side, draw the string around the first branch, then extend to the second and wrap it once, and then to the third, and so on, until you reach the last branch to which you want to tie the other end of the string.
4. Now you can lean the support against the wall or fence and plant the plants, which will therefore curl around the string.
Support can also be made using tall boards and old bicycle wheels:
And here is a flower support made of small pots and a wooden frame:
Crafts for flower beds
Crafts for a flower bed will decorate the entire garden as a whole. A flower bed can be decorated in a special way: not just put different objects around the flowers, but create a whole composition.

For example, piglets and other animals will be made from a large plastic bottle, and flowers will be planted in them. Such a flower bed looks very unusual and interesting.

A flowerbed is also easy to make from a tire. It is enough to paint it, paint it, plant flowers inside. You can plant several flowers in a flower bed from a tire, or you can plant one.

For making a regular flower bed, it is better to use several tires. For a more interesting design, they should be painted in different colors. The splints are stacked on top of each other to create a defined shape. There will be no difficulties during work, but how beautiful it will turn out!

Photo of crafts from scrap materials for giving
In conclusion, we can say that from such simple scrap materials as a bottle, wood or old tires, you can make real works of art. The main thing is that this does not require a lot of money, only our imagination and a couple of unnecessary things.Let's see a photo of what else can be done to give a summer residence from various scrap materials - you can use not only the most popular, but also polystyrene, metal, old dishes, shoes and clothes, unnecessary furniture, records and CDs and other unnecessary things.
 Well from other crafts for giving from scrap materials
 Cute daisies from plastic bottles
 Chic homemade garden lights - bottle candles
 Garden figurine from various scrap materials
 Garden decor from garden gnomes
 Hanging pots from old teapots are a very beautiful idea
 An old kettle easily turns into a street pot in the country.
 Plastic bottle swan pond
 Funny donkey made of tires, wood and thread
 Decor of a small plot in the country from scrap materials
 We decorate old stumps with bright crafts
 Decorations for giving from basins, helmets and other things
 Original country craft made from different materials
 Pond with a frog made of a tire, a basin, a bucket and a bottle
 Bright snails from scrap materials for decorating a summer cottage
 Garden gnomes from ordinary plastic bottles
 Crafts for giving from tires and wood
 Idea for just a garden figurine from scrap materials
 Using an old wheelbarrow or cart for garden decor
 Old rubber boots will make a beautiful flowerbed on the fence
 Crafts for giving from CDs
 Luxurious flowerpots made of wood and clay flower pots
 Bright old shoes easily transforms into an original flower bed
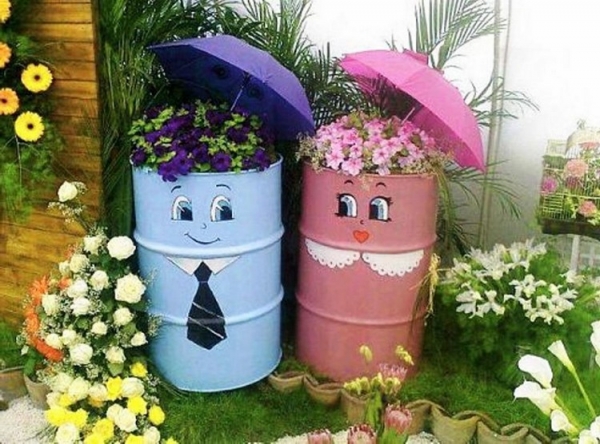 The gentleman and the lady from the water barrels
 Funny cow from the old bath
 Unusual basketball pots
 Many crafts for giving from different materials at hand
Crafts for the garden with your own hands from cans
From canisters, as, indeed, from other similar containers, come up with a bunch of useful products. By the way, the time is often required at least from the allotted for needlework.
Here, see how to simply prepare a flower stand from a small canister of bright color.

Depending on the color of the source material and the chosen design, completely different shapes are obtained.

And here is not a large number of such holders I have seen.
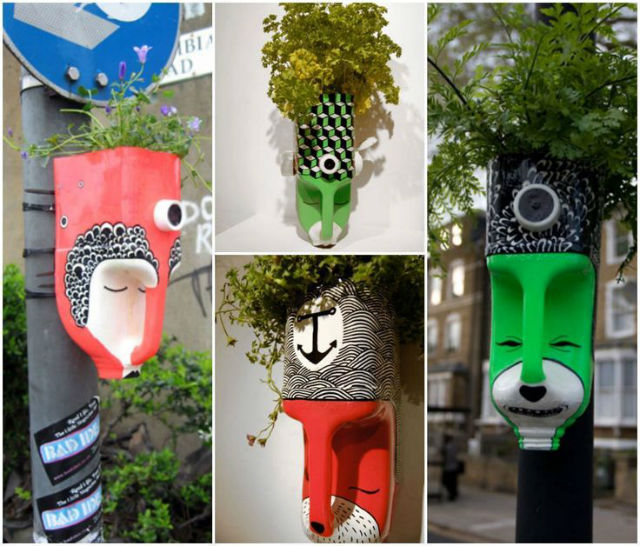
Well, the blue fat man, in my opinion, is simply incomparable, don't you agree?

Or see how convenient it is to move around the site with a small container of tools and have it at hand.

Fabric rinsers, after complete emptying, turn into a wonderful married couple in your garden.

Household hands can independently build a hand basin with a faucet, convenient and practical in any area.

Or a watering can for the garden, sometimes even more convenient than one bought in a store.

As I love such products, sunny, colorful, in flowers, even in rainy weather, they give the feeling of sun and warmth.
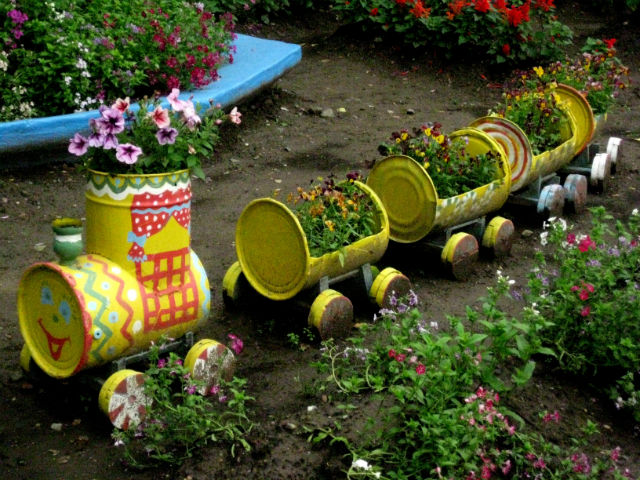
And look at another cute family of canister flower stands.

And another very important and useful device is a bird feeder. Birds are in great need of our care during the winter, and the feeder dispenser is very helpful.

Cook with completely different materials.

And the most colorful guys come out of such containers, which can simultaneously perform the function of settling and heating water for irrigating seedlings.

For children, such a sandbox, a train, will become an interesting entertainment, in some trailers to grow flowers on their own.

There are still a lot of options, the main thing is desire and patience. And you will definitely succeed.
Hammock chair
A hammock chair can be a replacement for conventional chairs and armchairs due to its convenience and unusual appearance.

For manufacturing you will need:
- cloth measuring 1.5 × 1.5 meters;
- strong threads;
- sewing machine;
- straps;
- pencil;
- chalk;
- ruler;
- scissors;
- wooden rod;
- rope;
- carbine;
- dowel hook;
- puncher.
Progress:
- To begin with, it is necessary to cut out a workpiece from the fabric in the shape of a trapezoid with bases of 1.5 and 0.8 m.All edges must be bent by 2 cm and sewn with a machine. After that, it is necessary to sew straps to the inner side of the workpiece at each of the corners so that loops are obtained at the corners.
- From a wooden rod, make spacers between the front and rear parts of the workpiece. To do this, you need to drill 2 holes in the rod and through them tie the loops from the straps to the spacer, while leaving the end of the rope behind the tree. Repeat this for each side.
- Next, you need a third spacer - transverse. The ends of the rope remaining on the edges of the longitudinal struts must be tied to the edges of the transverse, observing the rule: right to right, left to left.
- The hammock is ready, it remains to hang it. To do this, you need to drill a hole in the ceiling with a puncher and install a dowel hook into it. It is worth remembering that the more powerful the dowel hook, the more weight it can withstand. Next, you need to put a rope on the hook and tie its ends to the ends of the cross-brace.
That is why, for your own safety, you should take a material that has a higher cost, but is much stronger.

