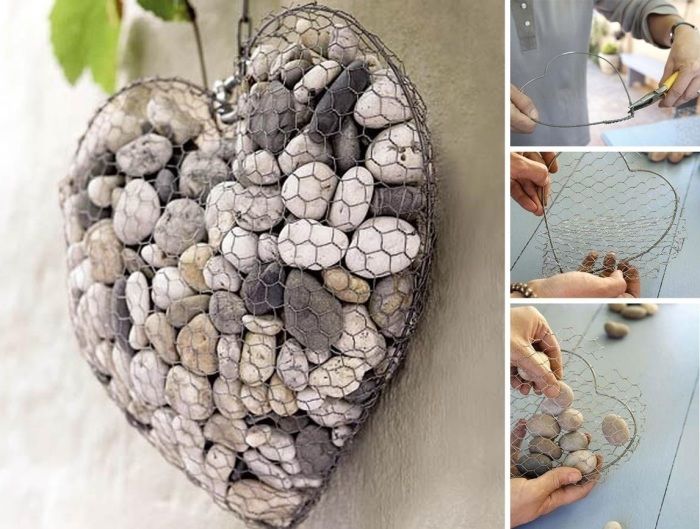
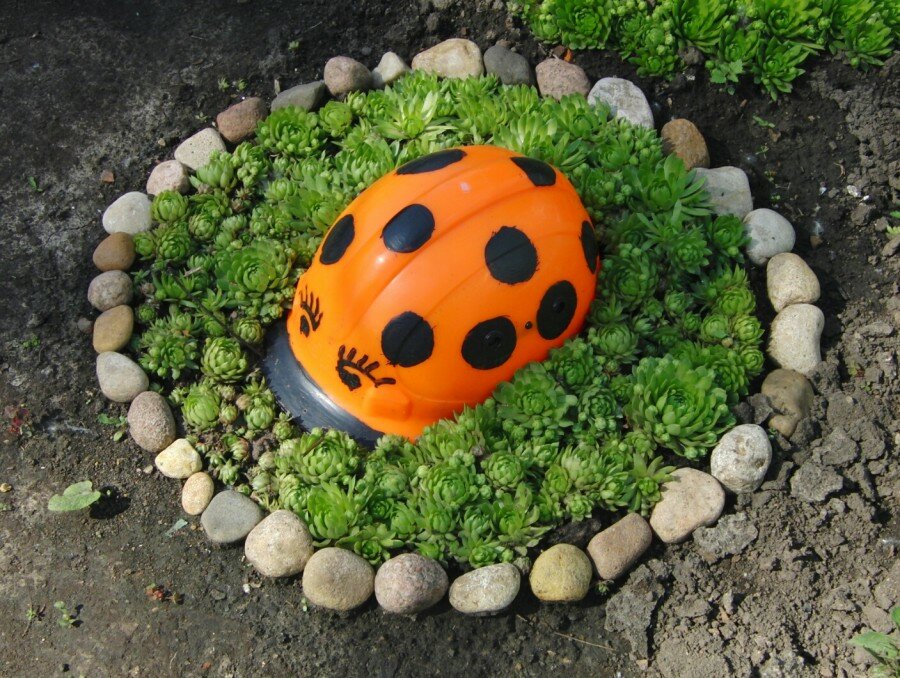
Original crafts from sea stones
Resting on the sea, many tourists bring a lot of beautiful stones. Use a little creativity, invite the kids to take part in creating crafts or decor for decorating a home or garden.

For products we need: stones, glue, colored paints, polymer clay and plasticine.

Crafts from macrame with stones
Even preschoolers can make simple knots.

Stages of work:
- You need to take the lightest patterns, for example, weave a "pigtail" of 2 or 3 strands.
- Weave the braids together, you can take cords of different colors.
- Place one large or several small pebbles in the center. Connect the "pigtails" with knots, and braid the stone.
- For decoration, you can glue large rhinestones of the desired shade on the stone.

The decoration is ready.
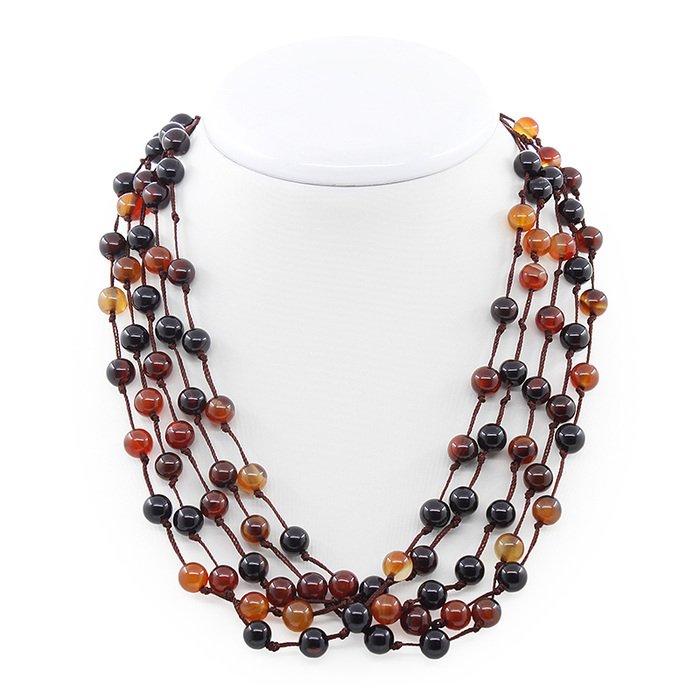
Bracelets, beads and buttons made of stones
On the coast of the seas you can find bizarre pebbles. If the stone has a natural hole, then you can hang it on a beautiful rope, paint the stone, varnish it.

A bracelet. If the sea stone is large enough and has a flat shape, then you can use a drill (drill) to make 2 holes, insert a dense silk thread or a thin cord for needlework. You will get an unusual bracelet. Execution techniques can be different.
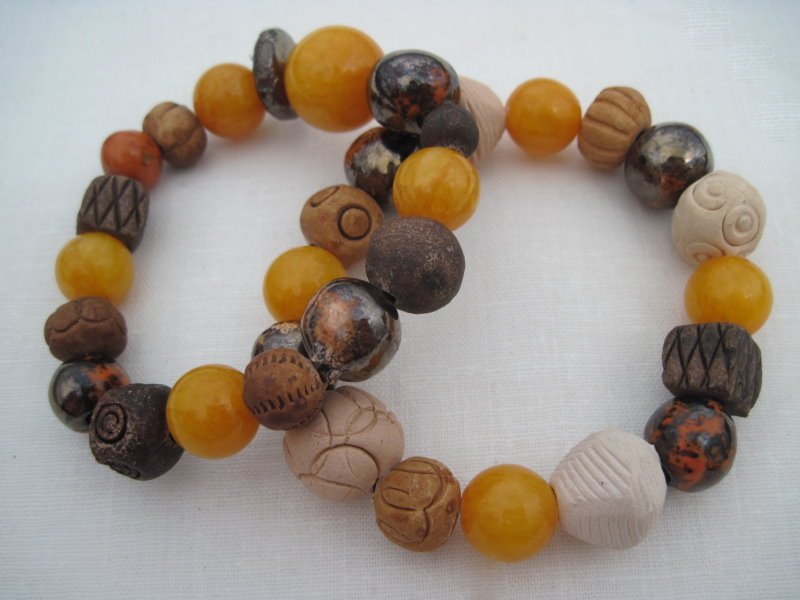
Beads. You can collect small flat pebbles on dense cords, tie knots between them for strength. Be sure to attach the clasp.
Stone fridge magnet
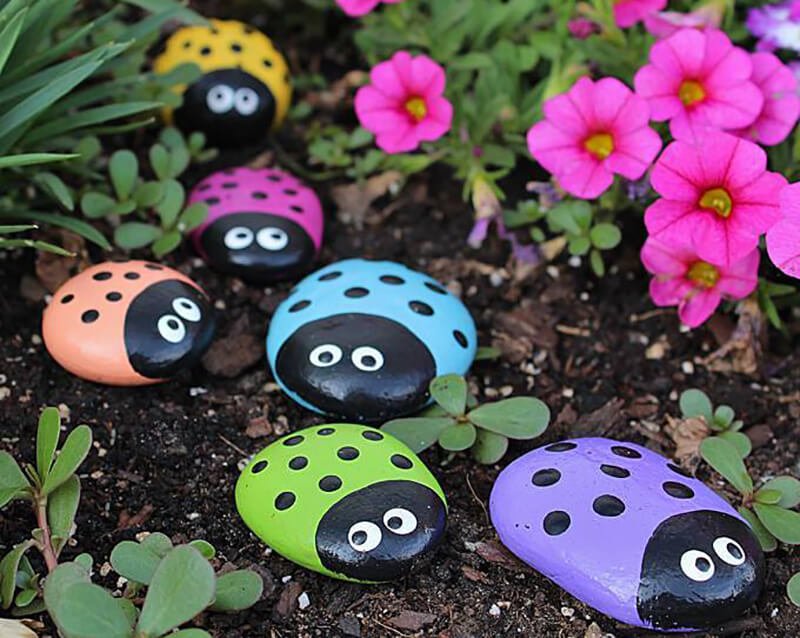
The easiest thing to do is to make a magnet. You need to take a flat small pebble, you can paint it with colored paints.
- Draw a monkey, bunny, snail, etc.
- Glue a small magnet on the other side.

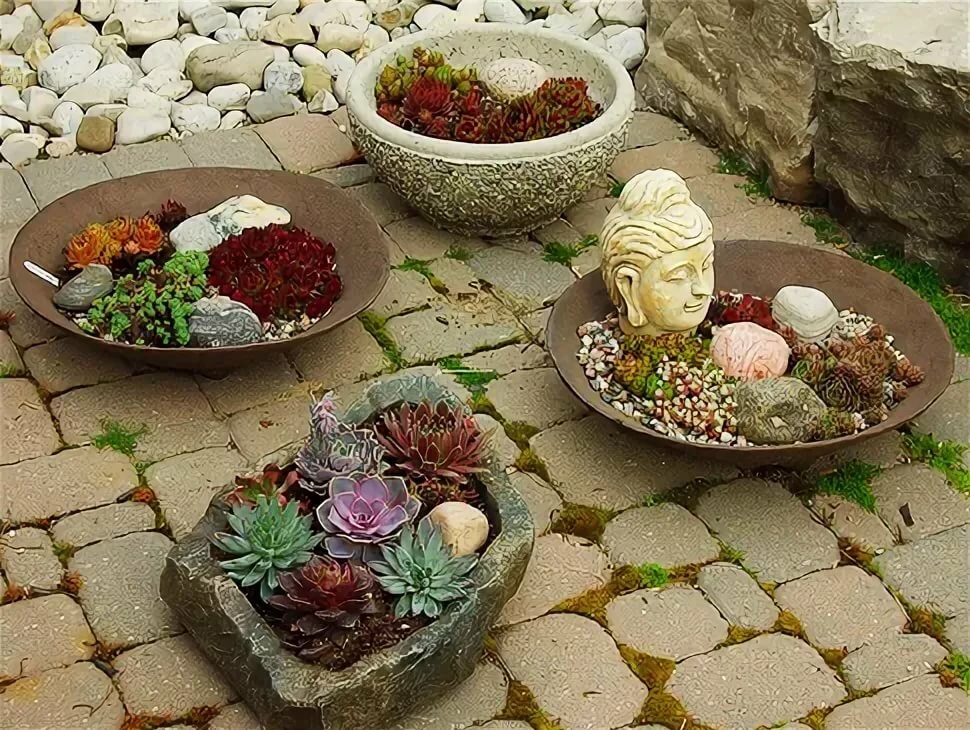
Flower pot made of stone
For lovers of florists, another idea is suitable. An ordinary pot can be pasted over with small sea stones. You can choose them in one color or beautifully combine different shades.

Picture of stones
Ideas for pictures can be gleaned from children's books or the Internet:
- The caterpillar is a few curved flat stones painted green.
- A blue bunny - an oval (body), elongated pebbles, long thin ears. Decorate the legs and ears of the hare with white paint.
- Flower, branch of grapes.

A plywood rectangle can be painted in the desired color; any drawing looks better on a dark background.

Glue the selected pattern onto the plywood.

Decoration of bottles made of stones
You can decorate the container diagonally or with an intricate pattern with pebbles and shells. But do not stick it, but roll the bottle in plasticine, and shells, glass and stones will fit well on top.

Another option is to put a colored marine "material" inside a transparent container.

Decoration on a jewelry box made of seashells
Even small fragments of shells will look great on the lid of the box. The top can be painted or varnished.

There are other crafts made of stones and shells, for example, a photo frame. Even an old shabby frame can be beautifully decorated with shells. Put on glue, varnish on top for strength.

Ideas for creativity with children
Every child will love working with stones and creating non-standard products, since such material is rarely used for creativity. Together with the child, you can make the following crafts from pebbles:
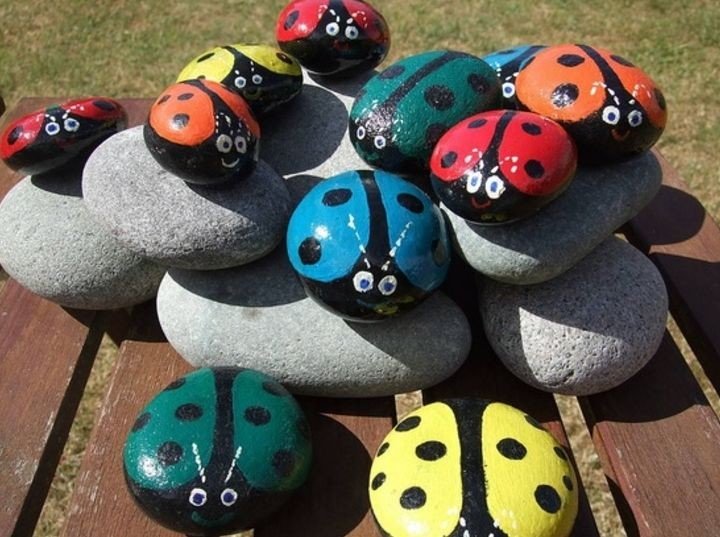
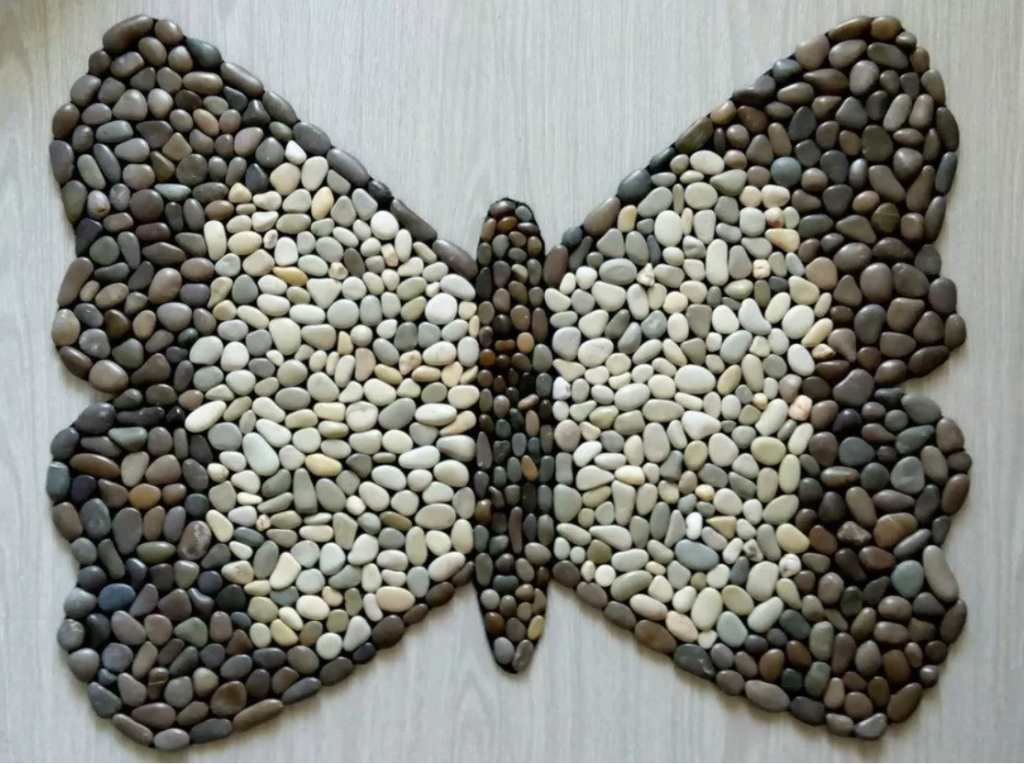
Applications.
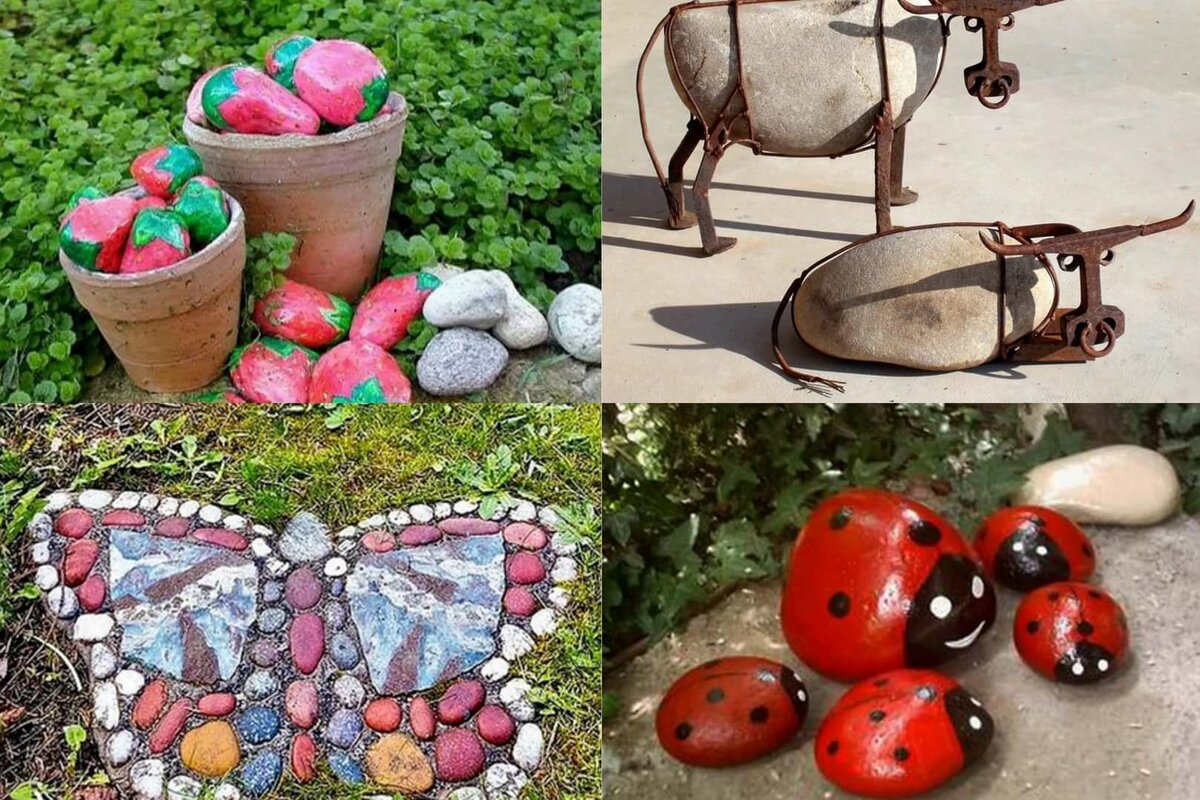
Having previously painted the stones in different colors, you can make appliqués in the form of caterpillars, butterflies, flowers.
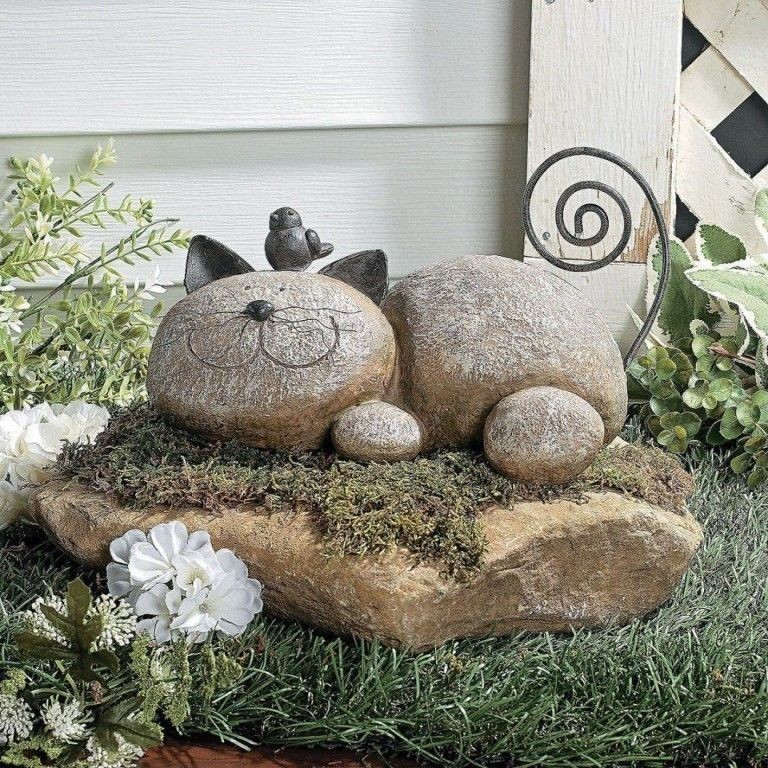
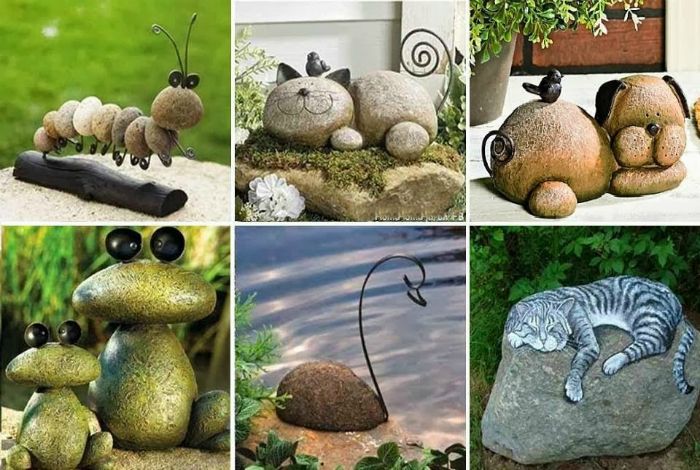
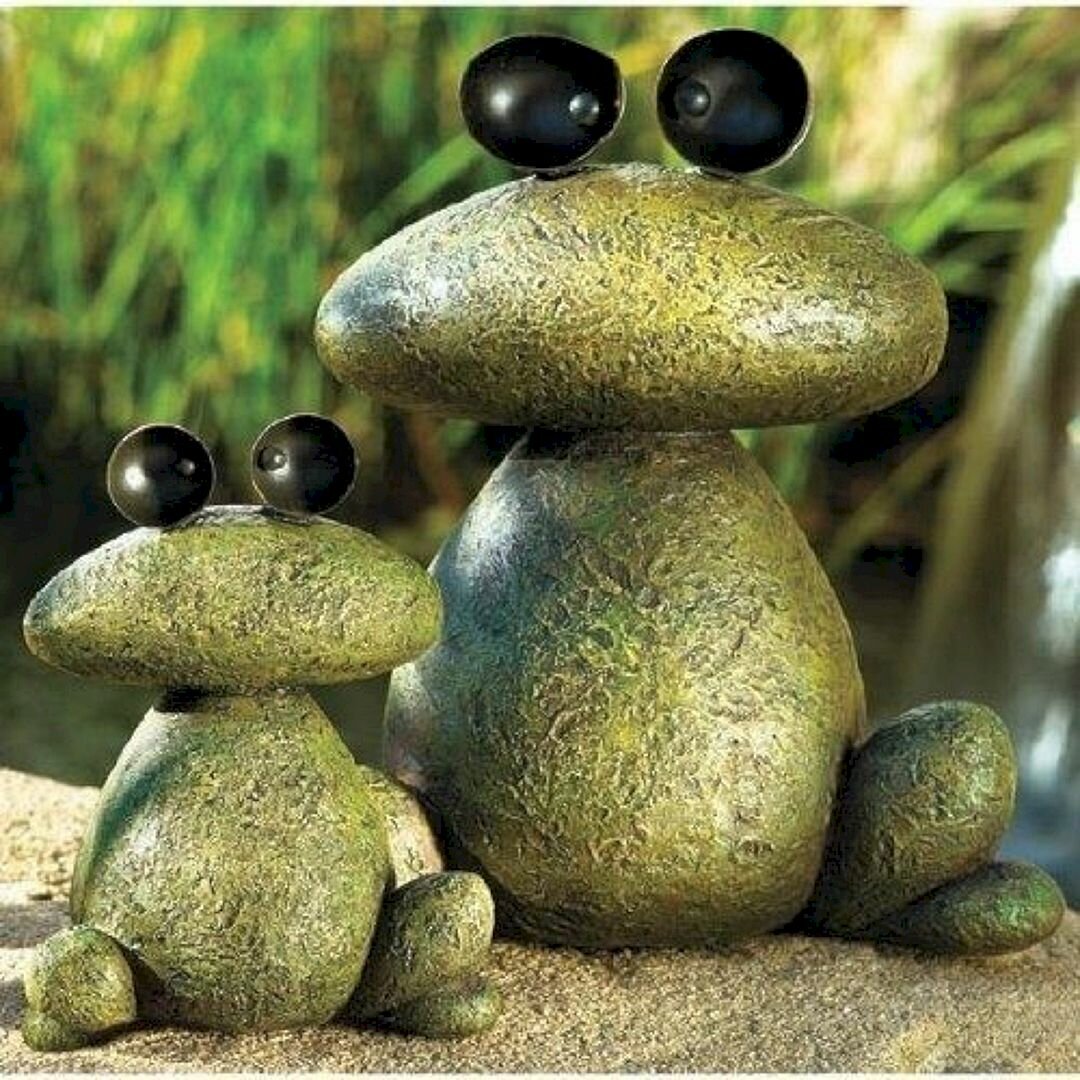
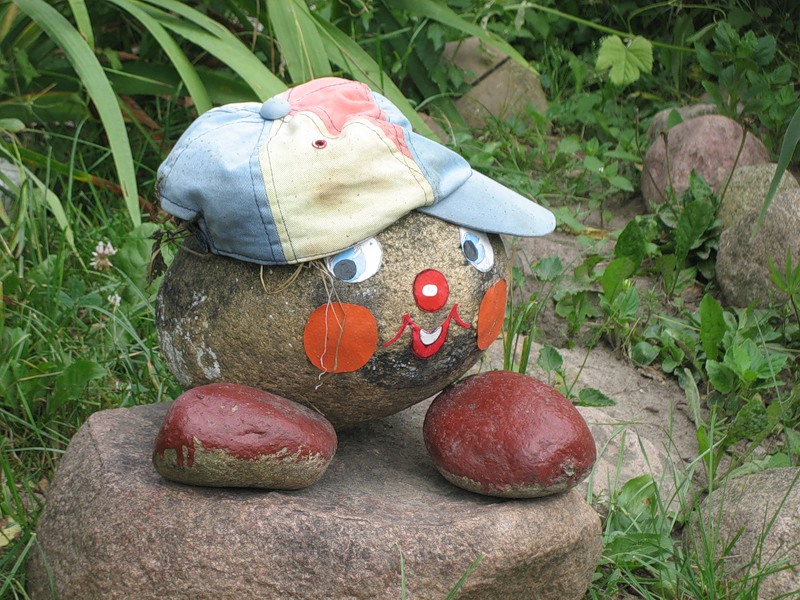
Volumetric figures.
From a pair of flat small pebbles and one large one, you can make a simple frog. Also, by drawing little men on large voluminous stones and gluing hair from knitting threads to them, you can get pretty stone dolls.
Interior decor.
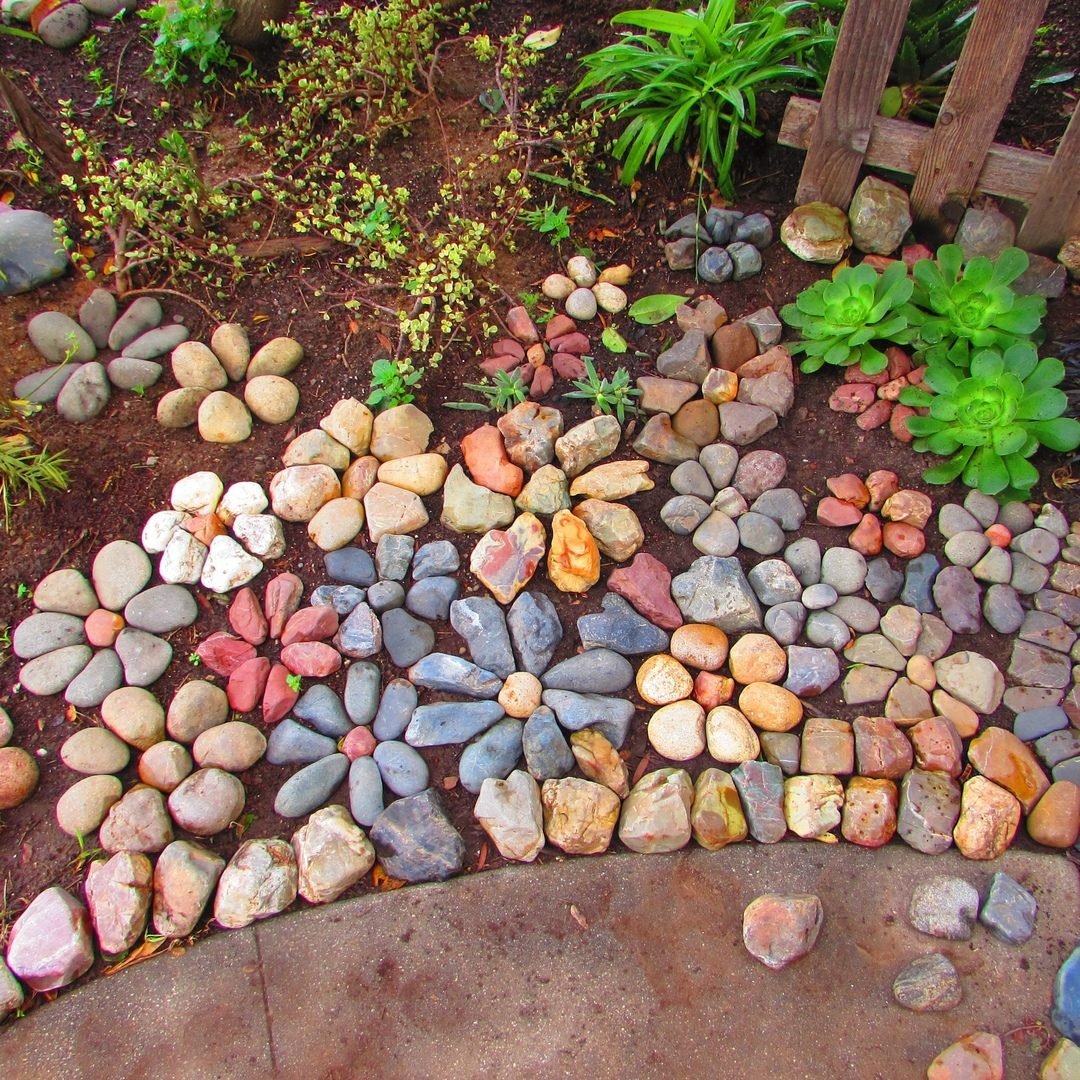
By painting the pebbles in green and pink, yellow colors, you can make cute cacti. It is recommended to install them in a flower pot. Also, having laid out a few pebbles nearby and making a general pattern on them, you can make a nice decor for the table in the form of a stone "puzzle".

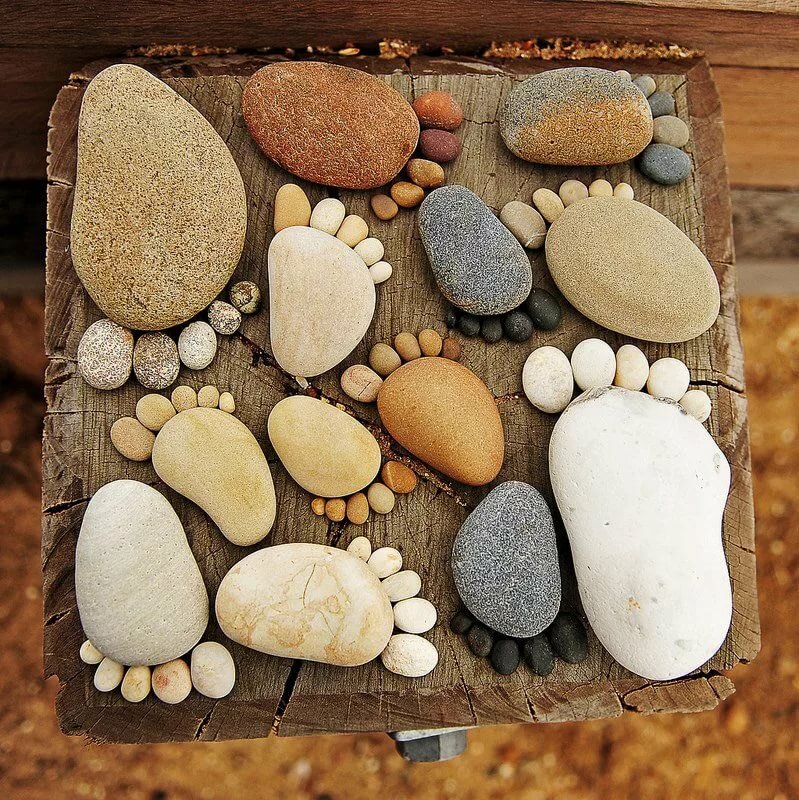
Creative stone rugs
Stones carry a special energy, they have been used as a treatment for a long time.
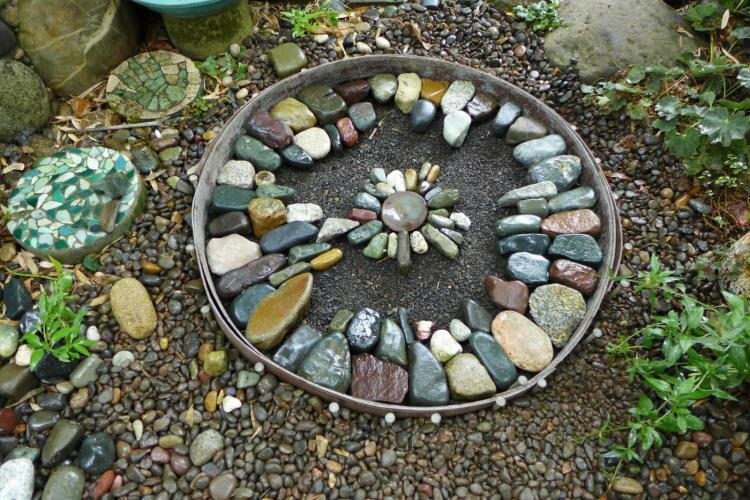
You can put a rug of tightly glued stones in a certain pattern in front of the front door. For example, in the form of a wave or a spiral, where stones are glued in large sizes along the edges, gradually decreasing towards the center.
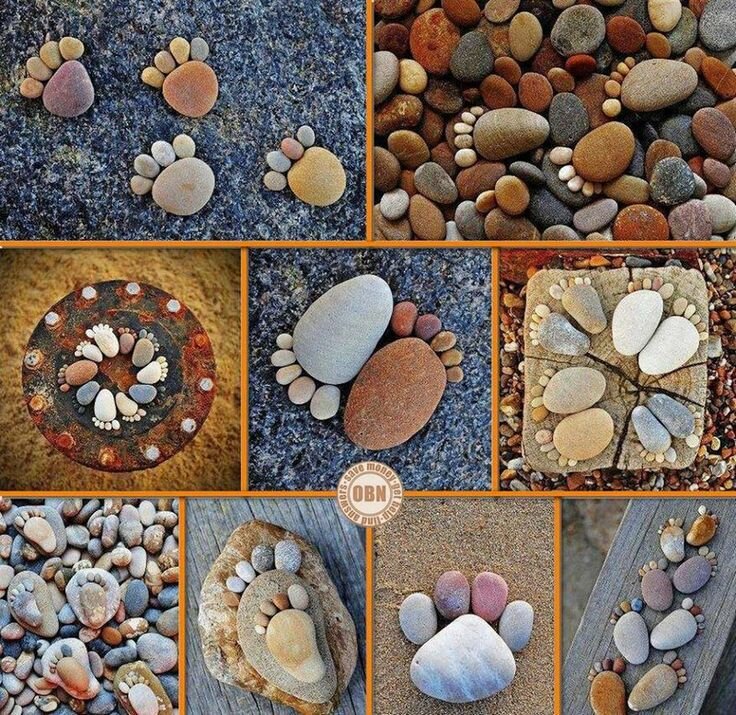
For those who love humor and creativity, you can create a rug that can only be stepped on with bare feet. Stone rugs are great foot massagers. The feet may look in different directions.
Pick up a large oval stone - a foot, 5 small ones to it (imitation of toes). Different sizes of children's feet, simply glued to a wooden surface, are very effective.
Question answer
Brought a lot of shells from the sea, what can you make of them, besides a photo frame?
You can make a frame for a large mirror. Sort shells (small / large). The frame can be repainted in the desired color. Close the mirror with paper, and begin to glue (PVA) in rows, first small shells, then larger ones. Think over several options.
My son loves sea animals, can you create a picture from stones and shells?
You can lay out a picture in the form of a pattern from shells in the shape of a heart (wave).
For example, choose an animal, for example, a whale, a seahorse, a mermaid ... Cut out a template on thick cardboard, plywood. From above, pick up a beautiful drawing of pebbles and shells. There is coarse material around the edges, fine inside.
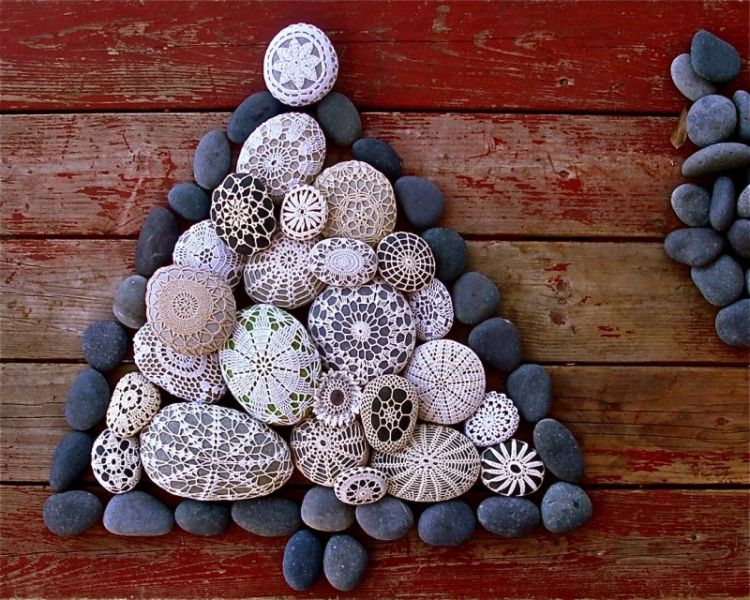
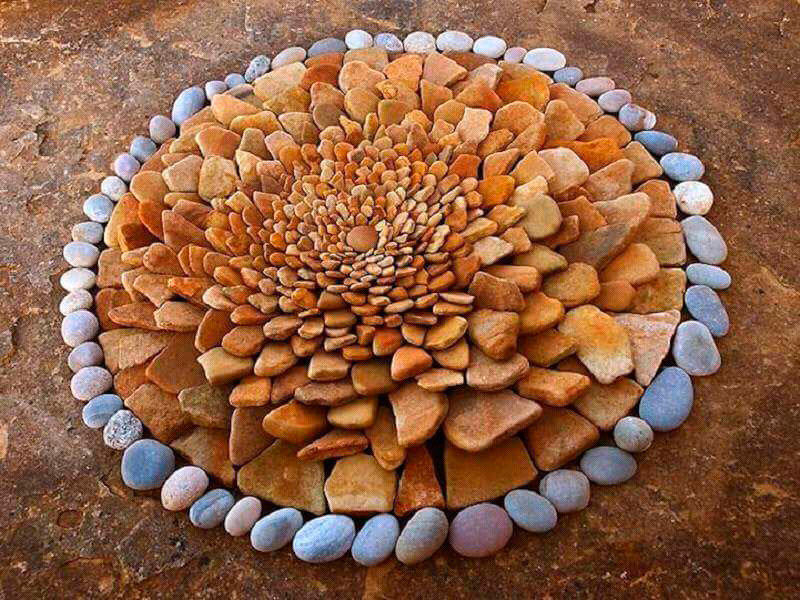
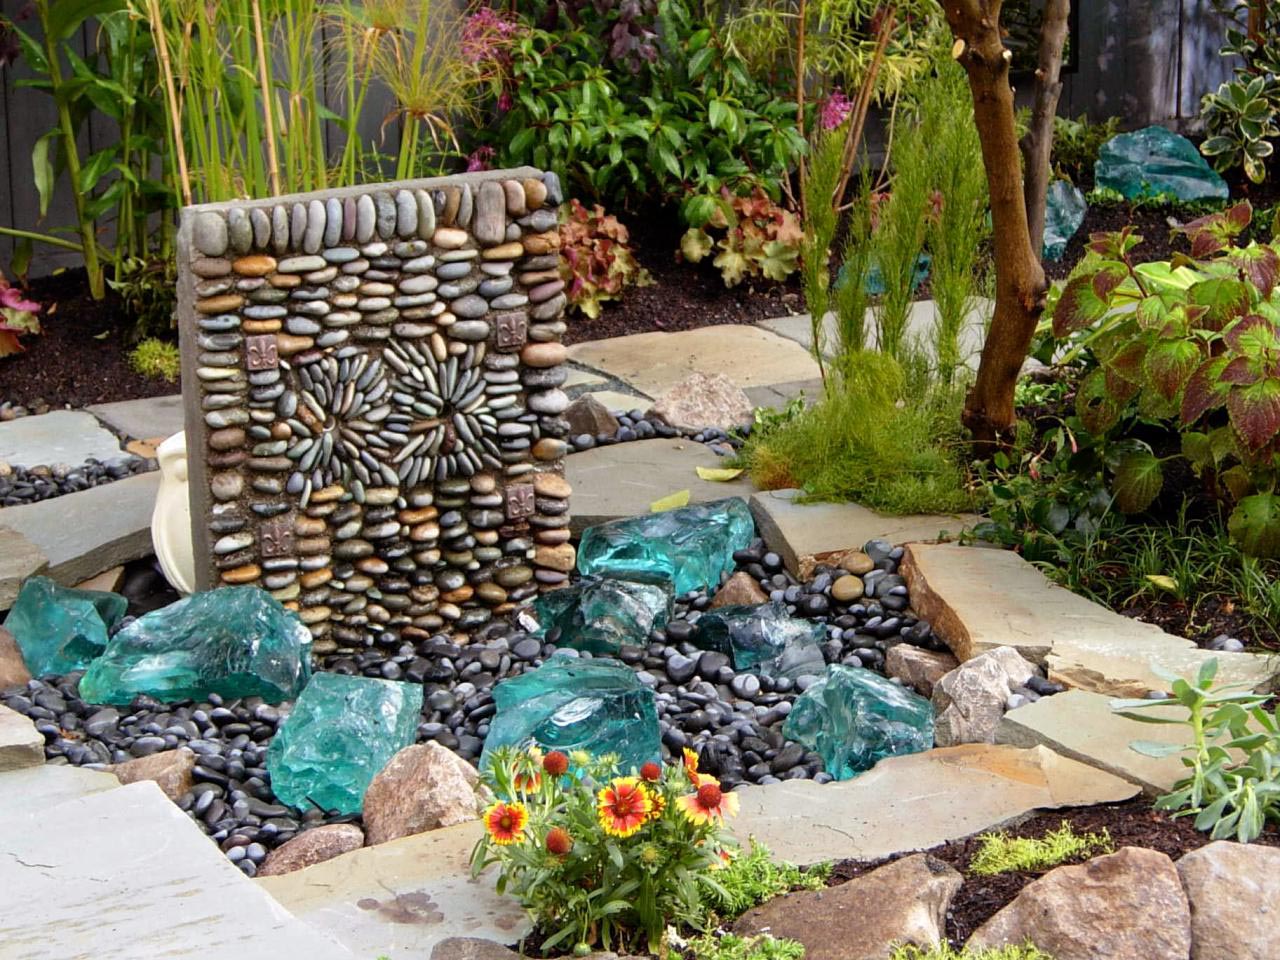
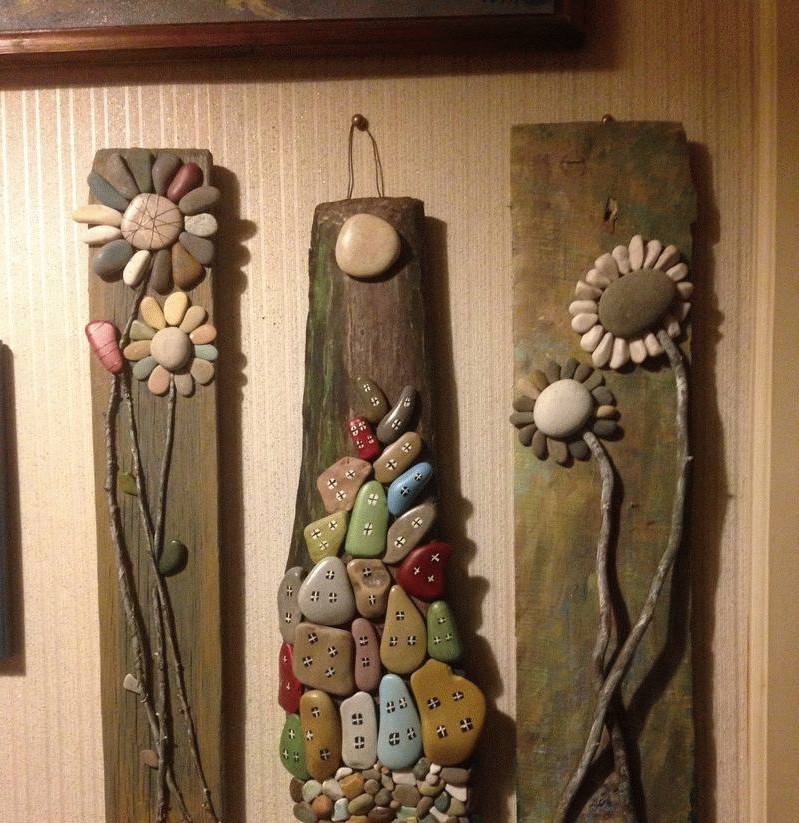
Stone panels and decorations
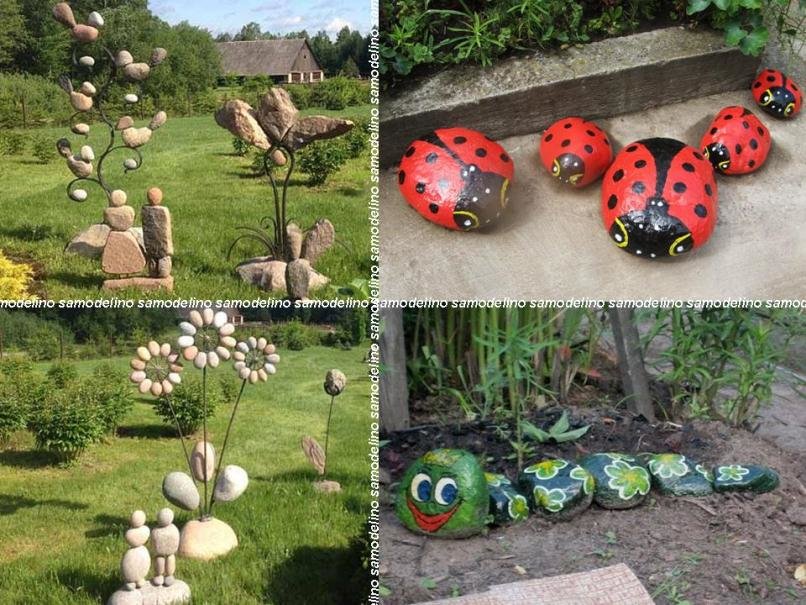
You can create decorative panels and original colorful paintings from natural and painted stones. The plots can be very diverse. Several ideas could be suggested. When arranging a playground, it is better to use fairy tales and the image of animals. For example, a couple of bears will fill the atmosphere with joy. Popular images of flowers and still lifes with fruits. An example of a fairly simple panel is shown - chamomile made of stones and branches
Small jewelry made of stones can replace purchased jewelry. Pendants or souvenirs in the shape of a heart look beautiful. If you paint such a craft beautifully, then it can become a good gift. A simple mandala looks modern, to which magical properties are attributed.
Decoupage stone crafts give particular attractiveness. Using this technique, you can make a beautiful craft from any stone.
It is important to choose an unusual shape of the right size. The technique consists in layer-by-layer gluing on the item of multi-colored napkins, paper or fabric, followed by coating with a special varnish
You can use ready-made pictures for gluing.
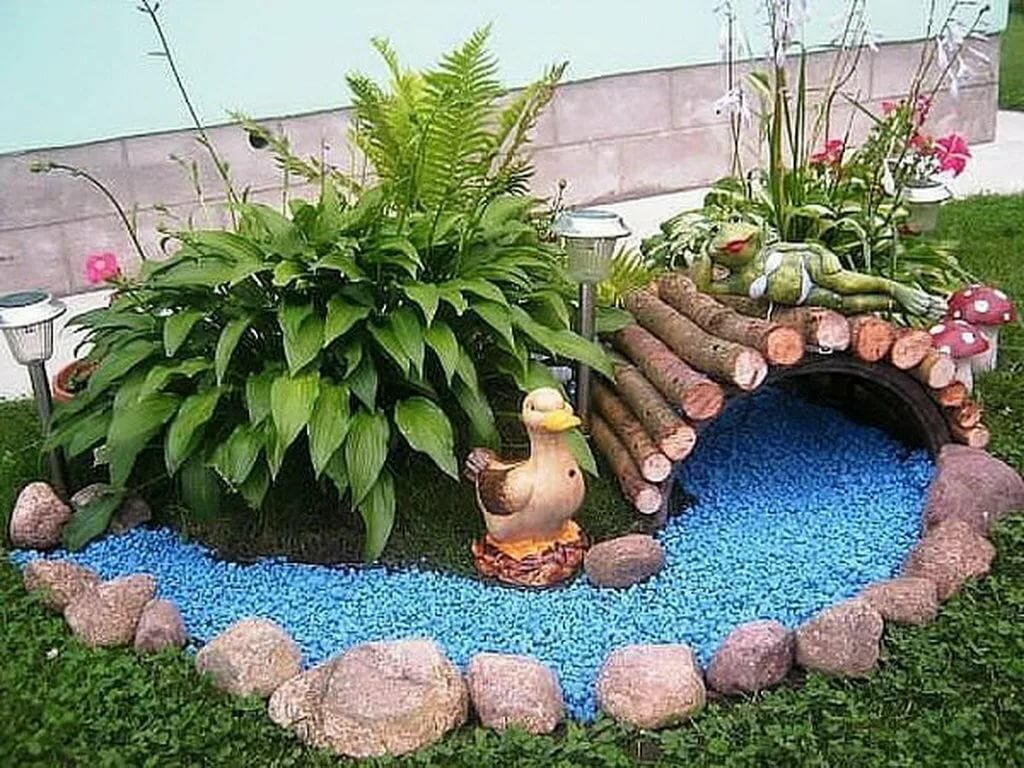
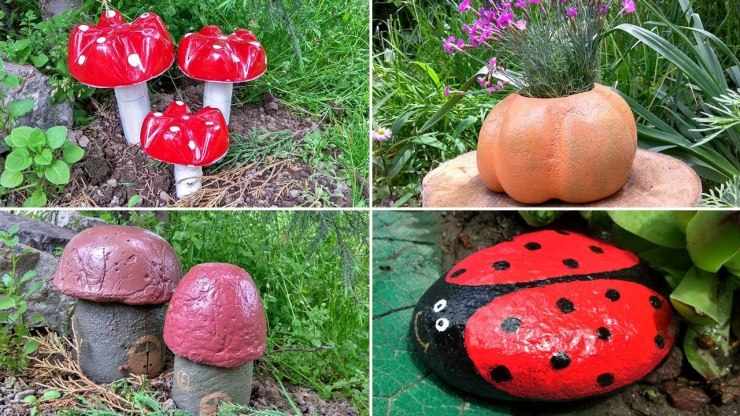
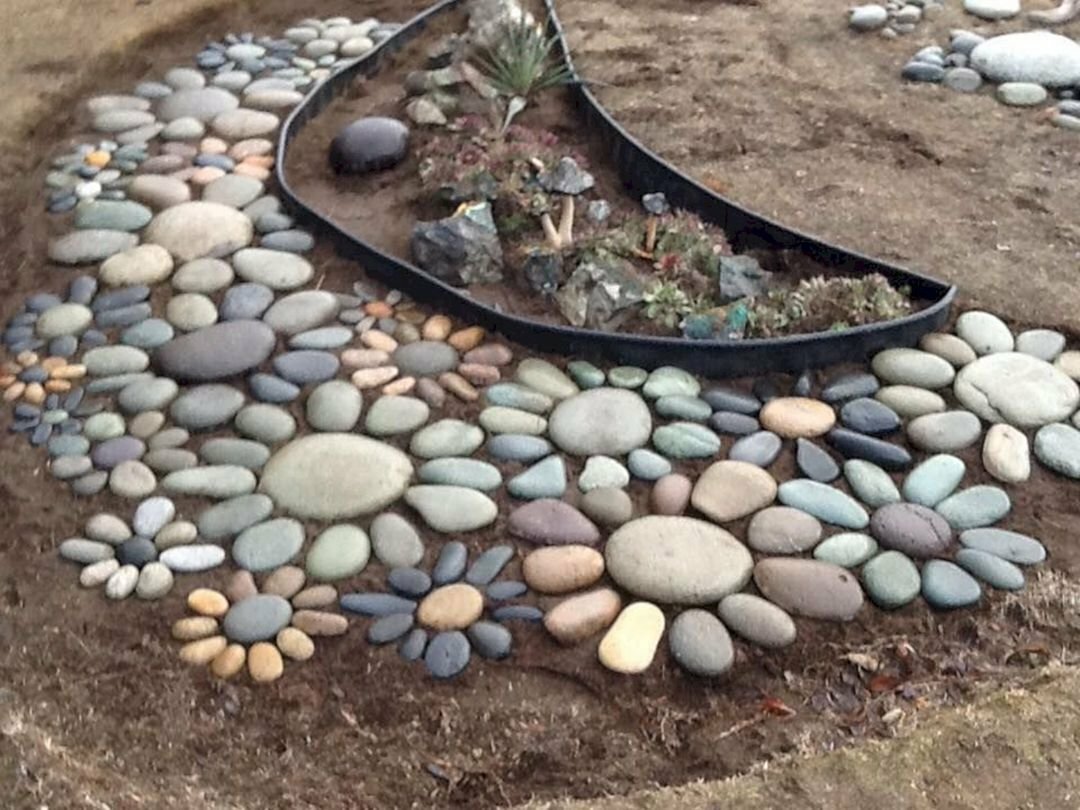
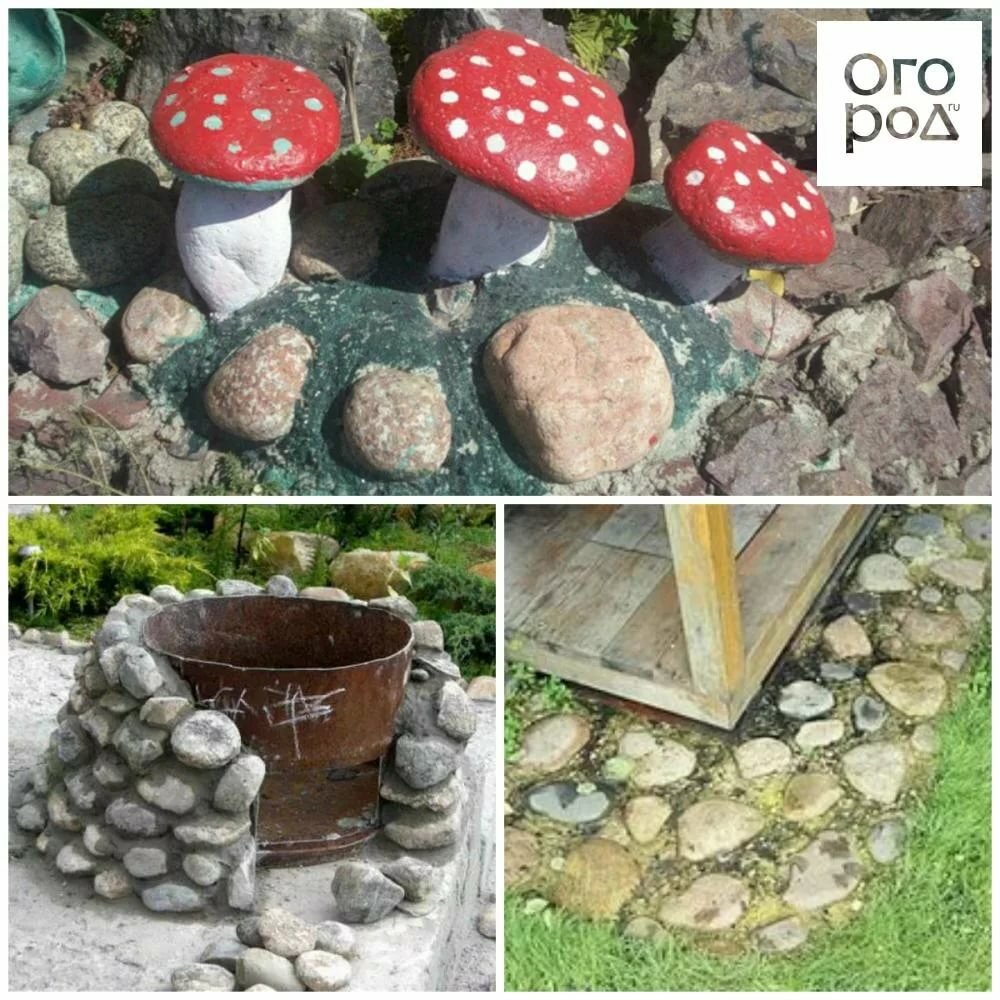
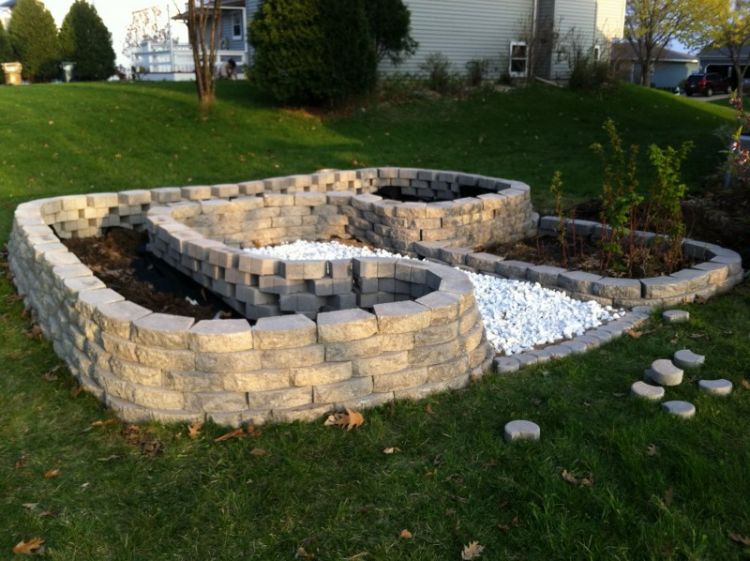
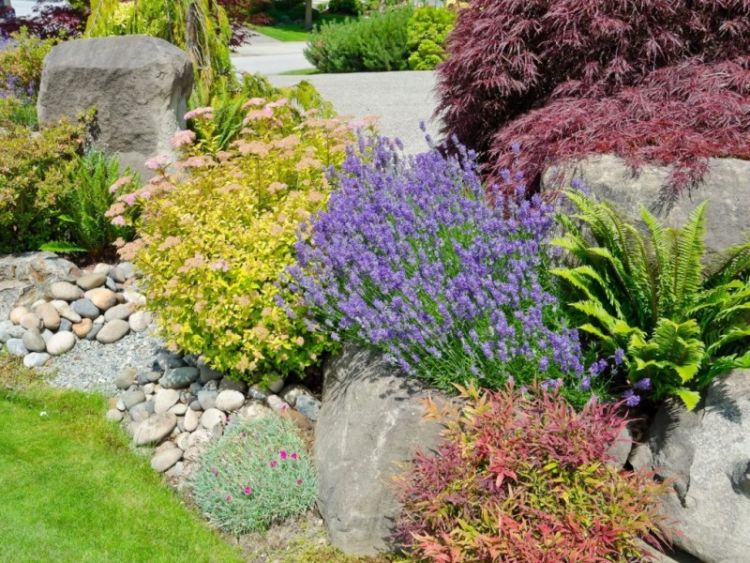
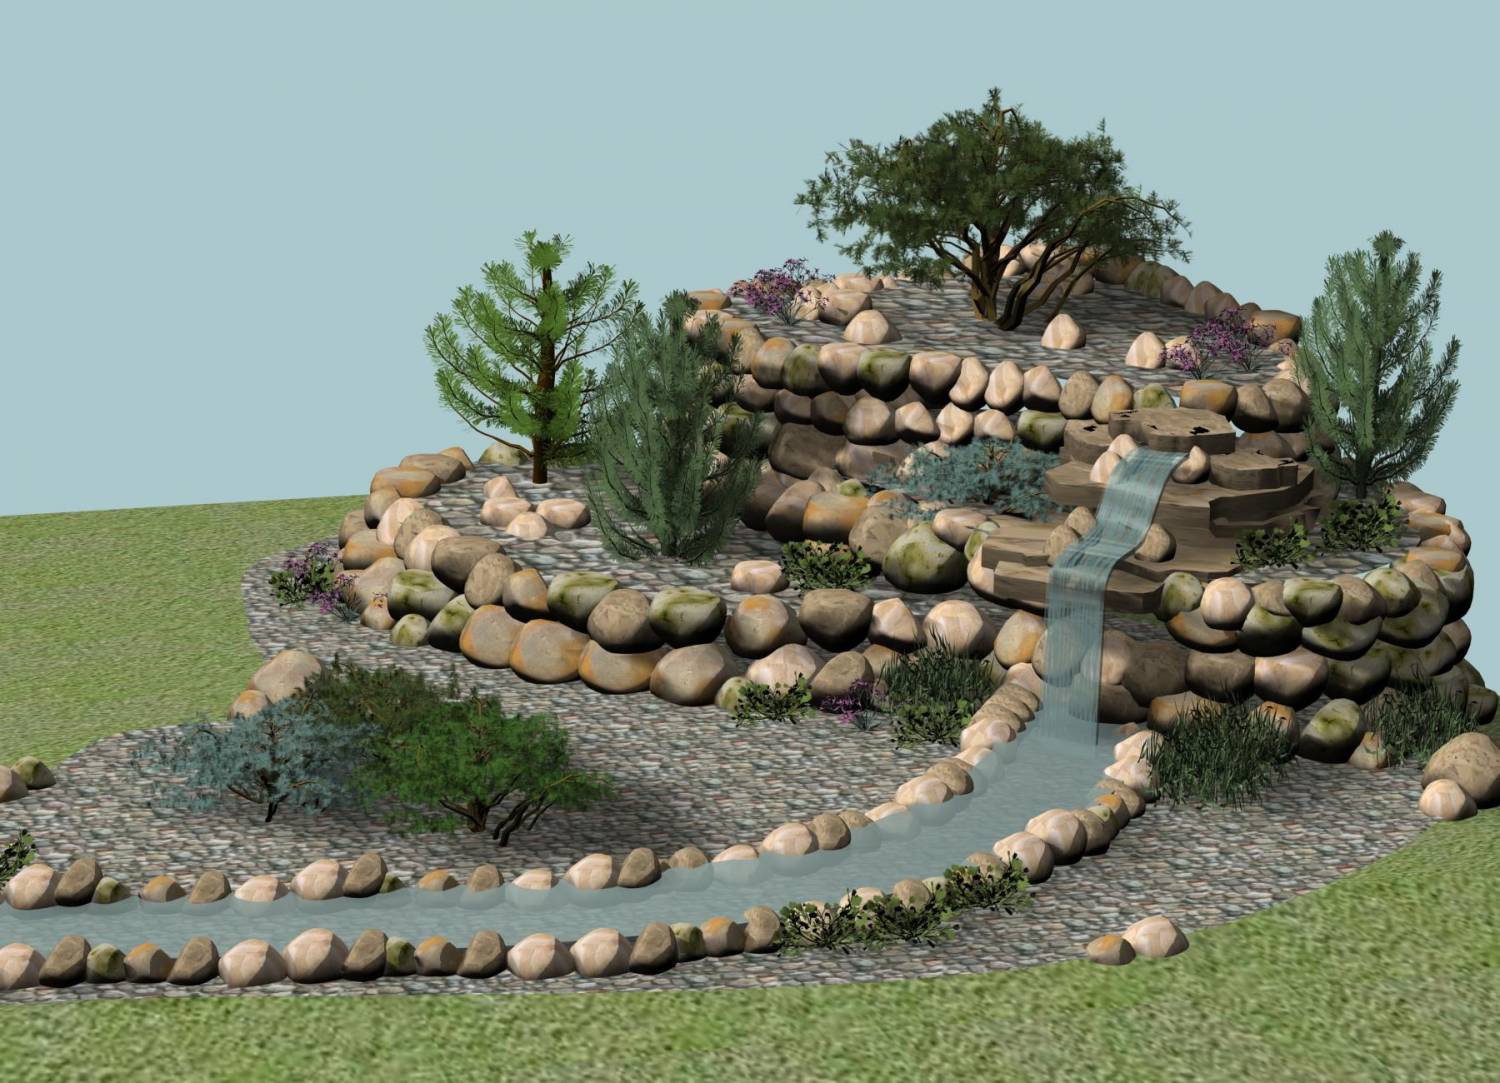
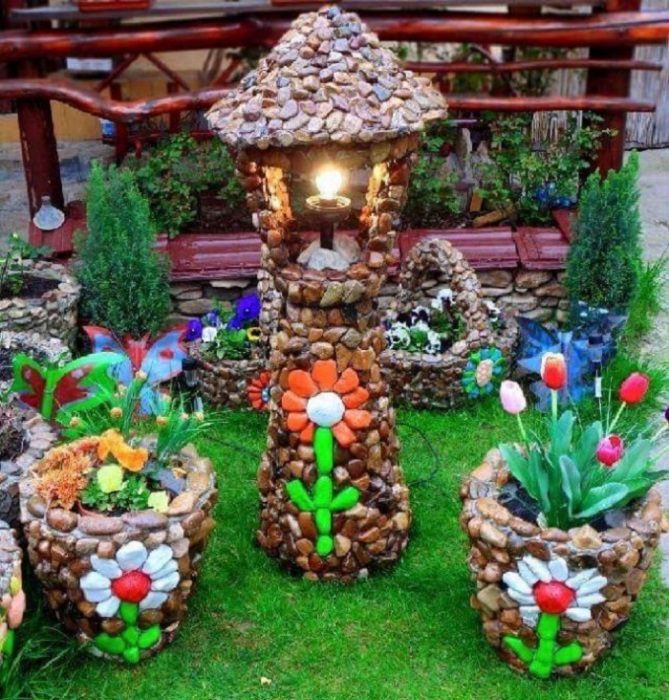
Varieties of garden stone decorations
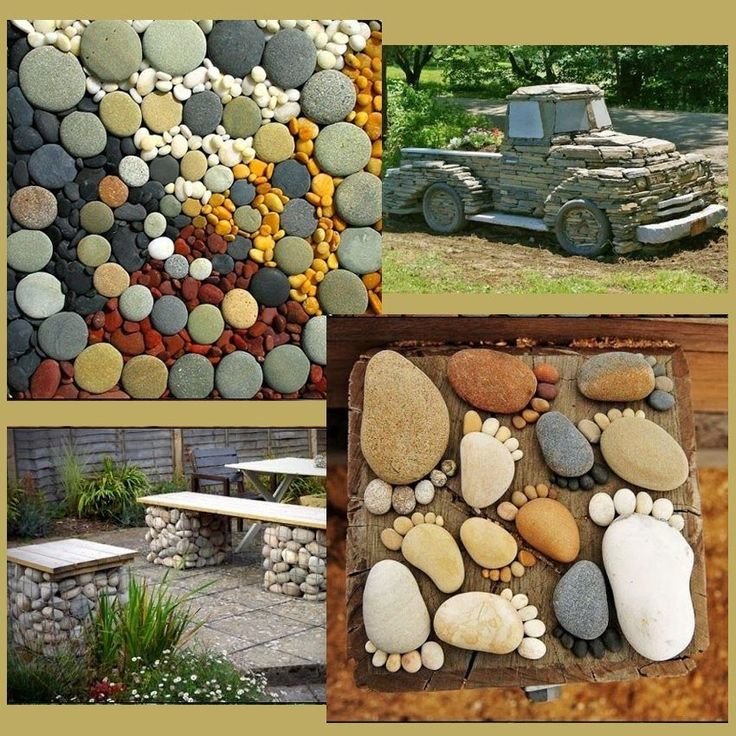
A fairly common decorative element is a stone spiral. It is quite simple to make it - flat stones must be placed on the lawn in the form of a spiral. Such a decoration can also be placed in front of the facade of the cottage - it will look wonderful.
Do you have a lot of small multi-colored rubble? Use a stone for paths in the country. They will not accumulate water, which means that ice will not form in autumn and winter. And if you lay out the pebbles in the form of a patterned ornament, you get not a path, but a dream. Pebbles can be selected not only in color and size, but also in shape.
A slide with stones in the country is already a classic. There is little that can be compared with its picturesqueness. Are you tired of a boring lawn? Dilute it with a stone composition of rubble of different shades.
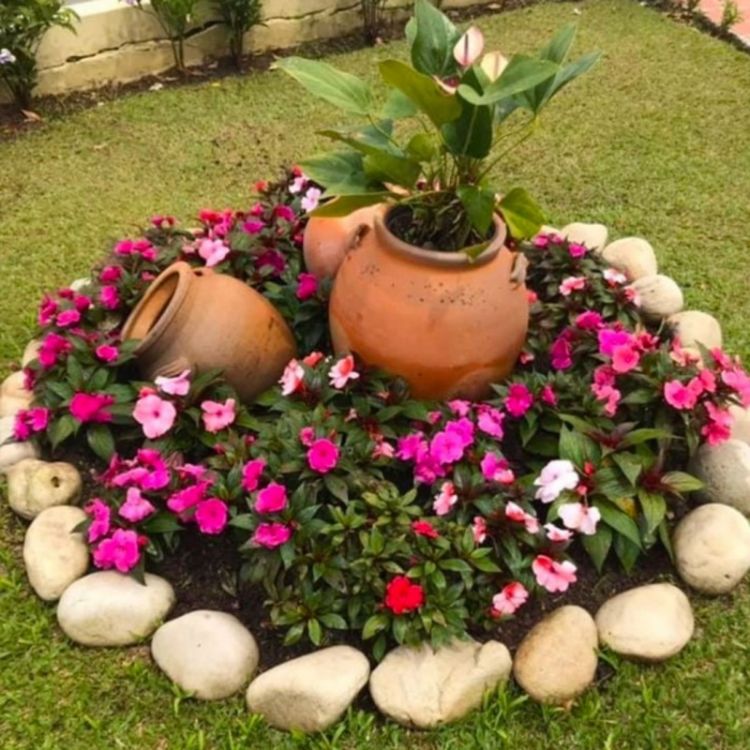
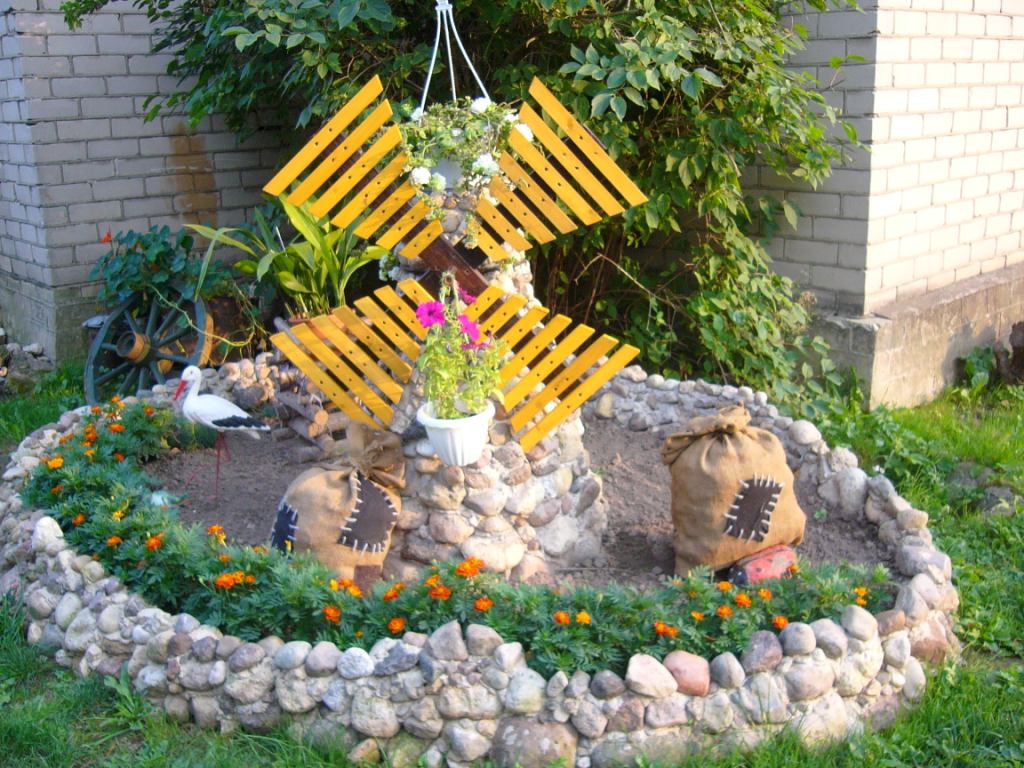
A flower bed made of stones is rightfully considered to be a traditional decoration of the dacha. Even a housewife can do it - you just need to buy cement and pick up stones. A flower garden like this will decorate any lawn.
From stones, using mosaic technique, you can make such a decorative element as a non-fading carpet. It will look especially perfect at the gate.
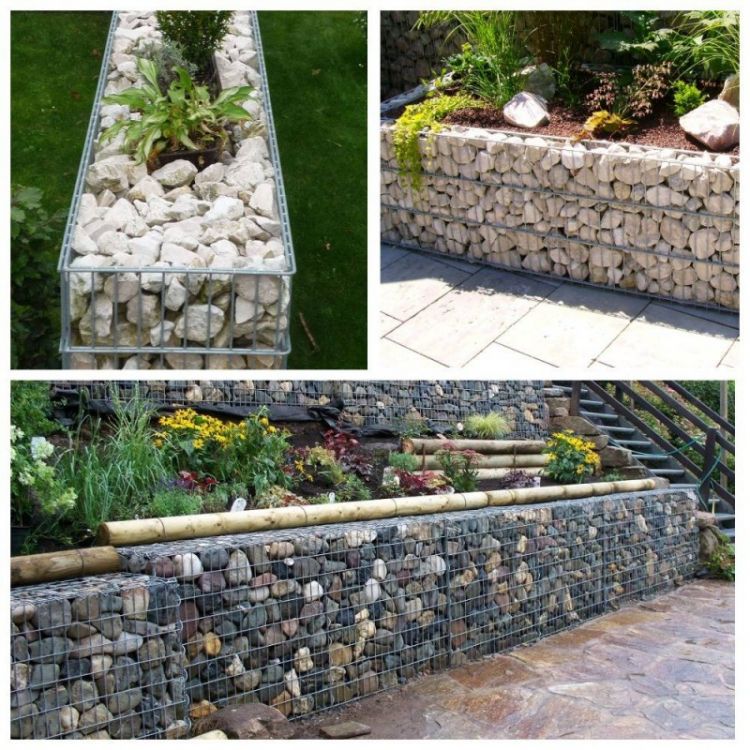
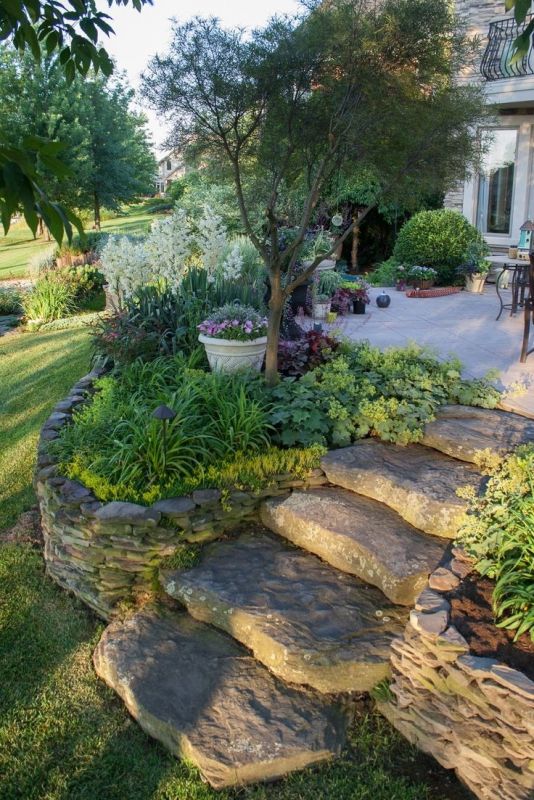
In addition, stones are used to create decorative retaining walls, decorate garden stairs, as original lawns. Sculptures collected from pebbles are considered a special delight. Hewn stone is used for cladding terraces and creating whole stone corners in the garden. You can also create a magnificent rockery out of stone or lay out a beautiful alpine slide.
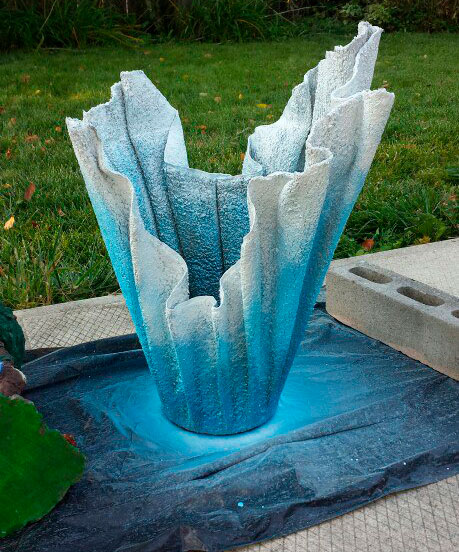
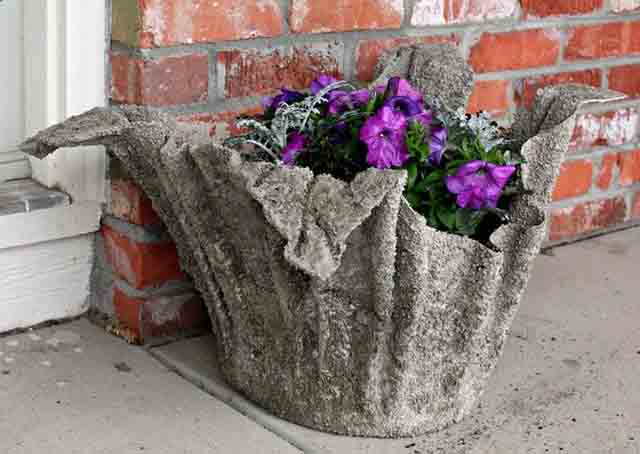
Video on how to make a fabric concrete flower pot
It really captivated me with its simplicity, lightness and cool result. Agree, well, who would have thought, from an ordinary, sometimes unnecessary rag, such incomparable pots are obtained. No one will ever guess, they were created at home, if they dry the same size, or vice versa, completely different and place them around the yard. Plant more different flowers in them and after a certain time - a miracle will decorate the yard with beauty.
At first I left the pots in their original form, but then I began to paint them in different colors and it turned out not to be a probable beauty.
Jellyfish in a flask: how to make a DIY craft
You can make an interesting and original interior decor with your own hands and spend a minimum of effort and money on it.


A beautiful jellyfish in a flask is made very quickly and for such a craft you will need a plastic bottle of a simple design, blue food coloring and a plastic bag (colorless) scissors and water:
- a plastic bag unfolds and a rectangle must be cut out of it, it is put on a finger and carefully wrapped with thread with an indent of 2-3 cm from the top;
- the lower part of the bag, free from binding, is cut into long strips imitating its tentacles or a petticoat, you can not cut it, but just carefully cut the edge;
- an impromptu jellyfish is removed from the finger and turned over, clean water is carefully poured into the resulting container (you can use a liquid with glitter);
- the thread on the jellyfish is tightened more, and water is collected in the bottle, it is necessary to dissolve the dye in it so that it acquires a blue or turquoise hue;
- the blue liquid will turn turquoise if you add a few grains of regular baking soda to it, this will help create a more realistic composition with jellyfish;
- the jellyfish prepared in advance is gently lowered into the blue water, the bottle cap must be tightly closed, you can decorate it using different decorations.
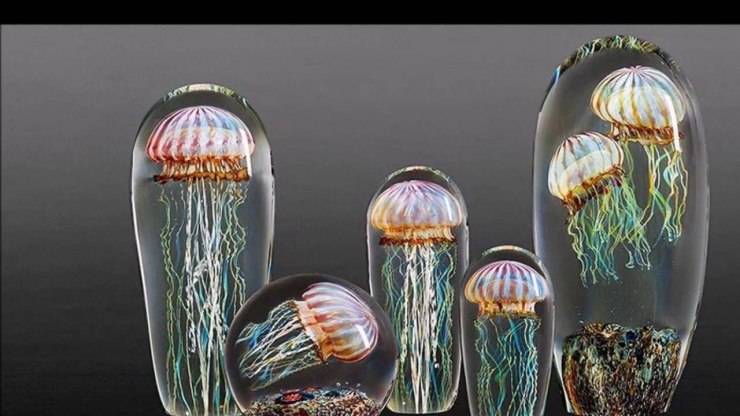
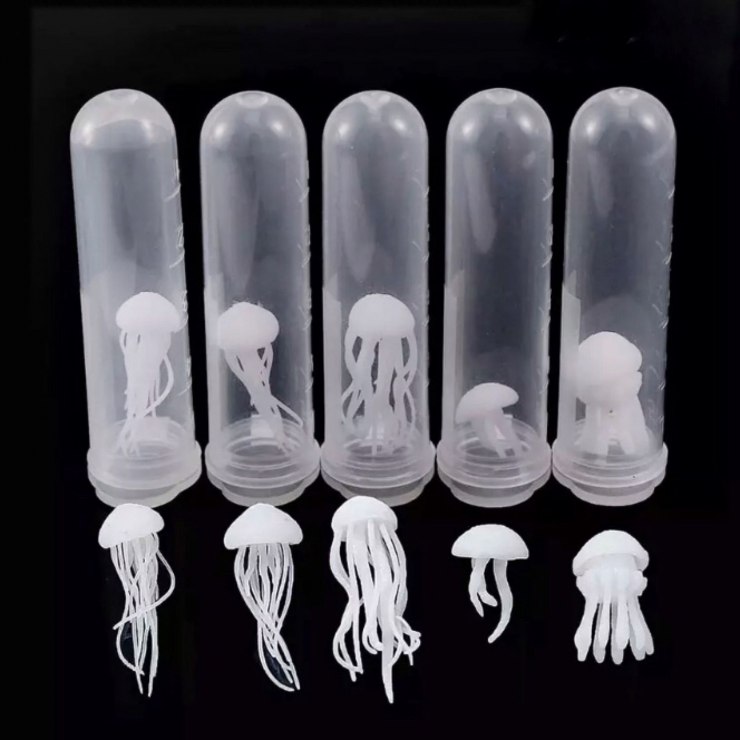
To do this, you can use pebbles and shells collected on the seashore, and the plastic bottle itself can be easily replaced with a glass jar of any shape and volume.


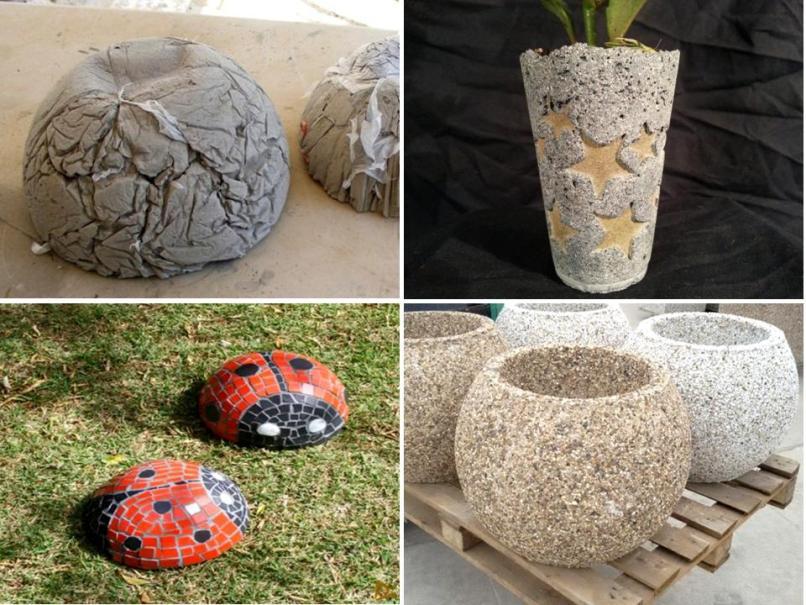
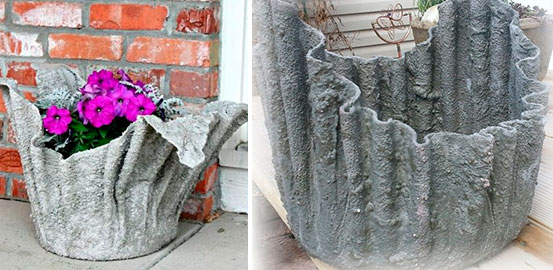
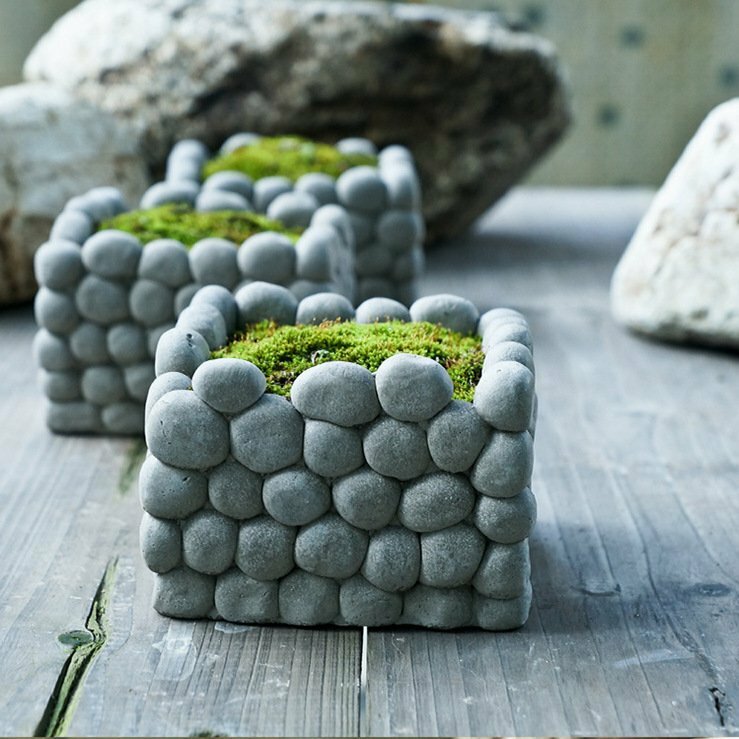
Decorative planters made of rags and mortar
In summer cottages, flowerpots made of a variety of materials and improvised means are quite often found. Now I will tell you how with your own hands create an original cement decoration.

Materials for work:
- rags or absorbent cloth (any size)
- old bucket or tin can (to shape the product)
- dense polyethylene film
- cement, water, sand
- deep metal or plastic container
- drill - with a "whisk" for stirring cement
First of all, in the container for diluting the mixture, you need to put a rag from which you will make the pots, and note the volume occupied by it. After that, water is poured - up to the level that the rag occupied. In a ratio of 1: 3, cement is poured and sifted sand is obligatory, mixed thoroughly.
After the cement mixture is ready, you can start creating the original planter:
- Wrap the bucket with plastic wrap. So the finished product can be easily removed from the mold.
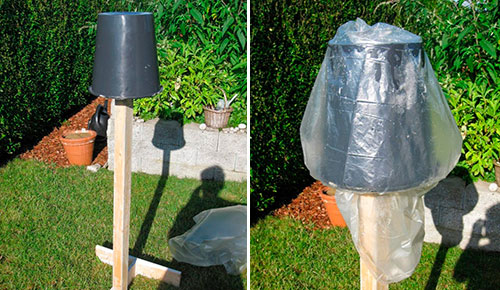
- Place a rag in the solution for 10 minutes. Make sure there are no dry spots on it.
- Place a rag on top of the mold to drain off excess cement.Then straighten it so that the bottom of the future vase is as even as possible. Give the edges a look.
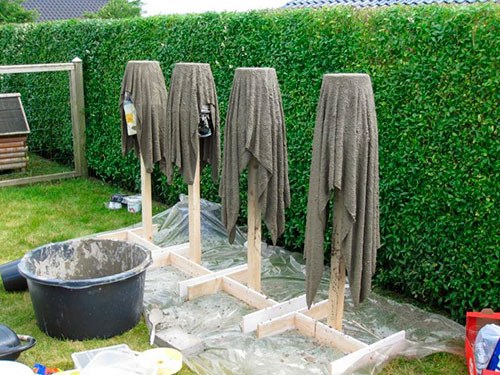
- Leave the garment to dry - this step will take about 72 hours.
- Remove the completely dried pots from the mold.
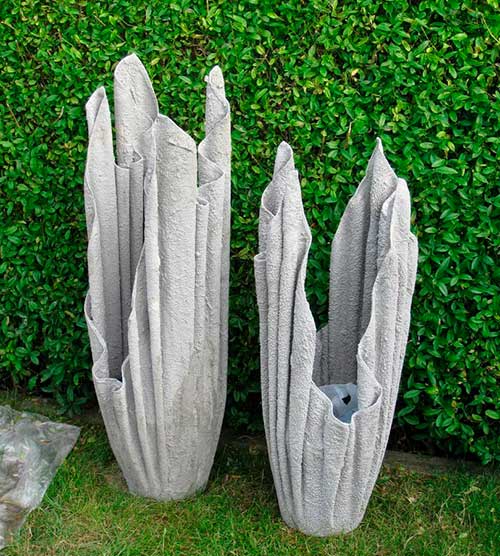
To make the vase brighter, you can paint it over concrete. Although without staining, it will be a wonderful decoration for your site!
And finally, two tips:
- if you find defects on the surface of a dried product - do not be discouraged! They can be removed with ordinary silicate glue. To do this, take a brush and completely cover the vase with undiluted glue.
- you can cut or shape the edges with a hacksaw. And so that the corrected area does not stand out, it is treated with a coarse-grained abrasive mesh for drywall.
It's so easy to transform your site by making an unusual piece of jewelry out of materials that you might even be about to throw away.
Crafts for kindergarten from your own garden
A lovingly decorated and well-groomed site is sure to bring a rich harvest. And then it will already become the basis for creativity. Educators hold contests or exhibitions every year, asking children and parents to bring crafts to the garden from vegetables.
Here are some ideas:
With skewers or sharply sharpened sticks, you can fasten five to six apples together. It turns out the body of the caterpillar. We fix one more fruit over the last apple - the head. On it we draw or pin bead eyes on a French pin. Toothpicks will serve as horns, on which you can string rowan berries.
A friendly company of funny little people can be seated in an eggplant car. The vehicle will need wheels made from plastic covers, and the passengers will be: a potato, an onion, a pear and an apple. Add fun faces and greenery to your vegetables and fruits, and you're good to go!
Cauliflower resembles a herd of white fluffy lambs. Disassemble the head of cabbage, add the legs and head from a small inflorescence - the craft is ready.
Pumpkins make fancy houses for fabulous creatures or a carriage for Cinderella. Nice and well-fed piglets come out of the zucchini. The halves of bell peppers resemble the bright crowns of autumn trees, and carrots will serve as the trunk. A small part is cut from the thick end for stability, and you can collect a grove.
This is not a complete list of possible ideas. The imagination of the craftsmen is limitless, as are the materials for the implementation of original ideas.
Garden paths
Due to the fact that the stones differ in different shapes and sizes, but at the same time have increased strength to the effects of the external environment (including loads), this material is often used for laying garden paths. For such purposes, various cobblestones are used:
- small and large;
- with a smooth and rough surface;
- with pointed corners and rounded.
>If you plan to pave a stone path, it is recommended to select a bright material or paint the cobblestones with persistent paint. This will create a path that will remain visible in any weather.
Laying a stone path is straightforward. This will require:
- A trench is dug on the site with a width and length that correspond to the dimensions of the planned path.
- A drainage layer 10-15 centimeters thick from gravel or crushed stone is laid. This is to ensure that the water does not wash out the track.
- Non-woven textiles, 4 centimeters of sand and 15 centimeters of concrete are punctured on top of the simulator.
- A sand-cement mixture is laid (1 part of sand to 4 parts of cement) and compacted.
- Stones are laid out in accordance with the selected pattern and tapped with a rubber hammer.
- The path is watered with water.
To simplify the paving, it is recommended to place a board over the stones and tap on it with a hammer.
It is important to consider that the path should be located at a distance from the roots of the trees.
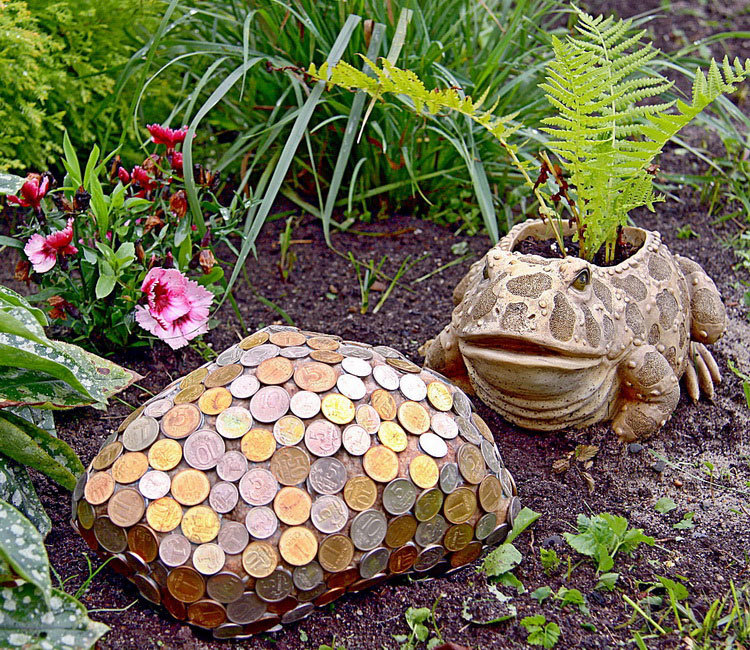
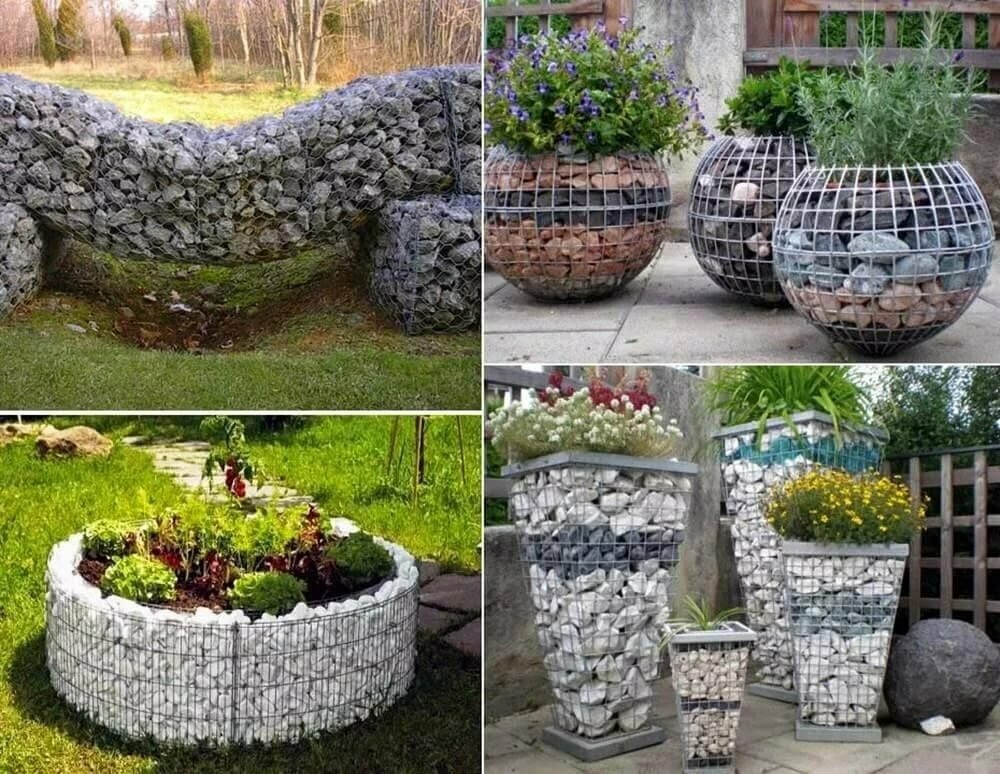
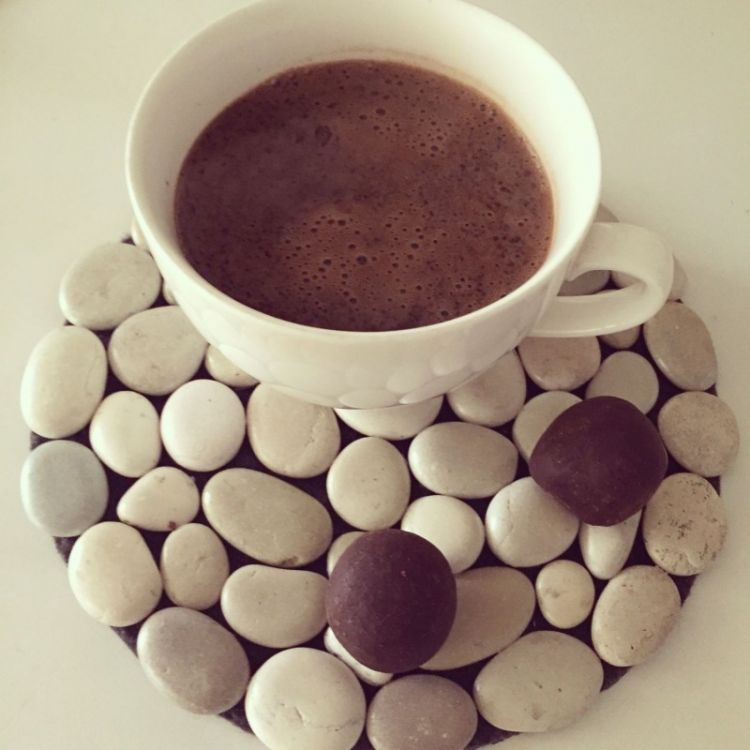
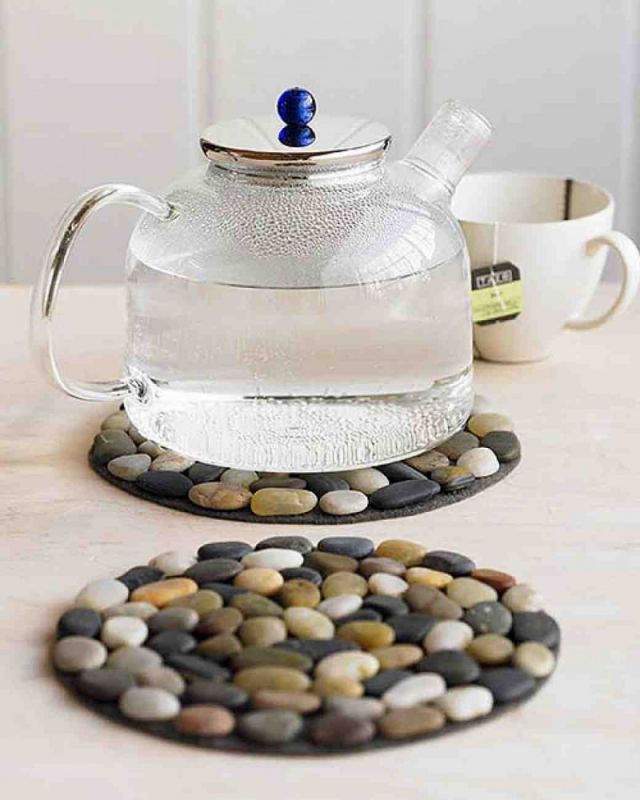
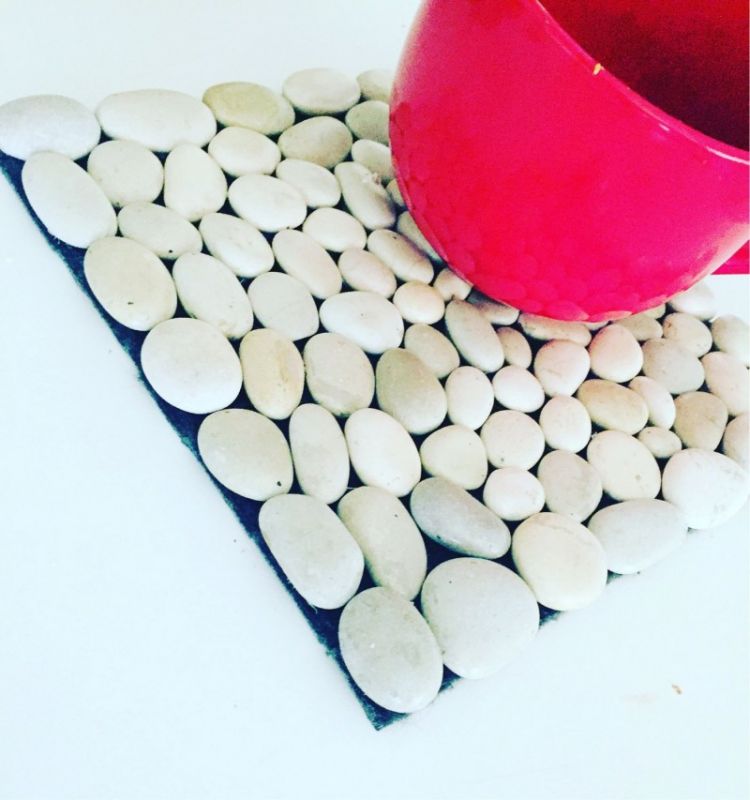
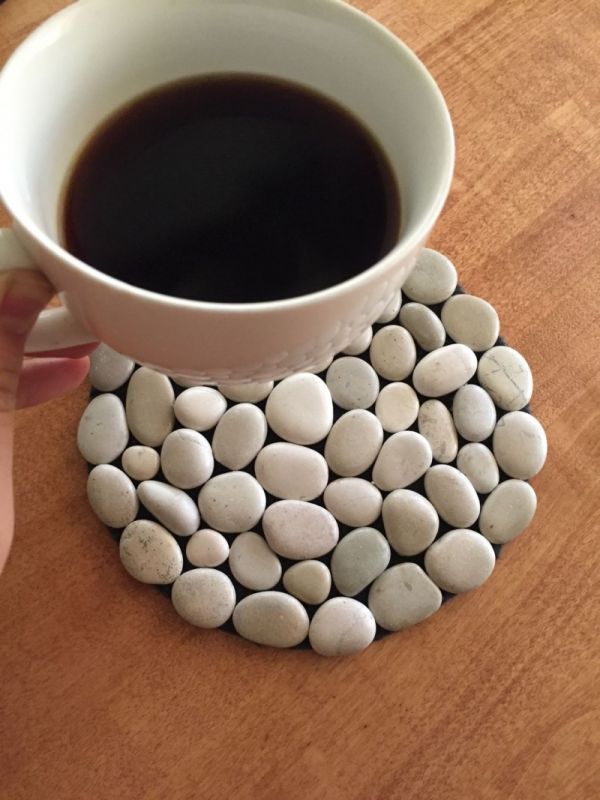
Home decor made of stones
Small pebbles, pebbles can be the basis for unique crafts that will add zest to your home interior. Such DIY crafts look very beautiful for a house made of stones:
- vase of the five elements;
- Frame;
- hot stand;
- hallway or bathroom rug;
- candlestick;
- fridge magnet;
- watch.
To create a simple fridge magnet from this material, you just need: a flat pebble, acrylic paints, a thin brush, a small magnet and silicone glue. Using paints and a brush, apply an image to the stone as you wish, let it dry.
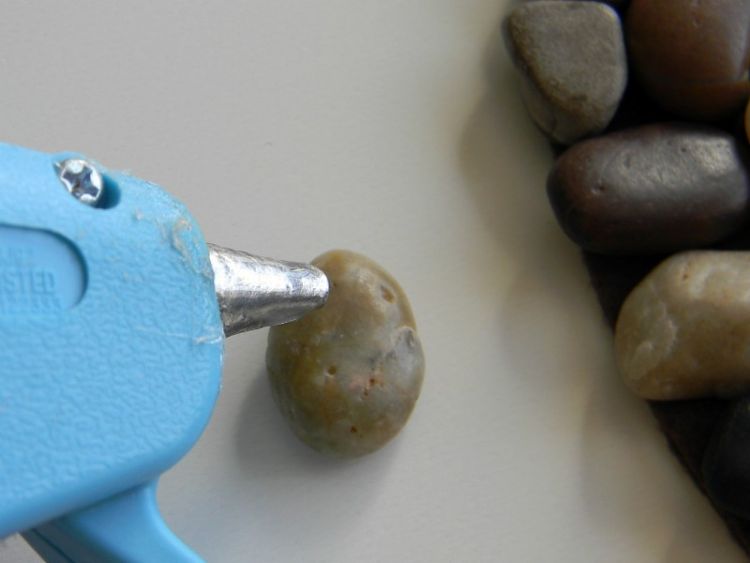
Glue the magnet with silicone glue to the back of the stone, press it well for a few minutes. The finished work can be hung on the refrigerator.

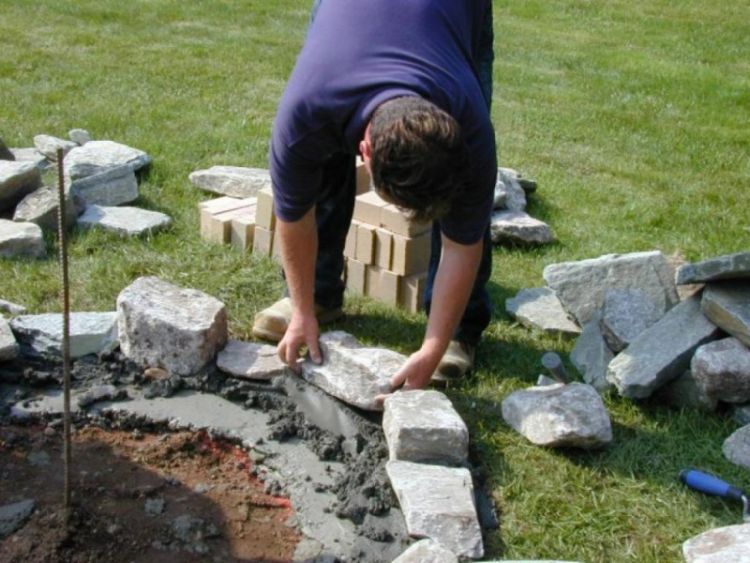
We make a flower bed with our own hands
Before making a flower bed, you need to carefully plan everything, prepare the site, purchase building material. And now, in order:
Pay attention to the location of the territory, its illumination, composition and moisture content of the soil. This will affect the choice of flower beds, plant varieties
For example, at high humidity, high structures are preferred.
Draw a sketch, make a markup


They calculate and purchase materials.
Carefully remove the fertile soil.
If necessary, dig a trench and lay the foundation.
In masonry, you can use cement mortar. The largest stones are placed below, with each subsequent row their size decreases
For the top layer, stones with an even side are used.
After completion of construction work, drainage is installed.
Only after that, the fertile soil is spread, they give time for it to settle.


Fashionable stone garden
It is necessary to understand that laying out a small mosaic or picture from a stone is the easiest option. It is used by children when doing assignments. But, if you approach this lesson creatively, then you can lay out real paintings that will decorate the interior of a very different style direction.
But, this is far from the only option for crafts. It is necessary to understand that with the help of such decorations you can decorate not only a room, but also summer cottages. The scale can be very different.
Crafts for children
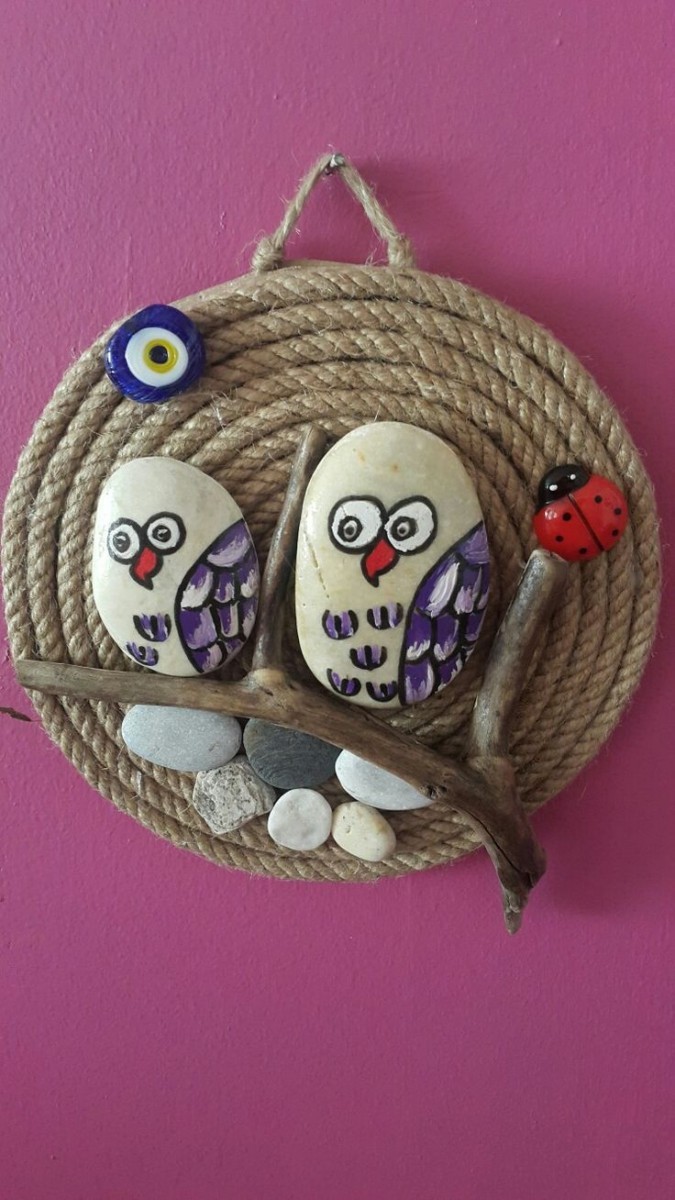
The easiest option, since you can turn on your imagination and perform, for example, cute owls sitting on a branch.
For them you need to prepare:
- The right size stones.
- Acrylic paints.
- A thin brush.
- Very thick cardboard or thin plywood.
- Instant glue or liquid nails.
Of course, this version of the craft can depict a variety of objects and animals.
Of course, you will also need intense fixing glue or liquid nails here. It is better to choose a wooden base or ceramic dish as a base. They can be purchased at specialized stores.
In this case, the composition can be very diverse. Its motive and plot depend only on the fantasy of an adult and a child who fulfill it.
In this case, you can not use paints - there will be enough different natural shades - this is enough for naturalness.
Jewelry from stones
If you have special tools, you can drill holes in the stones and string them on chains or bundles. Thus, a variety of jewelry is formed, ranging from pendants to earrings.
If desired, you can use either natural stones or paint them with acrylic paints. It all depends on the imagination and the original idea.
If a person has good taste, then real works of art can be made from stones.
It is necessary to take as a basis a dense canvas fabric or a thin plastic mesh with a fine mesh. It is necessary to come up with a drawing that will be displayed on a napkin. It is easier to use geometric patterns or silhouette images. It is for the silhouettes that you need to choose only 2 colors that will contrast with each other.Next, you need to put the stones on the glue and fix them in the right order.
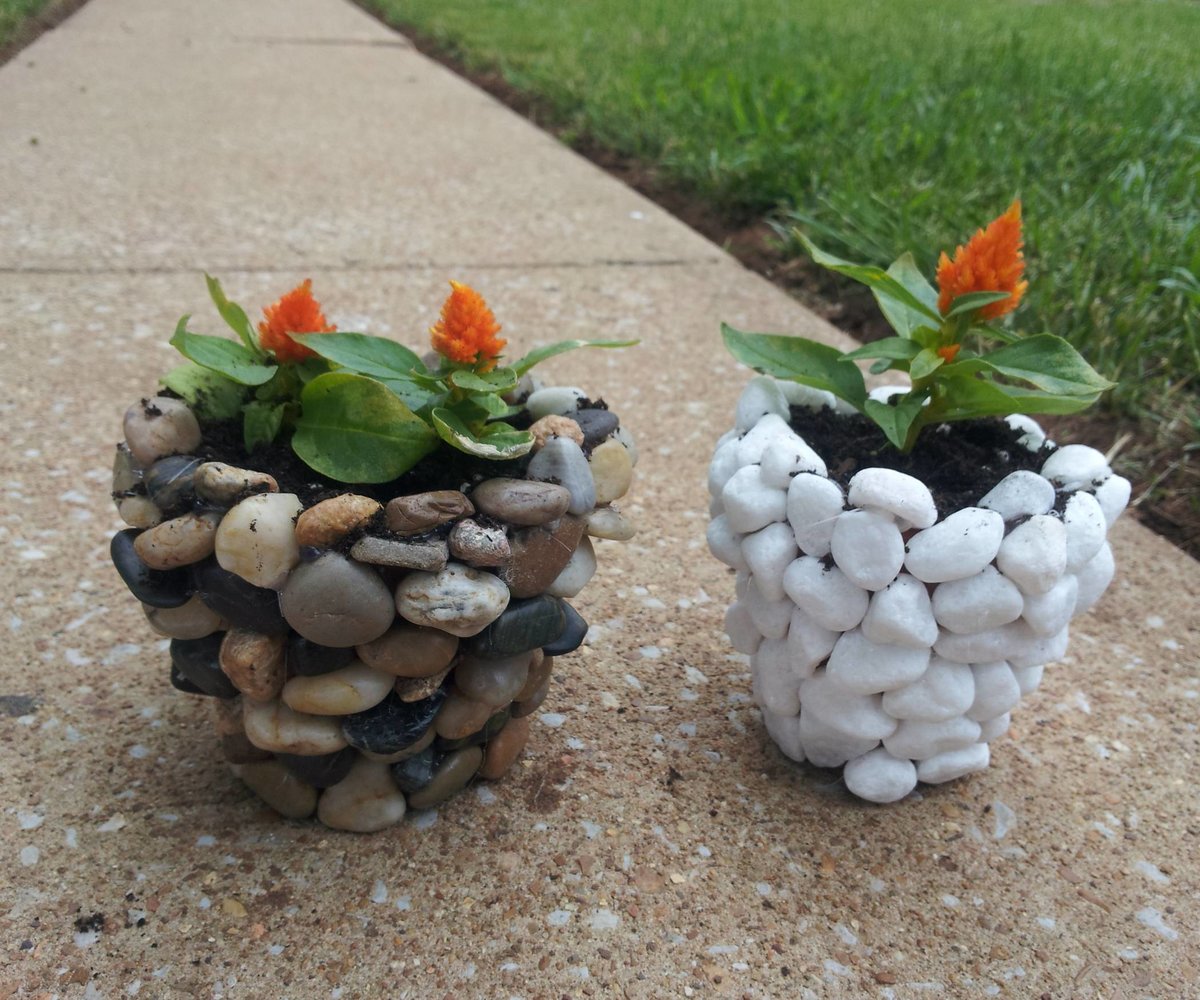
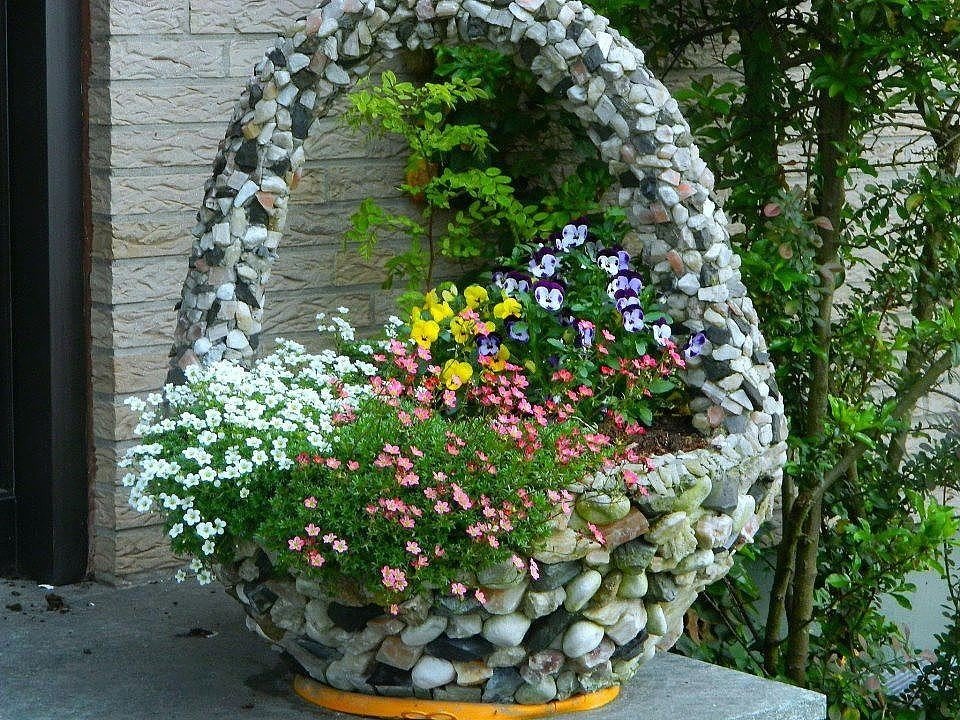
Flowerpots
If you want to change the pots in which the plants grow, you can easily do this by decorating them with a wide variety of pebbles. They can be used in alternation with other elements such as shells.
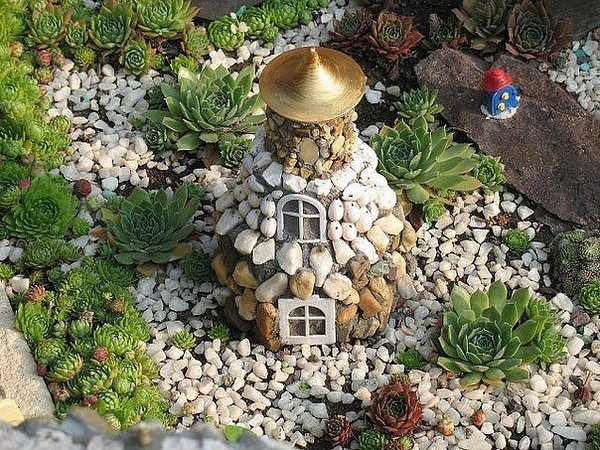
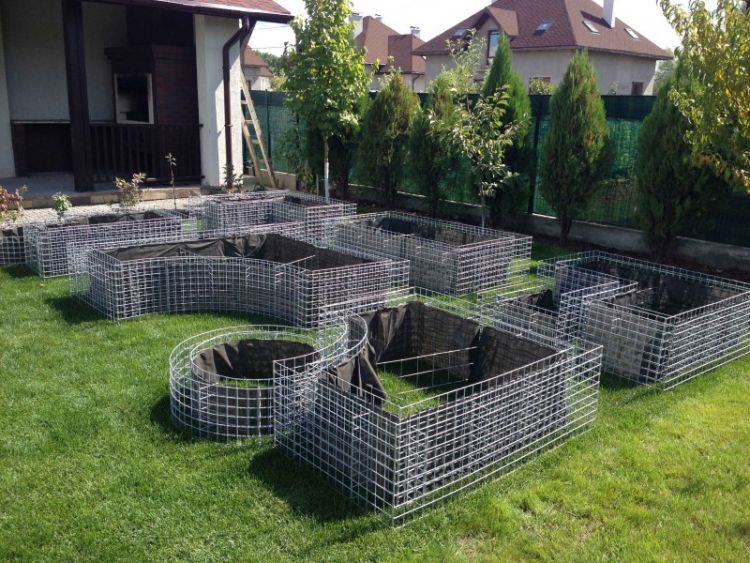
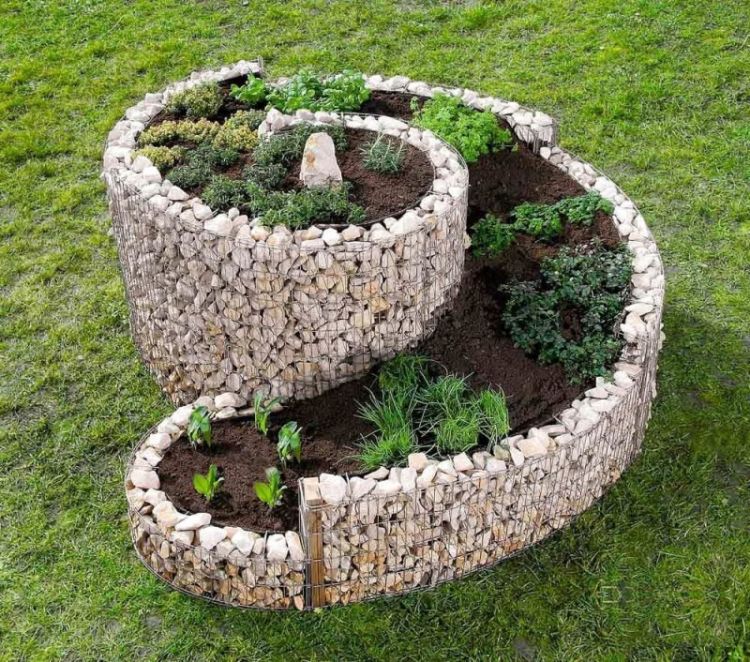
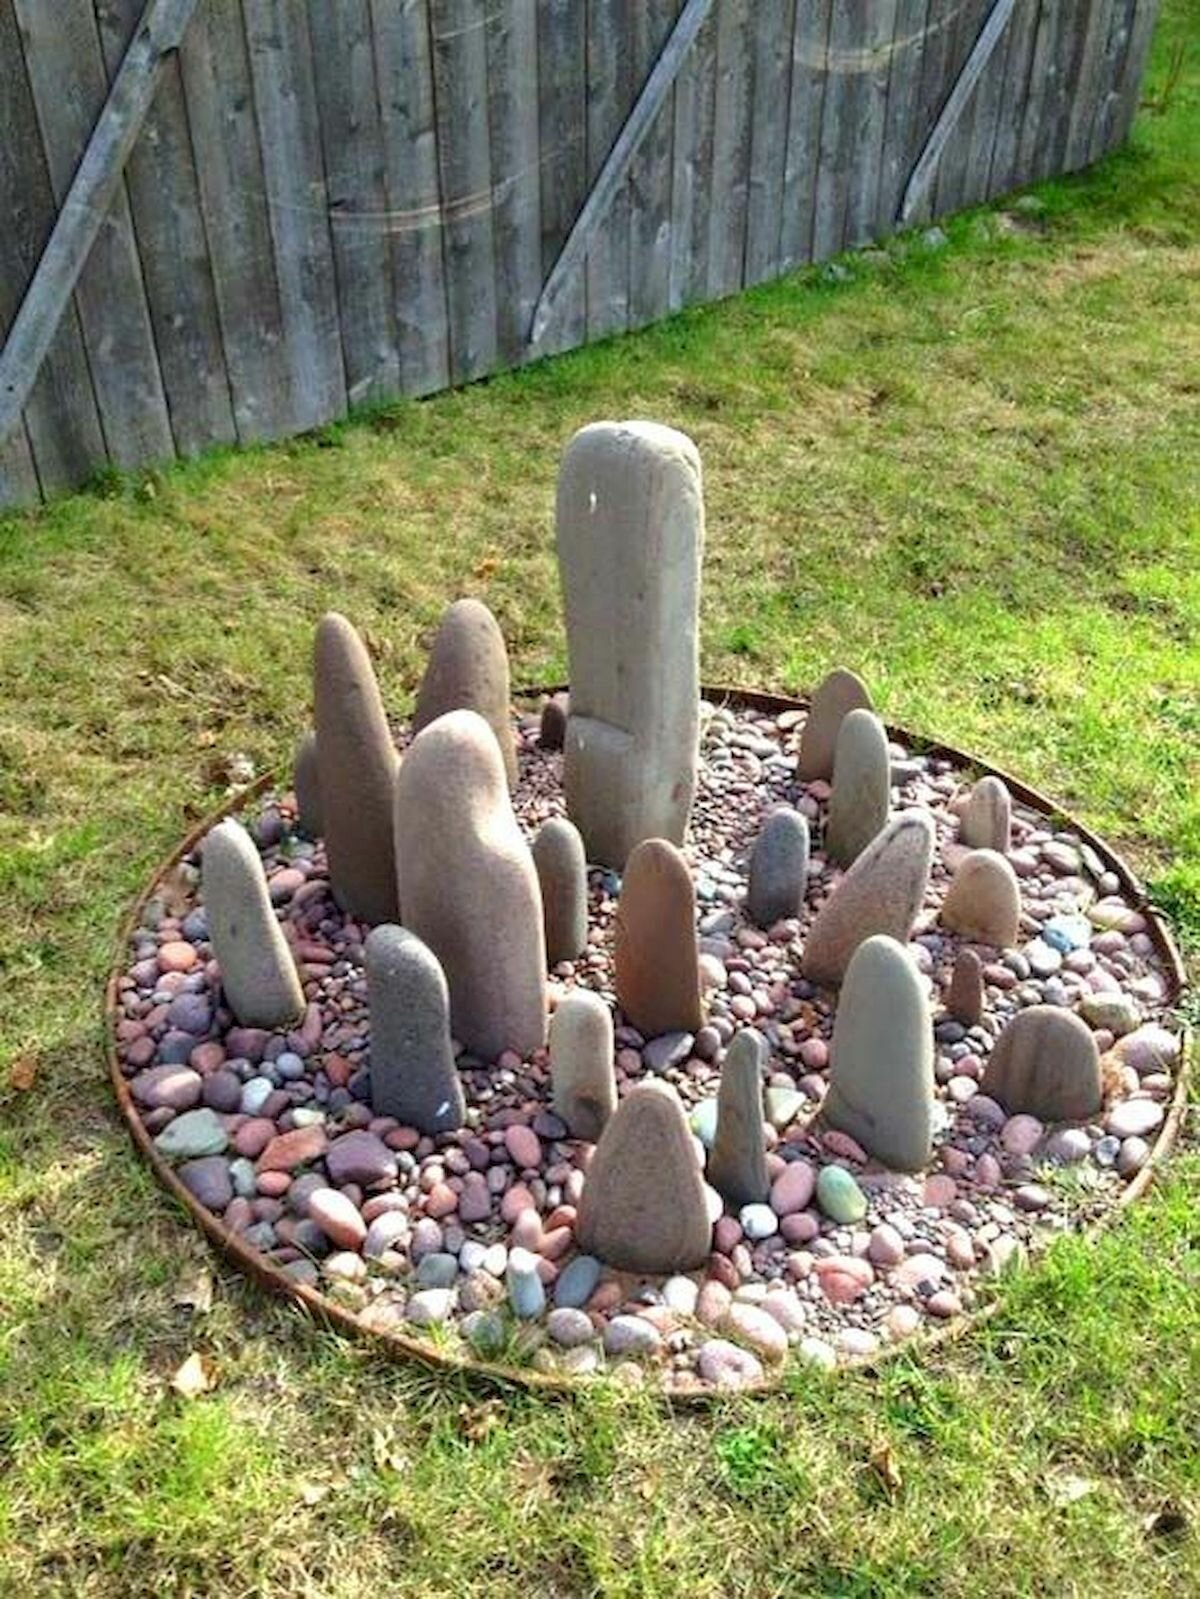
Creating a garden of stones is a rather time-consuming process. This is because it involves cutting the elements. Stone gardens come in all shapes and sizes. Proper surface preparation is essential. A stone garden is a flat area covered with pebbles or fine gravel. Instead of trees, stones are placed on it.
The seeming randomness of the placement of cobblestones and boulders should not deceive you. The entire stone ensemble obeys certain laws, which are based on Japanese philosophy.
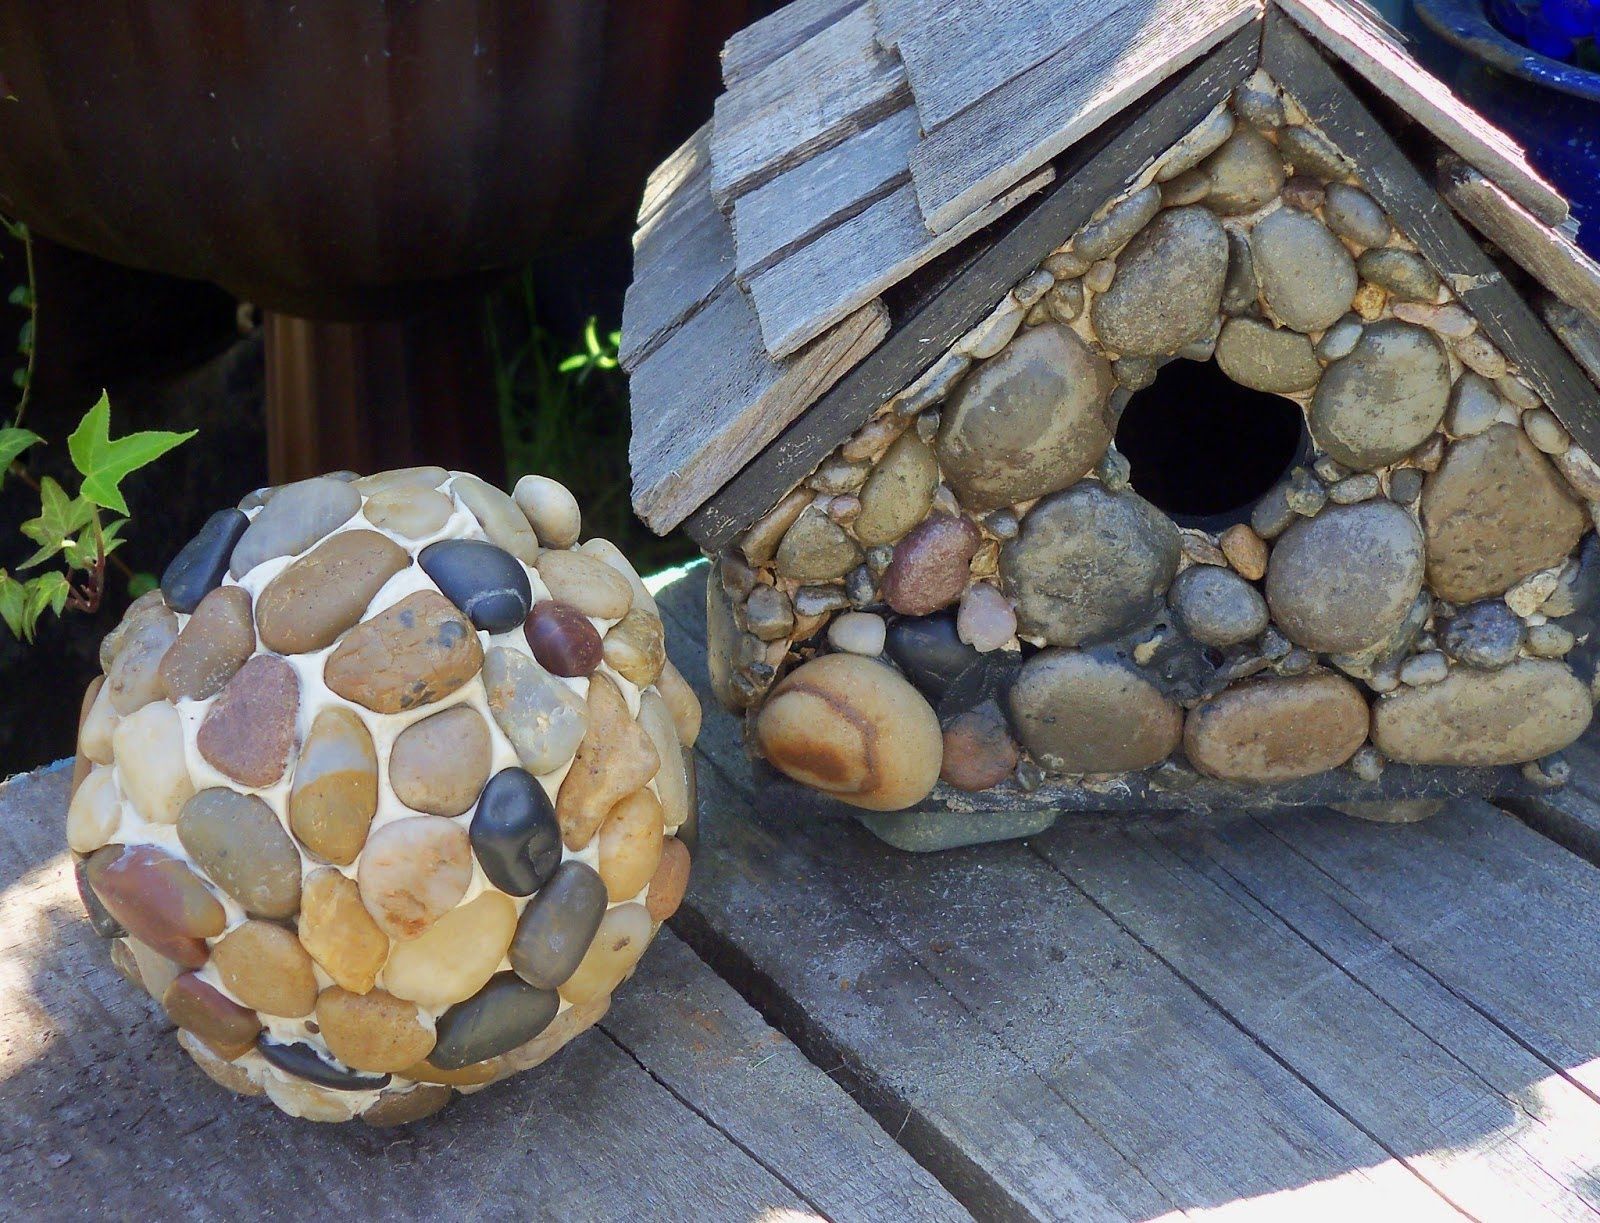
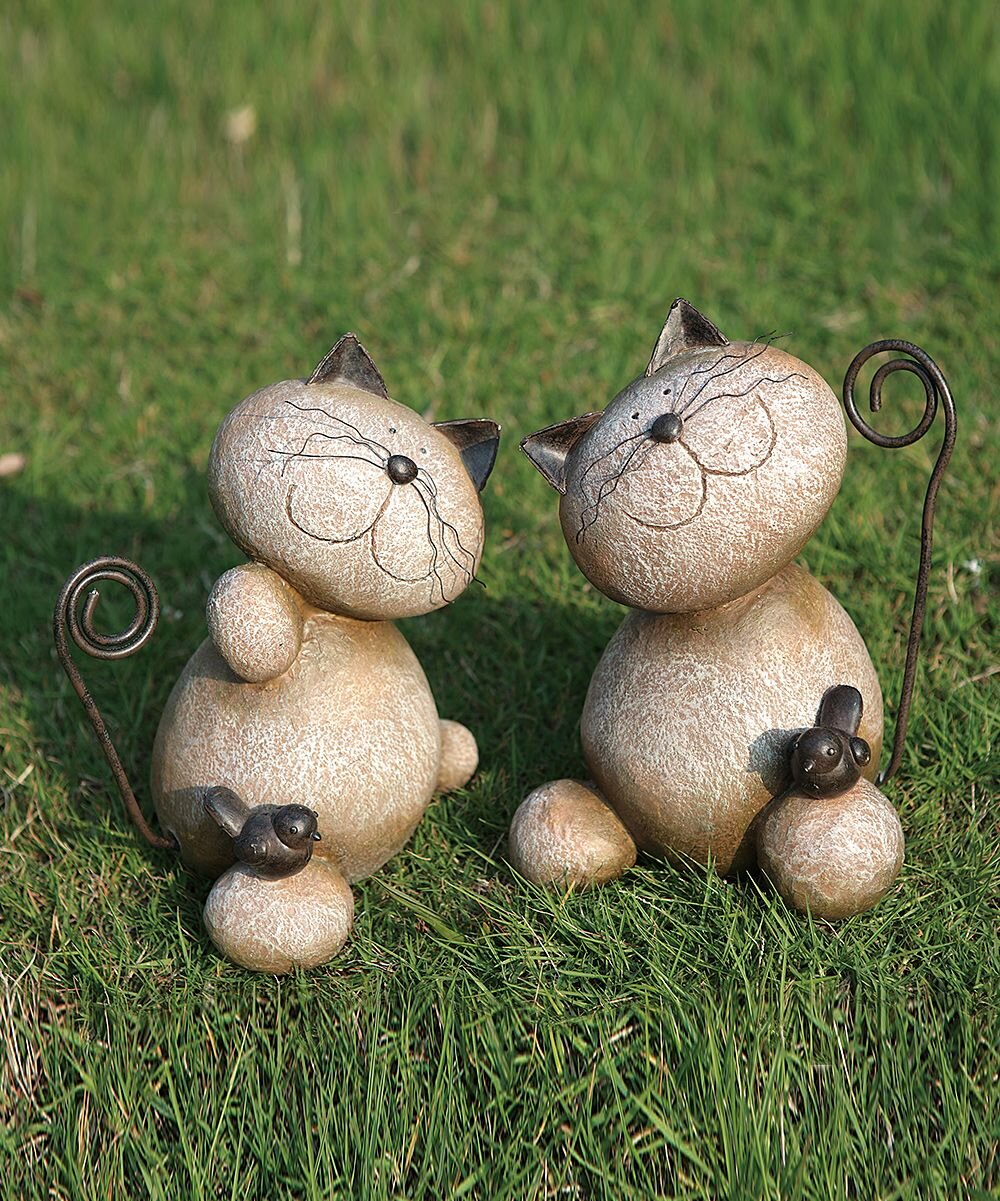
A variety of shapes, colors and materials at hand allows craftsmen to make unsurpassed works of art. Most often, children are engaged in making crafts, but adults have also succeeded in this lesson. Stone products are needed not only for school exhibitions and children's rooms, they are also an element of home improvement, garden and courtyard.
The peculiarity of childhood is an increased interest in subjects. It is in childhood that talents, love of beauty, and needlework are manifested
When raising a child, it is important to teach him how to create. Together with an adult, a child can create a wonderful craft, which may become his "best friend" for many years
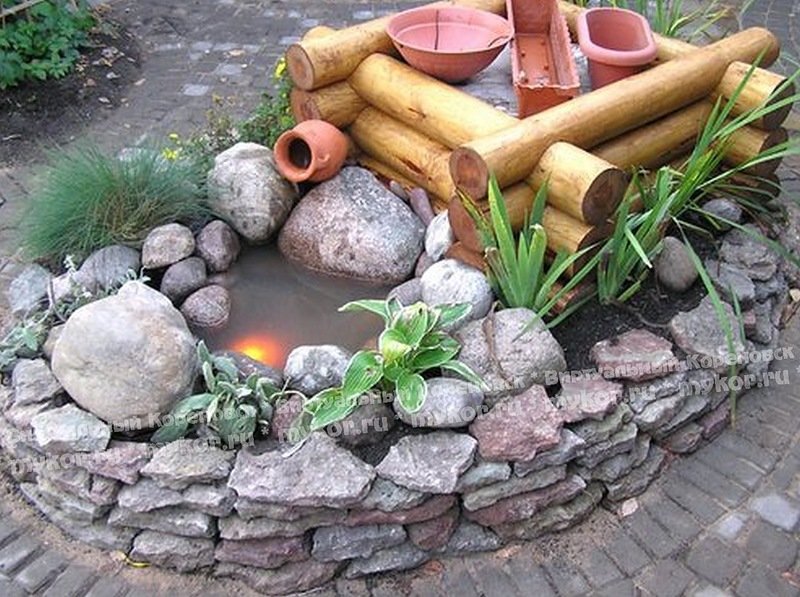
The central part of the composition is usually a large natural object. Small pebbles are used for backfill.
The installation of the stones must be carried out according to a pre-planned plan so that you do not have to make changes to the project. A self-made composition will complement the design of the site, make it unique.
Novelties of crafts for giving from cement
Flowerpots
For 1 kg of cement, you will need about a liter - one and a half water and you can add 0.5 kg of sand.
We make a solution, immerse any unnecessary fabric in it, preferably a square piece. Soaked, and, without wringing, we pull on a bucket covered with film.
Next, you need to straighten it to get beautiful folds, and leave it to dry for a day.
We remove from the bucket and the pots are ready!
See how Master Sergeich makes such beauty. I love this author very much, he always has interesting crafts, everything is accessible and understandable, and most importantly quickly - without unnecessary words and rassoling.
First, make a small slide of sand so that we have a solid base and the sheet is bent into the desired flowerpot shape. Cover the pile with plastic so you don't have to scrub the sand off the sheet later.
We place a plant on it and cover it with a cement solution.
We cover the top with a film from the rain, after 2-3 days the product can be cleaned and painted in the desired color.
Here are some more original such pots from Sergeich gloves, watch the video.
Balls
With the help of cement, you can make beautiful balls, I also like such an unusual decor item in the country.

If you wish, make small compositions on a balloon, as we already did when creating New Year's decorations. It's even more fun to use a large beach ball.

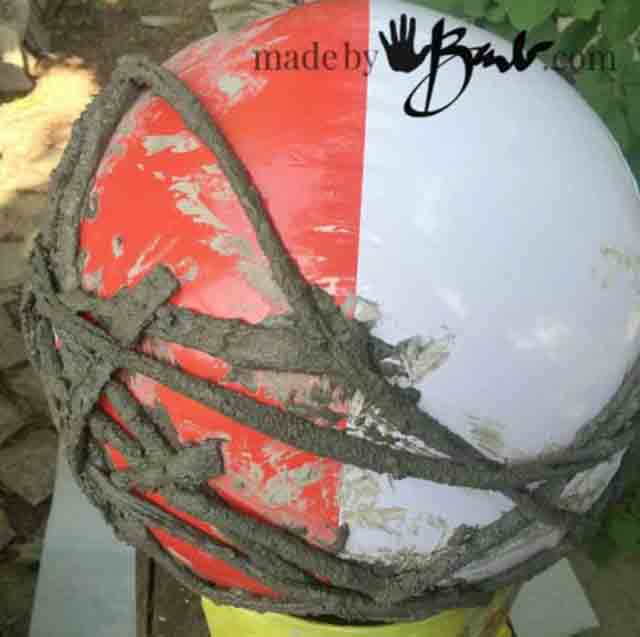
Instead of thread, you can use scraps of fabric that you need to soak in the solution and wrap around the ball.
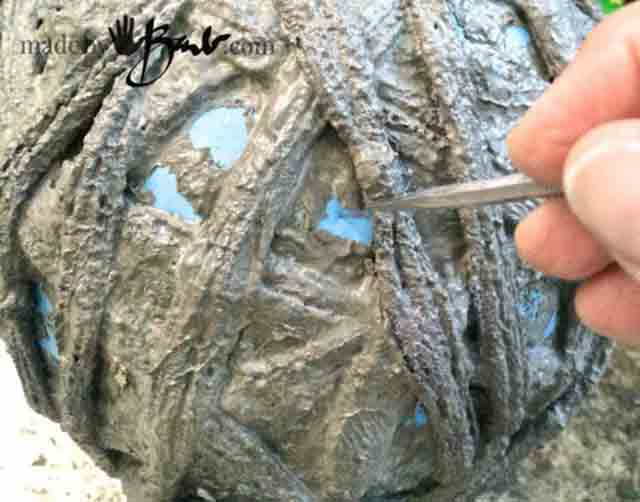
After the cement has dried, it will not be easy to remove the ball, but you will have to tinker and, of course, spoil it. But we will get a magnificent craft, so surprisingly seemingly light and delicate.
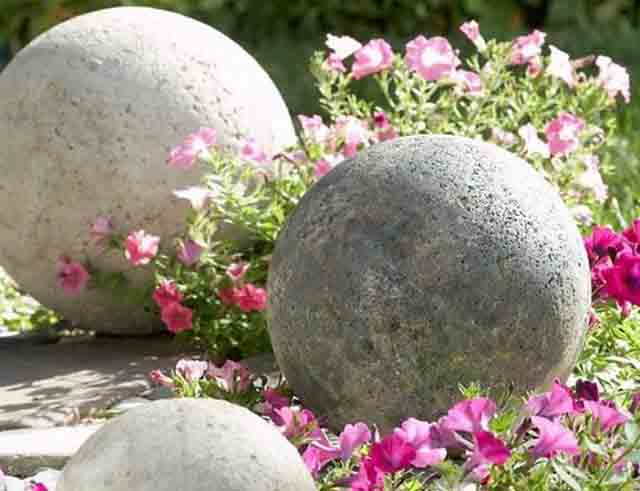
And if the cement is poured into rubber balls, then it will be possible to decorate the garden with original stylish monolithic decorations scattered over it.
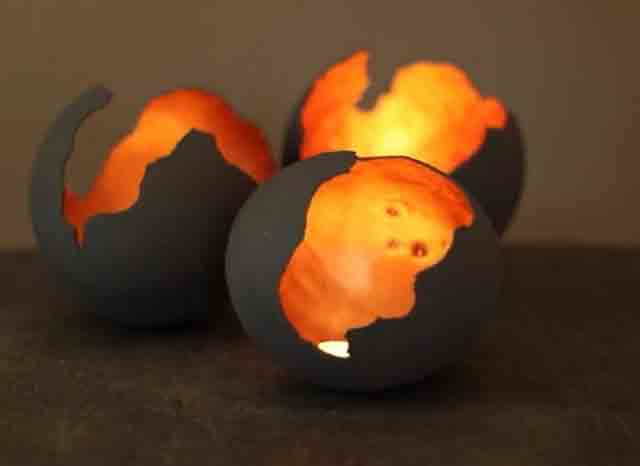
Is this what you think? Dragon eggs!
They are made on the basis of a balloon smeared with a solution of cement and plaster. When covering the surface, leave a small area intact, creating a kind of chipped shell edge.
Once everything is dry, paint the upper part with bright yellow paint with a reflector. This will give the impression of a fiery light.
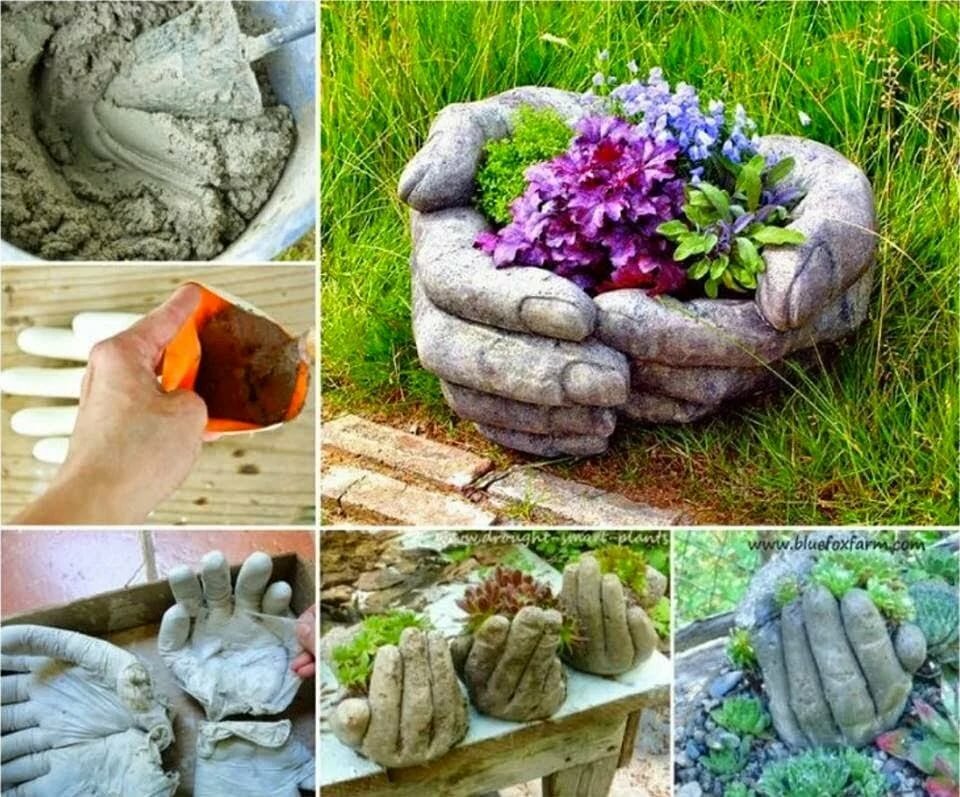
Sculptures

And what a lovely thing! Similar sculptures are also made of cement or plaster. You can create any kind of heroes: chickens, geese and others.
Women's tights are required to give the desired shape!
The prepared solution is poured into them, the body is formed by hands and stretched between some supports.
Ready-made figures dress up, as fantasy tells.
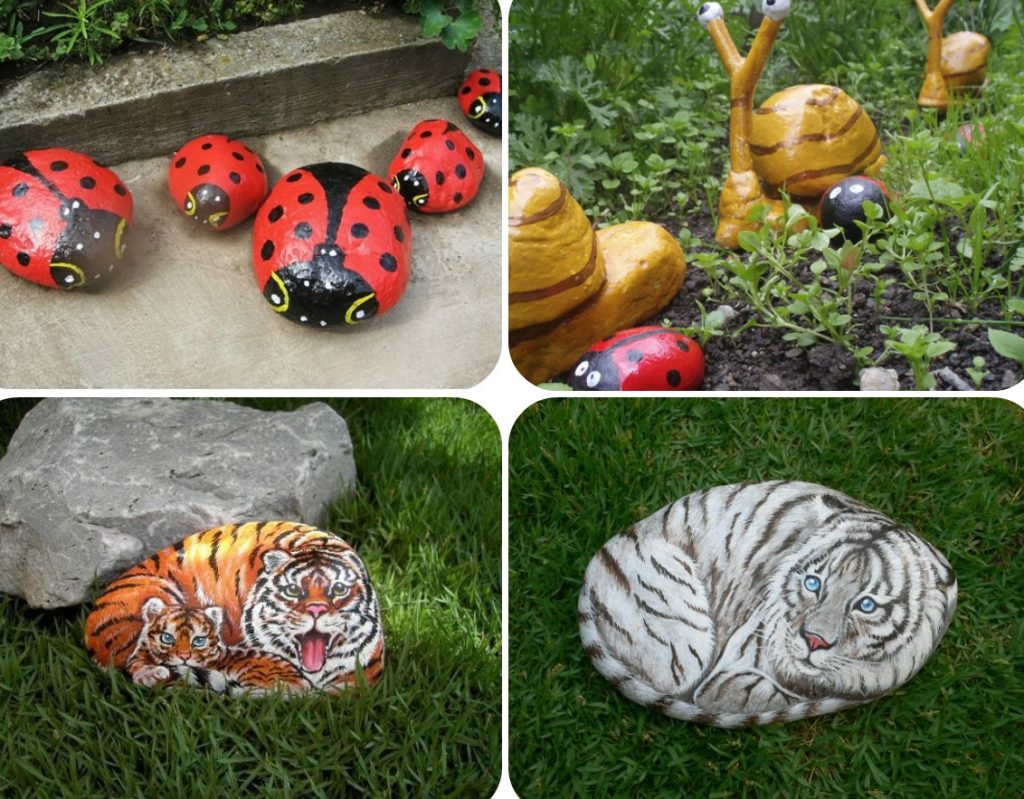
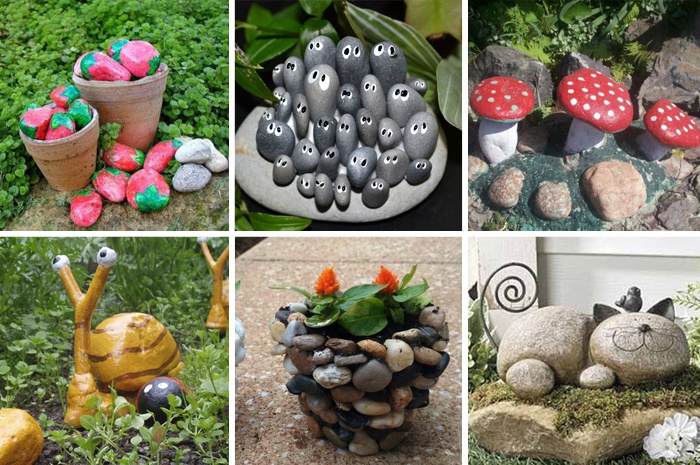
Photo of crafts from stones


We also recommend viewing:
- Felt crafts
- Plywood crafts
- Grain crafts
- DIY crafts
- Crafts from balls
- Crafts from colored paper
- Foil Crafts
- Crafts from candy wrappers
- Dough crafts
- Crafts from plates
- Crafts from cups
- Crafts from matches
- Crafts from corks
- Crafts from improvised means
- Pipe crafts
- Crafts from plastic bottles
- Crafts from socks
- Crafts from threads
- Metal crafts
- Crafts from pasta
- Craft tulips
- Crafts for March 8
- Crafts from toilet bushings
- Crafts from ribbons
- DIY coffee crafts
- Crafts from boxes
- Crafts from disks
- Clay crafts
- Crafts from waste material
- Craft mug
- Craft house
- Craft tie
- Beautiful crafts
- Decorative crafts
- Crafts from spoons
- DIY flowers
- Crafts from foamiran
- DIY paintings
- Quilling crafts
- DIY Easter crafts
- Egg Crafts
- Twine crafts
- Crafts from fabric
- Crafts from natural material
- Crafts from packages
- Crafts from corrugated paper
- Crafts from newspaper tubes
- Cotton wool crafts
- Crafts from cotton swabs
- Crafts from cotton pads
- Crafts from bottles
- Crafts for home
- Knitted crafts
- Military crafts
- Unusual DIY crafts
- Bulk crafts
- Craft letter
- Craft bouquet
- Craft shirt
- Crafts for giving
- Crafts for the garden
- Crafts from cans
- Origami
- DIY paper and cardboard crafts
- Plaster crafts
- Wood crafts
- Crafts from cardboard
- Crafts from glue
- Crafts from sticks
- Styrofoam crafts
- Crafts from napkins
- Crafts for the exhibition
- Leather crafts
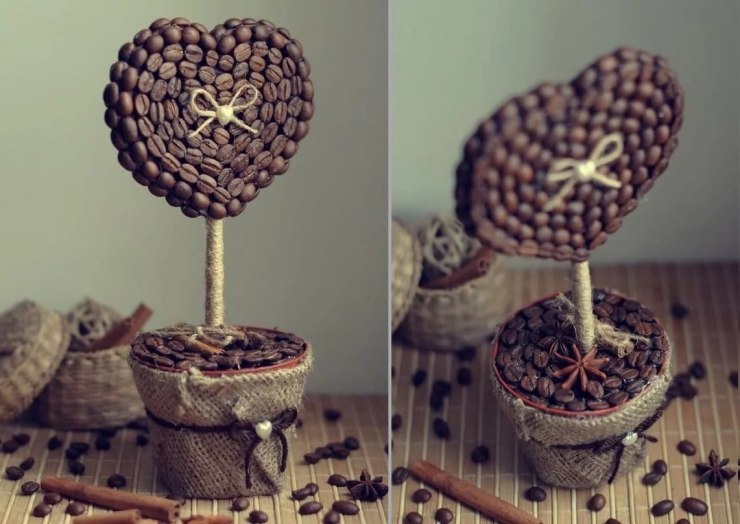
- Coffee crafts
- Crafts from branches
- Crafts from egg trays
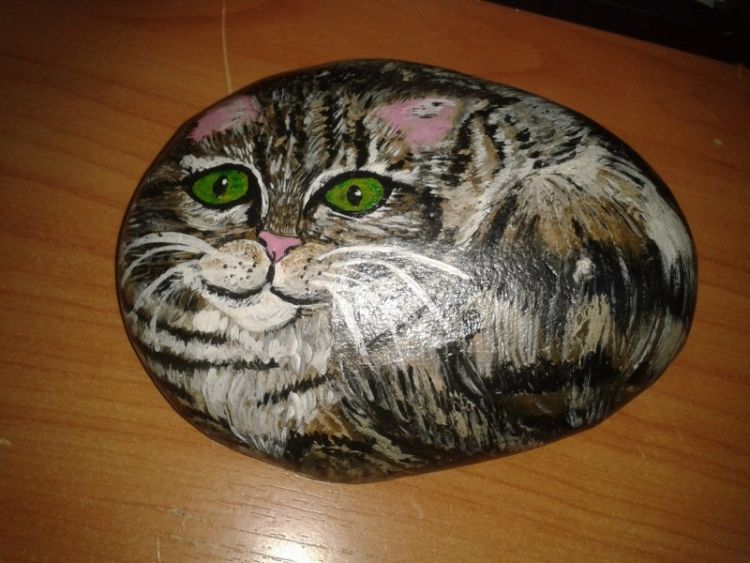
Crafts for giving with your own hands. Painting stones master class.
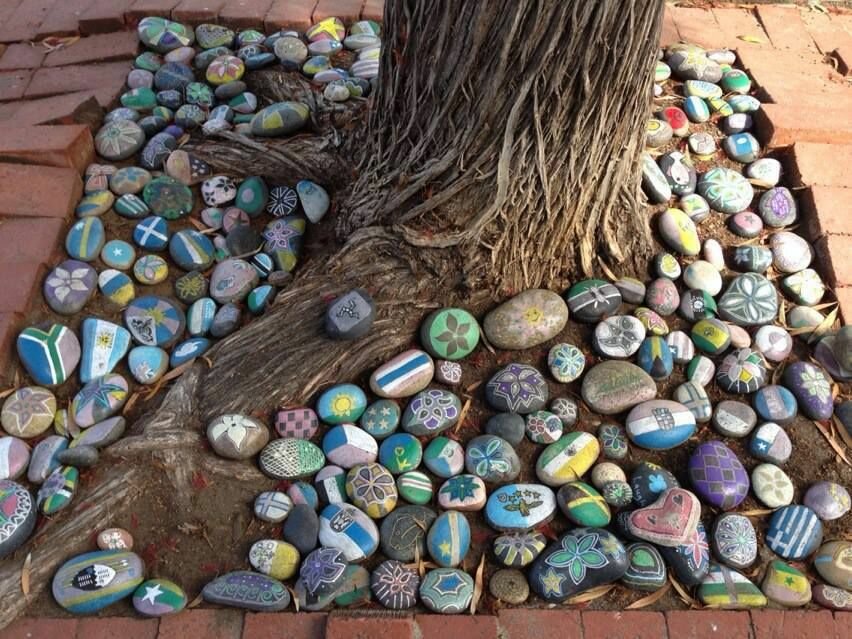
In the simplest case, you can simply pick up the stones you like and paint them with acrylic paint, applying a simple drawing. Such crafts for a summer residence are already cute, and they can easily be made with children.

We will tell you a more advanced version of a beautiful painting on a stone. In fact, this is also not difficult, it just requires knowledge of the basic techniques.
- For painting, it is better to choose a flat stone with a flat surface. To work we need acrylic paints and brushes.
We start painting from the center. To make the painting on the stone look more contrasting, draw a black background in the middle of the stone, leaving a distance to the edge of the stone. Draw a white dot in the middle of the black background. - Draw smaller ones around it with equal intervals. Equal intervals are easy to observe if you draw according to the principle of cutting a cake: we divide the circle in half, then into four parts, then into eight, etc. We make sure that there is a distance between the points. It is not necessary that they merge into one line.
- Around the white dots, draw larger dots with yellow paint so that they are not located opposite the white dots, but between them (Fig. 4). Next row of green dots. Each next row of a dot is larger.
- We mix the green and blue paint and paint the next rows with a slight color transition, each time making the content of the blue paint more and more saturated (Figure 7).
- We try to keep the points exactly on the edge of our black circle. If necessary, the black background can be slightly corrected (Fig. 8).
- We put small white dots between the points of each circle (Fig. 9). We put a dot of paint inside each circle, which corresponds to the inner circle (Fig. 10)
- Optionally, we can expand our circles outside the black background (Fig. 11) Put a lighter one inside each point. We surround each point with white small ones.
- We make a vertical chain of yellow dots from the center to the edges (Fig. 14) We put a green dot inside the largest yellow dot. (fig. 15)
- Put green and then yellow dots in the center of the central white circle.
Decor items
With beautiful sea or river pebbles, you can easily decorate any piece of furniture. The following ideas and tips can be used to style personal items:
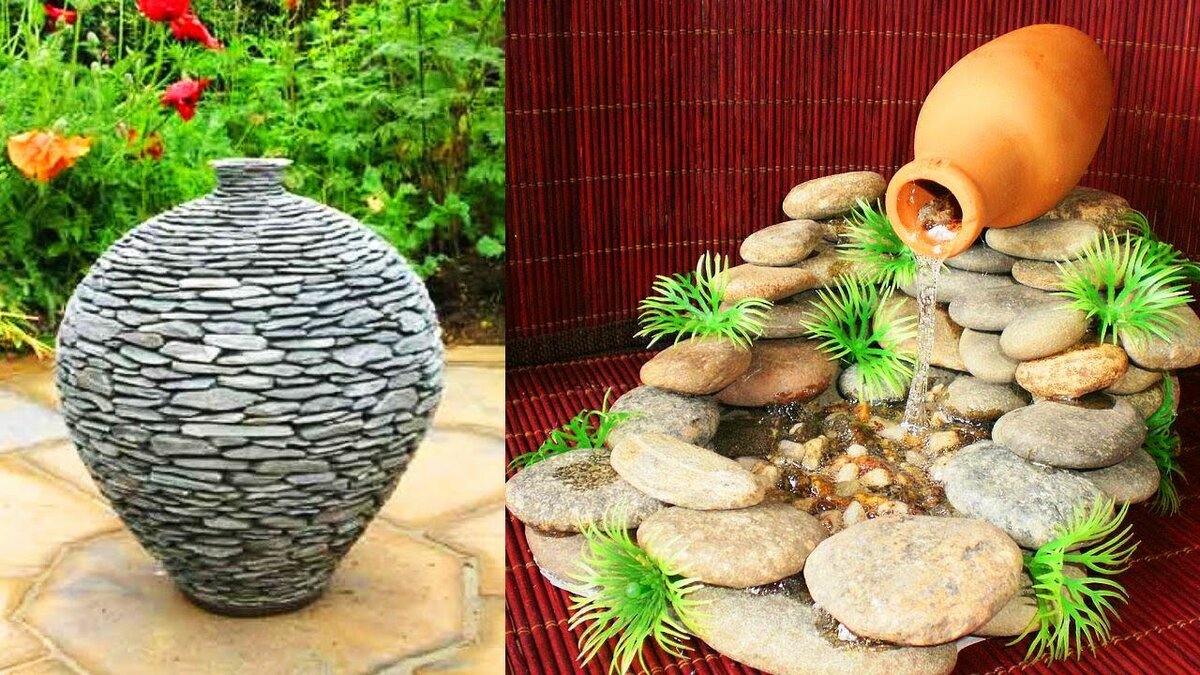
Vases.
The vase can be completely pasted over with small pebbles or ornate patterns can be laid out of stones on the surface of this vase, and volumetric strips can be made.

Photo frames.
It is recommended to use stones of different sizes and colors for work. Additionally, you can paste over the frame with dried stars or ordinary shells.

Lamps.
The lamp leg (or the lower part of the stand) can be pasted over with a variety of stones. True, this option is more suitable for table lamps in gray-brown, beige or coffee colors.

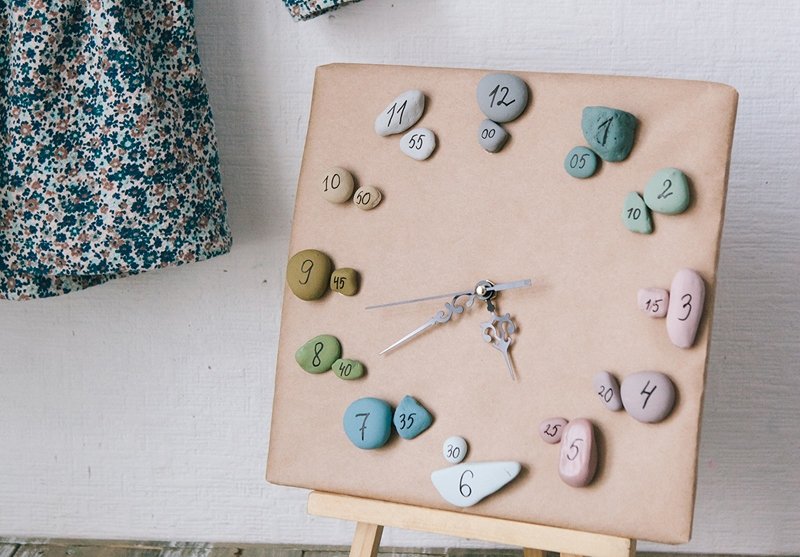
Watch.
With the help of stones, you can easily update the watch frame. To do this, around the perimeter (or circle), pebbles of different sizes should be glued. Glued seashells will help to make such a watch "marine".
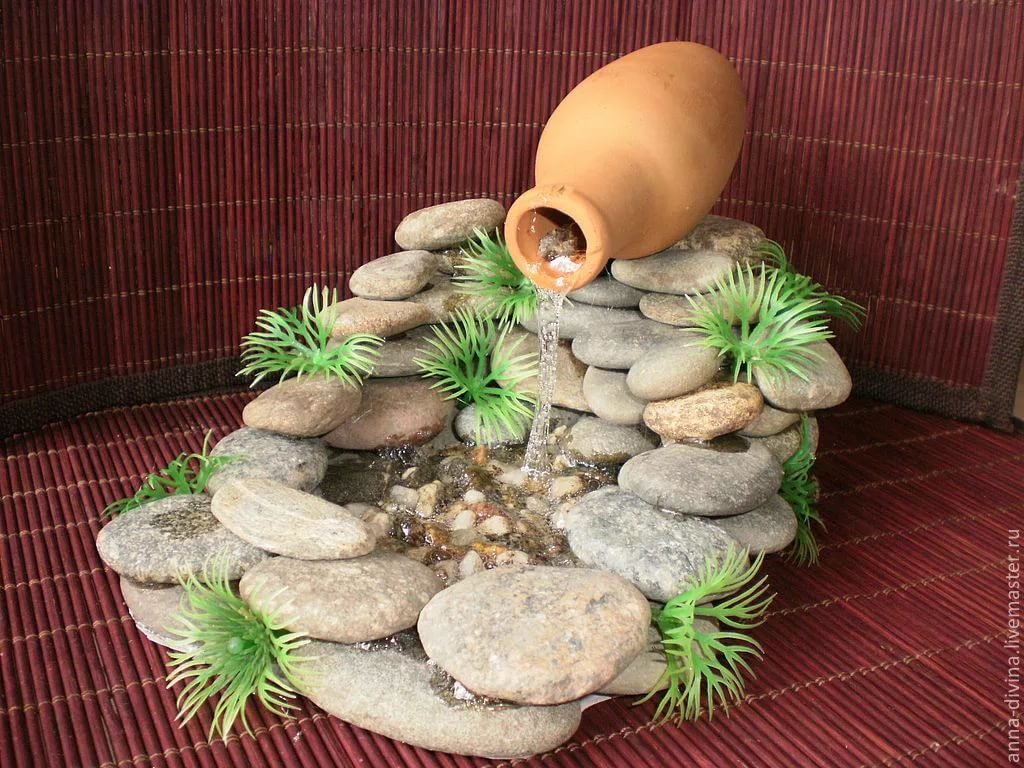
Candlesticks.
You can not only paste over an old simple candlestick (in the form of a cube or a parallelepiped), but also create a new beautiful lamp from a wide glass, a half-liter jar. Stones should be put down the vessel, water should be poured. Place a tablet candle on top.
