How to mix tile adhesive correctly?

Only at first glance it seems that diluting the glue is as easy as shelling pears.
There are many nuances, non-observance of which can not only make the glue unusable, but also completely ruin the cladding.
Rules and principles for the dilution of dry glue
Experienced builders recommend following these rules:
- the mixing container must be clean, you need to scrape off the remnants of the previous glue or solution from the walls, otherwise they will violate the composition;
- the water must be clean, match the temperature of the dry mixture and the environment (it will need to be heated or cooled);
- the mixture must be poured into a liquid, and not vice versa, otherwise it will be more difficult to get rid of lumps;
- it is better not to use industrial water due to the presence of impurities that can react with glue;
- if the cement slurry in the container has begun to set, dilution with water will not help, it is better to prepare a new mixture;
- the permissible volume of water must not be exceeded, otherwise the solution will turn out to be liquid and will not hold the tiles.

Advice! If in doubt about the consistency of the glue, leave the mixture for 5-10 minutes. If the texture remains unsatisfactory, you can add a little water or dry powder.
How to knead tile adhesive: choose a tool
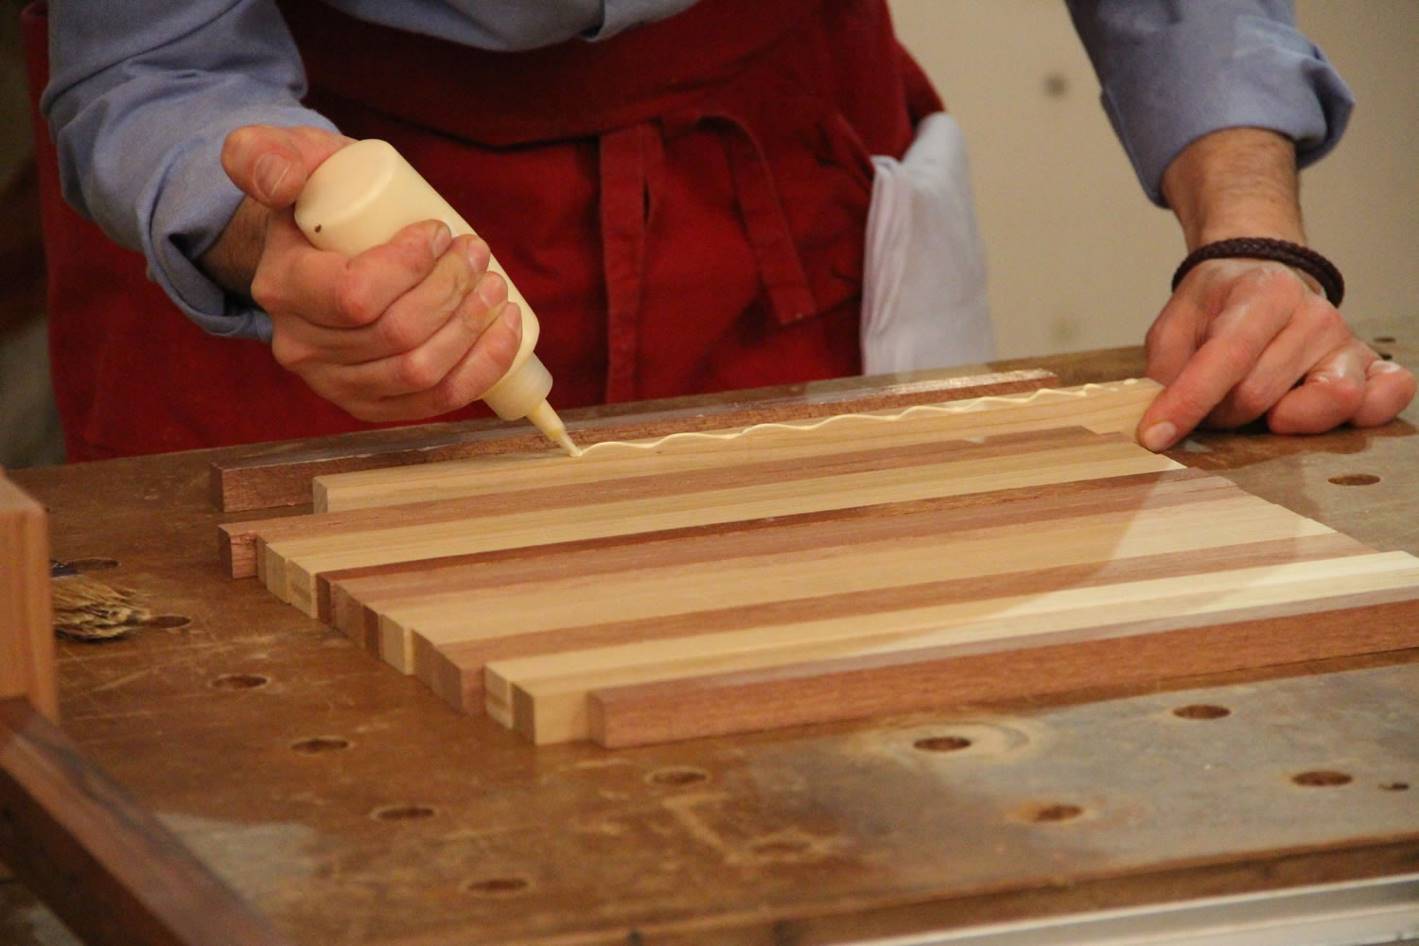
If you have to cook 10 liters or less of glue, it will be convenient to mix the components using a long rectangular trowel.
This steel shovel with a curved handle can be worked by hand, trying to lift dry particles from the bottom so that there are no lumps.
Making large volumes of glue by hand is problematic. You will need a drill with a blade-like attachment - only it should be designed to mix the solution, not paint. Experienced craftsmen use a construction mixer with a whisk for this purpose.

The rotation speed of the nozzle should not exceed 300 rpm.
In this case, the blade must be completely immersed in the solution, otherwise bubbles will appear in the texture, deteriorating the quality of the glue.
Step-by-step dilution of glue
Work order:
- Pour water of the required temperature into a clean prepared container. Add the dry mixture to the liquid according to the instructions. For a start, it is better to take ⅔ of water, and if the mixture is thick, dilute it with the rest of the liquid to an optimal consistency.
- Measure out the required amount of dry mix planned for the first batch.
- Add the first portion of dry glue while stirring the solution. Introduce the entire prepared mass in small doses, achieving a homogeneous consistency by stirring.
- Leave the solution for 10-15 minutes so that the particles are well moistened.
- Stir again, break up remaining lumps and delamination. The adhesive is ready to use.
The mixture should be quite thick and elastic. It is easy to check its quality - just scoop up the glue with a trowel and turn it over. A high-quality solution should not drain and fall off in pieces. In the process of laying the tiles, it is recommended to stir the solution periodically so that it retains its plasticity and does not dry out.

Advice! The longer the glue is mixed and whipped, the more liquid it turns out. The situation can be corrected by adding a small portion of the glue mixture.
Criterias of choice
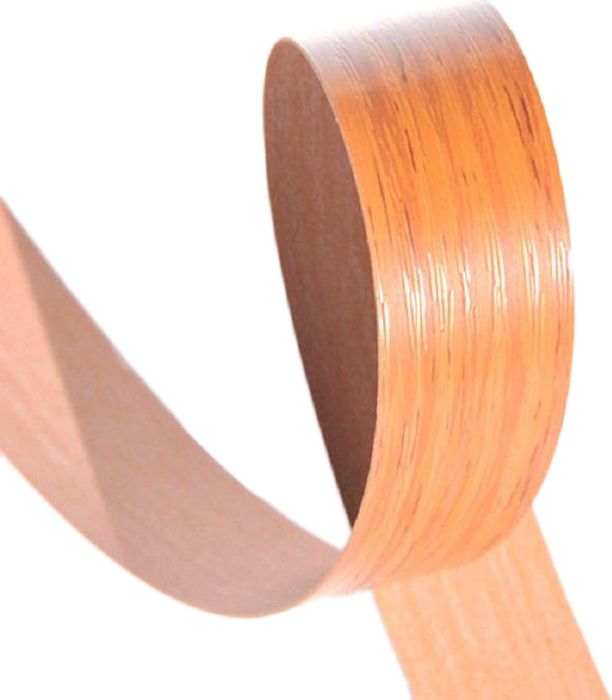
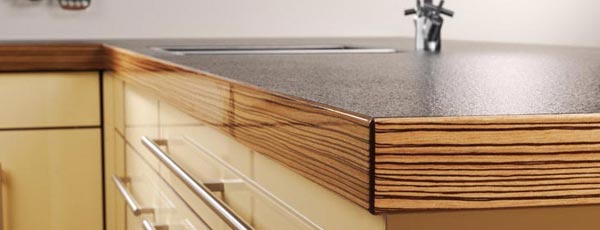
The edge in furniture significantly improves the appearance of cabinets, drawers, tables, as well as any other cabinet furniture. Today it is available in various colors, and it will not be difficult to choose an option for the shade of the furniture.
To make the selection process easier and the result pleasing to the family for many years, pay attention to the following selection criteria:
Material - speaking of material, edging can be divided into paper, plastic and rubber. The pros and cons of each have been described above.
When choosing, you should pay attention to its compatibility with the material of production of the furniture itself;
Width - popular sizes vary between 22 and 38 mm, so before trimming the product, it is worth choosing the optimal width - it should completely hide the edges of the product;
Thickness - today manufacturers use an edge from 0.2 mm thick. It is necessary to take into account the purpose and storage conditions of furniture in order to select the required thickness parameter;
The presence of an adhesive layer
This criterion is important for people who want to fix the edge on the product on their own. If the device does not have an adhesive layer, then it will not work to make the edging with your own hands;
Fastening type - there are rigid, overhead and cut-in edges. Depending on the purpose, one of the options is chosen. Also, the mortise type is divided into T-shaped and U-shaped;
Surface type - edge coating can be glossy, matte, embossed or embossed. Consider this criterion in order to improve the characteristics of the appearance of the furniture.
Having studied all the indicators of furniture edges, you can safely go for a new set of furniture
When purchasing, pay special attention to the quality of the processing of the edges and end parts. It is worth additionally asking the seller about the method of fixing the edge
By purchasing furniture products with a durable edge, you can provide them with a long service life.


Helpful hints
It is possible to trim the tabletop on your own, but you must follow the instructions, take into account the recommendations. Helpful hints:
- The edging material is sold with and without an adhesive base, it depends on which tools, materials are prepared, and the course of work itself.
- If an iron is used as a heating device, cover the strip with paper or cloth to prevent the top of the strip from melting.
- Alignment and pressing is carried out until the material cools completely;
- The end side of the countertop must be free of dust deposits, dirt, otherwise the glue will not provide the desired adhesion.
- The glue is applied to two glued surfaces, the required time is waited for impregnation.
- If there are chips on the border, sandpaper is processed, and you should not make any efforts so as not to scratch the plane.
Installation procedure
You can only glue melamine tape and U-shaped PVC - edging on your own. Consider the technology of how to glue the edge. This method will help you restore old furniture or decorate new ones.
- Unwind the roll of melamine border. Attach to the end of the surface to be treated. Mark the length with allowance for trimming. The standard self-adhesive edge is 2.1 cm wide and the chipboard width is 1.6-1.8 cm.
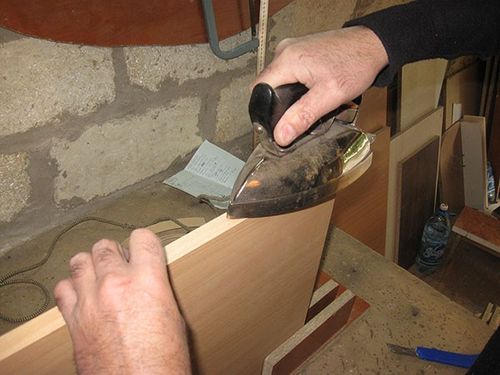
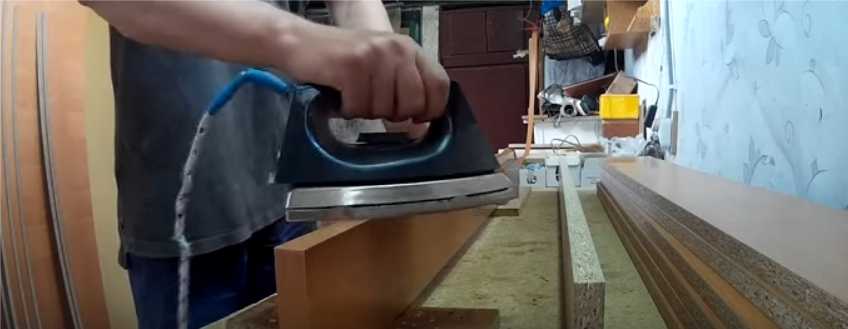
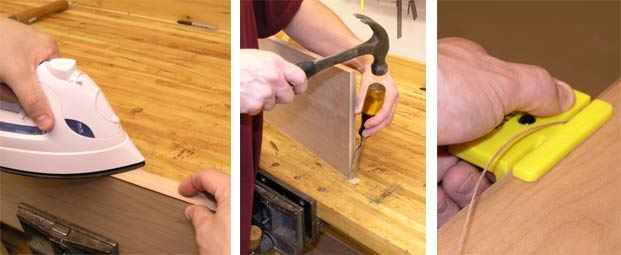
- Attach the tape, align the edge along one edge, iron with an iron.
- Iron in small areas of 10-20 cm.
- Roll with a roller or rub the heated areas with felt.
- Depending on the selected material, you need to glue the edge with an iron with a certain temperature regime. With a properly heated iron, the glue base will evenly adhere to the end without swelling.
- After the tape has cooled, proceed to trimming and rubbing the protruding edge with sandpaper or a file.
You can see more clearly all stages of work in the video below:
The stage of pasting the end surface is completed. The tape allows you to decorate the edges of various configurations. If you follow all the recommendations, the butt will turn out to be of high quality, without scratches, minor defects and glue.
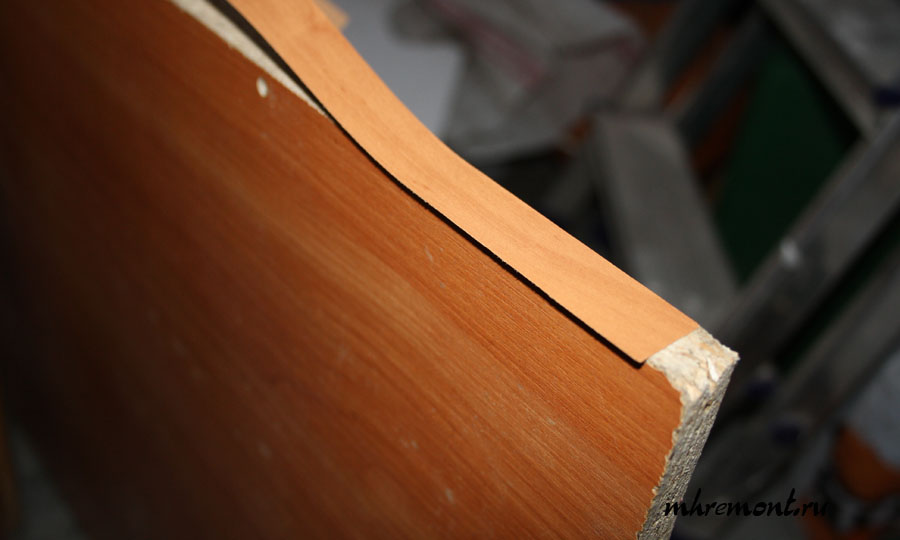
Furniture edging tape is used not only by craftsmen who make furniture, but also for the restoration of wooden structures by home craftsmen.Any kind of edge, which is applied to the end of the chipboard, independently or by furniture manufacturers, gives the product an aesthetic look. And also protects the structure from moisture, microorganisms, insects that can destroy the internal or wood structure of the product, therefore, the edge gluing on the chipboard is simply necessary.
What to do if a tooth crown falls out at home
If the prosthesis is broken, it does not have to be thrown away. For fixing, it is permissible to use special glue. The most popular are Protacryl-M and Corakril. These substances differ in almost the same composition and characteristics.

This glue is sold as a kit. It includes the following:
- separating varnish;
- polymer in powder form;
- liquid;
- dichloroethane glue.
To achieve good results in the repair of the prosthesis, it is recommended to strictly follow the instructions for using the fixing compound. The glue is diluted in glass or porcelain containers. In this case, it is worth following the manufacturer's instructions.
Thorough mixing of the substance is of no small importance. There should be no lumps and grains in its structure.
Material properties
The edging material is produced by extrusion from PVC and ABS. This method ensures uniform color of the material throughout the entire thickness and, therefore, high quality after milling. Optimum physical and mechanical properties of the material guarantee a long service life of the machining tools.
The edging material is lightfast and tested according to DIN 53387.
Surface properties
UV-applied acrylic resin coatings are scratch-resistant and have high mechanical strength. Within 24 hours of exposure, they are resistant to almost all household cleaning agents and are not sensitive to stains. The surfaces are easy to clean, hygienically impeccable and moisture resistant.
Permitted Tolerances
The production of edging material is subject to careful quality control, which not only checks the surface quality, but also adheres to extremely tight tolerances.
| Thickness of edging material | Tolerance | Width of edging material | Tolerance |
|---|---|---|---|
| 0.4 - 0.8 mm | ± 0.05mm | 11 - 17 mm | ± 0.02mm |
| 0.9 - 1.6 mm | ± 0.1mm | 18 - 33 mm | ± 0.03mm |
| 1.7 - 3.9 mm | ± 0.05 / -0.15 mm | 34 - 40 mm | ± 0.04mm |
| more than 4 mm | ± 0.05 / -0.20 mm | more than 40 mm | ± 0.05mm |
The permissible longitudinal stretch is 6 mm by 2 m (edge thickness up to 0.6 mm) and 2 mm by 2 m (edge thickness over 0.6 mm).
Adhesion properties
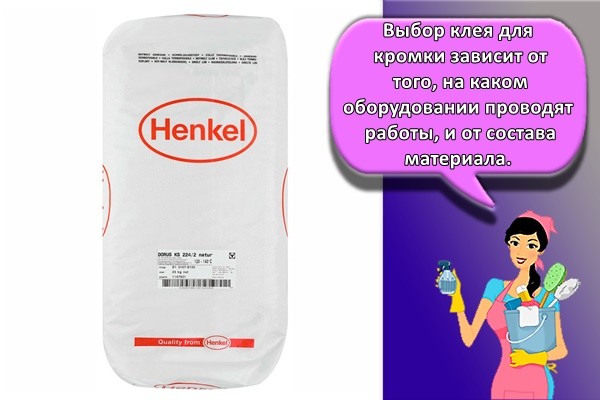
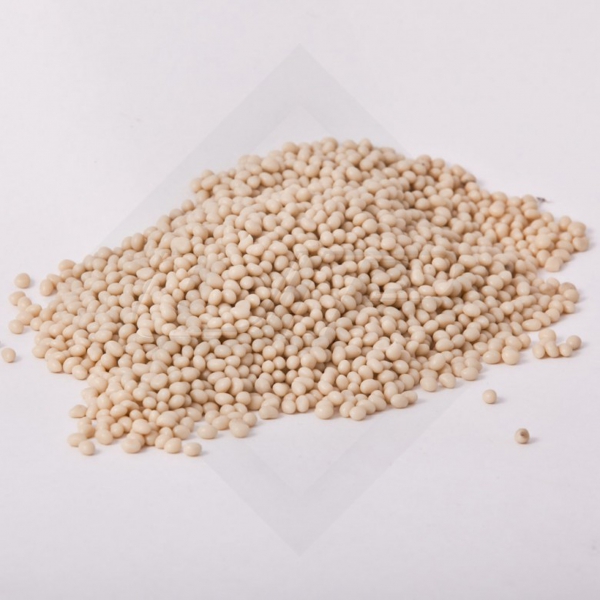
The adhesive (S-primer) in combination with hot melt adhesive ensures perfect adhesion of the edge and the carrier material.
The edging material is supplied with a standard universal adhesive for bonding with any type of hot melt adhesive.
Processing parameters
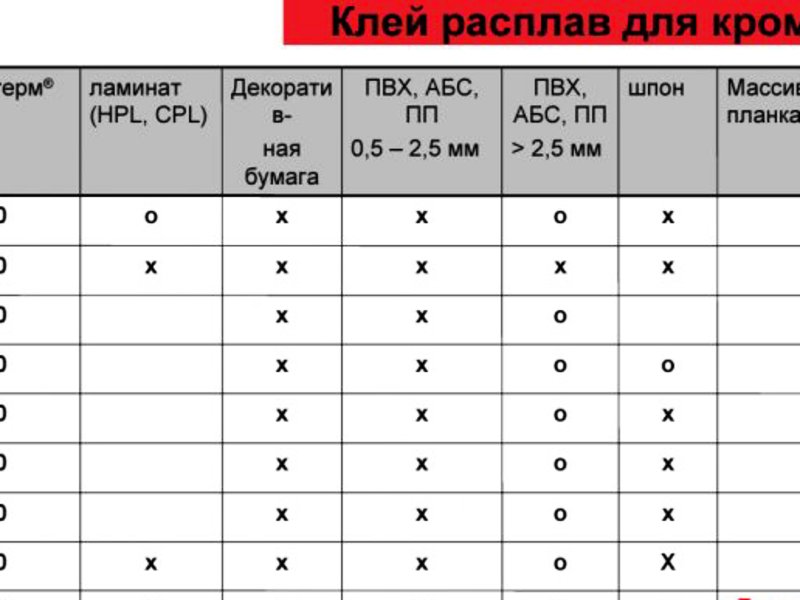
To ensure a clean and durable PVC edgebanding, many processing parameters must be observed, depending in part on the material used (edgebanding, adhesive), the existing edgebanding machine and the ambient temperature. Therefore, it is recommended to find the optimal options for the required settings and processes, for which it is necessary to carry out appropriate tests in advance. In doing so, the design values specified by the manufacturer for the respective application must be taken into account:
- Glue processing temperature: from about 180 C to 230 C.
- Processing temperature of chipboard and edging material: room temperature (not lower than 18 C, not higher than 30 C).
! Attention
When using extremely cold edging materials and chipboards (for example, after storage in unheated rooms), the applied hot-melt adhesive crystallizes even before the pressing zone of the edging material!
- Hot melt glue storage: in a cool and dry place.
- Permissible moisture content of solid wood slabs: 7 to 10%.
- Adhesive colors: the color of the hot-melt glue is selected according to the color of the edging material, since the glue seam is in a visible place, or a universal colorless hot-melt glue is used.
- Temperature: minimum temperature of materials and air in the room: 180C. Avoid drafts!
The feed speed of the workpiece is too high
Fibers from the hot-melt glue appear, which prevents the adhesive from being evenly applied to the chipboard edge. Unevenness appears when milling edging material.
The amount of glue applied:
Hot melt adhesive: 160 to 220 g / m2. The adhesive should be applied evenly and in sufficient quantity, but in such a way that not a single drop of adhesive can be seen from under the edging material and that all cavities in the board are filled. The amount of glue applied depends on the density of the chipboard, on the edging material (more glue should be used to glue thick edging material) and the feed rate (the lower the feed rate, the more glue is needed).
Aspiration:
When processing thermoplastic edging material, the chip suction power must be higher than when processing other types of edging material, since thermoplastic chips can be charged with static electricity and "stick" to the workpiece (air flow rate 2.5 m3 / sec.).
Facing:
Edging material up to 3.5 mm thick can be processed from a roll, if the edge banding machine is equipped with reinforced pre-trimming scissors, thicker edging material is fed in strips of fixed length.
After gluing the edging material, the processed parts are stored for 24 hours for the final crystallization of the adhesive.
Required tools
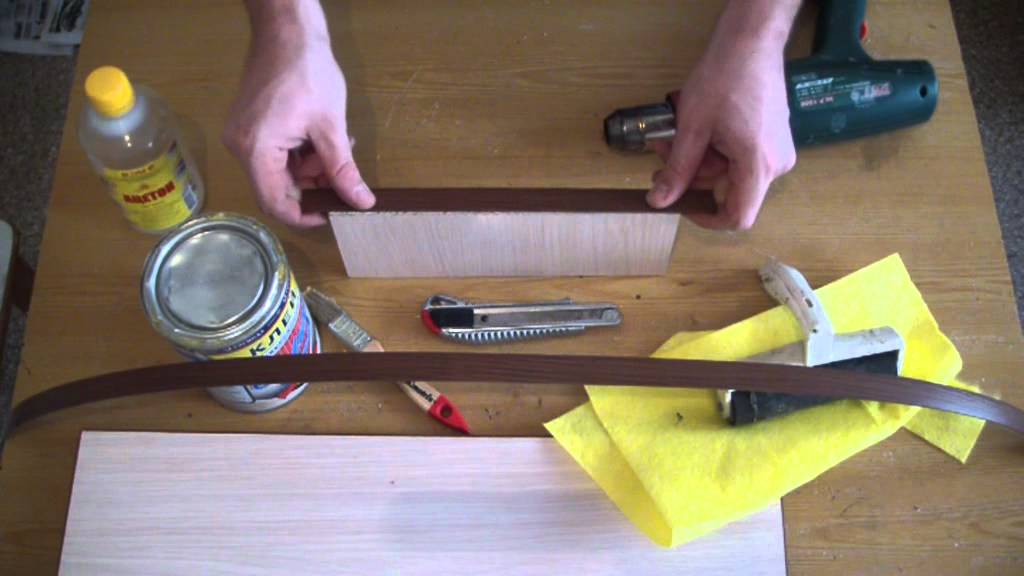
For edge trimming, it is not necessary to use professional equipment or ask for help from the masters. If you need to update old items, you can self-paste the surface with multi-colored tape. The question arises: how to glue the edge to the chipboard? It is enough to have the essential tools at hand at home:
- iron;
- sandpaper (fine fraction);
- file (optional);
- utility knife or scissors;
- rubber roller (optional);
- felt or other dense material.
Adhering to some rules, the product will turn out to be neat. Use a utility knife to cut off excess tape, and an iron to glue it.
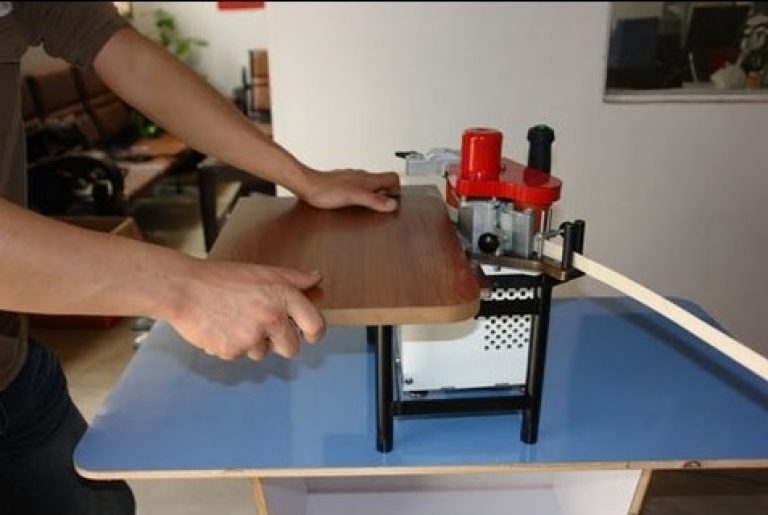
DIY edging machine
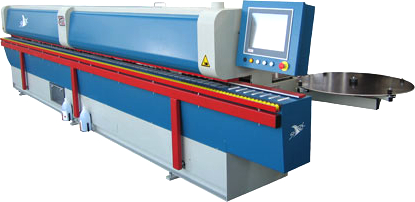
Factory-made devices are expensive, so for a small home workshop it is advisable to make a machine with your own hands. A do-it-yourself edge-gluing machine will be noticeably inferior to purchased counterparts in power and performance, but it can easily cope with the volume of work in the home workshop of a novice furniture maker.
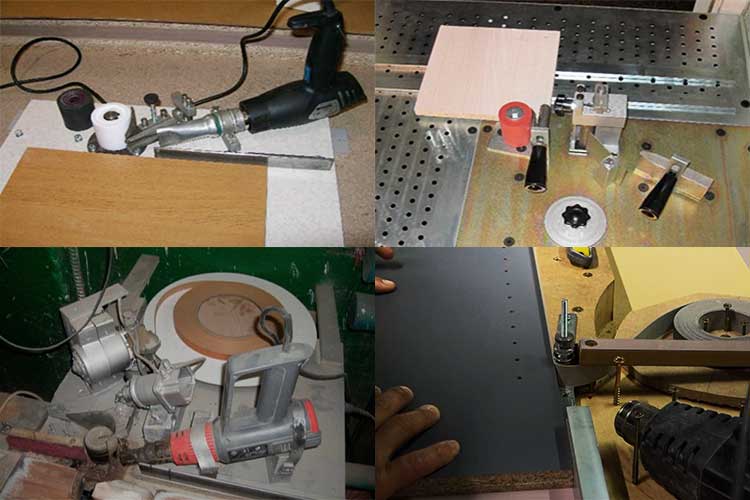
When planning to make such an edge unit with your own hands, you should soberly assess your strengths. The edgebander is a dangerous device, and the safety of the operator depends on the quality of its assembly
It is important to understand that the working parts of the machine are heated to very high temperatures. When using it, you need to be careful and follow the safety rules.
3> Structural elements
Devices of this type are used in various industries, while they have a different design. In general, a homemade machine should include:
- stable bed and comfortable table;
- ribbon supply and centering unit;
- heater with temperature control system;
- heat-resistant guides;
- excess edge trimming system;
- polishing module.
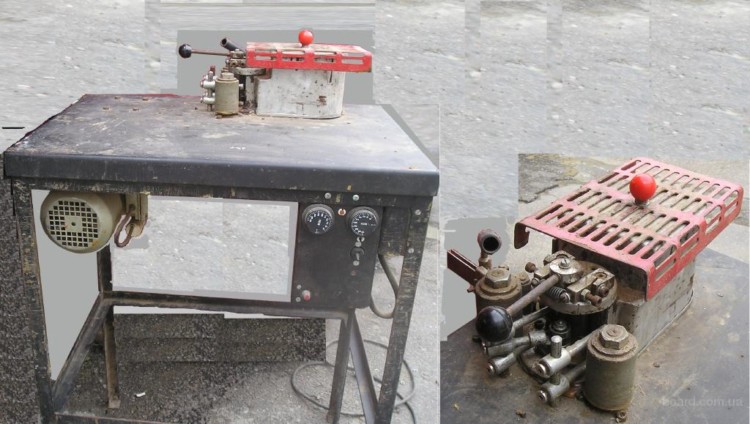
The combination of all these nodes is a rather complex device, therefore, for home use, you can limit yourself to a simpler design.In a homemade edging machine, you can do without unnecessary automation, leaving only the device that feeds the tape and the device for heating it. In this case, you will have to use a tape with a pre-applied adhesive, which is somewhat more expensive, but at the same time you will be able to save on complex components of the machine.
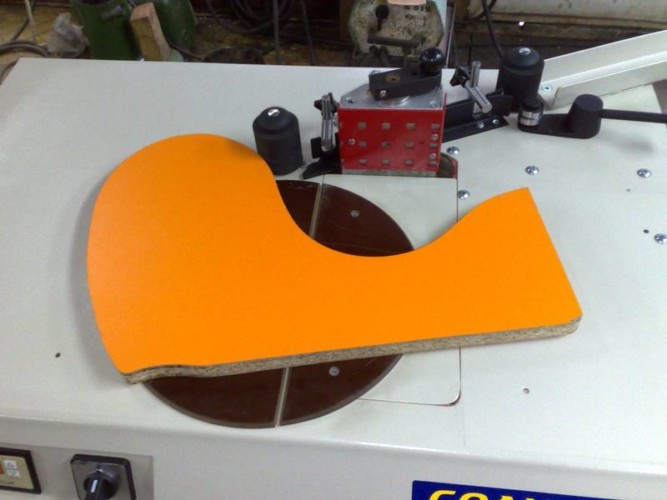
Properly manufactured, this device can be used as a machine for edging boards, plywood, wood-based panels and other similar material. The machine will have a simple design; expensive components and assemblies are not required for its consciousness.
Assembly order
First of all, you need a tabletop made of PCB or plywood, pasted over with plastic. A horizontal stop, a metal square is attached to it, against which the workpiece to be processed will be pressed.
It is rational to use a metal roller heated from a building hair dryer as a heating element and at the same time a clamp. In the place where the roller exits, a cutout is provided in the guide square. Part of the square behind the roller can be pasted over with a soft material, felt or cloth, which will serve for polishing.
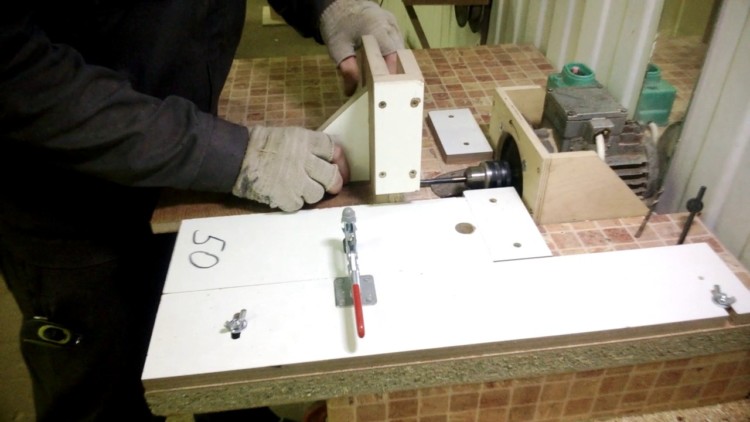
Actually, the machine is ready. You just need to screw a pin into the tabletop, which will become the axis of the roll, bring the end of the tape into the working area, turn on the hair dryer and wait until it warms up the roller. Further, the end of the workpiece is brought to the horizontal stop and the beginning of the tape can be glued. The workpiece is moved along the guide, while trying not to overheat the tape, but also to ensure the maximum strength of the connection.
3> Care of the edging machine
It does not matter whether you use factory equipment or a simple machine made by yourself, you must observe safety measures when working with it and ensure its timely maintenance. There are several important rules that, if ignored, could result in damage to the device or injury to the operator.
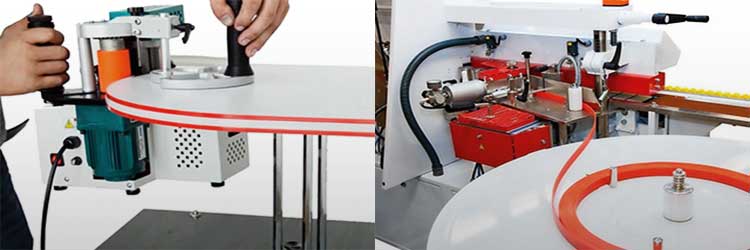
- Before starting work, be sure to study the device and the principle of operation of the edging machine, the location of the controls.
- Before switching on the device, it is necessary to make sure that the power cables and protective mechanisms are intact.
- Do not allow oil, water and other liquids to enter the work area.
- Keep the workplace clean.
- The moving parts of the device must be lubricated with the recommended materials.
- In the process of work, it is necessary to control the temperature of the pressure roller, to prevent overheating, sticking of the adhesive composition.
- If difficulties arose during the operation of the factory equipment, you should not try to fix them yourself, you need to seek help from specialists.
> Times are changing, technology makes life much easier for the home craftsman. Now making furniture yourself is easier than ever, you only need a few tools and equipment. Those who have a desire to try themselves as a furniture maker will hardly be able to do without this useful device. To begin with, you should make a simple device, try yourself in a new quality, and then think about buying a full-fledged factory equipment.
Varieties of profiles
The edges of the furniture are processed not only with the edge. One of the decorative and protective ways of finishing the cuts are profiles - special overlays that are put on the saw cut or inserted into pre-cut grooves in the chipboard. Profiles change the look of furniture, serve as an additional decorative element, effectively protect the inside of the chipboard from the external environment.
T-shaped
To process the edges with a T-shaped profile, a groove is cut in advance with a mill with a cutter. At the final stage of furniture assembly, the profile is inserted into the prepared hole (hammered with a soft hammer). T-shaped profiles are made with a girth or with simple overlays on the edge. Usually aluminum or PVC is used.
U-shaped
C- or U-shaped profiles do not require cutting into the groove plate, they are simply put on the edge and reinforced with glue
It is important to choose a good adhesive and attach the pad tightly to avoid voids. U-shaped pads are produced from soft and hard materials
Rigid parts are stronger, but assembly on rounded edges is more difficult. The profile will have to be warmed up to give flexibility and fasten with tape until the glue dries.
Criterias of choice
To choose a quality product, there are many criteria to consider. The main ones are the consistency, smell and composition of the cream.
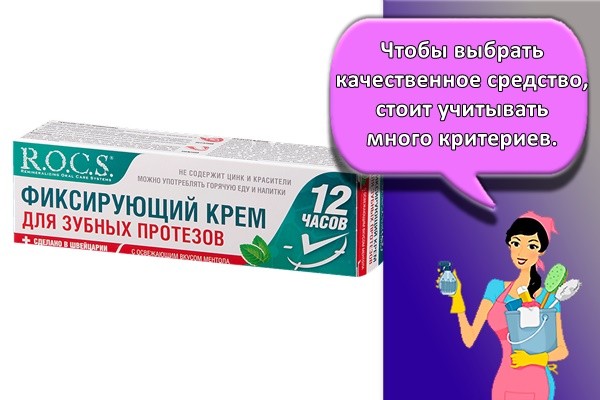
Consistency
The texture of the substance affects the features of its application. There are several options on sale today.
Liquid
This cream is considered to be the most convenient. It is easiest to dose. Therefore, this consistency is suitable for beginners.
Viscous
To make the consumption of the substance to a minimum, it is worth giving preference to a viscous texture.
Smell
The pleasant smell of the glue will help keep your breath fresh throughout the day. At the same time, at first it is better to refuse such a substance. At the stage of getting used to dentures, there are difficulties with the perception of taste. Aromatic additives will make the situation worse.
Duration of action
The glue works for 12-24 hours. However, the exact duration depends on many factors. These include food intake, acids in foods, and fluid intake. Under normal load, fixation usually lasts 8-9 hours.
Manufacturer
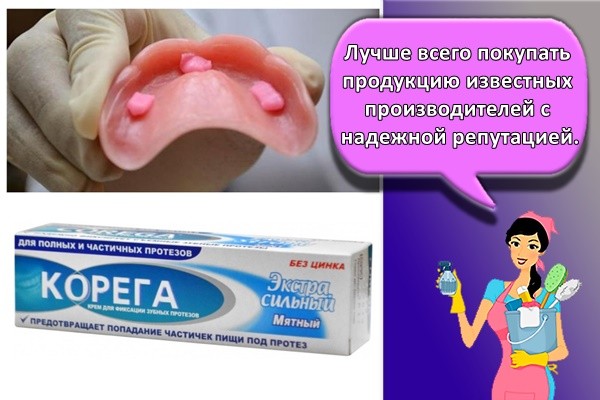
It is best to buy products from well-known manufacturers with a reliable reputation. They offer a wide range of products, which makes it possible to choose the best option.
Applied edges
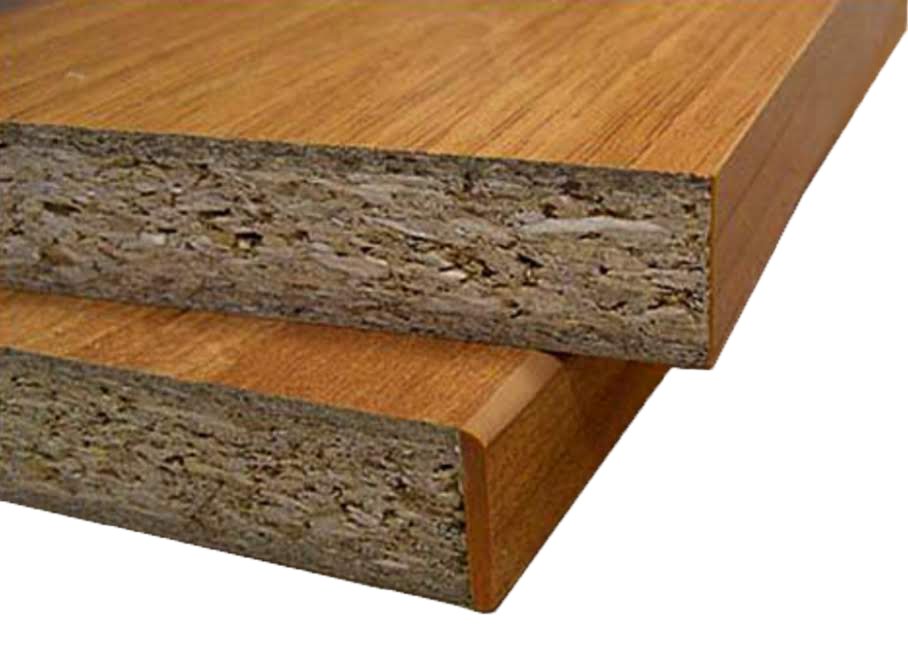
The edge is needed not for beauty, but to protect the chipboard from moisture
This is especially important if the table is in the kitchen.
If the table top is made of chipboard, chipboard, then formaldehydes are released into the air from the side ends, which adversely affect the body. The second task is to protect the border from discharge.
There are several types of this material on sale, each with its own installation characteristics and composition.
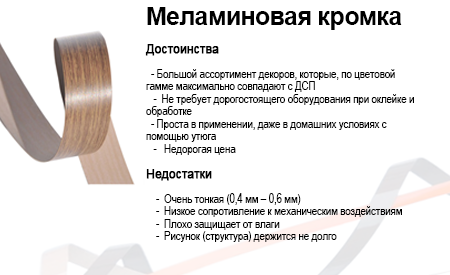
Melamine edging
Melamine look is the easiest to use at home. Border on a paper base with an adhesive layer, refers to the natural look. But in terms of durability, it is significantly inferior to other types. If there is no sticky layer, then the application is carried out with an iron or glue.
Sold in various widths. The base is presented in several layers, each having its own function. The top layer is thick paper with a pattern, which gives the product individuality. There is a decorative layer on the substrate. The backing itself is made from a tissue material. The type of melamine product depends on the number of base layers - single-layer, multi-layer.
PVC edging
PVC edge is a strip of polyvinyl film. The composition includes carbon, hydrogen, chlorine
The strip is wound into a roll, respectively, it refers to flexible materials, which is important when applying the corner parts of the product. The strip can be of different thickness, width, tone
Does not allow water to pass through, protecting the table from swelling. Such material in everyday life is convenient for cleaning, as it resists the effects of chemical, acidic substances, alcohol, mineral oils.
There is no adhesive layer, which complicates installation.
ABS edging
The ABS strip is made from plastic. Practical to use. Contains an adhesive base for easy do-it-yourself fastening.
Has mechanical strength that resists mechanical stress, scratching. Such materials are thermally stable. Due to these properties, the ABS border is used in rooms with high humidity (bathroom, kitchen, sauna), office buildings, showcases.
Positive aspects of using:
- Does not contain toxic compounds, heavy metals, chlorine.
- Subsequent processing with varnish-coloring materials is possible.
- Produced by extrusion for uniform color distribution.
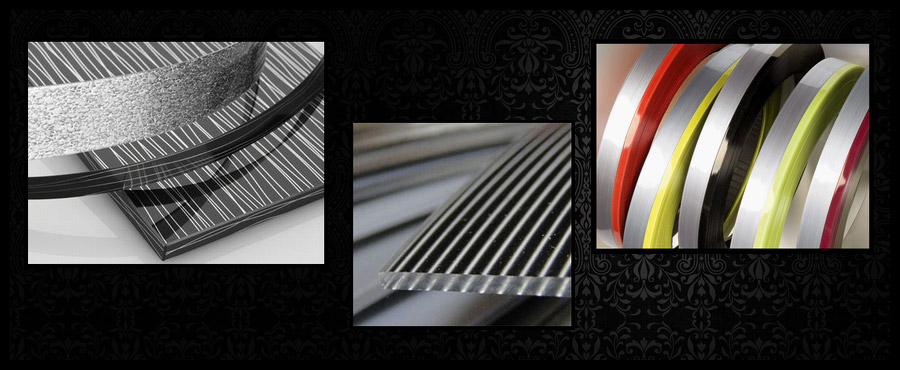
Acrylic edgebands
This border is made of transparent acrylic. On the reverse side, there is a pattern that appears three-dimensional through the polymer layer. Which has a positive effect on the type of material used.
It is difficult to install the strip on your own at home, since the technological process is complicated. This type is used in furniture production when making an individual design solution.
Home gluing instructions
When independently carrying out work on the repair of ceramic and porcelain items, you need to adhere to the standard instructions in order to avoid mistakes and reliably seal the damaged areas. The instruction includes the following steps:
- The surfaces to be bonded are thoroughly cleaned of dust and dirt, and then dried.
- The adhesive composition is applied in a thin layer to the surface of one of the parts to be joined.
- The parts are applied to each other and squeezed tightly for a few seconds so that the applied substance has time to set.
- The repaired item is left for a couple of hours to allow all the glue to dry, after which the free operation of the item is allowed.
We glue the furniture edge with our own hands
There are two technologies for gluing furniture edging tape. The first is for those who have glue on the back. In this case, you need an iron or a hair dryer. The second is for gluing tapes without glue. In this case, you need a good universal glue that can glue plastics and wood products and a furniture roller, a piece of felt or a soft rag so that you can press the edging well against the cut.
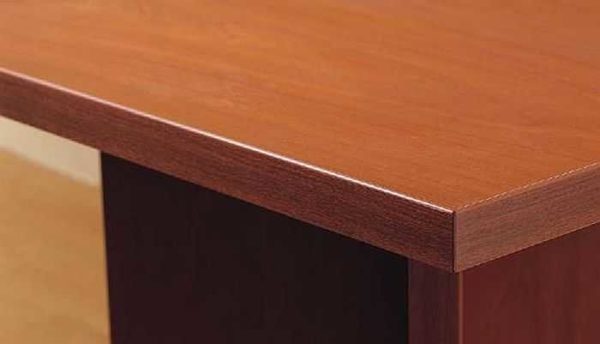
It's real to get such an edge at home
A little about how thick the edge to glue on what parts. Those edges that are not visible, according to GOST, can not be glued at all, but basically they are trying to process them so that moisture is less absorbed into the chipboard, and also to reduce the evaporation of formaldehyde. Melamine tape or PVC 0.4 mm is glued to these edges. The edges of drawers are also processed (not facades).
On the front ends of the facade and drawers, it is better to use PVC 2 mm, and on the visible sections of the shelves - PVC 1 mm. The color is chosen either to match the main surface or "in contrast".
How to glue a piping with glue yourself
The adhesive is applied to the melamine edge, sometimes it is on PVC. If you have chosen PVC, it is easier to start with thin ones - they are easier to process, any melamine is glued simply.
We take an iron and a fluoroplastic nozzle on it. If there is no nozzle, a thick cotton cloth will do - so as not to overheat the tape, but to melt the glue. A construction hair dryer is also suitable for this purpose. We put the iron on about "two", while it heats up, cut off a piece of tape. Length - a couple of centimeters longer than the workpiece.
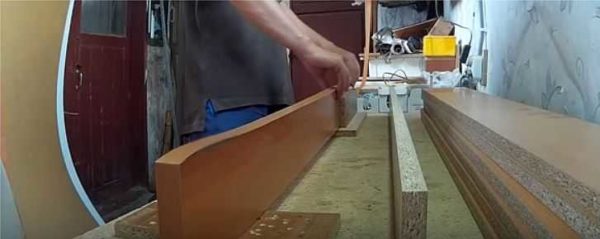
We put the edging tape on the part
We apply the edge to the part, level it, smooth it out. There should be small pieces hanging from both sides. We take an iron and, through a nozzle or a rag, iron the edge, heating it until the glue melts. Warm up evenly over the entire surface. After the entire edge is glued, let it cool. Then we start processing the edges.

Warm up with an iron
The edge can be cut with a knife, both with a sharp and a blunt side. Someone uses an ordinary metal ruler, someone is more comfortable with a stainless steel spatula.
So, take the tool of your choice, cut off the hanging edges of the edge. They are cut close to the material. Then cut off the excess along the part. Melamine and thin plastic can be easily cut with a knife. If the PVC edge is thicker - 0.5-0.6 mm or more, difficulties may already arise. Such edges can be processed with a hand router, if available. This guarantees a good result in a short time. The processing will take longer if you use sandpaper, but the result may not be worse.

Even a trowel with a hard blade can be used
One important point: when gluing thin edges, the cut of the part must be even, without protrusions and depressions. The material is plastic, which is why all defects are visible. Therefore, preliminarily go through the cuts with sandpaper, then carefully dust, degrease. Only then can you glue.
Edging with PVC tape (without glue on the back)
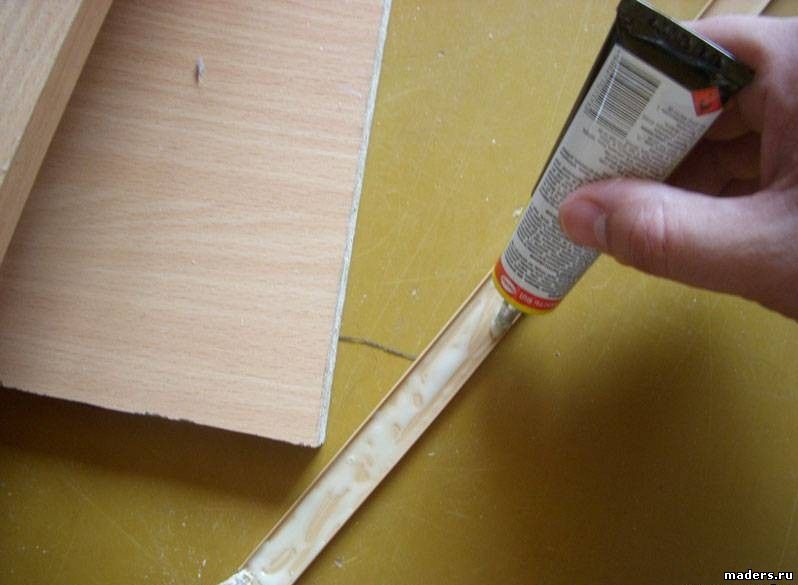
With this method of self-gluing PVC edges, you need a universal glue and a piece of felt or rag. We read the instructions for the glue, we carry out all the actions according to the recommendation. For example, for the Moment glue, it is necessary to apply and distribute the composition to the surface, wait 15 minutes, and firmly press the surfaces to be glued.
Apply glue and wait - no problem. To tightly press the edge to the cut, you can use a wooden block wrapped in felt. Instead of a bar, you can take a construction float, and fasten felt on its sole. As a last resort, you can roll up the dense fabric in several layers and thus press the tape to the surface.
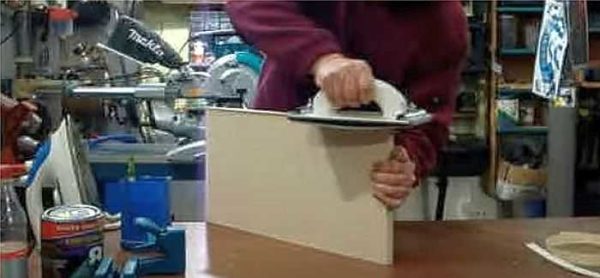
Press down firmly, leaning on with all the weight
The selected tool is pressed against the laid edge, pressed with all weight, pressing it against the surface of the chipboard. At the same time, the movements are stroking. So iron the entire edge, achieving a very tight fit. The part is left in this form for some time - so that the glue "seizes". Then you can start processing the edge.
Additional tips and tricks
When working with edging glue, a number of recommendations should be followed:
- the surface on which the composition will be applied must be cleaned of dust and degreased;
- in the room where the work is carried out, provide a temperature of +18 ⁰С and above;
- eliminate the presence of drafts, especially in winter, since a decrease in temperature can lead to solidification of the edge glue ahead of time;
- maintain normal humidity in the room;
- if necessary, remove the old edging tape, for which warm it up with a hairdryer or iron and carefully remove;
- glue consumption is more economical if a brand with a lower density is used;
- PUR glue is more economical than EVA glue.
It must be remembered that when using a manual edge gluing machine, productivity increases significantly, but all its parameters should be accurately set:
- time of continuous work;
- edge thickness;
- maximum and minimum of its height;
- feed rate;
- maximum dimensions of the workpiece;
- the weight of the hand-held machine.
The operation of the device may be affected by:
- the presence of different types of attachments for edges;
- the existence of a special dispenser for edge glue in the kit;
- the ability to rotate the part;
- simplicity of operation and maintenance of the device.
p> Share link:


