Patches and accessories for decorating defects
If the down jacket is torn in a conspicuous place and you need to hide the flaw, a patch will help. You can buy it at a specialty store with sewing supplies.
Decorative patches come in various shapes and colors. From a wide assortment, you must choose the option that will look appropriate on a down jacket, combined with the material of the product and the style of clothing.
The stores sell bright stripes with company logos, cartoon characters, animals, flowers and other images. Some elements have an adhesive backing, others do not.
To hide a defect on a product, you can purchase metal or plastic fittings: buttons, zippers, buttons. The decor is attached to the surface of the fabric with your own hands. In difficult cases, the task can be assigned to specialists.

Care rules
When it was still possible to sew a bologna jacket, you need to take proper care of it so that it lasts as long as possible. The main rule is that before washing and other procedures, it is imperative to study all the recommendations on the label. To keep the jacket from losing its shape, it is best to wash it by hand.
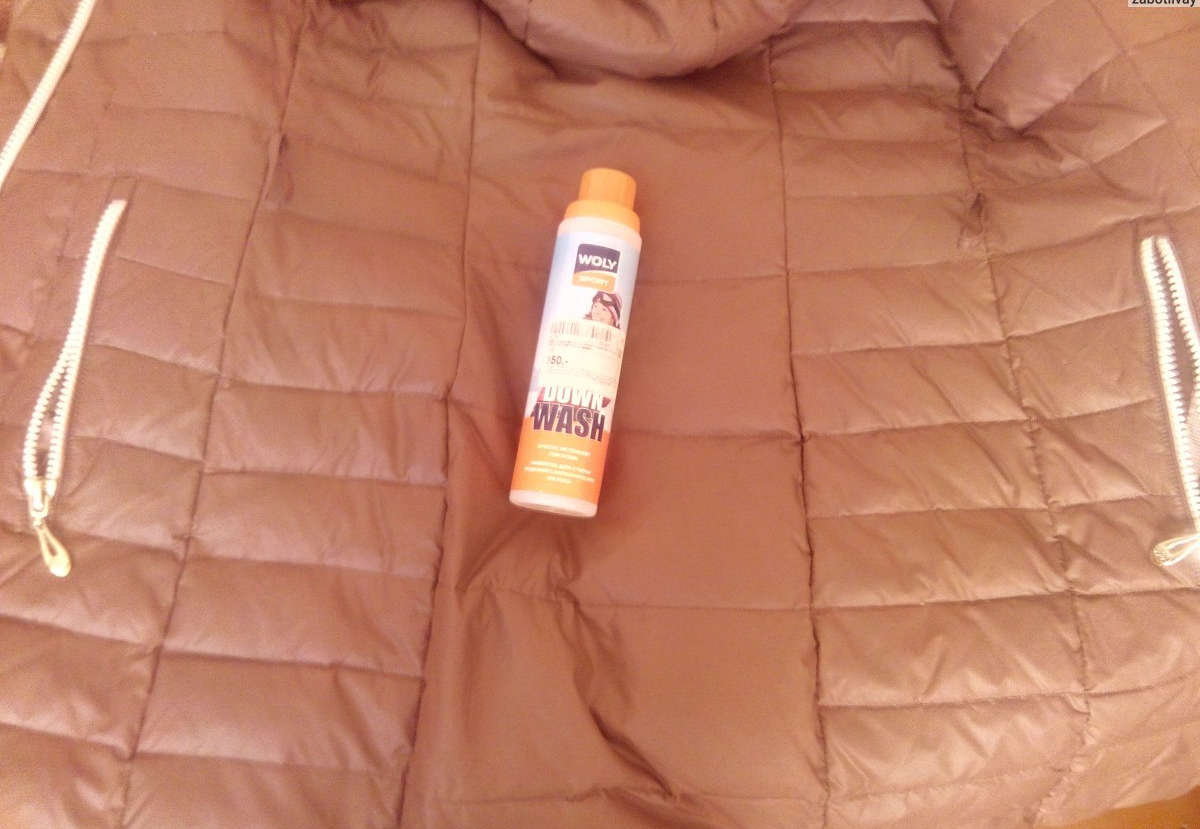
Specialized detergents and synthetic care products have a gentle effect. To remove all stains, the jacket can be soaked in a previously diluted product for 45 minutes (it all depends on the degree and nature of the dirt). The surface of the material can be rubbed with a sponge or brush, but not rubbed.
To prevent the jacket filler from straying into separate bunches, it must not be machine washed. Indeed, in this case, there is a high probability that creases and folds will appear on the surface of the thing, which are very difficult to eliminate. In rare cases, you can resort to the help of technology, but you need to choose a delicate mode.
After washing, the outerwear is not squeezed out, but allowed to drain over the bathtub or basin. For gradual drying, it is better to choose a well-ventilated area, but away from direct sunlight and electrical appliances. A small jacket can be hung on a hanger, but large products based on padding polyester are best laid out on a clean terry towel, letting them dry in a horizontal position.
How to remove glue from skin
After working with glue, situations often arise when it gets on human skin.
To wipe it off, you can use several methods:
- Rub the remaining glue with your fingers, roll them into a small ball.
- Mix hot water with laundry soap. The stained areas are thoroughly wiped with soapy liquid until the adhesive structure comes off.
- Use sunflower oil. Moisten hands with vinegar, lather. Wait 10 minutes. With a swab moistened with oil, carefully wipe the dirty areas of the skin.
- Apply White Spirit. This solvent can quickly remove glue residue from dirty surfaces. However, its pungent smell, and the active ingredients can negatively affect the general condition of a person.
If the above methods do not help, you can use a special chemistry called Antiklei Moment. They need to process dirty places, wait for the time indicated on the package, wipe off adhesive residues. Knowing how to wipe the glue from the skin, you can safely carry out repair work.
Conclusion
Genuine leather is not cheap, which is why not everyone can afford to buy products from this material after complex damage. You can fix your favorite thing yourself in order to save on the services of a repair shop.
The best glue for leather is extremely difficult to find.Products of even the same name from different manufacturers differ in technical and operational characteristics and can be used for different purposes. Now it became clear which adhesives are best to use, according to professionals.
In addition, you need to carefully study the gluing procedure. It will not be superfluous to practice on unnecessary leather trimmings.
Break the corner
There are situations when the jacket clings to sharp objects, which leads to the rupture of the material. To repair the damage, it is necessary to rip the lining with any sharp object.
Step-by-step instruction:
- Having turned the jacket inside out, spreading the seam near the damage, you need to unfold it in front of you to make it more convenient to work.
- Moisten a cloth with a solvent, wipe the area to be treated.
- Cut the patch to a size that exceeds the damage by 10-15 mm on each side.
- Cover the patch and the edges of the gap with glue. Do not apply adhesive to the ends of the material.
- Let the first coat harden for 20 minutes.
- Repeat the procedure.
- Apply a patch to the torn area. Smooth out its edges, put a heavy object on top.
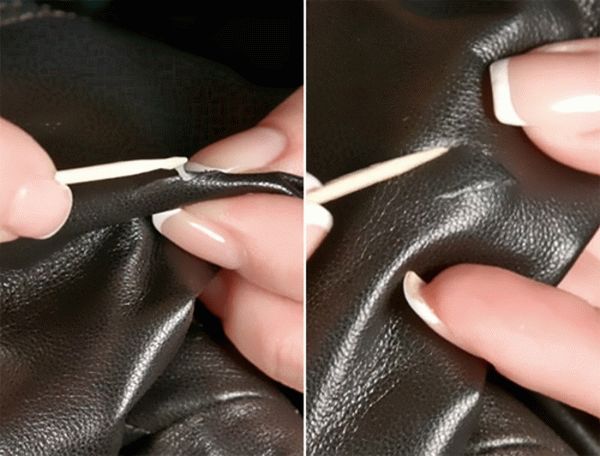
- After 10-15 minutes, turn the jacket back out. Use a toothpick to apply glue around the edges of the patch.
- Press down with a load for a day.
All that remains is to sew up the lining from the inside.
Folk remedies
If it is not possible to use aggressive chemical preparations for washing, then you can try using folk recipes. Improvised means are sometimes much more effective than expensive powders and gels.
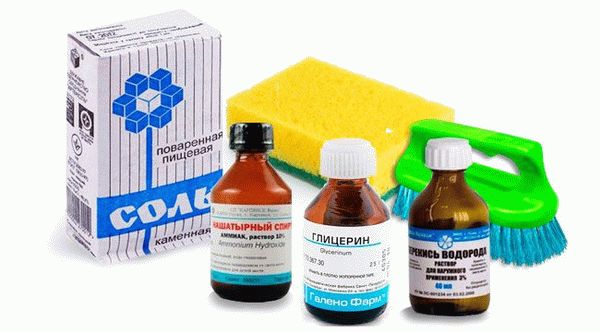
An excellent way of how to wash the greasy places on things is ammonia, which has been tested by many housewives. Not only Bologna fabric is cleaned with ammonia, but also natural suede.
Dissolve 50 ml of the drug in 200 ml of warm water and sponge the stained areas on the product with a sponge. After that, it remains to rinse the jacket in cool water and dry it - all the shine will disappear.
Potatoes are an unusual tool that can quickly remove the gloss, but very effective. It is enough to grate the shiny places with a cut of raw potatoes, and then wash the thing, and all the dirt will disappear.
Salt and alcohol are suitable for cleaning all types of fabric. First, the oiled areas are wiped with a cotton swab, abundantly soaked in rubbing alcohol, and then a thick layer of salt is poured onto the still wet footprint. After a couple of minutes, you need to clean the clothes with a brush.
Glycerin in everyday life was used by our grandmothers to wash things from stains. A cotton swab should be soaked in liquid glycerin, which is sold in pharmacies, and applied to all affected areas on the product. After 15 minutes, the item must be washed with soap or powder, or sent to the washing machine.
Will it be possible to remove dirt with an iron?
You can remove superglue from clothes with an iron. As you know, superglue is afraid of high temperatures and, under the influence of 80 ° C and above, it is able to melt and fall behind clothes on its own. How to do it:
- 1 Spread the glue-soiled item on a flat surface and place any clean cloth underneath.
- 2 The iron must be heated to the maximum temperature and lean against the place on the clothes where the adhesive was spilled, using a piece of natural cotton fabric or a handkerchief as a spacer between the iron and the material. The fabric or handkerchief should be monochromatic so as not to leave traces of paint on the surface.
- 3 Using a hot iron, iron the place on the fabric where the glue was spilled for a few seconds, periodically checking the condition of the glue base on the surface. When the glue begins to soften its structure, you can try to scrape it off with a blunt edge of a knife or other convenient object.

After removing the glue from the surface of the garment, the item must be soaked in warm water with washing powder or stain remover for a few minutes, then wash normally or by hand.
Sealing a torn jacket - step-by-step instructions
To seal a torn leather jacket, we need the following materials and tools:
- glue for leather (for example, glue Moment-1 "Classic");
- scissors;
- blade;
- toothpick;
- a fragment of a similar leather / leatherette for making a patch;
- weight for fixing the patch;
- hammer.


We repair the sleeve of the jacket in the following sequence:
- We turn the injured sleeve inside out, open the lining along the seam with a sharp blade;
- We find the place of the gap on the seamy side of the product;
- We lay the product on a flat surface, coat the cut joint with glue using a toothpick;
- We connect the edges of the gap end-to-end, lightly tap the place of gluing with a hammer in order to ensure full contact of the parts to be glued;
- Apply a uniform thin layer of glue to the previously prepared patch. It should be 2-3 cm wider in size than the torn area on each side;
- Press the patch to the inside of the gap, tap it lightly with a hammer;
- We put the load on the patch, leave it in this position for 24 hours;
- We turn out the sleeve, glue the visible seam from the outside with glue, leave it for another 24 hours.
VIDEO INSTRUCTION
If possible, you can additionally treat the seam with liquid leather - a special tool for repairing scratches and abrasions. In this case, the product will regain its original appearance.
How to patch a hole in a jacket at the seam
If the jacket is torn at the seam, then we use the easiest way to fix it. We do not invent anything such a hole can be sewn up with thread and a needle. A seam gap can be repaired with a sewing machine, but not many have one.
What the repair process looks like:
- Match the threads to the color of your jacket;
- Turn the jacket inside out and lay it on a flat surface;
- If there is a lining, then open it, so it will be more convenient to work with a torn seam;
- Thread the needle and carefully sew the gap. Sew so that the new stitch is a continuation of the old one, and the stitch does not differ much from the factory one;
- Sew the lining and turn the jacket inside out.
If you don't want to open the lining, sew the jacket with a blind seam. You need:
- Stick in a needle from the wrong side of the fabric (so that the knot on the thread is not visible) and from the front side sew the gap with parallel stitches;
- Maintain the same spacing between stitches;
- Once the hole is completely sewn up, fasten the thread and hide it inside the jacket;
- The braid will be able not only to disguise the torn seam, but also to make the jacket more original;
- A reflective tape sewn along the entire length of the jacket will cover defects and make you more visible in the dark.
This will help if the cut on your jacket is where the zipper can be inserted to cover the damaged area.
To keep your ripped jacket looking new, use decorative buttons or rivets instead of zippers. A spare piece of fabric is usually sold with the jacket, take it and close the slot, then punch it with buttons. This will create a kind of decorative element.
- Match the threads to the color of your jacket;
- If there is a lining, then open it, so it will be more convenient to work with a torn seam;
- Thread the needle and carefully sew the gap. Sew so that the new stitch is a continuation of the old one, and the stitch does not differ much from the factory one;
- Sew the lining and turn the jacket inside out.
Eliminating gaps
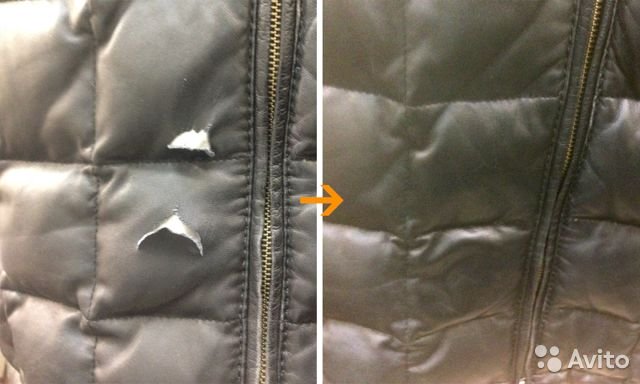
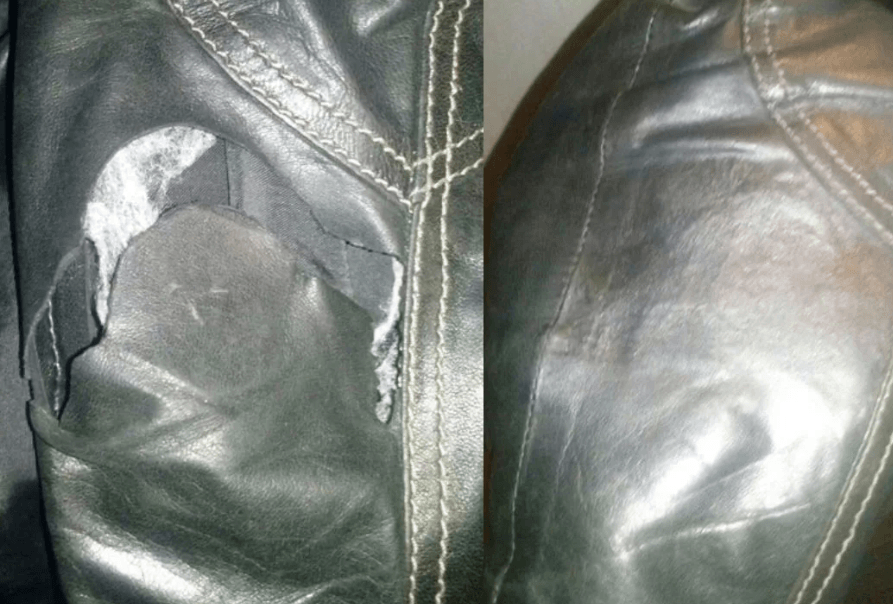
This is perhaps the most common problem among leather jacket owners. As soon as you catch on a poorly hammered nail, iron fence or other sharp object, an ugly cut will remain on the thing, spoiling its appearance. First, you need to figure out what the gaps can be.
On a note! The most common are two cases: either a piece of skin is torn out completely, or the cut will be in the shape of a corner.Note that the recovery procedures in these spirit situations are fundamentally different.
To begin with, we propose to consider the step-by-step instructions on how to fix a leather jacket, if a “corner” gap has formed on it.
- Turn the garment inside out. Look for a stitched seam on one of the sleeves, and then gently open it. It is most convenient to work on a clean, level, well-lit surface, so think beforehand about where you will perform the procedure. Unfold the jacket, then stick your hand through the ripped hole. You need to find the gap on the wrong side.
- Carefully wipe the torn area with a special solvent to remove excess fat from it.


- Fold the product flat on the table, and place the load on the patched area. Heavy books or a canned jar will do. Leave the jacket in this position for a day.
- After the required time has passed, treat the gluing line with a special cream paint for leather. This will help mask the seam and give the surface an even color.
- Now you just have to sew up the lining and enjoy the result of the work done.
Down jacket repair
In the event that the jacket is torn at the seam, there is no need to invent anything. This hole can be sewn up with threads. First, it is recommended to visit a haberdashery store that sells suitable threads.
It should be noted that such a gap can be closed even without a sewing machine. To make it more convenient to sew, the jacket must be put on the table, having previously turned it inside out.
It is important to sew so that the new stitch is a continuation of the old one. In this case, the seam should be as even as possible.
Seams are most difficult to sew up if the jacket has a lining. To make it easier for yourself, you should make a small incision from the inside, which, as a result, will also need to be sewn up.
When a torn hole appears, you can not only sew up everything or apply a patch. Various kinds of applications are popular now. This can be used. Thus, you can not only get rid of the hole, but also update your down jacket.
Before darning the gap, you should visit the appropriate store to select a sticker or pattern. A similar method can be used if the sleeve or the main part of the jacket is torn.
Appliques and stickers can help out in many cases, but this method has a drawback. Sewing a pattern or sticking a beautiful picture is possible only where it is appropriate, namely:
- On the sleeves;
- On the chest;
- On the pockets.
Otherwise, the stickers will look silly, which means it is best to consider another way to fix the holes. If embroidery was chosen, it should be done on a separate fabric, which will subsequently be sewn to the torn place of the jacket.
Braid or tape
You can mask the hole next to the seam with tape. Many are interested in the question of how to close up a hole in a jacket so that it is invisible and also beautiful. It's simple, you should show all your imagination
It doesn't matter how long and color the braid will be. Don't be afraid to experiment
Another way to mask the hole is with reflective tape. The advantage of this method is that it will not only hide the defect, but also make the jacket visible at night. It is necessary to cut a piece of tape, and carefully stick it on the gap.
There are several ways to sew up or make a hole in the jacket invisible. Most of the methods are universal for all types of jackets. However, for each type, a certain method is better suited. There are three ways to fix the hole:
- pull it off;
- glue;
- glue.
Quite often, a patch looks lonely on a jacket. In this case, you can stick a few more patches on the undamaged areas. Thanks to this, the stripes on the down jacket will look organic.
A variety of patches are great for repairing women's jackets, but men's models are not so tolerant of such unplanned "modernization". A bright colorful stripe will look ridiculous on a strict men's down jacket. In order not to be mistaken when choosing a patch for a men's jacket, it is necessary to give preference to items made in a strict, restrained style. Patches made of leather are well suited for men's jackets.
Despite the fact that winter jackets in most cases are made of reinforced materials, various damages occur on them - from holds to burns. Down jacket repair is made by several main methods:
- patches;
- thermal stickers;
- reflective tape;
- decorating the gap with a zipper or fittings.
The main difficulty when filling the hole on the down jacket is the inconvenience. If the item is not properly repaired, the filler may begin to crawl out. If the task seems difficult, it is recommended to take the jacket to the atelier.
Homework instructions
Before proceeding with the repair of the jacket, they carry out preparatory work:
- They study the type of material for the manufacture of a down jacket, its characteristics and possible methods of exposure. Information can be found on the product label.
- Examine the damage to the jacket or down jacket.
- Decide on a repair method.
- Find the materials and tools you need.
- Carry out repairs according to the chosen method.
Application of adhesive tape
This method is suitable for the case when the fabric clings to the nail and the gap is smooth, like a cut. For repair it is necessary:
- Cut a piece from a piece of a suitable color and texture slightly larger than the size of the cut.
- Carefully cut off the protruding threads on the damaged fabric.
- Place the prepared tissue under the incision.
- Cut off a piece of adhesive tape that is longer than the cut in the jacket.
- Place it between the patch and the incision.
- Gently iron the hole by lowering and raising the sole of the hot iron.
The edges of the cut at the time of ironing must be tightly closed.
If the seam has come apart
If the seam of the jacket has come apart and a hole appears, you need to sew it up by turning the down jacket inside out and ripping the lining. When the lining cannot be ripped open, you can get rid of the hole with a blind stitch by sticking in a needle from the inside out and sewing the seam with parallel stitches.
Hole in the front
An inaccurate gap, a hole from a cigarette located on the front shelf of a down jacket should be masked. The safest way is to glue reflective tape on this place, stretching it along the entire length of the product.

If appropriate, an embroidery or decorative sticker can be affixed to the tear area.
The product ripped from the back
A tear in the back of a jacket is a tricky case. In children's clothes, the hole is sealed with a patch, which is applied from the bottom of the gap. Beforehand, its edges should be carefully trimmed. The patch is masked with applique or braid. On an adult jacket, the patch is masked with rivets and other decorative elements.
How to hide a hole under a zipper
When the jacket is damaged in the form of a straight cut, it is masked with a zipper. The method is used only if the zipper can be inserted into this place, and its location there is quite acceptable.
Blind seam use
The jacket can be repaired with a blind seam. To do this, you need to prepare threads to match the damaged fabric, pins, a needle, scissors. Split off the two pieces of the cut with pins. Without unpairing the lining, a needle is inserted from the inside out and, hiding the knot, the incision is stitched with stitches of the same length parallel to each other. The thread is securely fastened and hidden on the seamy side.
How to fix a burnt hole
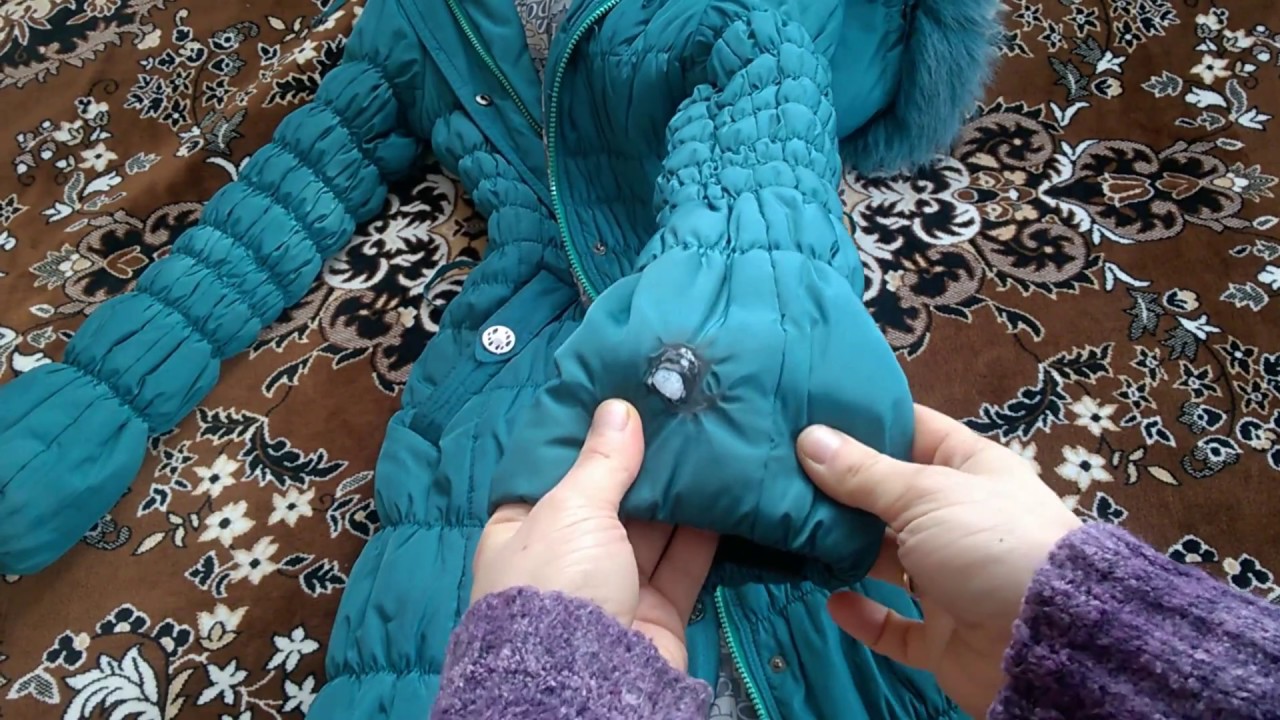
A hole resulting from burning tissue can be masked in different ways.It all depends on its size and location. If the size of the hole is small, fittings will help. The main thing is that it matches the style of the jacket. When the size of the burnt hole is significant, then two patches should be applied - one on the bottom of the fabric, the other on top. The second can be decorated with stitching or embroidery. The patches are applied with glue suitable for the material of the down jacket.
Iron-on stickers and applications
This repair method is very quick and allows you to deal with the problem within a few seconds. A sticker or applique is applied to the hole so as to overlap it with a margin. Above - a sheet of white blank paper. With a heated iron, iron the thermal sticker until the plastic layer melts.
The use of polyethylene or non-woven
To repair a polyester jacket, use dry glue in the form of a tape (non-woven) or ordinary polyethylene. For this purpose, the following actions are performed:
- The jacket is turned inside out, the lining is paired.
- Cut a piece of non-woven or polyethylene and a patch.
- Connect the edges of the hole.
- Above - interlining and patch.
- Iron through the fabric.

Extra pocket
Defects on the jacket can be closed using a pocket that is cut out of the same material as the jacket, or matching it in color and texture. The pocket is neatly folded over, the place of damage to the jacket is sealed and attached. The place of the decorative element must correspond to its purpose.
How to properly seal a hole or cut
When gluing the cut on the jacket, they act according to the plan:
- Pick up the material for the patch.
- Unscrew the jacket.
- Treat the hole with acetone or gasoline.
- Apply adhesive to the patch evenly.
- Join the edges of the cut.
- Apply a patch and install a press on top.
How to glue a leather jacket at home?

A leather thing belongs to expensive products, therefore, if there is minor damage, it is irrational to throw it away, and you don't want to get rid of a beautiful favorite thing. There are effective ways to help your leather jacket get rid of holes and cuts at home. So how to glue a leather jacket with your own hands? We will talk about this further.
Preparatory work
It is worth noting that the most reliable way would be to use the services of a sewing workshop. If you are ready to take this step, you should not experiment with glue at home.
After applying the glue, the workshop specialists may refuse to work with the skin.
This is due to the fact that professional craftsmen do not glue, but put neat patches that harmoniously fit into the design style of the jacket and do not violate it.
If you decide to glue the jacket with your own hands, then you should first purchase the right materials. For home gluing, you will need glue and solvent.
Not every all-purpose superglue is suitable for working on leather. You must first familiarize yourself with the instructions and characteristics of the material. Instant action products are not suitable because it takes a short period of time to complete the work.
The peculiarity of the glue for leather is that after its application, the product should not stand with a stationary stake, it is necessary to obtain an elastic surface. Adhesives with 2D and 3D effects work well for this purpose. They are the ones that guarantee plasticity.
These adhesives have a higher price tag than the usual super-versions, but are so good that they are used to make individual leather goods.
Thinner may seem like an unnecessary material for the job. But the quality of the preliminary cleaning of the surface depends on how long the patch will last.
You will also need a patch or lining option. Depending on how the jacket was torn: with a corner, a strip or just a piece of leather torn out, the quality of the patch depends. If a piece is torn out, a leather of similar quality and texture is required.It is desirable the same color, but it can be tinted after the completion of the work.
In the event that a cut remains just after the jacket was torn, an ordinary hard fabric is allowed as a patch. However, this option is not the best, because the fabric sticks and holds up worse. The dimensions of the patch should be 1 - 2 cm larger on each side than the hole. To carry out repair work, prepare the necessary piece of leather.
Work order
Work on repairing a jacket at home is performed in the following sequence:
- To complete the work, you must gain access to the back of the skin. To do this, the lining is ripped out in the area of one of the sleeves. The work must be done very carefully in order to restore everything well later.
- Spread out the inside-out jacket on a large surface. Degrease the reverse side of the skin in the area of the cut and the front side of the patch with a solvent.
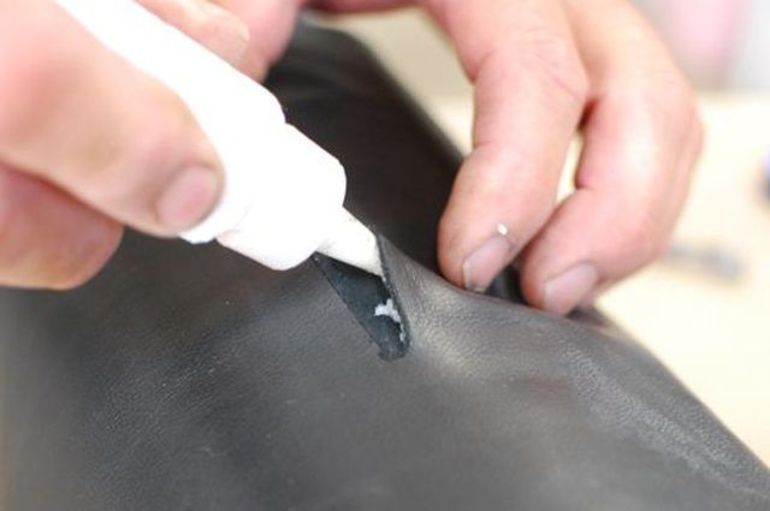
- The glue is applied in a thin layer to the treated surface. Read the instructions beforehand, check the holding time before joining the skin and the time required for the adhesive to fully cure.
- The next stage of work requires scrupulousness and accuracy. It is necessary to glue the patch on the back of the jacket. First, one part of the cut is glued, the second part is adjusted to fit it. It is advisable to dock the parts as close to each other as possible.
- Next, the jacket is turned inside out. Use a toothpick to push the cut edges apart and apply glue. The edges are carefully joined. Remains of glue are gently rolled off.
- The place of repair is left under pressure for the time necessary for drying according to the instructions.
- After completing repair work at home, you need to sew the jacket according to the style.
Sometimes it is recommended that before starting work, for better fixation of the part of the skin at the place of rupture, connect with tape from the front side. You can try this option as well. But first you should think about how to remove the adhesive coating left by the tape.
Repair in case of damage to the skin surface
In the event that the jacket has suffered significantly and a piece of skin has been torn out, the sequence of actions remains the same.
After internal gluing work, it is necessary to restore the surface with an external patch. It should correspond to the configuration of the torn piece of skin as much as possible in size and shape.
Well, if it is not lost, in this case you can try to glue it back.
An additional patch is installed from the front side. Before applying the glue, the surface is treated with a solvent.
How and with what skin is glued
How to fix a leather jacket? Restoring a leather product involves studying the process itself, preparing the necessary material and tools.
How to glue a hole in a leather jacket
You can seal a hole in leather clothes with a special glue for leather and shoes. Different brands have different adhesive composition, but each of them must be elastic, have good viscosity, waterproof and heat-resistant, and have transparency when dry. You can buy an adhesive in specialty stores or households.
Several variants:
- Rapid is a glue with a pungent odor that passes five minutes after gluing. Set quickly. When gluing, the skin is applied to two surfaces, dries out a little, then a second layer is applied, after which it is gently squeezed.
- Ago is an effective glue for gluing leather surfaces. Apply on two surfaces, shrink and leave under pressure for 20 minutes. The glued seam becomes strong.
- Moment - glue does not harm the human body. Water and heat resistant. Moment 1 is universal, does not spread, transparent, adheres firmly, the seam is flexible.
All of these adhesives are suitable for bonding both natural and artificial leather.
How to seal gaps
When repairing a jacket tear, tools and materials are first prepared:
- Patch 2 pieces - selected in the same color as the item. You can use an old leather glove version. The patch for the inner part should exceed the size of the sealed place by 1–1.5 cm, and the outer one should fit exactly in size with the hole.
- Glue.
- Sharp scissors.
- Small brush.
- Toothpicks.
- Degreaser.
- Dye for leather.
- Weighting agent.
Bonding process:
- Initially, one patch is glued on the inner edge. To do this, the lining is carefully detached along the seam, and an approach to the torn section is obtained.
- Spread adhesive around the edges of the flap and press against the hole.
- When the inside is dry, work begins on the outside.
- Spread the entire piece with glue. Attach to the desired location and press down. To better match the patch with the hole, more glue is added to the edges of the patch and the material is tightened.
- After fully gluing, it is better to paint over this area with a suitable paint, this will help to make the seam less noticeable.
- Sew backing fabric.
We advise you to watch a video about repairing leather goods:
How to seal a cut on a leather jacket
To complete the process of gluing a cut on a leather jacket, you need to find a suitable place to perform the work. It must be well lit.
Stages of work:
- Unfasten the lining fabric, find the incision.
- Cut the patch to the desired size (1–1.5 larger than the cut size).
- The surface must be degreased.
- Apply glue to the area along the edge of the cut.
- Apply glue to the surface of the patch.
- Wait time according to the instructions.
- Connect two surfaces. Make sure that the edges of the cut are as close to each other as possible (you can apply additional glue to the edges with a toothpick).
- Align the place to be glued.
- Press down with a weighting compound.
- Wait until completely dry (about a day).
- Paint the front side with paint.
- Sew backing fabric in place.
Fixing the collar
It is very difficult to fix a collar on a jacket. The best option is to unpick and sew a new one.
If the collar has slight scuffs, then you can simply paint over these places. If a little cracker, then use liquid skin.
Adhesive for car leather
Before buying leatherette glue for auto or genuine leather, you need to pay attention to several important factors.

These include:
Setting time.
Solubility under the influence of chemicals, various aggressive substances.
Thermoplasticity - it is important to take into account the temperature region of your place of residence in order to choose the right glue.
The two most popular groups of adhesives are based on polyurethane and polychloroprene.
Mah 800 * 213 glue (based on polychloroprene)
The product from the German manufacturer has many positive reviews among professionals. Among its own kind, it is the leader in auto repair shops for the uplifting of car interiors. The main advantages are resistance to temperature extremes, reliable bonding with a prepared base.
Polyurethane UR-600 (Rogneda)
The leather glue is elastic, waterproof and very durable. One-component, transparent. It sets quickly, does not contain solvents. Designed for stretchy and ductile materials. They are also glued to shoes, PVC. With the hot method, full hardness is achieved after 4 hours, with the cold method - 24 hours.
Clay 88-Luxe (Rogneda)
As versatile as the first two. Bonds a variety of materials, the seam is resistant to moisture and frost. Durable and elastic. Maintains long-term stickiness, this quality helps when working on large areas. According to reviews, it is suitable for skin without problems, but there is a significant drawback - a persistent smell for several weeks after the interior is tightened. Curing - 24 hours.

Can I sew it up?
They resort to using a sewing machine if the jacket is torn at the seam or there is a fairly large-scale hole with a torn piece of material.First of all, you will need to rip the gasket, and then process the edges of the hole so that they become even. A flap should be cut out of ordinary fabric, which will be 2-3 millimeters larger than the damage on the jacket. This piece must be attached from the inside. In the same way, you will need to cut out the leather material and lay it on the front side of the thing.
Next, you need to arm yourself with a strong needle, which is designed for stitching leather goods. When using a regular needle, the possibility of damage to the jacket or sewing machine is possible. Then a neat seam should be made that will combine the leather and ordinary material. However, this method is not considered a panacea, since the patch is clearly visible. So that the result is not very conspicuous, they put a few more patches all over the jacket.
How to sew a lining
In many jackets, an inexpensive material is used as a lining - artificial silk, polyester, satin, satin, less often viscose. With regular wear of clothing, holes appear in the seam area, which eventually turn into large holes.
How to repair jacket lining:
- turn the jacket inside out;
- select the desired thread color;
- thread the needle;
- cut off the frizzy part of the fabric along the edge of the hole;
- Sew the lining by hand with a stitching stitch.
In half the cases, holes in the lining appear in the seam area. In case of untimely repairs, they increase every day. To repair a loose seam, use a sewing machine:
- set the latching mode;
- adjust the stitch length (optimally 1.5 mm);
- fold the two halves of the lining and clamp it under the machine's foot;
- Sew with a 0.5 cm bartack at the beginning and end.
Shiny stains after washing
It happens that even after a thorough wash, the greasy spots on the jacket are not washed, and an oily sheen remains. The main reason for the appearance of a greasy shine is too high water temperature during washing.
To remove stains that remain even after washing, you can use "Vanish", but only without chlorine, or the balm "Laska Magic of Color".
Removing stains step by step:
- Dissolve the cap of the chosen product in a large basin of lukewarm water.
- Soak the product in the solution for 4 hours. It is not worth keeping the thing in the product for too long.
- After soaking, thoroughly rinse the jacket or down jacket with plenty of water, changing it several times.
- Wring the item in the washing machine and hang to dry.
If, even after such processing, the result turns out to be unsatisfactory, then the only way out is to dry-clean the thing.
What is known about natural and artificial leather (leatherette)
Before you know how to glue the leather, you need to consider what kind of material it is, what varieties are.
There are several types:
- Artificial leather, it is granitol, vinyl leather, stretch leather and others. Leatherette at a lower price, which are made from polymers. In appearance, it is not much different from natural. Loses in performance, however, withstands mechanical stress better.
- Genuine leather is the most expensive option, which is used for sewing clothes, various accessories, making furniture, and decorating car interiors. It is comfortable to wear and durable.
- Recycled - analogue of leather, made from natural scraps and parts.
- Eco-leather stands out as a separate group.
Leather is vegetable and chrome tanned.
In addition to tanning methods, they are divided into:
- clothes;
- haberdashery;
- lining;
- furniture;
- shoe.
Made from bulls, sheep, goats, pigs, calves, exotic animals.
According to the processing method, the following are distinguished:
- suede leather;
- split;
- nubuck;
- perforated;
- embossed and some others.
Coated processing method:
- Painted with nitro paint, the relief created by the press.
- Uncoated - painted, but not additionally processed.
Eco leather
It is a combination of a polyurethane base with synthetic fibers. After launching into production, the number of animals killed to obtain natural material has decreased.
Several strengths are noted for which it is appreciated by modern manufacturers and buyers:
- Various color variations.
- Resistance to mechanical stress.
- Less costly production process.
- Visually, the pattern is difficult to distinguish from genuine leather.
- Easy to process, sewn.
- Durability, wear resistance.
- Low hygroscopicity.
- Does not cause allergic reactions.
To connect two separate pieces of this material, you can sew them, or use eco-leather glue.

