How to fix an overhead sink
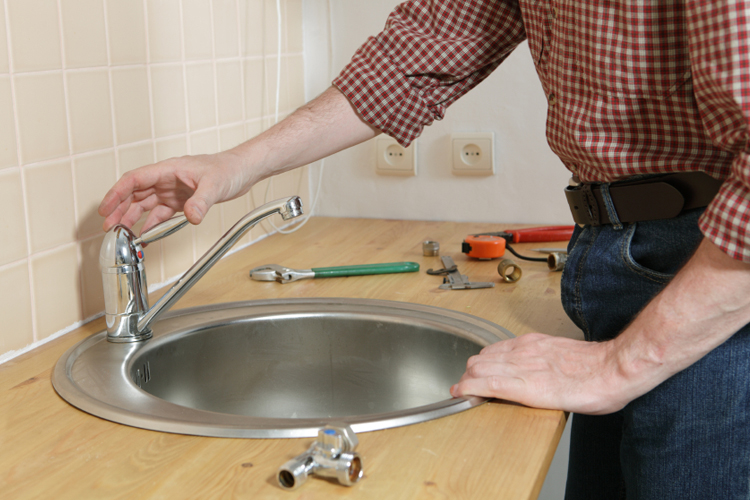
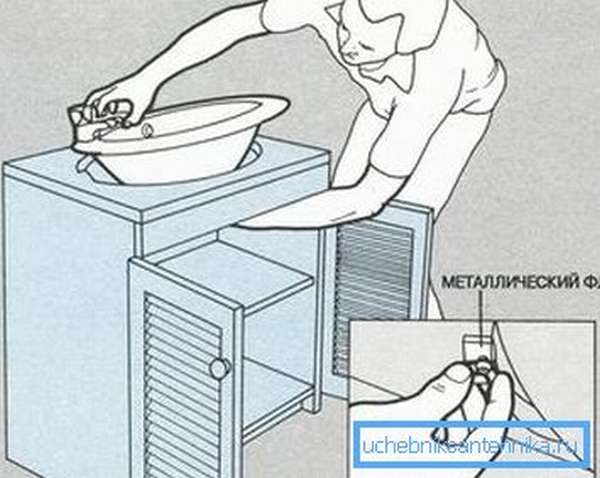
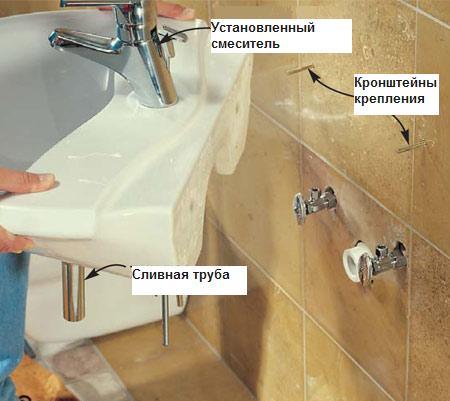
The surface-mounted sink can be fixed directly to the wall without a cabinet. To do this, you need to use special brackets (sold in plumbing stores or furniture fittings departments). First, make the first markings at the desired height from the floor (about 80 cm). Then, just below the first, make a second markup - it should correspond to the thickness of the wall of the sink at the back - you get a line for attaching the brackets. Then measure the distance between the proposed installation locations of the brackets on the sink. Next, you mark an equal distance on the line for attaching the brackets. Then drill holes in the wall, screw on the brackets and secure the sink.
The easiest option is to install an overhead sink on a special cabinet (underframe). In this case, it should be wider in width than the underframe. Those. You simply install an overhead sink between the sides of the cabinet, and its sides will cover the edges of the cabinet. To do this, treat the end of the cabinet under the sink with silicone sealant, place the sink and press down. After the sealant has dried, the sink will fix well.
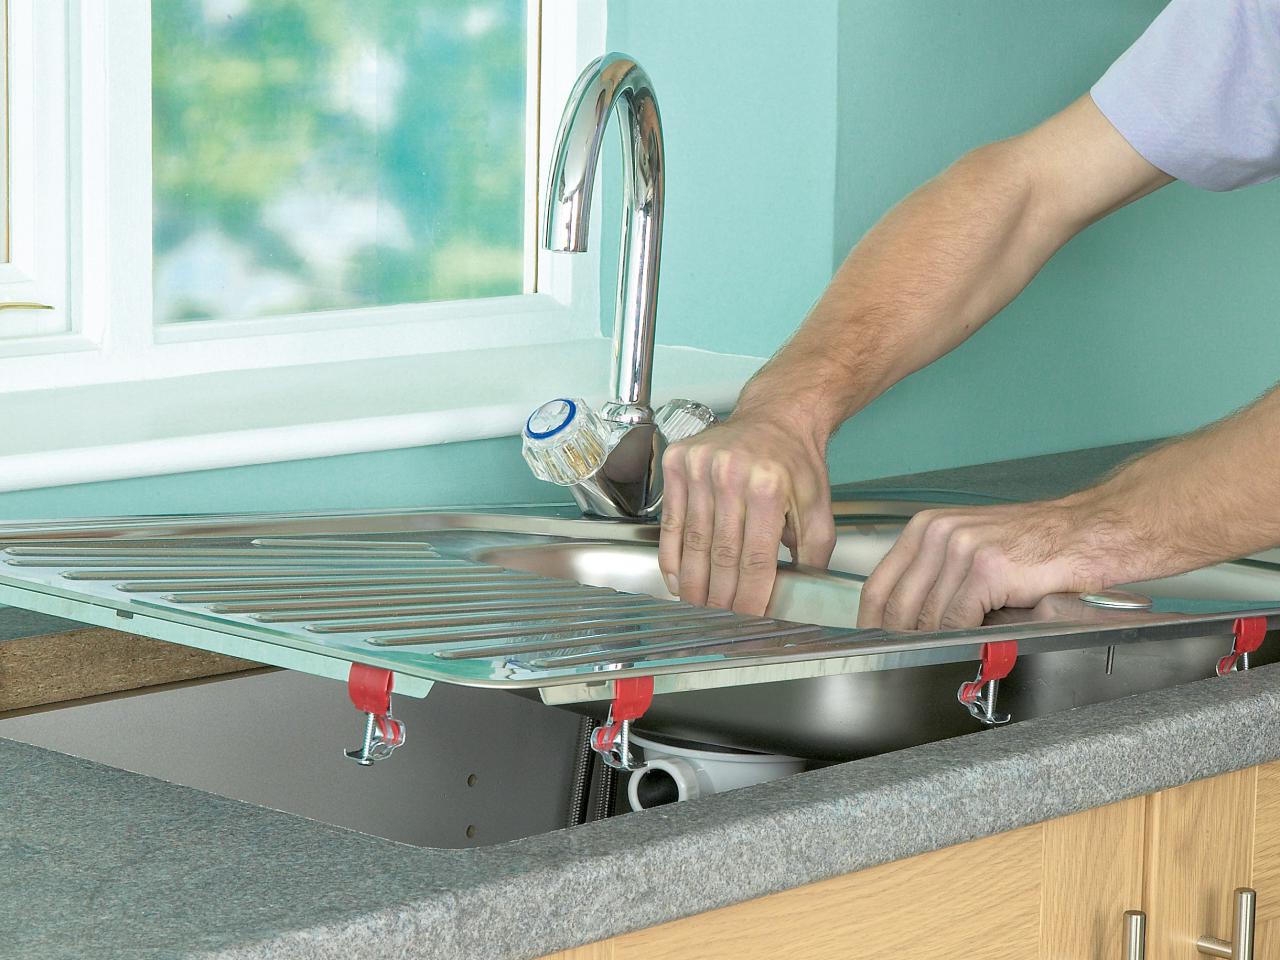
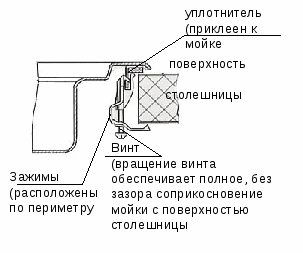
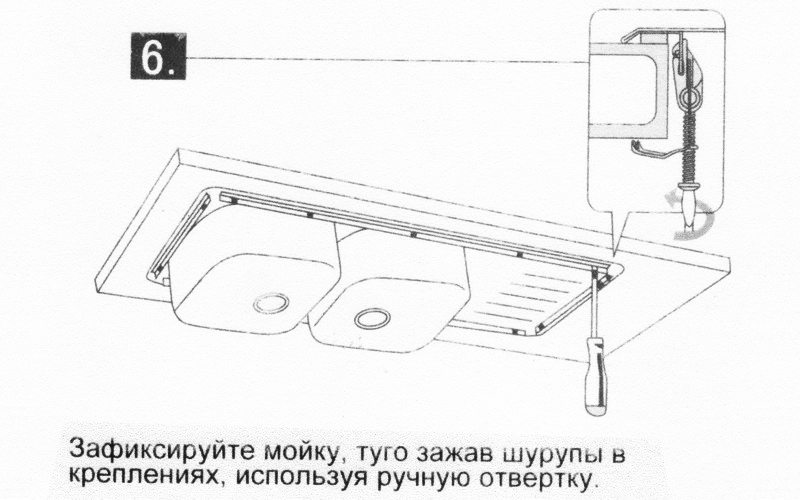
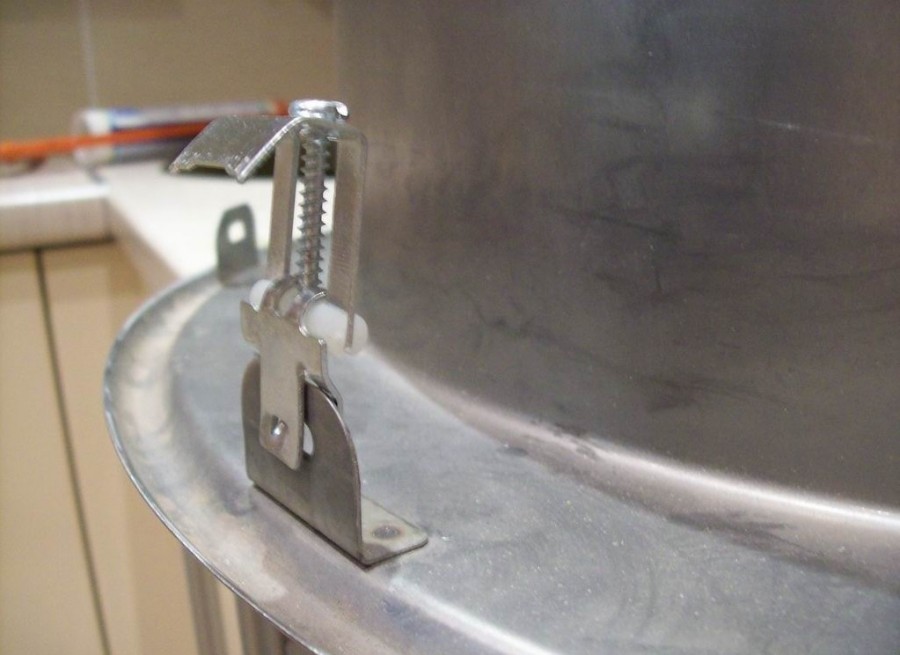
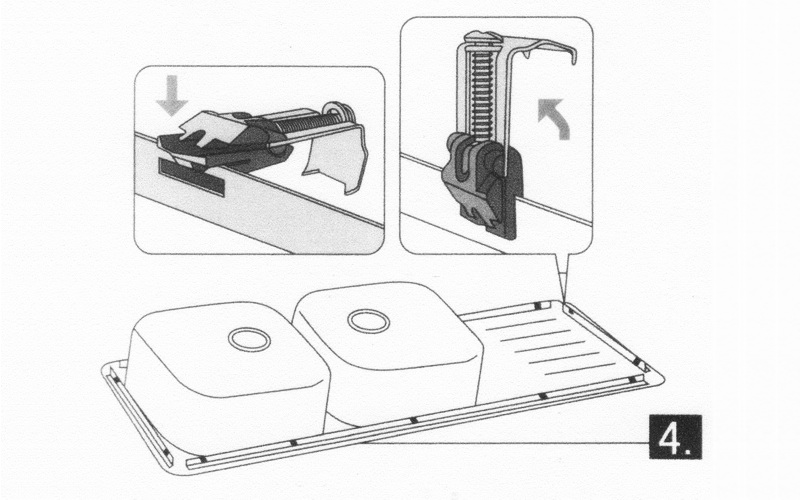
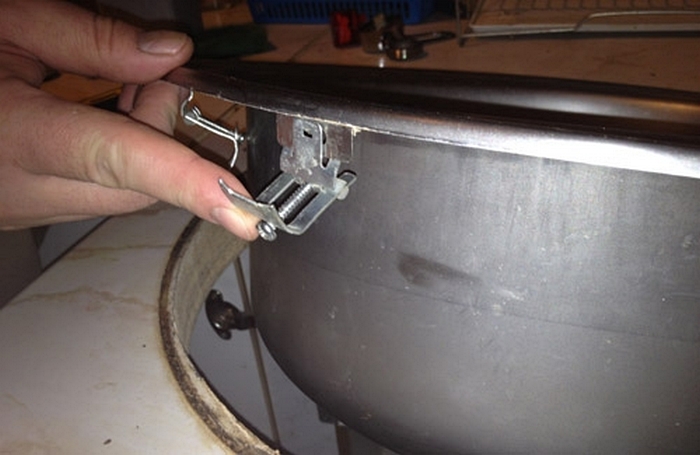
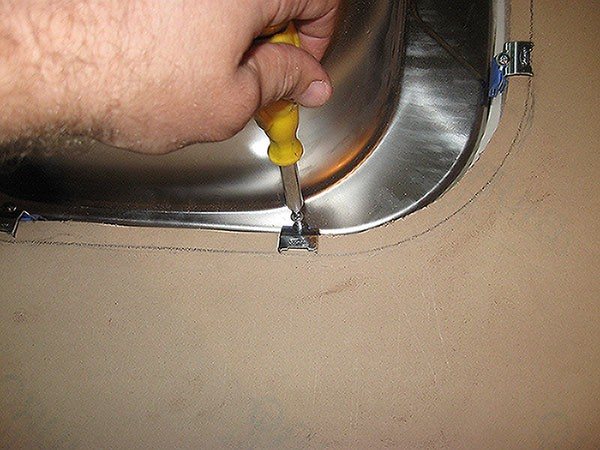
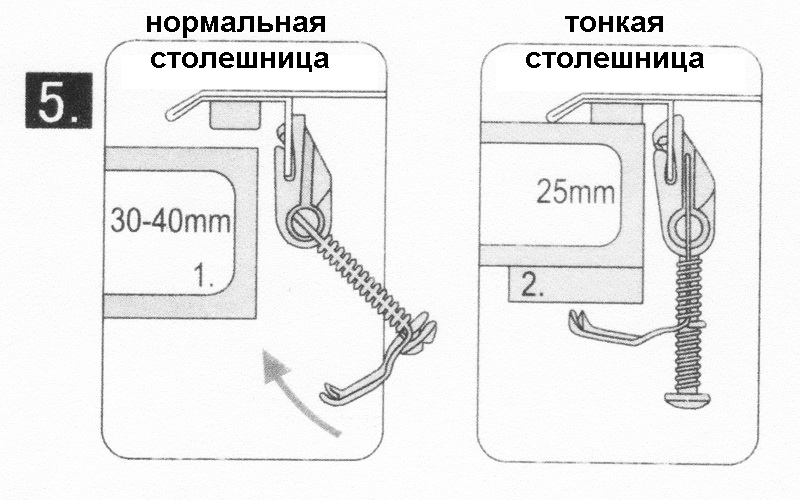
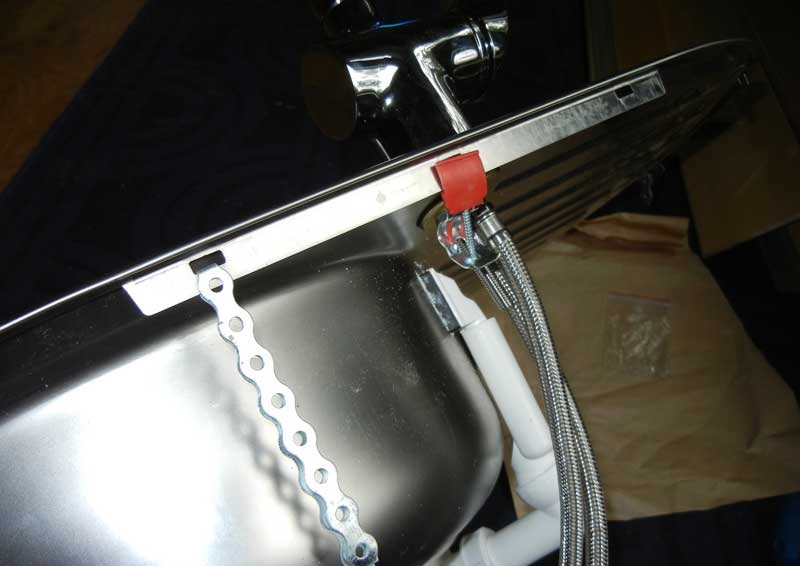
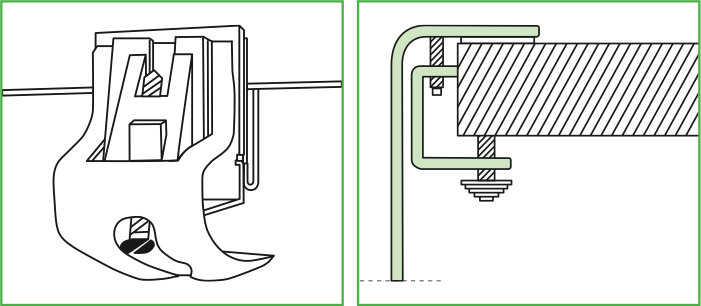
In normal situations, an overhead sink is fixed with special fasteners (4 pcs), which can be included with it or sold separately. Initially screw the self-tapping screws into the cabinet walls from the inside. Then attach the brackets to them (the corner should face the curbstone). Next, you need to tighten the screws a little. Then install the sink and slide the mounting angle along the screw until the self-tapping screw locks into the recess of the corner. Finally, pull the fixing surface of the sink to the underframe.
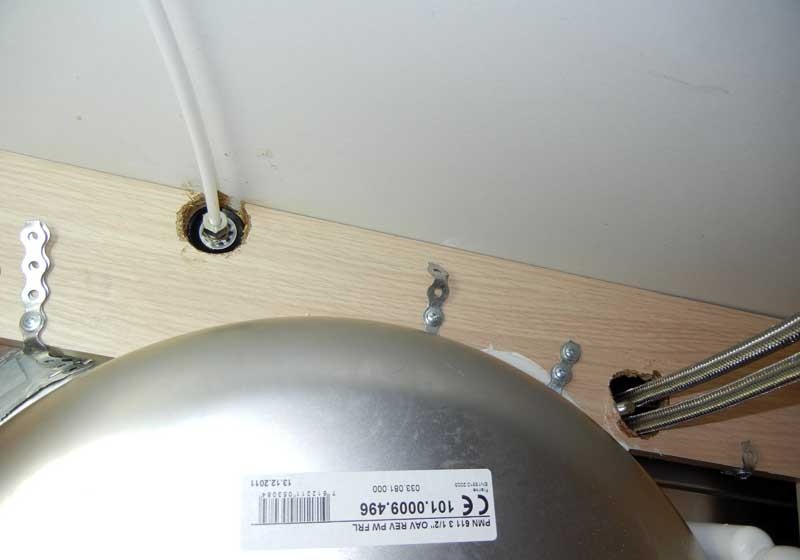
If fixing with standard brackets seems unreliable, fixing the sink with wooden blocks and furniture corners will save the situation. To do this, you need to put the wooden slats in the sink overhead box. Then screw the four metal corners to the strips around the sink and place it on the cabinet. And only then you must fix the second part of the corner from the inside to the walls of the underframe.
Pros and cons of self-assembly of the sink in the countertop
When buying a new sink, the question often arises of whether to install the structure yourself or invite a professional, so you should first evaluate all the pros and cons of such actions.
Self-installation benefits:
- The ability to save your budget. This is the main point that encourages people to do the editing without the help of specialists.
- Thorough control of work performance. You can do the installation of the sink slowly, only in the consolidated time. This will allow you to do the job efficiently.
Of the negative aspects of self-installation, the following can be distinguished:
- Poor installation of equipment is fraught with leakage, which will result in damage to property.
- Not every beginner has all the necessary tools that are needed during the installation of a sink.
-
Installation of the structure by a professional eliminates the possibility of chips and cracks.
When doing self-installation of the sink, you must follow the detailed instructions, then the more likely you will not make a mistake.
In addition, it is important to make sure that all the necessary tools and fasteners are included with the product.
3 more important tips
Do you want to connect the sink yourself correctly? Don't forget 3 more nuances:
- It is better to replace rubber seals with silicone sealant. The rubber will not provide a snug fit and will not have a sufficient life, while the sealant will fill all gaps and cracks;
- It is better to connect sinks made of natural or artificial stone together in order to prevent falling and damage;
- The fixing of the sink to the countertop or the module with self-tapping screws is carried out exclusively by hand. Using a tool can create too much stress, which could damage the structure.
How to install a sink in the kitchen with your own hands - a step by step diagram
Step 1: markup
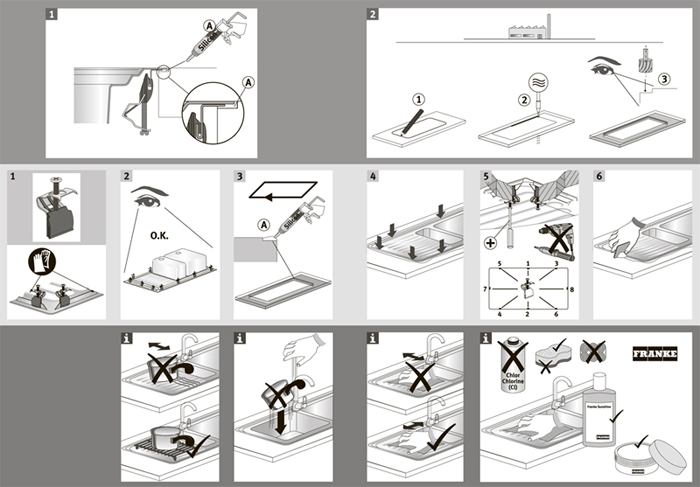
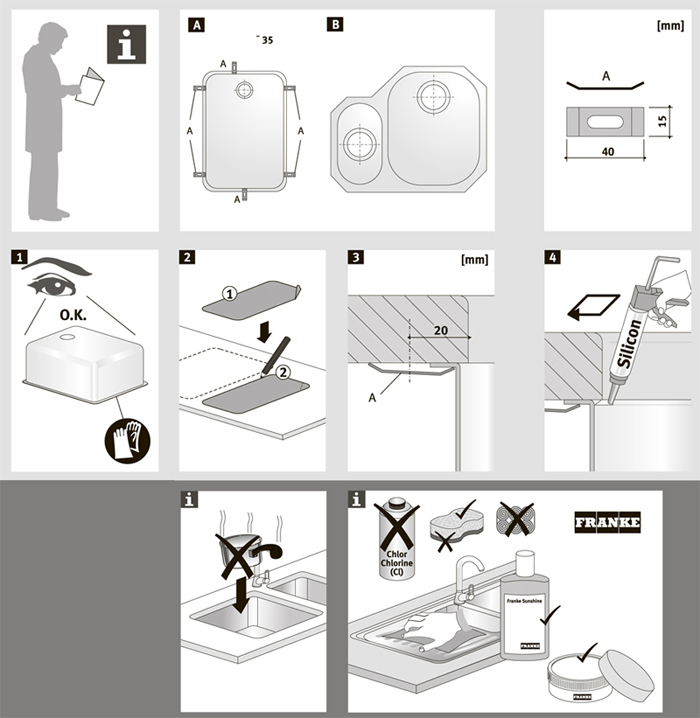
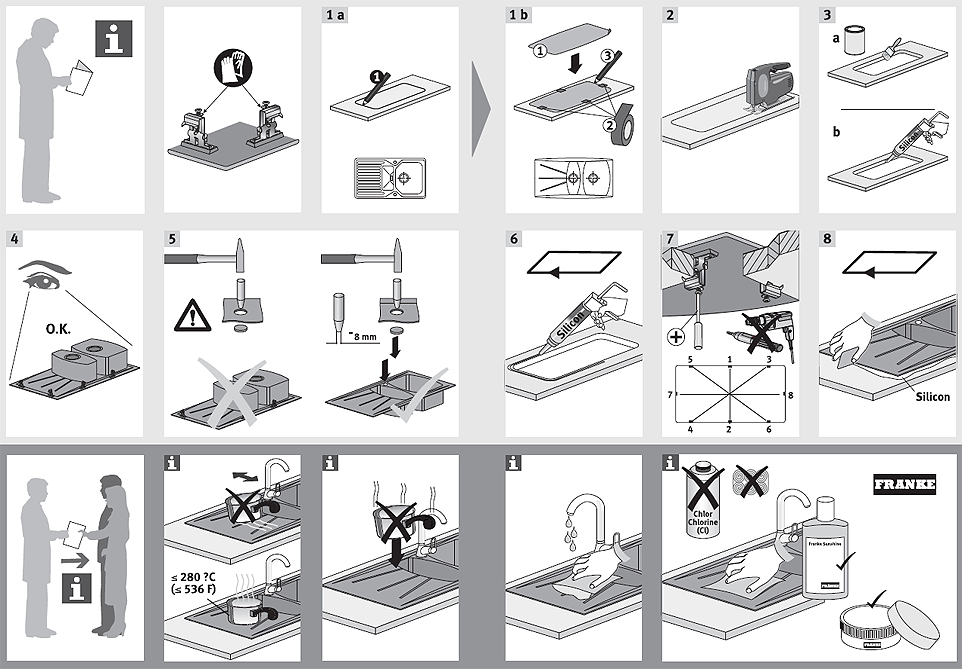
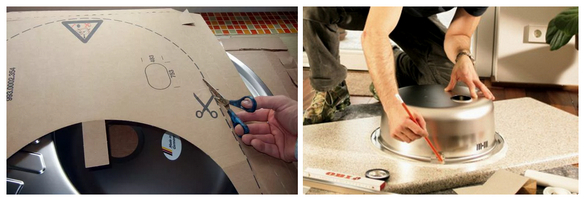
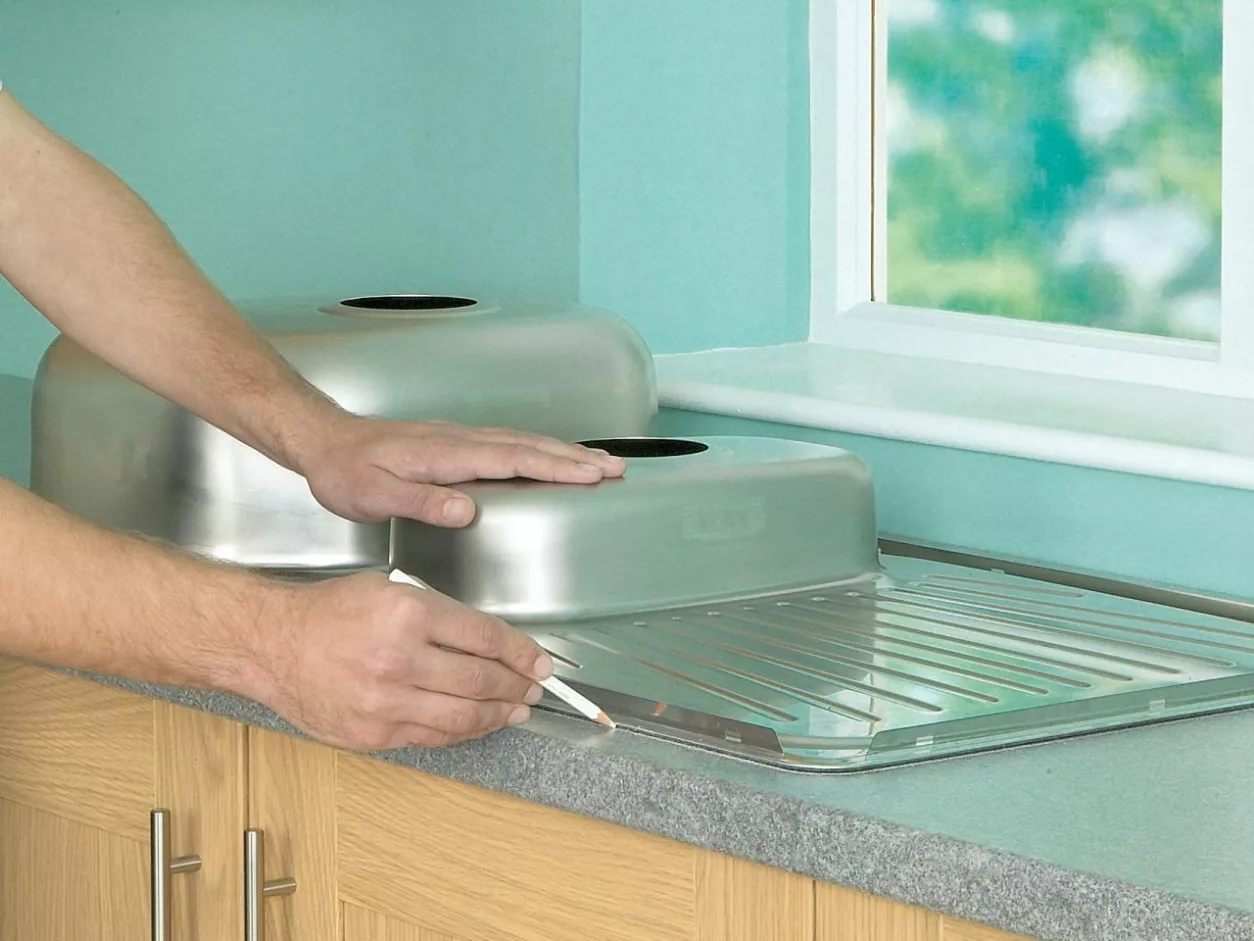
Most inset sinks are sold with a ready-made template, which acts as a packaging container. It is enough to cut out such a template from cardboard and attach it to the countertop at the location of the sink - and the contour of the seat is ready.
If there is no template, you will have to make it yourself. For this, it is better to use thick cardboard (for example, from a TV or monitor). After measuring the inside of the sink, transfer this measurement to the cardboard surface and cut off a few centimeters more. It is better to cut a piece of cardboard several times than look for a new piece.
Step 2: Location
The proverb about the need to measure seven times before the first incision is very relevant to our work. You can easily and freely move the finished template along the tabletop - until you start sawing through it. So take into account how the tap will open, where the filter will be, how the kitchen utensils will be located, etc.
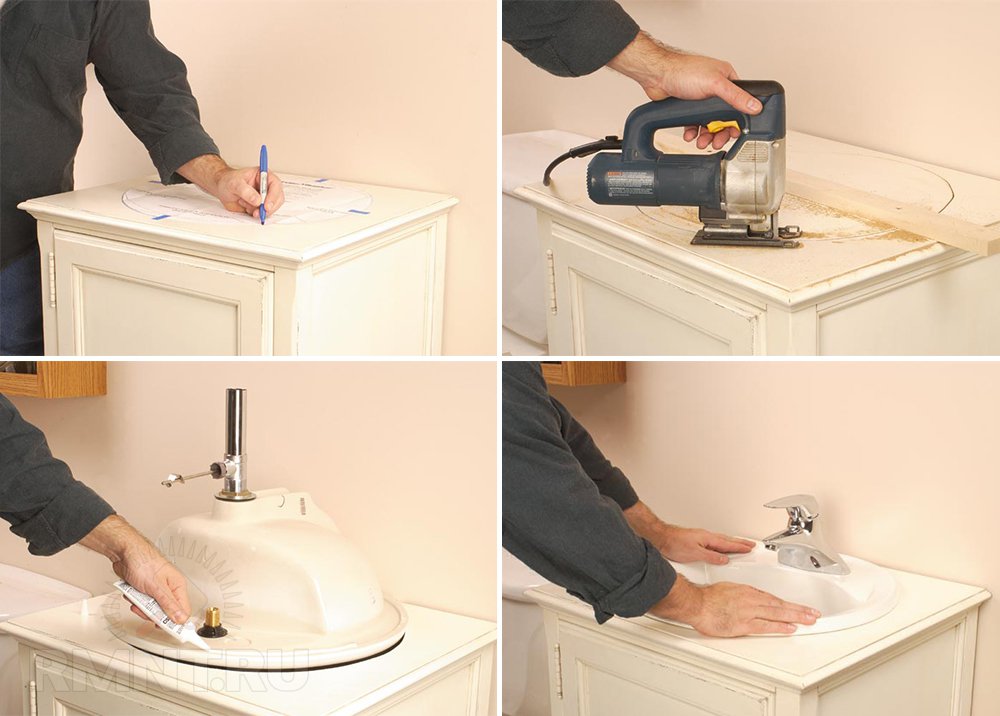
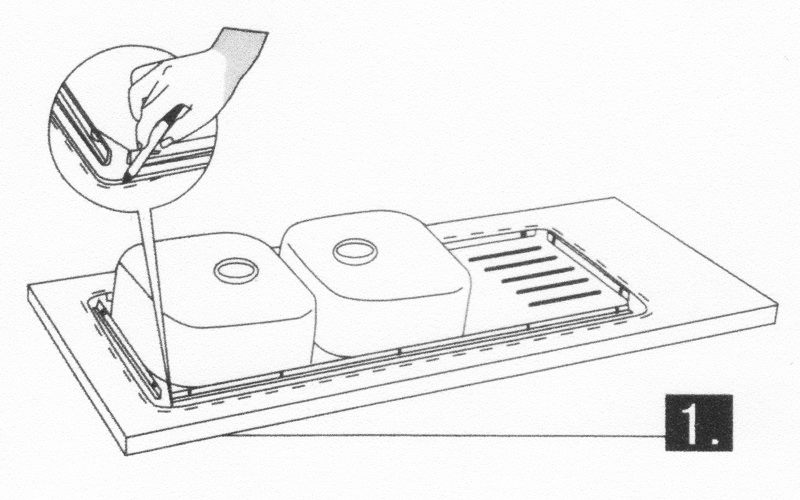
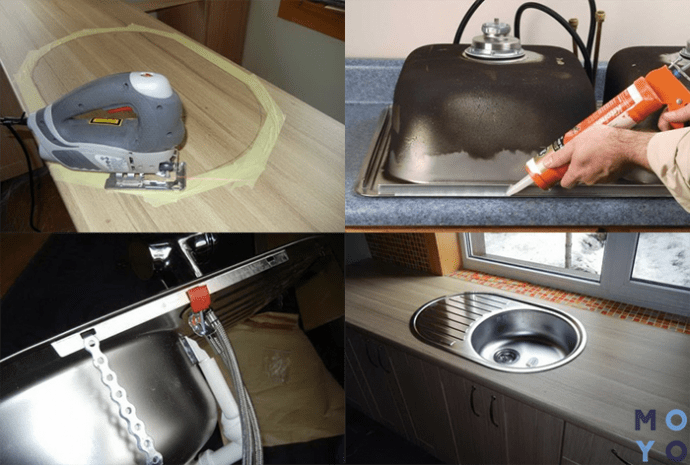
Trace the cardboard template as smoothly and accurately as possible. To do this, it is attached to the tabletop with ordinary tape and one thin line is drawn with a pencil. After that, the "cardboard assistant" is peeled off and sent to waste paper, it will no longer be useful to us. We glue the perimeter of the future hole from the outside with masking tape 8-12 cm in order to prevent damage from mechanical tools.
Step 3: drill and saw
Yes, the first power tool will be a drill, not a saw. A drill with a diameter of 2 mm is selected and several closely spaced holes are drilled in the place where it is convenient to start cutting the contour. The holes are connected into a single groove using a chisel.
It is convenient to saw the tabletop with a jigsaw on wood. Just do not forget to stock up on extra canvases - thick tabletops are difficult to saw, the web is likely to break with a slight deviation from the vertical. Take your time and drive the jigsaw confidently - it is more difficult to fix a crooked cutout than to immediately cut a hole along a plumb line, with a strictly perpendicular cut.
Step 4: Finish the installation
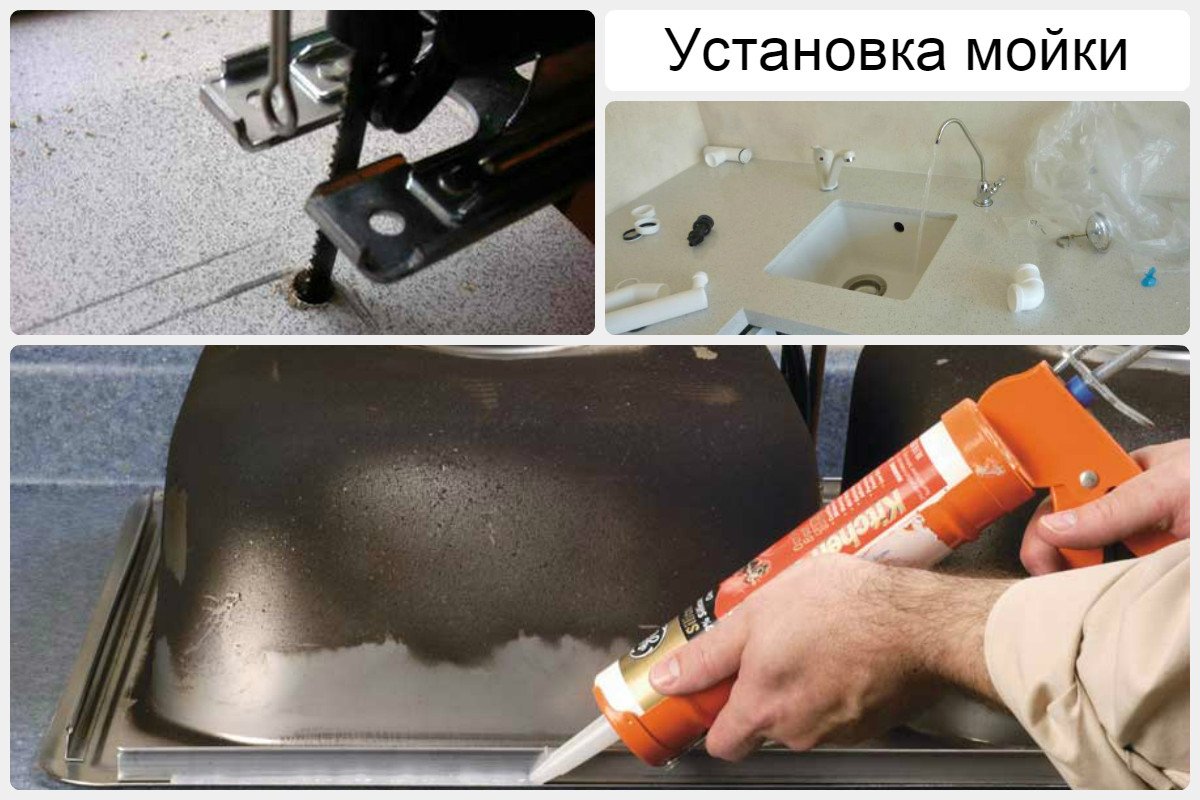
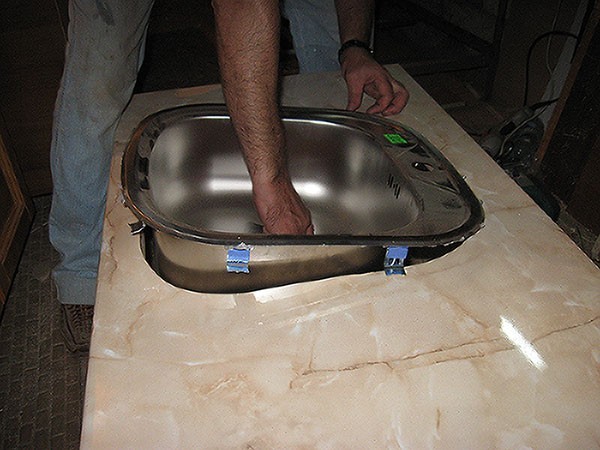
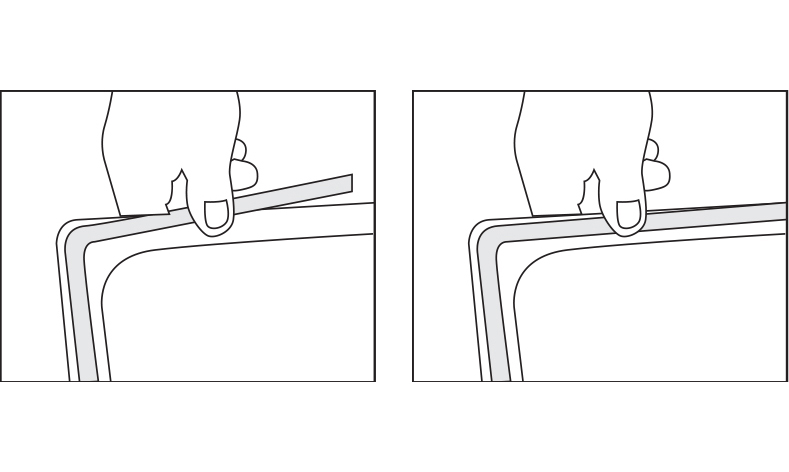
Apply sealant to the end of the fresh mounting hole and insert the sink tightly. We hold the sink under load from 10 to 60 seconds (depending on the type of sealing compound)
Carefully remove excess glue from the outside and inside of the sink and wait a few hours until the sealant has completely solidified. We connect hoses, pipes, sewers, install a mixer and use the new sink for pleasure
How to choose a sink under the countertop?
In any plumbing store, the buyer will see a large number of various sinks, but not all of them are suitable for tie-in. There are several options:
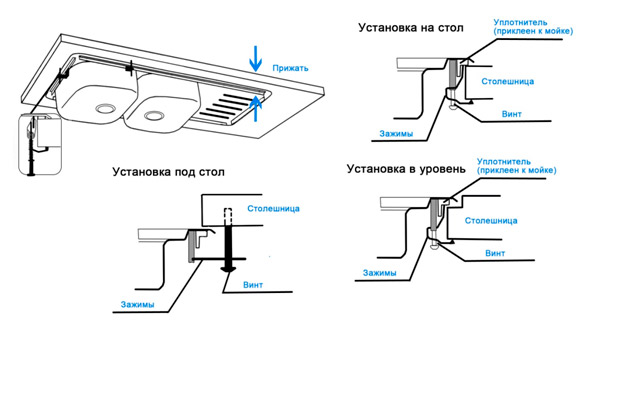
- Overhead. Installed on top of the curbstone, completely cover it. Extremely easy to install. The main disadvantage is the presence of gaps between the furniture and the sink.
- Mortise. They are inserted into the hole provided in the base. Installation is a little more complicated, but the sections are reliably protected from moisture.
- Integrated. Practical sink / worktop combination. The side can be at different levels: flush with the table, below it, etc.
- Under-table. They can only be integrated into worktops with special properties: hardwood or stone. The edge of the bowl drops below the level of the base.
In practice, cut-in devices are most often mounted. They are durable and attractive, easy to use. The most demanded equipment is made of stainless steel and artificial cast stone.
Installation process
The installation process is very simple. The sink is installed on a pre-assembled cabinet.
Required materials and tools
To install a countertop sink in the kitchen, you will need the following tools and materials:
- 4 L-shaped fasteners;
- masking tape;
- self-tapping screws;
- wood drills;
- ruler;
- silicone sealant;
- pliers;
- screwdriwer set;
- electric drill.
The tool, which is in every home, will help to install both pieces of equipment.
Assembling the structure itself
Work begins with determining the size of the product. Further, the assembly is similar to making a cabinet:
- You need to make the lower and upper belt.
- Reinforce the side walls with a metal square.
- The front pad is being manufactured.
- Doors are made of boards.
- Hollows are hollowed out or drilled for the hinges.
- The structure is firmly attached to the wall.
- Sewerage and water supply are being installed.
- After the cabinet is fitted, the wood is sanded and varnished.
- They put the handles, tighten all the screws.
 Putting together the underframe
  Installing the mounts
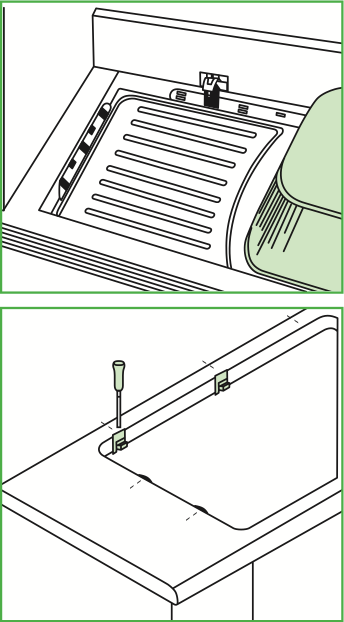
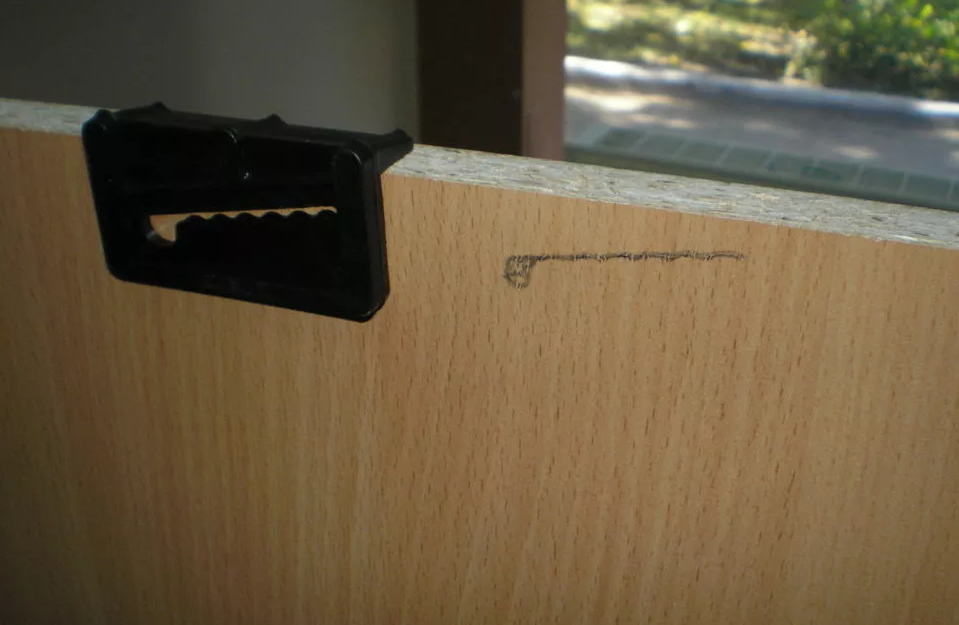
  We attach the mount to the upper edge of the inner side of the underframe
  Mark with a pencil the place of the slot
  We screw in a self-tapping screw (no more than 16 mm long) 5 mm above the bottom of the mark
Sink assembly
A standard sink is mounted in the following ways:
- Secure with sealant.
- They are hung using self-tapping screws.
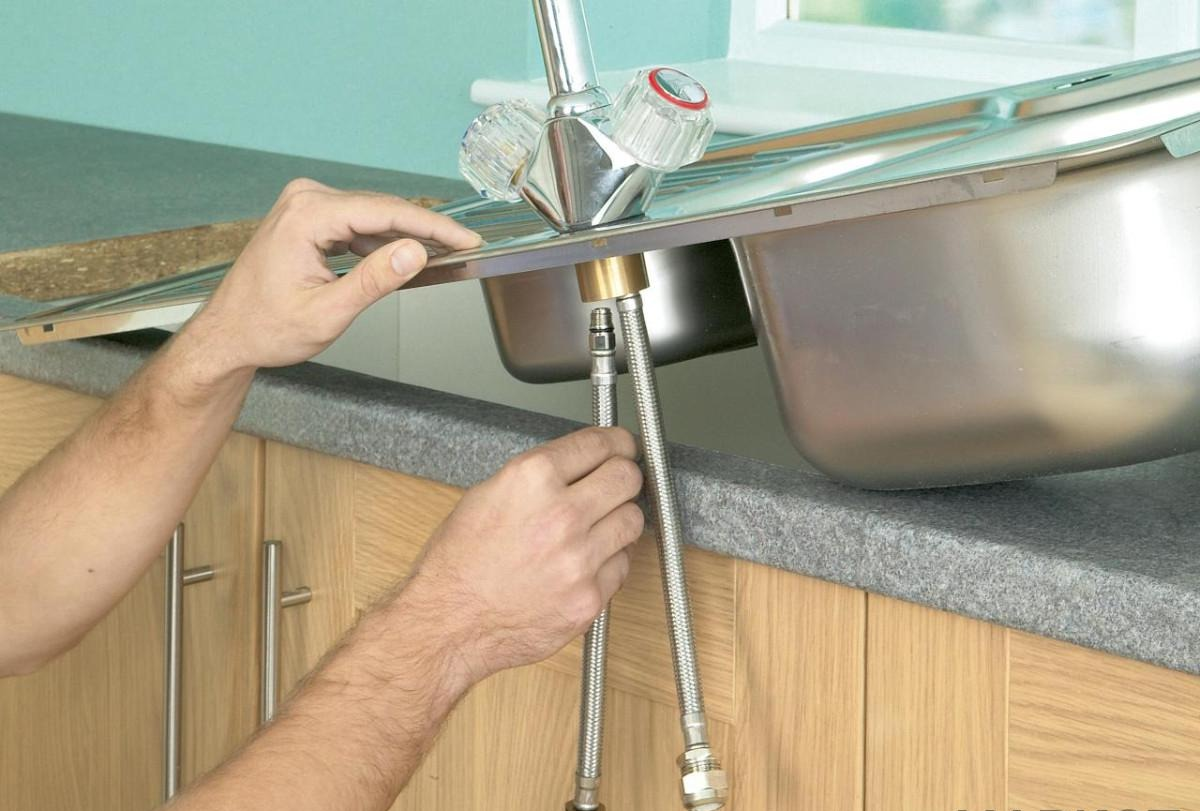
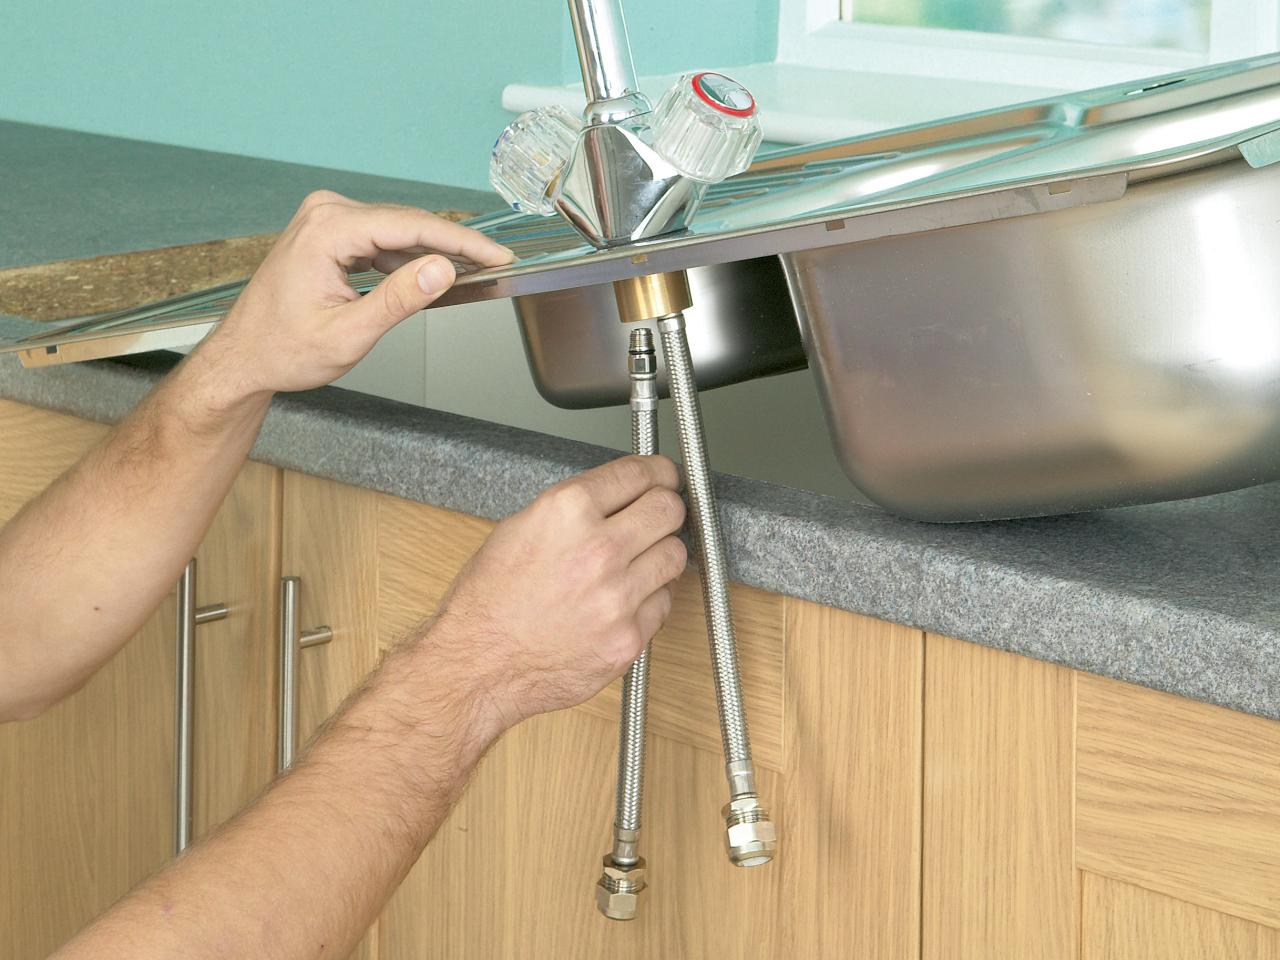
 Before installing the sink, we install a mixer and siphon outlets in it.
Installation on sealant, self-tapping screws
The ends are treated with silicone sealant. A sink is installed on them and pressed on it. This method is good for standard cabinet and sink sizes.
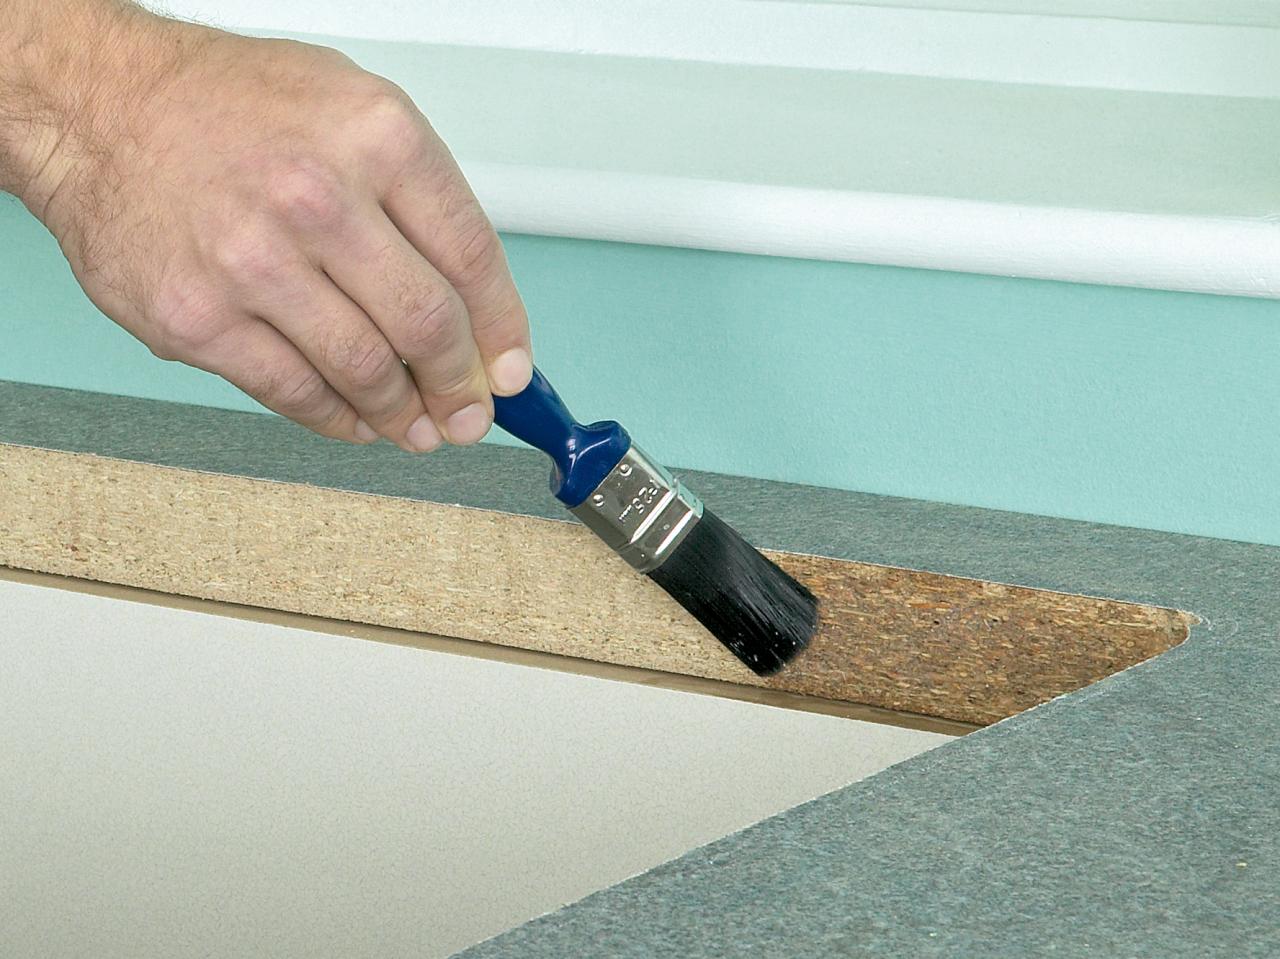
 We apply silicone sealant to the upper part of the underframe (chipboard cut) to create a waterproof barrier between the underframe and the sink
  Carefully turn the sink over and insert it into the hole, being careful not to touch the sealant applied to the edges.
The sink is mounted on self-tapping screws in the following order:
- 4 L-shaped mounts are installed on the structure.
- Holes for self-tapping screws are drilled in the upper corners of the curbstone, so that it would be easier to fasten.
- Mounts are mounted on them.
- The mixer, siphon, gaskets are fixed.
- Unprotected places are treated with sealant.
- The sink is inserted into the cabinet so that the fasteners are steel on the self-tapping screws.
- They are displaced along the slot, pressing the sink against the cabinet.
Light sinks are attached to the sealant.
It is better to immediately fix it with self-tapping screws.
Final work
At the end of the assembly, the following work is performed:
- The siphon is connected to the drain pipe.
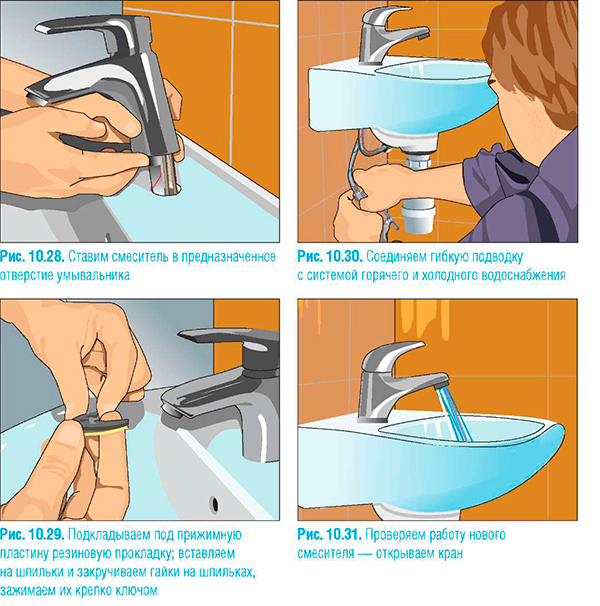
- The pipes are connected to cold and hot water.
- The taps are opening.
- Before installing the doors, the sink is checked for leaks.
If water does not ooze at the junction with the mixer and the siphon, the work has been done efficiently.
 To complete the installation, connect the siphon to the sewer pipe
Knowing the size and layout of the kitchen, it is important to choose a false sink for it as accurately as possible. It is important to correctly assemble the bedside table and the module.It is important that the product is of high quality, attractive, functional, fits perfectly into the design style of the apartment and the interior of the kitchen
Step-by-step equipment installation technology
The problem of how to install a sink with a pedestal is solved quite simply.
The work is carried out in stages:
Then the bowl is inserted into the pedestal and leaned against the wall, while the marked line and the top edge of the equipment are aligned. A pencil is inserted into the holes on the back of the device and the places for fastening are marked.

A level is required for the correct installation of the sink
-
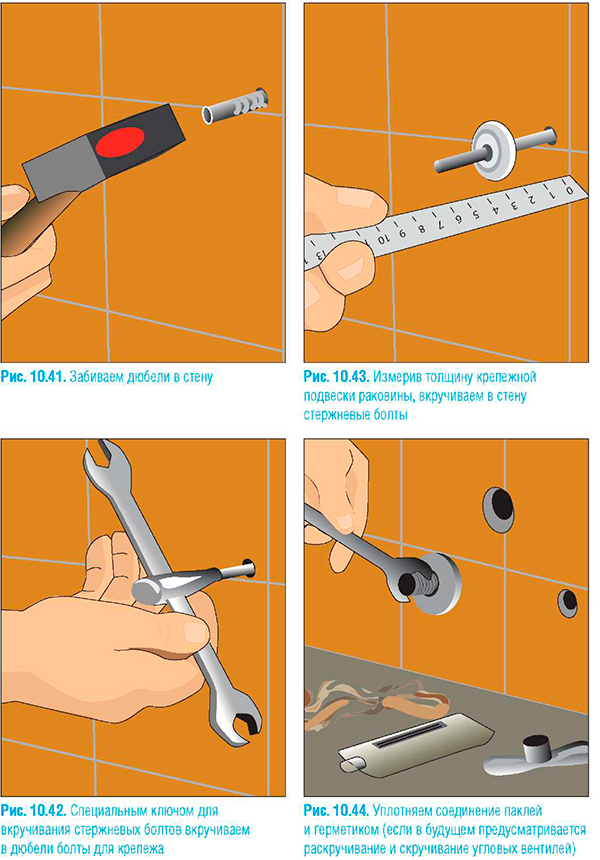
- Hole preparation. Using a punch or drill, holes are made, the diameter of which is slightly smaller than the diameter of the dowels. A little glue is poured into the prepared holes for a stronger connection, and expansion dowels are hammered.
- Preparation of the base for the pedestal.The floor must be perfectly level or the equipment will wobble. If necessary, you will have to level the surface with mortar.
Installing the sink. Plumbing self-tapping screws are screwed into the prepared holes. A shell bowl is put on them. We install it on a pedestal, make sure that the drain hole is located exactly in the center of the structure
We put on the self-tapping washers and carefully screw the structure to the wall
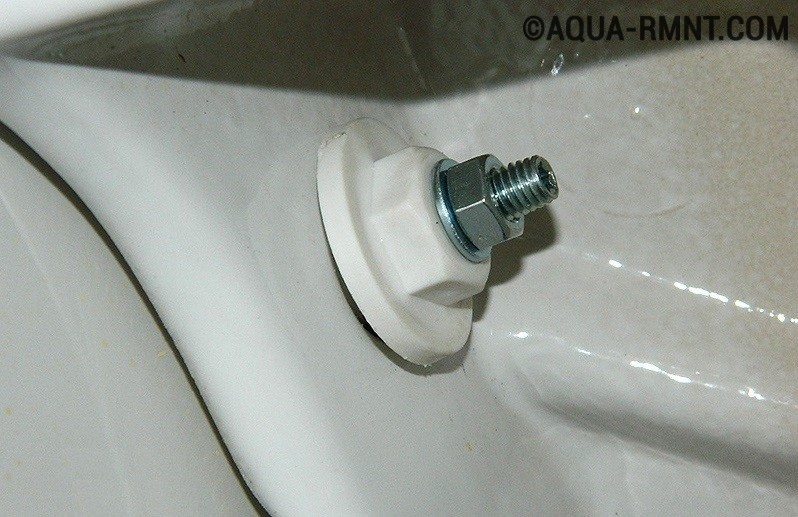
Do not tighten the nuts too much: the sink may burst. It will be enough to tighten the washers so that the bowl does not wobble. Tightened nuts are covered with decorative plugs
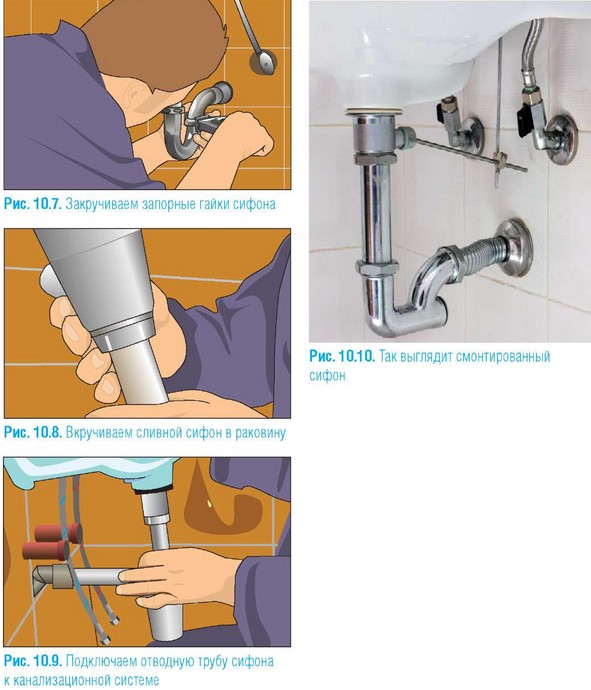
- Siphon installation. The outlet is attached to the sink. A mesh with a gasket and a screw is inserted into the drain hole. The installation of the outlet must be carried out with the installation of gaskets, which should tightly fit the sink drain without the slightest gaps and displacements. We tighten the screw and connect the siphon to the outlet, after which we fix the branch pipe in the sewer bell.
- Mixer installation. Any pedestal bathroom sink must be equipped with a mixer. It is mounted using a flexible hose that connects to the water supply. The design consists of hoses with fittings or other assemblies for attachment to the pipeline. In any case, a special winding is used to install it, most often fum tape, designed to prevent leakage and seal the connection.
These stages are present during the installation of any equipment. A corner washbasin with a pedestal is installed in the same way.
Seat selection
First, you need to find a suitable place to install the new equipment.
Where not to put
Experts recommend, before installation, to familiarize yourself with the places where it is definitely impossible to install an electric refrigerating chamber.
4> Under the window
If you study the requirements of manufacturers for the use of equipment, you will notice that many of them do not recommend placing it under windows. Do not allow direct sunlight to fall on the body of the device, as this contributes to its damage.
Near a heat source
There are several heat sources, near which refrigerators cannot be installed.
Battery
In an apartment or a private house, where there is heating, special batteries are installed. Some people decide to put household appliances near them, but this is not worth doing. Under the influence of high temperatures, the case will begin to deteriorate quickly.
Radiator
In many apartments, you can see heating radiators on the walls, which are responsible for heating the room. They are hot in winter, and therefore it is better not to put anything near them.
Oven
In some kitchens, in addition to gas stoves, there are special ovens used to make baked goods. During operation, such ovens emit a lot of heat, and therefore it is contraindicated to put refrigerators near them.
Plate
The stove is an indispensable device in the kitchen, as most dishes are cooked with it. Refrigeration equipment should be located at a distance of 100-120 centimeters from the gas stove.
Other
There are other appliances that can generate heat during operation. These include convectors, infrared heaters, heating ovens, electric stoves.

Next to the sink
Some people decide to place the refrigerator close to the washbasin. Experts advise against installing it in this place due to the following factors:
- high humidity, due to which the case will quickly deteriorate;
- high probability of water ingress on the equipment.
When choosing a suitable location, the location of the outlet must be taken into account. The equipment must be connected to grounded sockets, which are connected to special stabilizers. They help equalize the voltage and prevent burning of connected refrigerators.
When choosing a place for installing a refrigerating chamber, pay attention to the features of the floor covering. It must be smooth and highly durable.
If the floor is uneven, you will have to install special pads under the feet of the device so that the body does not wobble.
Views
There are several types of sinks, differing from each other in shape, size and functionality.
Classic wall
The most common and versatile option. This structure can be hung both in the family bathroom and in the guest bathroom. The classic washbasin does not require a base for installation - it mounts directly to the wall. The structure looks particularly elegant on a thin plinth.
Tulip shells
This design is an ordinary sink mounted on a pedestal leg. The pedestal has two functions - it serves as a solid base for the washbasin, and also hides water and sewer pipes inside it.
For furniture
Furniture sinks are designed to be installed on a curbstone, table, and other pieces of furniture. In addition, they can cut directly into the surface. Structures are divided into overhead and built-in. The main advantage of such a washbasin is a significant saving of space in the bathroom, since the washbasin is installed directly on the furniture, which carries its own functionality.
Corner
The corner sink, as the name suggests, is located in the corner of the room. Due to its shape and location, such a structure effectively uses the bathroom space, since the corner of the room is often left unused. Corner washbasins are available as classic - wall-mounted or built-in in furniture, as well as in the form of a tulip with a support leg.
With a curbstone
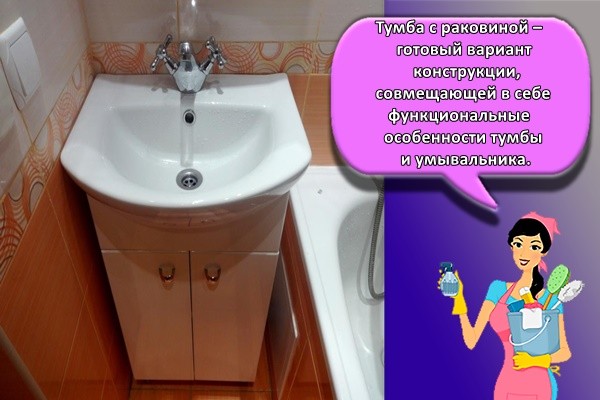
A cabinet with a sink is a ready-made design that combines the functional features of a cabinet and a washbasin. This is a convenient and practical option that saves space in the room. The curbstone is suitable for storing linen, perfumes, cleaning products.
The structure can have different shapes - it can be angular or straight. There are wall-mounted washbasins with a vanity unit. This design allows you to protect furniture from the accumulation of water at the bottom. There are also pedestals with a plinth - they cannot be turned over and they do not require additional fastening.
Shell material
The choice of the material from which the sink is made should be approached with no less responsibility. Stores offer a wide range of products, which you need to choose wisely
Experts recommend paying attention to products made from:
- of stainless steel;
- artificial stone;
- ceramics.
Cheap products quickly deteriorate, requiring additional money for repairs or complete replacement.
Stainless steel
The choice of most buyers who want to install a high-quality and inexpensive product in the kitchen. Material advantages:
- easy;
- does not deform when the temperature changes;
- impervious to moisture and steam;
- is cheaper than its competitors.
The only drawback is considered to be an everyday appearance, which does not give the interior any individuality.
Fake diamond
The composition of the artificial stone used in the manufacture of kitchen sinks includes:
- stone chips;
- dyes;
- polymers;
- natural ingredients.
The advantages of the material include:
- strength;
- a variety of shapes and colors, allowing you to give the kitchen individuality;
- dirt does not accumulate on the surface of the sink, since the material has no pores;
- dampens noise from water, due to its massiveness.
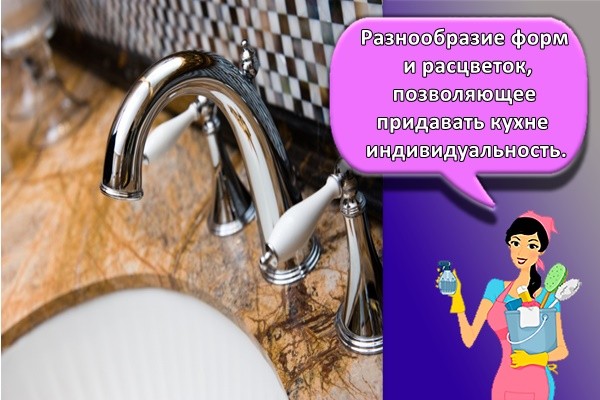
There is only one drawback - cost.
Ceramics
Ceramics is a cross between stainless steel and artificial stone, harmoniously combining their positive qualities. Material pluses:
- noiselessness during operation;
- attractive appearance;
- easy to clean;
- well resists moisture, temperature extremes and chemicals.
Minuses:
- price;
- product weight.
Specificity and models of sinks on the wall
The latest trend in washbasin installation is fixing this unit to the wall surface. This type of arrangement is one of the most familiar and favorite among Russians, since it is this type of installation that has worthy and significant advantages. By installing the sink on the wall, you will save the desired floor space, and the space under the sink is very convenient to operate and keep it clean.
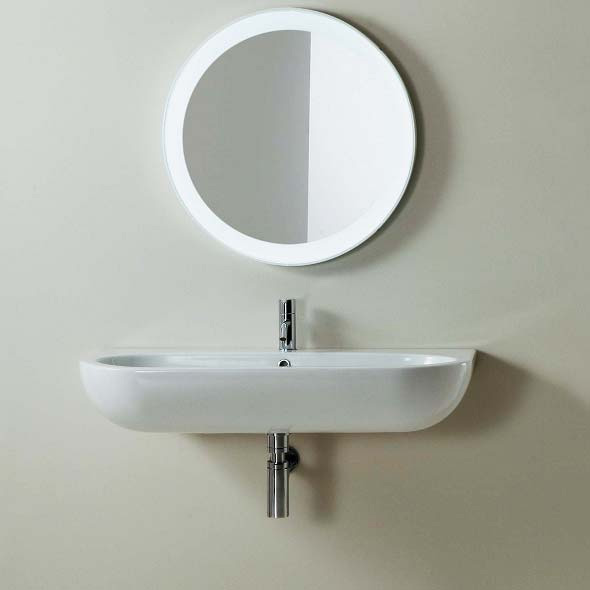
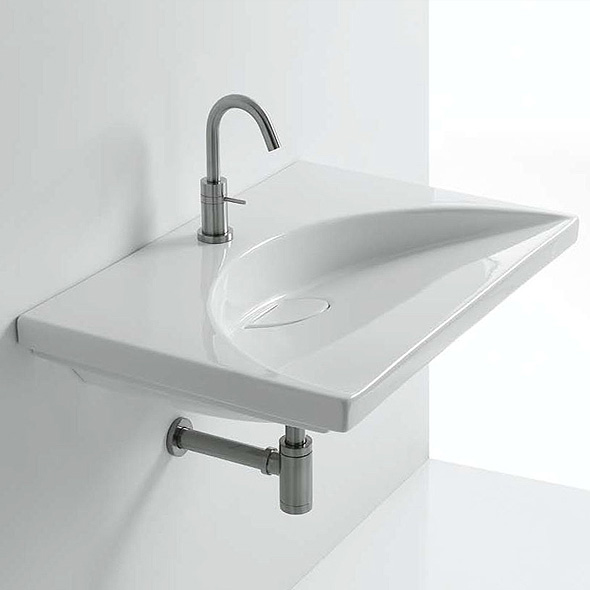
Wall hung washbasins save space in the bathroom
Before proceeding directly with the installation work, choose for yourself the model of the wall-mounted sink, in the most ergonomic design. An individual model has specific design features, which, of course, also affects the way it is installed. Therefore, it is so necessary to have at least some knowledge about the installation and the specifics of connecting the device to the general water supply system.
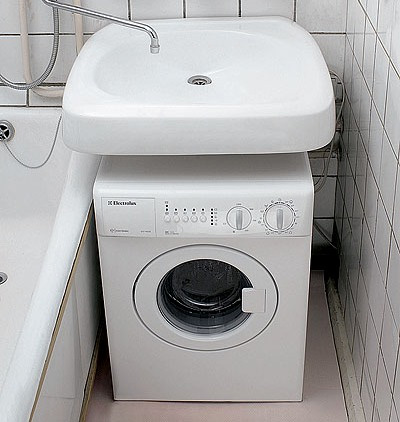 A hanging sink above the washing machine is a great solution for a small space
An interesting solution is to install a sink above the washing machine, this saves precious space in the bathroom.
Features of working with artificial stone
As a rule, stone countertops are made to order in accordance with the preferences of the buyer, and the hole for the installation of the sink is provided in advance. But there are also exceptional cases when, for example, initially it was planned to install an overhead sink in the kitchen, and the tabletop was supposed to be solid.
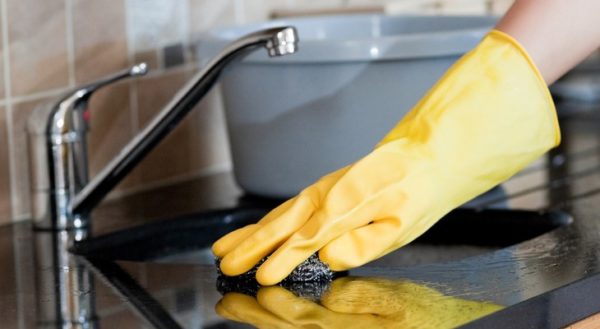 The artificial stone countertop is rather difficult to work with. It must be handled with care, as the material is fragile
For such work, it is better to invite a qualified specialist with a professional tool who will make a hole of the required diameter with a correctly processed cut and install the sink in accordance with all requirements.
If you decide to make a hole for installing a sink on your own, saving on workers, instead of a jigsaw, it is better to take a grinder and protect your eyes and respiratory tract from stone dust when cutting. The work algorithm is not much different from installing a sink in a MDV countertop.
What material are sinks made of?
Quite often the choice sinks for the kitchen becomes a daunting task. Errors in operation lead to the fact that the products have to be constantly changed, so it is necessary to familiarize yourself in advance with some of the features of each material.
Table 3. Materials for the manufacture of modern sinks
| View, illustration | Description |
|---|---|
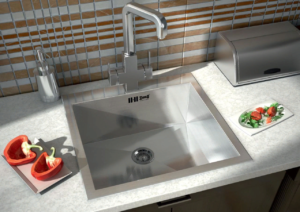
Stainless steel |
It is often used in the manufacture of sinks. Products are available with a rough, matte and glossy texture. At the same time, the main advantage of the material is its low price. In addition, even a beginner can handle the installation of such a sink without fear of damaging the surface. Metal products have an aesthetic appearance, which makes them fit perfectly into the interior of various kitchens. In addition, stainless steel does not suffer from exposure to various chemicals. Of the shortcomings, only the possibility of scratches and dents can be distinguished. |
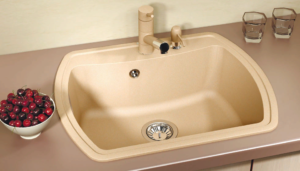
Ceramics |
Washbasins of various types are often made from this material. At the same time, the main advantage of ceramic products is considered to be an attractive appearance. Especially such designs are suitable for a classic design kitchen. In addition, such a surface is not damaged when exposed to hot water, aggressive alkali, scratches are very rare on it. Another clear advantage is the ability to install the sink yourself without the help of a wizard. Among the disadvantages, one can single out the fragility of ceramics - this means that the sink can break with a strong impact. |

Fake diamond |
This is the most modern material that is actively used for the manufacture of sinks. It is based on natural and synthetic components. The first option has a higher cost, it is resistant to various damages, chemicals. The main advantages are the variety of colors. |
Features of the installation of structures of unusual shapes
If the sink has an unusual shape, but a cut-in type, its installation will not take much time and effort. It will be enough to use the template included in the kit. The material can be anything: steel, stainless steel, plastic, MDF, chipboard. Another thing is integrated sinks, which are mounted below the level of the countertop. This type of installation is typical for products made of granite, natural stone, plastic or wood. Their shape can be round, oval, square, triangular or abstract.
In any case, it is important to ensure perfect sealing and precision when cutting the hole. As a rule, coordinate milling machines are used to cut them.
It is thanks to the possibility of programming such equipment that the accuracy of the cut and the entire trajectory as a whole is ensured.
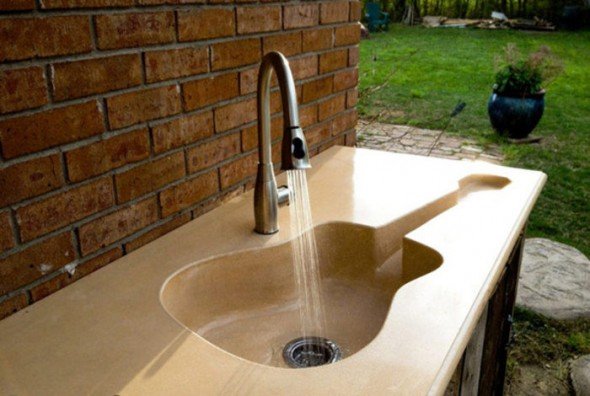
Musicians will definitely like this sink.
Installation of inset sinks
You need to know the features of the process, how to install the inset sink correctly. The quality of sealing the junction of the countertop and the sink is of great importance during installation. It is necessary that the niche be as flat as possible and correspond to the parameters of the product.
High-quality installation of the inset sink will further eliminate the problems associated with the swelling of the countertop due to excess moisture. The complexity of the working process directly depends on the size of the working surface and the product - the larger they are, the more difficult it will be to perform manipulations.
If the installation of the sink in the countertop in the kitchen was carried out competently, using the advice of experienced craftsmen, a successful result will certainly be obtained. First of all, you should decide on the location of its placement, so that it is convenient to use the bowl.
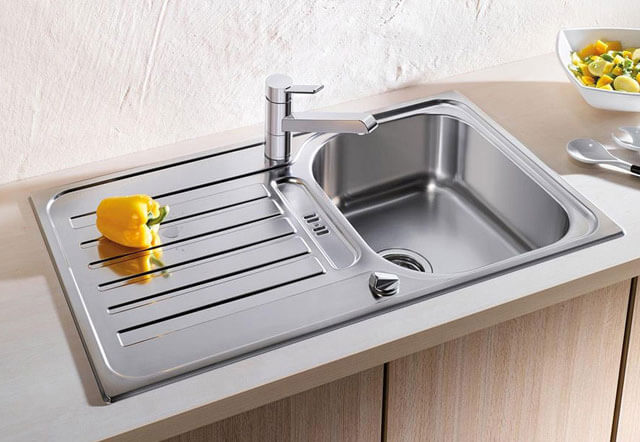
Be sure to take into account the location of the water sockets and sewer outlet. It is desirable that the points for connecting utilities are located as close as possible.
The process of how to fix a flush sink has several stages:
- Choice of location.
- Sink hole marking.
- Fixing the mixer and arranging the piping.
- Fixing the bowl in the hole.
Features of installing an overhead sink
The main advantage of overhead products is their low cost and extreme ease of installation. They go well with almost any kitchen design. They can be made of different materials, but stainless steel still remains the main one. The sink is simply put on a cabinet, the main thing is to choose its size in order to avoid unnecessary gaps between kitchen furniture.
No preparation of the cabinet surface is required. It is a rectangular opening bounded by the walls of the cabinet. The only thing that needs to be done is to treat the ends of the walls of the bedside table with silicone, to ensure the wood is insulated from moisture.

Installation materials and tools
Although the installation is not difficult, the work requires a set of the following set of tools:
- fasteners, masking tape;
- measuring instruments, pencil, ruler;
- electric drill;
- pliers;
- a set of drills for wood;
- silicone sealant;
- bedside table with work surface, water hoses, mixer, siphon.

Washing installation process
Before starting the installation of the overhead sink, the support bedside table is assembled. Installation of doors on the cabinet is carried out after installing the work surface. Before starting work on fixing the sink, a siphon and a mixer are attached to it. Further, the structure is connected together, this can be done in several ways:
- Fastening with glue.The sink should be wider than the bedside table, cover the ends of the walls. The contact points of the elements are treated with a sealant, a sink is installed on top of the support, and pressed. After the silicone is completely dry, the two objects are completely glued together.
- Installation on brackets. A universal way. Fasteners are included with the product and may be sold separately. The fixing process begins with fixing the brackets to the ends of the support sidewalls, for this, self-tapping screws are used, which are screwed in from the inside of the side walls. Next, a sink is installed, while the main fastening screw should rest to the end against its metal corner. Clamping to the ends is adjusted by moving the fastening angle.
- Fixation on a self-made stand. The product is made in the form of a lathing, can be attached to the walls of the cabinet inside. After installation, the sink stays on both the walls and the frame. The lathing can be an independent support.
- Using wooden blocks. In the absence of brackets, the presence of defects on the pedestal, you can use the bars that will serve as fasteners.
At the final stage, the corrugated pipe from the siphon is taken out into the sewer, and the hoses are connected to the water supply system. Having checked the structure for leaks, you can safely use the sink.

Installing an overhead sink ↑
There are three options for installing an overhead sink:
- Fastening with glue is the easiest option. The overhead sink is installed on a special cabinet. In this case, the sink should be wider in width than the underframe and its sides will completely cover the edges of the curbstone. The ends of the underframe must be pre-treated with silicone sealant, put the sink and press down. The sink will fix well after the sealant has dried. Silicone glue will protect the end of the underframe from water ingress.
- Fastening with mounting brackets In normal situations, the surface sink is fixed with special fasteners, which can be included with it or sold separately. First you need to screw in the self-tapping screws from the inside of the cabinet walls and then attach the brackets to them. Next, tighten the screws a little. Install the sink and shift the mounting angle along the screw, making sure that the self-tapping screw is fixed in the recess of the corner, and the sink is completely pressed against the underframe. Then the fastening screws are finally tightened.
- Fixing the sink with wooden blocks. In cases where the standard mount is not suitable (there are defects in the tabletop), or there are no mounts at all, you can safely choose suitable furniture corners and wooden blocks and make your own mounting platform. The bars must be placed in the sink box. Then you need to screw four metal corners to the slats (along the perimeter of the sink). Now the structure can be placed on the curbstone. After that, the second part of the corner is screwed on from the inside of the walls of the underframe. The height of the blocks can be adjusted, if necessary, so that the top of the sink is at the same level as the rest of the pedestals.
How to fix a sink in the kitchen directly to the wall, without a cabinet? To do this, we use special brackets (they can be purchased at plumbing stores). We carry out the first markup at the selected height from the floor (approximately 80 cm). Then we make a second markup just below the first. The distance between the markings corresponds to the thickness of the back wall of the sink. We get the line for attaching the brackets.
Next, we measure the distance between the designated places for installing special brackets on the sink. We mark an equal distance on the line of attachment of the brackets. We drill holes in the wall, fasten the brackets and fix the sink.
Observing simple rules, you can do a good job of installing a kitchen sink with your own hands so that it works without problems. A properly installed sink will last a long time and will ensure the safety and hygiene of the countertop.

