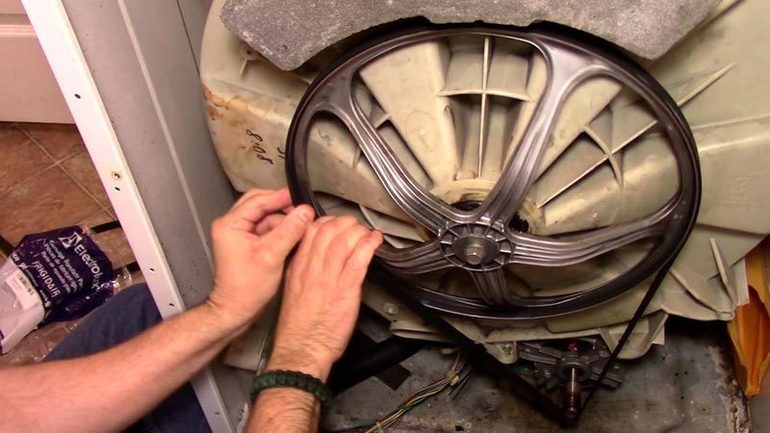
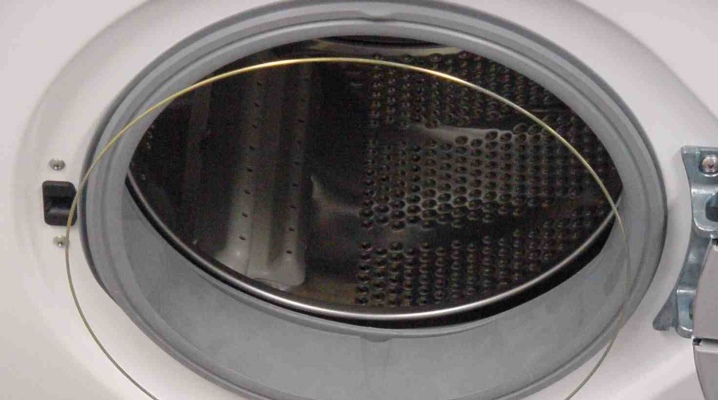
The need for dismantling, the reasons for the wear of the product
A seal of this kind during operation experiences multi-vector loads, especially since it has only one version of the correct position for installation. Therefore, it is simply impossible to simply glue or put a patch in the place of a breakthrough. Usually, 2-3 weeks after such a repair, you will still have to change the clutch.
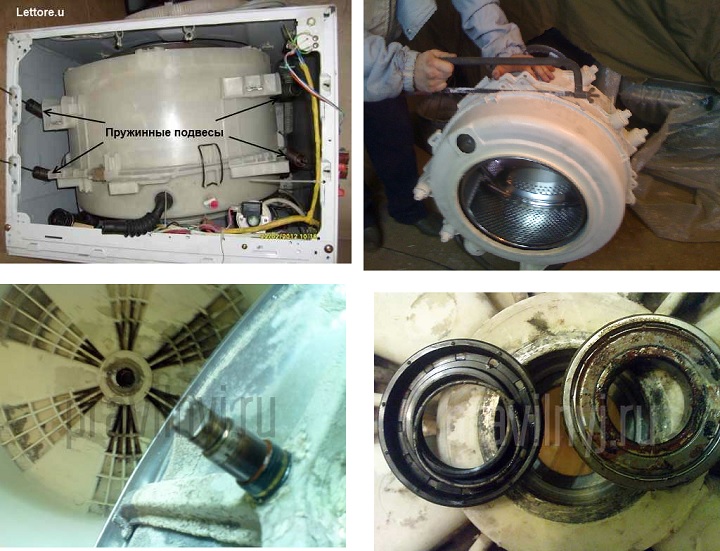
Disassembling the machine in order to get the seal will have to be done in any case. The seal is rigidly attached at both ends with wire clamps or clamps, some models use plastic tape or clips. To install a new part, the old one, in whole or in parts, will somehow have to be removed from two parts, and this cannot be done without partial disassembly of the case.
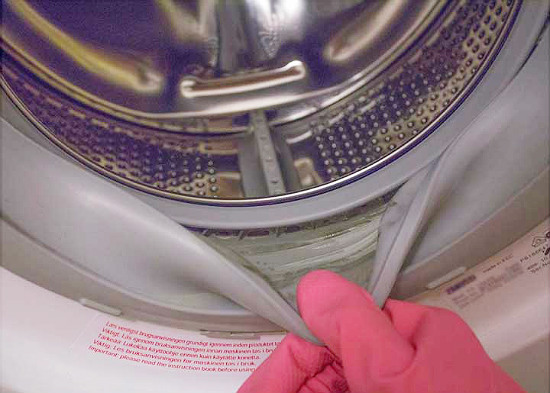
Conventionally, the reasons for the breakage of the coupling can be four main reasons:
Improper use of the machine
Incorrect use of the machine means such situations, after which the cuff loses its integrity:
- when loading the laundry into the drum, part of the laundry remains outside and is clamped by the door, after the start of washing, when the drum rotates, the product is twisted and pulled inward, literally cutting through the seal.
- before washing, foreign objects are not removed from the pockets of linen: coins, nails, screws or keys - all this causes holes in the rubber;
- the use of concentrated products or chemicals for washing that are not intended for use in the machine - they simply corrode the rubber;
- constant use of modes with a high temperature and maximum spin speeds, even for daily washing;
- washing bras, corsets and other things with metal spring inserts, without special containers;
- washing clothes with zippers when the slider is not fastened and fixed.
In case of poor-quality repairs, unskilled craftsmen often use "folk methods". Wherein:
- components from other washing machines are used;
- instead of new parts, used and removed when disassembling old machines are installed;
- temporary solutions are used: application of a patch, displacement of the seal, while the owner is misled about the guarantee of repair;
- repairs are carried out by an unskilled worker without work experience and the necessary tools, which leads to a rush of a new part and the need for new repairs.
Manufacturing defects
As for the factory defect, the seal itself acts as the narrowest point, then there may be defects in spring wire clamps and defects in body and tank parts. Quite often, the rubber band breaks at exhibition samples of equipment that stand under the sun for several months and in which buyers are showing increased interest.
Normal wear and tear
Natural wear and tear usually occurs by 8-10 years of continuous operation. Cracking of rubber can also begin from a long downtime, especially in the summer, it simply dries up and microcracks appear. It is recommended to use only products approved by the manufacturer for flushing, since the effect of inexpensive folk remedies usually does not last long and then passes into the phase of expensive repairs.
Removing the facade of the case
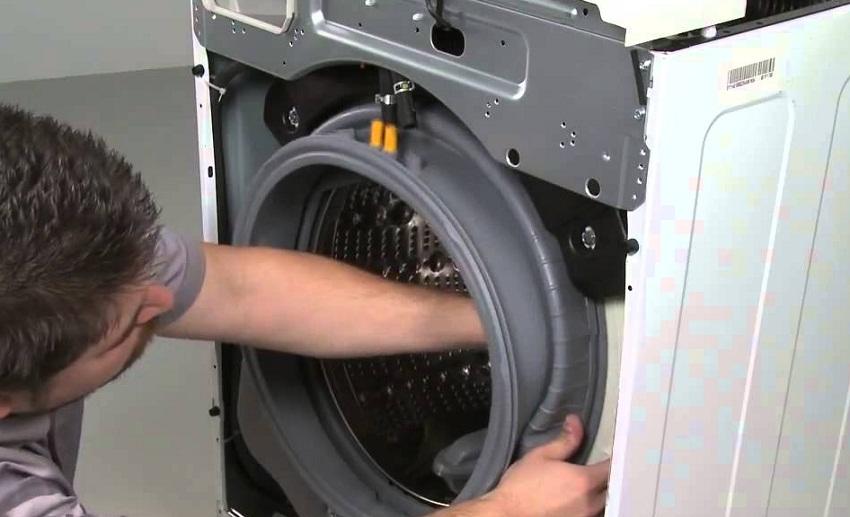
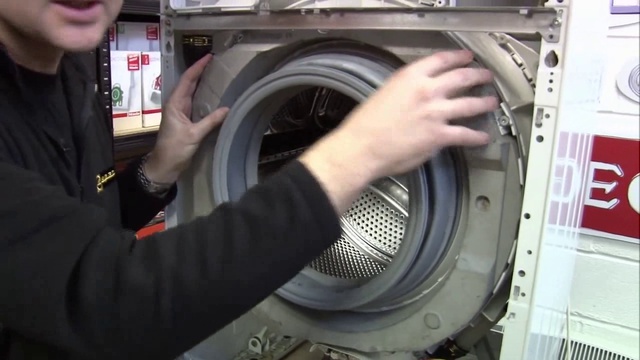
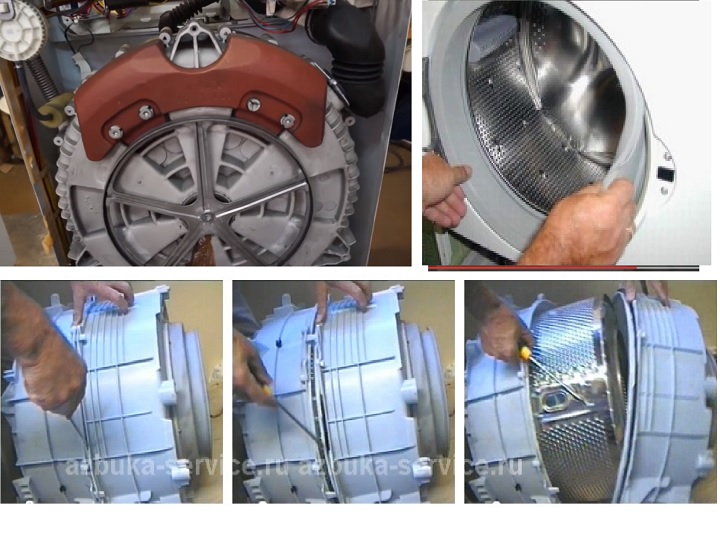
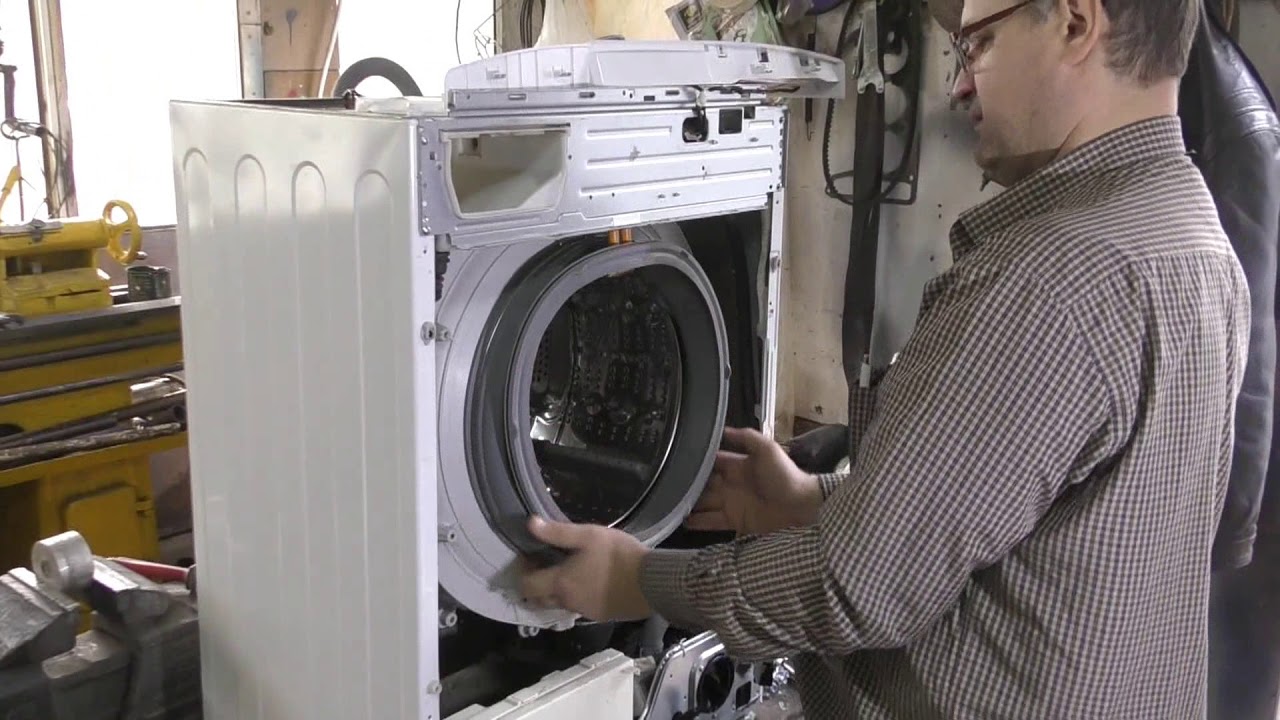
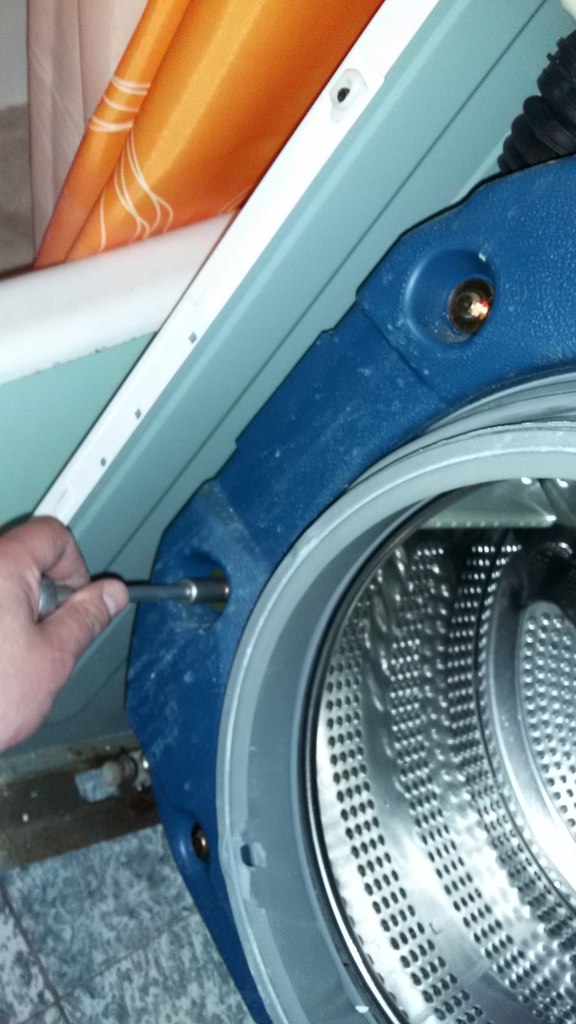
If the goal was just to replace the seal, you will have to remove the front panel of the Samsung washing machine. This is necessary to gain access to the inside of the drum, to securely fix the cuff in the housing.
Using a screwdriver or screwdriver, unscrew the screws on the front of the machine.Three bolts are located in the lower area of the wall and are easy to find. The upper fasteners are covered by the control panel - you will have to detach this part and put it aside.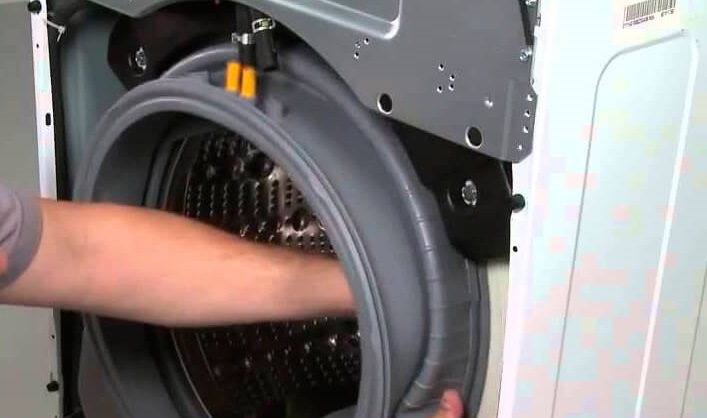
The last bolt can be found under the powder receptacle. When all the screws are unscrewed, it remains to detach the front wall of the case and remove it to the side. This will open up direct access to the drum.
Experienced craftsmen change the seal without removing the front panel, thus saving time on repairs. However, it is much more difficult to install the gasket from the inside, so it is better to still get access to the drum.
We put the detail
Pulling on and securing the cuff is much more difficult than removing it. It is better to find yourself an assistant, as additional hands will help you cope with the editing faster. Self-training with the rubber band removed earlier will not hurt - you can rehearse the upcoming work. What will the process look like next?
- Site preparation. We take a sponge, soap and water and thoroughly wash the seat. It is not necessary to completely wash off the formed foam - the slippery surface will facilitate installation.
- Stretching the elastic. First, find the mounting marks and align them. Next, place the cuff in the groove and pull it with your thumbs, moving in a circle in both directions. This will eliminate dropping and displacement.
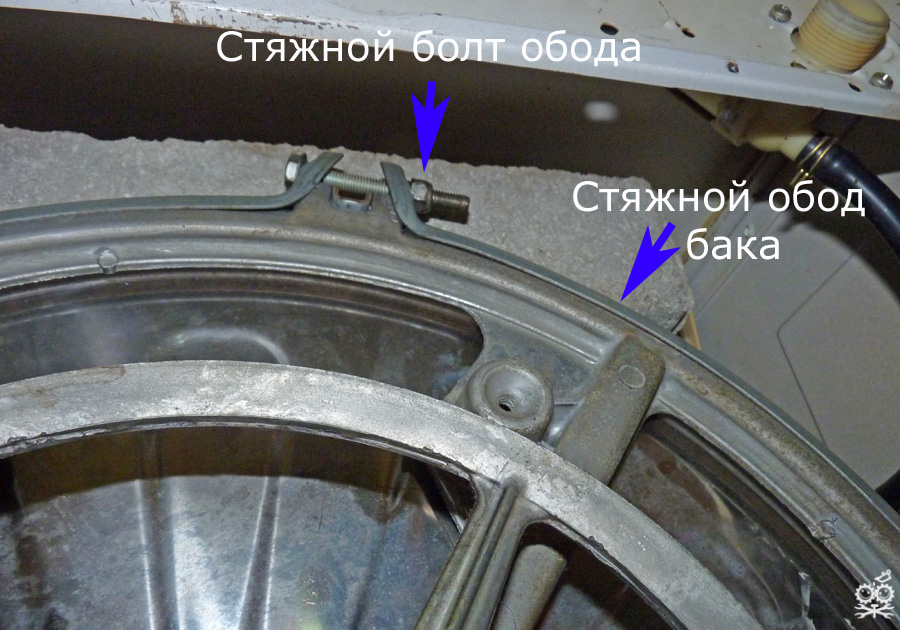
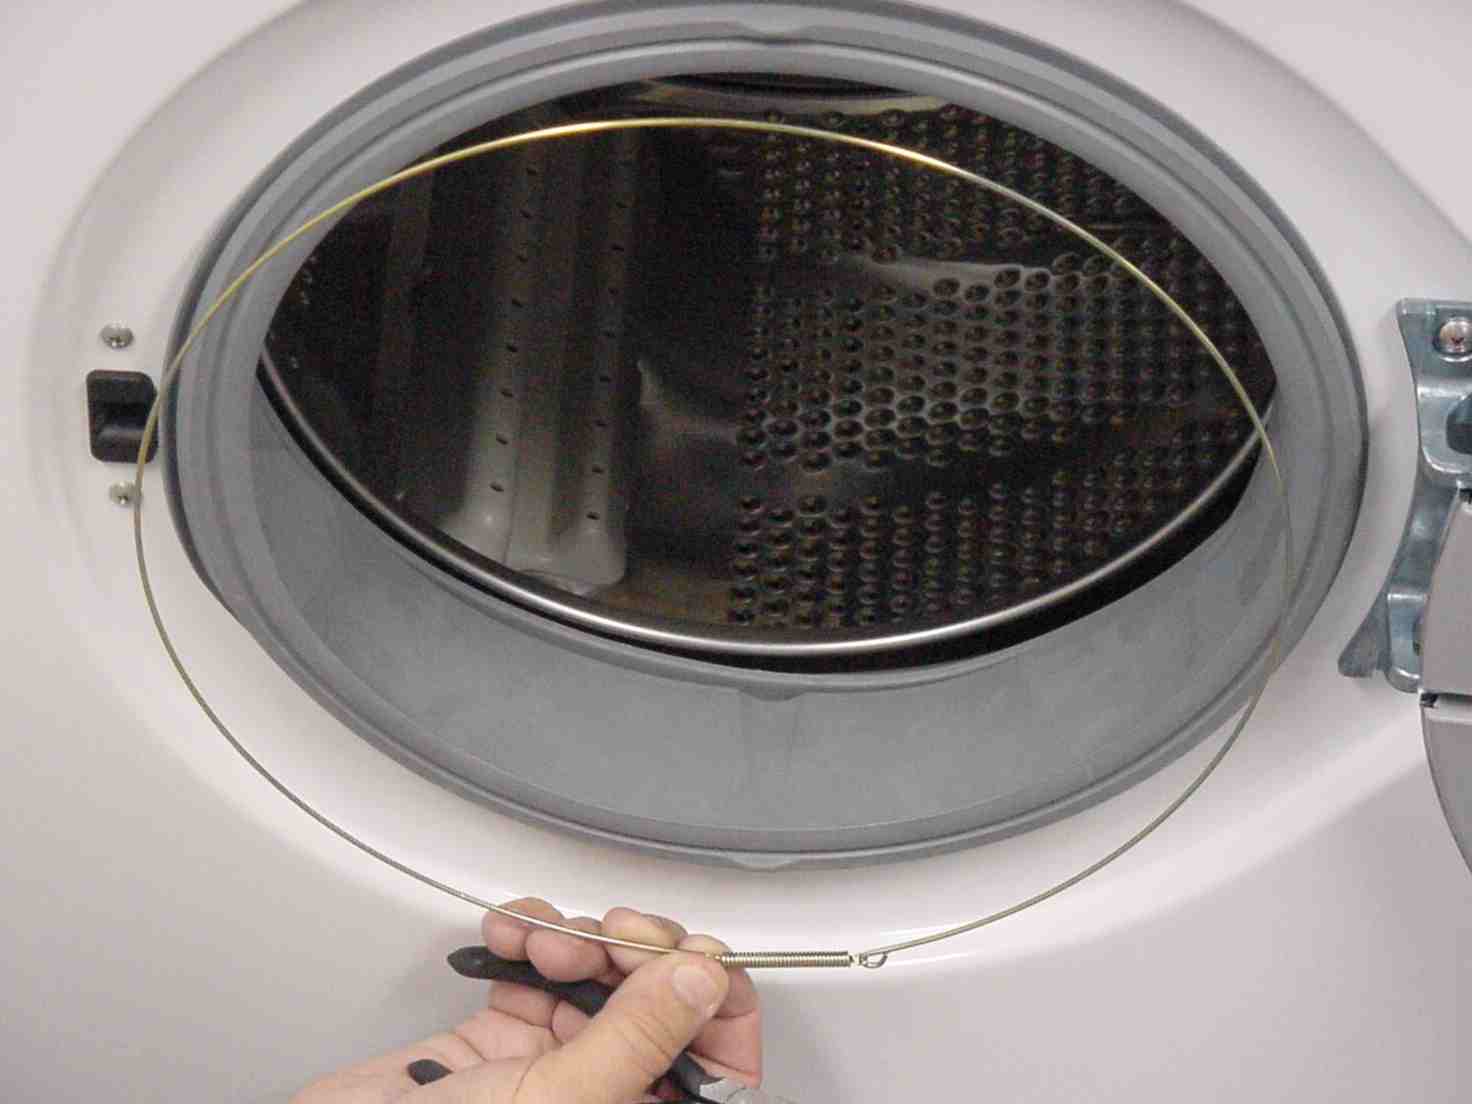
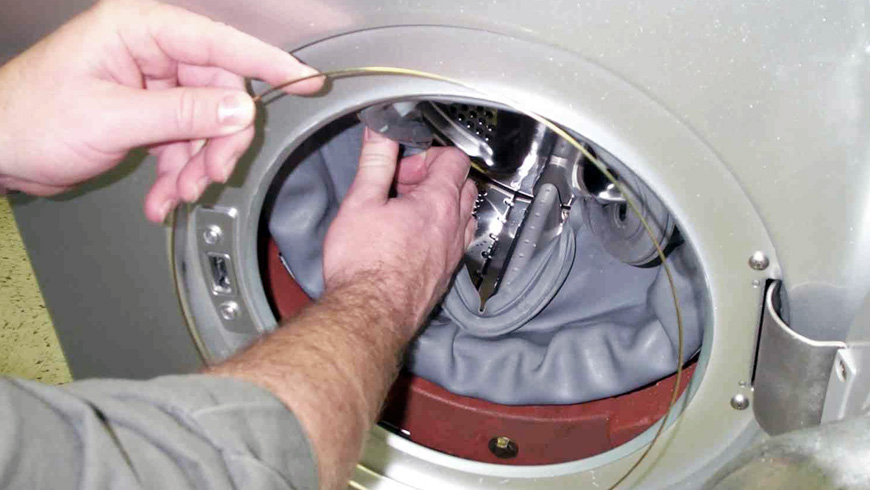
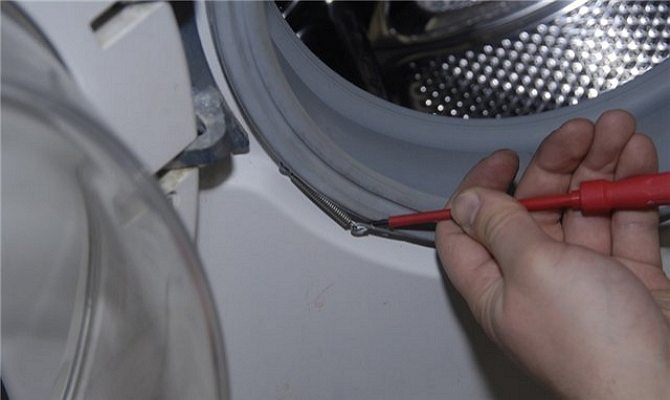
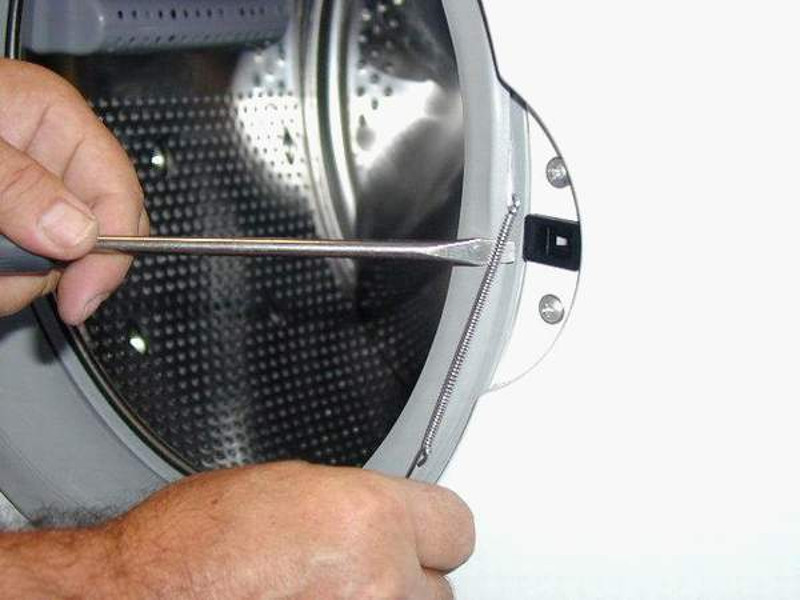
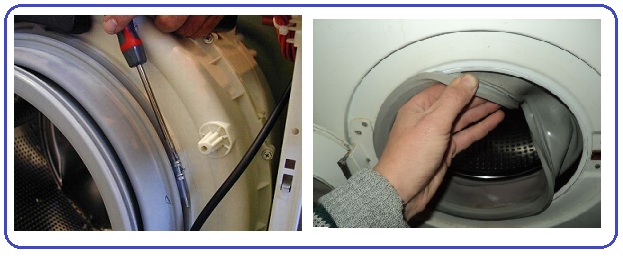
- Installing the inner clamp. If the ring is screwed, the installation process will be easy: we loosen it to the desired diameter, place it in the grooves and tighten the screw. Spring fasteners are more difficult to install. To begin with, we fill the edges of the cuff into the drum, unscrew the hatch lock on the body and insert a screwdriver into the freed key hole until it is completely stable. Then you need to put a spring on the tool and tighten it around the entire circumference of the hatch with another screwdriver. Then we take out the retainer and return the lock to its place.
- External anchoring. With the second clamp it is easier, since access to the seat is not blocked by anything. The procedure itself is the same: with the spring, we put the ring on one side, we hook it from the opposite edge with a screwdriver and gently pull it around the perimeter. If there is a screw, we loosen the fasteners, install the retainer and tighten it securely.

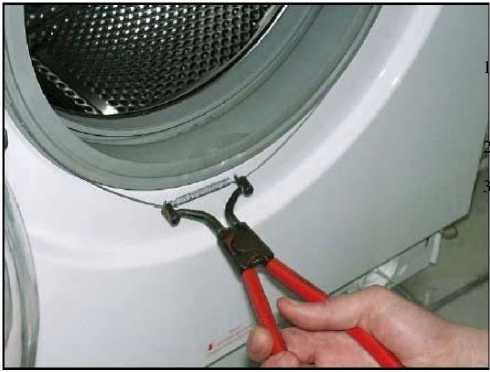
On the old-style Zanussi, you may find another type of clamp equipped with special hooks. They are disconnected with round-nose pliers, and then tightened back in a similar way.
It remains to assess the quality of the repair. We compare the conformity of the mounting rails and the tightness of the cuff. Finally, turn on the machine, select the rinse mode and start the cycle. Upon completion of the work, we tilt the machine body back and inspect the bottom and floor: there should be no traces of water, puddles and drops.
The nuances of installing a new part
To change the cuff, you have to try. Pulling the seal back onto the drum is a little more difficult than removing it. A very dense factory gum will "resist" during installation, and this will be the main difficulty in the installation process. To make it easier to tighten the rubber gasket, follow the following algorithm:
- attach the cuff to the seat so that the mounting mark on its surface and the tank coincide;
- start the installation from the outside, hold the already worn section of the elastic band with one hand, with the other - pull the seal onto the ledge;
- tighten the inner edge of the cuff onto the edge of the tank;
- feel the gasket around the circumference, make sure that it "sits" tightly on the edge and fits well to the body of the automatic machine;
- check that the timing marks are aligned with each other. If displacement is evident, the seal will have to be removed and re-tensioned.
On Atlant washer models, you can change the cuff without removing the front wall of the case. However, in order to have more free access to the inside of the machine, you can still remove the front panel.
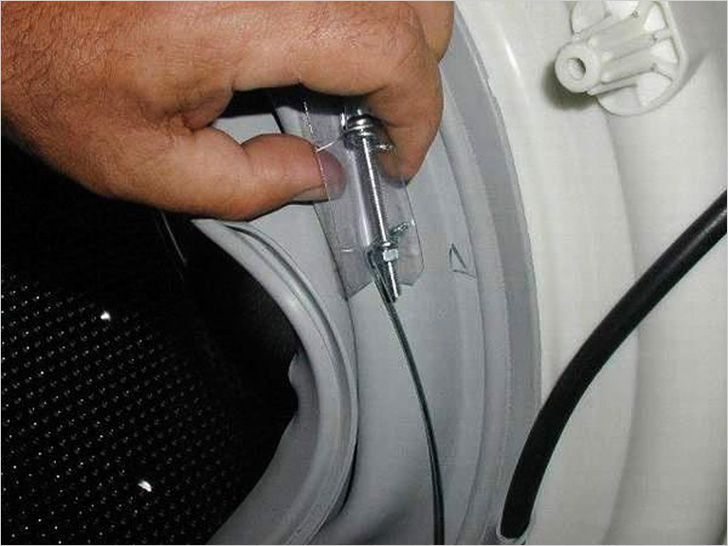
After the seal is in place, fix it with rings.The inner clamp is more difficult to fit. The installation method directly depends on the type of latch. If the rim is metal, it is necessary to loosen the screw "lock", fix the element on the collar and tighten the fasteners.
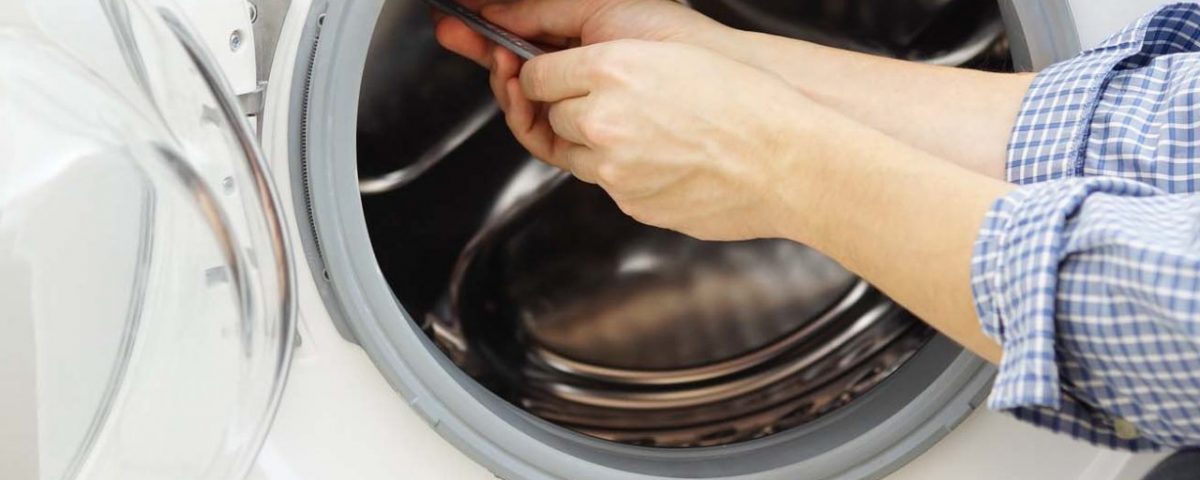
If the latch is made of plastic, it is necessary to loosen the clamp by pressing on the junction of the "tongues", put the rim in place and fix it inside. If a wire mount is made in the machine, you will have to pull it around the circumference, tighten the ends with pliers, hide the formed knot in a special hole in the seal. It is more difficult to work with spring tension. You need to insert a thin screwdriver into the groove of the door locking device, pry off the spring and put on the bracket.
The final step is to attach the outer clamp. The rim is installed and locked in place
It is important to understand that only old clamps without defects are allowed to be reused. If there is damage or the ring is deformed, be sure to replace it with a new one.
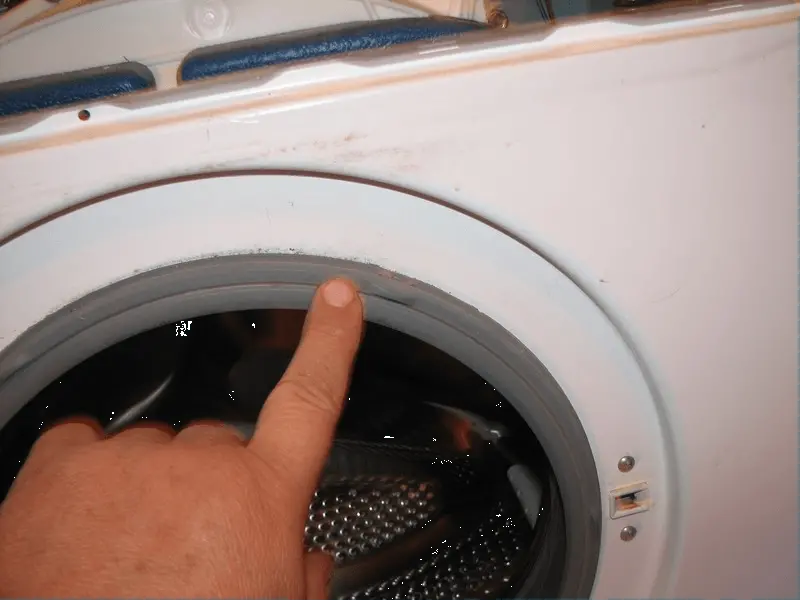
If everything is done correctly, the cuff and clamps will be located close to the body
After that, it is important to check if the system is tight. To do this, start washing "dry", the shortest mode is turned on, providing for a set of water, for example, "Rinse"
If it does not flow from under the hatch door and it is dry under the typewriter, then the installation of the rubber band was carried out correctly.
When droplets or even trickles of water are visible on the body, leaking under the hatch, you will still have to work with the cuff. Check how tightly it adheres to the edge, tighten the clamps more firmly. If this does not help, you will have to dismantle the seal and reinstall it.
When does a rubber seal need to be replaced?
If a leak is visible under the loading door or housing, the collar should be inspected first. If the upper outer part is damaged, water can flow directly from under the door. A more complex malfunction is damage to the interior. Then the leak occurs under the body of the automatic washing machine (SMA).
The causes of damage are different:
- Natural wear and tear. The friction of the drum against the seal during rotation, thermal effects affects. Then the surface becomes brittle, cracks form, through which water leaves.
- Poor quality powder, its excess. All this affects the condition of the cuff, leading to its destruction.
- Improper care. Mold and mildew eats into the inner layers of the rubber over time. A leaky product is not able to maintain tightness.
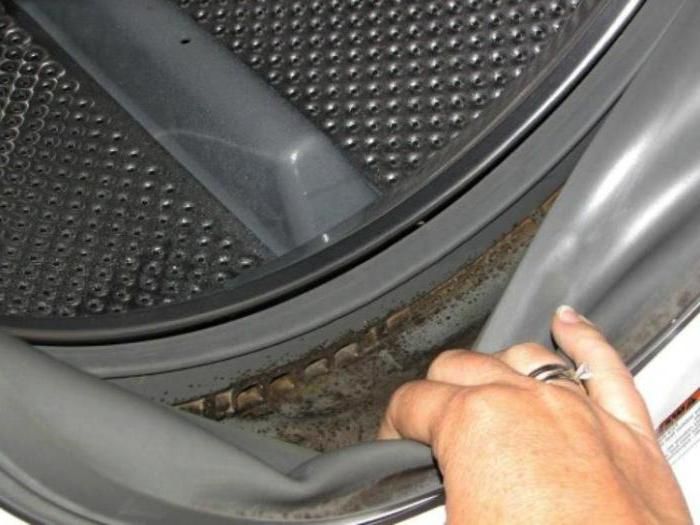
Mechanical stress. Metal objects forgotten in pockets end up in the drum. When rotating, they damage the seal.
Strong pops and careless closing of the door are also affected.
To replace the part, you need to dismantle the old one and install a new cuff. Prepare tools and materials in advance.
How to put an elastic band on a washing machine drum?
The work is quite doable. All you need is a slotted screwdriver and pliers. Prepare materials in advance, ready-made repair kits are sold in stores.
New seal. Buy specifically for your CM model.

Clamps. There are two of them: internal and external. Depending on the manufacturer of the washing machine, the clamps can be metal or plastic with a latch. If the old parts remain after the repair, they can be reused.
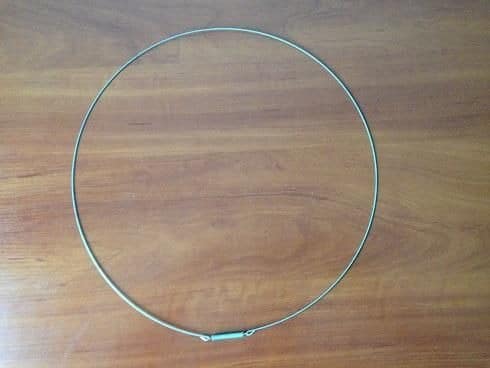
Fine sandpaper, sponges, rags, soap, marker - to prepare the seat and facilitate installation.
The removed front panel of the machine will simplify the task. Perhaps it was removed from you during repairs, then it will be easier to carry out the work.

It takes a long time to remove the wall on purpose, so we will tell you how to remove the sealing gum in another way.
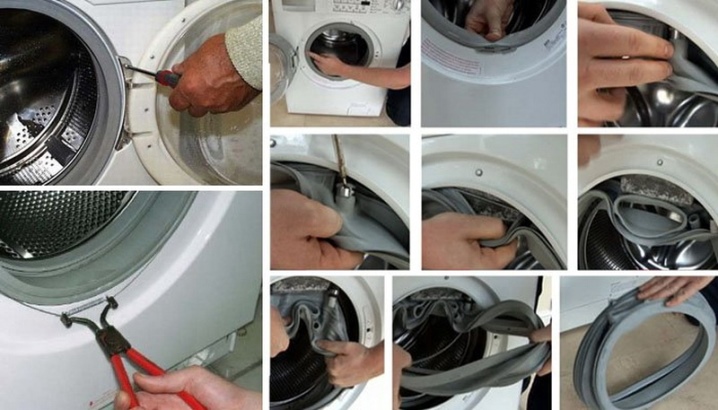
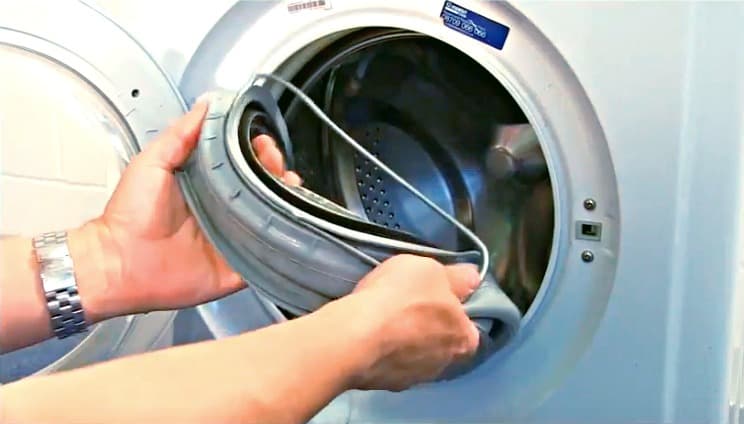
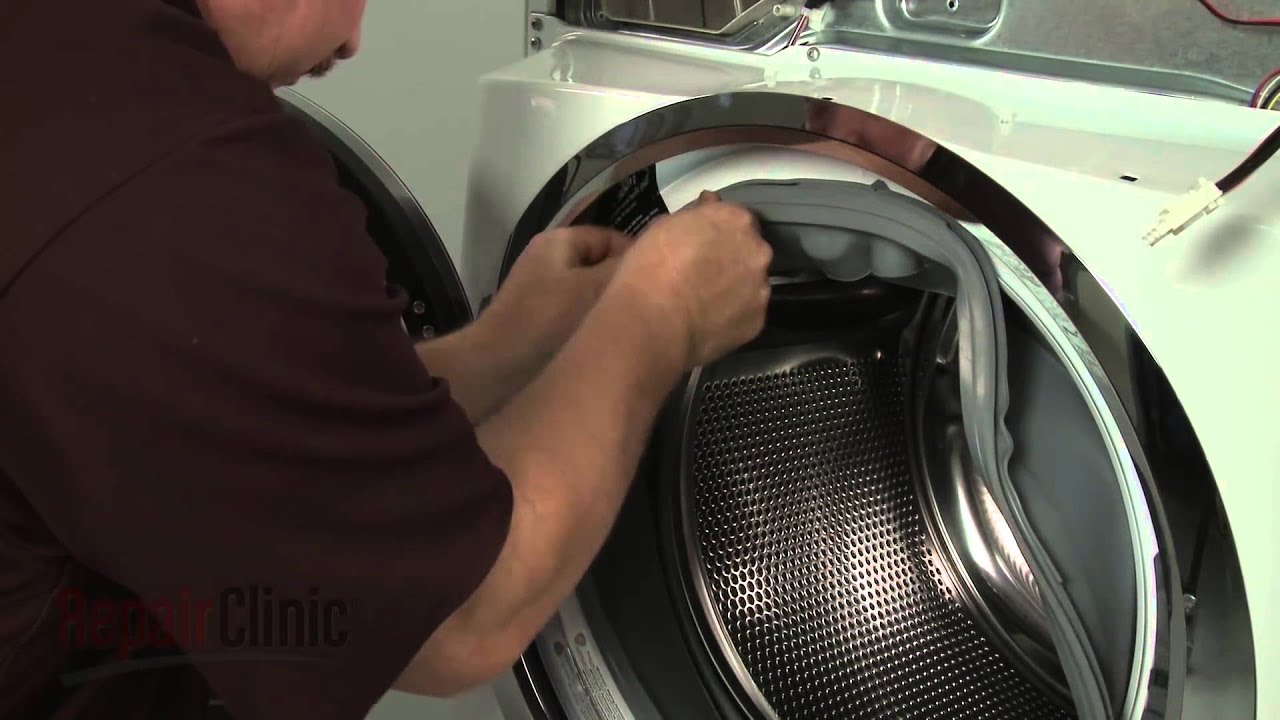
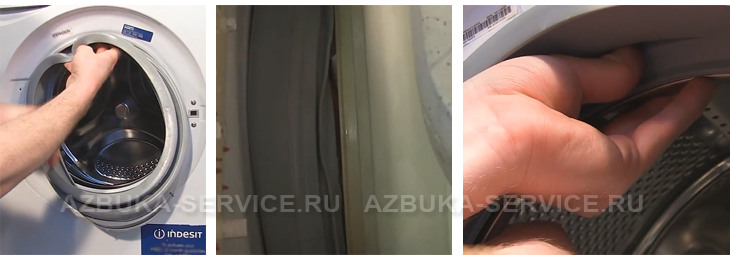
- Open the hatch door.
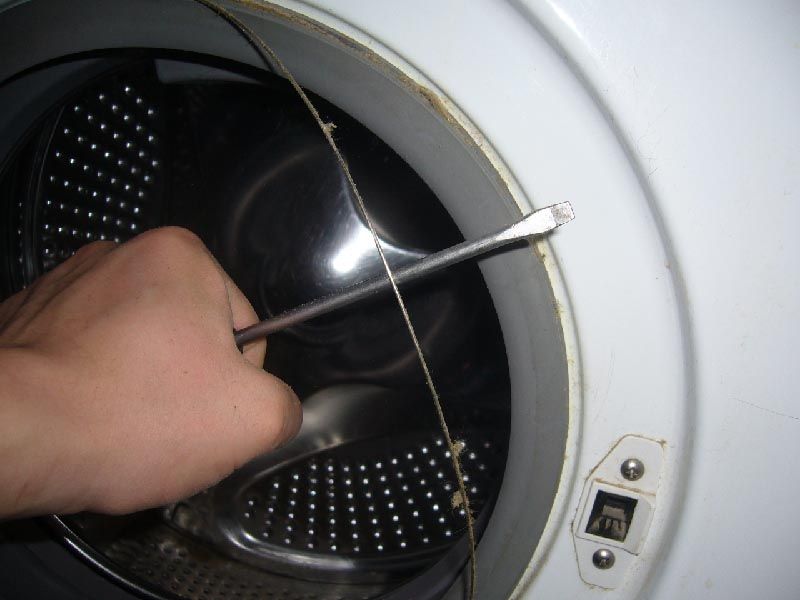
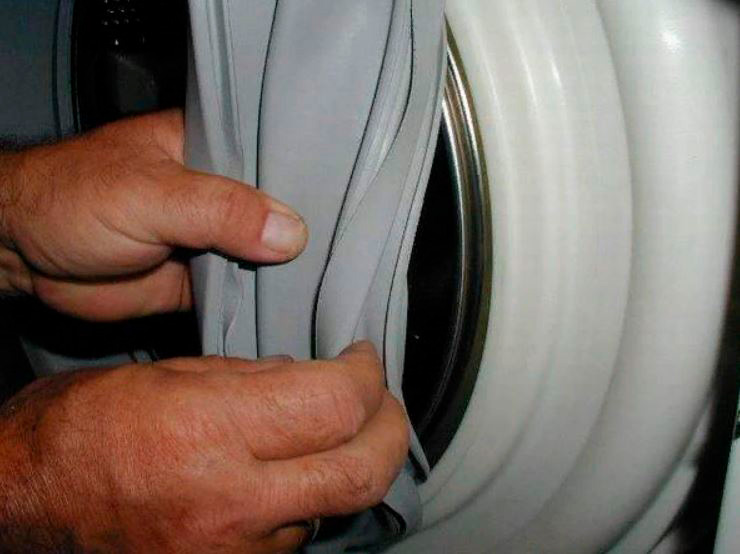
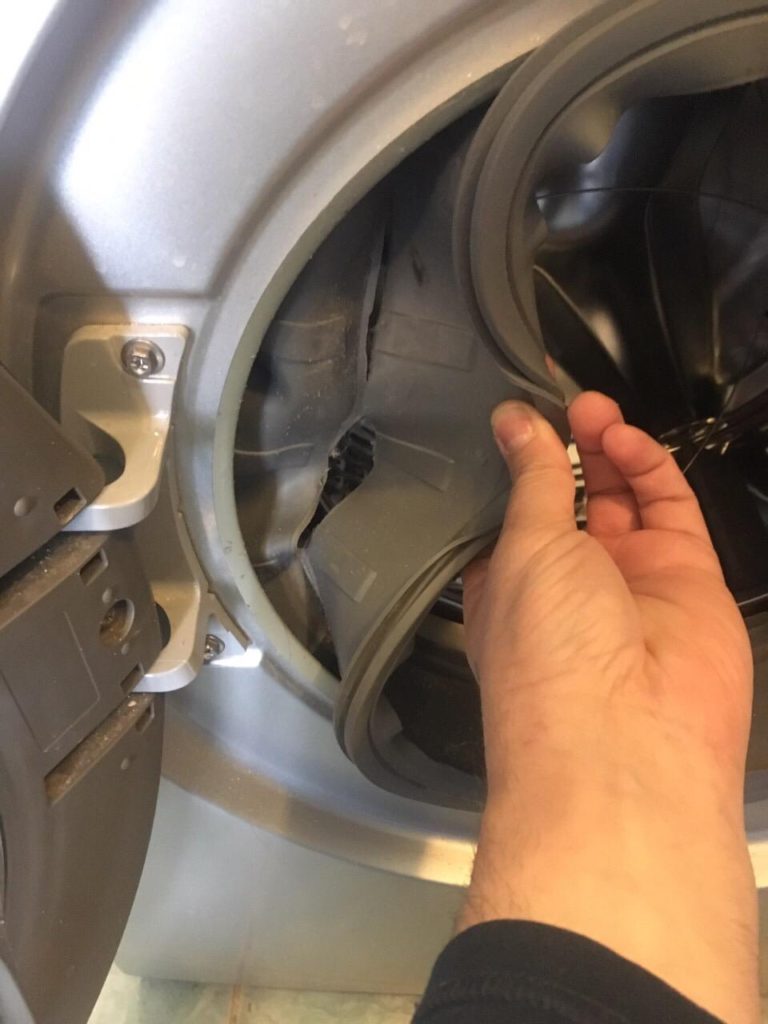
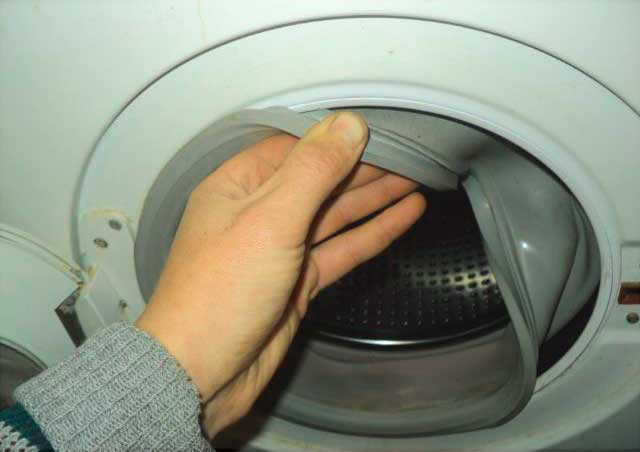
- Fold back the edge of the gasket until you can see the clamp.
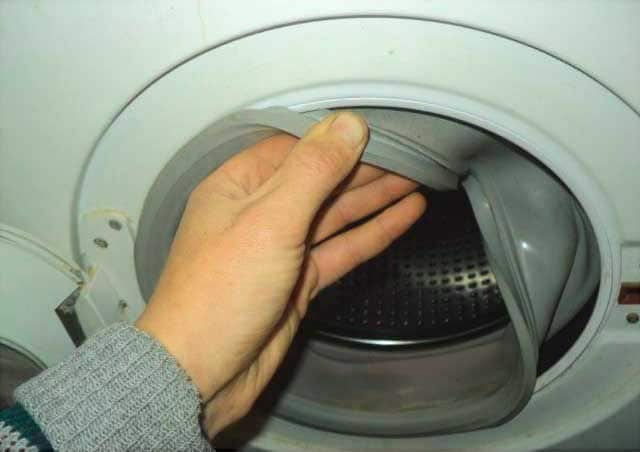
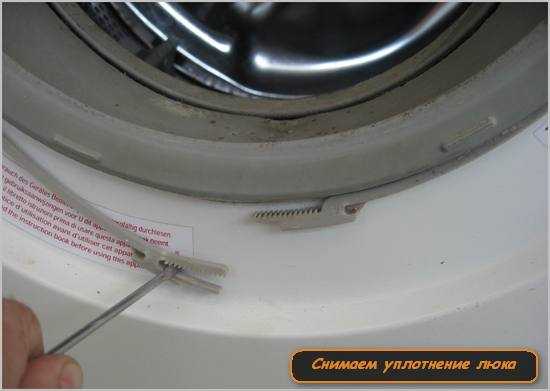
- Pry up the spring with a flat screwdriver.
- Pull the clamp out of place with a screwdriver in a circle.
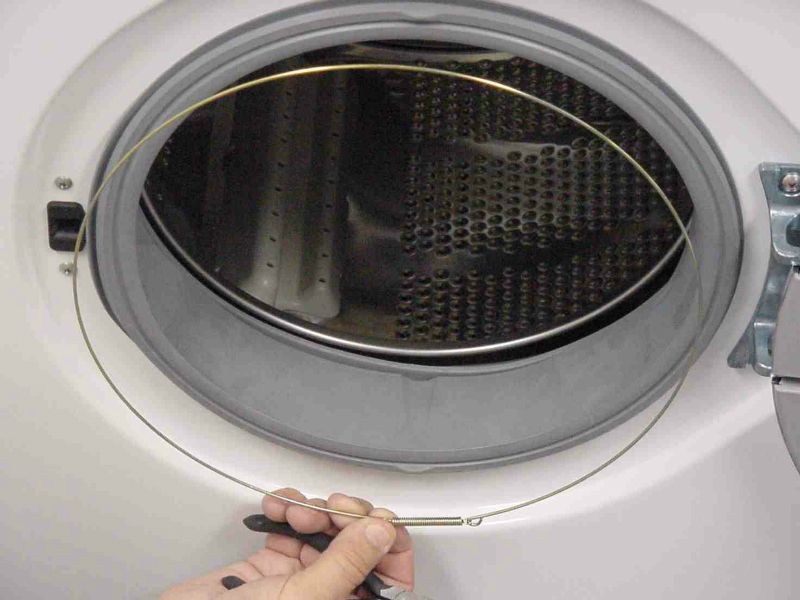
- Remove the cuff from the outer panel. It's easy to do with your hands.
- Fill it inside the tank.
- Unscrew the top cover securing bolts at the back.
- Slide it back and remove it from the case.
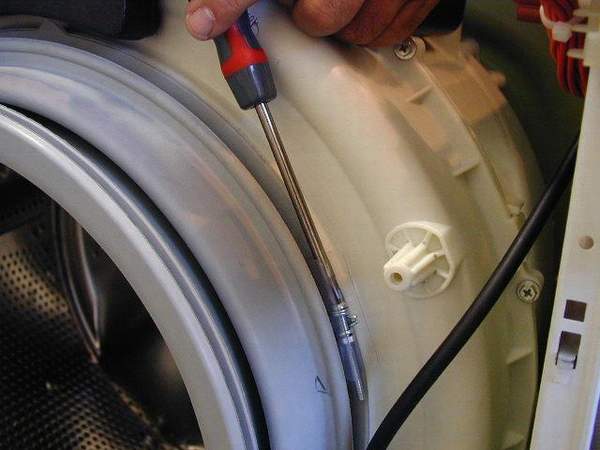
- Using a Phillips screwdriver, loosen the inner clamp securing bolt. Take it off.
- Now lift the cuff and remove it from the machine.

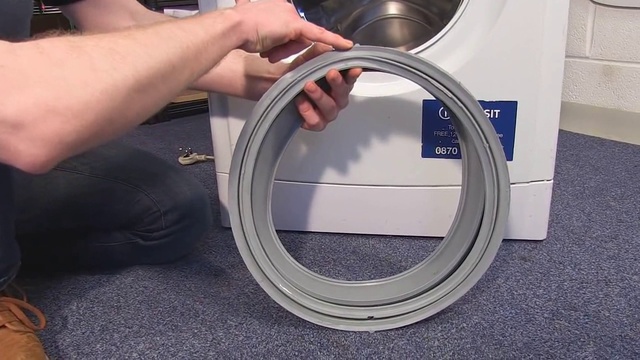
Prepare the seat. Using sandpaper, remove the stuck dirt, scale. Clean the hole with a sponge and detergent. Inspect the cuff before putting it on the washing machine. There is a drain hole at the bottom. And on top is a rubber arrow, which should be aligned with the mark on the hatch.
Now lubricate the fit with soap or detergent, especially the edges of the hole. Do the same with the rubber groove.
How to fit the cuff:
- Tuck it completely into the housing. Observe the top and bottom.
- Slide the top over the inner lip of the tank.
- Moving your hand in a circle, thread the elastic to the bottom.
- Install the inner ring.
- Tighten the fixing screw.
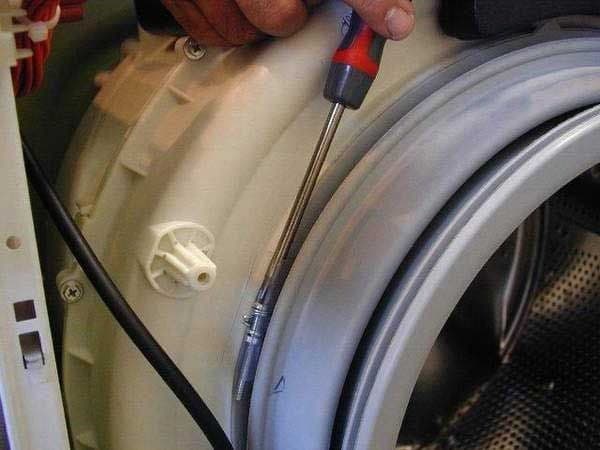
- Slide the outside over the body. Additionally, you can lubricate the fit with soap.
- Move from top to bottom.
- Install the outer ring.
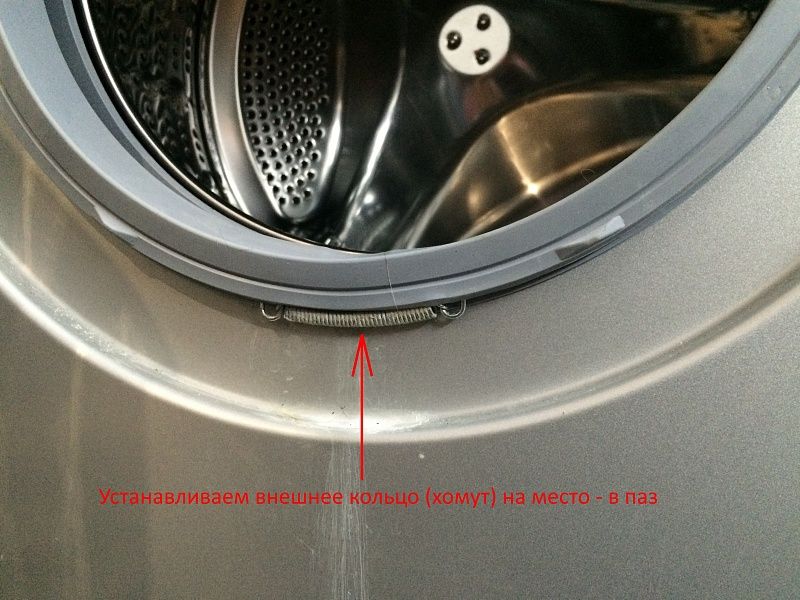
- Hold the ring spring with your finger and thread it in a circle.
- Replace the top cover.
Press down the hatch door. It should close normally. If the closure is loose, then something went wrong. Inspect the installation, correct if necessary. The elements must fit tightly to the body.
The video will help to visually assess the complexity of the work:
How to prevent damage:
- Wash items with tear-resistant decor in special bags.
- Check your pockets before loading.
- Leave the door open after each wash. Wipe the cuff to remove any remaining moisture.
- Remove mold and other dirt from the surface.
Finally, run a short cycle to check the tightness. Happy renovation!
Badly
3
Interesting
3
Super
4
Performing work to remove the cuff
The algorithm for all actions is as follows.
Removing the clamp
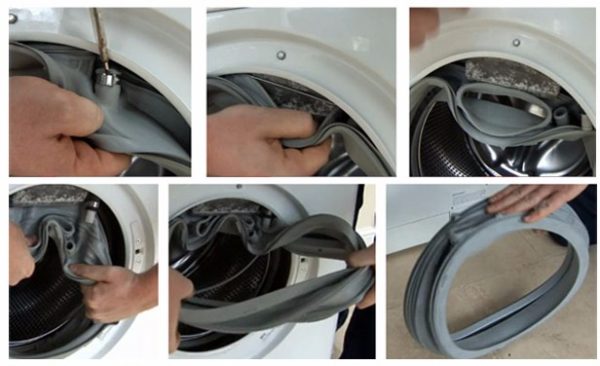
The damaged cuff is removed in two stages. First you need to disconnect the outer spring-type clamp
To do this, you will have to slightly pull the sealing element with a thin screwdriver, pry the clamp near the steel spring and carefully pull it towards you. In most models of Samsung machines, the clamp is metal, equipped with an insert in the form of a dense spring, which needs to be stretched a little and at the same time dismantle the rings without damaging the entire structure
There are machines with plastic rings. They are held comfortably and simply by opening latches.
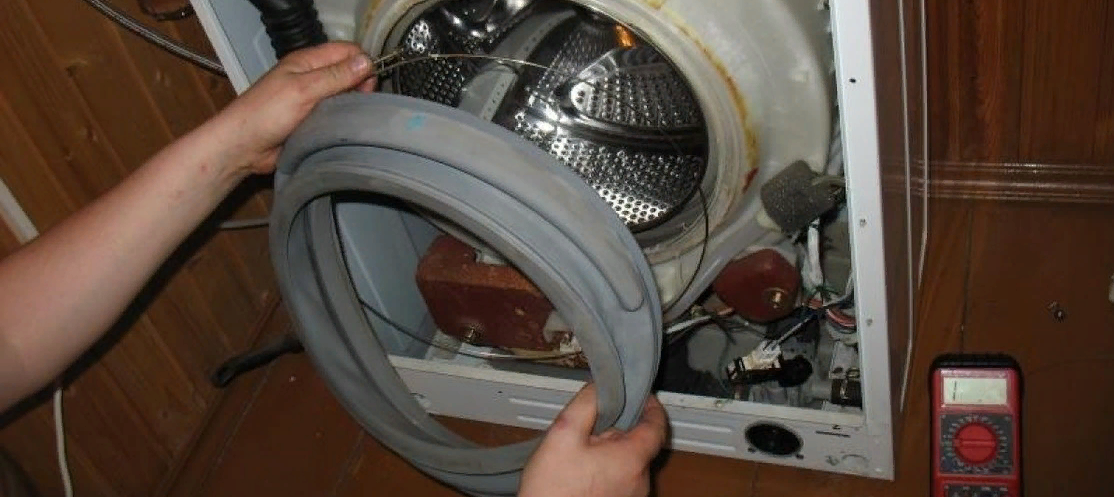
Having taken out the outer clamp, we remove the sealing collar of the loading hatch from the outer part of the machine body, wrap the rubber band in a drum so that it does not interfere with us.
Removing the rubber band and inner clamp
It is necessary to release the rubber band from the other clamp holding it from the inside. For this:
- unscrewing a couple of bolts, remove the top panel of the car;
- we loosen the steel ring with the tightening bolt. It is twisted until the ring is removed without much effort;
- the drum sealing rubber is removed together with the ring.
In the case when the cuff was taken out for preventive cleaning, it is thoroughly washed with the use of disinfectants. The space itself, which appeared after the recess, is also cleared, each recess of the drum, previously covered with an elastic band. As a rule, scale accumulates in such places, which can be removed with detergents.
Removing the front panel of the Samsung washing machine
To replace the gum of the Samsung car hatch, you will have to dismantle the front part of the device in order to provide free access to the inside of the drum, where the cuff is fixed. To do this, use a screwdriver to unscrew the fastening screws on the front panel of the case.The three located at the bottom can be easily removed, and the upper part is fastened with screws hidden by the control panel - it will have to be detached and put aside.
An additional bolt is located under the detergent dispenser tray. Once all fasteners are unscrewed, the front panel is removed, revealing the drum in front of your eyes.
Some technicians remove the sealing gum for replacement without removing the front cover of the machine, which reduces the time required to carry out repairs. It's just that it will be much more difficult to install the cuff on the Samsung washing machine from the inside.
How to put on a new cuff

At this stage, the sequence of actions should be followed exactly in order to avoid problems with a violation of the seal and the leakage of liquid. The final stage of the repair is as follows:
- the cuff is inserted simultaneously with the inner clamp into the body of the machine, put on the drum protrusion located inside;
- a gasket with a clamp is carefully tucked in a circle;
- check that the inner fastening ring holding the elastic is tucked in along the groove to the full length, after which you can tighten the tension screw to the end;
- the outer part of the elastic is inserted on the front of the machine;
- as soon as you are finished putting on the elastic, install the outer clamp.
Having put on and fastened the elastic for the doors, we proceed to the installation of the front panel and the top cover of the Samsung washing machine. The elements are alternately applied to their former places and fastened with screws. The replacement of the cuff on a Samsung machine is complete, do a test wash to check the performance.
Cleaning rules
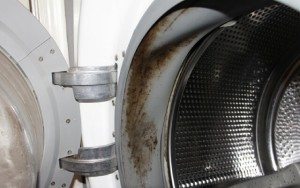 To prevent mold from developing in the drum of the machine, and a rotten smell does not appear, it is necessary to keep the door ajar. Also, after washing, be sure to rinse the powder tray to remove any remaining detergent. Wipe it with a dry cloth, and also wipe the connector where this tray is inserted. However, let's go back to the drum gum and show you how to clean it.
Use a damp cloth to remove mold and other plaque from the outside of the gum.
Fold back the edges of the cuff and wipe the inside, where mold usually grows.
Soak a sponge in white or another chlorine-based product.
Sponge the inside and outside of the rubber and the surface of the drum
Particular attention should be paid to the grooves of the cuff, applying more product.
Close the drum and leave the car for half an hour.
After disinfection, you need to run the rinse mode to rinse the drum and gum from the detergent .. You can effectively clean the cuff from mold with a solution of copper sulfate diluted in a proportion of 30 g per liter of water
It is enough to apply a small amount of the solution to the cuff, wait about a day, and then rinse with water and wipe with a dry cloth. You can start the machine in the "Fast 30" mode so that the residues of the substance are well washed
You can effectively clean the cuff from mold with a solution of copper sulfate diluted in a proportion of 30 g per liter of water. It is enough to apply a small amount of the solution to the cuff, wait about a day, and then rinse with water and wipe with a dry cloth. You can run the machine in the "Fast 30" mode so that the residual substance is well washed out.
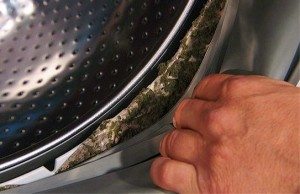 In the event that too much mold and debris has accumulated under the cuff, you will have to completely remove it. This is easy to do, the whole process is described in the article on how to replace the cuff on a washing machine. This has its own plus, because this way you can completely and more thoroughly rinse the rubber in the basin in a large amount of water, then dry it and install it back. And if it is damaged, then generally replace it with a new one.
Complete cleaning of the washing machine
In addition to weekly and constant maintenance, the washing machine needs to be thoroughly cleaned. To carry out a complete custom cleaning of the "washing machine" you need:
- descale the drum;
- clean the drum cuff;
- clean the hatch door;
- clean the drain filter;
- rinse the powder tray.
Since the water in the mains contains salt impurities, it causes limescale deposits on the inside of the washing machine. Limescale deposits on the heating element, on the drum, as well as on the cuff. To prevent excessive scale formation, you can use water softeners, one of which is Calgon. However, in this case, at least twice a year, it is necessary to descale the washing machine. For this, many housewives use citric acid or a special agent called "Anti-scale".
To effectively clean the machine from the accumulated scale, you need to take 100-200 grams of citric acid and pour it directly into the drum, then select the longest program with a water temperature of up to 60 degrees. You can set an additional rinse for better removal of limescale residues. At the end of the program, be sure to wipe the cuff and make sure there is no residue underneath.
It is also easy to clean the door of the hatch of the washing machine from drops of soap solution and other substances. Use any glass cleaner and the door will shine again. As for the filter cleaning, it should be done as often as possible. After all, the filter can become clogged and lead to malfunctions in the washing machine.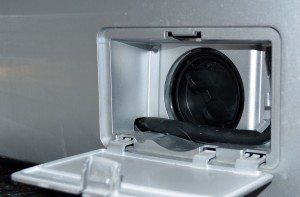
To clean the drain filter, you must first unscrew it from the washing machine. But before that, turn off the machine from the network and close the water supply tap. Then, at the bottom of the case, open the panel or door and find the filter cover. We unscrew it counterclockwise and take out the filter. Do not forget to put a cloth on, as residual waste water will flow out of the filter. Rinse the filter from debris and dirt under running water and reinstall.
Thus, if you are going to clean the gum of the washing machine, you will need both a drum and a tray for detergents. Such care will extend the life of the parts and the washing machine as a whole.
DIY part installation
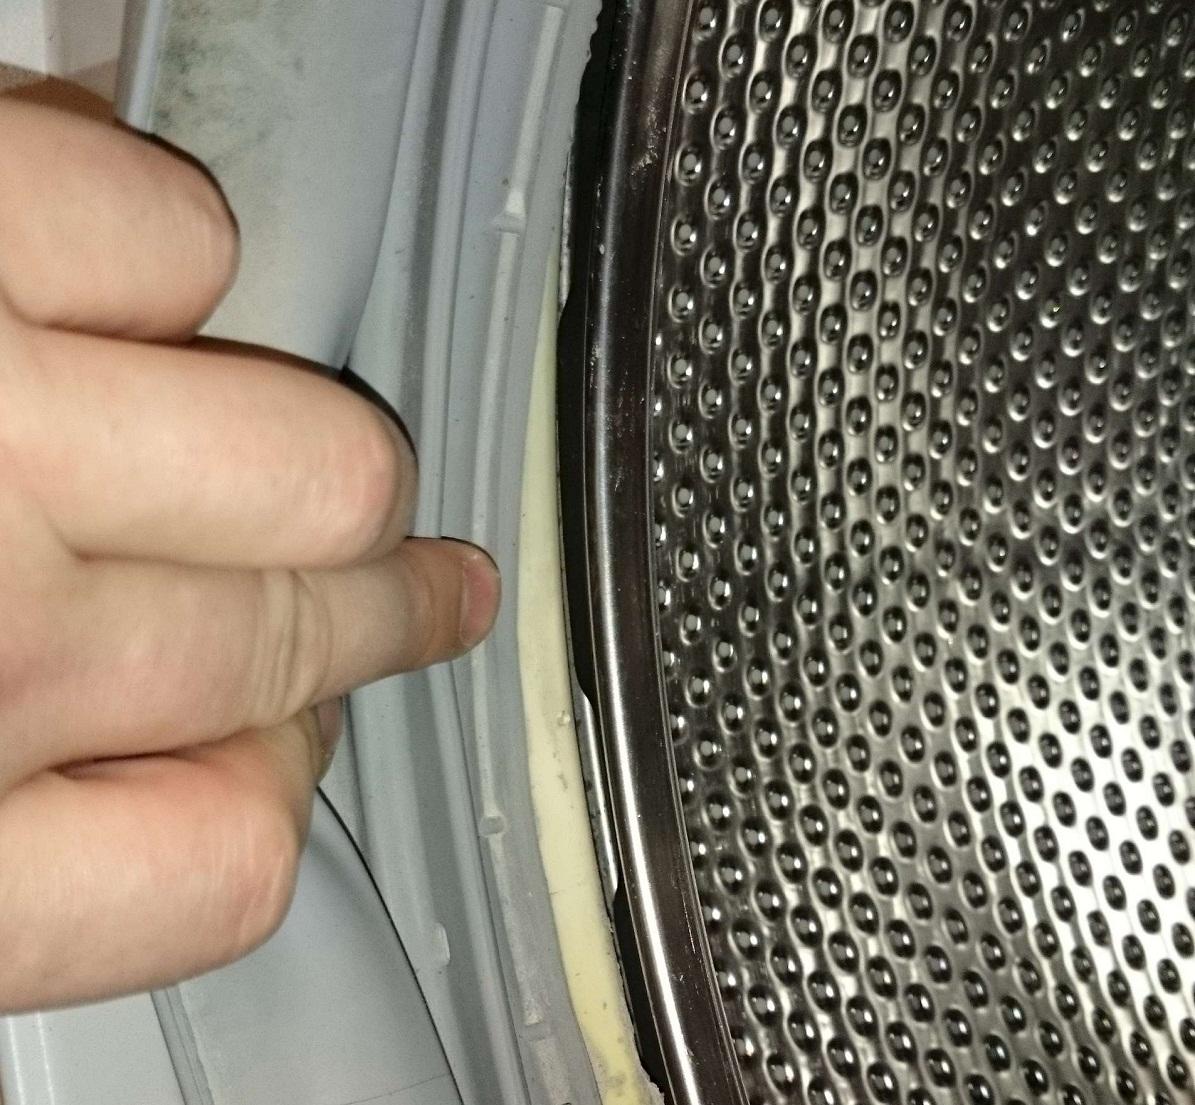
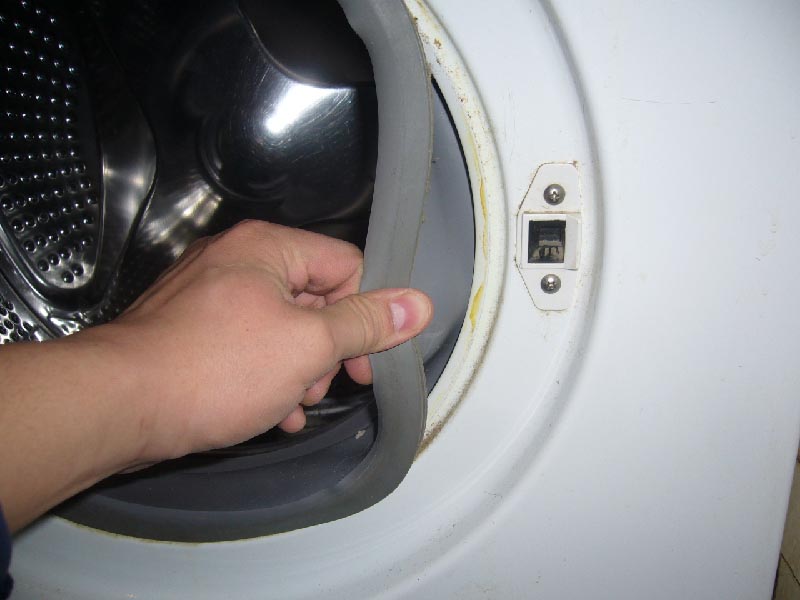
For mounting, there is a certain recess in the cuff that fixes it. It is more correct to take the cuff from the inside and, pressing with your fingers, put it on in a circle on the edge of the tank.
To eliminate slippage, it is necessary to continue mounting the seal from two edges towards each other with your hands. Efforts must be made to understand the movement of the cuff.
Completion of work:
- It is necessary to stretch the elastic on the tank. To do this, we connect the previously found tank mark and the location of the old cuff marked with a pencil. Then we try to fix the inner part of the elastic in a circle. If the elastic is in place, check with your fingers that it is securely fastened along its entire length.
- To define an internal stirrup, define its type. If adjusting, unscrew to the required diameter, install in the established place and tighten. If it is spring-loaded, in principle, fix it at one point, thread it into the hatch lock hole with a screwdriver. Then, using a screwdriver, distribute the seal in a circle.
- The last step is to install the outer clamp. If difficulties arise, you can use round nose pliers.
How do you know when the cuff needs to be changed?
If you find a leak under the hatch or the body of the Indesit washing machine, first of all, you should inspect the sealing lip. If there are defects on its outer part, water will begin to seep out from under the door. If the inside of the gasket is damaged, water will collect under the CMA housing.
There can be several reasons for damage to the seal:
wear. The elastic rubs against the drum during the washing process, and also constantly experiences thermal effects. After a while, the cuff may crack. It is through these cracks that water will begin to flow;
improper care.If you do not wipe the pad after each wash, over time, mold will form on it, which eats into the upper layers of the gum. Such a cuff will no longer be able to ensure the tightness of the system;
influence from the outside. Foreign objects in the drum (coins, paper clips, nails, forgotten in pockets) damage the rubber pad during washing
Also, the condition of the cuff may deteriorate due to pops when the hatch is closed carelessly.
If you properly care for the elastic, do not allow mechanical stress on it, the cuff will last for years. But there is nothing difficult in replacing the seal, it is really possible to carry it out on your own, at home.
Installing a new rubber band
Installing the cuff is one of the most critical stages of repair, since it is necessary to maintain a tight fit and tightness. The step-by-step algorithm of actions is as follows:
- unpack the clamps and set aside the inner and outer separately;
- position the cuff in the correct position using the markings. In most models, the triangle corresponds to the top of the seal, and there is a hole for the hose at the bottom;
- fill the rubber on the tank in strict accordance with the markings, fill it into the drum;
- unscrew the two screws and remove the blocking lock;
- insert the tip of a screwdriver into the lock, this will help fix the clamp firmly;
- install the inner clamp;
- put the lock in place;
- spread the rubber around the outer circumference of the body;
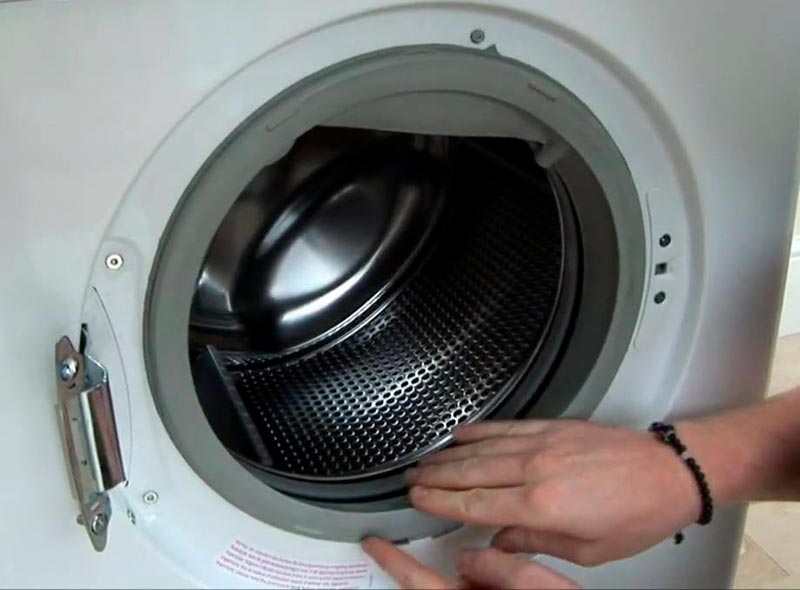
- use a soapy solution to treat the surface and the joint;
- put on the outer clamp and place the door in place.
Try to close the hatch, and if it comes out without effort, then you have correctly seated the seal. To check the tightness and tightness, run the wash test program. The rubber is tightly fitted if there is no leakage.
It is better to entrust the repair of washing machines to professionals !!!
We present to you our unique catalog of private craftsmen and service centers
— .
Select your city and craftsmen in the filter: by rating, reviews, price!
What causes damage to the cuffs (hatch seals)
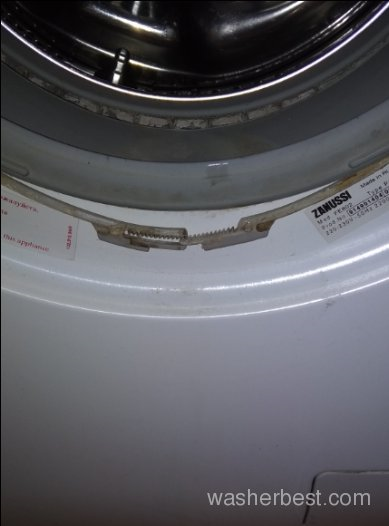
There are many reasons for cuff damage:
- Natural temporary wear and tear during the operation of the washing machine. This is the rarest reason for replacing the cuff, this part is made of high quality rubber, taking into account all possible impacts on it in the future during operation.
- Due to the poor quality of the water and detergents used, the lack of prophylaxis to remove scale and other deposits in the washing machine. Hard water and inadequate powders negatively affect the elasticity of the cuff, it becomes stiff. During the operation of the washing machine, water leaks are often observed along the outer part of the case due to poor sealing of the hatch with a cuff. It is even worse when, due to the loss of elasticity of the polymer, cracks begin to appear, damaging the rubber. For the same reason, other rubber parts of machines - oil seals, hoses and gaskets - come out prematurely.
- For the prevention of scale and other deposits, special means will be required.
- Incorrect and inattentive loading of the laundry. When loading laundry, the user is often guided only by the maximum permissible weight of things, but not by their total volume. When washing, a large volume of laundry rubs against the rubber, and if there are metal objects on it, it can tear it. Frequent failure of the cuff is associated with the presence of foreign objects (gum, keys, coins, etc.) in the pockets of the loaded laundry. A frequent case is an undesirable clamping of a part of the object between the hatch and the cuff; at the first revolution of the drum, the rubber band breaks and the seal with the hatch is lost.
- In case of incorrect installation of the washing machine, namely the exact correspondence of the level.
Tilting the clipper forward or backward will either rub or stretch the cuff.Very often it is for this reason that this breakdown occurs in narrow washing machines, where there is less space for the free movement of parts moving during operation.
After detecting damage to the rubber, many users are wondering how to glue the cuff of the washing machine hatch and what glue to use for this. At the same time, repair of the cuff is almost impossible, since it is difficult to adhere due to the properties of rubber.

