How to veneer with your own hands?
Let's move on to a step-by-step review of the hot veneering process as the most acceptable at home.
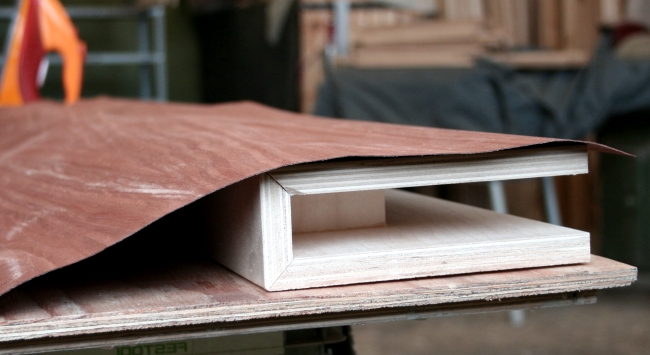
Basic tools and materials:
— veneer
- the base that we will veneer
- plywood knife
- PVA glue
- iron (better old, Soviet)
- a blank sheet of paper
- wooden block, roller (for grouting)
- emery cloth
- cutter
DIY veneering: preparation
The basis for do-it-yourself veneering should be perfectly flat, all defects are sealed with putty or sedenticon glue. After the putty (glue) has dried, we clean the surface with sandpaper.
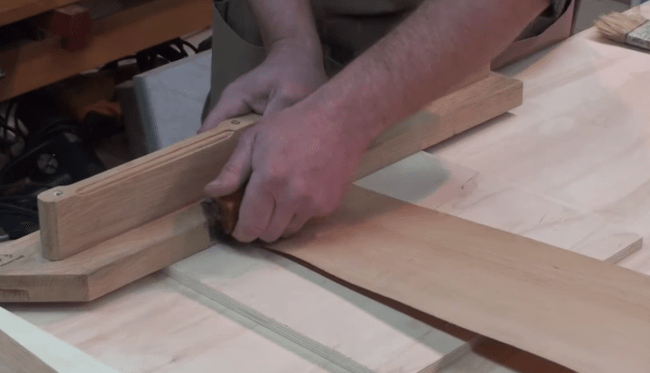
Before directly veneering with your own hands
, it is necessary to prepare the veneer for work. Natural veneer is often deformed - twisted into a roll, warped, etc. Giving the veneer sheets the correct position is not difficult: moisten the veneer with a damp sponge and place it under the press between the layers of plywood. To absorb excess moisture, insert wrapping paper (on both sides of the veneer) between the veneer and the plywood.
Now you need to take care of the size. Today, to decorate furniture and walls, planed veneer is most often used - long, but narrow sheets (no wider than 30 cm). To glue, for example, a table, you need to prepare in advance pieces of veneer of the required length - as a rule, it should slightly protrude beyond the edges of the base (at the end, the excess can be cut off and smoked). It is not recommended to cut the veneer with a knife or scissors - it will crack or cut unevenly. Better to use a plywood knife or planer.
DIY veneering: gluing
Do-it-yourself veneering at the next stage involves gluing the veneer and base.
For do-it-yourself plywood, PVA-based glue is perfect. You can read more about wood adhesives.
So, we put glue on the veneer, and on the base we glue an area of the appropriate size with glue. Experts advise to coat with glue two times: the first time should be dried until almost completely dry, when the glue practically does not stick, and the second time we dry it until it is tacky. Double glue coating guarantees a “dead grip”.
But if, for some reason, when veneering with your own hands, you decide to glue the veneer and the base with glue once, wait at least 10 minutes for the glue to dry.
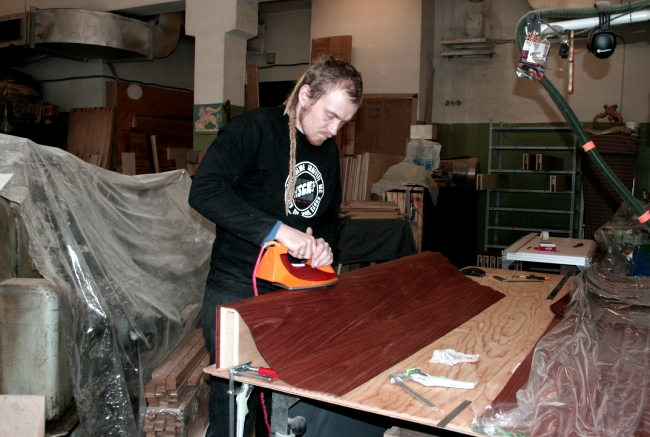
Next, we will use the ability of PVA glue to show fluidity when heated: we heat the iron to an average temperature, about 50 degrees (but you cannot bring the glue to a boil, this will nullify all its functions), and iron the veneer through a sheet of white paper (for the inexperienced). Immediately after using the iron, we begin to work with a wooden bar, a roller: we rub it in, squeezes the veneer and the base.
Do-it-yourself veneer
it is necessary so that the veneer sheets overlap by 3-4 mm
When gluing the joints, pay special attention: as if crush it with an iron
Now we determine if we have made voids and places not seized by glue: we just lightly drum with our nails on the veneer. If a defect is found, iron the place again with an iron. It didn't help - you have to cut the swelling with a thin cutter and pour the glue (with a syringe, for example).
DIY veneering: the end of the process
A few hours after veneering with our own hands (directly gluing), when the object dries out, we take up cutting and sanding the excess.
I would like to say a few words about how to skin veneered surfaces. At the joints of veneer sheets, as a rule, there is a little PVA glue. While non-glue areas are easy to sand, areas with glue form sticky rolls, but do not sand.
As a result, an unevenness may turn out, so pay attention to the moment with the glue initially
When using veneer, you need to be extremely careful - it is a thin material that can easily rub off (especially when using a grinder).
DIY plywood
almost over! Now there are only aesthetic moments - coating, final finishing.
As you can see, do it yourself at home
not difficult at all. And if you still have questions, we hope that a video on how to plywood with your own hands will answer them!Tatiana Kuzmenko, member of the editorial board Sobkor of the Internet edition “AtmWood. Wood Industrial Bulletin "
People who want to update their furniture, but do not have the opportunity to buy new products, should pay attention to veneer. It is represented by sheets of wood, which come in different thicknesses and colors.
Veneer is glued to old furniture, which improves its appearance. Such a finish will reliably protect objects from damage in the future, so many are interested in the question of how to glue the veneer to the base. At home, this is quite possible.
Helpful hints and tips
To make the user happy with the result of self-gluing veneer, you need to follow the advice of professionals:
- veneer textures allow you to create interesting patterns, you can even join different types of wood on one canvas;
- preliminary sanding of the canvas begins with coarse-grain sandpaper, ends with "zero";
- grinding is carried out only along the grain of the wood;
- when ironing the material with an iron, a layer of cotton fabric is applied on top;
- during ironing, you must not stop, you need to continuously drive the iron over the surface, otherwise scorch marks will quickly appear on the veneer;
- if black markings do appear, they can be carefully removed with a sharp knife;
- corners, veneer edges are most conveniently warmed up with a soldering iron (if the hot gluing technique is used).
Immediately after finishing the facing of the canvas, it must be covered with a layer of varnish
The fact is that the new veneer strongly absorbs moisture, it is important to protect it from excessive swelling. This will help the product to serve faithfully for many years.
How to glue at home
To achieve a strong and reliable fixation, the surface should be properly prepared and the technology for applying the substance should be strictly observed.
Surface preparation
Fixing veneers is considered a simple process that requires strict adherence to instructions. Otherwise, the lining may come off. First, the surface must be carefully prepared. It should be borne in mind that the material is not glued to the untreated canvas.
To prepare a door or other product, it is recommended to do the following:
- Remove the canvas from the hinges. This is done with a screwdriver or pry bar.
- Place the product on the floor.
- Remove fittings - decorative elements and handles.
- Remove the old coating with a sharp trowel. It is permissible to heat it with an iron or a building hair dryer.
- Sand the coating with sandpaper or a special machine.
- Cover holes and defects with a special putty, which is designed for wood.
- Apply wood glue.
How to prepare and cut material
To carry out the work, the required amount of material is required. Usually veneer is sold by the meter. The purchased material needs to be cut. First, the rolls should be straightened to level the veneer. Thanks to this, it will take on a natural shape.
It is recommended to measure the web carefully. After that, it is permissible to cut it. There should be 5 centimeters of allowance on each side. This will prevent problems with erroneous measurement. Use a plywood knife or plunge saw to cut the material. It is recommended to use a professional electric tool. This will help you get accurate and beautiful cuts. You cannot use scissors.They will lead to the formation of cracks in the material. It is recommended to choose veneer in the form of boards or stripes by pattern. After that, you need to glue the sheets with glue. This is done along perpendicular lines and joints.
Gluing methods
When using a two-component adhesive, mix the ingredients together. You can then commit in an optimal way.
Cold contact method
This is a rather complicated method. To carry out the procedure, you need a contact adhesive designed for veneers. This product is characterized by a minimum holding time, which helps the glue to set quickly. This method is not suitable for inexperienced craftsmen, since it does not allow correcting errors in the work.
Hot glue
This is an easier way. First, both surfaces are treated with a layer of glue, which must dry within a quarter of an hour. Then the veneer is applied to the main sheet and ironed with a hot iron. It is also permissible to use a lapping hammer.

The device helps to heat the adhesive layer. As a result, it melts and provides a secure fixation of the veneer and base. In addition, all air bubbles are released during the procedure. This helps to improve the hitch quality. This method requires a thick glue. If the surface dries too quickly, the base should be lightly sprinkled with water. Large bumps are gently punctured or incised. Then they should be ironed again.
Cold press bonding
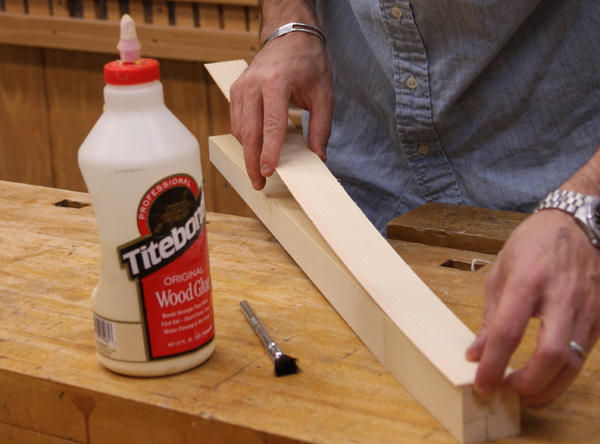
For this type of procedure, it is worth using the Titebond adhesive. They should treat both surfaces and level them with a spatula. After that, it is recommended to attach the veneer to the base. Then carefully adjust the position of the material and secure it with a clamp. The fixing elements must remain until the adhesive is completely dry. After that, they should be removed and the reliability of fixation assessed.
Veneering: types
There are several main types of veneering, let's take a quick look at them.
- Hot veneering
... With this method, the veneer is glued to the base thanks to adhesives. The most accessible method for home conditions, which will be discussed in the article.
- Cold veneering
... Here the veneer is pressed to the base. We are talking about pressing machines or screw clamps, which not every owner of the house has.
- Membrane veneering
... An industrial method used for veneering complex surfaces. Membrane veneering is based on the vacuum bonding of veneer and boards - both smooth and embossed.
Which glue is better?
Among the variety of adhesive solutions, it is very easy to get confused. What kind of glue is better to glue veneer on plywood or other similar material (see photo). Very often, when gluing sheets tightly, ordinary PVA glue is used. But it is only suitable for flat surfaces. More complex elements can be made only with the help of more reliable compounds, for example, Titebond adhesive solution for wooden surfaces. But it is worth noting that it costs not so little. In addition to the above compositions, veneer can also be glued using polyurethane, epoxy, as well as soluble flesh or liquid flesh glue.
It is best to start grinding the base under the veneer with a finely dispersed construction sandpaper, and finish with a zero sandpaper.
The color of the veneer sheets must be selected so that they blend harmoniously with wallpaper, furniture, etc.
Very interesting are the patterns left from sheets that are made from various types of wood.
With the cold dyeing method, the coating of the sheets at home is more uniform and stable.
After staining the veneer, it must be rinsed under running water, and then dried in a warm place, but away from direct sunlight.
In simple terms, veneering is the gluing of thin sheets of wood with a beautiful structure (in fact) on a wooden base - be it a table, wall or door - of lower decorative qualities. It turns out that veneering furniture means dressing it in nice clothes.
Veneering is more correct to call veneering
... But it so happened that the slang word “veneer” is more familiar to the average ear than “veneer”.
Gluing methods
The base on which the sheets will be glued must be degreased, after which it is covered with glue for gluing the veneer. The most popular method of gluing sheets is tight-fitting. The glue for it is made thick and applied hot. Care must be taken to ensure that it is dry on the substrate, otherwise the adhesive solution may appear on the surface, especially if the veneer is very thin. After the contact adhesive for the veneer has started to set, it's time to grind the sheets. This is done using a special lapping hammer, which is constantly moved in the direction of the fibers.
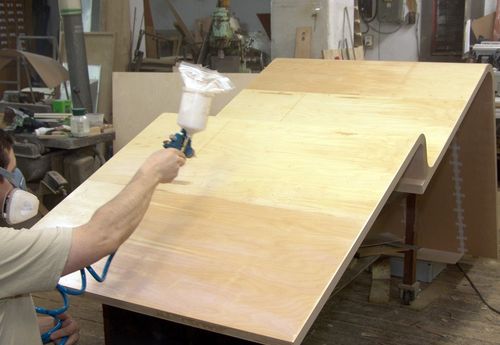
The grinding process begins in the middle of the sheet, gradually moving the tool heated to 85 ° C to the edges, while removing excess glue. It is advisable to moisten the veneer with warm water during operation. This is done so that the glue solution does not dry out too quickly. If it happened that not the entire base was covered with veneer glue, bubbles may form, to eliminate which you will have to cut the sheet with a blade and inject a small amount of adhesive under it. After that, the veneer is processed again with a lapping hammer or a warm iron. Thus, it is quite easy to glue the veneer at home.
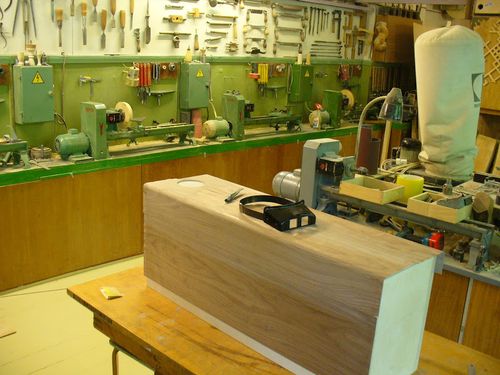
What is veneer and what types it is
Veneer is called thin sheets of wood, the thickness of which is from 0.5 cm to 1 cm. They are glued to the base material, for example, on wood or MDF. This process is called veneering.
Veneer is divided into several types according to the methods of sawing and manufacturing, the use of wood species.
By cutting methods
- Tangential - the tree trunk is sawn at a certain distance from the core to obtain an individual blade pattern and texture;
- Radical - the cut runs clearly in the middle of the trunk, and allows you to get a high-quality, homogeneous blade that is resistant to various influences.
By processing method
- Sliced fabric - made on a horizontal machine using a running knife. At the same time, the tree trunk is securely fixed, and the canvas turns out to be very thin. This veneer is used to decorate furniture and facades.
- Sawed - made on a machine with high precision and 20 saw blades. The sheets are flat and have high wear resistance. The material obtained by sawing is used for decorating multi-layer doors and parquet.
- Peeled - in the manufacture of canvases, a special machine is used that peels short pieces of wood. The resulting sheets are used for cladding and veneering. Special knives allow you to get an original drawing.
Gluing methods
Before starting work, you need to mix the glue if it is two-component. Next, you can stick to the selected method.
Cold contact method
This technique is much more difficult. For its implementation, you will need a contact adhesive for veneer, which sets very quickly due to the minimum holding time. This technique will not work for beginners, because there will be almost no opportunity to correct inaccuracies in the work. After applying the product to the base, you need to forcefully press the veneer to it
It is precisely the strong clamping force in the first seconds that is important, which allows you to not use the press in the future. Usually the technique is used for pasting small products.
Hot glue
Veneering in this way is easier.First, a thin layer of glue is applied to both surfaces, which dries up within 10-15 minutes. Then the veneer is applied to the main canvas, melted with a hot iron, or a lapping hammer is used. As the tool heats up the adhesive layer, the adhesive melts and firmly seizes the veneer with the backing. In addition, all accumulations of air bubbles are released, and the quality of adhesion is improved.

For this technique, it is important to use a glue with a thick texture. If it is noticed that it dries too quickly, the base is first sprayed with a little water.
Large swellings will have to be carefully punctured, cut, and then once again walk over them with an iron
Cold press bonding
For this type of veneering, the most commonly used glue is "Titebond". It is applied to both surfaces, leveled with a spatula, and a veneer is applied to the base. After carefully adjust the position of the material, fix it with a clamp (clamp). Do not remove the clamps until the glue is completely dry, then remove them and check the strength of the connection at the ends of the canvas.
Gluing methods
After the canvas is prepared, the material is cut to size, and the glue is selected, you need to find out how to glue the veneer at home. There are three ways to do this.
Cold contact method
It is considered the most difficult way of gluing wood to a treated surface. This implies the use of a contact adhesive. The difficulty lies in the fact that the binding composition sets quickly. This makes it extremely difficult to correct inaccuracies if the mating surfaces are misplaced.
In order for the gluing to be reliable, it is required to create a strong clamping force in the first seconds of contact of the materials (press it with your hand or with a load). Experts do not recommend using it for gluing large surfaces.
Hot glue
A layer of glue is applied to the surfaces to be glued, which must dry for a certain period of time. After that, you need to attach a veneer sheet exactly to size. With the help of an iron, the sheet begins to be smoothed from the center to the edges. The adhesive composition under the influence of high temperature melts and sticks two materials together.
For contact hot-sticking to work, a thick adhesive must be used. To prevent the glue from drying out too quickly when using an iron, it is required to moisten the veneer surface with warm water. Where the blisters are, punctures or cuts are required to release air.
Cold press bonding
The classic method of gluing, which requires fixing the clamps to the glued surfaces. The holding time is indicated on the packaging of the composition used. After drying, it is necessary to remove the clamps and check the condition of the ends of the door.
Now you know how to glue veneer
In order for the work to proceed without difficulty, it is necessary to take into account the recommendations and advice of the veneers:
- When using veneer from expensive wood species (oak, ash), a layer of cotton fabric must be applied to the canvas.
- Grinding a new surface is possible only along the fibers with emery paper.
- Since the new coating absorbs water well, immediately after gluing it must be covered with a layer of varnish.
- Using an iron, you need to constantly drive it along the work surface. It is forbidden to hold a heated metal surface in one place. If there are burn marks, remove the blackness with a sharp knife or razor blade.
- To secure a long strip of veneer to an edge, you need to secure one of the edges with an iron or a hair dryer. It is convenient to fix edges and corners with a soldering iron.
- The covering of radius doors must be entrusted to the cladders of old furniture.
- Stacked veneer panels from different types of wood look unusual.
- At the ends located below and above the blade, it is required to cut 2 mm chamfers on both sides. The sash will not cling to the box after gluing the new wood covering.
- When cutting a sheet with a knife, it is recommended to do this across the grain. If the sheet is cut lengthwise, it is necessary to make several movements with the blade. Otherwise, the cutting part of the knife will slip off and ruin the sheet.
By following the elementary rules, you can get the job done without difficulty.
The veneering skill can be useful not only for restoring door leaves. With the help of new wood sheets, you can change the design of wood furniture. It can be coated with any paint color for wooden surfaces. The main thing is to apply varnish or plastic wrap to protect the veneer from the damaging effects of moisture.
Bonding methods
The quality of the veneer material and its strength directly depend on how accurately and accurately the veneer is glued to the plywood blank. There are 3 types of veneer fixing methods.
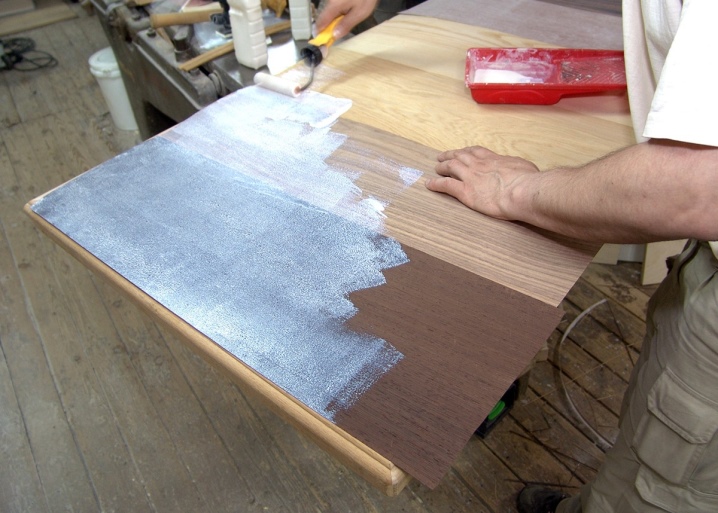
Cold contact method
This is considered to be the most difficult way to perform veneer gluing. For its implementation, an adhesive composition is used, which is able to polymerize quickly. This solidification rate has its pros and cons. The fact is that due to the fast adhesion, defects in the location of the veneer on the workpiece may not be noticed and corrected in time, and after polymerization it is no longer possible to change anything.
For this purpose, the workpiece is placed under a special pressing press, or press it manually. In this way, it is recommended to process workpieces that are small in size.
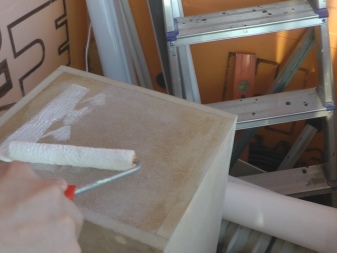
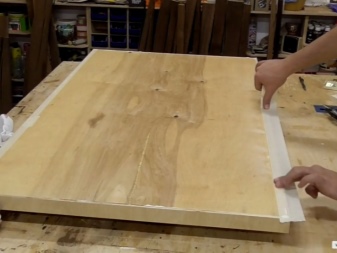
Hot glue method
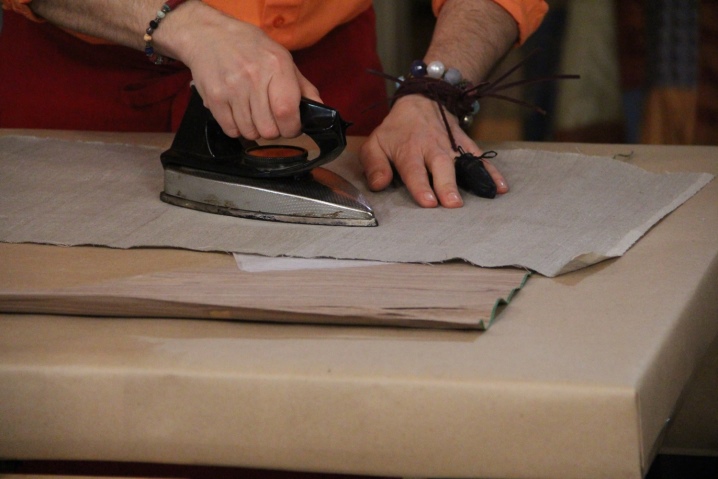
The essence of this method is that the surface of the workpiece and the surface of the veneer are separately processed with glue. The adhesive composition should dry out a little, after which the veneer is applied to the workpiece. Next, the veneered surface is treated with a hot press or iron, if the work is done at home. In order not to spoil the finish, you need to iron the veneer through a layer of clean paper. At this time, under the influence of high temperature, the adhesive composition will melt and create high adhesion.
To perform this finishing method, a thick adhesive composition is used. In the event of air bubbles or unevenness during the bonding of materials, the situation can be corrected. The adhesive composition, which in the form of excess has left the workpiece, is removed with a damp cloth.
Cold jointing method with pressing
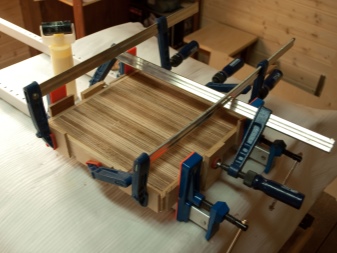
The method is based on the use of squeezing devices called clamps. Compression of the bonded surfaces is carried out until the glue is completely polymerized.
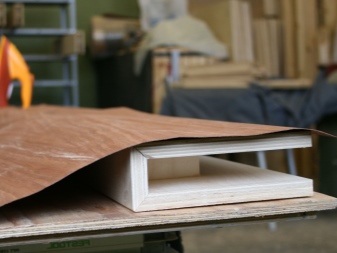
Choosing one or another type of veneering, it is important to perform the subsequent stages of work. After the glue dries, I grind the workpiece a little and cover it with a transparent quick-drying varnish
Already 24 hours after veneering, the product can be used.
The need for veneer finishing
Plywood is a type of glued sawn timber made using natural wood. But, despite its natural origin, the raw materials for the manufacture of plywood are inexpensive wood species with an unimpressive texture of fibers and an insufficiently attractive color.
In order to refine inexpensive material, rare or even valuable species are glued on top. As a result, the price of lumber increases slightly, while the aesthetic design improves significantly.

Finished veneer plywood and products from it look as if they are completely made of rare wood species. However, along with a more attractive and solid look, as a result of veneer finishing, plywood acquires improved technical and operational properties.
The main types of veneer
Veneer is a thin layer of wood.The substance is an absolutely natural material, which has several varieties:
- Standard - made from oak, cherry, walnut. Other types of wood can also be used.
- Special - made from rare and valuable wood species.
- Root cuts of interesting species - this material is not suitable for the production of furniture, but it has an interesting texture. This category includes myrtle or eucalyptus.
- Exclusive - characterized by an unusual texture and non-standard sizes.
The material may also differ in the way of cutting and processing methods. Most often it is used in the furniture industry. Often, the substance is glued to wall or facade panels. Veneer doors look actual. This substance is characterized by its excellent appearance. It is permissible to fix it on various wooden surfaces. At the same time, the substance is notable for its affordable price. Therefore, it is often used to decorate the interiors of residential premises. The main advantages of veneer include the following:
- long period of operation;
- moisture resistance;
- environmental friendliness;
- high strength.
By cutting method
Depending on the cutting method, veneer can be radial and tangential. Each of the options has certain features.
Tangential
This material is obtained by slicing the trunk parallel to the center. This helps to achieve the effect of rings on the surface.
Radial
This is achieved by planing at 90 degrees to the tree rings.
By processing method
Depending on the processing method, veneer has several varieties. Each of them has a number of features.
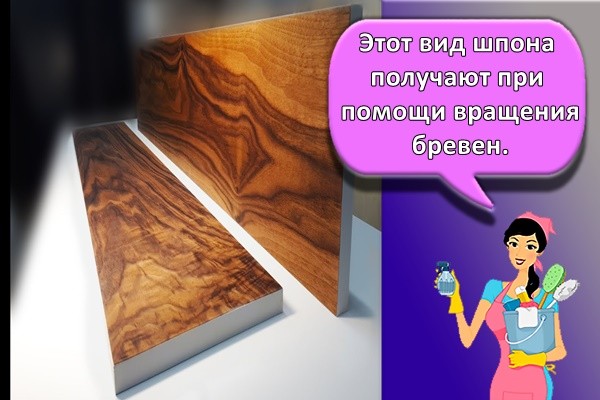
Shelled
This type of veneer is obtained by rotating the logs. During the procedure, a thin tape is cut from them. The saw of a special machine cuts the wood parallel to the grain. This material is obtained from oak and alder. Pine and birch are also used for its manufacture.
Sawn
This veneer is made from coniferous trees. These include Siberian cedar and fir. As a result, it is possible to obtain boards with a thickness of up to 12 millimeters. Usually the material is used to make musical instruments. It is sometimes used in the furniture industry as well. This type of veneer is considered the most valuable.
Planed
This material is made exclusively from solid wood. It can be obtained from oak or mahogany. It differs from other types of veneer by the method of cutting wood. First, the trunk must be cut into bars. Then its layers are cut off. This is done perpendicular to the fibers.
Conclusion
Veneer is a fairly simple and effective solution to problems of design transformation of various surfaces. High-quality lamellas are quite expensive, but in practice, this material justifies itself. How to glue veneer so that it retains its qualities for a long time? Cases when there are problems with the gluing zone are rare. Much more errors are allowed when the lamellae are located with deviations. Otherwise, everything will depend on the care of the renewed surface. So, in order to maintain the optimal technical condition of the veneer, it must be regularly treated with special impregnations and protective paint and varnish primers.
In simple terms, veneering is the gluing of thin sheets of wood with a beautiful structure (in fact) on a wooden base - be it a table, wall or door - of lower decorative qualities. It turns out that veneering furniture means dressing it in nice clothes.
Veneering is more correct to call veneering
... But it so happened that the slang word “veneer” is more familiar to the average ear than “veneer”.
