How to mount the formwork
Edged boards or thick plywood sheets with an even inner surface are used as formwork.
If the formwork is planned to be removable, then before its construction it is recommended to treat the inner surface of the boards with a special lubricant - thanks to it, later the formwork can be disassembled easily and quickly.
If there is no lubrication, then used machine oil can be used.
The step-by-step instructions for the formwork device can be presented as follows:
- Planks are installed in trenches on a previously prepared base. The formwork can be installed all at once or gradually, as the boards are released, the height should be equal to the height of the planned path. The horizontalness of the structure must be checked with a building level.
- Layers of sand and crushed stone (if necessary) are poured onto the pre-rammed bottom.
- Lay a mesh of reinforced rods.
- Every 2-2.5 m across the trench, boards up to 20 mm thick are installed, which will take the main load when pouring. They will also function as expansion joints, thanks to which they do not crack at temperature extremes.
The formwork should protrude 5-10 cm above the ground.
If you want to arrange curved paths, then instead of boards, plywood or plastic panels are used, which are easy to bend in the desired direction.
In order to save energy and reduce material costs, the formwork can be assembled in parts.
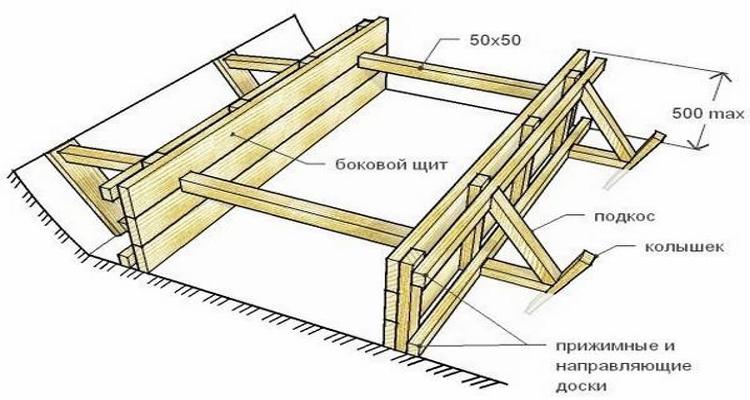 Edged boards are suitable for formwork.
Do-it-yourself paving with paving slabs: a step-by-step guide
If there is traffic, then the base should be strengthened. On top of the rubble, a layer of concrete 12-15 cm thick should be poured, providing drainage holes. Concrete can be reinforced with reinforcing steel mesh or simply loose pieces of reinforcement:
- The last base layer can be made from sand or cement-sand mixture. Only river coarse-grained sand is suitable, well sifted, without pebbles, debris and clay inclusions. If you prepare a mixture, then the ratio of sand and cement depends on the brand of cement: for M150, the proportion is 1: 3, for M400 - 1: 6.
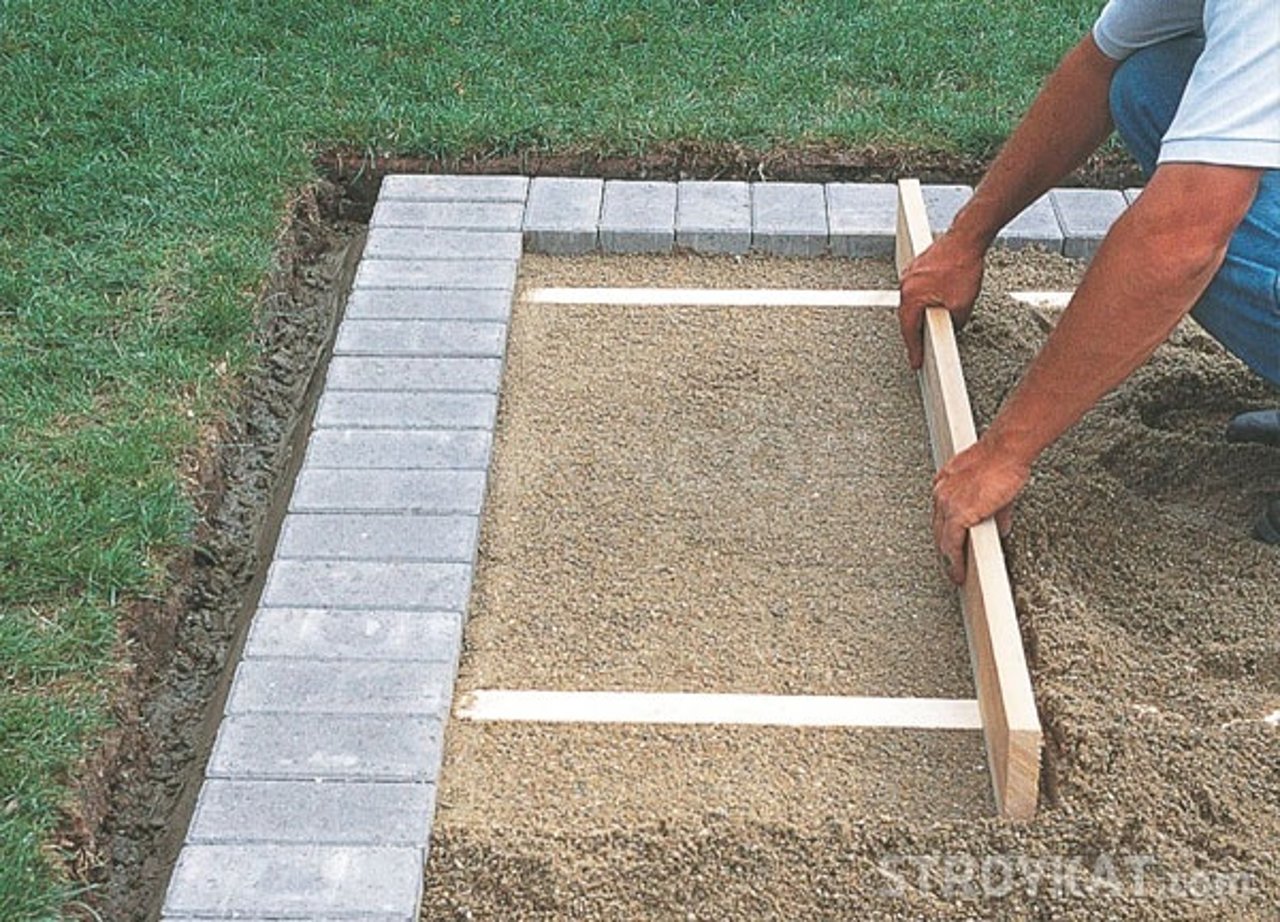
- To perfectly level the underlying surface, you will need guide beacons. Cemented curbs that have already been installed can be such beacons. In this case, the surface can be leveled using an even board-rule, in which slots are made at both ends with the letter G so that the board rests on both side stones.
-
If this method is not suitable, then two pipes with a diameter of 15-20 mm are used as beacons. They are laid along the aisle, the surface is leveled with a board, then the pipes are removed, and the grooves are covered.
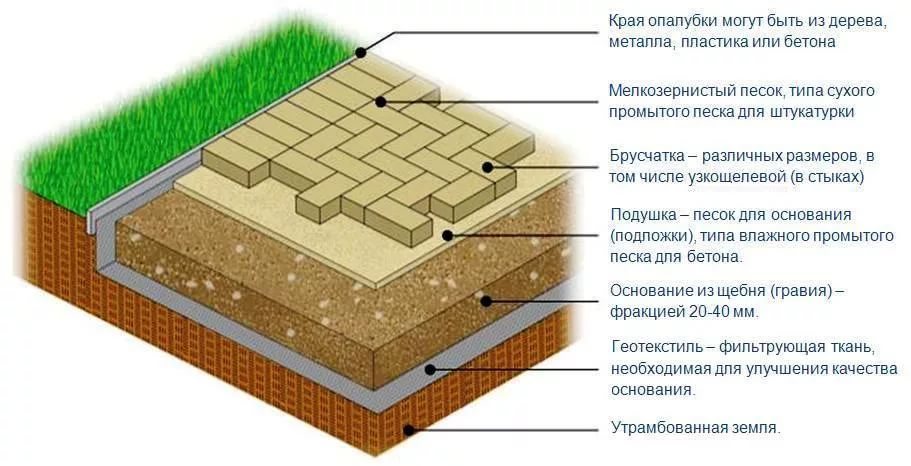
- Pour the sand or mixture in a layer of 7-10 cm, level it with a rake and tamp in such a way that the laid paving stones are about 1 cm above the curb. This is a tolerance for shrinkage.
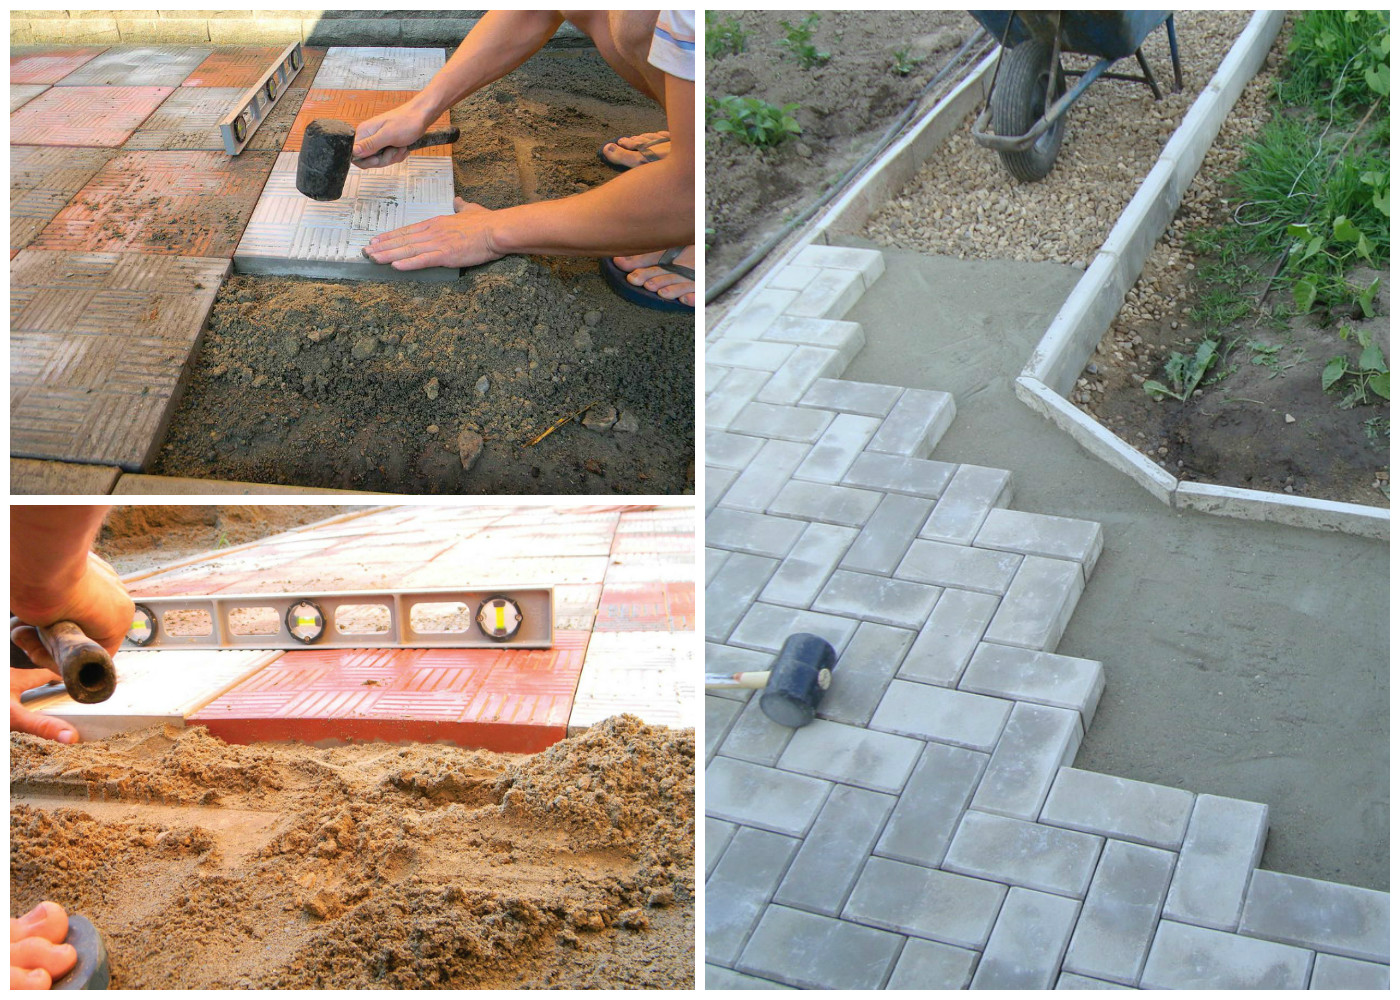
- Now you can lay tiles or paving stones on the finished base according to the conceived scheme. Each of them is driven in with a rubber hammer and leveled; if necessary, sand is added under the base or excess is removed. The width of the tile joints is maintained at 3-6 mm. A grinder is used to trim and fit the pieces.
- At the end of the installation, sprinkle the cement-sand mixture over the entire surface, replace it with a broom or a brush into the tile joints.
- Rinse the cover with a watering can or a hose with a low pressure, remove the mixture residues.
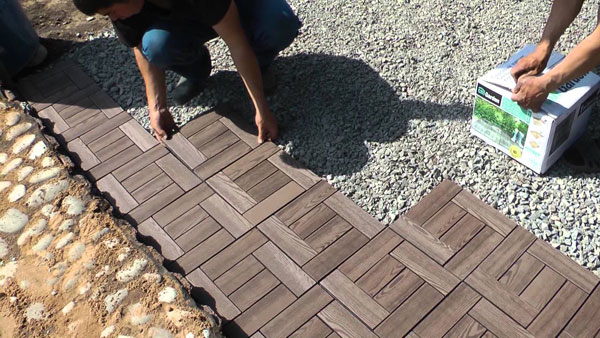
In the process of laying
Of course, it is not enough to lay garden paths with tiles with your own hands, you need to properly care for them so that the surface does not collapse.For example, in winter it is impossible to remove snow with metal shovels, and even more so to break off the ice with a crowbar.
Path of tiles and ceramic tiles
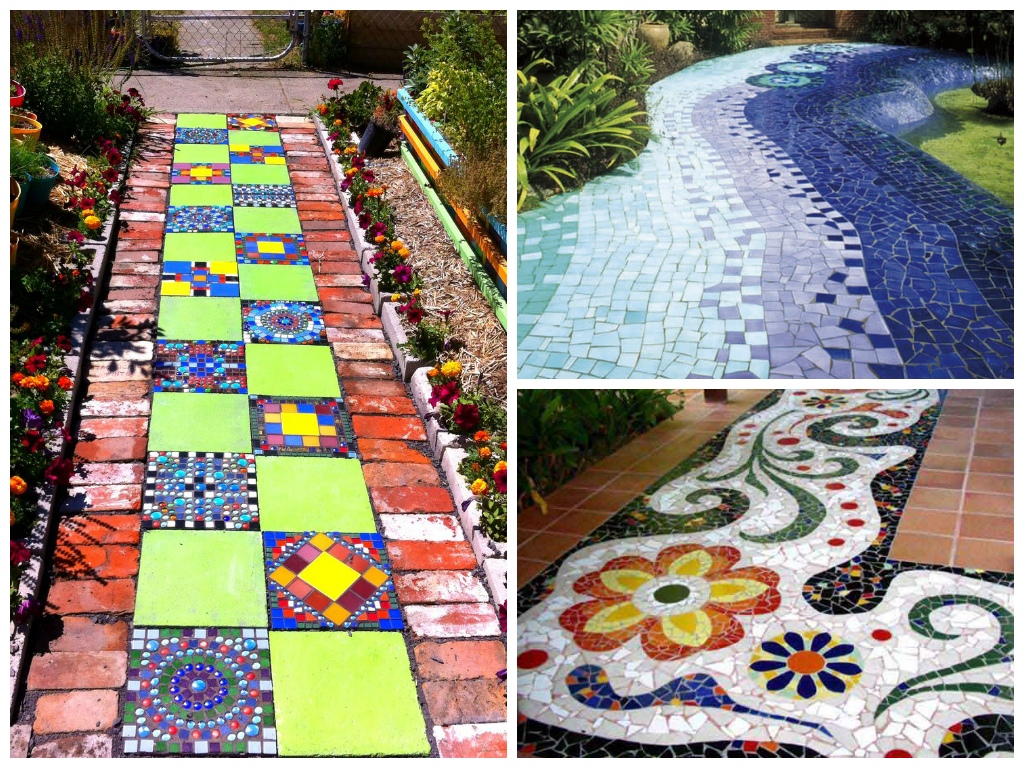
Remains of tiles after construction or renovation may well be used for laying paths in the garden. Moreover, not only whole tiles will be used, but also individual pieces.
Whole paths can be arranged both as an independent material, and in combination with facing brick or natural stone.
Pieces of ceramics and tiles can be laid out in a beautiful mosaic or in the form of a thematic picture. However, this will take a lot of perseverance and a lot of time. But the result will please.
To decorate the tracks from this material, proceed as follows:
- By established standards, they dig a trench 10 centimeters deep for the track. Crushed stone is poured onto the bottom in a thin even layer and carefully tamped.
- To strengthen the base and give it strength, reinforcement is made from a thick metal mesh.
- A concrete solution is prepared, the track is poured and leveled. The pattern or pattern of tile pieces is started to be laid when the cement composition starts to set slightly. To make the work go faster, the drawing is laid out in advance next to the track. Then it is only transferred to solidified concrete.
- After laying the tiles, the seams are rubbed.
If whole tiles and pieces are laid out, then large elements should be placed along the edge and in the center, and the space between them should be filled with smaller ones.
As borders, you can use glass bottles with sand, turned upside down, as in the photo.
Choice of material - varieties of tiles
For paving garden aisles, materials are chosen depending on the passability. For wide paths where vehicles can pass, strong surfaces are needed. Narrow paths are decorated with light tiles.

Highest quality and most durable track - bounded on both sides by curbs pre-installed on the concrete mix
A natural stone
Stone garden paths are a classic. The stone will fit into any landscape design, it all depends on the shape and color of the stone:
- durable granite with a variety of textures are offered in the form of tiles and bricks;
- marble strikes with a variety of shades, is more often used in the form of natural cuts of blocks;
- slate for laying is chosen hard, quartzite, the palette of shades is wide from gray to marsh, salmon pink to carmine;
- quartzite is harder than shale, rougher, cut to tiles or paving stones;
- shungite is even, smooth, gray as asphalt, sometimes there are pieces with shiny quartz veins;
- sandstone is cut into bars and tiles of various formats, the moisture saturation is higher than that of other stones, but it is very decorative, the rough texture creates an anti-slip effect;
- limestone is quartz rocks that form layered deposits, textured, color from yellow to reddish.

Stone tiles with a relief surface look elegant and expensive
A combination of stones with a rough and smooth surface is allowed. The best option is to lay sandstone and marble together.
Fake diamond
For paving paths in the country, clinker bricks and concrete tiles are used. The clinker is made of plastic clay, it looks like a solid brick, it comes in shades of brown and red-brown.

Clinker paving stones are one of the most durable materials for paths in the country.
Porcelain stoneware differs in texture, color, produced:
- in the form of tiles of various formats;
- torn plates imitating natural pieces of stone.

Most often you can find porcelain stoneware tiles of medium and large formats.

Garden path made of porcelain stoneware tiles with imitation of natural stone
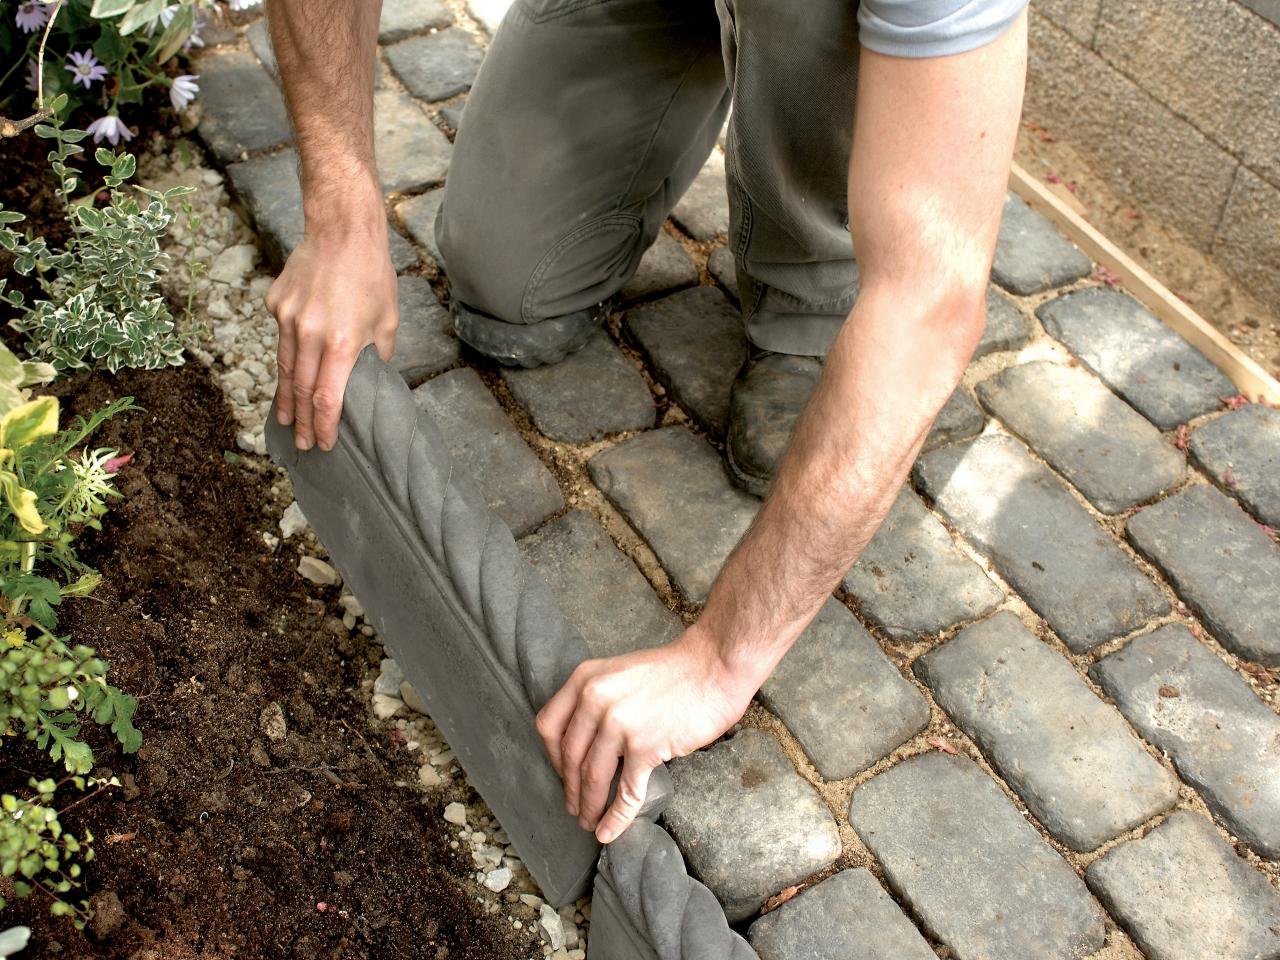
When working with tiled stone, it is recommended to install the curbs on the paths after installation in order to reduce the number of trimmings.
Concrete
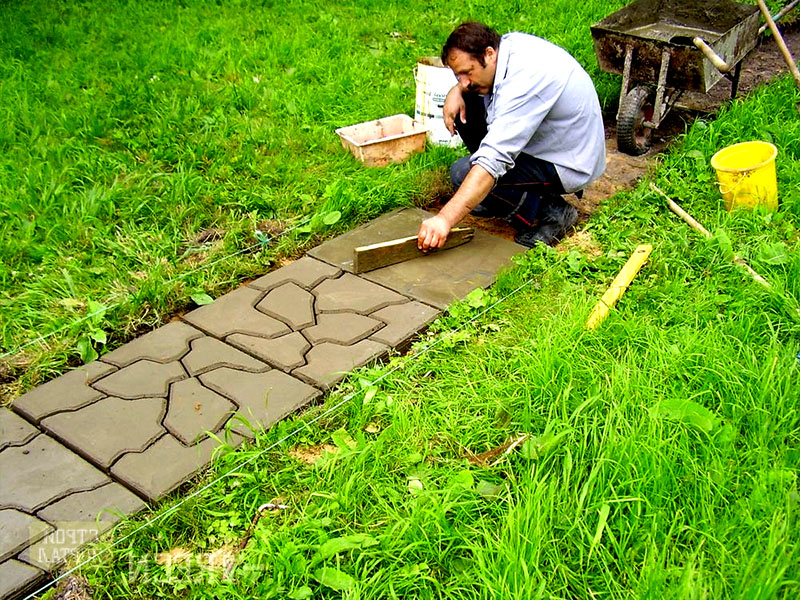
Concrete is made smooth or with an anti-slip surface (hardened concrete is treated with sand). They imitate the texture of limestone, clinker. Concrete tile paths in the country are an economical design option. For self-production of fragments, ready-made forms are used.

Concrete tiles are produced in different sizes, textures and thicknesses.

In case of self-production, concrete tiles are poured right on the spot
Polymers and plastics
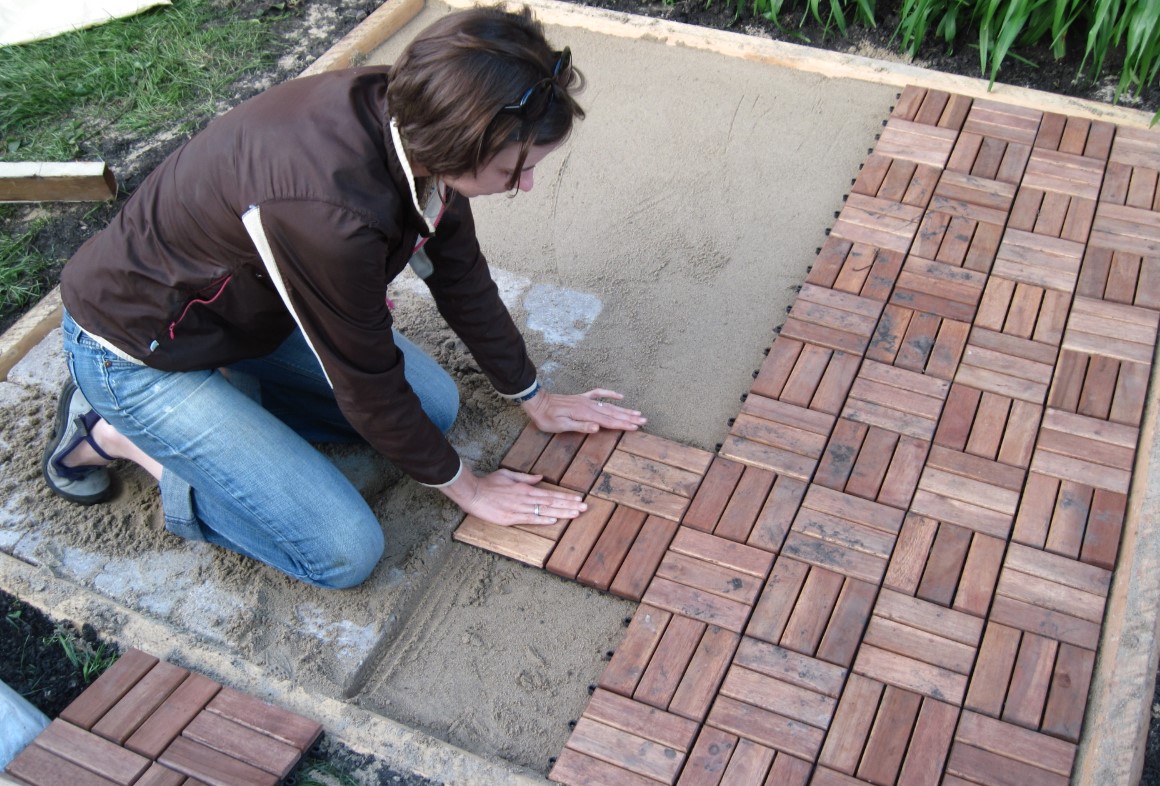
Modern manufacturers offer many types of decking - artificial deck boards or parquet. Paths made of such tiles look like wooden flooring, they are not afraid of moisture, temperature contrast.

Garden deck or parquet - these are panels with a pattern made from a mixture of plastic and wood flour

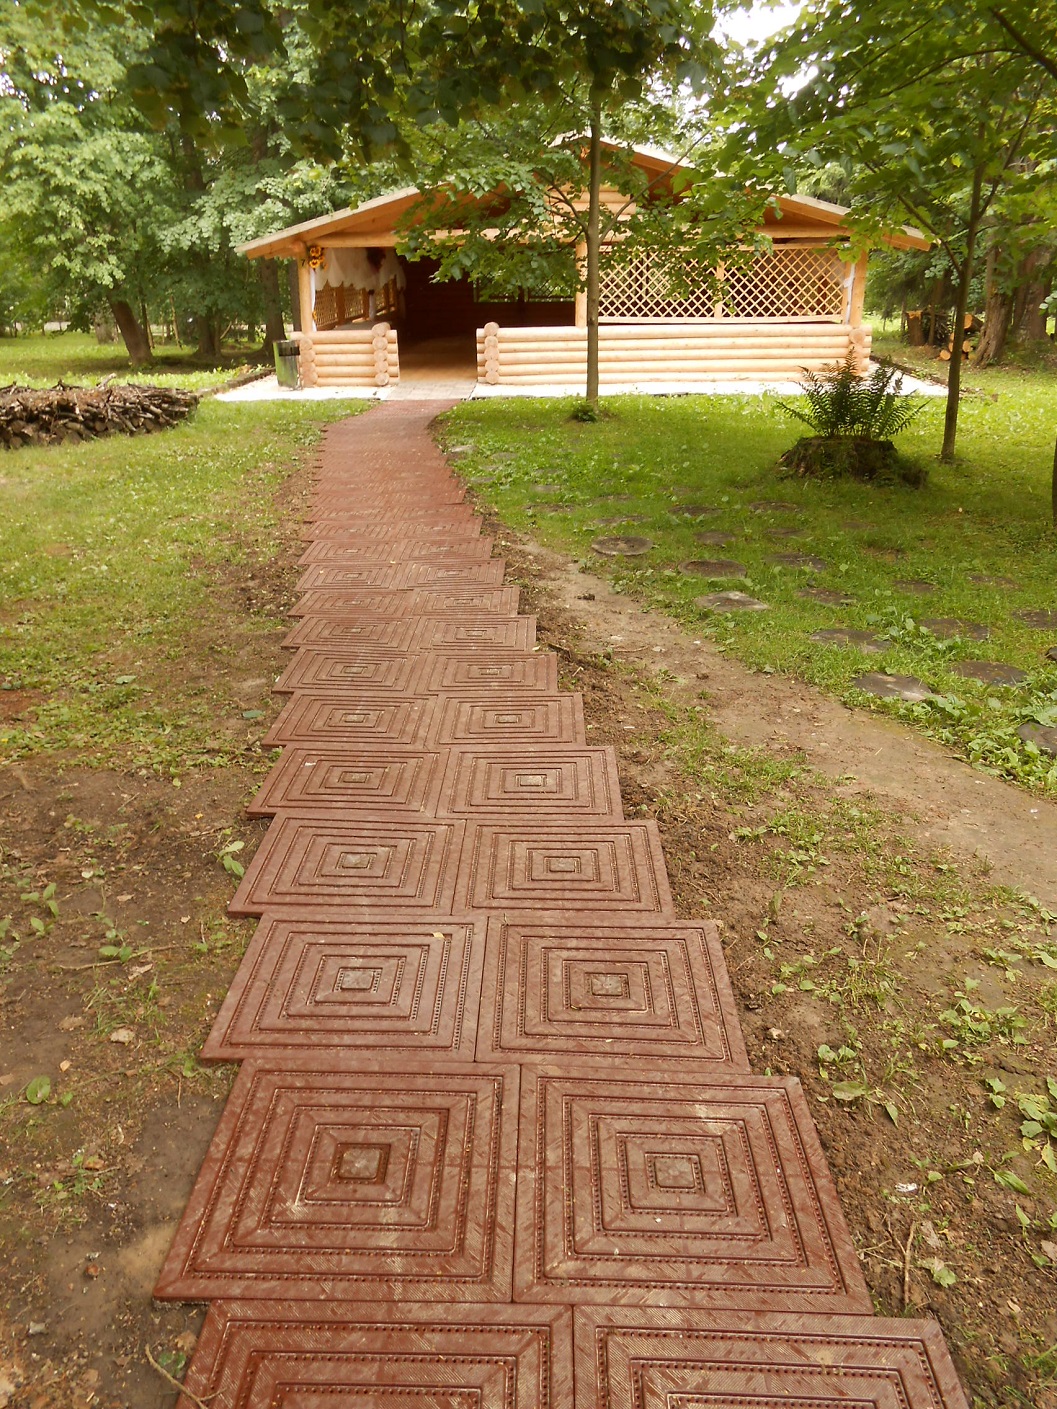
The plastic cover of the modules is suitable for the construction of paths and the design of recreation areas
Lawn tile grids are created in the form of modules, they are usually green, easy to install, and will preserve the green carpet.

Track from a plastic lattice can be made directly across the lawn or lay it on a sand cushion and fill the cells with fine gravel
Laying paving slabs on a paving path
How to properly lay paving stones with your own hands. There are several options for choosing a starting point to start tiling when constructing a structure. Where to start laying tiles? The most correct option seems to be the choice of the starting point for laying the tiles, depending on the important visible elements. In this case, it is the intersection of the movement lines.
Tip: the beginning of laying can also be done from the bottom to the rising point, from an optically important border or other significant visible elements - a porch, an entrance, etc.
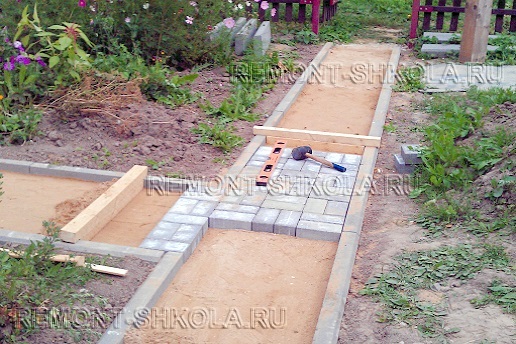
Use tool # 2 - (6 cm high) to create a level surface of the leveling layer. Move the device along the curbs as if along the guides, removing excess sand.
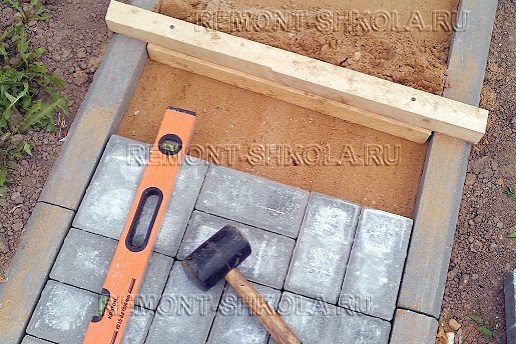
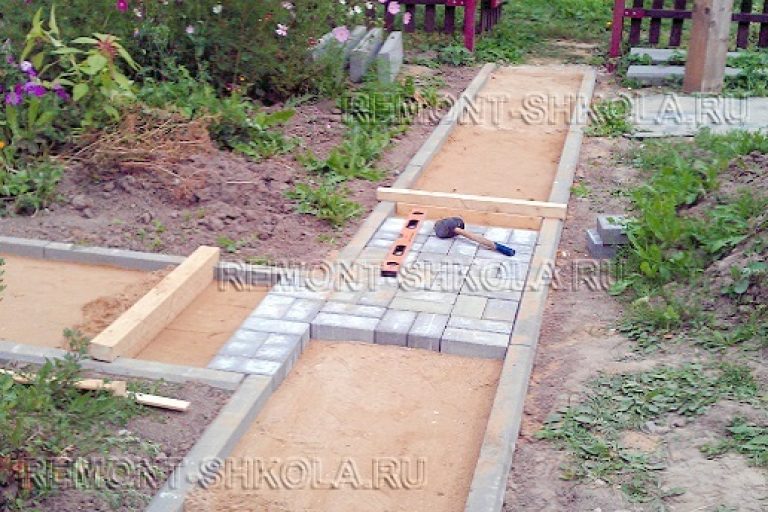
Lay the tiles starting from the center. Using a rubber mallet, press the tiles into the sand to the level of the curb. Sink the tile about one centimeter or less. Further tamping will eliminate minor irregularities. Control the plane of the tile with a building level.

Continue installing paving slabs until the entire surface is completely tiled. At the end of the paving stone path, if necessary, cut the curbstone to the required length using a grinder with a diamond wheel.
Safety measures at work
When working with cement, dust is one of the most harmful factors. Therefore, before mixing, you should wear protective clothing: gloves, a respirator or a protective mask.
But it is also important to ensure that diluted dye or plasticizer does not come into contact with the skin and eyes.
You need to be careful when the concrete mixer is running. You should check the integrity of the wires and sockets, do not try the quality of concrete or fix problems when the equipment is plugged in.
Although the process of preparing paving slabs is laborious, the result is worth it. In a month, the garden paths laid out with a beautiful exclusive covering can turn a personal plot into a small masterpiece of landscape design.
Drawings for laying paving slabs and paving stones - design solutions
There are several types of paving, the laying technology is chosen depending on several factors:
- relief features;
- the width and contour of the track, on a wide one you can create large mosaic patterns, on winding ones, chaotic laying is appropriate;
- architectural features of buildings located on the site;
- the purpose of the zone being drawn up.
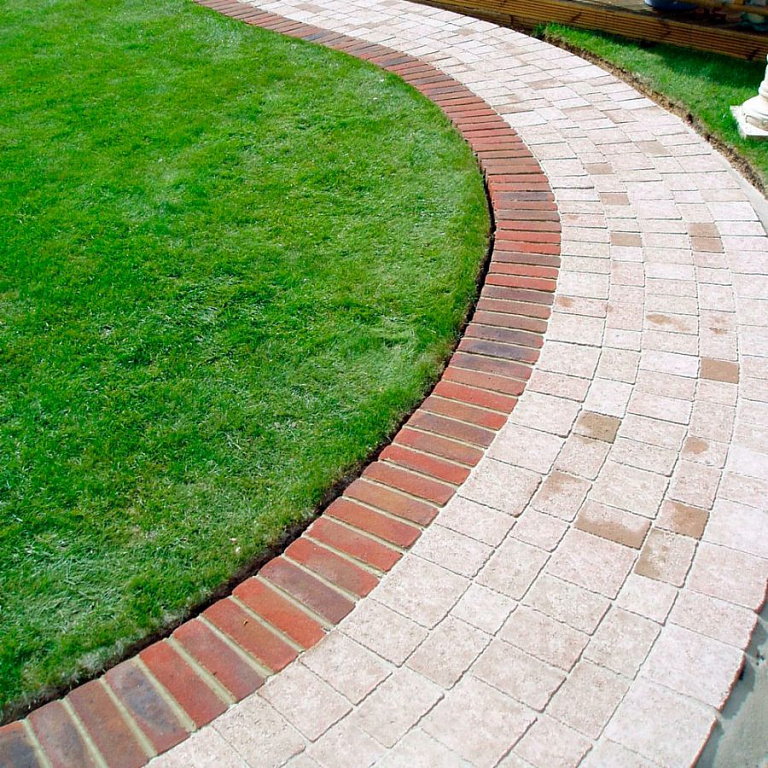
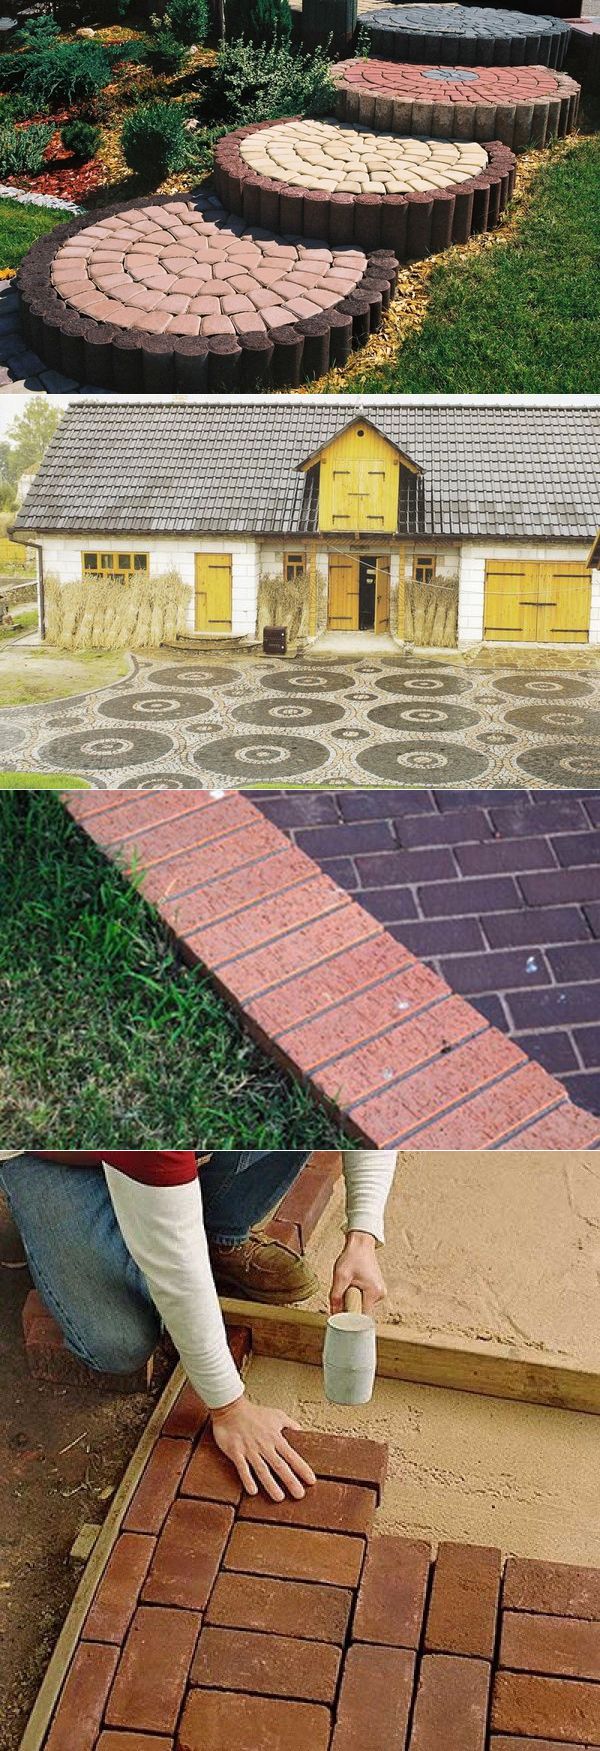
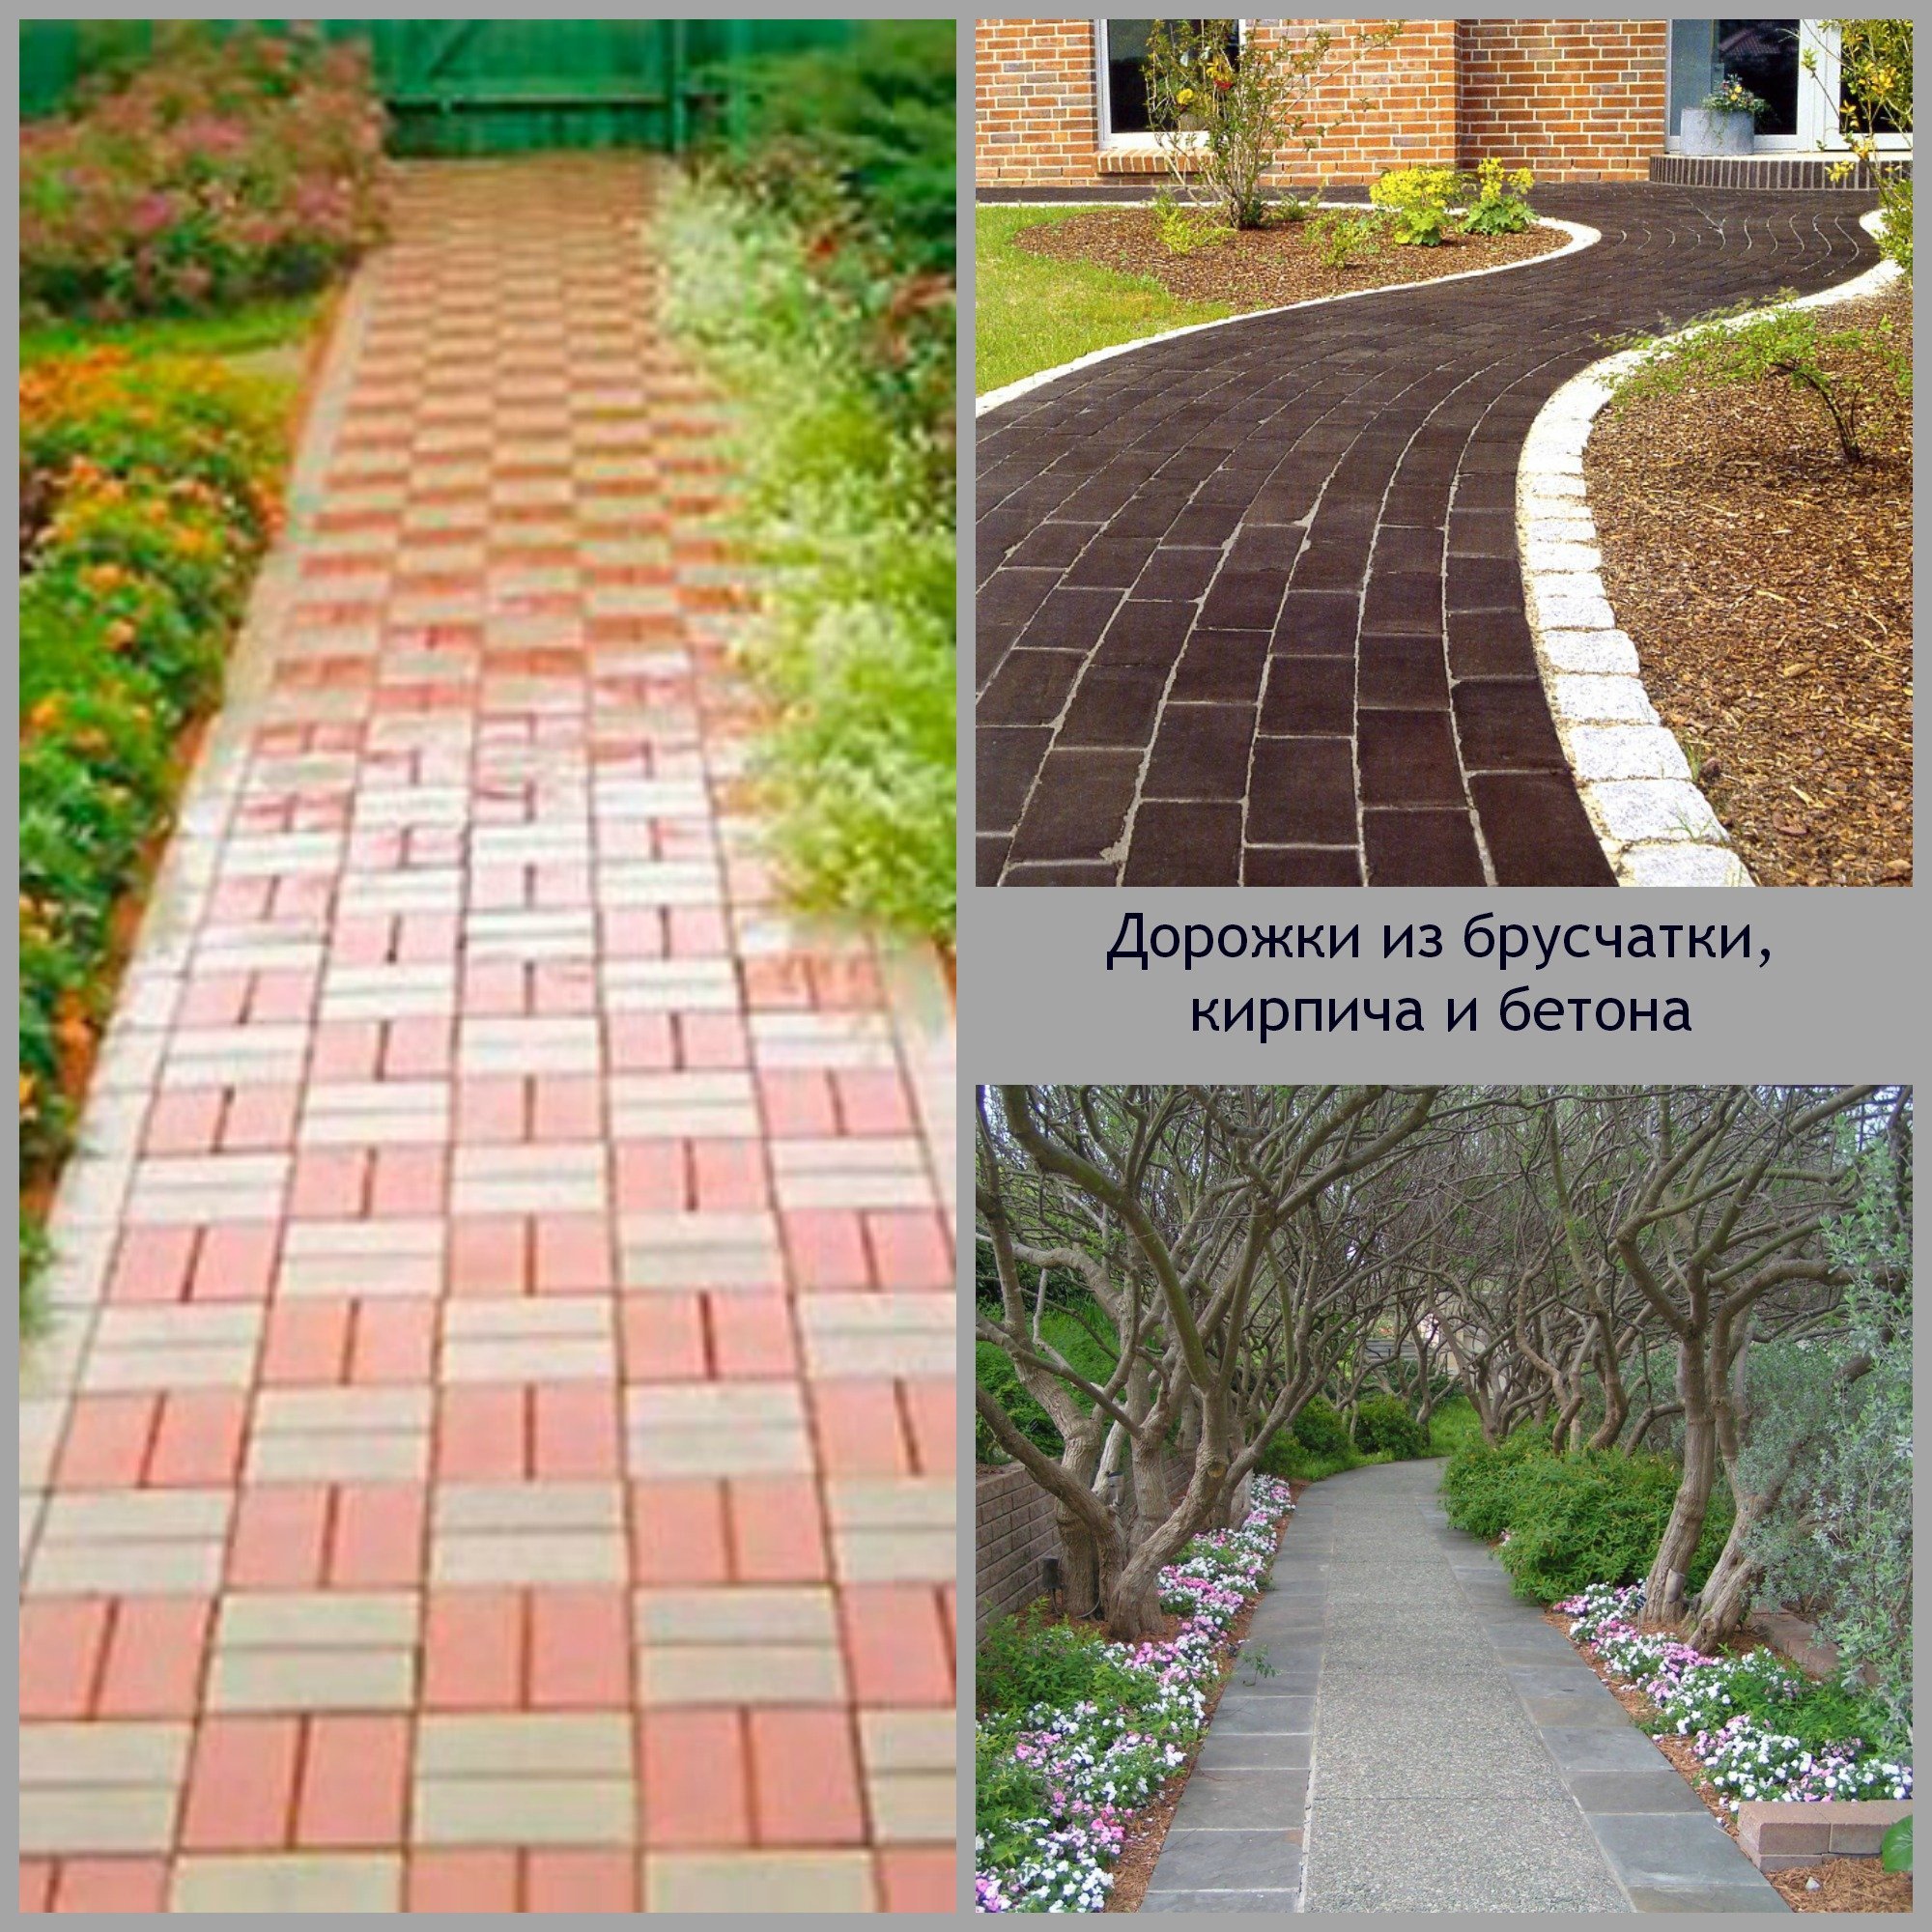
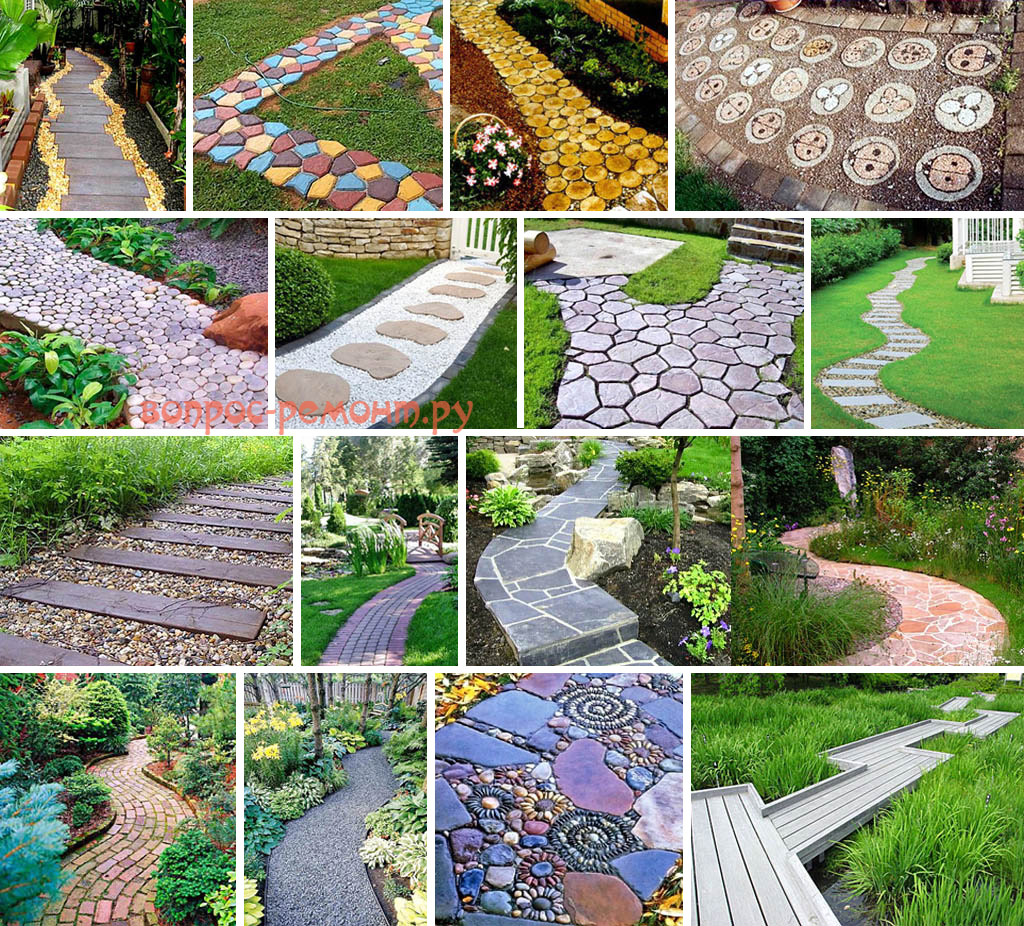
Using paving slabs, you can make paths with unusual patterns, different colors and textures
Manufacturers produce tiles in various sizes:
- square;
- hex;
- in the form of fish scales;
- rectangular - this shape is considered traditional.

It is convenient to use paving slabs both on narrow paths and for paving large areas

Paving the recreation area with large-format natural stone tiles

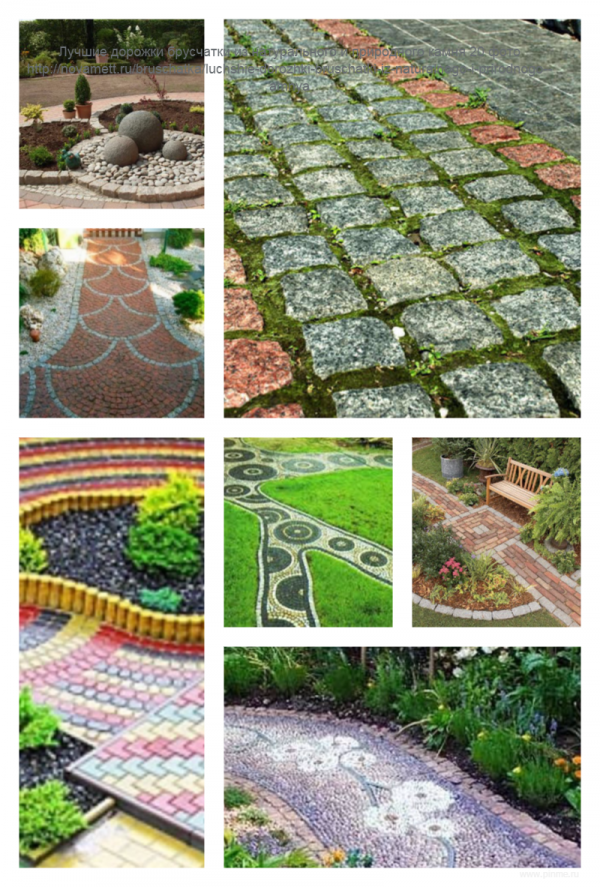
The combination of different tiles allows you to create beautiful patterns on garden paths
Patterns are created by alternating the position of the tiles, using coatings of various colors and sizes.
Errors in marking the site for tiled masonry lead to an increase in the consumption of coatings. The number of tiles to be cut increases.
Typical styling options with step-by-step instructions are easy to find on the Internet:
- Straight laying is the formation of narrow belts that define the direction of travel. In the rows, the seams are combined with adjacent ones or made with a shift by half or 1/3 of the tile.
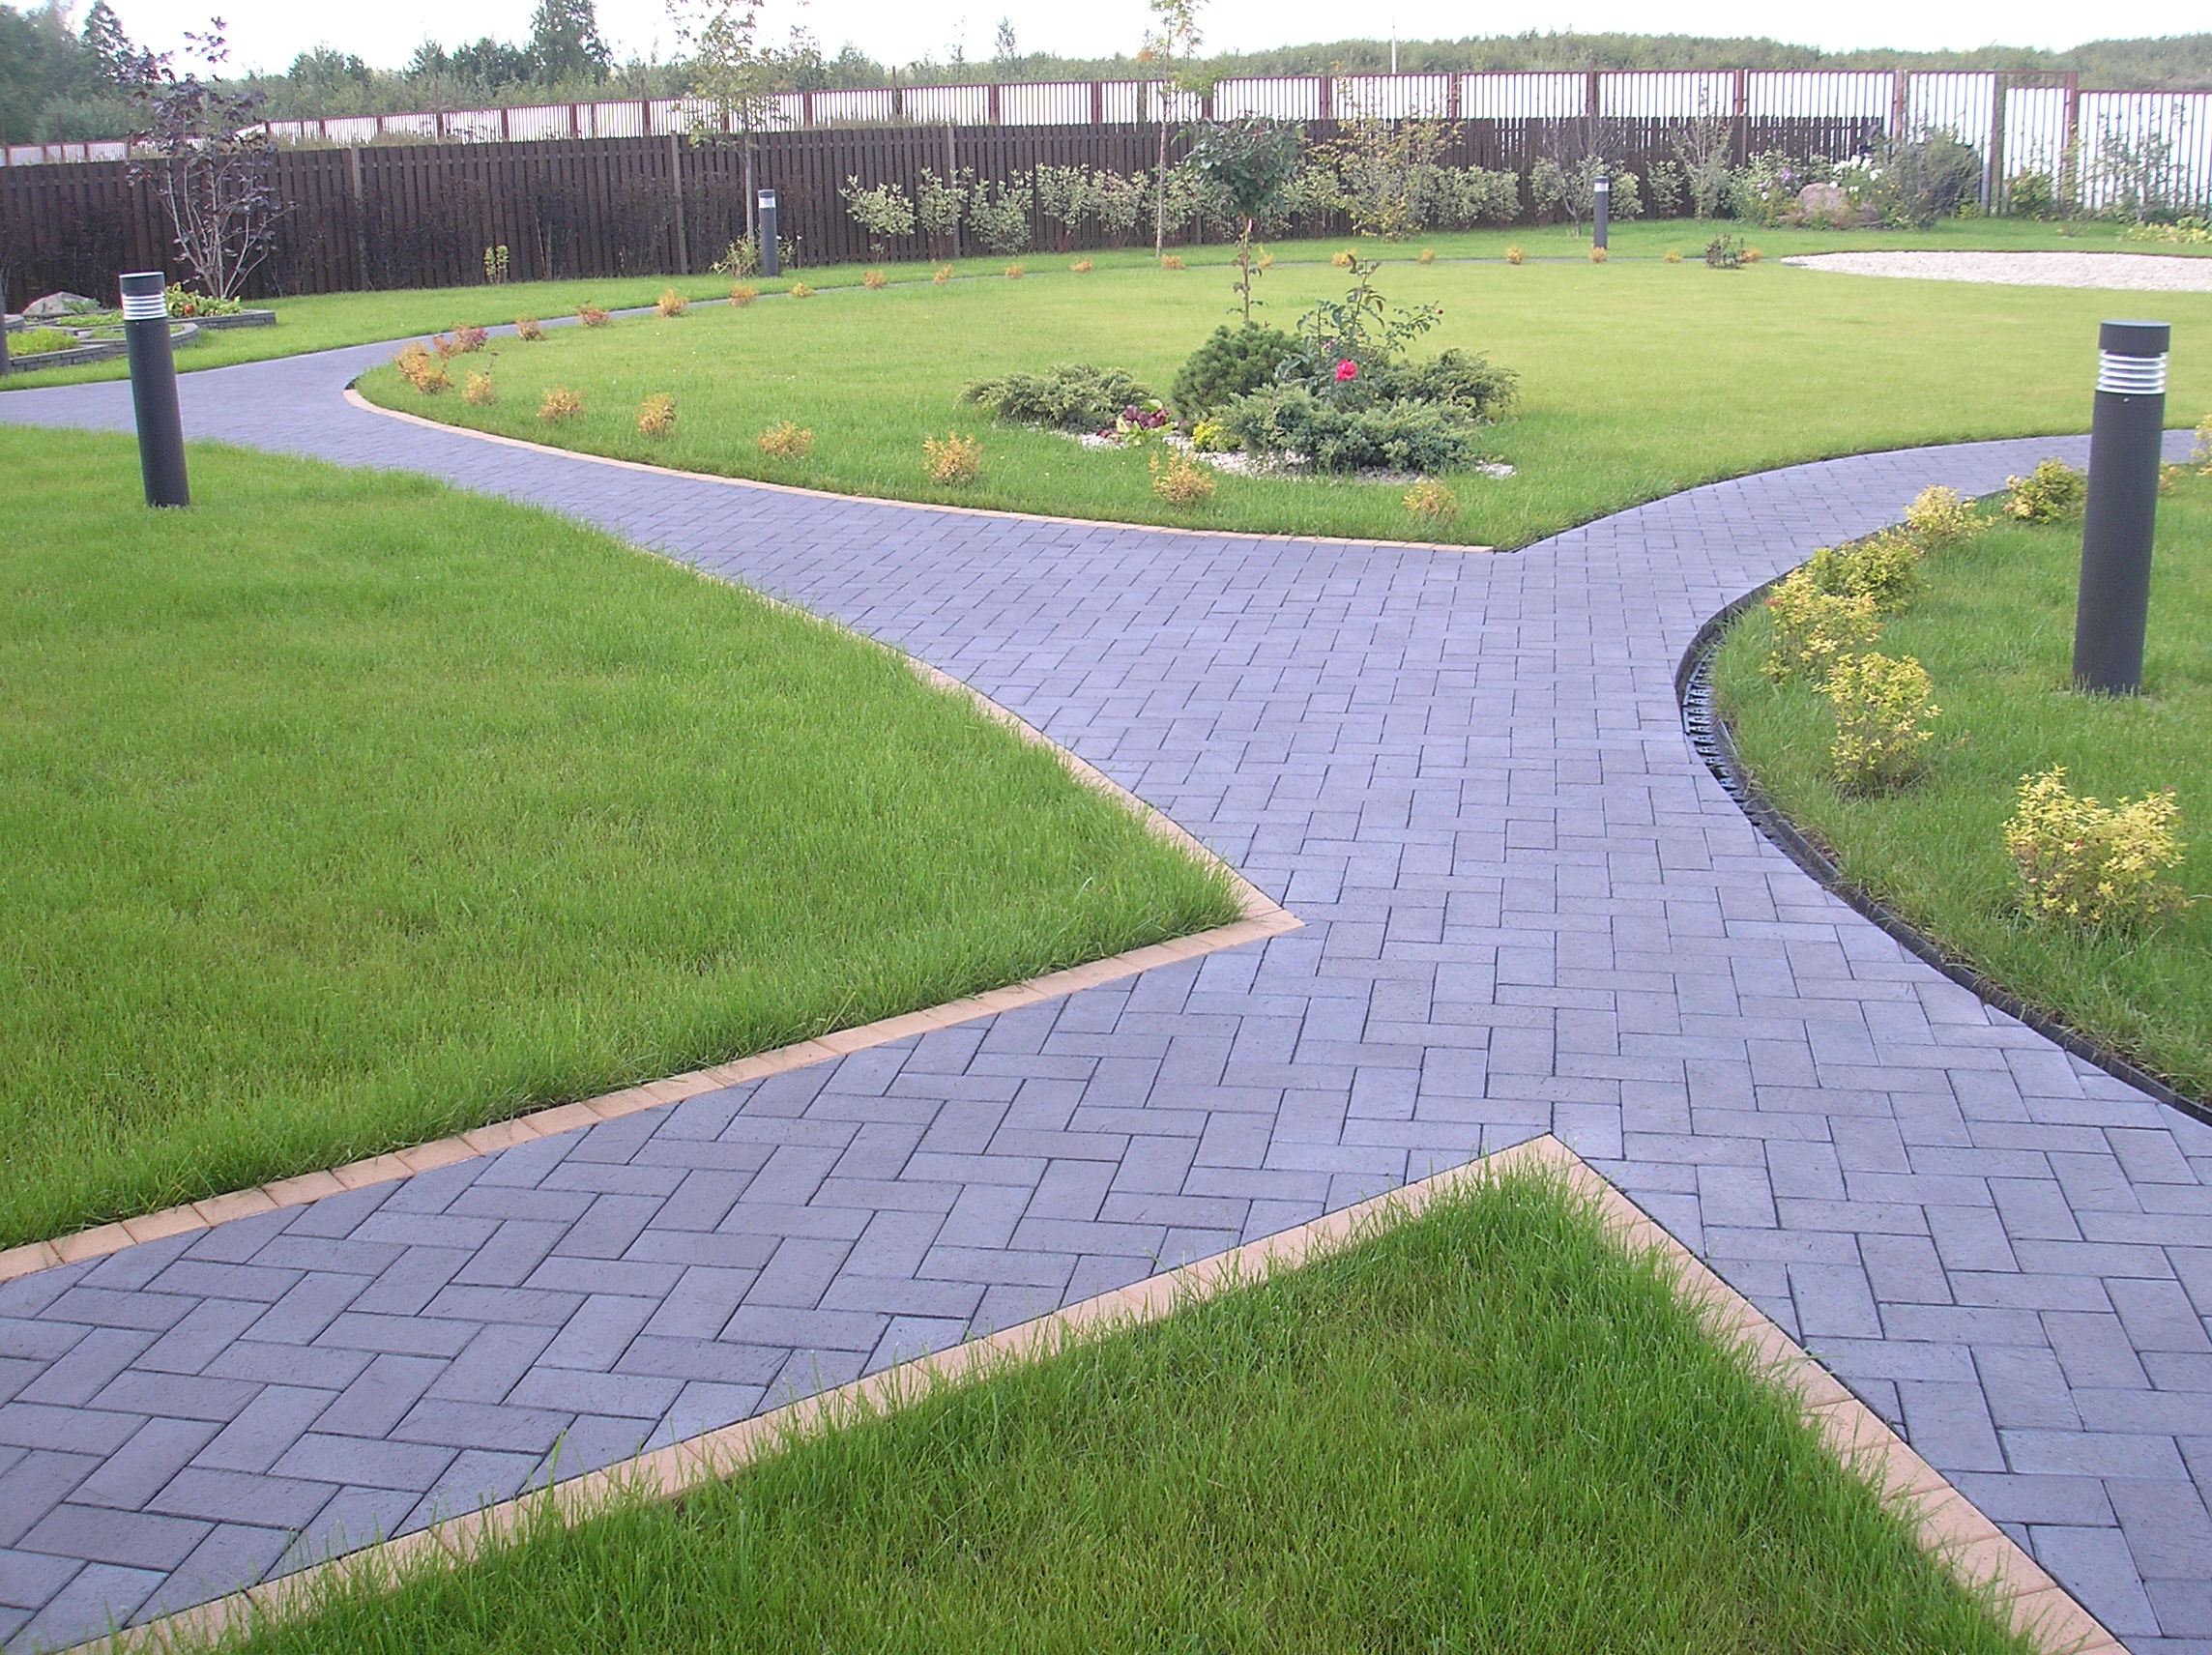
- "Herringbone" - installation of fragments of the coating at an angle, one of the most popular ways of paving paving stones, clinker bricks (changing the angle of the "Christmas tree", visually adjust the width and length of the path).
- A chaotic stacking order is encouraged if the tiles in the bundles do not match in shade (before installing the coating, it is recommended to open all purchased packages, only then start laying).
- "Chessboard" - alternation of light and dark fragments. For chess, tiles of any shape are used, the main thing is that they match in size.
- Rhombuses are created for visualization, they are able to stretch and shorten the sidewalk.
- Circles and segments are formed by radial laying, colored square tiles look especially decorative.
- Curly ones are laid out according to a prepared template, they get interesting images of birds and animals, intricate patterns, ornaments.
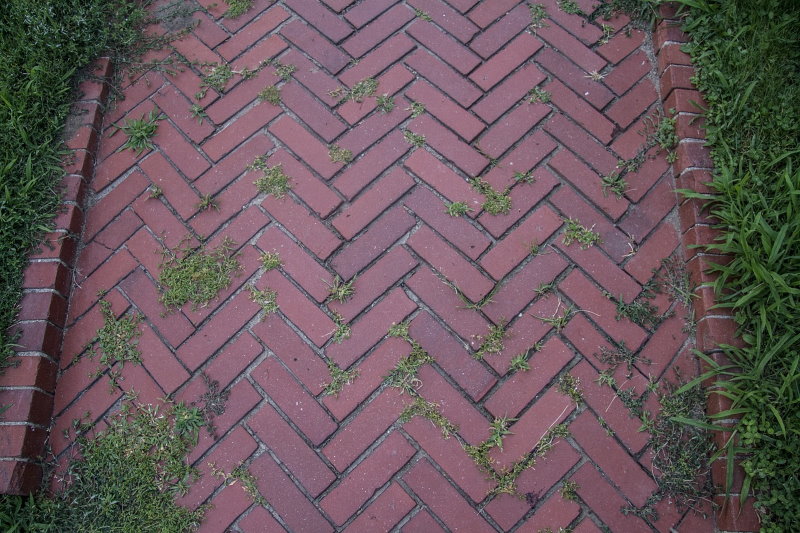
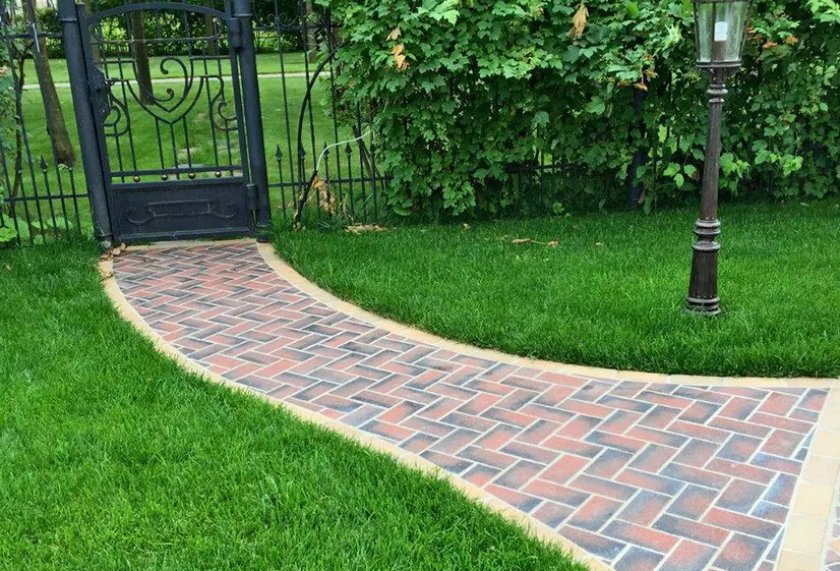
Herringbone clinker path
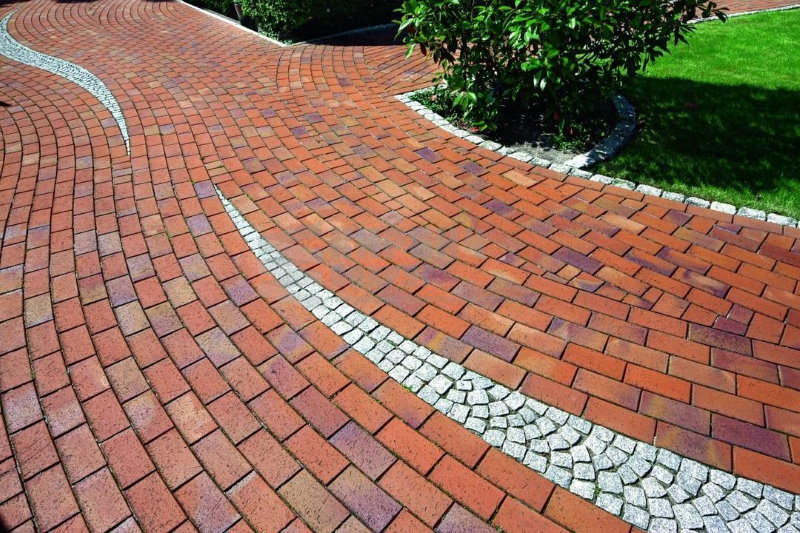
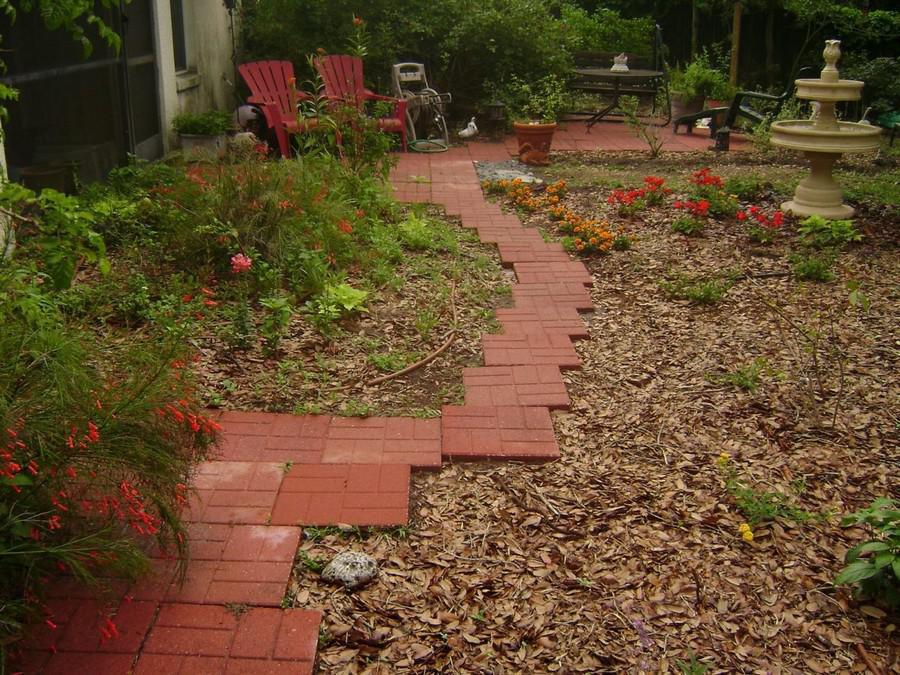
Garden paths lined with rectangular tiles "sprawling"
Working with natural stone, picking up pieces for the format of the track, cutting off or chopping off the excess. If desired, smoothen the sharp corners of the stone with a grinder. Fragments are laid end-to-end or with a gap filled with sand or concrete mortar with the addition of dyes. For whiteness, fluff is added, shades of gray are created with ash. Color for water-based emulsion or acrylic paint can be added to concrete.
In the trend, zoning using a combination of natural paving with other types of coatings, the transitions are decorated with different green spaces, complementing a single landscape picture.
Paving slabs
In terms of reliability and durability, tile stitch is not inferior to concrete. There are 2 nuances: the material will cost more and require proper styling. Therefore, ceramic bricks are often used instead of tiles, either used or left over after construction.
Having prepared the base of the garden path (the technique is described above), lay bricks or paving slabs using the following technology:
- Make a dry cement-sand mixture (grinder) in a ratio of 1: 4 and lay on top of the compacted gravel backfill in a layer of 2-3 cm. At this stage, provide a slight slope for water drainage from the pavement, leveling the grill with the rule.
- Lay the tiles back to back, stone to stone, tapping on one level with a rubber mallet. Check the horizontal with a building level after paving each row.
- Fill the joints between the tiles thoroughly with a grinder. Try to tamp the mixture so that grass does not grow through the seams.
If you want to lay out the area in front of the garage or in another place with an increased load on the coating, you should use a cement mortar. Decorating a sidewalk like this is easy: buy tiles in different colors and shapes. More information about the technology of paving tiled paths is described in the following video:
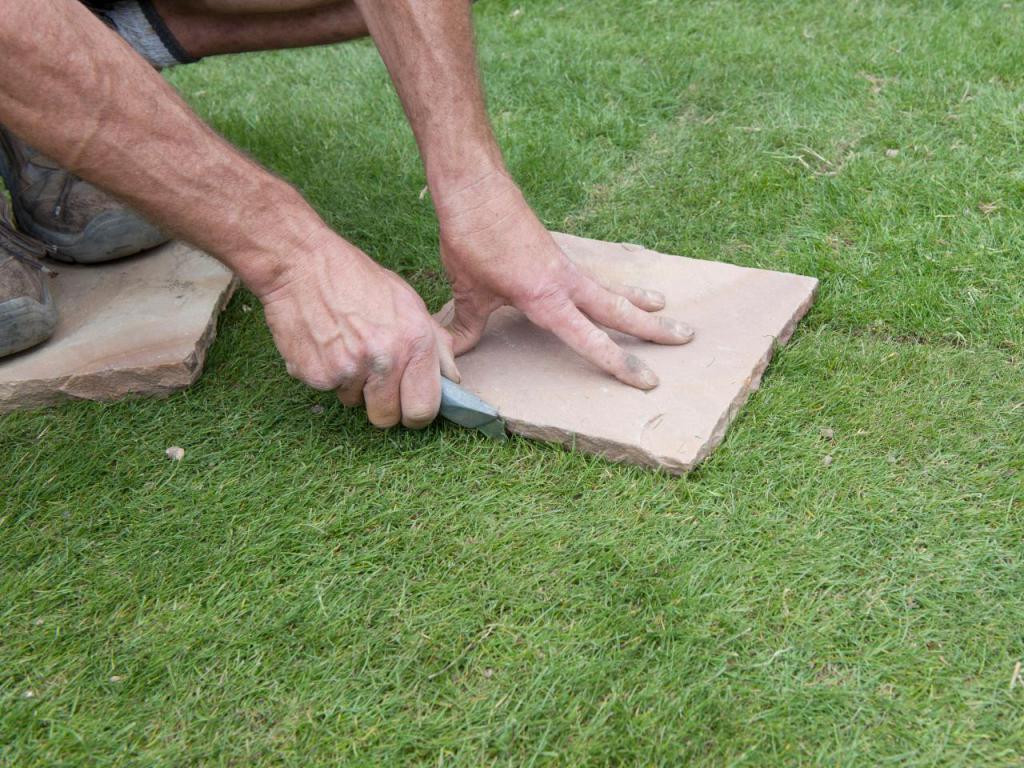
DIY concrete garden path: step by step mosaic
For those who do not like simple and boring options, we have prepared an amazing step-by-step master class on creating a unique and inimitable step-by-step path with your own hands! It is not difficult to do such beauty, but at the same time, no one in the district will definitely have such an amazing path. A very skillful craftswoman made such a step-by-step path from concrete with her own hands and shared her project on the network. Now, thanks to her detailed instructions, anyone can create such a miracle! And most importantly, to make such a path, you do not need to stir concrete or exert effort all day.It is enough to dream a little, and then you will have a unique masterpiece that will give odds to any store tile!
So, to create a concrete path with a mosaic, she needed:
- non-stick baking sheet (any shape, preferably round)
- petrolatum
- adhesive paper
- old plates
- pebbles and unnecessary jewelry
- glass
- concrete
- reinforcement mesh
The author described all the stages of work in step-by-step instructions. At the end of the work, the master advised to cover the finished parts with varnish. Then we lay the step-by-step slabs as in the previous master classes.
This version of a step-by-step concrete garden path will appeal to those who love a creative approach in everything!
Installation of tiles
After preparing the soil, sand is poured in an even layer, it will increase the strength of the sidewalk, and will also act as a drainage system. Water is gently poured onto the laid and leveled layer of sand until puddles form on its surface. Two pipes are laid along the edges of the base, at a selected distance from each other. Sand is poured between them, which is leveled by a channel. The result is a smooth sandy surface
The tiles are laid strictly according to the level of the stretched twine. Its installation begins from oneself. Place the tiles tightly to each other. Such actions will stop the increase in the seams between them. You can use crosses, then the distance between the tiles will be 2 mm everywhere. Its level is regulated by adding or removing sand from under its layer with a trowel. The track is leveled with a mallet, and checked with a building level. The resulting seams are covered with a layer of mixture, the components of which are cement and sand, and then poured with water.
Beautiful ideas for the yard
Practice shows that original handmade tiles often look more advantageous than factory tiles. Solving this problem yourself is quite simple:
- Tile in the form of leaflets. The creation of such elements involves the use of a combination of gravel, sand and cement in a ratio of 3: 3: 1. To obtain such plates, you can use any large leaves (as an option, burdock, zucchini or horseradish), carefully pressing their back side into the solution. Next, you need to put the tiles in the shade and spray them periodically. As soon as the mortar has half-hardened, the leaves should be removed and the plates should be left to dry.
- Concrete circles. Usually, such elements are located surrounded by gravel or pebbles. Round tile molds are most often made from cut plastic buckets.
- Patterned tiles. The material of this decor is DSP, into the surface of which decorating elements are pressed - pebbles and shells, keys and coins, pieces of colored glass and much more.
Finally, it remains to state that the laying of paving slabs in the country is a relatively cheap and at the same time effective way to improve the garden plot. To equip tracks from such material with your own hands, you do not need to contact specialists or purchase expensive equipment. It is enough to adhere to the recommendations listed above to solve this problem with the least expenditure of time and effort.
In the next video, watch a master class on making paving slabs with your own hands.
Which tile to choose?
Pedestrian paths are important objects in the country, providing free movement within the site. For their organization, paving slabs are most often used. This material has a number of important advantages, such as:

- environmental friendliness,
- reliability;
- durability.
Important! To lay such a track, the site must have a sufficient amount of free space.
This is a very important point, since in a limited area it is much more difficult to install the path, and its appearance will be less attractive. Experienced craftsmen do not recommend styling in rainy weather.
 Variety of tile tracks
How to choose a tile? When choosing this building material, you need to pay attention to the purpose of the future track. If this area is exclusively pedestrian, then for its construction, products with a thickness of 40 mm can be used.
From a more voluminous tile, you can lay out paths for the passage of vehicles.

You also need to pay attention to the shape of the tiles. The complexity of its installation depends on this factor.
Products of a rectangular shape are the most expedient, since it is the easiest of them to make a track.

Rules and Tips
When buying a tile, the site owner should take into account that some of the material will turn into waste. First of all, this is due to the cutting of paving slabs, which depends on the shape and dimensions of the elements used, as well as the way they are laid.

In addition, it is advisable to consider the following points:
- It is not recommended to equip paths at a distance of up to 70 cm from trees. While developing, the root system of the latter can seriously damage the created surfaces.
- If the traffic intensity on the paths is average, then in most cases their width is sufficient, equal to 0.8 m.
- In situations where the owner of the site plans to use the paths for transporting luggage in wheelbarrows or for the movement of a large number of people, the width of the created coverage must be increased by at least 20 cm.
- In order for subsequent work to be carried out with the least difficulty, it is advisable to outline the outlines of future tracks with a thin cord stretched between the pegs.

It should also be noted that tracks laid out on a dry mix or mortar on a crushed stone pad can withstand the weight of a passenger car. If you put the materials on a base, reinforced by 1.5 times, you can get a path that even a medium-sized truck will not be afraid of.

Design of paths from paving slabs
Even from the same squares, you can lay out beautiful garden paths from paving slabs. And if you use different colors, sizes, shapes and layouts, then the number of design options increases to infinity.
Square shapes lay a seam in a seam (for example, a two-color checkerboard layout), with a shift, a rhombus. For garden paths made of paving stones, the popular laying schemes are a herringbone, braid, brick dressing.
There are a lot of options for paving garden paths from paving slabs. If you wish, you can lay out any complex ornament. The main thing is not to forget about the main landscape style of the site design. Modern materials are not always appropriate; in some cases, products that have been aged by special techniques are needed.

Decoration of steps with inserts of luminous LED elements
Concrete preparation and mixing
Based on the calculations, a mixture of cement, sand and crushed stone is compiled, to which water and plasticizers are added. The composition is kneaded and brought to a homogeneous creamy consistency of medium viscosity.
Crushed stone is used in medium fractions, 10-20 mm in size. When constructing paths with increased load, it is recommended to take crushed stone with a fraction of 40 mm.
It is advisable to mix it with a concrete mixer, especially for a large amount of work. If there is no concrete mixer, then you will have to make the mortar by hand. To do this, all the components are poured into the container and thoroughly mixed with a shovel, after which water is poured into the mixture and mixed again until a homogeneous mass is obtained.

Mixing the solution.
It is advisable to use plasticizers in small quantities in order to make it more convenient to distribute the fill over the trench. Excessively with additives can reduce the strength of the concrete grade.
The simplest plasticizer additive can be prepared independently using the following starting materials:
- silicate glue;
- slaked lime;
- PVA;
- any detergent.
Instead of silicate glue, you can use liquid glass, and laundry detergent or laundry soap is suitable as a detergent.
If the paths are planned to be colored, then pigment dyes of the required color must be diluted with the concrete mixture.
Classic concrete walkway
A monolithic concrete coating is the most reliable and relatively inexpensive option. If the technology is followed when pouring, the structure will last at least 30 years. The main disadvantages are the laboriousness and duration of the process, because the concrete mixture hardens within 4 weeks. During the hardening period, the path cannot be used. Therefore, do not rush to plant flowers near the future path, where you will have to arrange a temporary passage.

To pour concrete paths with your own hands, you need to prepare the base, as described in the previous section. Then proceed in the following order:
- Install curbs or assemble wooden formwork for concrete placement.
- Get your tools ready - building level, trowel, and a rule made across the width of the monolith.
- Tie a mesh of reinforcement Ø8-12 mm with mesh sizes of 150 x 150 mm and install on top of the crushed stone bed using stands 3-5 cm high.
- Mix 1 part 400 grade cement with 2.5 parts sand and 4.2 parts crushed stone up to 20 mm. After blocking the mixture with water, you get concrete M 200.
- Lay the mortar in the formwork at a height of 12-15 cm, leveling with the rule. The task is to make a flat surface with a small slope to one side, ensuring that water flows from precipitation.
- Divide the reinforced concrete monolith into slabs with expansion joints at intervals of 2-2.5 m, installing transverse boards.
- Wait 7 days and dismantle the formwork. The final solidification will occur after 28 days.
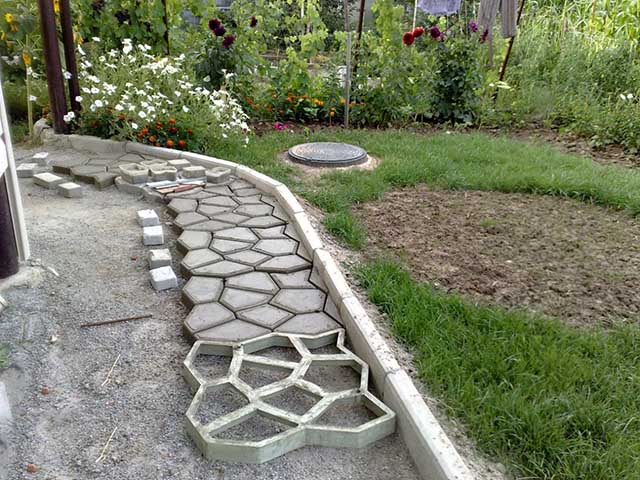
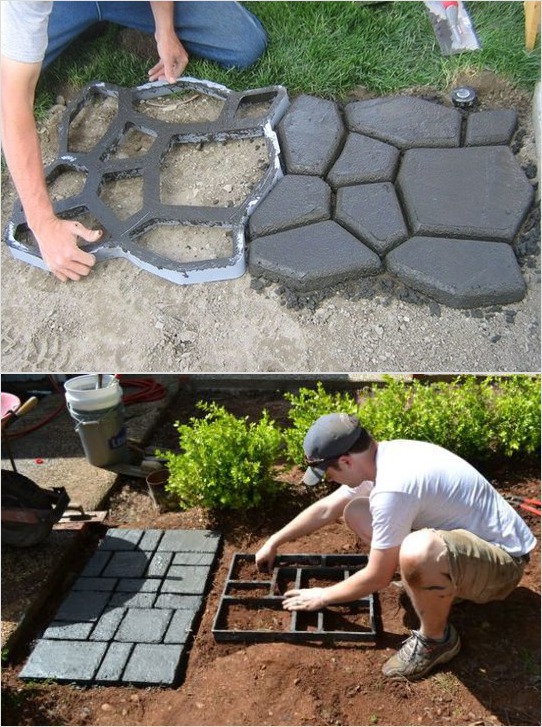
You can beautifully arrange a concrete path at the stage of pouring, using special plastic forms that imitate natural stone. The decor is simple to implement: a form is immersed in fresh concrete (preferably several), and pulled out after the initial setting. In order not to buy ready-made frames, savvy craftsmen have adapted to make homemade metal products, the technology is shown in the video:
Economy option - fill paths
Despite its simplicity, compacted crushed stone stitches provide the following advantages:
- cheap construction;
- absence of puddles on the surface - water goes through gravel into the ground;
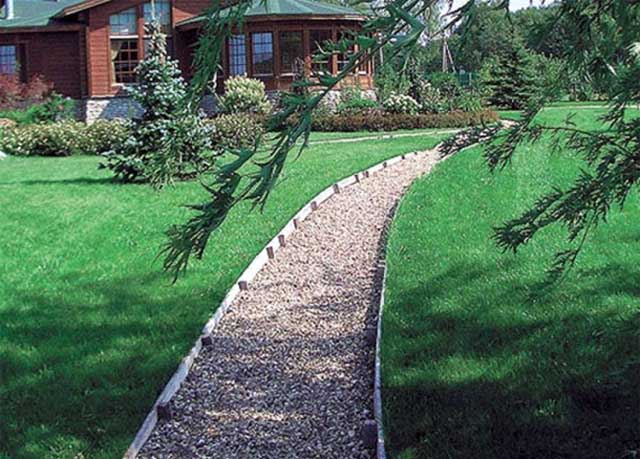
- a properly laid embankment has an attractive appearance, which is reflected in the photo.

Nice gravel path near the pond
It is difficult to build a crushed stone path on a slope, so for an inclined landscape it is worth choosing a different solution. The second drawback is the need for constant care. Need bedding, leveling, removal of sprouted grass
These works are performed annually, usually in spring, after the snow melts. To implement this inexpensive option, you will need fine gravel or gravel, geotextiles and sand.
Base device step by step
To begin with, mark the paths on the site in any convenient way - using twine and pegs or sprinkling with lime. Then remove the sod and proceed with the foundation according to the instructions:
- Dig a hole at least 150-200 mm deep along the marking lines, compact the bottom with a tamper.
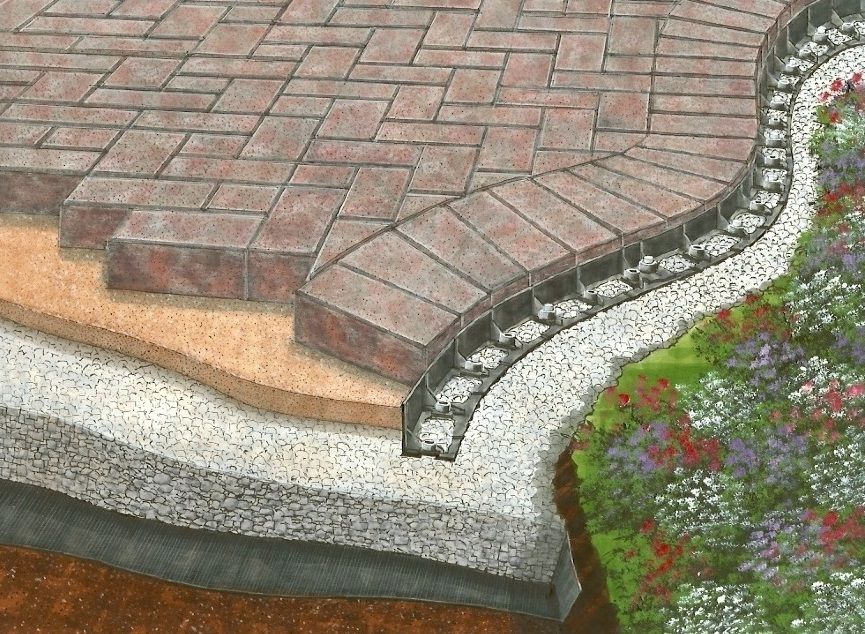
- Cover the dug profile with a sheet of geotextile and install curbs along the edges.
- Fill the sand cushion to a height of 7-10 cm (a mixture of gravel and sand will also work). Tamp down thoroughly and sprinkle with water.
- Arrange a base of coarse gravel 80-100 mm thick, level and compact. It is allowed to use broken brick and various natural stones. Large cobblestones should be smashed.
Making the finishing backfill
In order for the track to serve for a long time and not to sag from the load, it must be poured with an even layer of fine gravel and carefully tamped. Perform the operation in several steps, achieving the maximum coverage density.Means of mechanization will help a lot - a hand roller and a vibrating plate.
There are no more tricks in the construction of fill paths. Such stitches are often used by homeowners between the beds in their gardens in order to walk calmly in damp weather. When laying in a summer cottage, there is a way to bring beauty: combine a gravel embankment with flat stones or decorative slabs, as shown in the photo.

Layout and track layout
Making a pavement path begins with its layout on the ground. The approximate width of the building depends on your desire, and the exact width and length depend on the dimensions of the tile itself.
During the construction of this sidewalk path, ordinary gray paving stones with dimensions of 200X100X70 mm and a curbstone (sidewalk curb) with dimensions of 1000X200X80 mm were used. The total width, including the curbstone, was 76 cm.
Required tools:
- bayonet shovel;
- shovel shovel;
- level - 2 pcs. (2m and 1m);
- rubber hammer;
- stakes with twine;
- a log for tamping the earth;
- watering can (hose with water);
- leveling devices - 2 pcs.;
- container for mixing concrete;
- brush with stiff bristles;
- Bulgarian.
When you have determined the width of your future garden path, you can move on to the layout on the ground. Before starting the main work, clear the work area from foreign objects and dense vegetation.
Drive in two pegs at the beginning of the track and two at the end. Pull the string between the pegs, making sure it is tight. When adjusting the height of the strings, keep in mind that the plane between the strings is the plane of your future track!
Use a spirit level to line up both strings at the same level in two planes (along and across).

The distance between the strings is equal to the width of the planned path (the width of the tiles to be laid and two borders) plus 15 - 20 cm (the distance from the borders is 7 - 10 cm on each side).


