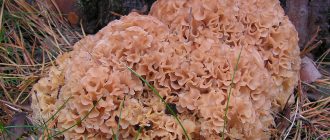
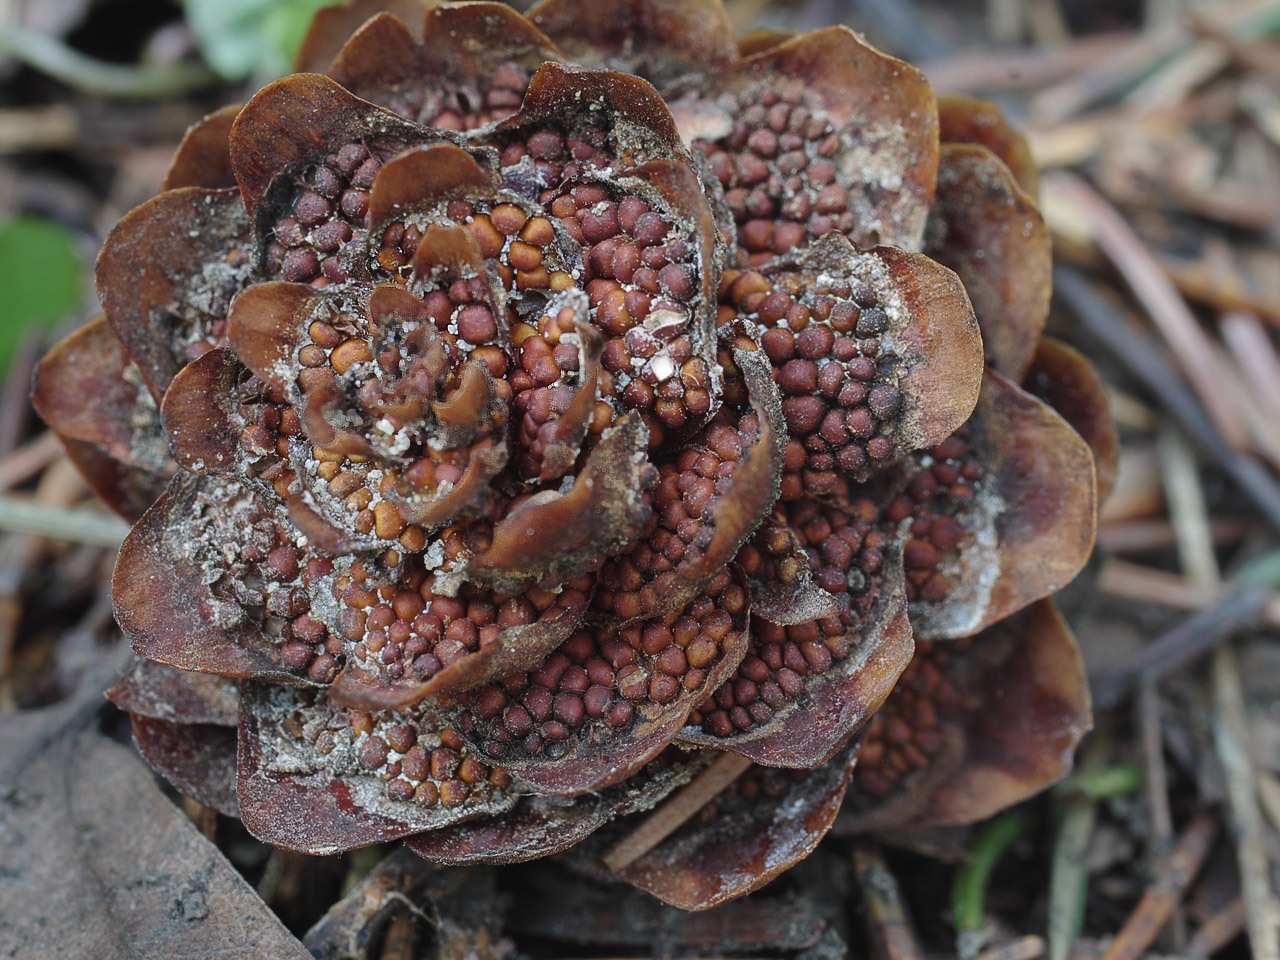
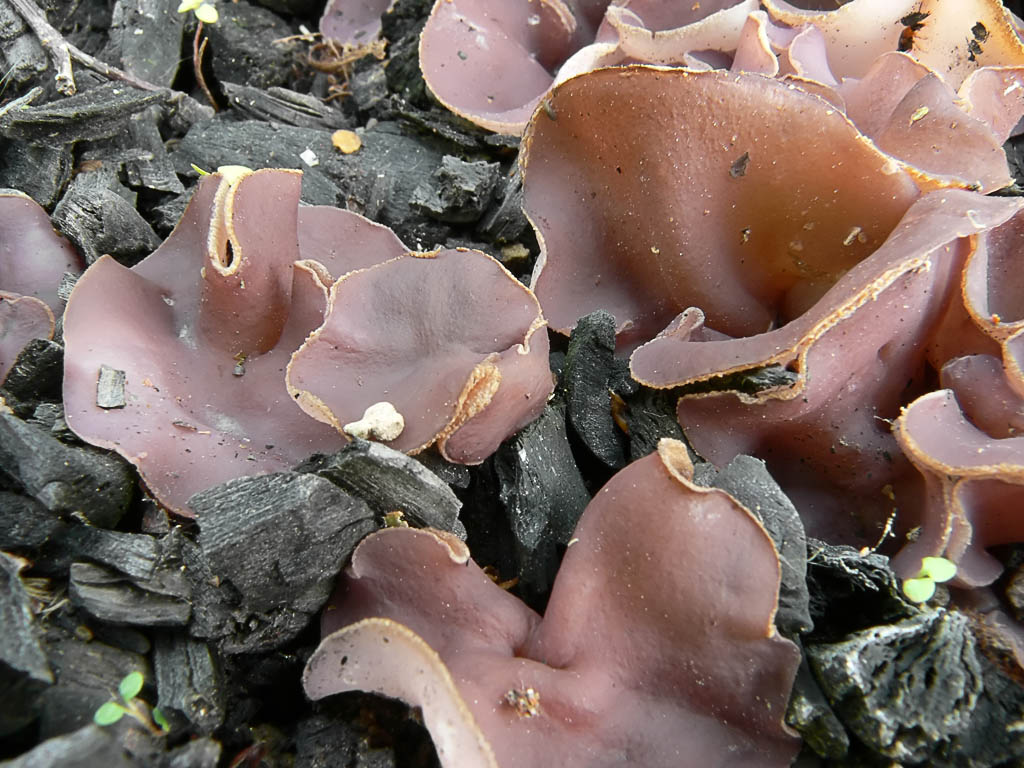
Caring for a nocturnal garden
Growing nocturnal in open soil is quite simple, like most other horticultural crops. Watering should be carried out regularly, while after it and after rain, it is sometimes necessary to loosen the soil surface. After the appearance of weeds, it must be removed immediately, and the bushes are systematically fed. In some cases, due to heavy inflorescences, the stems bend to the surface of the soil, which makes the bushes less attractive. In this case, you will need to install supports, to which the shoots are tied.
Experts advise cutting off the inflorescences immediately after they wither. This culture needs shelter only if a very frosty and little snow winter is expected. The plantings should be covered with non-woven material (lutrasil or spunbond). Spruce paws can also be used to cover the site.
How to water and feed
Watering such flowers is necessary on average 1 time in 7 days, for this they use warm water heated in the sun. During prolonged dry and sultry periods, the frequency of watering should be increased. At the same time, during prolonged rains, watering is suspended, since if the soil is excessively wet all the time, this significantly increases the likelihood that earthen fleas will harm the bushes, since they like to settle on crops belonging to the Cabbage family. It is necessary to water and loosen the soil surface only in the morning.
During the first season, the flowers are regularly fed with a solution of a complex mineral fertilizer, which contains a large amount of nitrogen. In the second year, during the period of bud formation, the plant should be fed with liquid complex fertilizer for flowering plants or phosphorus and potassium fertilizers.
Reproduction of nocturnal
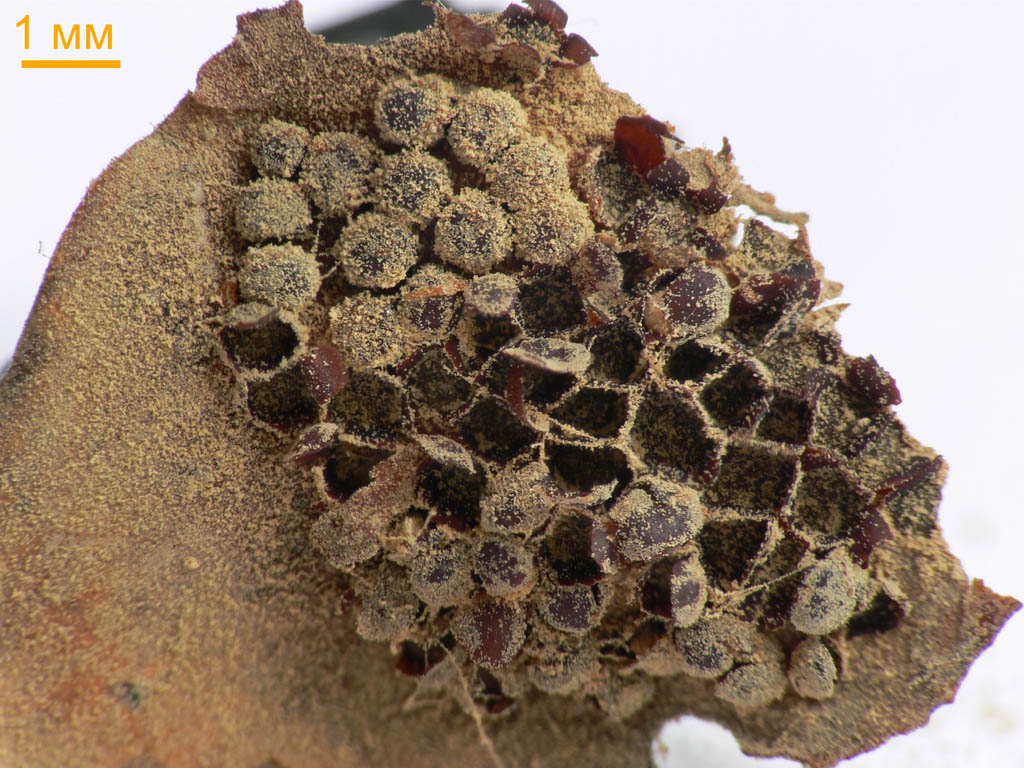
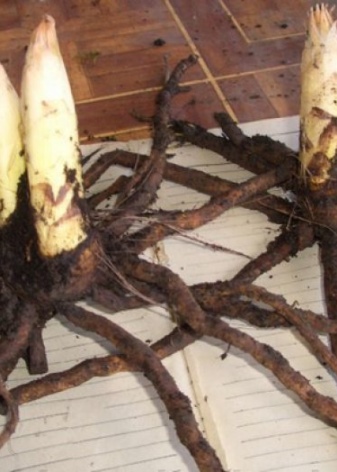
Species and varieties with simple flowers can be propagated by seed. But if terry night violets are cultivated, then they are propagated exclusively by dividing the bush, since if you independently collect seeds from the bushes and sow them, then the grown plants will have simple flowers. The division of bushes of terry varieties is carried out at the beginning of the spring period or in the autumn. To do this, the bush is carefully removed from the ground, divided into several parts, and the cuts are processed with crushed charcoal. Then the delenki are planted in pits, which are prepared in advance.
In late autumn, before the first frosts, the soil surface near the plants must be covered with a layer of mulch, which will save the root system from severe frosts in a winter with little snow.
Nocturnal pests and diseases
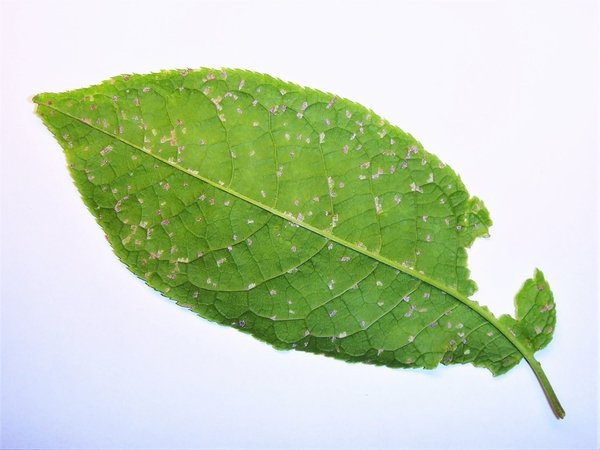
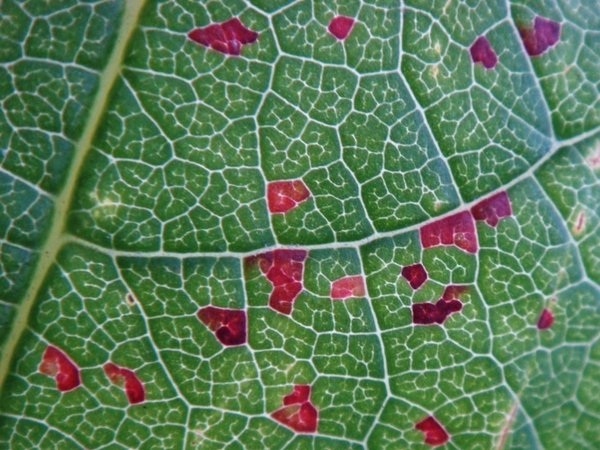
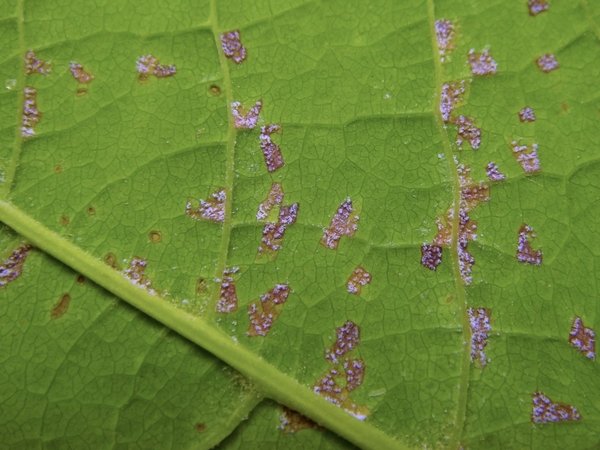
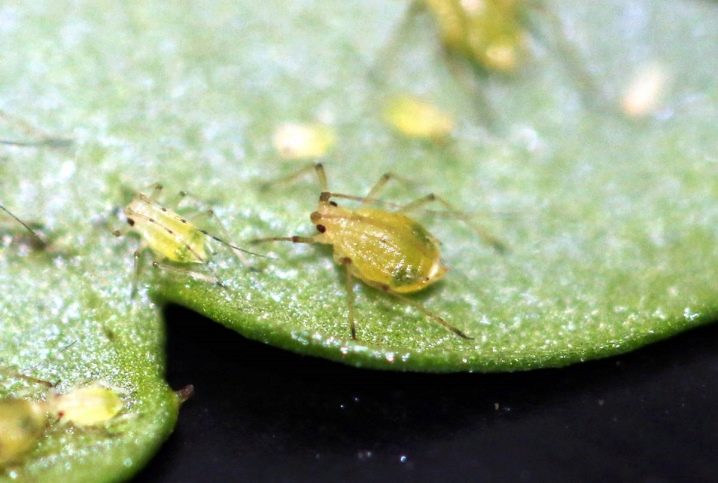
The night violet is affected by the same diseases and harmful insects as the rest of the Cruciferous family. Such a flower can be harmed by cabbage aphids, cruciferous fleas and bugs, cauliflower stem moth, cabbage moth, caterpillars of turnip and cabbage whiteflies and cabbage scoops, larvae of rape sawfly and cabbage fly and cruciferous gall midge. Insecticides are used to kill harmful insects; they can be bought at a specialized store. Experts advise to try to find a remedy that effectively destroys pests, while not harming the environment.
During the seedling period, seedlings can get sick with a black leg. An older plant sometimes infects keela, peronosporosis, alternaria, sclerotinia, phomosis, botrytis and fusarium, they are also fungal diseases. Also, the night violet can be struck by such bacterial diseases as black rot and vascular bacteriosis.For this culture, viral diseases such as mosaic and ring spot are very dangerous, since today they are considered incurable. In the fight against fungal diseases, fungicides show high efficiency, the choice of which in specialized stores is quite wide. However, those bushes that are affected by viral or bacterial diseases must be removed from the soil and destroyed as soon as possible. The area where the affected bushes were grown for three or four years will not be suitable for growing a single crop.
However, if you adhere to the rules of prevention and provide the plants with proper care, then they will be highly resistant to both harmful insects and diseases.
Planting and caring for cortaderia in the open field
When to plant
The landing of the cortaderia in the open ground is carried out in the spring, but only after the return frosts have passed. Do not forget to germinate the pampas grass before planting before planting rooted shoots. This perennial grows well on any soil and in any area, except swampy ones.
When purchasing a seedling in a flower shop, be sure to take an interest in a female or male bush. The fact is that female bushes bloom much longer and more spectacular than male ones. The planted bush grows rather quickly. In this regard, it is necessary to take care in advance of limiting the growth of the bush. To do this, you can install a small fence made of wood or metal.
Seat selection
When choosing a site for planting pampas grass, special attention should be paid to lighting. This plant is distinguished by its light-requiring and reacts negatively to prolonged shading.
Therefore, it is recommended to choose an open area for planting. Cortaderia should not be grown near artificial or natural bodies of water and swampy areas.
This plant is distinguished by its undemanding growing conditions. All that is needed for good growth is systematic watering and plenty of sunlight. Severe frosts can harm the plant. Best of all, such a perennial grows at a temperature of at least 12 degrees.
Site preparation rules
After a suitable site for growing a cortaderia has been found, it will need to be prepared for planting. It is enough to dig up the soil and remove the weeds. And you should also make sure in advance that pests do not settle on the roots of the bush.
On the prepared site, make planting holes, and the distance between them should be at least 200 cm. After that, planting bushes of pampas grass is carried out.
Remember that this plant has a strong root system that grows quickly. Therefore, it is able to drown out almost all other garden crops growing in the immediate vicinity. In this regard, the site for the cultivation of pampas grass must be selected with great care.
In order for the planted bush to grow normally and bloom quickly, it is recommended to apply a complex mineral fertilizer during planting, which can be bought in a specialized store.
Landing rules
Seeds are sown in open ground or the root shoots of an adult bush are planted. This is done in the spring, after the return frosts have been left behind.
Cortaderia seeds are sown directly into open ground. From above, the sowing site is covered with a film, which is removed immediately after the appearance of the first seedlings. A bush grown from seeds will begin to bloom only in the fifth year. If you want the plant to please you with flowers already in the first year of growth, then it is recommended to plant the seedling in a small container in advance and take care of it at home until the first shoots appear.
Experienced gardeners recommend planting cortaderia bushes in large containers. Thanks to this, they will be able to decorate your garden in warm weather, and during the frost period they can be transferred to a warm room.
During planting, the bushes are buried 30 centimeters into the soil. In this case, the seedling should be taken along with a large clod of earth. It is highly undesirable to clean its roots from soil. Remember that the planting hole must be located at least 1.5 m from other horticultural crops. The planted bush must be watered with plenty of water.
Cortaderia Pampas Grass 1
Watering
There is nothing difficult in caring for a cortaderia. Even a novice gardener can cope with this task. It should be watered only during prolonged drought. The plant has long and powerful roots that can penetrate deep into the soil. There they find all the nutrients necessary for a given crop, as well as moisture.
Even in a dry period, it is necessary to water the bushes no more than once every 7 days. If watering is more frequent, then the bushes will become lethargic and their foliage will begin to die off. During watering, 20 liters of water are poured under one bush.
Pruning and fertilizing
During the year, it is enough to feed the pampas grass only once in the spring. To do this, a solution of mineral fertilizer is poured under the bush.
In order for a perennial to always look neat and effective, it must be trimmed regularly. Every year in early spring, gardeners are engaged in thinning foliage, as well as removing dried inflorescences and dried grass. In order for the bushes to be compact and not grow strongly, it is necessary to timely prune the root system.
Types and varieties of tricirtis with photos and names
Gardeners cultivate both species and varietal tricyrtis.
Taiwanese tricyrtis (Tricyrtis formosana), or Formosan tricyrtis
The height of the bush is about 0.8 meters. The surface of the shoots is fleecy. On the surface of the green glossy oval-shaped leaf plates, there are specks of dark red color. The surface of the flowers is lilac-pink or pink-white streaked with brownish-red specks.


Tricyrtis yellow (Tricyrtis flava = Tricyrtis yatabeana)
This species is native to the mountain forests of Japan. The surface of the stem is hairy, and its height can vary from 0.25 to 0.5 meters. The apical inflorescences consist of yellow flowers, as a rule, they are monochromatic, but sometimes they are spotty. This species is currently not yet very popular among gardeners.
Hairy tricyrtis (Tricyrtis pilosa = Tricyrtis maculata = Tricyrtis elegance)
The homeland of this species is the Himalayas, while these plants can be found at an altitude of up to 2 thousand meters above sea level. The height of the bush is about 0.6-0.7 meters. There is pubescence on the lower surface of broadly lanceolate leaf plates. Apical inflorescences of whitish flowers, on the surface of which there are large specks of purple color. This type is not yet very popular with flower growers.
Long-legged tricyrtis (Tricyrtis macropoda)
In nature, this species is found in the subtropical regions of Japan and China. The height of the bush varies from 0.4 to 0.7 m. The stem of the cylindrical shape is short pubescent in the upper part. The length of the stalk-embracing leaf plates is 8–13 centimeters, and their width is 3–6 centimeters, they have an ovoid or oblong shape. The terminal and axillary inflorescences consist of white fragrant flowers, on the surface of which there are many purple spots. Flowers are shorter than pedicels.
Tricyrtis broadleaf (Tricyrtis latifolia = Tricyrtis bakeri)
The homeland of this species is the shady forests of Japan and China. The height of the bush is about 0.6 m. On the surface of the green ovoid leaf plates, there are specks of dark color, which are especially clearly visible at the very beginning of growth. This species begins to bloom earlier than other tricyrtis species. The flowers are collected in apical bundles, they are painted in green-white color, and on their surface there are specks of a darker shade.
Tricyrtis hirta, or Uvularia hirta
This species is native to the subtropics of Japan.He is the most popular of all. The height of the bush can vary from 0.4 to 0.8 m. On the surface of the cylindrical stem, there is dense pubescence, consisting of a short pile. The length of the leaf plates is about 15 centimeters, and the width is about 5 centimeters, they have an elliptical or broad-lanceolate shape, and on their surface there is also pubescence, consisting of short hairs. The foliage at the top of the shoot is stalk-enveloping. Flowers can be single or collected in several pieces, they grow on the tops of the shoots or in the axils. There are many purple spots on the surface of the white flowers. Garden forms:
- short-haired Masamuna - the bush has no pubescence;
- short-haired black - speckles on the surface of the flowers have a darker color compared to the main species, and this variety blooms earlier.
But the most popular among gardeners are hybrids of this type of tricyrtis:
- Dark Beauty. This variety is distinguished by its resistance. The flowers are pale pink, and on their surface there are many specks of dark purple color.
- Raspberry Mousse. The flowers are brownish-purple, without specks.
- Blue Haven. The leaf plates are leathery. Large bell-shaped flowers have light orange stamens and red pistils. The petals are blue at the base, and yellow at the tops, gradually turning purple with blue tips.
- Pearl Beauty. There are many purple spots on the surface of the white flowers.
Also quite popular are such varieties as: Mayazaki, White Towers, Lilac Towers, Kohaku, Milky Way Galaxy, etc.
Tricirtis
Reproduction methods
Eremurus can be propagated using seeds, this method is called generative. But many gardeners also resort to the vegetative option. It happens that in the spring, several smaller outlets are formed near the main outlet - they are daughter buds. They have both a bottom and roots. For reproduction, children should be separated from the adult mother's body, and the damaged areas should be sprinkled with ash and dried. After that, it is worth dropping the children into open ground. To separate the daughter kidney, use a slight pressure, if this does not help, then the baby should be left in place for another year.
Gardeners recommend using one trick - to divide the Cornedonian before planting. It is necessary to cut it in such a way that several roots remain on each part. Places of cuts are sprinkled with wood ash, after which you can proceed to planting. After a year, each part will form buds and roots and will be capable of new division.
Reproduction and planting of a vallot on their own
Some growers manage to find vallotta bulbs in a specialized store, in fact, this is a great success, since exotics can be found very rarely on sale. For those who are familiar with this wonderful plant, they jointly try to propagate the vallotta to obtain new beautiful specimens. For planting a plant with a bulb, a small pot is taken, which should be narrow. The fact is that with a large amount of space with soil mixture, the plant will begin to multiply very quickly by children, which will affect the flowering of the perennial. As a soil, you can use compositions based on humus, leafy earth and sod, with the addition of sand and peat. Some growers fertilize the soil with mullein or bone meal. Ready-made mixtures purchased from a specialized store are suitable.
The vallotta bulb can be planted during the summer season in nutritious open ground. If it is young, that is, only acquired, then the plant can be easily grown in the garden as an annual or perennial (in warm regions) culture.When transplanting a vallot for a while, make sure that the roots are not damaged in the process, any even the slightest damage can lead to decay. If you are not confident in your abilities, then the bulb is left in a container for the summer and taken out into the fresh air for sunbathing.


For propagation of the vallot, you can use seeds, cuttings of the bulb or children, which it forms from the top of the tuber. In any case, some problems may arise during cultivation, since the plant needs supervision from the earliest stages of life. To get seeds from your plant at home, after flowering, the largest ovary is left on the peduncle, as soon as it dries up and begins to crack, then it's time to collect planting material. In no case should you hesitate with the process, since the germination of seeds usually lasts for several weeks. Sowing is performed immediately after collection, the material is sown on the surface of a wet substrate, based on sod, leafy soil with the addition of peat in equal proportions. To lighten the soil, you need to add sand, which in the ratio with the turf should be 2/1. The first friendly shoots will appear in 3-4 weeks when kept under a film and a temperature of 16-18 degrees. Monitor the moisture content of the substrate by airing the greenhouse with seedlings daily. It is possible to dive a plant in separate containers only after six months. Youngsters are seated in permanent pots in the second year in the fall, after which the winter, until April, is kept in hibernation at a low temperature in a well-lit place. Vallota blooms only for 3-4 years.
The simplest division of the vallot is with the help of "children", which she forms very willingly. A new plant is cut from the mother bush only when it has developed its own root system and several green parts. Only such young growth can easily take root in a new place. If you cut the bulbs that have no roots, they will die within a few days. Some growers recommend waiting until the bulb falls off by itself, only then should it be removed from the parent specimen.
Features of caring for a wallot at home
Some growers, due to the peculiarities of caring for a vallot at home, laugh that the worse it is to take care of it, the brighter and more beautiful it blooms. But, nevertheless, some of the nuances are worth knowing, since if improperly performed, the plant can wither and die.
First of all, pay attention to the temperature of the content of the vallot - in the winter season, especially for young specimens, a state of dormancy is required, which lasts from late October to April. At this time, the plant must be kept in a room with 10-12 degrees of heat.
A short-term decrease is allowed up to 5-8. Before the start of the growing season, the temperature gradually rises and in the active period it is 20-25 degrees.
During the period of active growth and development, the vallotta flower prefers moderate watering with soft melt water without excess lime. It is recommended to introduce moisture only when the upper earth layer dries out. By the wintering period, watering is gradually reduced from late autumn to March, the plant is not recommended to be watered. Since March, water procedures have also been gradually resumed.
The illumination of the Vallot flower loves intensely bright, but in hot weather it is better to shade it from direct sunlight and spray it from a spray bottle. As top dressing, liquid fertilizers are used for indoor flowering plants, which are applied during the growing season at a frequency of 1 time in 2 weeks.
Solar splendor kerry
Among the ornamental shrubs, Japanese Kerria is considered a special, rare and exclusive star. She's not as popular as forsythia
Often, the plant is overlooked, thinking that such its splendor and showiness is a sign that the plant will have to provide difficult and tireless care.But kerria is one of the most unpretentious plants that can be recommended even to the most inexperienced gardeners.
The endurance and simplicity of this shrub can only compete with its decorative merits.
Japanese kerria (Kerria japonica) is oriental in origin, and in style too, an ornamental deciduous shrub from the Pink family. The specific name of kerria often leads to confusion, because the birthplace of this plant is actually not Japan, but China. The folk names of the plant are a vivid evidence of its extraordinary beauty of flowering. Easter or Japanese rose - this is how kerria is known all over the world, and it is especially loved in European landscape design.
The average height of kerrias is limited to 1.5-2 m (up to a maximum of 3 m kerrias grow both in nature and in free growing without forming in gardens), easily regulated by shaping and pruning. They are compact, deciduous shrubs with slender shoots. The shoots of kerria are green and straight, they initially form a rather strict pyramidal crown, but with age the shrub becomes more and more lush and curly, the shoots are inclined, the shape of the bush changes. One of the most valuable features of the Japanese kerriya is its strikingly elegant, not too thick, but seemingly curly crown.
This shrub seems fluffy and elegant at any time of the year, even in winter, impressing with its lace pattern and bright light green color of the shoots. Kerria shoots are thin, look amazingly graceful and only emphasize the beauty of the plant. All kerrias have medium-sized, but beautiful lanceolate leaves, the length of which ranges from 2 to 10 cm, and the width is up to 5 cm. The serrated edge of the leaves adorns the plant, as does their rich light green color in summer. The underside of the leaves is pubescent, the upper side is bare. The yellow spring and autumn flowering of kerria seems to be picked up by the crown: in the fall, the leaves of the plant are repainted in a bright yellow color, completing the yellow parade of the plant.
The flowering of Japanese kerrias starts in April, and in regions with severe winters - in May and continues in June, it is striking in its duration. With favorable weather and high temperatures, sufficient soil moisture, the shrubs bloom again in August or September. On average, the flowering period of kerrias lasts from 25 to 35 days, sometimes more than a month and a half. The duration of the flowering period directly depends on the weather and growing conditions. If the kerria is frozen over the winter, then the shrub blooms only by August-September.
Kerria flowers are single, outwardly strongly resemble buttercups with their rich yellow color, simple petals and a fluffy center of stamens. Flowers are located at the ends of shoots or in the axils of future leaves. The diameter of the flowers ranges from 3 to almost 5 cm in the best varieties. Along with simple forms, there are also terry varieties. By their smell, kerrias are most similar to dandelions.
After flowering, almost black prefabricated spherical drupes are tied, but only in regions with mild winters. In the middle lane, kerrias do not bear fruit.
Diseases and pests
The main pests of adromiscus are aphids, spider mites and mealybugs. In order to rid your pet of parasites, move it away from other plants for a while. In the future, tactics are different.
Aphid
White aphids are most often found on domestic flowers. It punctures the stem and sucks out the sap of the plant, making it weakened. To combat aphids, folk remedies are often useless, so start processing with professional tools:
- "Spark";
- "Neoron";
- Fitoverm;
- "Karate".
It should be remembered that all these products have an unpleasant odor, so there should be no children or animals in the treated room. Be sure to wear protective equipment: gloves and a respirator.


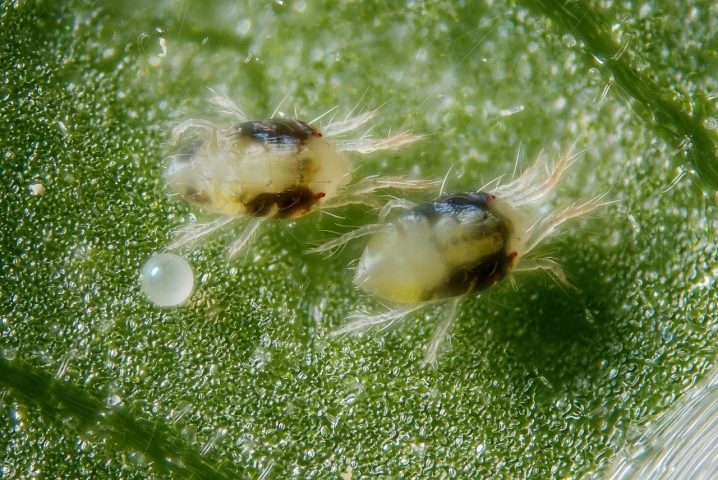
Spider mites
This is a very small insect that is difficult to see with the naked eye.A thin cobweb forms on the plant, on which ticks stick. To combat this pest, use insecticides such as Actellik, Flumite, Skelta. Read the instructions before use. Observe protective measures.
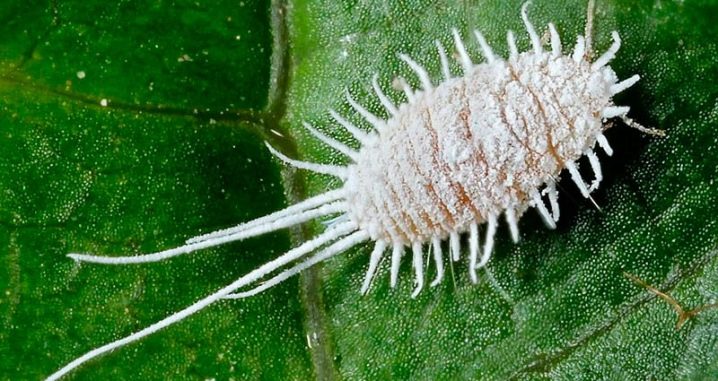
Mealybugs
The second name is hairy lice. On the plant, they can be seen with the naked eye. They feed on the juice of young shoots, causing significant damage. The choice of means for combating this pest is large. Treat every 1-2 weeks for three months.
Diseases
Most often, adromiscus gets sick from care errors. Let's consider the most popular problems.
- The lower leaves turn yellow and die off. These are the natural processes of plant growth and development.
- Rotten leaves. Appears when water gets in during watering.
- Drying foliage or excessive yellowing. These problems are most often the result of frequent watering. And also can occur after sunburn. It is recommended to reduce the frequency of watering and create diffuse light.
- Foliage cracking. The soil is dry.
- Elongated shoots, faded leaves. More often occur with insufficient lighting. Move the succulent plant to the south window. Adjust watering frequency and air temperature.

For an overview of adromiscus, see the following video:
Planting malopa in open ground
Growing from seed to seedlings
It has already been mentioned above that malopa grown in a garden plot is an annual. That is why it has to be grown from seed every year.
This crop is grown through seedlings, while the time of sowing seeds depends entirely on the climatic conditions of your region. You can sow the seeds of malopa throughout the spring, the main thing should be taken into account that when the time comes for transplanting seedlings into open ground, the air outside should already be well warmed up. And it should also be borne in mind that even a slight frost can harm flowers.
Therefore, it is so important that return spring frosts are left behind.
Before proceeding with the direct sowing of seeds, you need to prepare special seedling boxes. They are filled with loose peat soil. Malopa seeds are small and can break easily if you press hard on them. Therefore, after they are evenly distributed over the surface of the substrate, they only need to be pressed a little into the soil. It is not necessary to sprinkle them on top with either substrate or sand.
After the seeds are sown, you need to moisten the crops. It is recommended to water them with a sprayer. This will protect the seeds from washing out, and you can also avoid stagnation of moisture in the soil mixture, which can negatively affect young immature seedlings.
Next, it is very important to cover the top of the box with transparent glass or film. This will help prevent the surface of the substrate from drying out and maintain the required moisture level.
Do not forget to systematically ventilate and moisten the crops, and immediately after the first shoots appear, be sure to remove the shelter. Young seedlings are rearranged in a well-lit place, protected from direct sunlight. They are also provided with regular, moderate watering. It is recommended to transplant seedlings into separate cups after the appearance of the first true leaf plates.
Landing in the garden
When planting grown seedlings of a hole in open ground, you need to be extremely careful not to injure both the stems and the root system of the plant.
The first step is to prepare the site for planting. The soil is dug in advance, while a little organic matter is introduced into it. Prepare the planting holes immediately before planting the plants. Their depth can vary from 50 to 100 mm. The row spacing, as well as the distance between the bushes, should be at least 30–35 centimeters. Plant malopa in prepared holes and water well.

Cultivation of malopa and lavater on a personal plot without seedlings, watering and feeding.
How to plant correctly
When to plant irises? Seat selection
Most gardeners believe that as soon as the irises have finished blooming, they should be dug up, divided and planted in a permanent place. Because otherwise, they may not have time to be taken before the onset of the winter period. However, if in your area there is a long and warm enough autumn, then you may not be in a hurry to transplant irises. Such flowers can actually be transplanted from spring to autumn, but only after they have finished their flowering period. Remember that irises should be replanted at least once every 3 or 4 years. However, Siberian irises can grow in one place for about 10 years. If you do not transplant, then the overgrown bushes stop blooming.
For bearded irises, you should choose a sunny place away from drafts, which should be located on a hill or on a slope, since it is very important that the place is well drained, and there is also an outflow of melt water. Disembarkation is recommended from morning to lunchtime
For the Siberian and marsh species, you need to choose places with wet soil. Absolutely all irises need nutrient-rich soil. To correct poor soil, before planting irises in spring, you need to add compost or garden fatty soil, as well as phosphorus-potassium fertilizer. It is recommended to add chalk, dolomite flour or wood ash to acidic soil. It is recommended to add sand and peat to loam, and clay soil to sandy soil. It is recommended to disinfect the soil before planting irises. To do this, it must be watered with a fungicide, and also treated with herbicides from weeds. You cannot bring manure into the ground.
How to plant irises. How to plant irises.
Spring planting
The purchased planting material, as well as the one that was stored throughout the winter period, must be treated with a growth stimulating agent (Zircon or Ecoel). If the roots are long, then they must be trimmed, places where there are traces of decay must be carefully cut out. The root should be dipped in a potassium manganese solution for a third of an hour for disinfection. Make a not very deep hole and pour sand into it with a mound. The rhizome of the bearded iris must be laid so that it is horizontal. Spread the roots and sprinkle the hole so that only the upper part of the rhizome remains above the soil surface. Then the iris should be watered abundantly. In the event that the entire rhizome is underground, then this, as a rule, leads to the appearance of rot. Beardless species, on the other hand, need to be buried a few centimeters into the ground. A layer of mulch (peat or fallen needles) should be poured on top, which will help retain moisture. The wells must be spaced from each other at a distance of at least 50 centimeters.
Autumn planting
Autumn planting is not much different from spring planting. It is recommended to be carried out at the end of the summer season, when the flowering period ends. As a rule, it is advised to transplant from August to the last September days, but it should be borne in mind that an earlier transplant will allow the plants to take root and grow stronger. Dig the bush with a pitchfork, then divide it into annual links with a leaf blade
The cord-shaped roots must be carefully shortened, remove those places where there is damage or traces of decay. Then the delenki must be placed in a dark pink solution of potassium manganese for 2 hours for disinfection.
After that, they need to be put in a sunny place for 4–5 hours. Delenki should be planted in the same way as in spring. A distance of about 50 centimeters should be left between the holes of high grades, between medium-sized ones - 20 centimeters, between undersized ones - 15 centimeters.