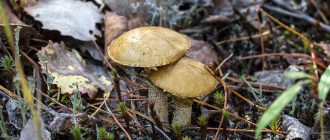
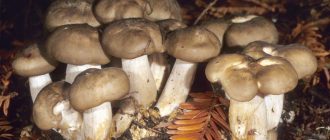
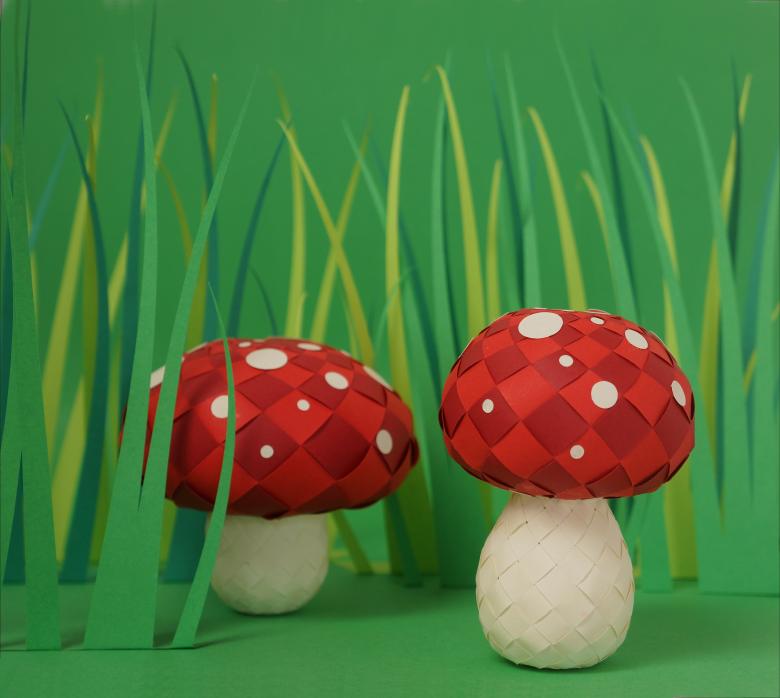
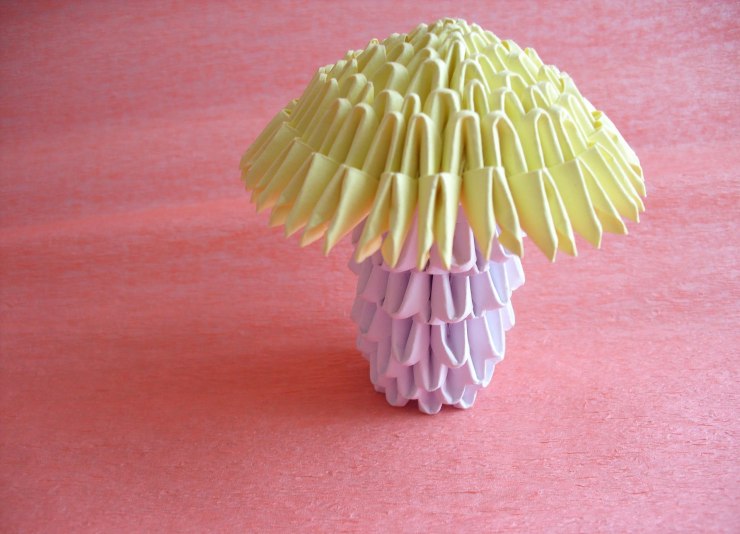
Origami mushroom
Such colorful mushrooms can be used not only as crafts, but they can be used to decorate postcards, make garlands and many other interesting things.
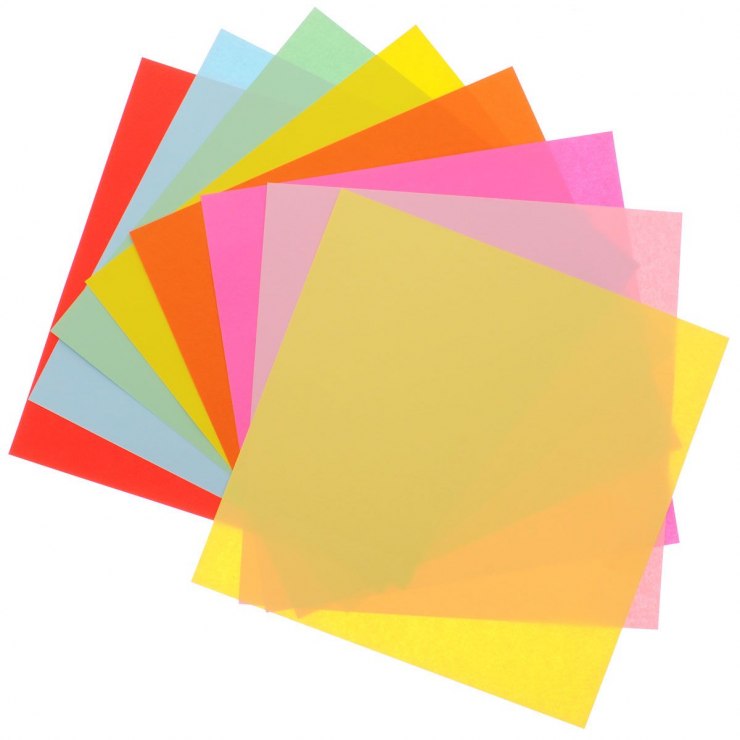
To create them, you need to take only two sheets of A4 paper - one white, the other red, and scissors.
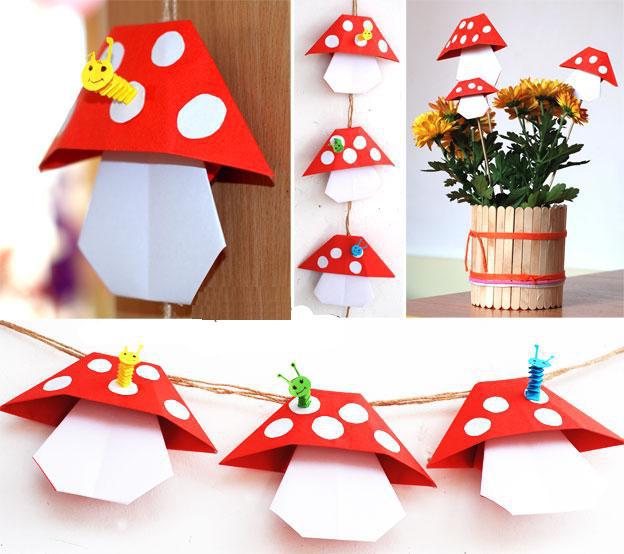
Master class on creating an origami mushroom:
- Make the sheets of paper square. To do this, wrap one corner of the leaf and make a triangle, and cut off the excess part.
- Fold the two sheets together.
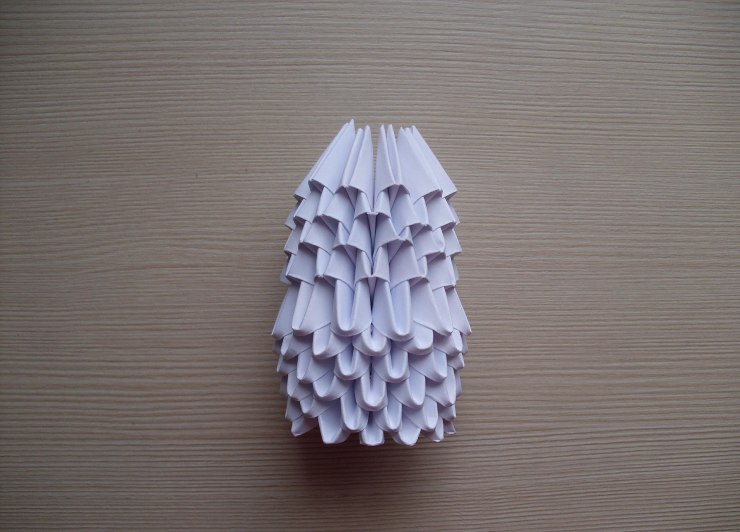
- Fold the paper diagonally twice, then flatten it. As a result, you will have two intersecting lines that form a cross (Figure 1).
- Lay the paper in front of you without pulling it apart. The white sheet should be on top.
- Fold the top, right, and left corners of the two sheets (illustrations 2-4).
- Fold the sheets in half (Figure 5).
- Fold the top left and right corners back (Figures 6 and 7).
- Flip the shape over to its side (Figure 9).
- Fold the left and right corners and unfold them again (Figures 10-12).
- Raise the upper triangle slightly and tuck the corners inward (Figures 13-15).
- Fold the bottom corner under the wrapped parts of the craft (Figure 16).
- Fold in the top corner (Figure 17).
- Flip the craft over and shape the hat. Everything is ready (Figure 18).
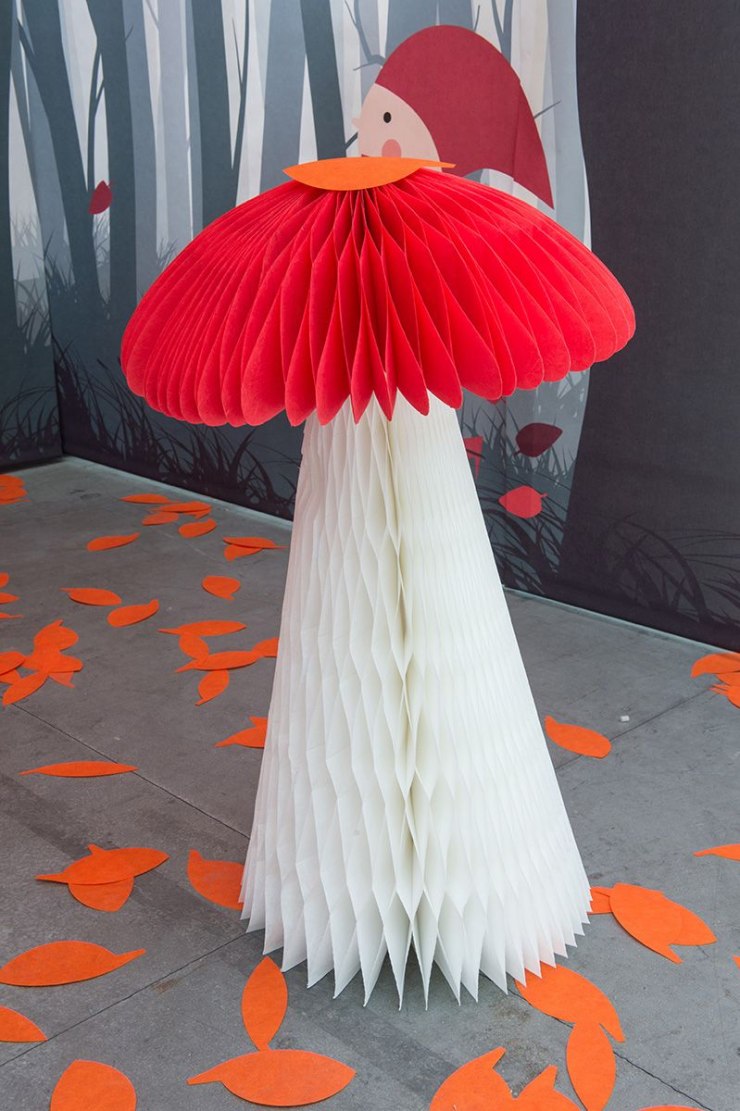
To make the fly agaric look more like a real one, cut circles out of white paper and stick them on the hat.
Penoplex product
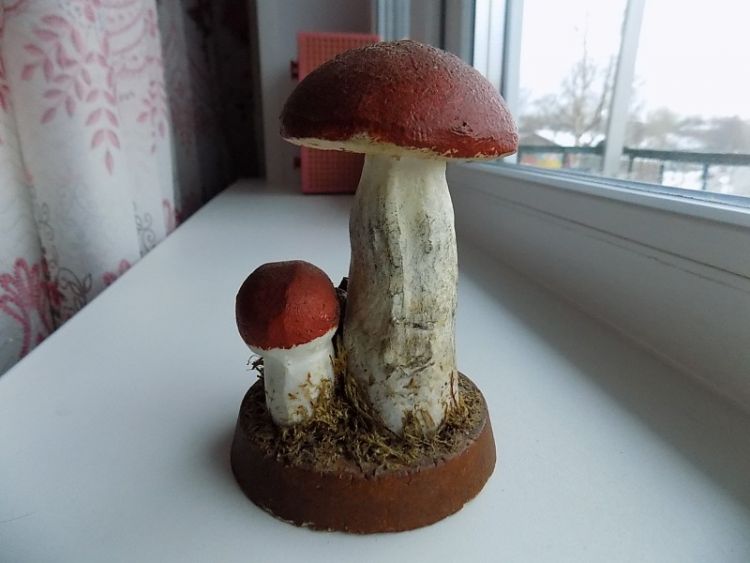
With the participation of parents, you can make an original composition from the material used for wall insulation. A simple instruction on how to make a mushroom will help you. A leg and a hat are cut out of two pieces of foam with a clerical knife. The surface is neatly leveled.
On the inside of the cap, a recess is made in the center for joining. A little glue is poured into this hole to fix the ceiling tile. A leg is placed inside.

You can color the craft using gouache. For better adhesion, PVA is added to it. The leg is painted in a light color, and the cap is painted in a darker color, for example, red or brown.
Several mushrooms can be fitted into a shoe cover. The material used in wrapping flowers as a substrate is pre-laid in it. The composition can be diversified with natural samples - dry twigs, leaves, cones.
Simple applications with mushrooms for kindergarten
We work with paper
The next material that is widely used by kindergarten teachers is colored paper. To get started, children need to be instructed on safety, explain how to use scissors. For children under five, the details are cut by the teacher himself.

To make a mushroom, we need:
- colored paper;
- cardboard;
- scissors;
- glue;
- craft blanks.
We glue the finished parts onto cardboard. We decorate the mushroom with our eyes, mouth, circles on the hat and attach the grass on the leg.
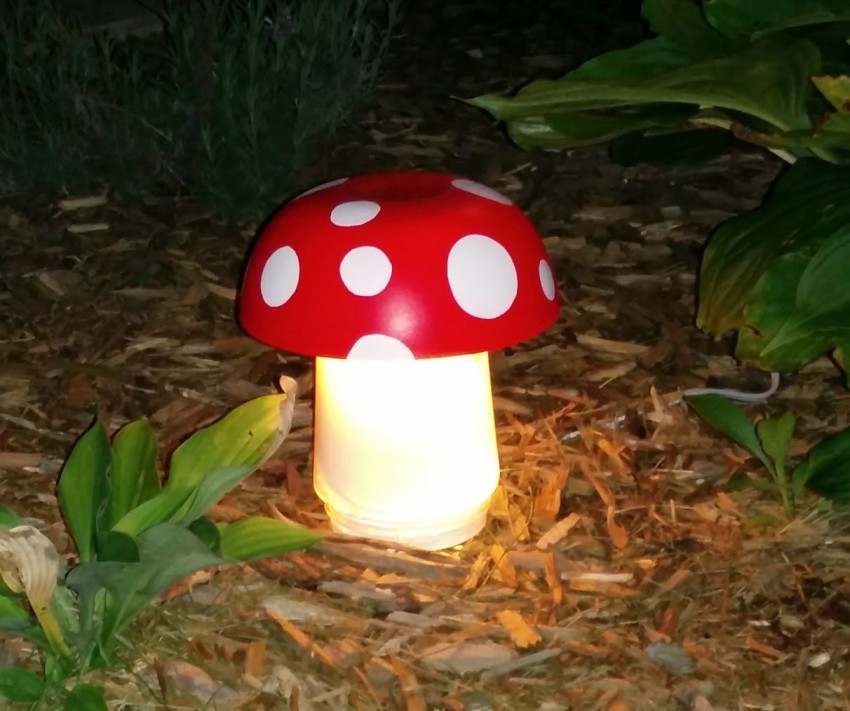
Craft mushroom flashlight
Any craft is especially good if you make it with your mom and put it on your shelf. We will now consider such a mushroom-flashlight craft
We need:
- cardboard;
- glue;
- scissors;
- transparent paper or file.
Cut out the silhouette of the mushroom, in the middle of which we make a hole and attach transparent paper or a file. We should have two mushrooms for the volume of the figure. In conclusion, we make the sides and insert a flashlight or light bulb for illumination. Choose luminaires with dim light to avoid fire. In this way, we got a lamp with our own hands together with my mother.
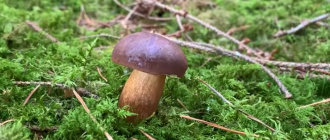
Crafts mushrooms from paper
Paper is the most readily available material, so mushroom-themed crafts are often made from it. There are many different techniques for working with paper, let's look at the main ones:
Bulk paper crafts
Everything is extremely simple here. The leg of the mushroom is a cylinder glued from paper, or a toilet paper sleeve. The mushroom cap is a cone made of colored paper.


The leg of the mushroom will be decorated with green paper herb, cut into fringes, and a leaf cut out of colored paper will decorate the head of the mushroom.
To complicate the craft, you can use the facing technique, and decorate the hat as in the photo below.
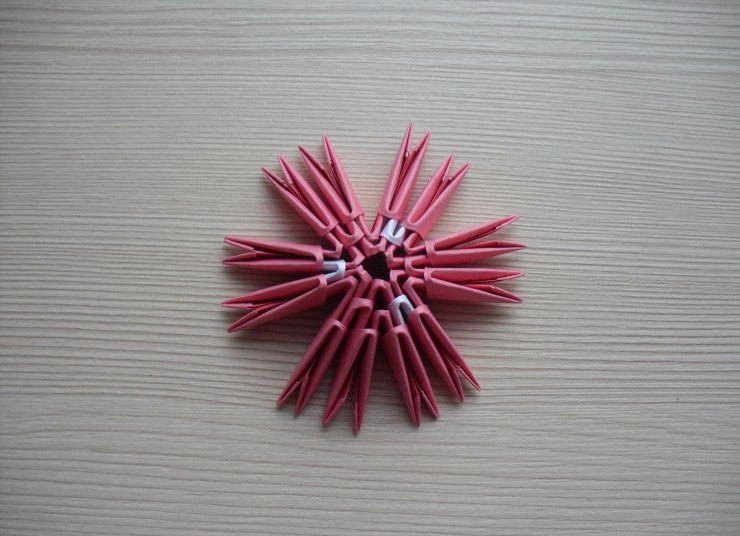
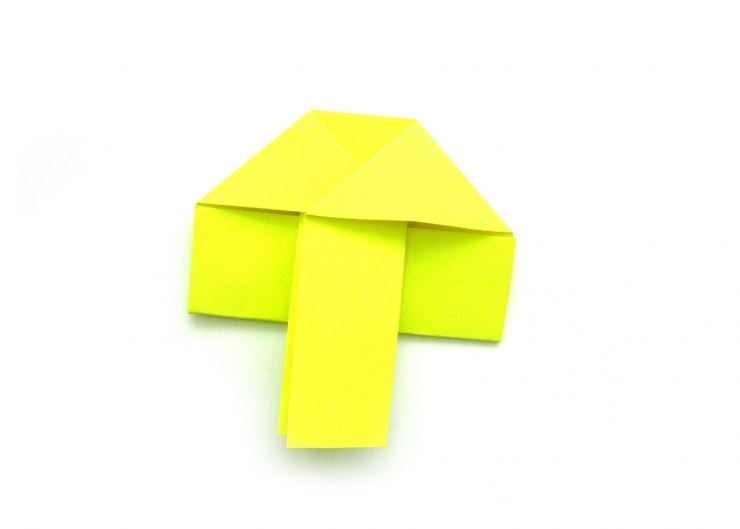
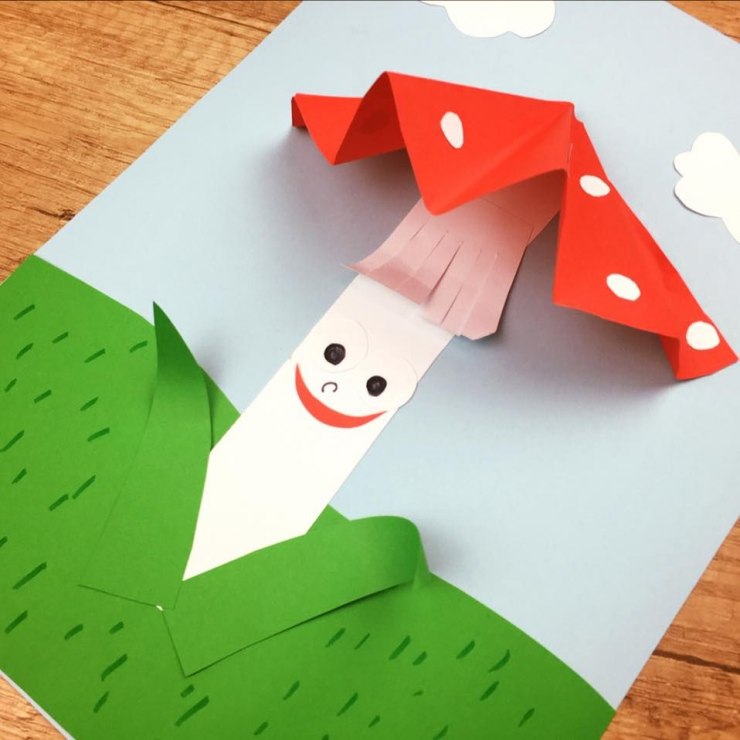
Origami
Not a simple, but interesting origami technique will appeal to older children. Below is an instruction and a photo of the origami mushroom craft.


- A cinnamon, orange or red paper square, with the colored side facing up.
- Now we take by the top of the sheet and bend a little more than half to the side from ourselves.
- Making the right side of the hat - Turn the sheet over, fold the right half of the sheet towards the center. Slightly open the pocket on the right, press and smooth out the folds well.
- We make the left side of the cap - fold the left side of the sheet with an overlap to the right. Now we will spread the resulting pocket in the same way as on the right side.
- It remains to round off the sharp corners a little, for this, bend the corners at the bottom of the cap and legs back. Our origami mushroom is ready, now you can glue it on a sheet of cardboard or paper and create a whole composition using the applique technique.
Application
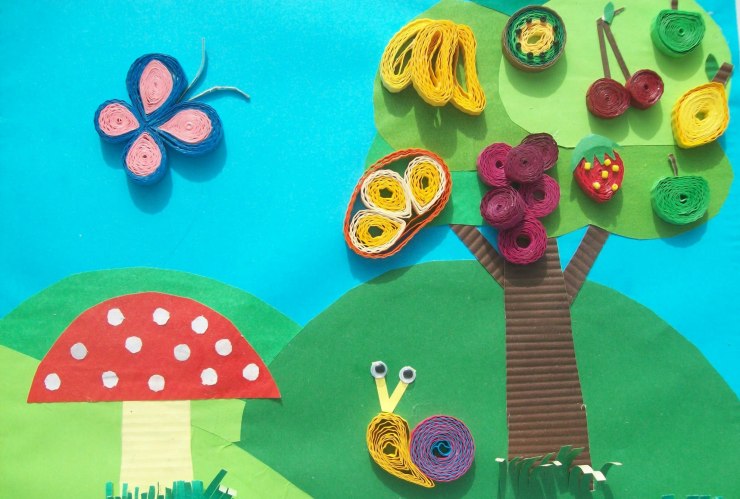
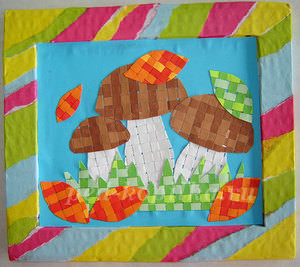
The most popular paper mushroom crafts are colored paper applique. Toddlers glue pre-cut parts, older children cut out themselves. However, even the usual application can be varied in the following ways:
- Add a drawing to the applique. For example, you can ask the children to finish painting the grass or background to the glued mushroom. You can let the children first paint the cap of the mushroom, and then glue it, or first draw a fly agaric, and then glue spots and a skirt to it with an applique.
- Add natural materials. You can glue a real autumn leaf on the mushroom applique cap, and instead of grass - dried moss.
- Make a cut-off applique. Children love to rip or cut paper into small pieces, and then glue these pieces onto a ready-made mushroom template.
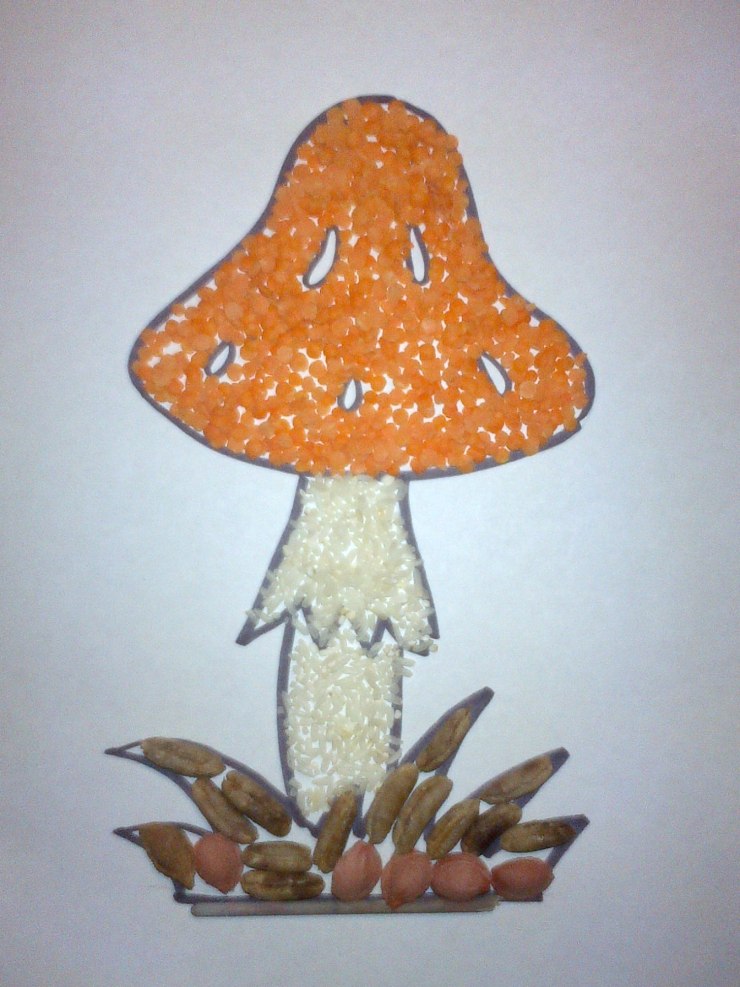
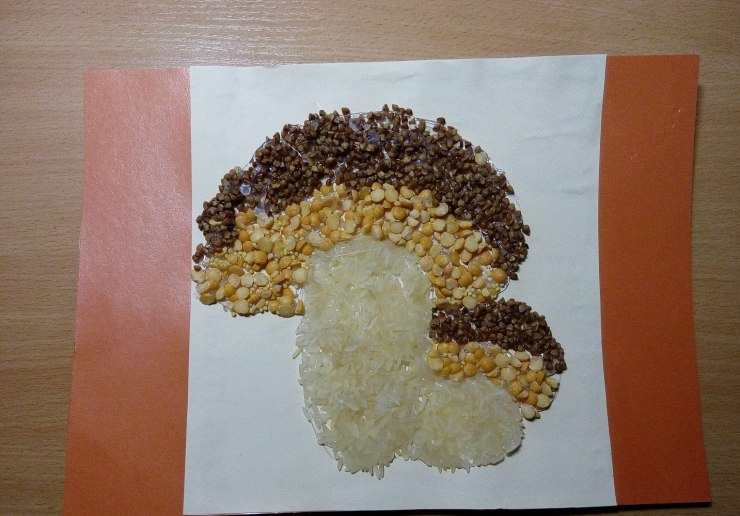
- Make a bulk application. Apply PVA glue to the prepared mushroom template, and sprinkle with any available materials on top. For example, a mushroom leg can be sprinkled with rice, and a cap with buckwheat. You can use other cereals, crushed dry leaves, tea, etc.

Quilling
Quilling is a technique for making compositions from long narrow strips of paper twisted into spirals. Crafts mushrooms using this technique are voluminous and very beautiful. However, this is a very painstaking work that not all children can handle.
The easiest way to make quilling mushrooms:
- We cut thin long strips, or buy ready-made in the store, with such strips the craft will look neater.
- Twist the red stripes tightly into a circle, add new stripes until the desired size is reached. This will be the mushroom cap.
- We also make a tight twist from white strips, give it the shape of a mushroom leg, flattening it a little.
- Now we glue the leg and the cap to the cardboard base and add white spots to make a fly agaric

The main thing is for the child to be interested in creating with you, for this it is important that the craft is suitable for his age

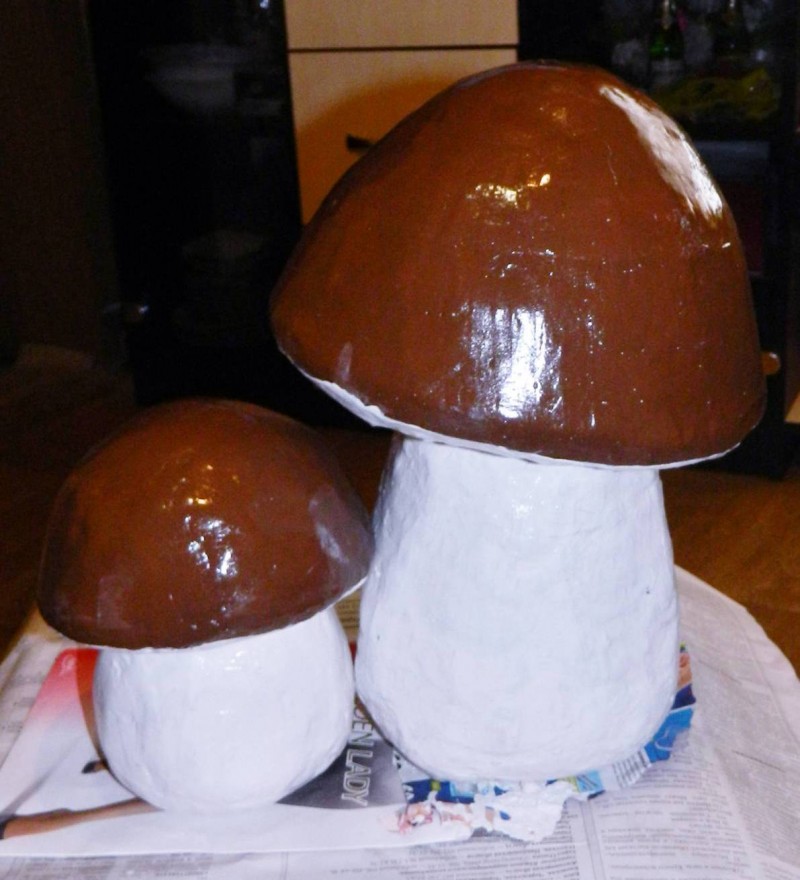
How to make a mushroom for the garden - step by step
As soon as the solution is ready, put in a nylon stocking a part sufficient to form the leg.
Immediately put part of the solution for the mushroom cap into the second stocking.
We hang stockings with cement on some kind of rail, pipe, crossbar.
 According to the same principle, cement pumpkins can be made, only we drag them cross to cross with twine.
Now comes the fun part - we need to shape the leg and the cap. We put a jar under the stocking with the future hat so that the solution is not completely suspended, but as if it blurred a little. Tie the stockings above the solution.We put a plastic film between the solution and the jar, so that after hardening the jar can be easily removed.
We also put a jar under the stocking in which the mushroom leg is frozen to form a flat surface (cut) of the leg.
We leave the elements of our future garden decoration to freeze. But not too long - if the cement mortar hardens completely, it will be difficult to fasten the parts of the craft together.
We take out the parts of the mushroom from the stockings, insert some metal pin (you can use a long nail) into the middle of the leg, put a hat on it.
If you missed the time, and the solution is too dry, you will have to seal the fungus in another way. You can drill holes in the parts with a drill and fix the pin in them with fresh mortar. If the cap and cut of the leg are large, you can also glue them together with construction glue or the same mortar.
It will not work to remove the stockings from the frozen cement, leave them in place, and apply a small layer of mortar to the dried craft to hide the material.
The mushroom will dry out, depending on the size, from three days. After that, it can and should be sanded with sandpaper to remove irregularities.
Apply a primer to the surface of the garden craft, leave it to dry for a day.
We paint the cap and leg with paints that match the color. If we want our mushroom to shine, after the paint has dried, we apply a layer of facade varnish.
The boletus turned out to be strong and beautiful.
Tags:
cottage garden figures
Plasticine: a combination of simplicity and originality
Such a fungus is easy to make. It is enough to roll out a sausage cylinder for the leg from light plasticine and roll a ball of brown or red plasticine under the future hat.

The leg should not be too long - a thickening is needed at the bottom for a stronger attachment. Below you can make grass. To do this, take a green mass, roll it into a sausage, and then flatten it. Using a knife, a fringe is cut out, which is then wrapped around the leg at its base.
Closer to the hat, you can make a skirt. To do this, a white plasticine sausage is wrapped around the leg, fixed and slightly flattened, as can be seen on the photo of the mushroom.


To make a double hat, it is enough to roll two balls out of white plasticine. One of them is flattened into a cake, which is fixed on the leg. A white ball is laid on top of the pancake. A pancake made of red plasticine is placed on top of the ball and smoothly flows around it, connecting with the white lining.
Plasticine can also be used as a connecting element - a ball of plasticine is laid on a vertically fixed acorn, and a chestnut hat is attached on top.
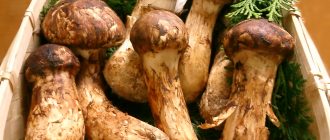
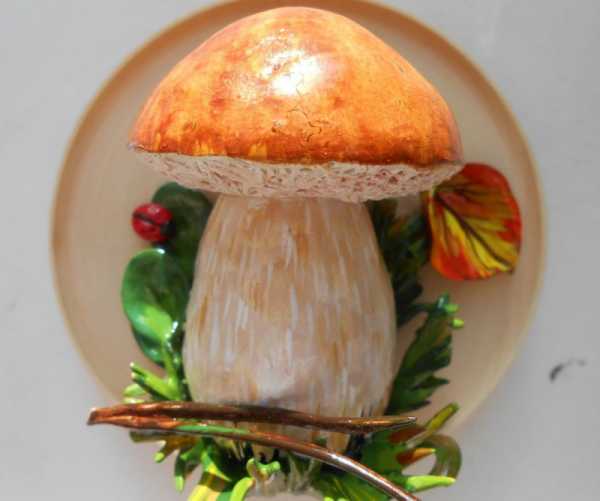
Wooden crafts
Almost any kind of mushroom can be made from wood. The photo shows the boletus. To make them, you need a hacksaw, chisel, ax, knife, hammer, file. If you use a grinder and a grinder, the work will be greatly simplified. The base for the mushroom can be made in the form of a saw cut 3-5 cm thick. The legs and caps are rounded with an ax, knife and file. Details are painted and fastened with wood glue. You can securely connect them with nails or screws.
Bright wood chanterelles look spectacular on the site. Each mushroom is assembled from 3 parts:
- A short stem is a cylindrical section of a tree trunk with a small diameter.
- Conical part. It doesn't need to be symmetrical. Usually the mushroom has an offset axis, which should be reproduced. Longitudinal grooves are made on the surface of the cone.
- Hat. It is made in the form of a cut of a trunk of any shape.
Completes the staining process. The leg and cone are painted orange, and the cap is painted yellow. Chanterelles can also be made by combining wood and polyurethane foam. A leg is made of wood, and a cone and a funnel-shaped head are formed from layers laid in a circle (with a gradual increase in diameter upwards).
Crafts from cereals: 150 photos of the best ideas and tips on how to make a DIY craft for children and adults
In the kitchen, any housewife will definitely have different types of cereals: peas, buckwheat, rice, pearl barley, lentils. You can use them not only for their intended purpose, but also in a slightly non-standard way - making all kinds of crafts.
This activity is sure to please both adults and children. How to make a craft from cereals, and what ideas can be taken as a model, we will analyze further.
We make topiary
The finished craft can become a beautiful interior decoration or take first place at exhibitions in a kindergarten, school.
To create it you will need:
- packing of green peas (it is better to take chipped peas);
- foam ball;
- glue gun;
- glue, preferably PVA;
- dry moss;
- a pot - earthenware or any other;
- long wooden skewer or stick;
- green paint;
- brush;
- stationery knife.
Take green paint and a paintbrush, paint the ball and remove it until it dries completely. Take a wooden skewer and make a hole in it for the trunk of the topiary.
Gradually glue the peas to the ball: small areas are gradually smeared with glue and gently sprinkled with peas. Using this technique, fill an entire ball with peas and leave to dry overnight.
After the ball is dry, fill the empty spaces with peas if necessary. We attach the barrel - drop a little glue on the tip of the skewer and place the stick in the prepared hole.
Fill the pot with floral foam, stick the barrel into it. Finally, decorate the surface protruding from the pot with dry moss. Do-it-yourself cereal craft for children is ready!
Photo frame magnet
Frames decorated with cereals look original and interesting. They will be a great gift for relatives and friends.
What you may need in the creative process:
- cereals of various types (beans, peas, rice, millet);
- thick cardboard;
- pencil;
- scissors;
- glue gun;
- 2 magnets.
First, cut out a frame of the desired size from cardboard. It can be of any shape: round, triangular, square, etc.
Then, using a glue gun, glue it nicely with cereals. Examine photos of this kind of cereal crafts to choose a more attractive frame design option for yourself.
For example, you can lay out various patterns, ornaments, drawings, draw flowers, butterflies, and much more. Finally, glue the magnets to the photo frame.
Christmas tree decorations
To create Christmas tree decorations, you do not need to study the patterns of cereal crafts. The process itself will be very simple, so even the smallest children can be attracted to it.
Prepare:
- plastic balls or Christmas decorations that have long lost their attractive appearance;
- different cereals;
- glue and brush;
- a plate;
- satin ribbons.
Pour the cereal you want to decorate the toys with into a plate. Cover the ball with a layer of glue, then roll in the rump. It is advisable to make a ball of peas or buckwheat in one layer, from rice or millet in two. Leave the toy to dry, then decorate it with satin ribbons.
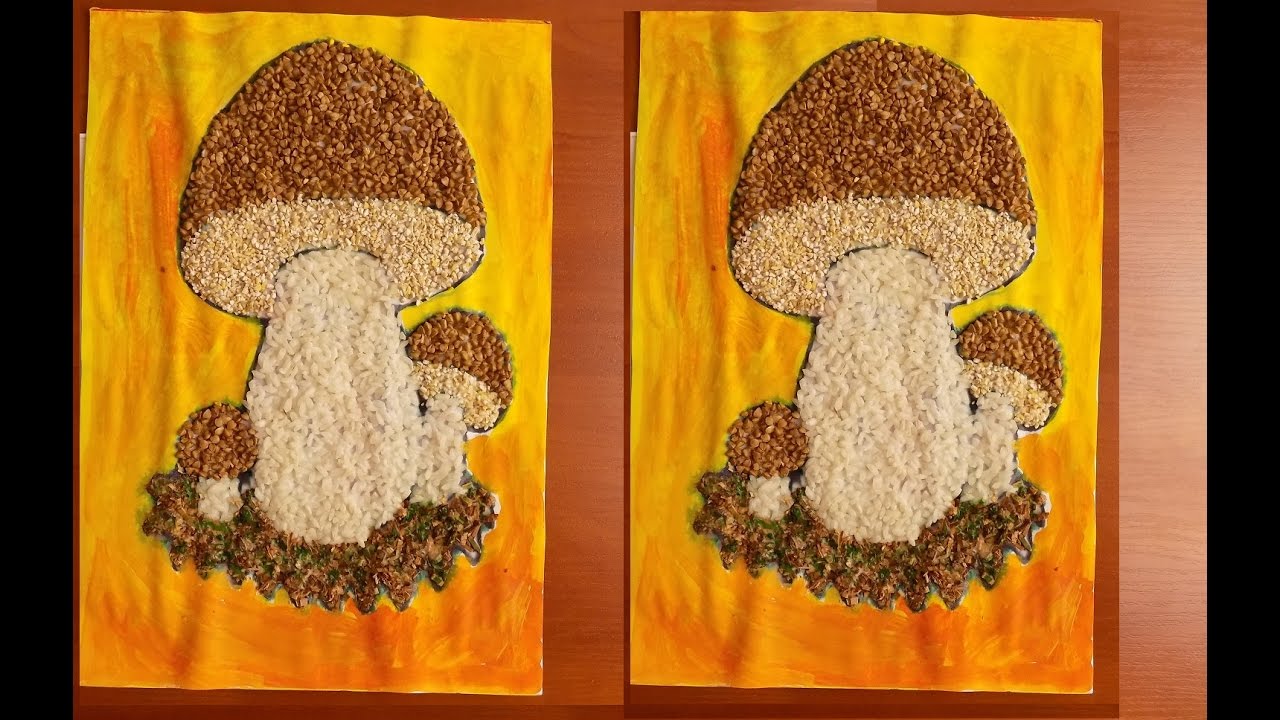
Mushroom
Such an autumn cereal craft is well suited for the next competition in a kindergarten or school. To create it, it will come in handy:
- colored cardboard;
- pencil and eraser;
- scissors;
- brush and glue;
- cereals: semolina, buckwheat, split green peas.
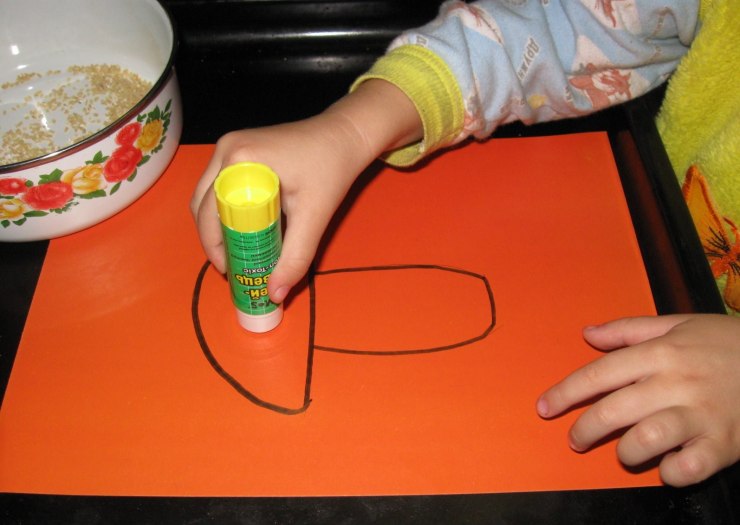
Draw a mushroom with a large head and a thick stem on the cardboard. Cover half of the hat with glue, gently distribute buckwheat over it, do the same with the second half.
Then proceed to processing the legs, smear it with glue and cover it tightly with semolina. With the help of green peas, you can depict a clearing, just glue it to the foot of the mushroom. Leave the craft to dry completely.
Helpful advice
Very often it is necessary to create a juicy, colorful craft in bright colors: blue, red, black, pink, purple.
It is very difficult to find cereals of such shades in your kitchen.But you can always simply and quickly paint available ones.


How to color craft cereals? You will need:
- food coloring (can be taken from Easter sets);
- water;
- vinegar;
- the container in which the staining will take place;
- baking sheet.
We mix the dye with water, add a little vinegar to the solution. We fill in the cereal and mix well so that each grain is colored on all sides. After that, pour the cereals into a baking sheet and put them to dry in the oven at a temperature of 180 degrees. That's all!
Try making your first cereal craft. You will certainly be satisfied not only with the result, but also with the very process of its creation.
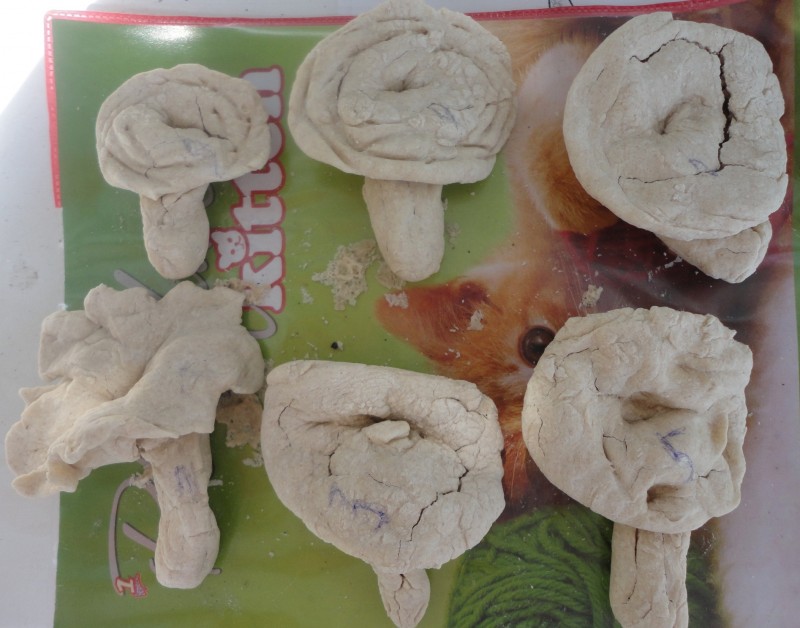
Dough mushrooms
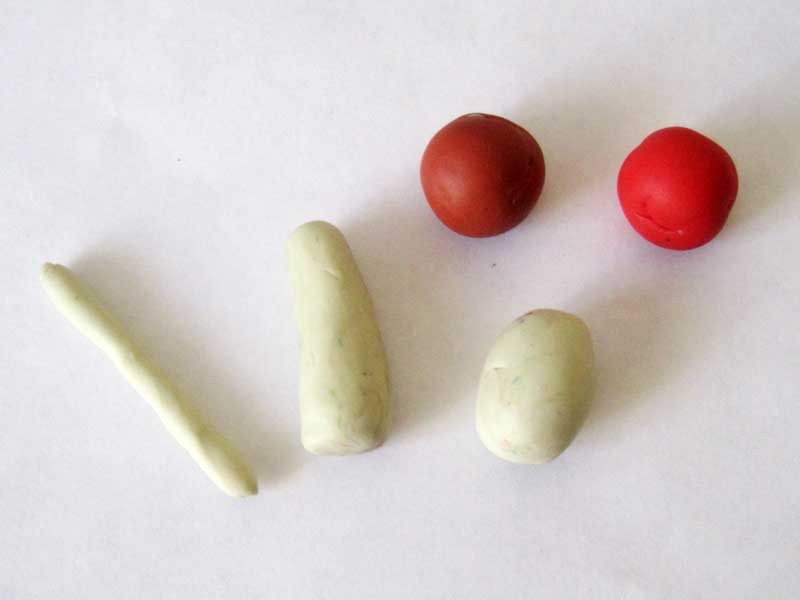
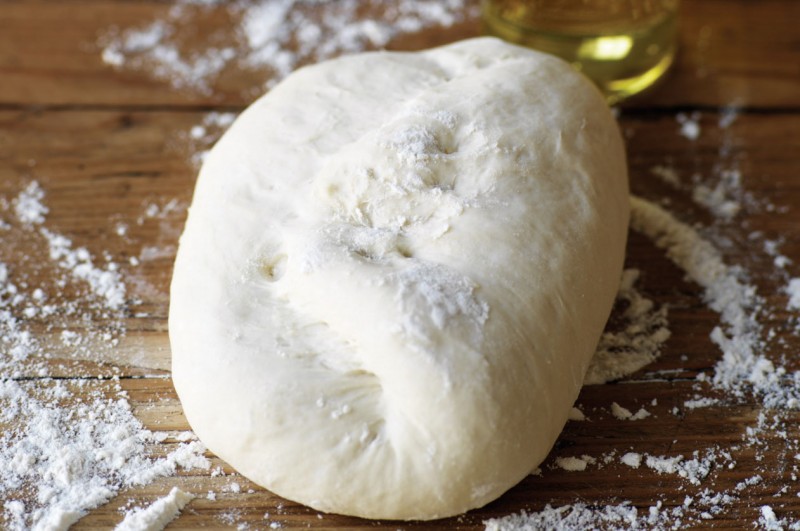
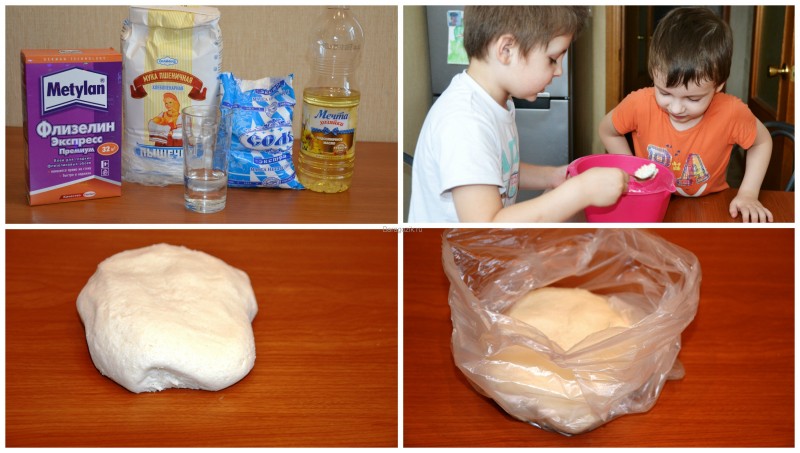
To work, you need to prepare the dough. You will need half a glass of finely ground salt. Hot water is poured into a glass of salt and the whole mass is kept in this form for an hour. After that, the solution should be poured into a bowl and add 2 tbsp. PVA glue for fastening strength, as well as flour. From a novice master, you will need to knead a thick dough.
The stem of the mushroom must be formed around the base in the form of a foil rod. The hat can also be wrapped around the foil, or it can be sculpted without it. For fixing on the leg, the attachment points should be treated with water. The blinded craft mushroom from salted dough is sent to the oven and dried over low heat for 10-13 hours.
If the composition is very large, then first the leg is dried for an hour and separately the hat, which must then be fixed to the support hot. After bonding, the entire structure is sent to the oven. It is recommended to dry the extracted mushroom naturally, for example on the balcony.
Mushroom from a disposable plate
Such crafts "mushrooms" for kindergarten are perfect. After all, a minimum of material is required to make them, and the process itself will be very exciting for children.
The following is required:
- one disposable paper plate;
- one cardboard roller or sheet of cardboard;
- paints and brushes;
- pin;
- cotton wool;
- PVA glue.
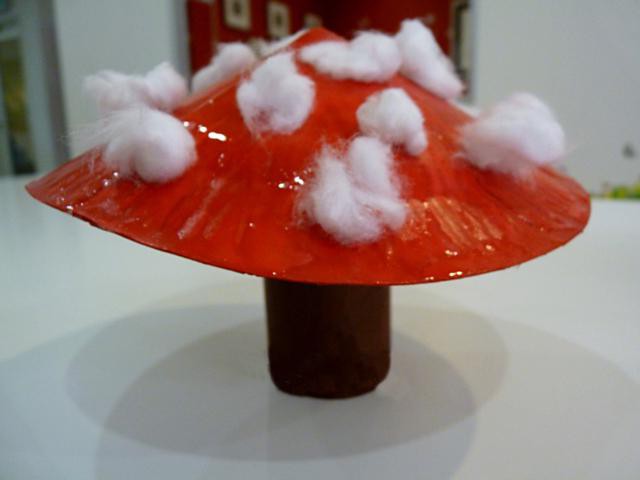
Operating procedure:
- Take a plate and make a small fold on it, giving it a more convex shape.
- Lubricate the fold with PVA glue and secure it with a clothespin until the plate is dry.
- If you do not have a ready-made cardboard roll, then it is easy to make. To do this, take a sheet of cardboard and cut off a third of the width from it. Roll the paper into a roll and glue it together.
- Let the glue dry on a plate and roll.
- Take red paint and paint it on a plate.
- Until it's dry, tear the cotton wool into small pieces and stick it randomly onto a plate. As a result, you will get a fly agaric hat.
- Paint the cardboard roll with white, beige, or brown paint.
- Cover the top of the roll well with glue and glue a plate to it.
- Let the mushroom (craft) dry.
All is ready!
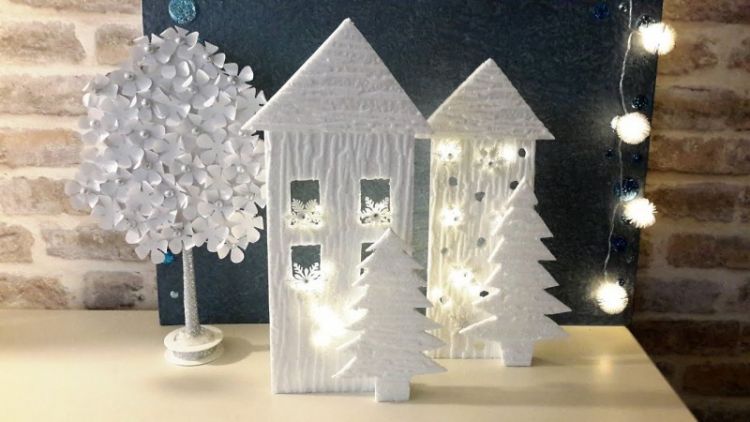
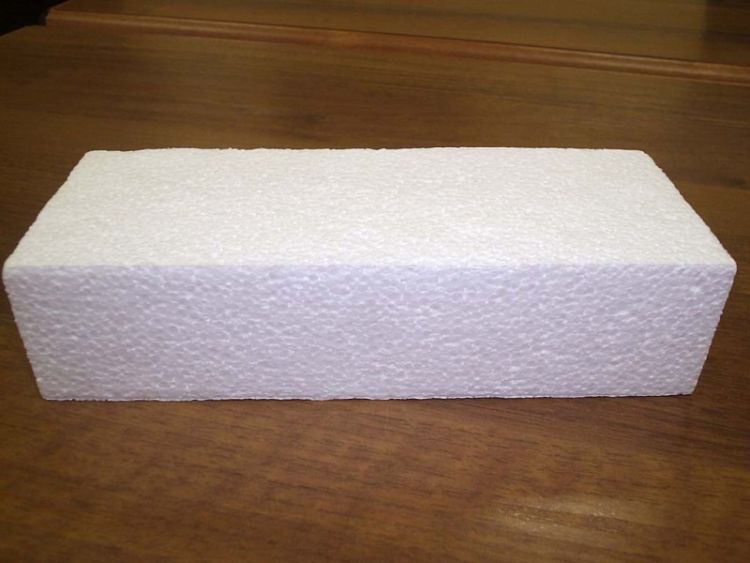
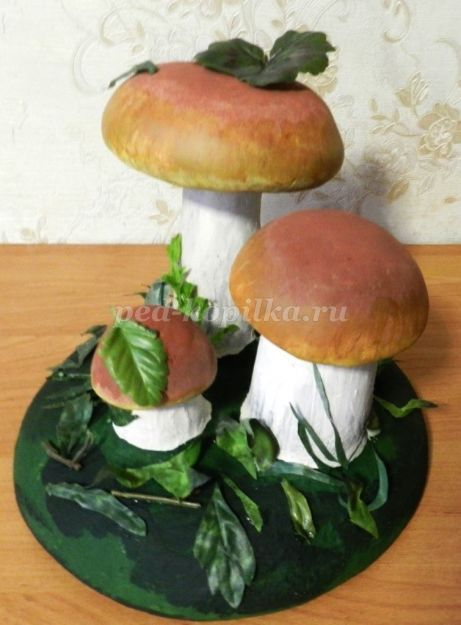
Styrofoam properties
Before making exclusive masterpieces, you need to know about the properties of the material. Polyfoam is a plastic mass filled with air. It is also called polystyrene foam. It is incredibly lightweight, quick to cut, pliable in processing. Therefore, it is comfortable to work with him.
Styrofoam can be connected with glue, putty, screws, liquid nails. Therefore, there is no particular difficulty in making any products from it.
At the same time, it is necessary to monitor the materials for working with expanded polystyrene. You can not use for its processing agents that can destroy it (dichloroethane, benzene, acetone, etc.)

Mineral, organic acids, ammonia should be used with caution. Before starting the manufacture of the product, you should check the material for contact with these agents.
To give the finished product a beautiful appearance, it must be painted. For this, any dyes are used that do not contain elements that destroy foam.
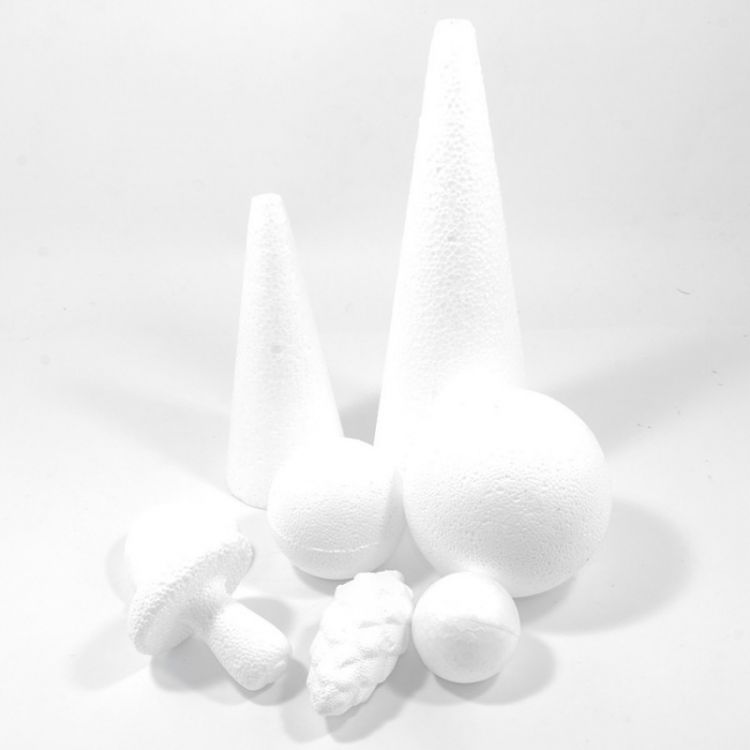
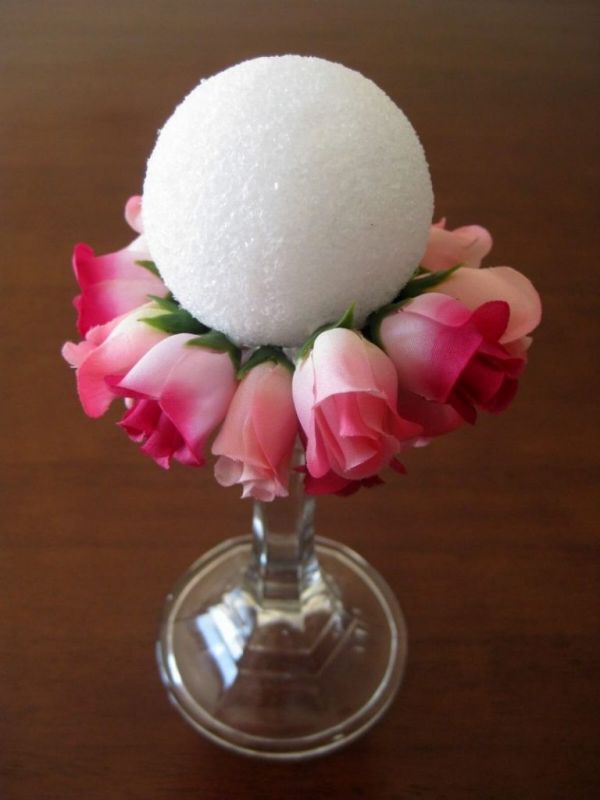
What else can you make with foam balls?

Due to its availability and low cost, polystyrene foam is an excellent basis for children's creativity.You can endlessly experiment with this material. Try to make figurines of smeshariki or a caterpillar. By collecting several blanks together, you can get different animals and fairy-tale characters. Small foam balls can be used to craft jewelry. Try covering them with fabric or paint. Ready-made elements can be simply strung on a thread or sewn together. If you have a lot of very small balls, you can use them as filler for pillows and Crafts from foam balls can be made different every time, training your imagination and mastering all the new needlework techniques.
Hey! New 2016 is coming very soon. It's nice to decorate your home with interesting DIY crafts. I wanted to make one snowman, but the lesson turned out to be so exciting that, without stopping, I made a company of three cute snowmen who, making their way through the snow-covered forest, carry Christmas trees to our house :)
In order to make New Year's snowmen, I needed foam balls of different sizes (large and small), wire, eyes - beads, soft fabric (fleece or felt) in four colors: red, blue, green and yellow, silicone hot glue pistol, buttons , scissors, felt Christmas trees, ballpoint pen, wire tinsel for pompons, stationery knife.
Having picked up 3 pairs of balls, I decided to make three snowmen, the Snowman in a red hat with a pompom and a scarf is the smallest and most remote. I made it first and for its manufacture I used a red fleece fabric (like felt).
For the scarf, I cut a strip of fabric 3 cm wide and 20 cm long. At the edges of the strip, I cut a fringe (I made cuts about 1.5 cm long with a distance of 2-3 mm between the cuts).


For the hat, I cut out a strip of fabric 14 cm long and 7.5 cm high. I cut a fringe on the top of the strip and pulled off the pompom using wire tinsel.
I cut a triangle out of red fabric and glued the edges, giving it the shape of a nose and drew a mouth with a black ballpoint pen.
Having pierced the body with a wire (16 cm long) through and through, attached the sleeves (3.5 cm wide and 4 cm long) to it, cutting them out of the green fabric folded in half, and then glued red mittens to the ends, also double, to hide the edges of the wires inside. The snowman can now move the handles.
Bending the handles, I glued a Christmas tree to his right hand, and glued green buttons on the snowman's body ...
For large snowmen, I picked up foam balls in size: for a smaller head, and more for bodies. I glued them together, cutting off the tops of the balls with a clerical knife, which I then use for shoes.
To dress these snowmen, you need 2 scarves of different colors, 30 cm long and 3.5 cm wide.
For hats, the size of the fabric strips is 23 cm long and 10 cm wide. I cut one edge of the cap with a fringe and tighten it with wire tinsel. 
Glued 2 pockets, buttons and a herringbone. I pasted stars on the hat and pockets. Decorated the Christmas tree with rhinestones.
From the pieces from the tops of the foam balls, I made pretty shoes for the snowmen, gluing the fabric of the color of the clothes on the soles.
A large snowman made of snow is one of the main symbols of winter. If the winter turned out to be snowless, or you just had a desire to decorate your home on the eve of the New Year holidays, then there is only one way out - to make a snowman with your own hands. This process is quite easy and fun, and you can use a wide variety of materials at hand.
A large snowman made of snow is one of the main symbols of winter
An original snowman can be made from ordinary cotton wool, which will certainly be found at home.
It looks very attractive, but it is made madly simple. To make it you will need:
- An empty deodorant bottle
- glue;
- cotton wool;
- buttons;
- tapes;
- beads;
- buttons;
- colored cardboard.
Crafts are created in several stages:
- The bottle is first of all pasted over with cotton wool, given the necessary shape and dried.
- A spout and a cap are made of colored cardboard, and decorated with beads.
- Buttons are glued to the body.
- Nicely tie a ribbon around the neck.
- A mouth and eyes are cut out of paper, they are glued.
Tree stumps
Often, stumps located in a suburban area create problems for the owners, violate the harmony of the appearance of the territory. However, with a little creativity, they can become additional design elements. The final compositional solution depends on the size of the stumps and their location. You can offer the following options:
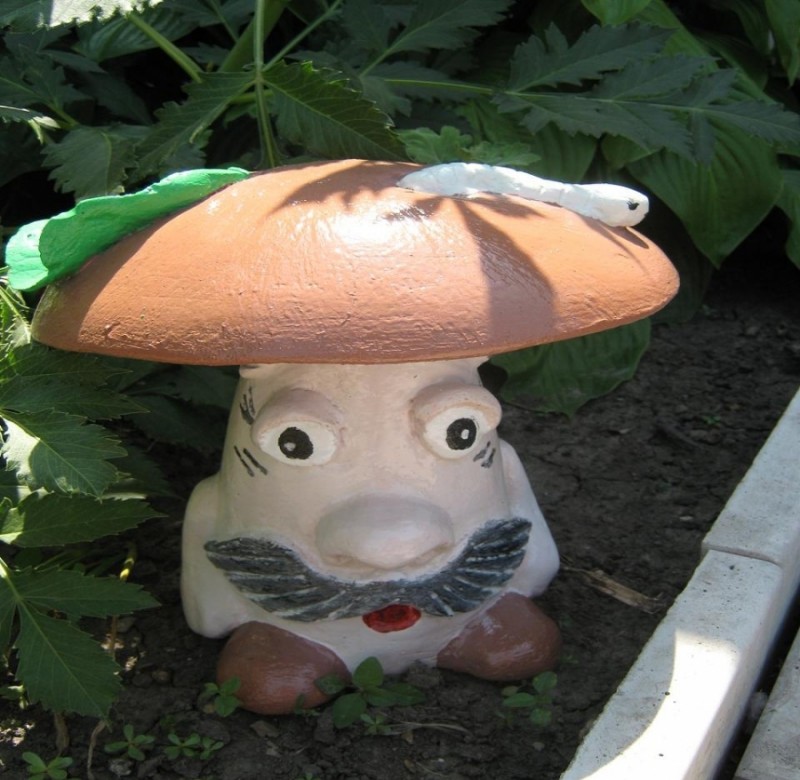
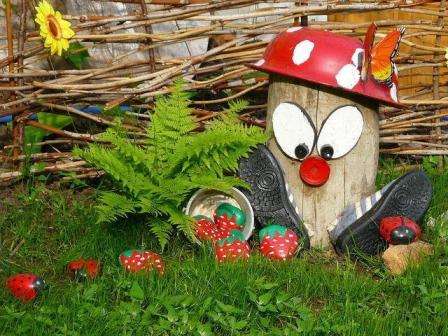
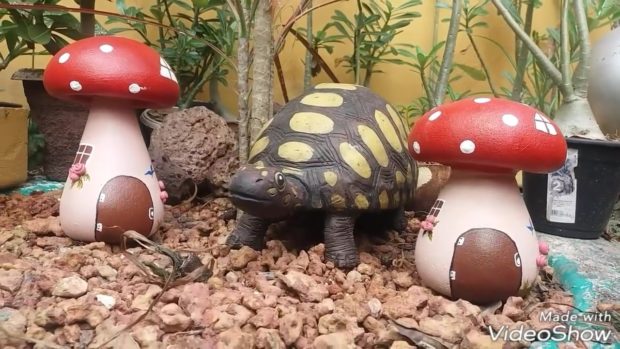
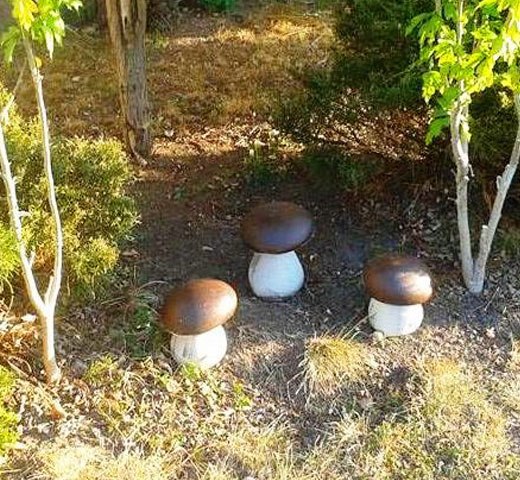
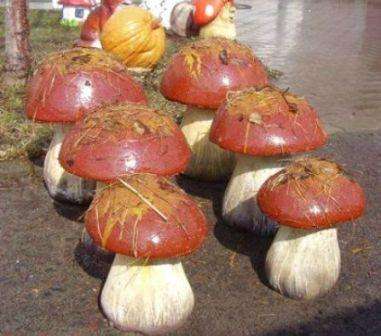
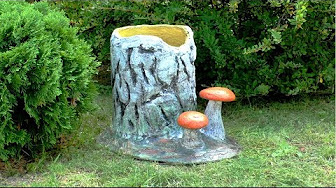
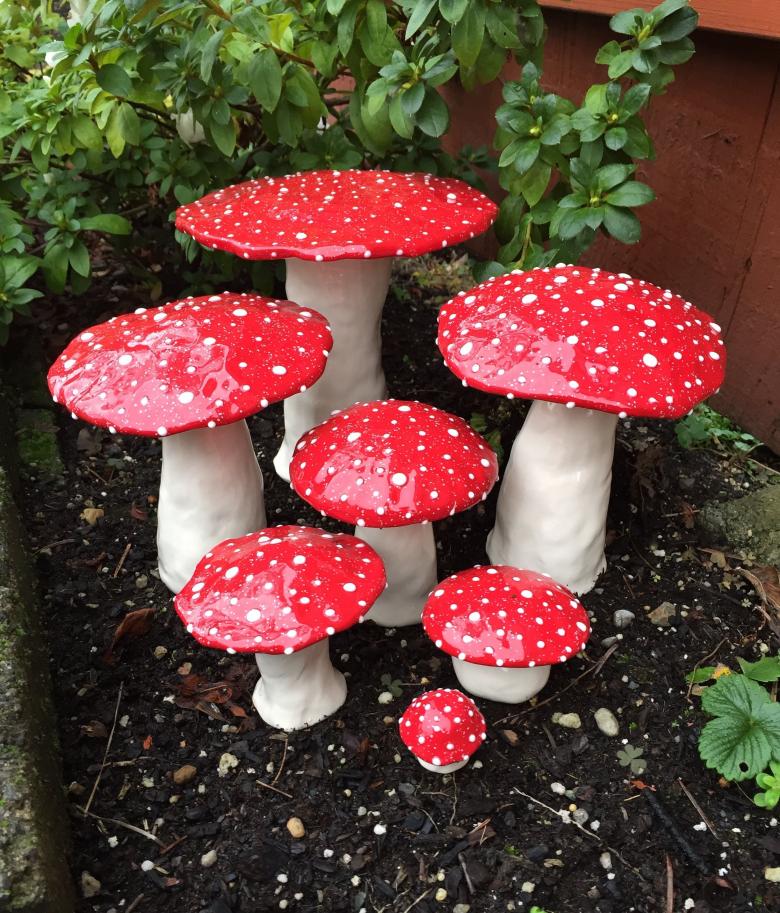
Amanita from birch stumps. The white bark naturally mimics the leg. It is enough to fix a red plastic bowl on top and draw white circles on it.
From a large stump, you can make a funny mushroom that a child will surely like. It is necessary to remove the bark as much as possible and clean the surface with sandpaper. A laughing face is drawn with a brush (no special artistic skills are required for this)
It is important that a funny character appears. A basin is put on top of the stump, it is painted with brown acrylic paint.
A mushroom family can be located on a stump of a sufficiently large diameter. Its cut is painted with green paint or covered with moss. Small mushrooms from rounded stones are planted in a mini-clearing. A pebble of a light shade is selected for the leg. It is better to paint the hats in a bright color.
Girlfriends
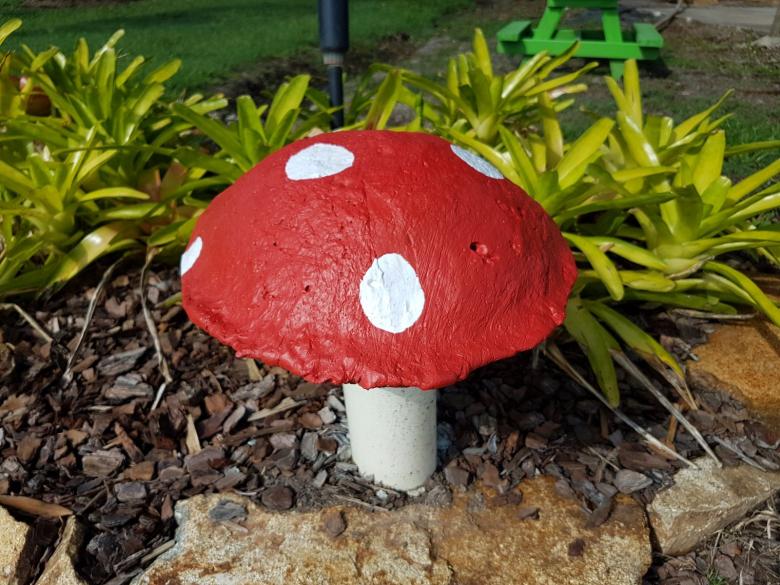
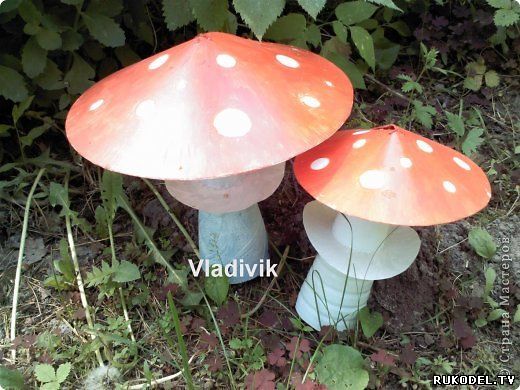
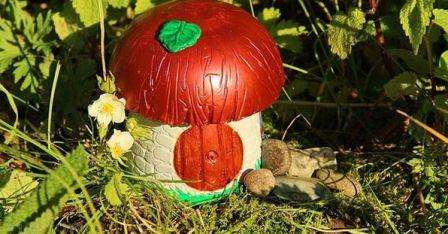
Decorate the kids corner with decorative mushrooms. It's easy to make them. Decorative mushroom hat. Take a bowl that looks like a mushroom cap and put a plastic bag over it, then fill it with a solution (cement, sand in a ratio of 1: 3, water). In summer, you can make the decorative mushroom more "natural" - for this, make indentations in the sand with a bowl and put a burdock leaf in the holes formed - it will create "wrinkles" and small cracks on the edges of the cap, thus enhancing the decorative effect.
After 30 minutes, insert three large nails (or a small piece of water pipe) in the center of the cap, halfway into the solution (for the bond). Leave until the solution hardens completely. The leg of a decorative mushroom. From roofing material, old linoleum, or a plastic bottle, model a mushroom leg by rolling the material into a tube and secure with tape
Attention - do not use bottles (cylinders) of substances under pressure !!! - air fresheners, deodorants !!! Assembling a decorative mushroom. Place the finished hat on the mushroom leg, sprinkle the junction with wet sand, tamp it slightly, and carefully fill the solution
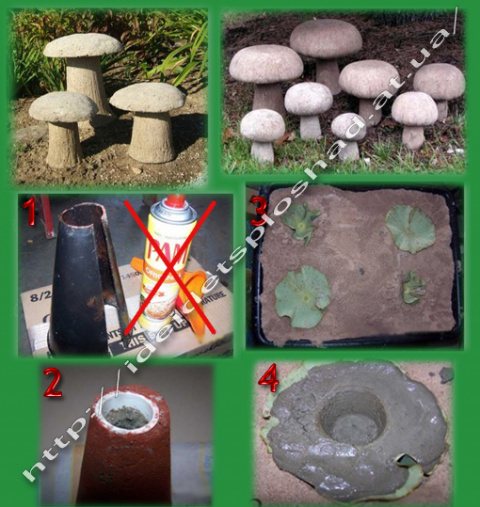
After three days, the mushroom is ready. Putty the bumps, paint and set it to decorate the kids corner.
A source
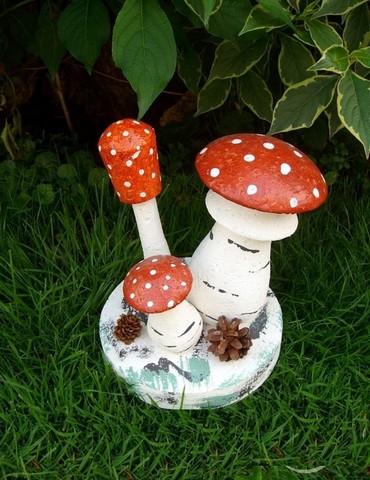
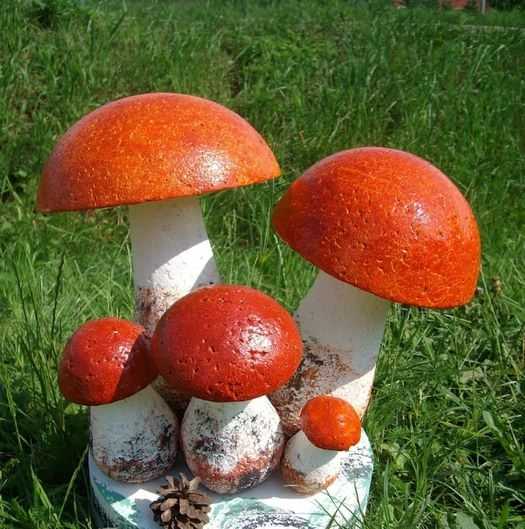
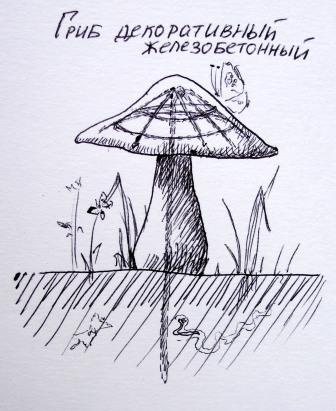
Do-it-yourself garden and garden sculpture.
In recent years, more and more people are beginning to look at their summer cottage or backyard plot not only as a potato and fruit plantation, but also, so to speak, from an aesthetic point of view. Our desire to plant a flowerbed, equip a sandbox, put up a brazier, build a fountain and in general ... There will be a garden city here ...
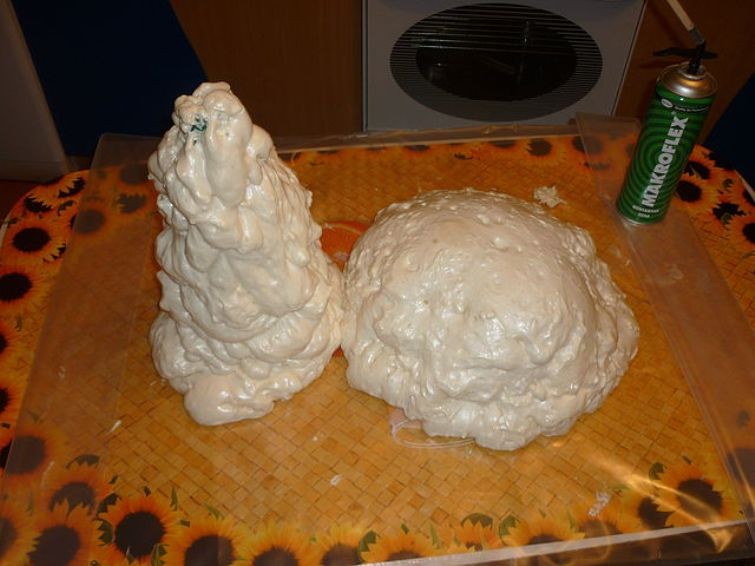
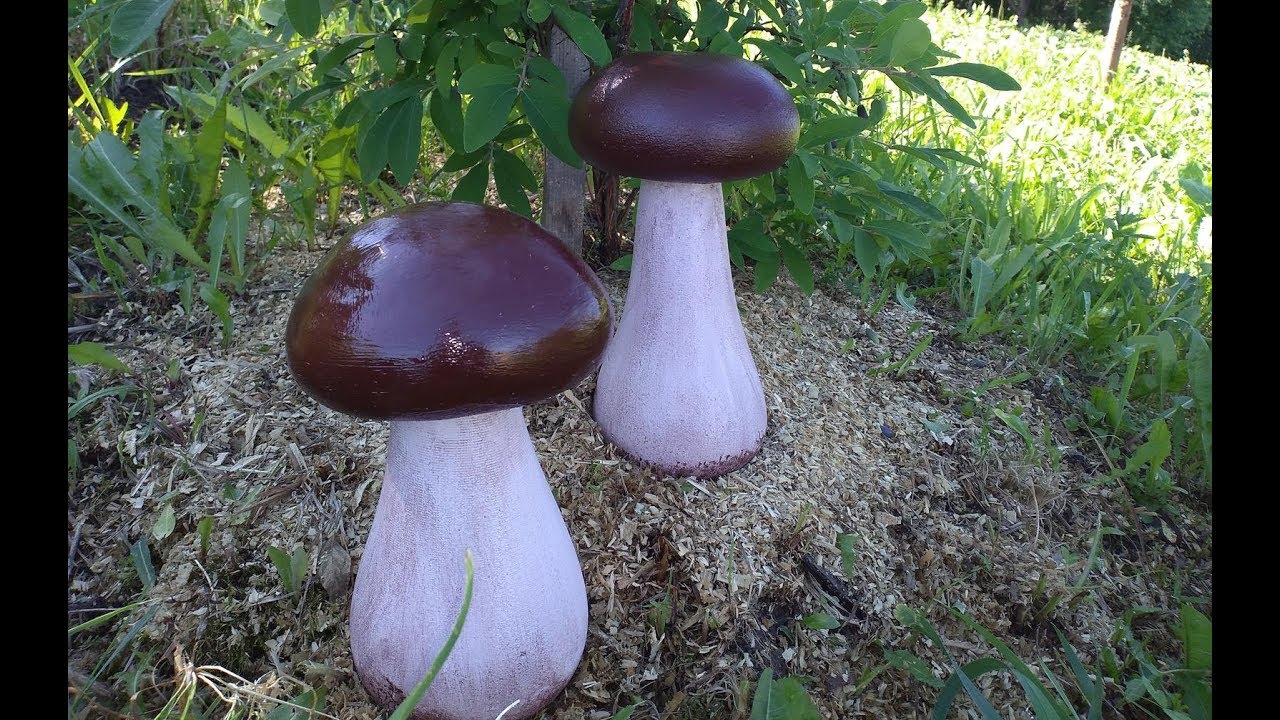
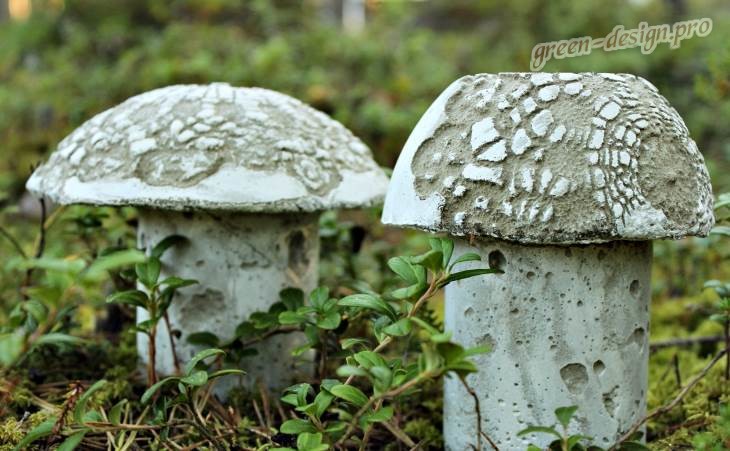
Garden and park (or rather, garden and garden) sculpture does not at all imply two-meter statues of Greek goddesses, wrought-iron lanterns and drinkers for birds, or marble fountains. The so-called small forms depicting all kinds of ducks, birds, frogs and gnomes can be found both in the store and in the art salon. But it's even better, and certainly more interesting, to make them yourself. And for this you do not need to comprehend the blacksmith's craft, finish Surikovka, build a muffle furnace or crush fireclay. There would be a desire. It is not without reason that our people are famous for their golden hands. So, it's time to break away from hilling strawberries and feel like Phidias. We will reveal the "secrets of technology" using an example of a simple, accessible to everyone and very attractive form. We will plant reinforced concrete mushrooms.You will need: cement, gypsum, PVA glue, water, a basin and a spatula to mix it all; thick flexible wire, even thicker wire (reinforcement), pliers or any other convenient tool to bend this wire; any water-repellent impregnation for concrete surfaces (for example: Aquastop); acrylic paint of the colors you need and varnish (for example: Tsaponlak or PF-283).
Description of work: We mix 5 parts of cement with 1 part of gypsum and, gradually adding water, we knead a thick dough (approximately like a shortbread for a pie). We add a plasticizer (in our case, it is PVA) from an approximate calculation of 1 tablespoon per kilogram of concrete mass.
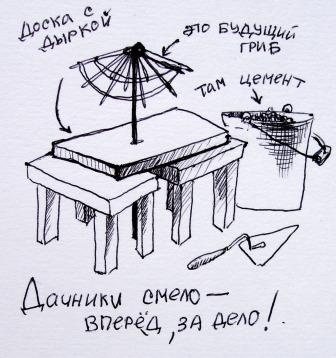
Now we make the frame. We take the thickest wire. She will serve as a leg for the mushroom. 20-25 centimeters will remain below as a "pile" + the height of the mushroom. For the convenience of work, drill a hole in the board, which will serve as a work table, and fix the future mushroom. We twist one end of the pin (you can attract dad, brother, grandfather) to strengthen the structure of the hat, and construct a web umbrella from a thinner wire. If the mushroom is planned to be tall and thick, then it is worth entangling the leg with a spiral. And then - full scope for imagination and ingenuity. We dress our skeleton with cement. Take your time so that the mass does not creep. If you have to leave the work for a while, do not forget to wrap it up with a damp cloth and cellophane, otherwise all the work will go down the drain.
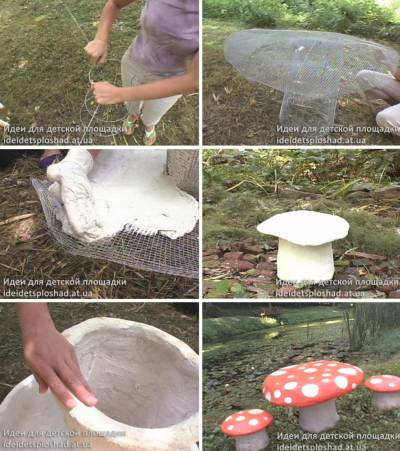
Are you finished? Dry. And slowly and naturally, not in the sun. We cover with impregnation, paint, varnish and solemnly set up in the garden under the admiring glances of relatives and envious (kindly) neighbors. Such a sculpture will successfully survive all the rains and winds, but it is better to put it indoors for the winter.
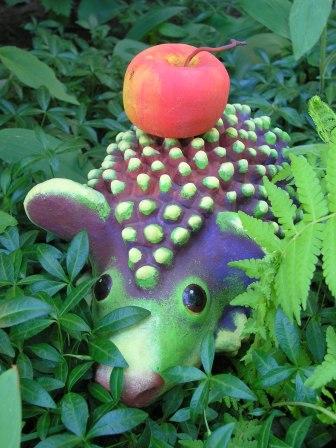
When you master the technology, you can start conquering new forms. Place under your decorative Christmas tree a couple of ripe apples (sprigs for an apple can be made from a bent nail) or pears. Let a turtle or a frog settle by the pond, and a green hedgehog in the front garden. In general - dare, create, sculpt and enjoy the unique look of your garden.
a source
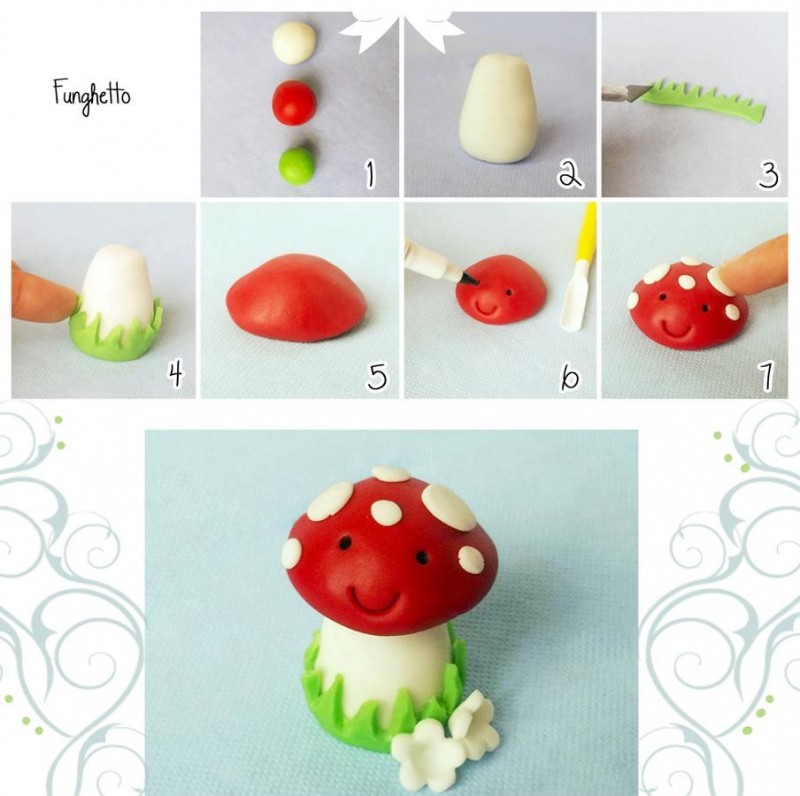
The most common plasticine crafts
Technique plast
The ideal material for children's creativity is plasticine. Soft, pliable, colorful material Connect your imagination and create a collection of mushrooms.

We need:
- plasticine;
- table;
- board for rolling plasticine;
- knife stack.
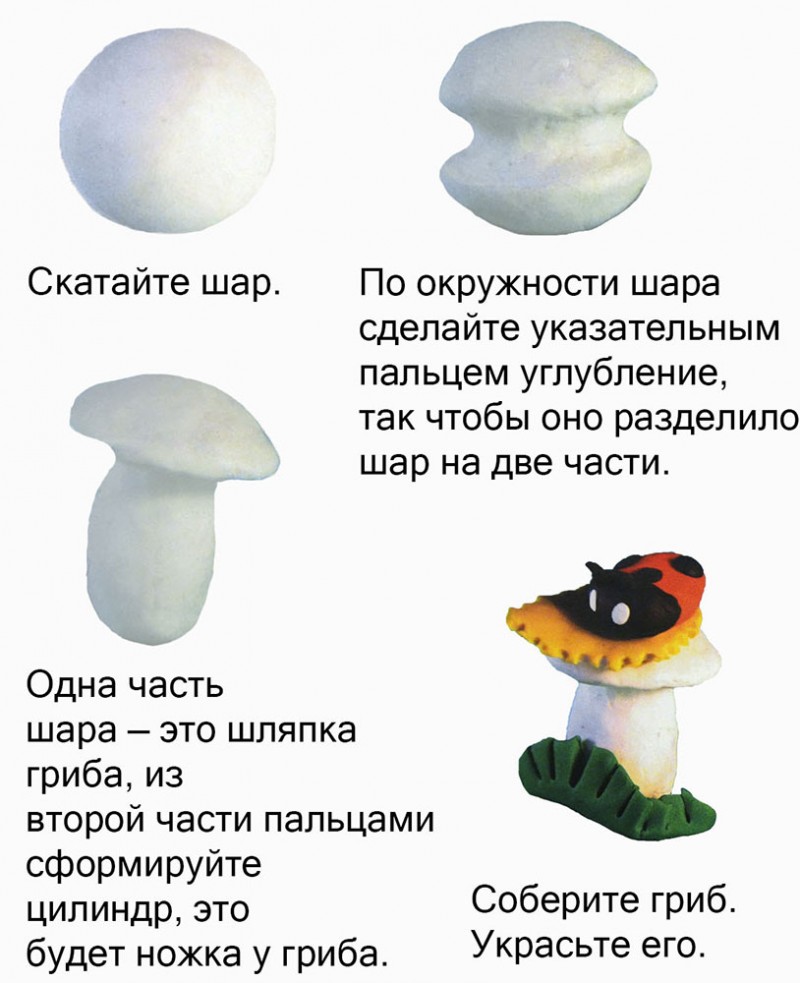
First, roll up the sausage. Where there is a mushroom cap, we will make the trunk thinner, and where the roots of the mushroom, then the trunk will be thicker. To make a mushroom hat, we will roll up a ball and flatten it to the size of the hat we are supposed to be. Such simple mushrooms are offered to children to sculpt in kindergarten, gradually complicating the tasks.


To make grass, we roll a green sausage, ivy it a little and cut the fringe, like buddhas of a blade of grass. And wrap the fly agaric. We attach white, small, flattened balls to the hat.
If the children still have attention, you can offer to make the mushroom eyes from white balls, mouth and nose with a knife

Consider another version of the mushroom, only with a double hat. We roll two white sausages. One smaller one is needed for the skirt, we fasten it around the trunk and flatten it. Next up is the hat. We roll two balls from white. We flatten the first, leave the second, it will give us volume for the second hat. We take red plasticine, form one ball. Stretch over the white ball and the first hat. We make the patterns inside with a stack knife. It remains to stick white peas and our mushroom with a double hat is ready.

Working with plasticine involves different modeling techniques, for example, the layer technique, which is performed by rolling it with a rolling pin or a free bottle of plasticine, like dough. We cut out a silhouette and other details of the craft from it. The drawing is layered.
Smear technique
Another technique to consider is the smear technique.We smear the plasticine over the prepared surface.
The techniques discussed above are used for flat appliqués. We will study in more detail the technique of the smear using the example of the craft House
We need:
- plasticine;
- a small jar with a lid;
- hot water;
- knife stack.
We take a jar of glass, plastic, heated plasticine with hot water, spread it over the surface of the jar. We leave room for the door and windows, which will be made with the same technique, but in a different color. We complicate the work with additional elements. Add green branches and pink creeper flowers to the house, doors, window, use a stack to depict the material from which the house is built, a brick or a tree.
We fill the surface of the lid with plasticine and the work is ready.
As a decoration inside the house, you can place a light bulb, a luminous toy.
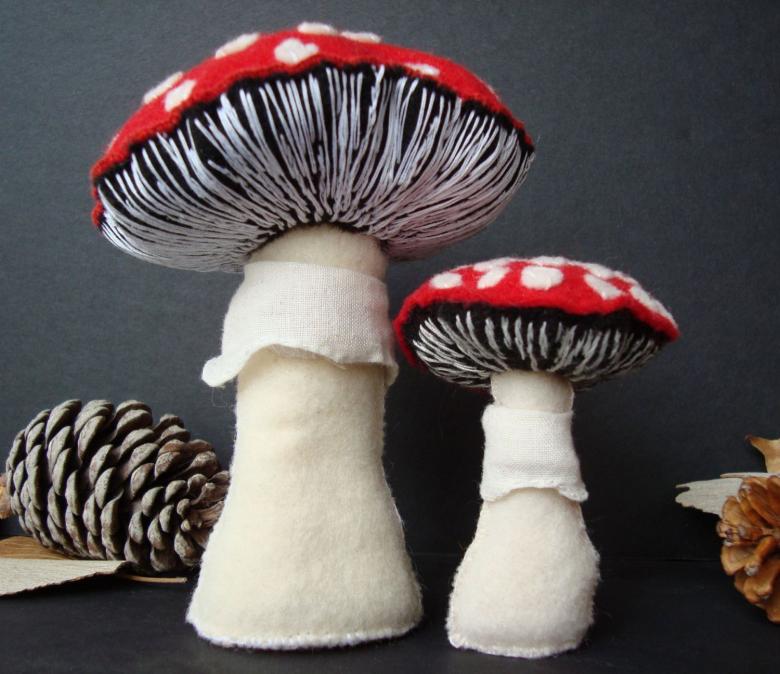
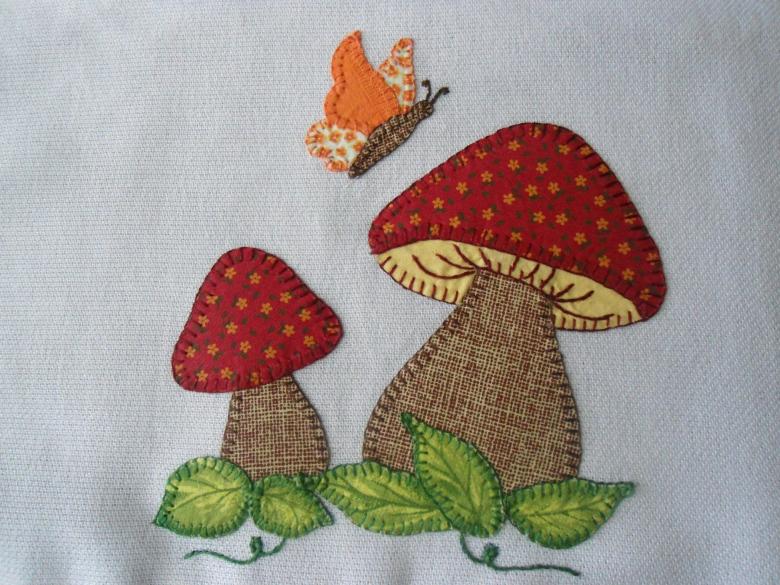
Bag mushrooms
It takes much more effort to create such a mushroom than in previous workshops. But this craft looks very beautiful, and the process of its creation will please not only a child, but also an adult.
You will need to take:
- burlap (you can buy pieces of fabric at the store or take a clean bag);
- paints and brushes;
- buttons;
- thread and needle;
- PVA glue;
- filler (cotton wool, synthetic winterizer, pieces of fabric, etc.);
- scissors.
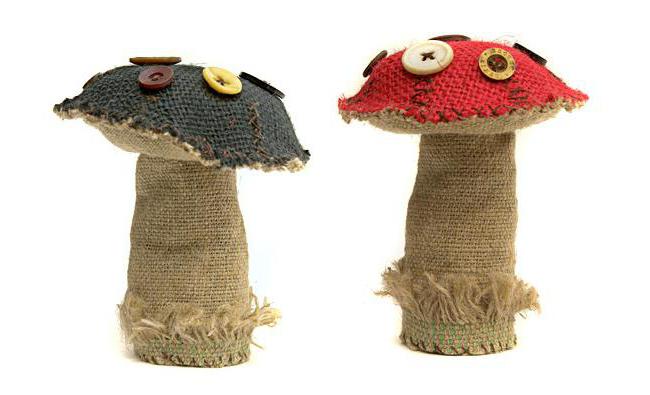
Master Class:
- Cut three circles out of the burlap.
- Paint one of them some color (for example, red).
- Take another piece of burlap and cut out a rectangle.
- Sew a tube out of the rectangle. To do this, fold it in half lengthwise.
- Turn it inside out.
- Fill the tube with any filler.
- Take one of the two uncolored circles.
- Place the straw in the center of the circle and sew the two pieces together. To do this, sew cross stitches on the outside.
- Cover half of the fabric that is not sewn with glue and press firmly against the tube.
- Add more filler to the stem of the mushroom.
- Take the colored circle and sew the buttons to it.
- Take two circles - one dyed the other is not - and sew them together also with cross stitches. Put some filler inside before stitching.
- Sew the cap to the leg.
- Sew some decorative stitches on the hat.
- Take a needle and make a fringe of the fabric that remains free on the bottom of the leg.
A beautiful soft fungus is ready!