Content
- 1 How to grow an orchid at home
- 2 Selection of soil and capacity
- 3 Orchid - flower description
- 4 Growing features
- 5 Planting an orchid at home
- 6 Features of orchid care
- 7 Fertilizing and fertilizing a flower
- 8 Pruning orchids
- 9 Orchid transplant
- 10 Orchid propagation
- 11 Orchid bloom
- 12 Pest disease problems
- 13 Popular species (varieties)
- 14 Useful tips (note to the florist)
- 15 Answers to readers' questions
- 16 How to determine if a flower needs a transplant?
- 17 When to transplant at home?
- 18 How often to replant?
- 19 Which pot to transplant?
- 20 What soil to transplant?
- 21 Transplant instructions: step by step with a photo
- 22 How to seat the kids correctly?
- 23 Post-transplant care
- 24 How to water after transplanting?
- 25 Possible mistakes
- 26 Useful video
- 27 Why is it necessary to transplant an orchid
- 28 What needs to be prepared for a flower relocation
- 29 How to prepare the orchid itself for transplantation
- 30 Planting a plant in a new pot
- 31 Post-transplant care
- 32 Does the type of orchid matter
- 33 How to plant an orchid with a shoot
- 34 How to decorate an orchid beautifully after transplanting
 Watching television programs about tropical flora, we are always amazed at the riot of colors and forms of plants growing in those latitudes. Did you know that there are many plants from tropical latitudes that can be quite successfully kept at home, and they will delight you no less than those on the TV screen? In order to prove this, take, for example, an orchid, a flower - which is striking in its originality and at the same time, ease of cultivation.
How to grow an orchid at home
Although they are considered capricious plants, many flower lovers, both professionals and amateurs, they grow on windowsills without any difficulty. To successfully grow orchids at home, you need to prepare well from the beginning, and then everything will go “knurled” and will be simple and easy. It is necessary to prepare several things: soil, containers for a flower, fertilizer. All this is in abundance in most flower shops. You also need to study information about watering, lighting, transplanting. It is not necessary to delve into the details, but it is necessary to study the general information.
What should be the lighting
What always attracts us in any color is, of course, the bloom itself. So how to grow an orchid at home, and even so that it blooms? This requires a lot of light. Moreover, lighting has a major role here.The most important thing is to find a middle ground, because if there is too much light, the flower will just burn, and with a lack of light, the plant will not bloom at all. The question immediately arises, how to determine this golden mean. Here the flower itself will tell you. With a lack of light, the leaves will be dark green (should be light), and if you overdo it with lighting, the leaves will begin to turn yellow.
Features of watering a plant
 Along with lighting, watering is also important. In nature, orchids never grow in water, their roots cannot tolerate an excess of moisture and standing water, so extreme care must be taken with watering. Factors affect the frequency of watering:
- the duration of daylight hours;
- the size of the container in which the plant is located;
- watering and feeding;
- other external factors such as dry air and ambient temperature.
The plant will immediately react to a lack of moisture with dark green leaves, and to waterlogging yellow leaves and rotten roots.
Increased watering is required only during rapid growth or flowering. Watering should be done as follows. It is necessary to water the plant under the shower with warm water so that the soil is completely wet and the water completely drains out through the drainage holes. Only after the water has completely drained can the plant be put back into the pots.
Selection of soil and capacity
The choice of a pot is very important for the favorable growth of the flower. Mainly used:
- transparent plastic containers;
- clay pots;
- baskets.
Some types of orchids from the epiphytic family are planted on a block. The block can be a piece of bark, and in order to prevent the roots from drying out, moss is used to retain moisture. Mostly miniature species or seedlings are planted on the block.
Now let's look at the soil. The selection of the substrate depends on what kind of variety you want to grow. If it is an orchid from the epiphyte family, then the soil will mainly play the role of supporting the plant in an upright position, protect the roots from excess moisture and provide them with the required amount of air. The substrate should consist of pieces of tree bark, coal, cork, moss, clay in granules and absolutely no garden soil, in general, from those components that do not retain moisture. It is also possible addition of coarse sand.
Any container capable of holding the substrate of the required composition is suitable as a flower pot. To grow terrestrial species, we need a substrate of the same composition as for epiphytes, but with the addition of a small amount of garden soil and dried leaves. All components must be finely ground. It is best to use plastic transparent containers with drainage as a pot. To hide the untidiness of the containers, you can always place the flower in a decorative planter. It is both beautiful and practical.
For beginners, it is advisable to buy ready-made soil in stores, rather than prepare it yourself. On the packaging, sometimes they even write for what type of this or that substrate. After gaining some experience, you can try to prepare soil for terrestrial orchids yourself from a soil mixture for epiphytes, moss and garden soil.
Optimum temperature for the plant
 Most plants require daytime temperatures from +18 to +27 degrees, and at night from +13 to +24 degrees. One of the most important conditions for flowering is the difference between night and day temperatures. With central heating, transferring a plant accustomed to heat to a cooler area overnight can produce good results. The plant can sprout. Orchids prefer air humidity of 60–80%.
If these figures are lower, then they can be achieved by placing a pallet with a grate under the pot. Such pallets can be purchased either in garden stores, or you can make it yourself by pouring water onto the bottom and placing a large layer of gravel on top. The main thing is to make sure that the roots do not touch the water.
In dry weather, spraying with a spray bottle will be helpful. Only it is worth calculating the time so that the plant has time to dry out by night. Plants are very air movement is also important... Especially for cold-loving species. An electric fan can be used for this. But it is worth protecting the plant from strong drafts. While blowing the plant, it is worth increasing the frequency of watering the flower.
Fertilizer selection
 For abundant flowering, regular, balanced feeding is necessary. It is best to do it once every two weeks. It is best to use specialized fertilizers for orchids, which can always be purchased at flower shops. The rules for preparing top dressing are usually written on the package.
In no case should you use fertilizers that are intended for other plants. This can lead to illness or even death of the flower. It is also worth remembering that during the rest period one should reduce the frequency of feeding... Sooner or later, the plant will need to be transplanted into a new pot. This is best done after the plant has bloomed and rested a little. The signal for this is the green part of the plant that has grown outside the pot. It is important to remember that you do not need to transplant if the root system just protruded above the surface of the container.
Plant transplant recommendations:
-
 Sometimes, in order to carefully remove the plant from the pot without damaging the root system, you have to cut the pot.
 - After that, you must carefully shake the plant from the old soil, cut off the old dried or decayed roots.
- Then you need to take a container a couple of sizes larger than the old one, pour some new soil on the bottom, put the orchid in a new pot and fill the space between the roots with a suitable substrate.
- After that, lightly press down on the soil, but do not over-compact. It is also necessary to ensure that the top of the flower (growth point) is above the surface of the soil.
Not everyone decides to reproduce orchids at home, since this is associated with a number of difficulties. There are two ways to propagate a flower - this is division during transplantation and seeds... Reproduction by seeds is considered impossible, since in a plant they are the size of pollen and require absolutely sterile conditions for germination, since even the smallest microbes can destroy them. Therefore, if you do not have a mini-laboratory at home, then you should not try. Reproduction by division is also difficult, but still quite real. And if a new plant develops a system of roots and leaves, then in a year it will delight you with flowers and become a wonderful decoration for your home.
Rate the article:
(3 votes, average: 1.7 out of 5)
Hard to believe, but orchids are not much younger than ferns. They existed 130 million years ago. Perhaps no flower has overgrown with so many legends as the orchid. In one of them, it is said that the beautiful Aphrodite, running through the forest, lost her shoe, and in this place an equally beautiful flower, an orchid, grew.
Another tells about a broken rainbow, from the fragments of which orchids grew.

For a long time it was believed that breeding them is possible only in greenhouses. Now indoor plant lovers proudly showcase their collections of orchids grown on the windowsills of city apartments.
Orchid - flower description
Pseudobulb
It is a seal on the stem that contains a supply of water. It is located almost at the root, it is from there that peduncles and leaves come. In shape, pseudobulbs are spherical, ovoid and cylindrical.
Leaves
Collected in a basal rosette, dense, green, oblong, at the same time wide enough.
Roots
They have a flattened shape, using which they stick to any plant.
Growing features
For a long time, the orchid was considered a difficult flower to grow at home. Now the situation has changed. The orchid is now a completely home flower. For successful cultivation, a little experience and practical knowledge are enough.
Planting an orchid at home

An orchid bought in a store does not always need to be transplanted, but only in a few cases:
- the flower does not keep in the pot, reasons: the leaves have grown on one side - you need not just transplant the orchid, but make the pot heavier or choose a heavy glass pots;
- if there was sphagnum moss in the shipping pot;
- if another pot is prepared for the orchid.
- there is little soil in the container, and the flower sways - fill up the substrate or transplant the orchid;
- root problems are visible through the transparent walls - the orchid must be urgently removed, bad roots removed, the cuts should be sprinkled with charcoal and replanted; if there are few healthy roots left, then the peduncle will have to be cut, otherwise the plant will die, the roots will not be able to fully provide it with nutrition;
Planting methods
The orchid is planted in a transparent pot, because its roots participate in photosynthesis on a par with leaves. There should be many holes at the bottom for water intake and excess drainage. The orchid pot can be plastic or glass. For step-by-step instructions on how to plant, see the Orchid Transplant section below.
Optimal planting time
The best time to plant is spring.
Soil for planting
Orchids are not suitable for ordinary soil: their roots are used to receiving a lot of air, at home most of them grow on trees. It is better to buy a ready-made orchid substrate. Then the plant is guaranteed normal air permeability. If this is not possible, you can mix pine bark chopped into small pieces (pieces about 1-2 cm in size) with garden soil.
The bark must be boiled within an hour. Crushed charcoal is added to the mixture.
Features of orchid care

In the process of caring for a plant, there are three main components: light, watering, temperature.
Location and lighting for the plant
Properly organized lighting is the key to successful orchid breeding. They need a lot of light, but it should be diffused, soft. In summer, sunlight is filtered using curtains or special filters that are glued to the window.
In the fall, you can let the sun's rays into the room: they will no longer be able to burn the delicate leaves of the flower. In winter, it is not only necessary to remove everything that interferes with natural light, but also to supplement it with artificial light. Daylight hours for orchids lasts up to 12 hours.
It is desirable that orchids stand on the southern windowsill, especially from autumn to spring, but they do well in the southeast and southwest, although there will be a problem of additional lighting. With good artificial light, some types of orchids feel comfortable on northern windowsills. Orchids can be taken outside, but do not forget to shade in time and do not expose to a draft.
Air humidity
Plants need high humidity. It is useful to spray regularly, increase the humidity in different ways, but only in a warm room. With cold content and high humidity, the orchid can rot the roots. Under any conditions it is necessary to provide care for orchid leaves by carefully wiping them with a damp cloth and spraying them.
When growing miniature orchids, the problem with moisture is solved simply. It is convenient to grow them in an aquarium. At the same time, watering is minimized: they have enough moisture in the environment for a long time and its supply in pseudobulbs.

Temperature regime for orchids
To choose a temperature for orchids, you need to know that different types of plants prefer different temperatures. You can distinguish:
Heat-loving
They need a high temperature, reaching 30-32 degrees in summer and not dropping below 20.In winter, they grow at 15-18 degrees, but the difference between day and night temperatures should not be more than 3-4 degrees. These orchids are native to tropical forests: they are mainly phalaenopsis, dendrobiums, and some varieties of Cattleya.
Growing at medium temperature
In summer they will be satisfied with a temperature of 18-25 degrees, in winter 12-15. These orchids were once brought to Europe from the tropics, but from the mountains and foothills, hence the low growth temperatures. These are miltonia and odontoglossums.
Cool temperature lovers
In summer, such orchids will grow successfully at a temperature of 18-22 degrees, and in winter, 10-13 is enough. They are from highlands and subtropical regions. Australian dendrobiums, almost all papiopedilums.
But most orchid owners bought them in a store or received them as a gift, again the donor bought them, as a rule, at the nearest flower kiosk. They themselves and their ancestors were raised in Europe, most likely in Holland, and will feel great at temperatures of 20-27 degrees in summer and 15-18 in winter.
Orchids get sick stuffy in rooms: the room should be regularly ventilated. But you can't make drafts.
How to water properly
To organize the correct watering, you need to have a good idea of the conditions under which the orchids grew in nature. And bring watering as close to natural as possible:
- all orchid plants are epiphytes, therefore, they can easily endure a short break in watering, but this should not be allowed often: the leaves of the orchid will begin to wrinkle;
- some orchids (phalaenopsis, cymbidium, pafiopedilum) like the substrate to be constantly slightly moist; others (oncidium, dendrobium, cattleya) require the soil to dry out first;
- the water should be soft and warm; ideal rain or thawed warmed up; tap can be boiled;
- it is better not to water the plant from above, but put it directly in a pot in a bowl of water and leave for a few minutes, then take it out, let the water drain.
Fertilizing and fertilizing a flower

Ideally, you don't need to fertilize your orchid. She has enough supply of nutrients available in the substrate. But then the flower should be transplanted regularly every two years.
If there was no transplant, then it is better to add top dressing. You cannot take any fertilizer for flowers. They only need special ones for orchids. It is necessary to strictly observe the proportions named in the instructions. Fertilizers are applied during the flowering period once a week.
Pruning orchids
Orchids are pruned after flowering.
Pruning methods
After the orchid blooms along the main axis, you can cut the peduncle, leaving up to 5 buds from the leaf outlet. Then peduncles from the buds below the cut can develop, and flowering will continue. When the plant has completely faded, all peduncles are cut off.
Orchid transplant
The flower is transplanted every two years to replenish the nutrients in the substrate. If the pot has become small, then it is transplanted more often. The plant is transplanted in the spring, but this cannot be done if the orchid has released a peduncle. It may not bloom.
Transplant methods
Transplantation raises many questions from novice florists. Here you need to follow a certain algorithm:
- carefully separate the walls of the pot and the root ball with a sharp narrow knife (the roots can grow into the pot);
- clean up old soil and cut off dead and rotten roots;
- pour a little soil into a new planter;
- install the plant in a pots, trying to keep it in the middle;
- gently spread the roots, they are brittle;
- first, little by little fill the voids between the roots, then the entire pot to the very edge, shaking it from time to time so that the substrate fills everything evenly;
- lightly crush the soil from above with something flat, for example, a spoon;
- After transplanting, the orchid is placed in a warm place and watered little by little.
Orchid propagation

It is not difficult to reproduce it at home if you have certain knowledge.
Reproduction methods
There are two main ways: by seed and vegetative propagation. When propagating by seeds, you may not get a plant that is the same as the parent.
Division
This method works if the plant is large. Then the rhizome itself disintegrates during transplantation. It can also be divided:
- the orchid is taken out of the container and the roots are thoroughly cleaned from the soil;
- with a knife, which has been previously disinfected over an open fire, divide the rhizome between pseudobulbs;
- the sections are powdered with charcoal;
- flowers are planted in pots according to the method already described.
It is better to do this in the spring.
Propagation by cuttings
Not all species can be divided this way, but some, for example, Vanda, succeed.
The apical shoot is separated with a sterile knife, the cut point is dipped in crushed coal and planted in a pot.
Reproduction by children (stem offspring)
Many flowers, for example, phalaenopsis and dendrobium, give side shoots, babies. If such a baby has formed, then it should be protected, sprayed often and patiently wait for it to give roots. Then it is separated and planted in a container, sprinkling the cut with coal.
The appearance of such a baby can be provoked. This requires: high room temperature and nitrogen fertilization.
Reproduction by layering (pseudobulbs)
The pseudobulb is carefully separated and, after coal treatment, is planted in the ground. Further care is watering.
Seed propagation
Orchid seeds are very small, this is the main difficulty of such reproduction. It is used only by those who are engaged in selection. The seeds are placed in an artificial nutrient medium under sterile conditions so that molds do not develop, and germinate within 3-9 months. Then they are planted in a substrate and wait another 2-3 years until the plant can be transplanted. Orchids grown from seeds bloom only after 3-4 years.
Orchid bloom

They buy a blooming orchid in the store. Therefore, each owner faces two acute questions: is it possible to make it bloom for a long time and how to force it to bloom again if it faded quickly.
When the orchid blooms
They bloom when they reach the age of 1.5-2.5 years.
In order for the orchid to please with flowering, it is necessary to create certain conditions for it:
- provide a long daylight hours, the orchid must lay the required number of buds and form peduncles, this is a long process;
- be sure to need drops in day and night temperatures, during this period they can reach 5-7 degrees.
But if the orchid does not want to bloom, you can try to force it by arranging extreme conditions of detention:
- keep it for 15-20 days at a temperature of 15-17 degrees;
- significantly reduce watering during this period.
In different types of orchids, flowers differ markedly both in shape and in shades of color. But there is also something in common: the lower petal resembles a lip in shape, there are two sepals on its sides, two side petals rise above them, and the upper sepal completes all this.
Orchid care during flowering
An orchid, depending on the species and how many buds were laid in preparation for flowering, can bloom from 2 to 10 months. During this period, watering is doubled, the air temperature should be at least 20-25 degrees.
Orchid care after flowering
First of all, the peduncle is cut to give the opportunity to form a new one. The orchid can be fed, followed by the usual care.
Pest disease problems

Diseases:
- anthracnose - manifests itself as brown spots with dots on the leaves; it is treated with preparations containing copper;
- fusarium - rotting spots appear on the leaves, this happens due to excess moisture — they are transferred to a dry room and watering is stopped;
- rust - rust spots on the bottom of the sheet — cannot be treated; the plant is destroyed so that others do not get infected;
- black rot - sprouts and leaves die off, the reason is in a too cold room - it is better to destroy the plant so as not to infect the rest.
Pests:
- aphid - destroyed by a mixture of milk and water in equal proportions;
- soft mite - the affected areas in the form of rosettes are cut out and sprinkled with ash along the edge;
- spider mite - the whole plant, window and windowsill are thoroughly washed with soap;
- scabbards - live in growths and bumps, get rid of them with the help of soap suds;
- thrips - translucent bugs living at the bottom of the leaf, cut out the affected areas.
If such methods do not help, then they turn to chemicals and process the plant according to the instructions.
Popular species (varieties)
- Phalaenopsis orchid—The most widespread species in indoor floriculture, there are many hybrids on sale that successfully grow in the house;
- Dendrobium nobile orchid - there are many varieties, they all bloom in spring, the most popular is white orchid, such plants, which have a pure white color, come from Thailand;
- Cambria orchid- an artificially bred plant, it blooms for a long time, grows well on the windowsill;
- Ludisia orchid—A plant with very beautiful leaves, grows indoors only with very high humidity;
- Miltonia orchid- Difficult cultivar to breed, but with very beautiful fragrant flowers, similar in shape to pansies;
- Cymbidium orchid—Very large plants, now miniature varieties have been developed that are so easy to care for that they are offered to novice growers;
- Cattleya Orchid- a species with spectacular waxy flowers, hybrids of which grow successfully in rooms;
- Orchid wanda - grows successfully indoors up to a meter;
- Oncidium - flowers resemble butterflies, grows in the house, but with strict adherence to the rules of care.
Useful tips (note to the florist)
- If the bathroom has a large enough window, then this is the optimal place for the orchid.
- It is better to buy orchids in spring or summer.
- If the flower has given aerial roots, then they must be sprayed.
- After the orchid has faded, it must be rearranged to a new place.
Answers to readers' questions

What is the lifespan of a plant?
Each species has its own lifespan. At home, orchids live from 3 to 10 years.
Can this plant be kept at home?
This flower will be a decoration for any home.
Is this flower poisonous?
This houseplant is not poisonous.
Why isn't the orchid blooming?
No preparatory measures were taken.
Why do the leaves turn yellow (dry)?
The reason is most often in excess or lack of moisture.
How does the plant overwinter?
Winters in a cool room with an average temperature of 15 to 18 degrees and limited watering.
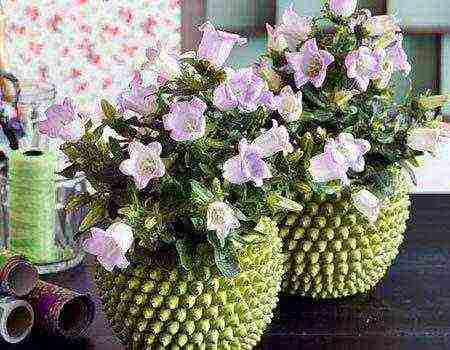
Phalaenopsis is a butterfly orchid that has won the love of Russians and a place in almost every apartment. A tropical guest is unpretentious if you provide her with the necessary living conditions. Like other indoor plants, it needs to be transplanted from time to time.
Dear Readers! For you, we have created communities in social networks, in which useful articles and interesting ideas are published several times a day! Subscribe and receive useful content in a convenient format!
The Aalenopsis orchid is an epiphyte in its biology. In nature, it grows on the trunks of tropical trees, collecting moisture with the help of aerial roots. The roots contain chlorophyll, and photosynthesis takes place in them. This type of orchid is not planted in the ground, but in a special substrate.allowing the roots to breathe and translucent pots.
How to determine if a flower needs a transplant?
When purchasing an orchid, the owners ask themselves how to transplant the flower correctly. Do I need to replant immediately or wait until the end of flowering? How to choose a pot and substrate for a plant?
Let's list the signs by which you can determine that Phalaenopsis needs a transplant.
 On the walls of the pot, accumulations of algae and moss are visible. This means that the substrate is caked and poorly ventilated. Orchid roots can rot from excess moisture. The purpose of the transplant is to provide the plant with a fresh, high-quality substrate.
- The roots have filled the entire volume of the container and closely intertwined. This is clearly visible through the transparent walls of the pot. In this case, the purpose of the transplant is to change the container to a more voluminous and convenient one for the plant.
- Root damage. Healthy Phalaenopsis roots are greenish in color with a silvery bloom. If blackened, moldy, or dried roots are visible through the container walls, the plant should be transplanted.
- Pestsseen in a pot - a reason to change the substrate.
- The leaves of the plant are lethargic and do not restore turgor after watering. It is necessary to remove the orchid from the pot and examine the roots.
- The plant moves freely in the pot - a sign of root death. This is a signal for an urgent transfer!
Important!Aerial roots outside the pot are normal and not a signal to transplant.
When to transplant at home?
The Aalenopsis orchid does not have a distinct dormancy period. Leaves and roots are formed year-round, with short breaks. Flowering also lasts several months. The best moments for an Aalenopsis transplant:
- Spring - the time of awakening and active growth. For indoor plants, spring begins in February and ends with the onset of heat on the windowsill.
- The best time to transplant may be after the central heating is turned off. Plants take a break from the hot dry air and begin to grow vigorously.
- Rest after flowering. It is highly undesirable to transplant flowering Phalaenopsis. It is better to wait until the flowers fall off and the peduncle can be cut off.
Phalaenopsis orchid transplant after purchase
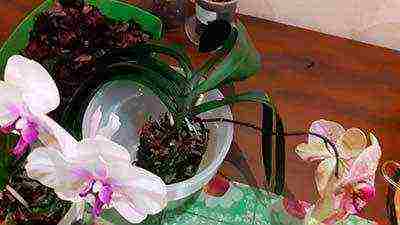
 So you bought Phalaenopsis. Try to determine if the plant needs a transplant.
- Examine the plant pot. Damaged pots must be replaced and containers that do not let in light.
- Examine the roots of the plant. Normally they are greenish, dry silvery. You should be alerted no visible roots, as well as signs of rot, mold, drying out of the root system. In these cases, Phalaenopsis is transplanted immediately.
- Assess the condition of the substrate. In stores, orchids are sold in substrates that are far from ideal: they contain additives of peat, coconut fibers and even foam rubber. All these inclusions accumulate water, and the roots suffer from waterlogging. The contents of the pot should be slightly damp, but not wet! The smell of mold and rot is unacceptable.
- Sometimes the roots of the plant are poorly visible. Carefully remember the plastic containers on the sides and pull the plant up to view the root system.
Thus, the orchid from the store is transplanted as needed. If the roots look healthy and the plant is not depressed, wait for it to bloom and acclimatize in your home.
Can a blooming orchid be transplanted?
 What to do if, for health reasons, it is necessary to transplant Phalaenopsis with flowers? This operation is a serious stress for the plant.
A blooming orchid will normally survive the transplant without destroying the coma if the roots become cramped in the pot.
But most often, the transplant is accompanied by trimming dead parts and replacing the substrate. Removing a significant portion of the rootlets will negatively affect flowering. In order not to weaken your Phalaenopsis, cut the peduncle for the sleeping bud or cut it off altogether. Let the orchid bloom with renewed vigor next time.
How often to replant?
 Florists agree that Phalaenopsis needs to be transplanted at least every 2-3 years. During this time, the following happens:
- Substrate partially decomposes, loses air permeability, becomes overgrown with moss and is saturated with salts.
- The central part of the root system dies off from waterlogging, poor aeration, excess salts. Roots twine around the walls of the pot, sprout from the drainage holes.
- The stem grows from above, is exposed, often hangs sideways from the pot - this is a biological feature of growth. The green mass outweighs, the pot may tip over.
- Young roots growing from the stem suffer from drying out, especially in winter.
All these signs mean that the moment of transplantation has come. Prepare an orchid pot. Phalaenopsis is buried in it to the level of the lower leaves. The part of the stem that has died from below can be broken off.
Which pot to transplant?
Choosing a pot for a Phalaenopsis orchid is a responsible business. The correct pot should take into account the needs of the orchid root system - access of light and air to the roots.
Types of pots
The best pots are transparent plastic, like those in which the orchid is sold in the store. They can be matte or colored, in various sizes. The advantages of such pots: the roots are well lit, do not grow to the walls of the container, they are easy to control.
 Colored translucent pots and planters - also a suitable option. They are even preferable if the sun sometimes peeps on your windowsill. Choose plastic in light shades, preferably white.
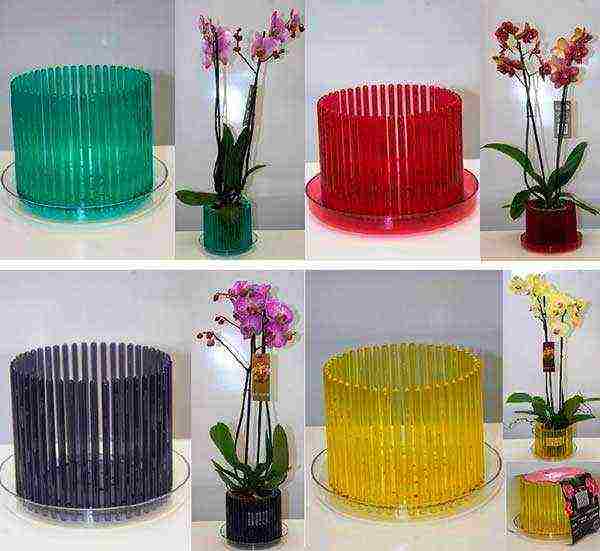
 Planters in the form of nets or sticks unsuitable in indoor conditions! The substrate in them will inevitably dry out. They can only "work" in a greenhouse with high humidity. Or, alternatively, these pots can be used for decorative purposes as in the photo below.
 Features of choice
- Pot must have a sufficient number of drainage holes... Irrigation water flows out through them and roots are ventilated. If these holes are not enough, drill the walls in several places or carefully saw through the slots in the bottom to one third of the height of the pot.
- For transshipment of orchids, choose a pot with a diameter of 1-2 centimeters larger than the previous one. A 3-5 cm thick drainage layer should fit at the bottom.
- You should not choose large containers for transplanting: after processing the roots, your plant may need a pot of the same or even smaller size. A large volume of the substrate dries out for a long time and is slowly absorbed by the roots.
Attention!An orchid in a transparent pot should not be exposed to sunlight! Otherwise, a greenhouse effect is created, the substrate overheats and the roots die off, and algae form on the walls of the pot.
What soil to transplant?
 Every novice florist asks the question - in what soil to plant Phalaenopsis?
Phalaenopsis Substrate can be purchased at the store. The main component of purchased substrates is pine bark.
Other components can be added to it: sphagnum moss, charcoal, fern roots.
The main thing to be guided by when choosing a soil is its looseness and good ventilation. The components must be coarse and not cakey. Fine-grained soil is unsuitable for Phalaenopsis orchids. It is better to purchase pure pine bark.
Another option is to prepare the soil yourself. For this:
- Collect pine bark from fallen trees (don't touch live pine trees!)
- Rinse the bark well in water.
- Use a pruning shears to chop up into 1.5 - 3 cm pieces.
- Boil the bark for a few minutes to remove resin residues, pests and pathogenic fungi.
- After boiling, rinse the bark again with boiling water or boil again.
- Lay out on trays to dry.
On a note! The orchid can be transplanted into an incompletely dried substrate.
Transplant instructions: step by step with a photo
Prepare materials and tools. You will need:
- Orchid pot.
- A suitable basin for work.
- Pine bark substrate.
- Drainage - expanded clay, ceramic shards, pieces of red brick.
- Alcohol disinfected pruning shears or sharp scissors.
- Antiseptic - powder of crushed charcoal, you can take activated.
- Sphagnum moss (if you don't find it, you can do without it)
- Stick for pushing the substrate between the roots
- Peduncle holder
- The drug Fitosporin for the prevention of rot.
- If necessary - insecticides (Fitoverm is allowed in room conditions)
 Prepare a solution of Fitosporin to soak an orchid. Dilute 1/5 teaspoon of the preparation in a little warm water, then dilute to two liters. You can add a drop of Epin to the solution, which stimulates the immune system.
 Gently lift the plant out of the container by the base of the stem. If the roots are strongly entangled in the pot, it is better to cut it with scissors.
 Shake off the old substrate from the roots. If it is difficult to remove, rinse it off the roots under running warm water.
 Mix a little good substrate from the old pot with a new one - it contains the microflora familiar to the plant. If pests are noticed, the soil must be washed in an insecticidal solution.
Carefully! Phalaenopsis roots are very fragile and easy to break.
Examine the roots, leaves, and stem carefully. We remove all blackened, rotten, shriveled roots to a healthy green part.
Remove diseased and withering leaves. To do this, cut the leaf along the central vein and remove the halves from the stem. Cut off dried leaves and peduncles.
 Immerse Phalaenopsis roots in the prepared Fitosporin solution for 30-40 minutes.
Dry the plant lightly and dust all cuts with charcoal powder.
 Lay drainage at the bottom of the pot with a layer of 3-5 centimeters. It protects the roots from getting wet and prevents the pot from tipping over, making the bottom heavier.
 Apply a small layer of substrate. Set the plant by placing the stem in the center of the pot. Place a support for the peduncles next to it.
 Gradually fill the pot with the substrate. Put large pieces of bark down, and on top - smaller ones. Gently push the bark between the roots, filling in the gaps. Do not compact the soil, you may damage the roots!
 When the pot is full of bark, place a layer of damp sphagnum moss on top. The moss will protect the bark and young roots from drying out quickly.
 How to seat the kids correctly?
Sometimes the Phalaenopsis orchid produces babies on the trunk or peduncles. They can be detached when the baby's roots have reached a length of 5 centimeters.
- Prepare a small plastic pot or glass with holes, 1 cm fine bark, sphagnum, charcoal powder, sterilized scissors. A little expanded clay is placed on the bottom for stability.
- Cut the baby carefully at the junction with the mother plant. If the baby is from a peduncle, cut off the baby with a small fragment of the peduncle.
- Dry the slices for half an hour and sprinkle with charcoal powder.
- Place the baby in the center of the pot. Straighten the roots gently. Holding the root collar, pour in the bark without tamping.
- Tap the sides of the settling pot.
- Cover the substrate with a layer of wet sphagnum.
- On the second or third day, the baby can be watered.
You can see the process in more detail in the video below:
Post-transplant care
After transplanting, place the orchid in a cool place, protected from drafts and sunlight. The temperature is desirable around 20-22 degrees. Do not disturb the plant and move the pot unnecessarily. In a shaded place, the orchid should stay for about 10 days.
Peculiarities! Phalaenopsis often grows not up, but to the side. Such a plant requires a garter. Wrap soft twine around the base of the stem and secure it, for example, to the hole in the side of the pot. The garter can be removed after a few months.
Since Phalaenopsis is planted in moist bark, it does not need watering for the first 3-4 days. You can spray the moss, but make sure that no water accumulates in the axils of the leaves.
More information can be found in the video below:
How to water after transplanting?
 Phalaenopsis is watered no earlier than 3-4 days after transplantation, possibly even later, depending on the temperature and humidity in the room.
Until the plant is rooted, it will be less traumatic to spill it with warm water from the shower.
Be sure to dry the outlet and leaves after watering. Phalaenopsis after transplantation is better to underfill than to overfill!
After 2-3 weeks, you can return to soaking watering. Gently immerse the plant pot in warm water for no more than 5 minutes. Hold the bark so it doesn't float. Remove the pot and let the water drain completely. Then you can put the pot back in place.
Possible mistakes
Common mistakes when transplanting Phalaenopsis:
- Wrong choice of soil.
- The pot does not provide aeration and illumination of the roots.
- The size of the pot is incorrect.
- Transfer to a new pot without examining the root ball.
- Cauterization of roots with brilliant green, iodine and other substances.
- Watering by soaking immediately after transplanting or over-watering an unrooted plant.
So, Phalaenopsis orchid needs a planned transplant every 2-3 years or for "medical" reasons. Don't be afraid to replant your plant. After a while, you will understand his needs and requirements, gain valuable experience, and your pet orchid will delight you for many years.
Useful video
Find out more about Phalaenopsis transplant from the video below:
Orchid is one of the most beautiful and popular indoor flowers. In any room, you can create comfortable conditions for life, reproduction and development of orchids. It is enough just to make an effort to organize the correct modes of lighting, watering and ventilation. In addition, the delicate flower needs a change of pot and soil from time to time.
Why is it necessary to transplant an orchid
Transplanting an orchid, especially immediately after purchase, remains one of the most important steps in caring for it. Large woody elements of the substrate in which the flower grows may contain mold, spores of fungal diseases, viruses and parasites.
Conscientious flower shop sellers treat the substrate with special solutions to eliminate possible pests and pathogens, but not everyone does this.
The use of a substrate contaminated with fungal spores leads to sad consequences.
If the grower already has other orchids, then a newly acquired one with untreated soil can cause diseases in the entire group of flowers. To eliminate the possible consequences, the new plant must be isolated from the rest for a period of up to one month or until the end of the active flowering phase. In this case, you need to daily monitor the state of the substrate. In case of detection of the slightest signs of decay, fungus, changes in the color and structure of leaves, parasites and their waste products, medical and preventive measures should be taken immediately. One of these measures is a transplant, which involves disinfection and changing the substrate.
In addition, there are a number of specific conditions and signs that signal the need to relocate an orchid:
- 1–1.5 years have passed since the purchase of the plant;
- the root system is strongly constrained by the walls of the pot and pushes the plant out;
- the substrate retains moisture for a long time and has signs of decomposition, decay;
- the flower is affected by disease or pests and requires resuscitation.
In addition, a plant over two years old needs replanting every 2-3 years.
What needs to be prepared for a flower relocation
It is best to replant the plant in the spring: it is at this time of the year that the dormant period begins for orchids. If a newly acquired flower needs to be relocated, then it is better to wait until it fades. You cannot transplant an orchid during the flowering period.
The destruction of the lump of the substrate is always stress for the flower. Sometimes it is better to replant the plant with the remnants of old soil, filling the empty space of the pot with fresh substrate.
The root ball must be cleaned of the substrate very carefully.
To successfully complete the resettlement procedure, you will need the following tools and materials:
- a new transparent pot of slightly larger diameter, previously disinfected with boiling water or a solution of potassium permanganate;
- a sharp garden knife or pruner;
- prepared substrate (disinfected and dried);
- expanded clay or fine gravel for drainage;
- special sticks made of natural materials (bamboo, pine chips) for fixing peduncles;
- activated carbon for root cutting;
- insecticide solution for treating roots affected by parasites.
Pot selection
In nature, the roots of orchids receive enough light, it needs it for normal growth and development. Therefore, in room conditions, the pot must provide lighting. You need to plant an orchid in a container that will allow enough light to pass through. In addition, its bottom should contain a large number of drainage holes so that water does not stagnate in the substrate. There are special clear plastic pots on the market that meet these requirements.
The orchid pot should be transparent or translucent and contain many holes
Gained popularity and special flowerpots for ordinary containers for orchids. They act as a second pot of a more aesthetic design and at the same time serve to collect excess moisture from the substrate.
Such stands look aesthetically pleasing in interiors of various styles.
Recently, a modern solution has appeared to provide the root system with light and an influx of fresh air and remove excess moisture. These are pots, made in the form of a frequent fence, which surrounds the substrate and the root system of the flower. This solution brings the conditions of keeping the plant as close to natural conditions as possible.
Such a pot brings the conditions of keeping the orchid closer to natural
The size of the pot should exceed the volume of the ball of the root system of the plant by only 1–2 cm. Orchids love tightness. An excess of substrate will lead to excess moisture accumulation, which is fraught with the formation of mold and fungal diseases, as well as an increased risk of activating decay processes. Sometimes the orchid will release individual roots outside the pot, this is normal.
Several roots outside the pot are normal for an orchid
Substrate preparation
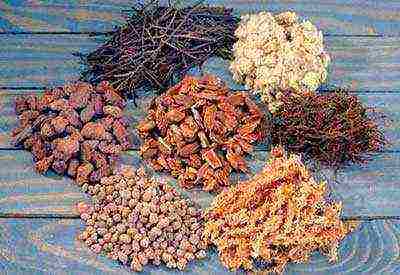
Ordinary soil will not work as a soil for these plants. The root system of orchids requires ventilation and freedom in space. Therefore, the pot is filled with rather large particles of bark, chips, twigs.
Pine bark, charcoal and moss substrate ideal for orchids
Ready-made substrate can be purchased at the store. However, cooking it yourself is not difficult. It consists of the following components:
- bark (pine or larch), crushed to a size of 1–1.5 cm;
- particles of charcoal;
- expanded clay;
- sphagnum moss;
- small twigs (optional).
Before use, the bark must be boiled in a large container for 5 minutes and left to cool completely. After that, it is dried at room temperature. This process takes about a day.
Chips, pieces of bark, expanded clay, charcoal, small branches - everything you need for the substrate
Important! If the old substrate is not infected with pathogens or parasites, it is recommended to add a small amount of it to the new one. This will help preserve the biochemical composition of the soil familiar to the flower.
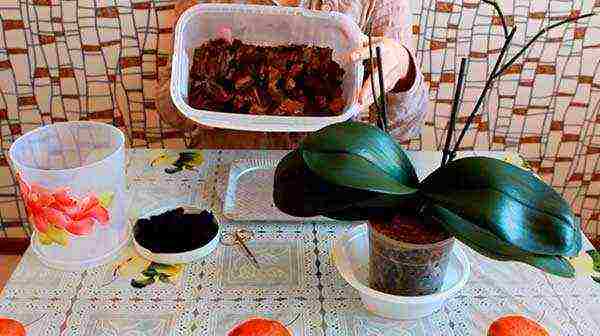
How to prepare the orchid itself for transplanting
The transplant process consists of several sequential stages:
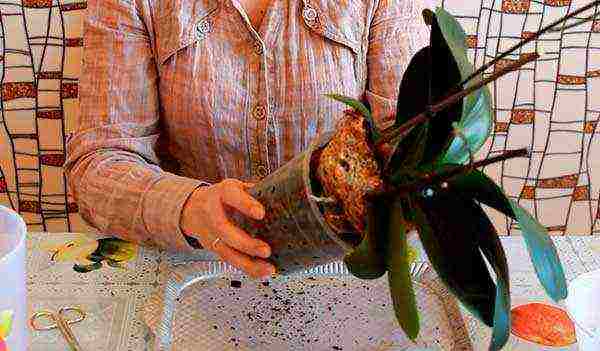
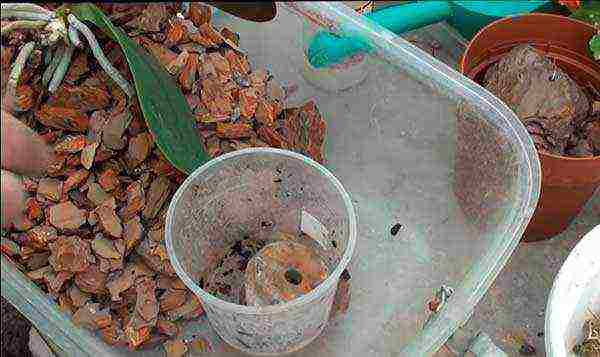
- First of all, you need to carefully remove the lump of substrate with the root system of the orchid from the pot. There is no need to pull on the leaves. It is better to turn the orchid over, fixing the base of the flower in your hand, and gradually tighten the pot. Most often, the lump is released by itself, under its own weight. If this method is not successful, it is best to cut open the old pot and free the plant.
When removing the flower, you need to gently hold it at the base.
- Next, you need to free the root system from the old soil by selecting particles of bark, wood chips, moss. This must be done very carefully so as not to damage the roots.
The old substrate should be completely removed.
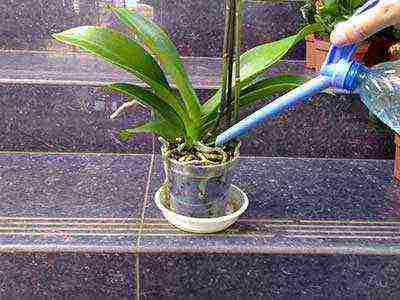
- Peeled roots should be rinsed in a large enough container with room temperature water. For convenience, you can use a shower head. Then the plant must be dried, excess moisture must be removed.
It is convenient to rinse the roots with a shower head
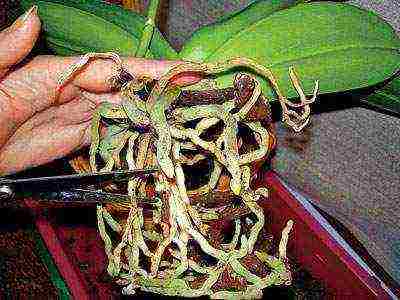
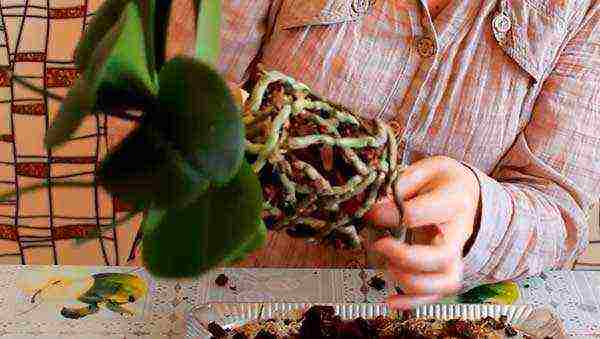
- After rinsing, the roots should be carefully inspected for pests, rot, and other disease symptoms.
A thorough examination should reveal any unhealthy roots.
- Dry and rotten roots are removed with a pruner or scissors. All cut elements must be destroyed. Cutting points are processed with crushed activated carbon.
All rotten and dried roots must be removed.
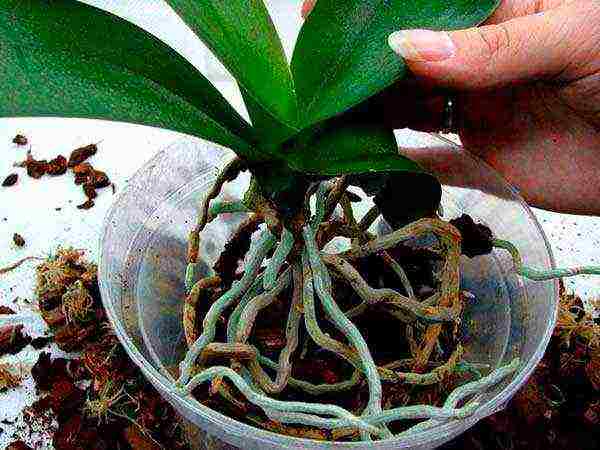
- If traces of parasites are found on the roots, then they should be soaked in an insecticide solution for half an hour, and after the procedure, dried with a soft towel. As a result, only elastic green or gray-green roots should remain.
Healthy orchid roots are green
Planting a plant in a new pot
The process of planting an orchid prepared in this way into a new container takes several steps.
- A drainage layer of 2–2.5 cm (expanded clay or crushed stone) is poured into the disinfected pot.
- A little new substrate is added on top of the drain.
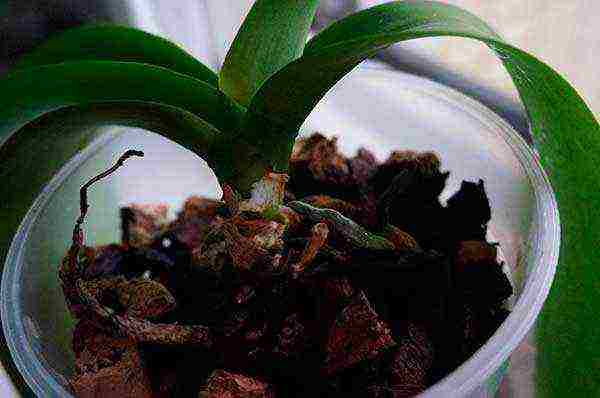
- An orchid is placed in a pot, its roots are distributed evenly throughout the volume of the container. The base of the plant should be 1–1.5 cm below the edge of the pot.
- The support for the peduncle must be installed at this stage, before the substrate falls asleep, so as not to accidentally injure the roots. It should be located very close to the base of the flower.
The support is installed before the new substrate is filled
- The substrate should be poured in little by little, gently shaking the pot so that the bark particles fill the space between the roots.
The substrate is filled up tightly, but not compacted
It is important that the orchid is fixed with the substrate on all sides and not toppled to one side. It is advisable to leave some roots on the surface in order to improve the process of photosynthesis.
Video: orchid transplant
Post-transplant care
After transplanting the orchid, it is necessary to create favorable conditions so that it takes root in the renewed substrate as soon as possible. For her, illumination, humidity, temperature are important.
It is not recommended to feed the plant for a month after the relocation procedure.
Watering and humidity
If the preparatory stage took more than 2 hours, then the orchid can be watered immediately after relocation, so the roots will retain the required moisture level. If the preparation was faster, then the first watering should be done in 3-4 days, depending on the humidity in the room.
The process of watering an orchid is different from that of ordinary houseplants. The substrate must be sufficiently saturated with moisture, and for this it is best to place the flower pot in a container of warm water and hold for about 15 minutes. However, after that, the water must be completely drained. A constant excess of moisture leads to root rot.
Submerging orchid pots in water is the best way to water
You need to use purified water, this will help maintain the normal acidity level of the substrate - 5.5–6.5 pH.
The orchid needs a fairly high level of humidity (60–90%). If the air in the room is dry, then periodically spraying with a spray bottle. This procedure also helps to slightly moisturize the soil and refreshes the plant.
Spraying with water refreshes and moisturizes the plant between waterings
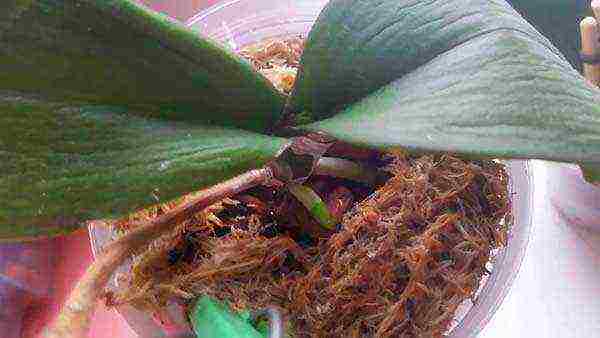
In this case, care must be taken that water does not accumulate in the axils of the leaves. This will lead to rotting and the occurrence of fungal diseases.
Excess moisture causes rotting of the base of the sheet
The installation of humidifier devices in the room where the orchid is located will help to solve the problem of excessive dry air. In addition, you can use more affordable means: for example, hang wet woven materials on heating radiators.
Temperature control and lighting
Large changes in temperature are harmful for the normal life of an orchid. The maximum daily change in air temperature in the room where the flowers are located should not exceed 5-7 degrees. Orchids love warmth, but not heat: a comfortable temperature for them is from +20 to + 25 ° C. Cooling down to + 12 ... + 15оС threatens plant hypothermia.
Orchids are best kept in well-lit rooms, but direct sunlight should be excluded. The location of the flower on the windows facing the east side would be ideal.... In hot summertime, it will be useful to protect the plant from direct rays of the sun by darkening the windows with paper, foil or light-colored cloth. Also, blinds will perfectly cope with this task.
You can adjust the intensity of sunlight using blinds
Does the type of orchid matter
In general, the orchid family has similar living conditions in nature. The only difference is that in some orchids, the root system is involved in photosynthesis, so they need a transparent pot. For species whose roots do not need light, for example, for Dendrobiums, you can take opaque plastic or ceramic containers.
Dendrobiums do not need transparent pots
Phalaenopsis is the most common type for home cultivation, because it has a rich color variety. All Phalaenopsis are transplanted in the same way and require the same care measures. They need a transparent container.
Phalaenopsis is one of the most popular types of indoor orchids.
An exception to the general rules are orchids that grow without a substrate, for example, the Vanda species. These plants get their nutrients and moisture directly from the air. They do not require a transplant.
Orchids grown without a substrate do not need replanting
How to plant an orchid with a shoot
Such a need arises when paired leaves with root rudiments (children) appear on the peduncle.
New plants formed on the peduncle are ready for separation
When jigging the offshoot, the following rules should be followed:
- Before you cut them from the mother plant, you need to let them grow.
- When the roots are 3–4 cm long, the baby can be detached. To do this, you need to cut the peduncle of the mother plant a centimeter on each side of the process.
The baby is taken from the mother plant along with part of the peduncle
- Treat the cut sites with activated carbon powder.
- Soak the baby in warm water for 15 minutes.
- Pre-disinfect the substrate.
- Further, the planting process takes place in the same way as for adult plants, see the instructions above.
No more than one shoot should be planted in one pot.
Separated young orchid plants will soon delight the owner with flowering
How to decorate an orchid beautifully after transplanting
The orchid itself is already a wonderful element of the interior, combining aesthetics, brightness, minimalism and naturalness. A beautifully designed pot will complement this plan. Both natural and artificial materials are suitable for decoration.
List of decorative materials that can be used:
- moss, various wood elements;
- artificial bright coasters for a pot with an orchid;
- homemade coasters made of natural materials (wood, stone);
- ceramic and clay vessels;
- brackets with wood elements for hanging the plant;
- synthetic fillers of bright color;
Photo gallery: examples of the design of orchids in the interior
Moving an orchid to a new pot is easy. The procedure is quite simple, knowing some of the nuances, even a beginner can carry it out. Subject to the frequency of transplantation, attention to rehabilitation measures and care advice, this beautiful epiphyte will feel confident and delight you with its unique beauty for a long time.
A housewife. Rate the article:
(2 votes, average: 5 out of 5)