Content
- 1 What are the benefits of worms
- 2 Types of worms
- 3 Technology for growing worms at home
- 4 What and to whom to sell from the worm farm
- 5 Calculation of profitability
- 6 Pros and cons of business
- 7 General information about earthworms
- 8 Red worms
- 9 Habitat conditions for red worms
- 10 Reproduction of red worms
- 11 Growing worms
- 12 Construction of a worm cultivator
- 13 Breeding worms at home
- 14 Feeding the worms
- 15 Compliance with conditions of detention
- 16 Growing worms at their summer cottage
- 17 Reproduction of worms
- 18 How to breed mealworms
- 19 Instead of an afterword
- 20 Reasons for breeding earthworms at home
- 21 Varieties of annelids
- 22 Household breeding technology
- 23 Possible sales markets
- 24 Production profitability
 Breeding worms at home for beginners attracts with a minimum start-up capital and the simplicity of the equipment used. The cultivation technology is simple and does not require special knowledge. Also tempting is the lack of special breeding facilities. In the initial stage, you can start a business in an ordinary apartment.
If you have already decided to engage in such an unusual business, then you should know that you can sell the worms themselves, vermicompost and worm tea. Vermicompost is an excellent fertilizer.
Worm tea is a unique product that will increase the yield by at least two times. It is effectively used for the cultivation of strawberries, indoor plants, for growing vegetables and fruits both in greenhouses and in the open field. In order for the business to develop effectively, it is necessary to create the most comfortable conditions for the life and reproduction of worms.
How to breed earthworms at home and how to make this activity grow into a business - this will be discussed further.
What are the benefits of worms
Earthworms are soil animals that feed on decaying plant debris and animal excretions. They consume bacteria, algae, nematode protozoa, fungi and their spores. Passing food through their intestines, the worms destroy it and mix it with the ground.
Recycling compost heaps, they leave the most valuable forms of humus with high microbiological activity in the soil. In the intestines of the worm, processes occur as a result of which the decay products of organic substances are converted into molecules of humic acids. The molecules combine with the mineral components of the soil to form calcium humates. These substances make the soil structural.
The soil processed by worms contains many different enzymes, amino acids, vitamins, antibiotics, biologically active substances that disinfect the microflora. And worms play a dominant component in this process. In addition, these animals take an active part in loosening the soil, which makes it water and air permeable.
Earthworms are an indicator of the health and fertility of garden soil. If they feel good on your site, then the harvest will be good. Their normal density should be at least five large worms per 1 square meter of excavated area. If this amount is less, then the land needs organic fertilization.
You should be aware that worms help neutralize the acidity of the soil, since they prefer a neutral environment. They eat straw, loosen the soil, and reduce the number of nematodes.
Types of worms
Consider what types of worms you need to buy for breeding and how they differ.
Plain rain
Earthworms are invertebrates whose body consists of ring-shaped segments with short bristles. The body is smooth, slippery, cylindrical, 15-30 cm long. Leaning on the bristles, the body of the worm moves. The ventral side is flat, the back is convex and dark in color.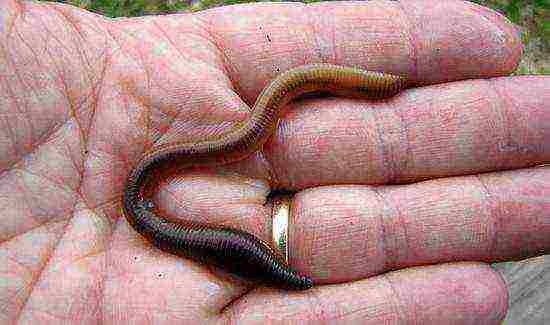
The earthworm is hermaphrodite, but reproduces sexually through mating. The thickening at the front is called the girdle. There are glands that secrete a sticky liquid. The animal envelops the eggs with mucus during reproduction. A cocoon of mucus protects eggs from dampness and adverse factors. After a while, small worms come out of it. The life span of an earthworm is 3-4 years.
The earthworm has no sense organs, but it perceives stimuli with the help of the nervous system and reacts to them reflexively. He also has no organs of vision, but he perceives light stimuli. Earthworms sense odors and are capable of regenerating lost body parts.
California red
One of the varieties of earthworm is the red California worm, which is often bred at home. Compared to earthworms, Californian ones have many advantages in breeding, growing, feeding. This animal reaches 6-8 cm in length and weighs 1 g. Reproduction takes place at the age of three months.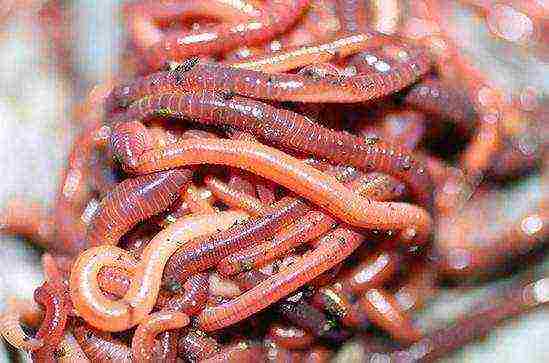
With proper care, each individual produces up to 500-1500 pieces of its own kind per season. The California worm is distinguished by both high fertility and longevity. Its life span is about 16 years. The only drawback of the Californian worm is that it is very thermophilic and does not crawl deep into the soil when the temperature drops.
Prospector
The prospector worm is the result of selection. This species was obtained in 1982 as a result of crossing the southern and northern dung worms. A distinctive characteristic of an animal is the presence of a self-preservation instinct. At low temperatures, it goes to a safe depth. This species reproduces in a much wider temperature range - + 8 ... + 29 ° С.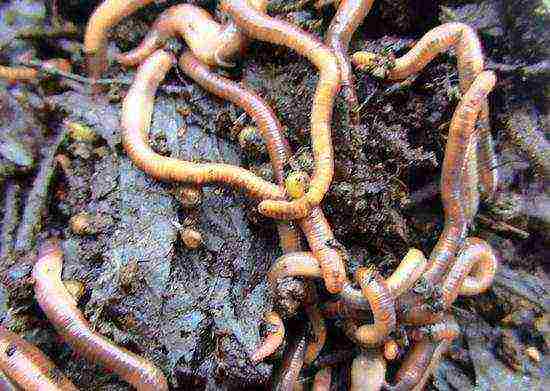
Productivity of a prospector worm is higher than that of a normal earthworm. He is unpretentious, does not get sick and differs in perseverance in the substrate. Unlike the red Californian, the prospector worm easily switches from one type of food to another. The reproduction rate and lifespan is the same as that of the Californian, but this species retains high viability and productivity at a high density of the substrate population.
Technology for growing worms at home
In order to get the required amount of vermicompost for fertilizing the garden, you should think about breeding earthworms at home.
The recipe for a fertile soil mixture is simple. It is necessary to add 1 kg of sand and 5 kg of vermicompost to black soil per 1 square meter.
How to choose a seat
If you decide to start breeding worms, then you should know that this requires a mini-farm or vermicompost. The wormhole can be placed anywhere: on a balcony, in an apartment, in a yard, in a garden, in a garage or any utility room. It should be a place free of noise and vibration. During processing, no unpleasant odors emanate from the structure.The main thing is that the temperature in the room is within acceptable limits.
At temperatures above 36 ° C, the worms will die.
The odor can be emitted by the feed. In this case, it must be sprinkled with vermicompost or earth.
Types of worms
For breeding worms, wooden or plastic boxes made of food plastic with a height of 30-40 cm are often used. Tanks must be ventilated. To do this, use a drill to drill holes in the upper part of the box around the entire perimeter and in the lid over the entire area. The boxes should be installed on the legs at an angle. Then the vermicelli can drain through the hole in the bottom. Place a container to collect it under the hole.
Worms also feel good in cardboard boxes. They feed on pieces of cardboard. True, the boxes get wet, and they often have to be replaced with new ones.
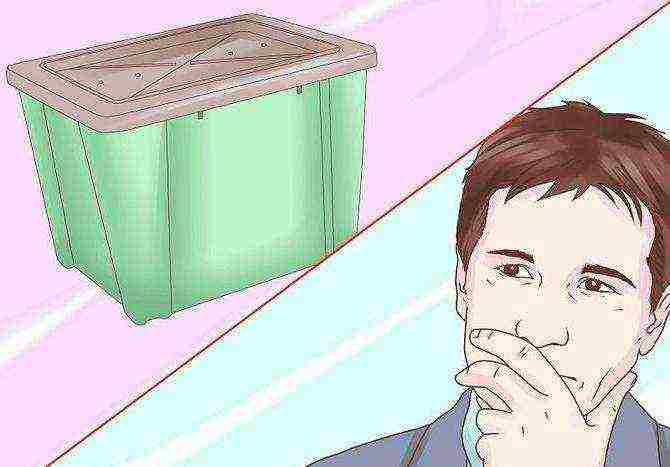
An old refrigerator is also suitable for breeding. It is installed with the door facing up. Don't forget to make ventilation holes.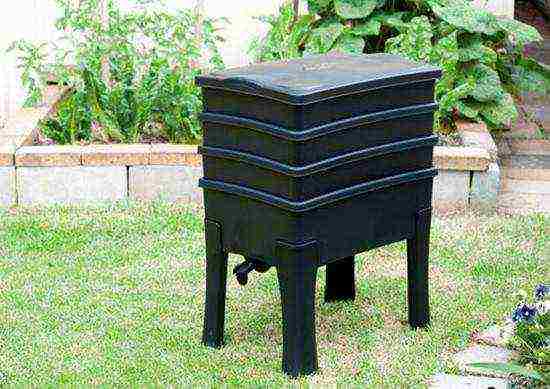
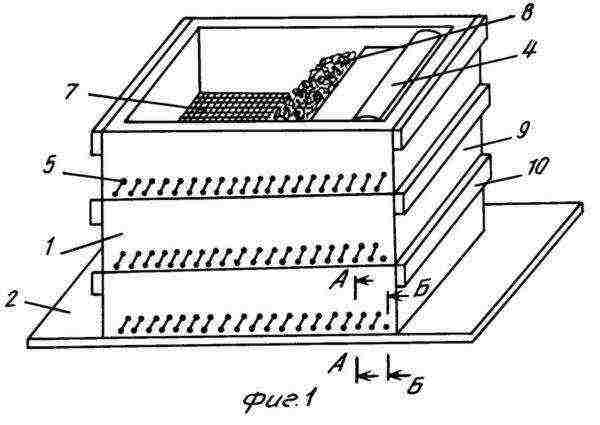
The most convenient but expensive equipment for breeding worms is a special vermicompost. It consists of several plastic boxes that are stacked on top of one another. Each has side vents and bottom slots for water passage. The bottom drawer is placed on legs. In its bottom there is a faucet for draining the vermicom. The top drawer is covered with a duvet to maintain moisture and a plastic lid.
Instructions for making a homemade worm
Consider how to build a vermi farm with your own hands, where to start manufacturing and what tools you need.
For a homemade worm, the same plastic food boxes are most suitable. They fit well vertically and fit into each other. The box must be one-piece, without holes, measuring 60 × 40.
The lower drawer will be used to collect the soil solution, the upper ones to contain the worm. On top, you can put three compartments for growing a worm. In the bottom drawer, a series of holes are drilled from the top of the side pieces with a drill. But in the corners (up to 10 cm), holes should not be made, since the soil solution will drain through them.
In the second box, you need to make the same holes, but around the entire perimeter. In the bottom of the second box, we make cuts parallel to the stiffeners using a grinder (approximately 8 pcs.). We clean the surface from burrs with a chisel. We make 3 boxes of the second type.
At the bottom of the boxes, we lay a row of wooden rods as thick as a finger. They will prevent clogging of the bottom holes. It is necessary to sew bags from spunbond fabric of high density. They are laid on top of the rods. It is necessary to cut out the plastic nets to move the worms to a new box. They are used when 5 cm remains to the full box, and continue to feed the worm. Then, with a full box, the worms will be in the net, and they can be resettled.
We repeat the procedure with relocation three times until the worm is completely caught. We make the top cover from plywood. Using a drill, we make its perforation.
What equipment is needed
To breed worms at home, you need to purchase a small amount of equipment: scales, wheelbarrow, sieve, shovel, pitchfork, bucket, thermometers for measuring soil and air temperature, instrument for measuring soil acidity, racks, boxes for growing worms.
Soil selection
The reproduction and life of worms depends on the quality of the soil. Half of the container must be filled with humus with the addition of crushed cardboard. The soil should have a moisture content of 70-80%. It's easy to check. To do this, take a handful of soil in your hand and squeeze it tightly. If, as a result of compression, 1-2 drops of water are released, then the soil has the required moisture.
Vermifarm preparation
Starting a business, you should not immediately buy expensive vermicomposters. Use a wooden or plastic food box.It is necessary to make a hole in it for the outflow of liquid and ventilation. The room should have a temperature regime within 18-25 ° С, lighting 60 W at 20 m, ventilation no more than 0.5 m / s. Be aware that chlorinated water inhibits worms, so use water containers. Take care of protecting the worms from pests. They are eaten by moles, rats, and other rodents.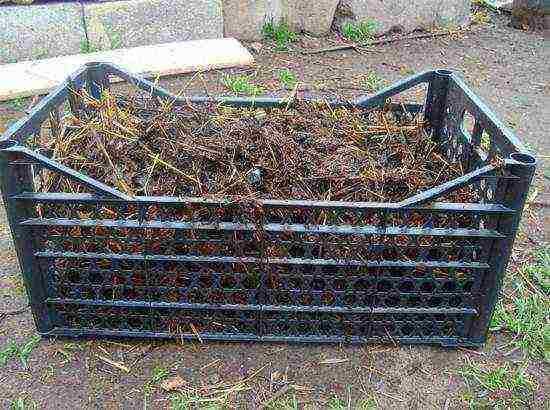
Buying broodstock
You can buy worms for breeding both online and from local worm farm owners. When buying a breeding stock, you should pay attention to the appearance of the worm. It should be red and mobile. The broodstock includes at least 1500 worms. The calculation must be carried out from the following ratio: for 1 cubic meter of soil, 1-3 families are needed for breeding.
How to populate correctly
2-3 days after preparing the soil, it is necessary to make a deepening in it and populate the first inhabitants there. Then gently spread the soil and close the lid. After a couple of days, you need to add food.
In order to determine the required acidity of the soil and check whether the worms will take root well in the new house, it is necessary to do a trial settlement in a small container. Based on the results, you can determine whether the optimum acidity level has been reached or needs correction.
The optimum acidity level for breeding worms should be in the range of 6.6 - 7.5 pH.
If there are a lot of dead worms, then the acidity must be changed. It is increased by adding straw, sawdust, plants. To reduce the acidity of the soil, it is necessary to add chalk, limestone, shells.
Within a week after settling, it is necessary to check how the worms feel in the new home. If the surface of the substrate is clean, and they are mobile, then the resettlement was successful.
What to feed
How to feed the worms at home?
Worms are not picky about food. They feed on dead or decaying plants. It is recommended to give potato peels, cabbage leaves, banana peels, stale bread, tea or coffee grounds, straw, grass, water from a container washed from sour cream or kefir, chicken droppings.
Worms can be classified as vegetarians. Citrus fruits, meat, eggs cannot be added to their food. Fresh manure should not be added to worms, as it generates heat up to 70 ° C.
All the food you give to the worms must be minced. They cannot process it in solid form. A constant feed composition should be maintained. Worms tune in better to the food they have tasted for the first time in their life. When food changes, individuals must adapt over a period of time.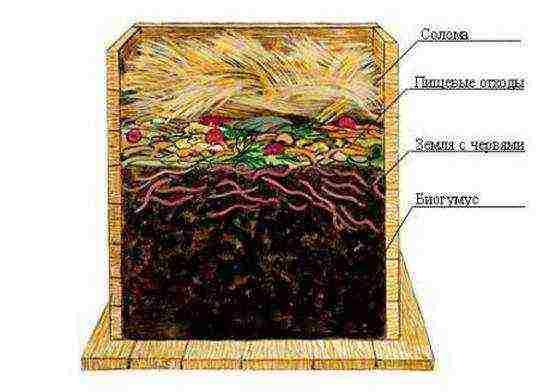
Care rules
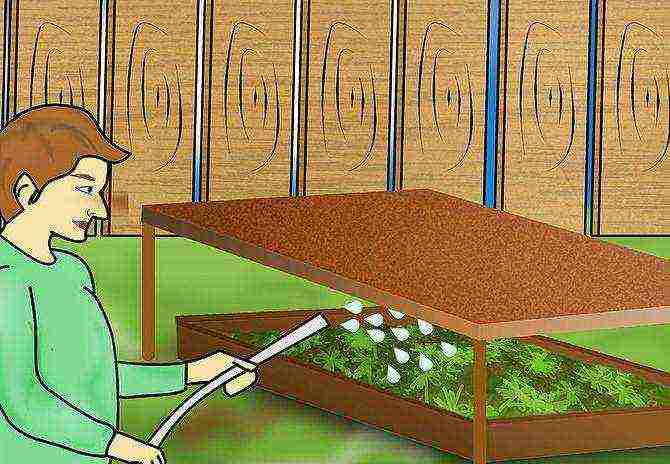
Growing and caring for worms at home includes feeding, maintaining a favorable temperature regime, watering and loosening the substrate.
The first feeding is carried out a few days after settling. For this, feed 3-5 cm thick is applied on a fourth of the surface and evenly distributed. Next time, the food is applied 5-7 cm thick on the entire surface of the box.
Feeding the worms is added every 1.5 - 2 weeks, as they are eaten, until the box is filled to a height of 50-60 cm. The frequency of feeding depends on the number of worms and on the temperature of the housing. It is necessary to keep worms at a temperature of + 15 ... + 25 ° С. The worms reproduce quickly enough, so it is necessary to have prepared transplant boxes. One family after overwintering increases 10 times.
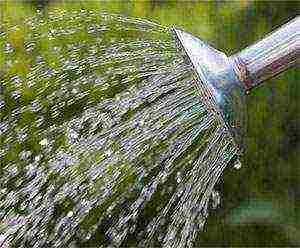
It should be remembered that worms need moisture. Therefore, the substrate must be watered regularly. Optimum humidity should be 80%. This procedure must be done using a watering can with fine holes with settled water or rainwater at a temperature of 24 ° C.
Worms need oxygen, so if the substrate layer is 20 cm or more, it is necessary to regularly loosen it. This procedure is carried out with special forks with round ends.For this, the substrate is pierced without stirring the layers twice a week to the depth of occurrence of the worms.
As a result of their vigorous activity, the substrate in the box is divided into three zones.
The top layer contains nutrients and organic debris. The middle layer is designed to house the worms. The bottom layer is the most valuable. It collects all the products of soil processing, which are used as vermicompost and worm tea. As the worms work, the lower layer is constantly growing. The duration of the complete processing process in one box is 3-4 months. After that, the worms with a part of the old substrate are transplanted into another container, and everything starts all over again.
What and to whom to sell from the worm farm
The main advantage of the vermi farm is that you can get valuable fertilizer and good income from unnecessary waste. To do this, you need to study the market and potential buyers.
To fertilize the soil
To fertilize a plot with an area of 3-4 acres, it is enough to purchase 1.5 - 3 thousand worms. Throughout the year, they will produce the required amount of vermicompost. This valuable fertilizer can be sold to neighbors and acquaintances. When expanding the vermi farm, it can be offered to specialized stores, farms.
For fishing
It is also profitable to grow worms for fishermen and sell in bazaars or take them to specialty stores, since this is part of the vermi business. A fisherman rarely takes the time to dig up the soil in search of a worm. It's always easier to buy it. Fishing shops will borrow from you because the worm has a long lifespan and demand is strong. The main thing is that the packaging promotes the life of the worms not for a certain period. The worm is the most valuable product for fish. Therefore, real professionals often breed worms at home for fishing.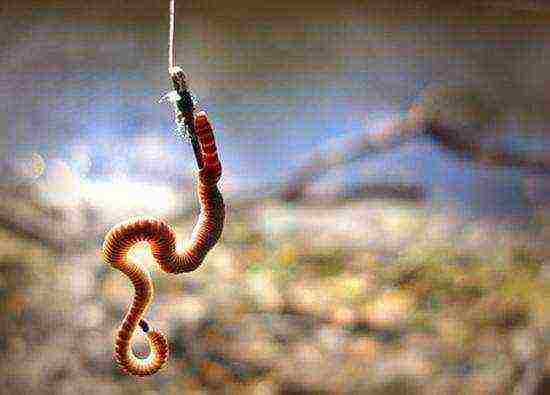
To the pet store
The pet store also needs a constant supply of fresh worms and vermicompost. Worms are used there as food for fish, birds and other inhabitants.
For fish farms
For the efficient operation of fish farms and the normal growth of fish, it is necessary to use live food for its feeding. Therefore, the need for a worm as an irreplaceable product with a high nutritional value is constantly growing.
For plant nutrition
The vermicompost obtained from the vermi farm can be used for growing indoor flowers, seedlings, vegetables in the greenhouse and in the garden, for planting fruit crops, grapes, and medicinal plants. Vermicompost is especially valuable in greenhouses, since it is important to exclude the likelihood of diseases. Don't worry about worms in flower pots. Worms cannot cause any harm to plants. Since the use of vermicompost is wide enough, the demand is obvious.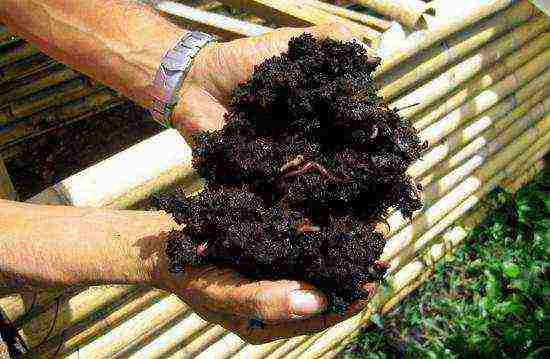
To expand the assortment, you can also offer vermicelli. It is made in worm farms by slowly passing water through a stack of containers or with a recipe. To do this, mix vermicompost with water in a ratio of 1: 10. Saturate it with oxygen for good bacteria growth. This can be done with an aquarium compressor. Insist during the day at room temperature, after which the solution is defended and filtered. The sediment can be used as fertilizer, and the solution can be used for foliar and root feeding.
Vermicelli should be used within 4 hours after turning off the compressor. With its further storage, bacteria die, the effectiveness of the solution decreases, and it emits an unpleasant odor.
How to prepare vermi farm products for sale
- worms;
- biohumus;
- worm tea.
To prepare products for sale, they need to be properly packaged and stored. Worms can be packed in tight plastic bags with ventilation holes. Store them in a cool place to avoid excessive worm activity.A sufficient amount of soil must be added to the bag.
It is good to pack mother colonies for sale in cardboard boxes. The family should be composed of cocoons, fry and adults.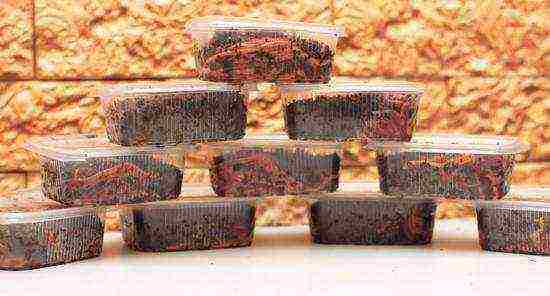
Vermicompost is a dark-colored smearing mass. After removing the worms, it is collected with a scoop, dried to a moisture content of 40-50%, sieved with a sieve and packed for storage. Vermicompost can be stored at temperatures ranging from -20 to + 30 ° C. So that the fertilizer does not lose its biological activity, it is still not worth freezing it.
Vermicelli is packed in plastic bottles before being sold. Do not forget to indicate the expiration date of the solution.
Calculation of profitability
From 1 cubic meter of nursery, you can get up to 10 thousand worms and about 0.5 tons of vermicompost per year. When selling 1 worm for 2 rubles, you can get 20 thousand from the sale of worms alone, not taking into account the profit from vermicompost and vermicelli. Calculating the profitability of the business, we get 150%. As you can see, the revenue is quite decent.
Is it possible to make money on a business like growing strawberries all year round in a greenhouse? Let's try to answer this question in a separate
article
.
Champignons lend themselves well
growing
in artificial conditions. The demand for champignons in the food market makes them attractive for entrepreneurship.
Pros and cons of business
Breeding worms is a profitable and rewarding business. This business is associated with minimal risks, so if you are interested, then you should try first in an old refrigerator or wooden box. Having mastered breeding worms at home through video and in practice, having studied all the subtleties and working with the sale of products, you will decide whether to expand your business. There are practically no shortcomings in the business based on worms, as evidenced by the reviews of entrepreneurs. With a serious approach, the business will generate significant income.
Despite the huge variety of artificial baits for fishing, nothing can replace real worms. Therefore, anyone who knows a lot about this prefers to always have them at hand. That is why many fishermen ask a natural question: "How to breed worms for fishing on your own?"
Lovers of winter fishing know perfectly well how difficult it is to get the necessary bait at this time. It's good if there is a bloodworm on sale. And if it is not there, then you have to use any available food, which does not always guarantee a successful catch. As a result, many are thinking about how to breed worms for fishing at home.

General information about earthworms
Almost any fish can be caught with this bait. There are several varieties of these living organisms that are popular with anglers. How to breed earthworms? How are they different from others? This general name covers a number of families of small-bristled worms. The most common individuals have a body of 3-15 cm. There are worms 2.5-40 cm long. There are 1,500 species of them, although most of them are found in the tropics. In temperate latitudes, there are about 100 species of worms. They live in the ground and lead an active life at night. During the day they can be found on the ground after rain. Due to the fact that in the process of their digestion they process organic residues, the most valuable fertilizer is obtained - vermicompost. Thinking about the question of how to breed earthworms, it is necessary to understand the most common types of this bait for fish.
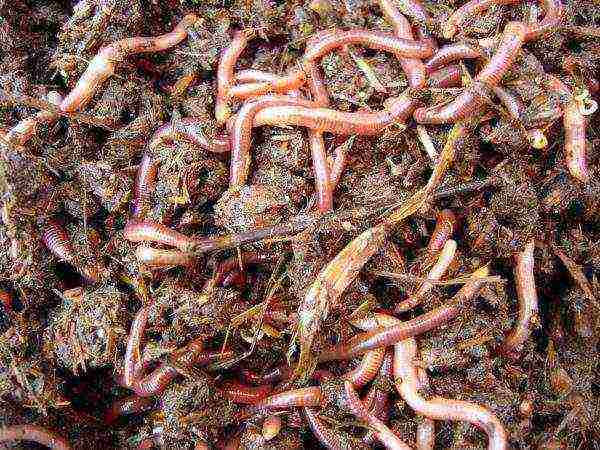
Red worms
Many fishermen believe that red worms are the most attractive bait. They are suitable for both industrial and domestic breeding. At the same time, a large increase in their biomass can be obtained in a fairly short period of time. The body of such creatures contains proteins, fats, carbohydrates, minerals, making them an excellent food not only for fish, but also for pets and birds.
How to breed red worms? There are different ways to grow them. In one cycle, lasting 3 months, up to 30 kg of worms are harvested from 1 m2. Almost any organic waste is used to feed them, such as food waste, animal manure, bird droppings, straw, waste from the paper, woodworking, meat and fishing industries.

Habitat conditions for red worms
How to breed worms in the garden? To do this, it is necessary to satisfy their need for nitrogen-containing organic matter. In such an environment, their growth and fertility are greatly enhanced. Adequate soil moisture is required to grow red worms. If it is below 30-35%, then the development of individuals will be inhibited. When the humidity level drops below 22%, they can die in a week. That is why it is necessary to regularly water the ground. Its optimum humidity is 70-85%.
Soil acidity below pH5 and above pH9 is unsuitable for breeding worms. In such an environment, they will die in a week. The best option is earth, which has an acidity of pH7. They also do not tolerate saline soil, and a salt concentration of more than 0.5% is simply fatal for them.
At temperatures below 5 ° C, the worms do not feed. They crawl deep into the soil and hibernate. As a rule, they wake up 10-14 days before the soil thaws. The optimum temperature for breeding them is 18-24 ° C.
Reproduction of red worms
Each adult lays 18-24 cocoons in summer. They contain from 1 to 20 eggs. After 3 weeks, young individuals appear, and after 7-9 weeks they can already bear offspring themselves. Most often, one individual lives for 10-15 years. Moreover, with age, their size only increases. Sexually mature young worms weigh about 1 g each.
Growing worms
How to breed dung worms? Collect a sufficient number of individuals in old heaps of humus or in clusters of last year's decayed foliage. Such worms are not so common in ordinary soil, but they can be found in some places with high humidity (for example, in raspberries). Dung worms are very similar to red ones. Only when put on a hook do they release yellow contents that have an unpleasant odor.
To create a worm cultivator, only about 500 individuals per 1 sq. m. One of the main factors for the successful reproduction of these organisms is the quality of the substrate in which they will live. For him, manure, straw, hay, sawdust are used, which are thoroughly mixed. Dense compost creates an ideal environment for worms to live and breed. It should stay moist even in dry weather.
Construction of a worm cultivator
In a shady place of the site, a small ditch (no more than 2 m2) with a depth of 30-35 cm is dug. A layer of clay is laid and tamped at its bottom. It should rise to the very edges of the ditch. The thickness of this layer is 10 cm. Good soil (preferably black earth) is poured over the clay. Next, the groove is covered with humus, which is well compacted. Ash or coal cannot be added to it, since the worms cannot tolerate them.
The collected individuals are poured into the substrate, evenly distributing them over the entire groove. In such a worm house, you can grow not only dung or red worms, but also ordinary earth or earthworms. For each of these types, the most suitable composition of the substrate is selected. So, for earthworms and earthworms, you should not add manure to the soil. Better to limit yourself to compost.
When breeding dung worms in a warm winter, they can be collected for fishing even during frosts. How can this phenomenon be explained? This is due to the fact that a large amount of manure in the substrate increases the temperature in it. For the winter, the wormhole is covered with bags and sprinkled with earth and snow.

Breeding worms at home
How to breed earthworms at home? Although the overwhelming majority of people breed them in their summer cottage or personal plot, some avid fishermen manage to do this in apartment conditions. True, not everyone succeeds in this, but those who have learned to breed worms in an apartment are provided with good bait all year round.
How to breed worms for fishing at home? To do this, you must choose the right container for their content. A wooden or plastic box can be used as housing.As a last resort, you can use a regular canvas bag for this. But worms cannot live long in such containers. For long term dilution, it is best to use an enamel bowl, bowl, or bucket. The worms will do just fine in the old aquarium.
After choosing a container, they begin to prepare the substrate. It should consist of soil in which there is no or very little humus. The best for this purpose is the land in which there are few fallen leaves and grass roots. This is due to the fact that during decomposition, this organic matter takes from the soil a lot of oxygen, which is necessary for the normal functioning of the organisms we are considering.
Feeding the worms
Answering the question of how to quickly breed worms, it is safe to say that the rate of their growth and reproduction depends entirely on the feed. Almost any organic waste (cleaning vegetables or fruits), unsweetened sleeping tea leaves, coffee grounds and boiled or raw oatmeal are suitable for them. It should be remembered that dry food helps to reduce the level of moisture in the soil. To increase the rate of reproduction of worms, many advise giving them dairy products. In no case should you give them potato peels.
Worms are fed according to the following calculation: 3 handfuls of cereals per 15 liters of soil. When feeding into the soil, it must not be left on the surface. Thoroughly mix the soil by hand. When a "ball" is found, consisting of many individuals spat among themselves, they must be carefully separated, evenly distributed over the entire container. If this is not done, many of the worms will die due to the increased temperature inside such a lump.
Compliance with conditions of detention
Thinking about the question of how to properly breed worms, one should not forget about maintaining optimal conditions that ensure the normal functioning of these simplest animals. For this, it is necessary to constantly maintain the appropriate humidity. To determine the condition of the soil, it is compressed in a fist. If, after unclenching it, a lump forms, then the humidity is normal. At the same time, we must not forget that excess moisture affects the worms unfavorably.
Despite the fact that these creatures do not like low temperatures, they should not be located in close proximity to heating devices, since they will quickly die there. The optimal temperature regime for the normal development of worms is 17-24 ° C. The container is placed in a dark place, far from direct sunlight.
One container can contain different types of worms (earthworms, red), but it is better to allocate "separate housing" to each subspecies. When raising these animals according to this method, it is possible to collect up to 1 kg of fish bait per week from a 30 liter container.
Growing worms at their summer cottage
How to breed worms for fishing in the country? The easiest way is to dig a small groove, 30 cm wide. Its depth should be 15-20 cm. Rotting leaves, grass, hay, humus are placed in the groove. From above it is covered with boards or burlap. After 7-12 days, earthworms will appear in it. A special dwelling is being built for them, which is a wooden box on legs with a removable lid. Its minimum size is 100 x 100 cm, and its height is 35-40 cm. A net with small cells (0.5 cm) is attached to the bottom of the box.
How to breed worms in the country? For this, the box is installed in a shady place. It can be placed near the compost pit. About 20-25 cm of compost is poured into the bottom of the box. In this new dwelling, the worms are moved from the groove along with a small amount of soil. The earth is moistened and covered with burlap. After a week, the box is filled to the top with compost and watered again. It is necessary to moisten the substrate 1-2 times a week (depending on the rate of its drying).
Reproduction of worms
For 2-3 months, worms lay cocoons in the ground.Moreover, each individual gives one cocoon weekly. 5-20 worms emerge from it. The last clutch is observed at the end of July. The first offspring appear at the end of August. Already in October, the worms become adults. For development and growth, they need a lot of food, therefore, from July to November, a layer of compost with humus 10 cm thick is added to the box twice a month.In the process of digestion of worms, vermicompost is obtained from it, which spills out through the mesh bottom of the box. In one season, the layer of accumulated valuable fertilizer can reach 25-30 cm. In winter, the worms' dwelling is left in place, insulating it on top with compost, a layer of 20-30 cm. From the sides it is covered with earth and sand. When snow falls, a small snowdrift is poured onto the box.
In the spring, vermicompost is collected and used for its intended purpose, and most of the worms are spread around the site. Only a small number of individuals are left in the box for further reproduction.
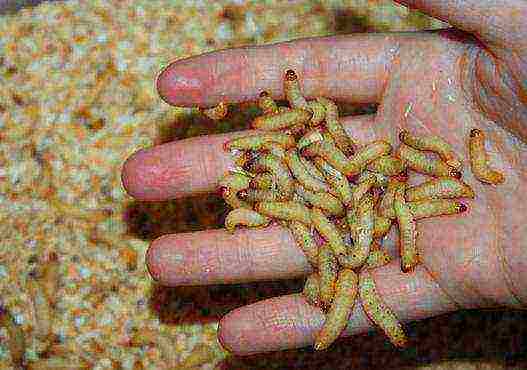
How to breed mealworms
Recently, fishermen are increasingly using mealworms, often called zoophobes, to bait. In big cities, they can be purchased at pet stores as they are used to feed a variety of animals. Where this is not possible, you can grow them yourself. How to breed mealworms at home?
You should choose a suitable place for their placement and a container for growing. For this, large plastic boxes or trays without gaps are suitable. A fine mesh is used as a cover. Flour, bran, sawdust, and ground crackers are poured onto the bottom of such a container. The nutrient layer should be 2-10 cm. Acquired beetles are placed in trays, whose larvae are zoophobes. When using pupae, the breeding process will take longer. The number of beetles depends on the expected result.
After laying eggs by adults, it takes 2 months before mealworms appear from them. The moisture in the box with them should be about 50%. Worms develop best at temperatures of 26-28 ° C.
The larvae of beetle beetles are omnivorous. Zoo buses are fed every 2 days. They are given bran, oatmeal mixed with grated carrots, beets, and other vegetables.
Instead of an afterword
We have considered the most common ways to address the issue raised in the title of the article. Of course, it is easier to buy bait in the store. However, after spending some time on the arrangement of the worm house and caring for its inhabitants, you will not lose either. Firstly, breeding worms cannot be called an expensive pleasure, but rather the opposite. And secondly, you always have fresh bait at your fingertips, and at any time of the year or day. And this, you see, is sometimes very important.
Soil, as you know, is the basis of all living things and developing on our planet, the basis of life. In order not to dry up its strength, soil fertility must be constantly restored, and the most important workers in this direction are earthworms. Everything ingenious is extremely simple - the quality of lands, their fertility and high crop yields directly depend on the waste product of an ordinary earthworm. How to breed it at home, how and what to feed and what kind of care to take will be described further.
Reasons for breeding earthworms at home
Breeding worms at home is not at all difficult. And the case can become a very serious business, and there are at least two good reasons for this:
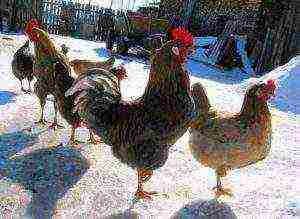
- creepers multiply very quickly, gain useful biomass and are excellent feed for poultry (poultry farms, poultry farms and egg production);
- the product of active life is vermicompost - the highest quality and environmentally friendly fertilizer for farms and greenhouses.
In addition, in pharmacology, these animal organisms are also used for the manufacture of medicines.The use of vermicompost on personal backyard plots and in households will significantly increase the egg production of poultry, soil fertility, increase the productivity of vegetables and fruits without the use of chemical fertilizers.
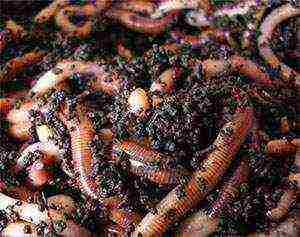
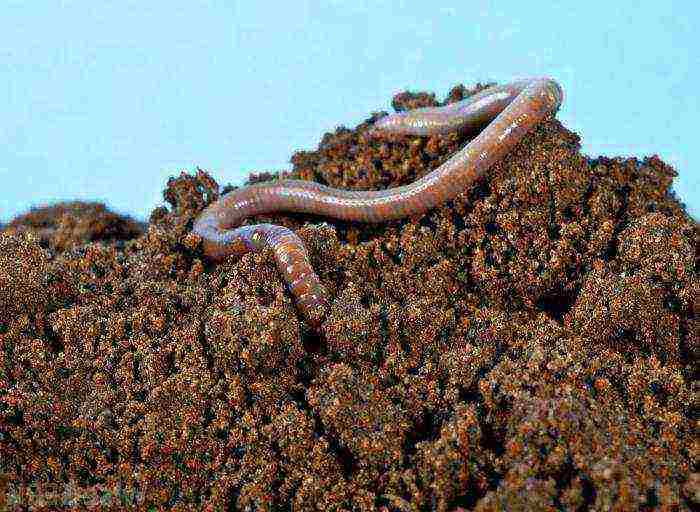
 Worms produce the most natural biohumus
Varieties of annelids
The most common common representative of bristle annelids is the earthworm. But it is they, freely occurring in nature, that are least suitable for reproduction in artificial conditions. Representatives of this subspecies reproduce rather slowly, adapt with difficulty to new conditions and unfamiliar food, live relatively little. They, perhaps, are suitable only for breeding for their own needs of a personal backyard farm.
For industrial cultivation and production of vermicompost, the Russian scientist, Professor AM Igonin bred a special breed "Prospector". By crossing various breeds of species living at a sufficient distance from each other, he was able to get individuals with completely new qualities:
- long life expectancy - from 4 to 16 years;
- multiplies rapidly;
- easily tolerates changing feed (you can use any type of food - from fallen leaves and grass to human food waste).
Prospectors adapt as quickly as possible to the conditions of artificial reproduction and give an excellent increase in biomass and humus.
Another variety that meets industrial production requirements is the California red worm. Individuals of CCC also reproduce very quickly, increase the useful mass, process various organic waste of human life into vermicompost, serve as an excellent protein feed for agricultural and fish farms.
 The prospector worm is the fastest breeding individual. In 1 year, it can produce offspring of 1500 worms
Household breeding technology
Required equipment and breeding space
If you decide to start breeding worms, first you need to carry out preparatory work - choose and prepare a place or container. Containers can be wooden, plastic or cardboard boxes (it is clear that cardboard containers will have to be changed often), piles.
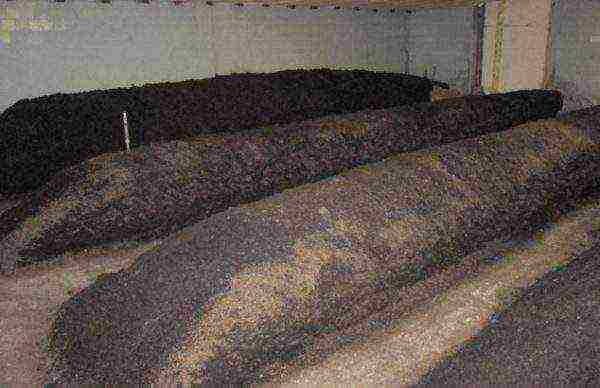
They are placed in a barn, garage, any other specially designated place where it is possible to comply with the necessary conditions - the substrate moisture content is not less than 70-80% and the temperature is from 12-15оС to 22-24оС. You can also breed worms in an ordinary compost heap, a pit.
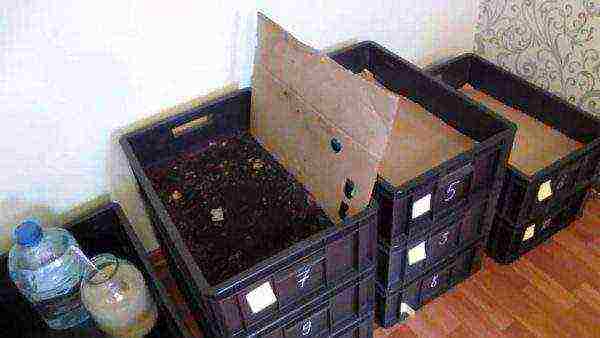 You can breed worms in simple boxes at home in the basement.
One convenient option is to use two or three perforated boxes stacked on top of each other. The lowest one - with holes along the perimeter at the top of the sides. This box is intended for vermicelli - a liquid component of vermicompost. A box with perforated walls and a bottom is placed on top of it, a nutrient medium for worms is laid in it and individuals are populated, on top the boxes need to be covered with burlap or other "breathing" cloth, since creepers love dark and damp places.
Making a worm
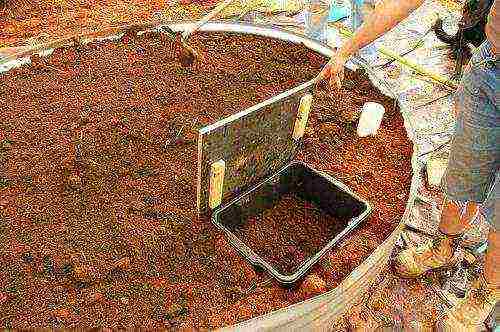
You can breed individuals on the street, right in the garden, separating a certain place for this and fencing it with boards or other improvised material.
Approximate dimensions of the wormhole: width 1-1.2m, height 30-40cm, arbitrary length. A thick layer of compost is placed on the bottom, leveled and well moistened. Then cover the compost heap with material that allows air to pass through for 5-7 days.
It can be an old burlap, cardboard, a layer of straw, which need to be watered from time to time with rain or well-settled water (at least 2-3 days).
Chlorine must completely evaporate, as it is a poison for worms of any kind.
After a week, each square. m, a recess is made in which the creepers are placed, and again the wormhole is covered with an air-permeable material.
 Both a box and other options can serve as a wormhole.
Compost preparation
Mixtures of rotted manure, poultry droppings, peat, straw, leaves and stems of vegetables and weeds, crushed eggshells and food waste can be used as compost for laying in boxes or pits.
In no case should fresh manure be used, it contains a large amount of ammonia and individuals die. Rotten manure from 2-3 years ago will also be of little use, since it already lacks useful nutrients.
All organic materials suitable for breeding are collected on a heap (or in a specially designated place), covered and, periodically moistened, kept for 1.5-2 months.
 Worm Box Diagram
Own vermi farm
If you decide to acquire your own small worm farm, then, first of all, you need to equip a place for keeping worms, stock up on containers, prepare compost and provide comfortable conditions for breeding.
The purchase of broodstock is of decisive importance. The most suitable species, as already mentioned, are the Californian red worms or prospectors. One family is 1500 individuals. In order to populate 1 cubic meter. m of compost, 1-3 families of broodstock are needed.
Moving into a new location must be done with great care. First, a few individuals are introduced into a small amount of prepared soil in a separate container, the soil is leveled and the dishes are closed. After a couple of days, you need to add a little feed. If all the worms are active, mobile, with a characteristic red color, the entire livestock can be colonized. If dead individuals are found, then it is necessary to correct the acidity of the soil (the most favorable environment is considered to be an acid indicator of 6.5-7.5 PH).
 Growing worms
How to feed earthworms
Ringed earthworms are real vegetarians and they do not tolerate protein foods: meat, fish, eggs. When buying a broodstock, it is necessary to find out what the seller fed his wards, since the most common is the feed that they have tried "from birth". However, they quickly get used to new foods, especially Prospectors. It takes some time to get used to a certain type of feed, therefore, new components should be introduced into the feed base gradually, allowing the worms to adapt.
As a top dressing, plant residues, potato peelings, cabbage leaves, various food waste from the kitchen of plant origin, tea and coffee grounds, straw, grass, dry bread are suitable. Only whatever you add to the compost heap needs to be shredded for easier and faster processing by creepers. Otherwise, the process of acidification, fermentation or rotting of products may begin.
You need to feed it every 2-3 weeks. Pour the top dressing on the entire surface of the boxes or piles, evenly, 7-10 cm thick, until the thickness of the processed humus reaches 50-60 cm and the substrate takes the form of uniformly processed biomass. The approximate cycle time is 3-4 months from the time of the settlement of the livestock.
 Fertilize the worms every 2-3 weeks
Care and reproduction
The main care in worm farms or in wormhouses is to comply with the temperature regime, timely feeding, and maintain the humidity level when irrigated with warm rain or settled water.
In favorable conditions, the worms begin to multiply. In the compost, they lay cocoons - small balls of yellow-sandy color. Each of the cocoons contains several eggs, of which 2-3 weeks later small worms appear, and after another 7-8 weeks they are ready to produce offspring themselves. The unsurpassed leaders in reproduction rate are the Prospectors - one individual produces 1,500 offspring per year.
Possible sales markets
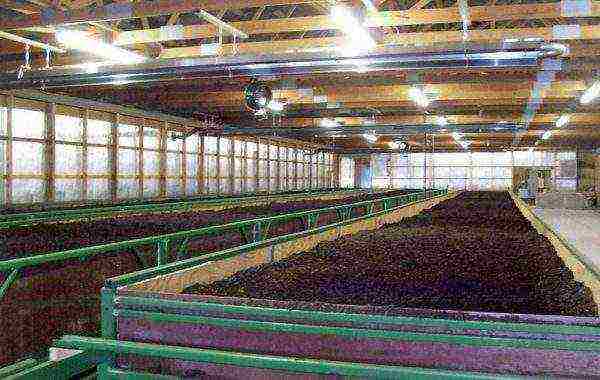
Growing worms can indeed be a profitable business if you worry about the market for processed products and increased livestock in advance.
- Vermicompost is an environmentally friendly fertilizer, highly effective in terms of increasing crop yields, growing seedlings, flowers, etc. Therefore, the consumers of vermicompost can be farms, greenhouses, flower greenhouses, as well as private entrepreneurs engaged in plant breeding.
- Live biomass is a valuable nutritious protein feed for poultry and poultry farms.
- Live food in the form of worms is an indispensable nutritious product for fish farms.
- Worms are in great demand as pet food for zoological shops.
 Worms can be sold to poultry farms
Production profitability
According to the estimates of earthworm farmers, the profitability of the worm farm is in the range of 150%. One Prospector per year gives offspring of 1500 individuals and about 100 kg of the most valuable fertilizer - vermicompost. From 1 ton of harvested compost, you can get up to 600 kg of high-quality fertilizer and 10-15 kg of new individuals.
Farms for growing worms and producing vermicompost is not only profitable and profitable farming, but also enrichment of the environment with useful substances, the possibility of obtaining environmentally friendly food products.
Breeding worms at home for beginners attracts with a minimum start-up capital and the simplicity of the equipment used. The cultivation technology is simple and does not require special knowledge. Also tempting is the lack of special breeding facilities. In the initial stage, you can start a business in an ordinary apartment.
If you have already decided to engage in such an unusual business, then you should know that you can sell the worms themselves, vermicompost and worm tea. Vermicompost is an excellent fertilizer.
Worm tea is a unique product that will increase the yield by at least two times. It is effectively used for the cultivation of strawberries, indoor plants, for growing vegetables and fruits both in greenhouses and in the open field. In order for the business to develop effectively, it is necessary to create the most comfortable conditions for the life and reproduction of worms.
How to breed earthworms at home and how to make this activity grow into a business - this will be discussed further.
Earthworms are soil animals that feed on decaying plant debris and animal excretions. They consume bacteria, algae, nematode protozoa, fungi and their spores. Passing food through their intestines, the worms destroy it and mix it with the ground.
Recycling compost heaps, they leave the most valuable forms of humus with high microbiological activity in the soil. In the intestines of the worm, processes occur as a result of which the decay products of organic substances are converted into molecules of humic acids. The molecules combine with the mineral components of the soil to form calcium humates. These substances make the soil structural.
The soil processed by worms contains many different enzymes, amino acids, vitamins, antibiotics, biologically active substances that disinfect the microflora. And worms play a dominant component in this process. In addition, these animals take an active part in loosening the soil, which makes it water and air permeable.
Earthworms are an indicator of the health and fertility of garden soil. If they feel good on your site, then the harvest will be good. Their normal density should be at least five large worms per 1 square meter of excavated area. If this amount is less, then the land needs organic fertilization.
Consider what types of worms you need to buy for breeding and how they differ.
Earthworms are invertebrates whose body consists of ring-shaped segments with short bristles. The body is smooth, slippery, cylindrical, 15-30 cm long. Leaning on the bristles, the body of the worm moves. The ventral side is flat, the back is convex and dark in color.
The earthworm is hermaphrodite, but reproduces sexually through mating. The thickening at the front is called the girdle. There are glands that secrete a sticky liquid. The animal envelops the eggs with mucus during reproduction. A cocoon of mucus protects eggs from dampness and adverse factors. After a while, small worms come out of it. The life span of an earthworm is 3-4 years.
One of the varieties of earthworm is the red California worm, which is often bred at home. Compared to earthworms, Californian ones have many advantages in breeding, growing, feeding. This animal reaches 6-8 cm in length and weighs 1 g. Reproduction takes place at the age of three months.
With proper care, each individual produces up to 500-1500 pieces of its own kind per season. The California worm is distinguished by both high fertility and longevity. Its life span is about 16 years. The only drawback of the Californian worm is that it is very thermophilic and does not crawl deep into the soil when the temperature drops.
The prospector worm is the result of selection. This species was obtained in 1982 as a result of crossing the southern and northern dung worms. A distinctive characteristic of an animal is the presence of a self-preservation instinct. At low temperatures, it goes to a safe depth. This species reproduces in a much wider temperature range - + 8 ... + 29 ° С.
Productivity of a prospector worm is higher than that of a normal earthworm. He is unpretentious, does not get sick and differs in perseverance in the substrate. Unlike the red Californian, the prospector worm easily switches from one type of food to another. The reproduction rate and lifespan is the same as that of the Californian, but this species retains high viability and productivity at a high density of the substrate population.
In order to get the required amount of vermicompost for fertilizing the garden, you should think about breeding earthworms at home.
If you decide to start breeding worms, then you should know that this requires a mini-farm or vermicompost. The wormhole can be placed anywhere: on a balcony, in an apartment, in a yard, in a garden, in a garage or any utility room. It should be a place free of noise and vibration. During processing, no unpleasant odors emanate from the structure. The main thing is that the temperature in the room is within acceptable limits.
The odor can be emitted by the feed. In this case, it must be sprinkled with vermicompost or earth.
For breeding worms, wooden or plastic boxes made of food plastic with a height of 30-40 cm are often used. Tanks must be ventilated. To do this, use a drill to drill holes in the upper part of the box around the entire perimeter and in the lid over the entire area. The boxes should be installed on the legs at an angle. Then the vermicelli can drain through the hole in the bottom. Place a container to collect it under the hole.
Worms also feel good in cardboard boxes. They feed on pieces of cardboard. True, the boxes get wet, and they often have to be replaced with new ones.
An old refrigerator is also suitable for breeding. It is installed with the door facing up. Don't forget to make ventilation holes.
The most convenient but expensive equipment for breeding worms is a special vermicompost. It consists of several plastic boxes that are stacked on top of one another.Each has side vents and bottom slots for water passage. The bottom drawer is placed on legs. In its bottom there is a faucet for draining the vermicom. The top drawer is covered with a duvet to maintain moisture and a plastic lid.
Instructions for making a homemade worm
Consider how to build a vermi farm with your own hands, where to start manufacturing and what tools you need.
For a homemade worm, the same plastic food boxes are most suitable. They fit well vertically and fit into each other. The box must be one-piece, without holes, measuring 60 × 40.
The lower drawer will be used to collect the soil solution, the upper ones to contain the worm. On top, you can put three compartments for growing a worm. In the bottom drawer, a series of holes are drilled from the top of the side pieces with a drill. But in the corners (up to 10 cm), holes should not be made, since the soil solution will drain through them.
> Make the same holes in the second box, but along the entire perimeter. In the bottom of the second box, we make cuts parallel to the stiffeners using a grinder (approximately 8 pcs.). We clean the surface from burrs with a chisel. We make 3 boxes of the second type.
At the bottom of the boxes, we lay a row of wooden rods as thick as a finger. They will prevent clogging of the bottom holes. It is necessary to sew bags from spunbond fabric of high density. They are laid on top of the rods. It is necessary to cut out the plastic nets to move the worms to a new box. They are used when 5 cm remains to the full box, and continue to feed the worm. Then, with a full box, the worms will be in the net, and they can be resettled.
We repeat the procedure with relocation three times until the worm is completely caught. We make the top cover from plywood. Using a drill, we make its perforation.
To breed worms at home, you need to purchase a small amount of equipment: scales, wheelbarrow, sieve, shovel, pitchfork, bucket, thermometers for measuring soil and air temperature, instrument for measuring soil acidity, racks, boxes for growing worms.
The reproduction and life of worms depends on the quality of the soil. Half of the container must be filled with humus with the addition of crushed cardboard. The soil should have a moisture content of 70-80%. It's easy to check. To do this, take a handful of soil in your hand and squeeze it tightly. If, as a result of compression, 1-2 drops of water are released, then the soil has the required moisture.
Starting a business, you should not immediately buy expensive vermicomposters. Use a wooden or plastic food box. It is necessary to make a hole in it for the outflow of liquid and ventilation. The room should have a temperature regime within 18-25 ° С, lighting 60 W at 20 m, ventilation no more than 0.5 m / s. Be aware that chlorinated water inhibits worms, so use water containers. Take care of protecting the worms from pests. They are eaten by moles, rats, and other rodents.
You can buy worms for breeding both online and from local worm farm owners. When buying a breeding stock, you should pay attention to the appearance of the worm. It should be red and mobile. The broodstock includes at least 1500 worms. The calculation must be carried out from the following ratio: for 1 cubic meter of soil, 1-3 families are needed for breeding.
2-3 days after preparing the soil, it is necessary to make a deepening in it and populate the first inhabitants there. Then gently spread the soil and close the lid. After a couple of days, you need to add food.
In order to determine the required acidity of the soil and check whether the worms will take root well in the new house, it is necessary to do a trial settlement in a small container. Based on the results, you can determine whether the optimum acidity level has been reached or needs correction.
The optimum acidity level for breeding worms should be in the range of 6.6 - 7.5 pH.
> If there are a lot of dead worms, then the acidity must be changed. It is increased by adding straw, sawdust, plants. To reduce the acidity of the soil, it is necessary to add chalk, limestone, shells.
Within a week after settling, it is necessary to check how the worms feel in the new home. If the surface of the substrate is clean, and they are mobile, then the resettlement was successful.
How to feed the worms at home?
Worms are not picky about food. They feed on dead or decaying plants. It is recommended to give potato peels, cabbage leaves, banana peels, stale bread, tea or coffee grounds, straw, grass, water from a container washed from sour cream or kefir, chicken droppings.
All the food you give to the worms must be minced. They cannot process it in solid form. A constant feed composition should be maintained. Worms tune in better to the food they have tasted for the first time in their life. When food changes, individuals must adapt over a period of time.
Growing and caring for worms at home includes feeding, maintaining a favorable temperature regime, watering and loosening the substrate.
The first feeding is carried out a few days after settling. For this, feed 3-5 cm thick is applied on a fourth of the surface and evenly distributed. Next time, the food is applied 5-7 cm thick on the entire surface of the box.
Feeding the worms is added every 1.5 - 2 weeks, as they are eaten, until the box is filled to a height of 50-60 cm. The frequency of feeding depends on the number of worms and on the temperature of the housing. It is necessary to keep worms at a temperature of + 15 ... + 25 ° С. The worms reproduce quickly enough, so it is necessary to have prepared transplant boxes. One family after overwintering increases 10 times.
It should be remembered that worms need moisture. Therefore, the substrate must be watered regularly. Optimum humidity should be 80%. This procedure must be done using a watering can with fine holes with settled water or rainwater at a temperature of 24 ° C.
Worms need oxygen, so if the substrate layer is 20 cm or more, it is necessary to regularly loosen it. This procedure is carried out with special forks with round ends. For this, the substrate is pierced without stirring the layers twice a week to the depth of occurrence of the worms.
As a result of their vigorous activity, the substrate in the box is divided into three zones.
The top layer contains nutrients and organic debris. The middle layer is designed to house the worms. The bottom layer is the most valuable. It collects all the products of soil processing, which are used as vermicompost and worm tea. As the worms work, the lower layer is constantly growing. The duration of the complete processing process in one box is 3-4 months. After that, the worms with a part of the old substrate are transplanted into another container, and everything starts all over again.
The main advantage of the vermi farm is that you can get valuable fertilizer and good income from unnecessary waste. To do this, you need to study the market and potential buyers.
To fertilize a plot with an area of 3-4 acres, it is enough to purchase 1.5 - 3 thousand worms. Throughout the year, they will produce the required amount of vermicompost. This valuable fertilizer can be sold to neighbors and acquaintances. When expanding the vermi farm, it can be offered to specialized stores, farms.
It is also profitable to grow worms for fishermen and sell in bazaars or take them to specialty stores, since this is part of the vermi business. A fisherman rarely takes the time to dig up the soil in search of a worm. It's always easier to buy it.Fishing shops will borrow from you because the worm has a long lifespan and demand is strong. The main thing is that the packaging promotes the life of the worms not for a certain period. The worm is the most valuable product for fish. Therefore, real professionals often breed worms at home for fishing.
The pet store also needs a constant supply of fresh worms and vermicompost. Worms are used there as food for fish, birds and other inhabitants.
For the efficient operation of fish farms and the normal growth of fish, it is necessary to use live food for its feeding. Therefore, the need for a worm as an irreplaceable product with a high nutritional value is constantly growing.
The vermicompost obtained from the vermi farm can be used for growing indoor flowers, seedlings, vegetables in a greenhouse and in a vegetable garden, for planting fruit crops, grapes, and medicinal plants. Vermicompost is especially valuable in greenhouses, since it is important to exclude the likelihood of diseases. Don't worry about worms in flower pots. Worms cannot cause any harm to plants. Since the use of vermicompost is wide enough, the demand is obvious.
To expand the assortment, you can also offer vermicelli. It is made in worm farms by slowly passing water through a stack of containers or with a recipe. To do this, mix vermicompost with water in a ratio of 1: 10. Saturate it with oxygen for good bacteria growth. This can be done with an aquarium compressor. Insist during the day at room temperature, after which the solution is defended and filtered. The sediment can be used as fertilizer, and the solution can be used for foliar and root feeding.
To prepare products for sale, they need to be properly packaged and stored. Worms can be packed in tight plastic bags with ventilation holes. Store them in a cool place to avoid excessive worm activity. A sufficient amount of soil must be added to the bag.
It is good to pack mother colonies for sale in cardboard boxes. The family should be composed of cocoons, fry and adults.
Vermicompost is a dark-colored smearing mass. After removing the worms, it is collected with a scoop, dried to a moisture content of 40-50%, sieved with a sieve and packed for storage. Vermicompost can be stored at temperatures ranging from -20 to + 30 ° C. So that the fertilizer does not lose its biological activity, it is still not worth freezing it.
Vermicelli is packed in plastic bottles before being sold. Do not forget to indicate the expiration date of the solution.
From 1 cubic meter of nursery, you can get up to 10 thousand worms and about 0.5 tons of vermicompost per year. When selling 1 worm for 2 rubles, you can get 20 thousand from the sale of worms alone, not taking into account the profit from vermicompost and vermicelli. Calculating the profitability of the business, we get 150%. As you can see, the revenue is quite decent.
Breeding worms is a profitable and rewarding business. This business is associated with minimal risks, so if you are interested, then you should try first in an old refrigerator or wooden box. Having mastered breeding worms at home through video and in practice, having studied all the subtleties and working with the sale of products, you will decide whether to expand your business. There are practically no shortcomings in the business based on worms, as evidenced by the reviews of entrepreneurs. With a serious approach, the business will generate significant income.