Content
- 1 Basic requirements for growing onions from sets
- 2 How to grow large, good outdoor bulbs
- 3 When to plant in the garden
- 4 Secrets of proper agricultural technology
- 5 Harvesting and storage of turnips and feathers
- 6 When to plant in spring?
- 7 Soil preparation
- 8 Growing conditions
- 9 Selection and preparation of planting material
- 10 Landing
- 11 Care
- 12 Fight disease
- 13 How to choose a set
- 14 When to plant onion sets in open ground
- 15 Processing and soaking onions before planting
- 16 Onion planting and care in the open field
- 17 How to treat onion flies
Onions are one of the first plants that humans began to grow. It is about four thousand years old from the moment of domestication and the beginning of cultivation.
No cuisine in the world can be imagined without this vegetable, because most dishes without its use seem bland and tasteless. There are quite a few varieties of onions, and each has found its fans.
Each gardener has his own secrets for good ripening of onions in the garden, but the most important thing is to adhere to the correct agricultural technology in order to obtain a large harvest, whether it is planting in a comb or from seeds.
Basic requirements for growing onions from sets
Not the most picky plant is considered cold-resistant, grows well at a temperature of twelve to sixteen degrees Celsius, seeds germinate even at five degrees in the cold season. Spicy varieties tolerate frost better, sweet varieties can die in the open field at a few degrees of frost.
Onion responds well to watering in the first stages of growth, in the future it needs dry soil in order to mature better. He needs more sunlight. Despite their low weight, onions require special attention to soil composition. The soil in the garden should be sufficiently loose and nutritious.
Onions should not be planted where groundwater is close to the ground.
 It is necessary to carry out regular weeding of the onion beds.
Weeding the beds must be carried out regularly, since the culture does not tolerate the neighborhood with weeds.
The correct solution would be to organize the onion beds and plant the vegetable in the places where they grew before cucumbers, cabbage, tomatoes or potatoes... These are the vegetables for which organic matter is added to the soil.
It is not recommended to plant onions in the place where they were grown last year. It is best if you return to this site in five years.
The increased acidity of the soil is harmful to the plant, since it absorbs nutrients worse, it can be affected by downy mildew.
Before planting onions does not tolerate liming of the soil composition, it is recommended to use wood ash.
How to grow large, good outdoor bulbs
One of five options is most often used - seedlings, seeds, seedlings, vegetative method, Chinese.
The Chinese way - how to plant on the technology in the combs
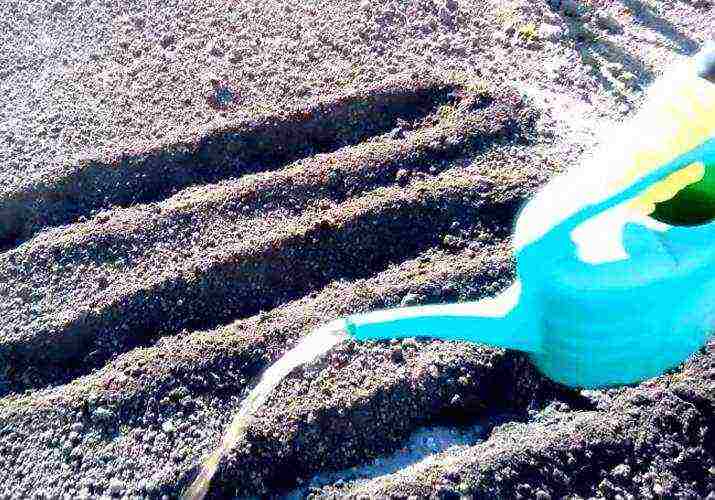
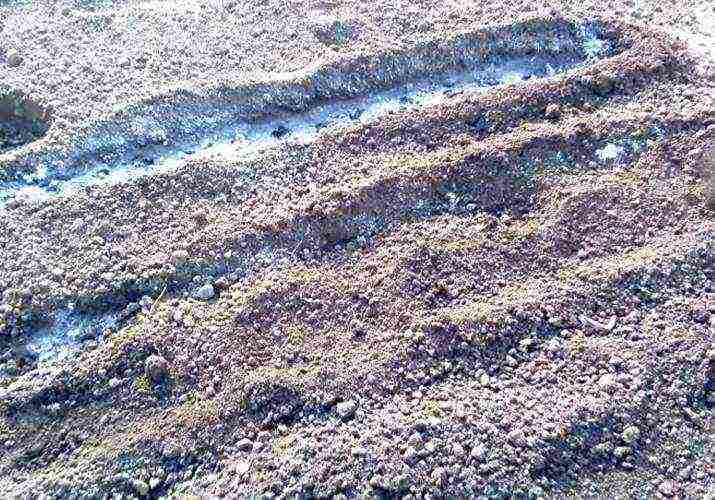
 The Chinese method involves planting onions in the ridges.
This option can help increase productivity... The main feature is the planting of onions on the ridges, and not in the beds themselves. The heads grown in this way are distinguished by their flattened shapes and large sizes. The tops of the vegetable are perfectly illuminated by sunlight, warm up, from this the onion receives good protection from the effects of rot.
It should be added that it is better to loosen and water such beds, remove weeds from them.
You can sow at an air temperature equal to 5 degrees... The planting material must be sorted out, smaller bulbs are allowed to be planted as the soil warms up. The larger ones should be held by May. Such a measure will give you the opportunity to harvest at the same time.
After the bulkhead, the sets are warmed up a couple of weeks before planting. To do this, it is placed in a box and placed near the battery.
It is imperative that each bulb is carefully the tail is cut off, excess scales are removed... If you have damaged the growth neck, you can put the material aside. It is no longer suitable for landing.
One day before planting, the material is soaked in warm water to give an impetus to the formation of the root system.
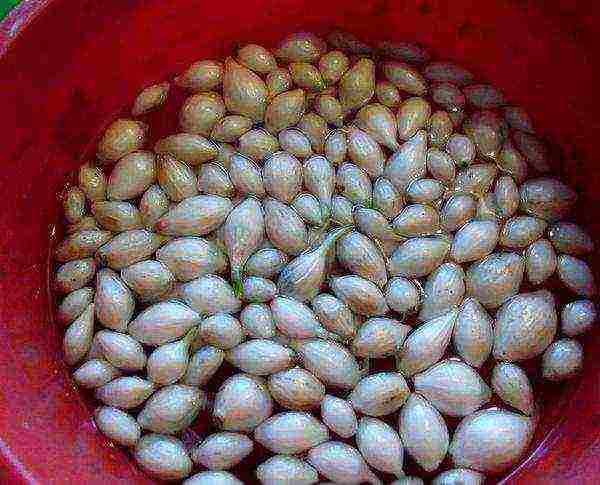 For better formation of the root system, the seedlings are soaked in warm water.
The soil for planting must be prepared in the fall. A spoon of superphosphate, a teaspoon of nitroammophoska, two of dolomite flour are added to each square of the site. In the spring, the bed must be dug up again, you can add a little manure, just not too fresh.
Ridges are arranged, the height of which should be about fifteen centimeters, the interval between them is up to thirty... Sevok is planted after ten centimeters to a three centimeter depth. The seeds should not be trampled; it would be more correct to lightly sprinkle them with earth.
In the first month of growth, if the weather is dry, the onions should be watered twice. But this is in the event that it rains between waterings.
You can feed it three times. Mullein is added in mid-May. June is the turn of potash, urea and phosphorus fertilizers. The third time it is necessary to fertilize at the moment when the bulbs begin to form.
Another feature of the Chinese method is that weeding the beds is necessary as the weeds grow, which happens quite rarely.
Copper sulfate is used as a protective measure against powdery mildew.
Method of planting and sowing seeds in the soil
This planting method is recommended for the northwestern regions and Belarus, when the onion is not able to fully ripen, which reduces its shelf life.
In the middle of spring, the seed is calibrated, more large specimens... After sowing "dry" the first shoots will appear in three weeks. To accelerate the process, you can soak the seeds in potassium permanganate, and after a day sprinkle them on the fabric and leave them alone to hatch. But at the same time, it is necessary to ensure that the planting material remains sufficiently moist.
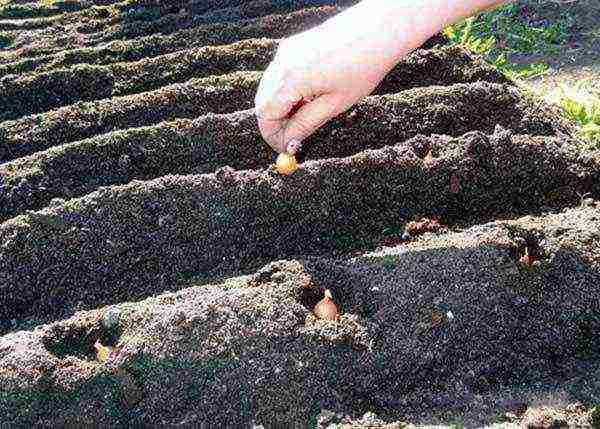
Furrows are made at a distance twenty centimeters... One gram of seeds is enough for two meters of sowing, planting depth - up to three centimeters. For convenience, you can mix the seeds with sand, sprinkle the grooves with dry earth after planting.
 Onion seeds are planted in grooves
When to plant in the garden
Landing time depends on weather conditions... If the weather is warm in spring, then sowing can be done in the last days of April. Otherwise, you will have to wait until the ground warms up.
The seedlings grown in advance are transferred to the ground not earlier than mid-May.
Sevok is planted in the first May decade... Inhabitants of the northwestern regions can orient themselves when planting onions on the flowering of bird cherry.
For winter sowing, the beds are prepared in the fall. Landing is carried out in the second half of November, before frost.
Secrets of proper agricultural technology
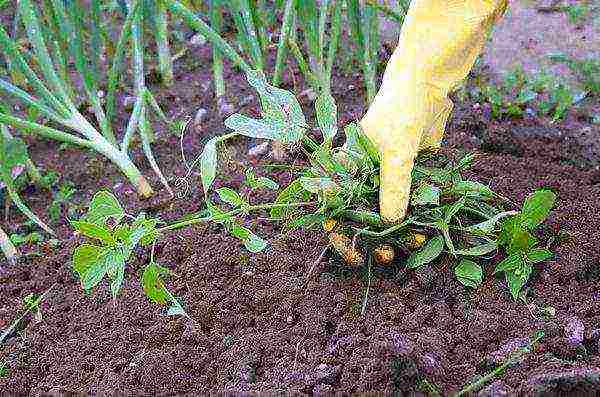
Avoid crusting or weeds on the soil surface. For this purpose, the beds must be loosened more often to a depth of five centimeters. Weed vegetation is best removed at the initial stage of growth, when the seedlings are still reddish.
 After the start of the formation of the turnip - it needs to be opened by a third
It must be remembered that the bow loves to show off. When a turnip begins to form, it is necessary open a thirdby freeing the shoulders. This technique helps the bulb to form well and fully ripen.
Harvesting and storage of turnips and feathers
As soon as new feathers have ceased to appear, and the onion has acquired a characteristic shade, it can be removed. As a rule, this falls on mid-August - early September... If you skip the harvest time, the vegetable will begin to grow again and will be of little use for storage.
The collected bulbs are washed, peeled from husks and dry feathers, the roots are cut off... For drying, it is laid out in one layer in a room that is well ventilated. After a few weeks, new golden scales appear on the bulbs. This means that the vegetable is ready for long-term storage.
 Before long-term storage, the bulbs are peeled and roots are removed.
As a rule, gardeners prefer growing onions with sevkom, purchasing them in special stores. It can be planted in the winter, after preparing the garden bed.
But if you adhere to all the recommendations, then in the Chinese way you can get a good harvest of this wonderful vegetable.
Growing onions to obtain a head (bulb) in the summer cottages of experienced gardeners does not cause difficulties. However, in order to get large (200-400 g) bulbs, it is necessary to strictly adhere to the cultivation technique, which has its own characteristics. How to ensure yourself a good harvest of large bulbs - what planting material to use, how to care for plantings of onions, etc., we will tell in the article.
Onion
Content:
- General Approaches to Getting Healthy, Quality Onion Bulbs
- Bulb varieties and size
- Selection and storage of seed
- Turnip onion growing technology
- Harvesting onions
General Approaches to Getting Healthy, Quality Onion Bulbs
Large onions start from seeds. Onions per bulb (head) can be grown through seeds (nigella), sevok (arbazheyka) and seedlings. On the garden wedge of the summer cottage for growing large onion bulbs for the purpose of eating and winter storage, it is more practical to grow a crop from sevka.
To get a harvest of large heads (up to 200-400 g) of onions, several conditions are necessary:
- selection of a zoned variety with a large onion;
- correct storage of seed;
- compliance with the requirements of agricultural cultivation.
Bulb varieties and size
Do you want a large onion? Be attentive to the varieties planted. Onions are a long day plant and react painfully to the ratio of dark and light periods of the day. Onions have a very interesting varietal characteristic of their reaction to the length of daylight hours. Culture tolerates climate change more easily than lack of daylight hours.
Southern onion varieties are genetically predisposed to grow and form a storage organ (bulb) as the day length approaches the maximum - 13-15 hours. The approach of the maximum in the south takes a long period, and the zoned variety manages to build up a large vegetative mass, including a large storage organ.
If a southern onion variety is planted in the northern region, where daylight hours in the summer season very quickly reach a maximum of 15-18 hours, the plants will tend to finish the growing season as soon as possible and form bulbs. The formation of the storage organ (bulb) means the end of development, and retirement. The bulbs do not have time to gain weight and remain small.
Northern onion varieties planted in the south will constantly form a leaf mass in anticipation of the onset of the longest day at 15-18 hours. And since in the south the maximum length of daylight hours ends at the 15 hour mark, the culture continues to increase the leaf mass, and does not form a bulb at all. The variety does not have enough light time to move on to the next phase of development.
Therefore, dear readers, when you want to get a large onion bulb, be sure to take into account the culture's reaction to photoperiodicity. Grow southern varieties of onions in the south, and northern ones in the north. Otherwise, the onion heads will be shallow, immature, or not formed at all. In this case, both the large-headed, but not zoned variety, and the fulfillment of all the requirements of agricultural technology will not ensure the production of a large bulb.
Onion Selection and storage of seed
It is possible to get a high yield of large onion bulbs only when sowing with high-quality seed material, which can be purchased in a store or grown independently and properly preserved before planting in the ground.
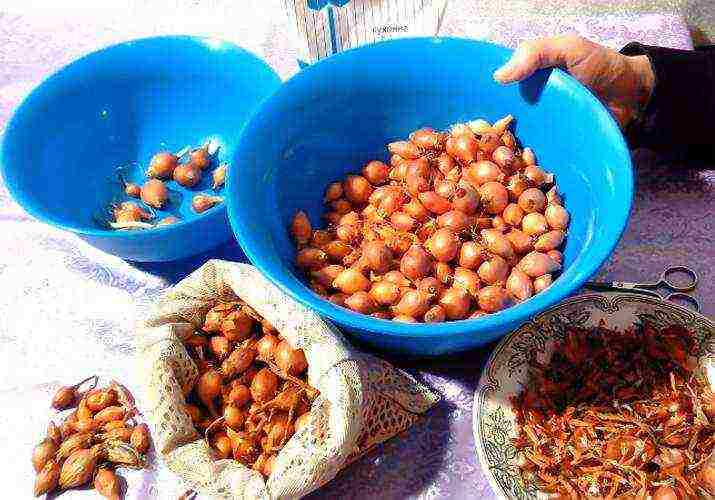
When self-harvesting seed, after harvesting and drying the crop of bulbs, it is necessary to divide them into fractions:
- Wild oat, 0.5-0.7 cm in diameter;
- Group I, 0.8-1.5 cm in diameter;
- Group II, 1.5-2.2 cm in diameter.
The best for sowing is the arbazheka of groups I and II.
Before planting, the selected seedlings are stored in a cool room at a temperature of 0 ... + 2 ° С and not higher, and in a warm room at + 17 ... + 18 ° С (away from heating batteries).
If the temperature regime was violated and the arbazheka was stored at home at a temperature of + 2 ... + 15 ° С, it makes no sense to hope for a high-quality harvest of onions. During spring planting in open ground, such an onion set will begin to shoot. A thick hollow peduncle will take away some of the nutrients, the onion bulb will be small. In addition, the base of the peduncle in the bulb will serve as a source of decay in the autumn-winter period.
Thus, the variety and quality of planting material are the prerequisites for obtaining a harvest of large onion bulbs.
Turnip onion growing technology
Precursors of onions
Tomatoes, cucumbers, early and medium potatoes, zucchini, legumes, and early cabbage are good precursors for onions in crop rotation. Onions go well with carrots, beets, radishes, greens, which allows these crops to be used as compactors in combined beds.
Planting onions
Planting period sevka
Planting onion sets can be carried out in late autumn or early spring. In practice, spring planting of onions is preferable. Climatic cataclysms of recent years can provoke early seedlings and their death during recurrent frosts, cause partial rotting of seedlings during the winter. The stress state of the plants will lead to the formation of small bulbs.
Depending on weather conditions and soil warming, arbazheka is sown in warm regions in the last decade of March – early April, in colder (middle lane) - in the last decade of April – early May. In the northern regions, after the frost passes and the soil warms up to + 6 ... + 10 ° С.
The optimum soil temperature for sowing seedlings is + 10 ... + 12 ° С, and air temperature + 3 ... + 5 ° С.
Onion shoots will appear on the 5th – 6th day. If you plant a seed in cold soil, it will begin to shoot.If you are late with planting, then, once in dry, overheated soil, the onion will slow down its development and will not form a large onion. That is, in order to obtain a large onion bulb, it is very important to withstand the planting time of the set.
Onion seedlings are patient to cold snaps and easily tolerate short-term frosts down to -3 ° C. But with the autumn planting and the onset of spring return frosts, the grown plants stop growing and developing when the temperature drops from -3 ... -5 ° C, which subsequently affects the size of the bulb.
Seed preparation for planting:
- Select only absolutely healthy onion sets for planting;
- Cut dry ends at the top of the set carefully with scissors;
- To protect the seed from fungal infections, be sure to disinfect it with hot water, potassium permanganate solution, and other known methods. Decontaminated onions are dried at room temperature until flowing. It is stored in a damp burlap until planting.
- The next day, they are planted in prepared soil.
Onion soil requirement
Onions do not tolerate acidified soils and fresh organic matter. Therefore, when growing in a culture rotation, organic matter and deoxidizers are introduced 2-3 years before planting onions for previous crops. Onions do not like liming the soil, therefore, if it is necessary to deoxidize in the year of planting, 3-4 glasses of ash per sq. m area.
For normal growth and development of plants, the soil under the onions must have a neutral reaction pH = 6.4-6.7 units, be moisture-consuming, permeable, fertile.
Planting material for onions - sets
Fertilization
Onions take out significant amounts of nutrients from the soil with the harvest, but they do not need to be fed. An even supply of nutrients and moisture during the growing season will contribute to the constant growth of the vegetative mass of the bulb. On depleted and dense soils, from autumn, under the main soil digging for onions, ripe crumbly humus is introduced no more than 1 / 3-1 / 2 buckets per sq. m or sow siderates.
Rye, oats, mustard, rapeseed are well loosened. On dense loose soils, you can use mustard with legumes, sweet clover, vetch-oat mixture. Mixed green manure crops will not only plow the soil, but also saturate it with available nutrients.
Of the mineral fertilizers under the onions, nitroammofoska is applied 50-60 g / sq. m. or only phosphorus-potassium fertilizers, respectively 25-30 and 15-25 g / sq. m, and in the spring, urea is added for sowing no more than 20-25 g / sq. m.
If the soils are depleted and higher fertilization rates are required, then it is better to add 2/3 of the dose in the fall, and add the remainder in the spring before planting.
Arbazheiki planting rules
Sowing is carried out in the prepared soil in a single-row method or in 2-3-row tapes. In the tape, 8-12 cm are left between the rows and 20-25 cm between the tapes.
In the first method, in a row between the bulbs, the distance can be different:
- When planting "shoulder to shoulder", the planting density is high, since the distance between the sets in a row is 1.0-1.5 cm. With this planting method, 2 thinning is carried out:
- at the first thinning, the distance is increased to 4 cm, and the young onion-feather is used for food;
- after 25-30 days, a second thinning is carried out, leaving a distance between young plants of 7-10 cm.
The second planting method is private. Sevok is planted at a distance in a row after 8-10 cm, between rows - 20 cm. Thinning is not carried out. Arbazheyka is placed in the furrows vertically up to a depth of 4 cm, covered with soil by 2.0-2.5 cm from above and slightly compacted with the palm of your hand.
Onion greens
Onion care during the growing season
It is very important to keep the soil moist, loose, and free of weeds during the growing season.Weeds obscure the bulbous zone at the base of plants and provoke the accumulation of fungal infection.
Post-irrigation mulching of onions is mandatory. The crust formed after irrigation is the reason for the uneven provision of moisture to the upper soil layer (sometimes dry, sometimes wet), which reduces the possibility of forming a large bulb. Loosening is only superficial, in wide aisles. When loosening in a row, damage to superficially located roots negatively affects the growth of the bulb. Onions must not be hilled. On the contrary, during the growth of the bulb, the "fashionista" opens her shoulders towards the sun. Timely watering plays a significant role in the formation of a large bulb.
Watering onions
Watering and feeding onions in the first 2-3 months are especially important. Interruptions in the supply of nutrients and a violation of the irrigation regime during this period lead to small heads of onions and a loss of their taste.
Approximate frequency of watering:
- The first month, watering is carried out once a week with the obligatory subsequent loosening and mulching of the crushed mulch. Pests settle under large mulch, fungal infection accumulates. Fine mulch protects the soil from drying out the top layer and quickly decomposes when exposed to moisture. During this period, when watering, the soil is soaked to a 10 cm layer.
- In June, by the growth phase of the bulbs, the number of watering is reduced to a 10-day break, but the soil is soaked to a 20-25 cm layer. To avoid stagnant water, watering is carried out with fine spraying.
- In July, watering is carried out every 8-10 days as needed (preventing the soil from drying out in the root layer).
- In the second half of July, the soil is only kept in a moist state, they switch to "dry irrigation". The soil is loosened, mulched, be sure to get rid of weeds.
- 2-3 weeks before harvesting, watering is stopped and carefully "bare" the shoulders of the bulbs from the ground. The procedure promotes ripening of the bulb, especially the stem at the base. Unripe stems in winter are affected by fungal and bacterial rot.
Watering errors
- Watering with high pressure breaks the feather, causing interruptions in the supply of nutrients to the plant, weakens it. The plant gets sick.
- Do not pour cold water on the onion. When irrigated with water below + 18 ° C, the culture becomes sick with powdery mildew.
- It is necessary to keep the plantings absolutely clean from weeds, preventing them from growing above 5-8 cm.
- Onion root collars remain juicy on a weeded and improperly watered area, which sharply reduces the keeping quality of the onion.
A bed of onions
Top dressing onions
The formation of large bulbs requires a fairly large amount of nutrients. Their entry to culture should be uniform, without hunger breaks and overfeeding. It is better to fertilize onions with nutrient solutions. Adding dry dressings is not as effective.
The first feeding of onions
With sufficient basic dressing of the soil, the first feeding of onions can be postponed to June, and if necessary, it is carried out after 2-3 weeks from shoots. Thin light feathers are a signal for feeding.
To carry out top dressing, a spoonful of ammonium nitrate or urea is diluted in 10 liters of warm water. They are applied at the root by 10-12 running meters. If the soil (for various reasons) was not fertilized enough before planting, then the first top dressing is best done with full fertilization, using nitroammofoska, Kemiru-lux, crystallin in the form of a solution (25-30 g / 10 l of water). After fertilizing, the plants must be washed with watering with a fine-mesh nozzle.
Second feeding of onions
The second feeding is carried out in the second decade of June with a solution of phosphorus-potassium fertilizers. In 10 liters of warm water, dissolve 20 and 10 g of superphosphate and potassium sulfate and add under the root of the plants.During this period, instead of a phosphorus-potassium mixture, you can once again feed the plants with nitroammophos, increasing the concentration of the solution to 2 tablespoons per 10 liters of water. Additionally, foliar feeding is carried out with microelements or boron with the addition of ash extract (0.5 l per 10 l of water).
The third feeding of onions
The third top dressing is carried out if necessary, if the development of the bulb slows down, The third top dressing is carried out when the bulb is the size of a walnut, usually with a solution of superphosphate. In 10 liters of water, 40 g of superphosphate are diluted. The solution consumption is approximately 5 l / sq. m landing area.
It should be noted that onions on fertile and well-seasoned soils with mineral fertilizers can not be fed with fertilizers, limiting themselves to fertilizing with microelements and ash extract.
Onion
Protection of onions from diseases and pests
To protect onions from diseases and pests, plants are treated with biofungicides (against diseases) and bioinsecticides (against pests) for preventive purposes. The most common biofungicides are Planriz, Gaupsin, Alirin-B, Trichodermin, Glyocladin.
For treatment against pests, use "Aktofit", "Aversectin-S", "Bitoxibacillin", "Verticillin", "Bicol". It is better to prepare solutions for processing in tank mixes. The selection of biological products, their dosage and mixing should always be performed according to the instructions. Onions are processed at least 3-5 times during the growing season in the morning. The last treatment can be carried out 2-3 days before harvest. Biologicals are absolutely safe for humans and animals.
Treatments are started at the first visible changes in feather color or plant condition.
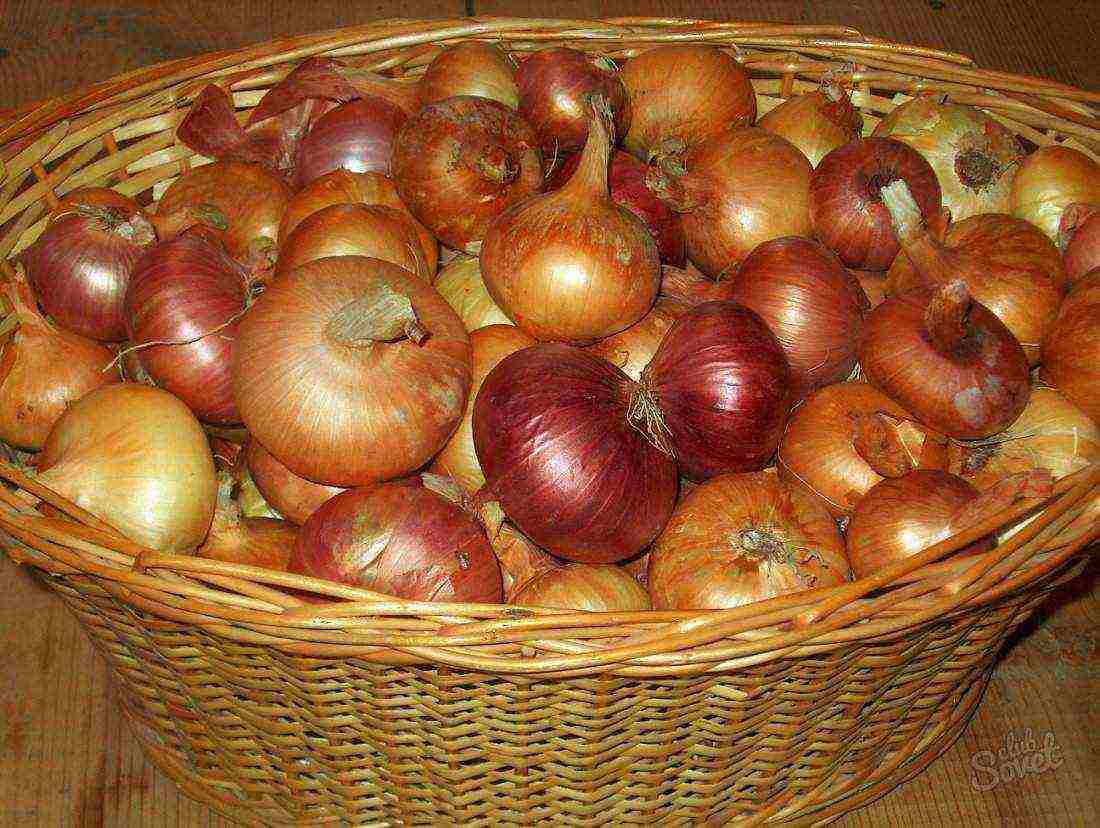
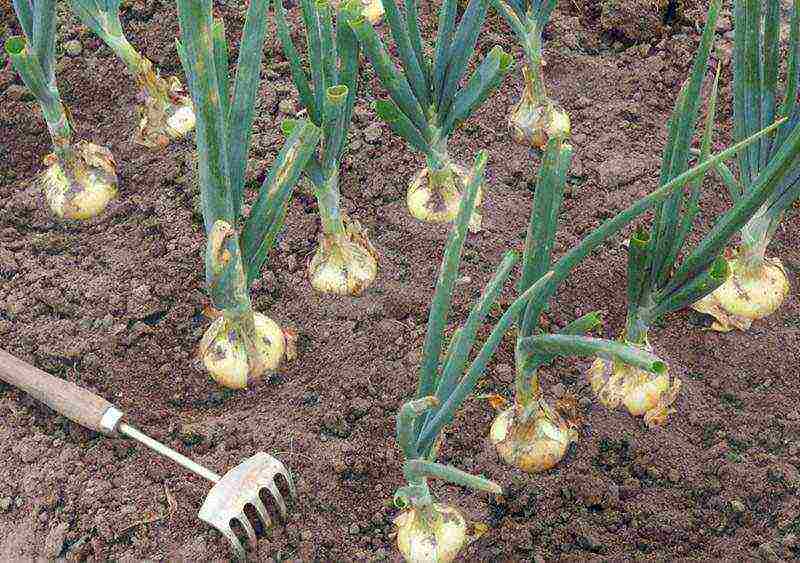
Harvesting onions
The beginning of harvesting is determined by the state of the above-ground mass of the onion. Depending on the variety:
- plant leaves turn yellow,
- lie down
- lose turgor, etc.
When harvesting, onions are pulled out of the soil, left for 1-2 weeks under a canopy for final drying. The dried onions are sorted out and dense bulbs with a dry root collar, covered with dry upper scales, are laid for winter storage. Before placing in a container for storage, dried stems are cut 3-5 cm on a stump or braided and hung in a dry, warm place.
Harvesting onions
Thus, the cultivation of onions with a large bulb requires careful implementation of agrotechnical techniques, the main of which are:
- selection of a zoned variety;
- seed quality;
- timeliness of sowing;
- compliance with the rules of care, which include timely watering and feeding, keeping the soil in a moist, weed-free state, with an optimal plant density.
Qualitative fulfillment of the requirements of agricultural technology creates all the prerequisites for obtaining a high yield of large bulbs.
Planting onions on the head in the spring is not a laborious and complicated procedure, but it requires certain knowledge from the vegetable grower. If you do everything right, after 9-12 weeks (depending on the growing region) after planting the seedling in open ground, you can get onion heads that will be especially large, fragrant and crispy.
When to plant in spring?

The main criterion that helps to determine the correct timing of planting a seedling is soil temperature. In order to get a good harvest of onions over time, it is necessary to plant the seedlings in open ground, waiting for the moment when the soil on the site warms up to at least 12 degrees. At a lower soil temperature, planting onions with sets on the head is impractical.
This limitation is not at all due to the fact that the planting material may not tolerate possible frosts: the cold resistance of this culture is well known.The thing is that at low soil and environmental temperatures, a rapid growth of green mass will be observed and, on the contrary, an extremely slow development of the bulbs themselves.
As a result, the seed will throw out a large number of long hollow arrows, on which its seeds will ripen over time. By significantly weakening the head, the arrows will prevent the formation of full-fledged bulbs suitable for human consumption.
To prevent this from happening, it is very important to adhere to the correct landing dates:
- In central Russia, gardeners, as a rule, plant onions on their heads in the first decade of May.
- In the southern regions of the country, sevka is planted two weeks earlier, that is, already in April.
- In the northern regions of the Russian Federation, it is possible to plant a seedling not earlier than mid-May.
Soil preparation

The site intended for planting seedlings in open ground, it is advisable to prepare in the fall. It can be considered a great success if legumes, potatoes, tomatoes or cabbage grew on it in the summer months: it is these plants that will saturate the soil with trace elements necessary for the successful development of onions, which are extremely demanding on the nutrient composition of the soil.
The best soils for it are loamy or chernozemic substrates, which are high in nutrients and have neutral acidity.
To restore the fertility of the soil, which significantly decreases by the end of summer, organic and mineral fertilizers are introduced into it:
- The best fertilizer applied to a bed intended for growing onions is humus, compost or rotted manure mixed with superphosphate (100 g of superphosphate per 5 kg of organic fertilizer).
- As a soil fertilizer, you can use a mixture of compost and wood ash (prepared at the rate of 5 kg of organic matter and 1 kg of ash for each square meter of the plot).
- It is necessary to fertilize a site with loamy soil annually, adding to each square meter of area a nutrient mixture prepared from humus (1/2 bucket), potassium chloride (15 g) and superphosphate (30 g).
- A good option is the introduction of complex mineral fertilizers (1 kg of fertilizer per 10 square meters of fertilized area).
During the autumn preparation, the site is dug onto the bayonet of the shovel, without breaking the clods.
Such a method of soil cultivation is the best prevention of the appearance of diseases and pests, since it provides:
- deeper freezing of the soil;
- the death of most of the larvae in it;
- long-term moisture retention during snow melting.
If it was not possible to prepare the site in the fall, in early spring the soil on it should be dug up only with a half-bayonet of a shovel, before scattering ammonium nitrate over the surface of future beds (at the rate of 20 g per square meter).
After digging, the soil is slightly loosened and harrowed. Surface tillage of the soil helps not only to retain moisture in it, but also prevents young roots from being burned by fertilizers that have fallen into its lower layers.
If the acidity of the soil on the site is increased, before digging it, it is necessary to add ground chalk, dolomite flour or wood ash (no more than a liter can for each square meter).
Onions grow poorly on clay soil. To remedy the situation, a mixture of peat and river sand is introduced into the soil, after which the plot is plowed.
Growing conditions
In order for the onion heads to grow especially large, it is necessary:
- not to be mistaken with the choice of the variety;
- properly prepare the land for planting a seedling;
- observe the rules of crop rotation.
The area where you plan to grow onions should be well lit, which means that there should be no trees or shrubs nearby that cast a shadow on the garden bed. As a bulbous crop, onions enjoy being in direct sunlight. With a lack of light, the heads will grow very small.
The best predecessor of onions is rye, whose powerful root system will not only thoroughly loosen the ground, but also saturate it with a whole range of nutrients. Equally important is what kind of vegetables will be planted next to the onion garden.
It is best to plant carrots next to onions. If you make a bed in which rows of onions are interspersed with rows of carrots, these two crops will protect each other from pests: the onion will scare away the carrot fly, and the carrot will scare off the onion. You can also plant celery, parsley, parsnips next to the onion bed: the onion fly cannot stand the strong aroma of these spicy plants.
Following the rules of crop rotation, in no case should you plant seedlings in the beds on which bulbous crops (primarily garlic and onions) and carrots had previously grown. Re-planting onions in this area is possible only after three years. It is during this time that the soil will be cleared of pests and pathogens inherent in these plants.
Selection and preparation of planting material
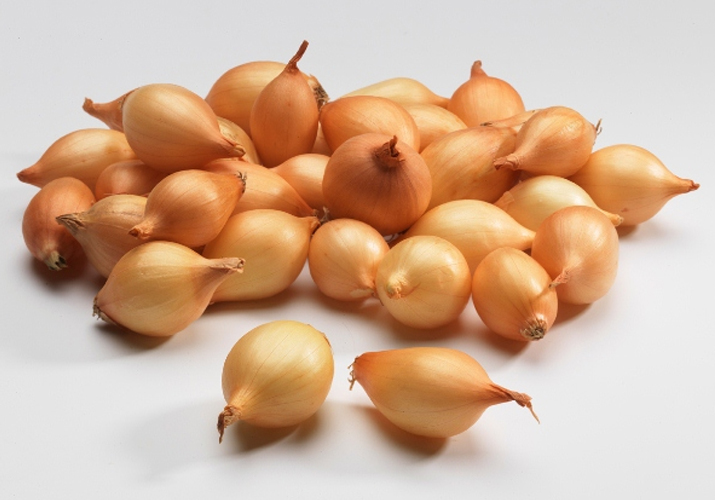
The first stage in the preparation of planting material is the sorting of the seedlings, which implies calibration (selection of heads by size):
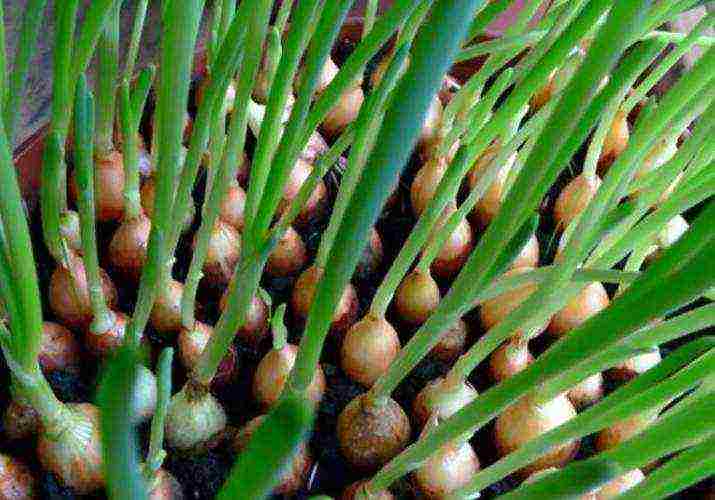
- The smallest bulbs, with a diameter of 0.5 to 1 cm, can only be used for green production. They are planted very first: either in a greenhouse or in open ground (in early May).
- Bulbs that are more than 2 cm in diameter cannot be used for large heads either, as they are likely to throw out arrows - powerful juicy stems with flower ovaries. Such bulbs are suitable for obtaining seeds for the next harvest or for growing succulent greenery. To prevent the appearance of arrows too early, large bulbs are planted last.
- The ideal planting material for growing large onions is bulbs with a diameter of 1 to 2 cm. It is them, having sorted out, should be put in a separate container. They should be planted in an open-air garden bed a couple of weeks after the smallest seedlings have been planted.
Selected bulbs are subjected to a thorough examination, during which dry, damaged or rotten heads are rejected, unsuitable for planting and subsequent cultivation.
Methods for warming up sevka
Heads intended for planting must necessarily undergo special processing, which consists in warming them up. This procedure helps prevent arrows from appearing. If you ignore the procedure for warming up the planting material, the probability of the appearance of arrows will be one hundred percent.
There are several options for heating the set:
- 14-20 days before planting, the calibrated and sorted seedling is brought into the house and, spread out in one layer, is left in a warm and dry place with a constant air temperature (values from 20 to 25 degrees are considered optimal). Ceiling shelves or tops of cabinets are ideal for this purpose.
- The duration of warming up can be significantly reduced by increasing the air temperature (up to about 35 degrees). This ambient temperature can be achieved by placing the seedling next to a heater, boiler or radiator. The duration of the procedure is no more than three days. This option has one significant drawback: in case of overheating, the bulbs, overheating, may lose their ability to sprout.
- If the gardener does not have a lot of time (for example, if the seed was bought at the last moment, right before planting), you can use the express method, which involves more intensive heating of the planting material. During the procedure, the seedling is placed in a container with water heated to 50 degrees for 15 minutes, after which it is cooled for the same time by moving it into a bowl with cold water.This technique contributes to additional hardening of the planting material, which becomes stronger.
Regardless of what method was used to warm the seedlings, after it the bulbs should remain clean and dry.
If the seedling was stored in a cellar or in any other cold room, it must be removed two weeks before planting and kept at room temperature during this time. Too cold bulbs planted in the ground can simply rot in it.
Disinfection of heads
 The next mandatory stage in the preparation of planting material is its disinfection.
This can be done in different ways:
- By soaking the bulbs in a solution prepared from a tablespoon of table salt and a liter of water. The duration of the procedure is up to 30 minutes.
- After immersing the seedling for a quarter of an hour in a strong (dark cherry color) solution of potassium permanganate. In order not to burn the bulbs, immediately after processing, they must be rinsed under running water.
- Having subjected the set to a contrasting procedure, at the first stage of which it is treated with a hot solution of wood ash (prepared from two handfuls of ash and 5 liters of boiling water). Having placed the seedling in a deep colander (you can also use a sieve), it is poured with an ash solution cooled to 50 degrees, and then poured over with cold water. Such processing helps to protect the planting material from many diseases.
- To prevent the occurrence of fungal diseases, you can treat the seedling with a solution of copper sulfate (prepared by diluting ½ teaspoon of copper sulfate in 5 liters of water), holding the bulbs in it for 10-15 minutes. After that, they are immediately rinsed with running water.
The final stage in the preparation of the planting material is the procedure for feeding the bulbs, during which they are kept in a complex fertilizer solution for 15 minutes (you can buy it in a specialized store).
After performing the above manipulations, slightly dried onions can be considered prepared for planting in open ground. It should be remembered that the set of onions after soaking must be immediately planted on the site, therefore all preparatory measures must be carried out shortly before planting.
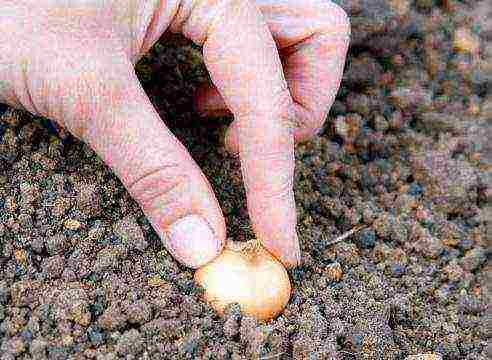
Landing
In order for the planting of the sevka on the head to give a good result, the smallest bulbs are planted first, after a few days - the medium ones, and some time later - the largest ones. If planted too early, a large seed will certainly release an arrow.
The seedling on the head is most often planted as follows:
- In the prepared area, the beds are first made (it is desirable that they be high). To exclude the possibility of water accumulation during irrigation, the surface of the beds must be carefully leveled before planting the seedling.
- On the formed beds, transverse grooves are made with a depth of no more than 5 cm, spaced 25-30 cm from each other.
- The distance between the planted bulbs depends on their size. Most often, it fluctuates between 5-8 cm. Between the largest bulbs, you can leave a 10-cm gap to avoid thinning thickened plantings, otherwise you can get too small heads.
- You should not immerse the seedling too deep in the soil, since when the roots are released, the bulb will be drawn into it even deeper. This will significantly slow down the emergence of seedlings, and the grown heads will be weakened and small. To prevent this from happening, the sevok is lightly pressed with your fingers into the prepared grooves so that their burial into the soil does not exceed 1 cm. After that, the planted bulbs are covered with a 2 cm layer of soil or humus.
- It is not worth watering the beds with just planted seedlings: there is quite enough moisture in the spring soil.
Care
Caring for onions is not particularly difficult, since this culture only needs good lighting, loose soil and regular watering (especially in extreme heat). The beds on which onions grow must also be freed from weeds in time and the soil must be loosened on them after each watering and rain.
Watering
The guarantee of the successful development of the bulbs and obtaining a good harvest is the correct watering of the plantings:
- During the first week after planting the seedlings, it is necessary to water the beds with onions every 2-3 days.
- For the next 5 weeks, the onion beds should be watered at least once a week. At the same time, it is important to remember that the cause of the overwhelming majority of diseases of this culture is not insufficient watering, but stagnation of moisture in the soil, so it is very important not to overdo it here.
- During severe droughts, onion feathers can become discolored and bent, and their tips can turn white. In this case, the bed must be additionally watered.
- The next day after watering, the soil in the garden must be loosened. This simple manipulation will improve the aeration of the root system. During loosening, all weeds must be carefully removed, using them as material suitable for mulching the row spacings.
- Medium-sized bulbs need to be slightly raked off the soil, as better access to sunlight will help them ripen faster and form larger fruits.
- Watering of the finally formed bulbs should be stopped 3 weeks before harvesting. The heads need to ripen, overgrow with the required number of scales and dry out a little. Otherwise, the moisture-saturated bulbs will rot before reaching the stage of maturity.
Top dressing
During the growing season, planting onions must be fed at least 3 times, using a mullein solution (a glass of manure per 10 liters of water):
- For the first time, fertilizing the soil is carried out before planting the seedlings.
- The signal for the second feeding is the growth of onion feathers up to 10 cm in height.
- The third feeding is performed when the size of the bulbs becomes comparable to the size of a walnut.
As a top dressing for onions, you can use a very effective herbal infusion prepared according to the following recipe:
- Having put any grass in a barrel, add a little yeast, fresh mullein or bird droppings to it and, putting it in a sunny place, insist for a week. After this time, the infusion is filtered.
- Diluted with infusion with water (in a ratio of 1:10), use it for watering onions that have released at least four green feathers. This tool can be used to feed any vegetables.
In the second half of summer, feeding the growing bulbs must be completely abandoned, since this can negatively affect their storage.
Fight disease
If the basic rules of planting and care are violated, onions can become infected with bacterial and fungal diseases: fusarium rot of the bottom, rust, onion mosaic, neck rot, peronosporosis, black mold, etc.
To prevent their occurrence, onion feathers that have reached 15 cm in length must be treated with a solution prepared from copper sulfate (1/2 teaspoon), laundry soap, grated on a fine grater (1/2 tablespoon) and water (5 l).
The procedure for dusting onion feathers with wood ash or tobacco dust also has a good prophylactic effect.
Dear friends, the spring sun in May warms more and more confidently, which means that it's time to plant onions. We hope that you have already prepared the onion sets.
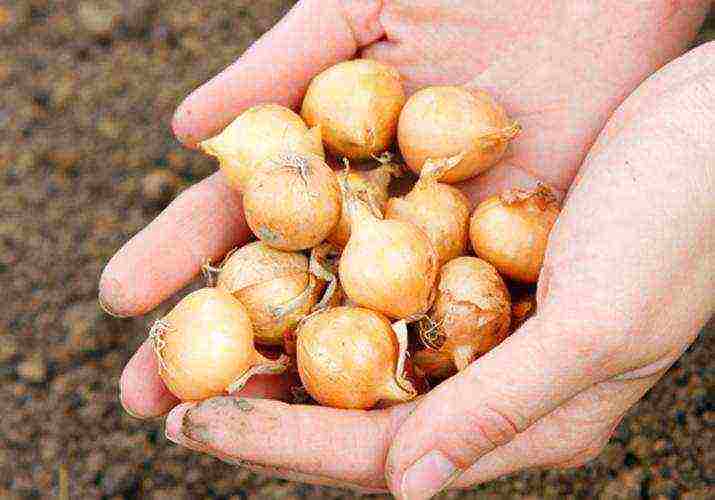
This is the name of a one-year-old onion grown from seeds (nigella) and representing a small onion.
Sevok can be grown independently from seed or purchased at garden centers and shops.
How to choose a set
It is important to choose the right quality planting material. Bulbs should not be shriveled, already sprouted. In this case, the supply of their nutrients has already gone to the feather, and a good turnip will not work.
Also inspect them for damage and rot, this is important because a good onion head will not turn out from such a set, it will be susceptible to disease, it will grow poorly, or it may even rot.
The principle applies here: quality is more important than cheapness. It is better to purchase a good planting material than a discounted one that does not meet these criteria.
Good set, small in size, dense, with a shiny, smooth, solid and tight husk.
When to plant onion sets in open ground
The most popular month for planting onions is May. Specific dates depend on your climate zone. In central Russia, onions can be planted throughout May, as long as the spring soil moisture remains, which the onion respects very much.
When planting onions, it is not even the date that is more important, but the weather conditions and soil temperature. There is no need to rush to land if the weather is cold and wet. You need to wait for warm days when the soil warms up to at least 15-20 degrees Celsius.
If you hurry and plant the bow in the cold ground, then it will not lead to anything good. Although the onion tolerates frost and cold well enough, its character deteriorates because of this. He will certainly take revenge on you and, instead of a good turnip and greenery, will grow you flower arrows.
Therefore, it is better to wait for stable warm weather without rain than to be left without a crop. Pay attention not only to the lunar calendar as the ultimate truth, but also to the weather forecast, it will be more accurate.
What to do to prevent the bow from going into the arrow
Even before planting, it is important to know why the sevok goes into the peduncle and how to avoid it.
The reason that the bow is shooting is the wrong storage temperature of the planting material, the lack of adaptation before planting, the violation of the rules of care.
Let's explain in more detail: onion sets must be stored at above-zero temperatures, because it is the cold that provokes the onion to create arrows. This is a signal to start a self-preservation program and sooner give offspring. Therefore, as soon as you plant such a seed, it will begin to give out flower stalks in order to give seeds faster.
The key to a large and strong onion turnip is storage in a comfortable environment, without cold stress.
But what if you bought onion sets in a store, and you have no idea how it was stored? No problem. Purchased onions need to arrange an adaptation period.
To do this, for two weeks after the purchase, we keep the onion near the battery or in another warm place. And then we store before planting only at room temperature and in the dark, so that it does not start to germinate ahead of time.
If there is no time to warm up the battery or the heating has already been turned off, then you can proceed as follows: arrange a warm bath on the bow. Put the onion in a bowl of warm water (40-45) degrees and leave for 8 hours, periodically adding warm water. Then we take out the heads, dry it thoroughly and store it at room temperature until planting.
For planting on turnips, choose medium-sized heads, because large ones are more prone to shooting and are best planted on greenery. Do not plant in cold ground. For the same reason, cold watering should be avoided.
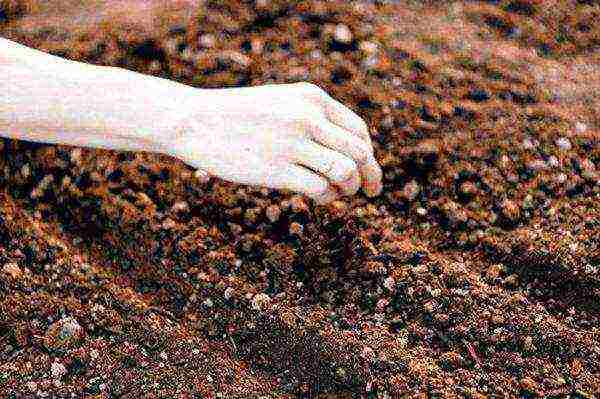
Processing and soaking onions before planting
First of all, when preparing the set for planting, you need to carefully sort it out. Equip yourself with several sorting containers.
It is necessary to discard all damaged and small specimens, leaving medium-sized onions for planting on the head. Large bulbs, small and even sprouted ones, are suitable for greens. But we throw away empty, wrinkled, missing ones.
Next, carefully cut off each dry tail at the crown with scissors. This simple operation will help them germinate faster and better.Well, you need to be afraid that an infection will get into the cut, because the sevok will be treated from diseases before planting.
Should onions soak before planting? And what is the best way to do it? Let's figure it out.
Of course, we are interested in our sevok growing large and at the same time being protected from diseases and parasites. Therefore, a simple scheme is usually used: first, the planting material is soaked in growth stimulants, and a little later, just before planting, it is treated with protective agents.
To feed the bulb so that it grows large, it is recommended to dilute the complex fertilizer in water (40-45 degrees) and soak the onion there overnight. When the sevok is saturated with usefulness, you can proceed to its protective processing and planting.
Most popular recipes:
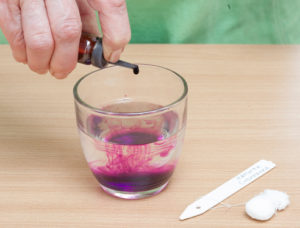
- Soaking onions in potassium permanganate. We make a strong dark pink solution of potassium permanganate and soak the bulbs in it for 2-3 hours. After that, they will need to be rinsed under running water so that the concentrated potassium permanganate does not damage future young roots. Potassium permanganate prevents fungal and bacterial diseases.
- Soaking onions in saline. 1 tbsp. Dissolve 1 liter of salt in one liter of water, immerse the bulbs in it for 2-3 hours. Salt also prevents rotting and disease.
- Soaking in copper sulphate. 1 tsp of copper sulfate in 10 liters of water, for 10-15 minutes. Copper sulfate disinfects seedlings and protects them from diseases.
These are the time-tested ways to prepare onions. But time does not stand still, and we want to share with you new interesting recipes that will help to comprehensively protect plantings. One of these recipes is a combined treatment with salt, potassium permanganate and ash together, in one solution. How to do it, see below:
Processing onions before planting with salt, potassium permanganate and ash
For a three-liter jar of warm (60 degrees) water we take 2 tbsp. l with a slide of salt + dark pink solution of potassium permanganate + 2 tbsp. l of wood ash. Soak for 2 hours.
Treatment of onions before planting from pests with birch tar
The most nasty onion pest is, of course, the onion fly. Fortunately for us, she cannot stand the smell of birch tar. And if you want to protect your crops, then it would be useful to soak the onion in a solution as well: 1 tbsp. l. tar in a liter of water for 10-15 minutes.
With the same solution, you can additionally spill plantings during the growing season.
Onion planting and care in the open field
As we know, onions cannot be planted in the same place where the onion garden was also located last year. The likelihood of disease in this case greatly increases, and such plantings should be avoided.
Choose a place where tomatoes, carrots, potatoes, legumes, cucumbers, zucchini, pumpkin, cabbage were previously planted. The earth after them retains its nutritional value, and this is necessary for the onion to grow a good turnip. Onions and carrots have good neighborly relations, they scare off each other's pests, so you can plant them side by side.
He also prefers that the soil is not heavy, loose and nutritious. Places like light, with good drainage, without moisture stagnation.
It is better to prepare the future onion bed in advance in the fall, loosen the soil well and add humus and compost. In the spring, one to two weeks before planting, we loosen the soil and spill it with organic humic fertilizers. Gumi Kuznetsova will do.
Planting onions on a turnip (on a head)
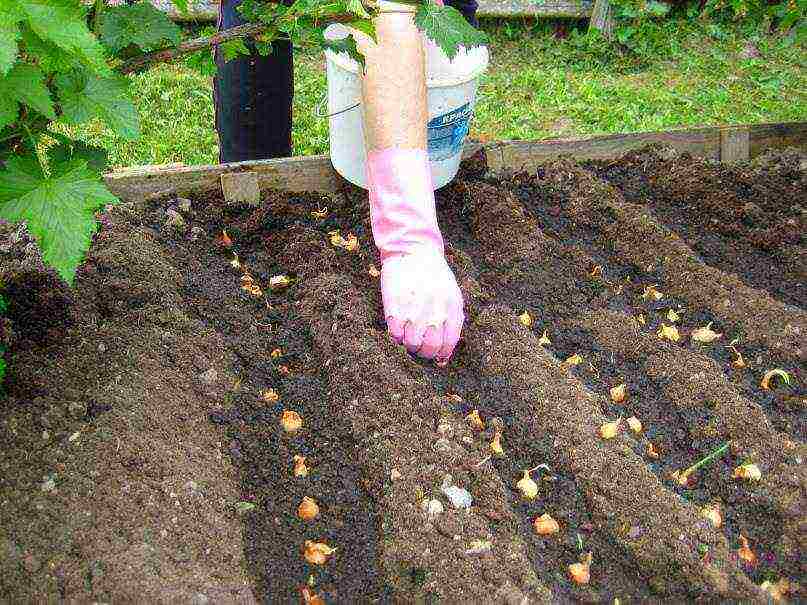
We prepare grooves with a depth of about 8-10 cm.The distance between them is at least 15 cm.
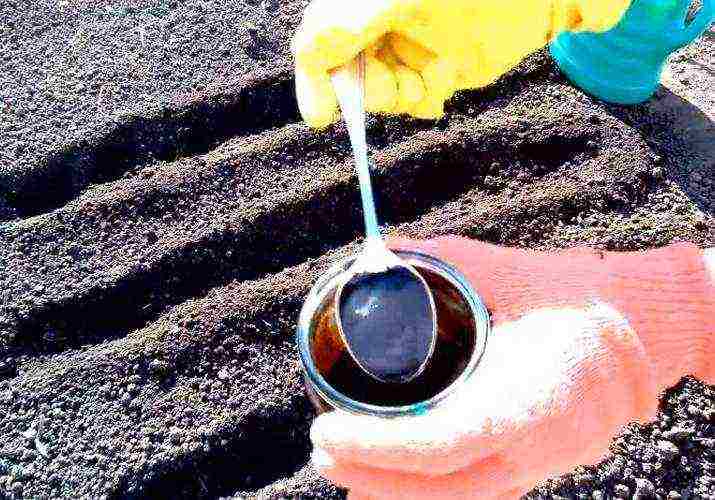
We spill them with Fitosporin solution for disinfection. You can use both powder (1 tsp per 10 l of water) and paste (1 tbsp of diluted paste per 10 l of water).
We plant our seedlings in the spilled grooves at a distance of 10 cm from each other. We put him on what is called "on the shoulders", i.e. not only to cover the roots, but much deeper. This is necessary so that the bulb has good contact with the soil and does not dangle, because it will not have roots soon.

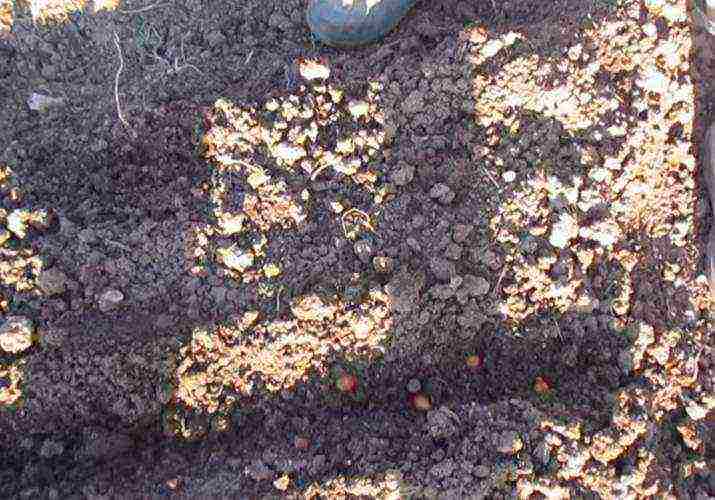
Sprinkle wood ash on top as fertilizer and disinfection.And we fill the grooves with earth.
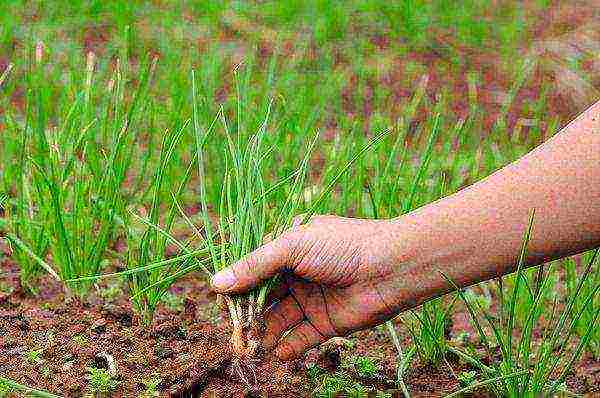
Planting onions on greens (on a feather)
When we do not have a goal to grow a turnip, but we only want greenery, then to save space, we suggest you use bridge planting.
This is when the bulbs are planted one to one very tightly and not very deep. In this case, planting in open ground is not necessary, you can use a container with earth. Or select a small spot in the garden.
Mixed feather and head fit at the same time
When we don't have a lot of space, but you want to grow good onions and eat greens, then this method will come in handy. We make grooves as usual, but we plant the sevok in them in a checkerboard pattern and quite often.
With such a goal that some of these seedlings will grow into a turnip, and some can be pulled as they grow, not greens and consumed fresh.
Otherwise, the steps are the same as in the classic turnip planting (see above).
Onion care
When we have organized a good bed, in a lighted place, with nutritious loose soil, we only have to weed it in time so that the weeds do not interfere with the growth of the crop. Watering is carried out after planting once a week.
Also, onions need frequent loosening of the soil (between rows and between plantings, especially after rain, so that the earth does not turn into a crust) and top dressing.
At the end of May, it is necessary to feed him with nitrogen-containing fertilizers, in mid-June - he already needs potassium fertilizers and ammonium nitrate. For those who prefer to do without chemicals, green fertilizers from weeds and nettles, vermicompost and ash are suitable.
Fertilizing with ammonia is also effective: 2 tbsp. 1 liter of ammonia dissolve in 10 liters of water, watered with such a product should be on wet ground, and not on dry ground. Therefore, we pre-moisten the beds. The ammonia will drive away pests and nourish your plantings with the necessary nitrogen.
We do this feeding with trids with an interval of 10 days. And you will forget about the yellowing of the onion feather, and the onion fly will not stick its nose on your beds.
So dear friends, there is nothing difficult in growing onions, you will definitely succeed.
How to treat onion flies
If you liked our article, please share it on social networks. I wish you success!
146,363 views