Cleaning components
Cleaning of different parts of a laptop must be approached individually. Taking into account all the nuances, it will be possible to prevent the breakage of the elements.
RAM
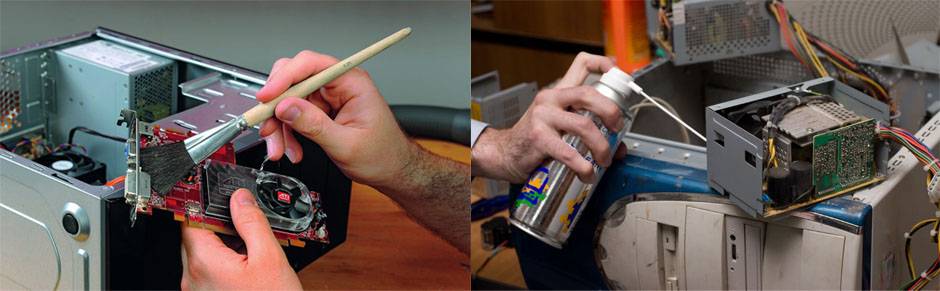
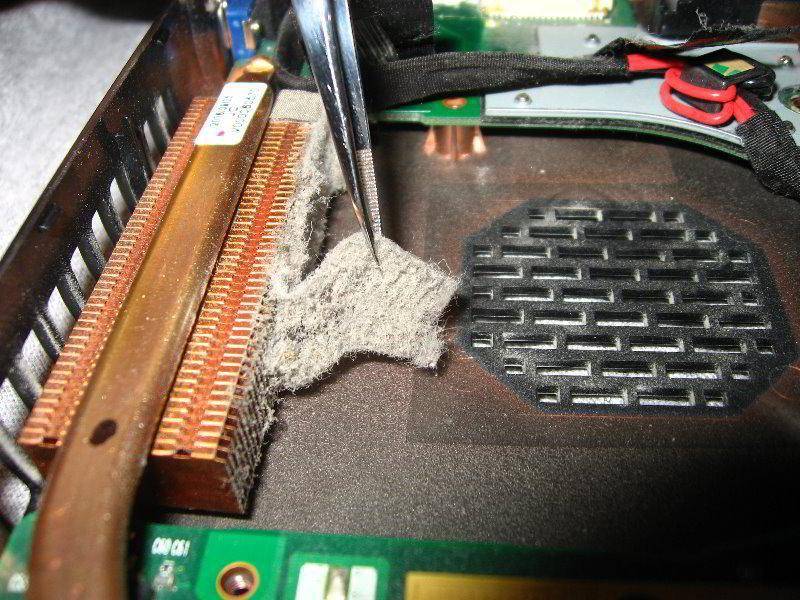
It is necessary to clean the RAM slots with a brush and a can of compressed air. First, the bulk of the dust is blown off with a spray can, and then the residues are carefully removed with a brush. All hard-to-reach areas should be cleaned out, including dents with accumulated dirt.
Fans
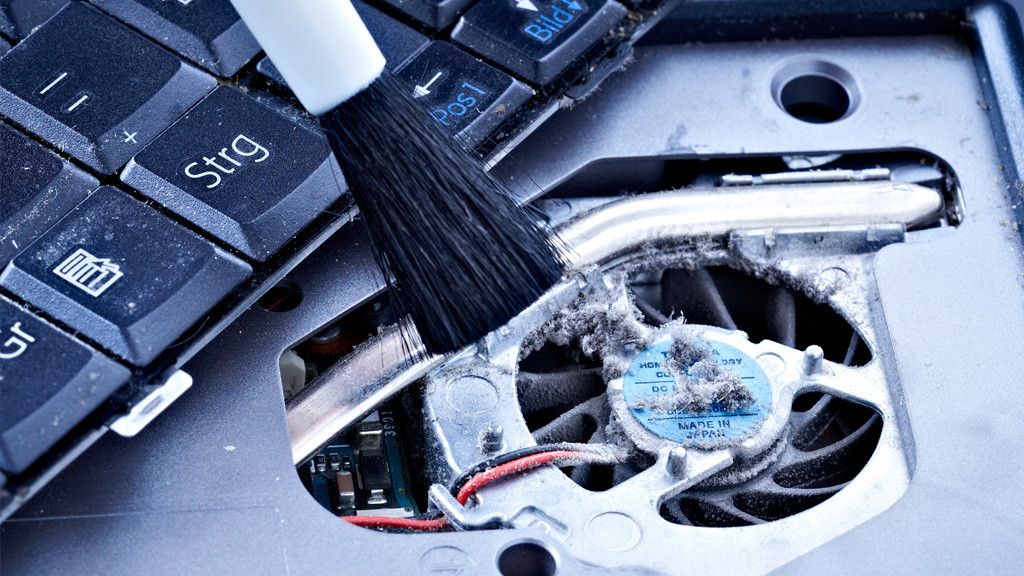
The laptop cooler is gently cleaned with cotton swabs. The fan blades can be cleaned with cotton pads. Excess dust is blown off using a compressed air stream.
Keyboard
The surface and the inner side of the keyboard are cleaned of dust with special impregnated napkins. The contacts can be cleaned with an electronics grade cleaner.
Radiator
The cooler-cooled radiator can be cleaned with a vacuum cleaner, sucking in the dust. The surface of the radiator can be cleaned with a cleaning agent.
Loops
It is important to clean fragile plumes with extreme care. To treat plumes, dip a cotton swab in a cleaning solution and run over the surface to remove dirt.
Replacing thermal paste
Once every few years, in the absence of a constant high workload, it is recommended to change the thermal paste. Thermal paste syringes can be found in the same computer stores. The average price of 4 grams of branded thermal paste is about 300 rubles. You should not take the cheapest one - such savings can result in much larger expenses in the future.

To replace the thermal paste after disassembling and cleaning the computer, you need to remove the cooling system from the motherboard, which is fastened with screws. Under it is the processor, on the upper side of which there will be remnants of the old thermal paste.


After stripping the processor, apply a drop of thermal paste to the processor pad and spread it evenly over the entire surface using a waste plastic card or the supplied brush. Remove excess paste with a tissue that has gone beyond the processor.

Then reinstall the cooling system.
Please note that the radiator must be level, otherwise it will not fulfill its purpose. If a separate video card is installed in the computer, then the same set of operations should be carried out for it.

The process of replacing thermal paste in a laptop can be complicated, since the processor may be on the side of the keyboard, and in order to dismantle the cooling system, you will first have to pull out the motherboard. If you are not confident in your abilities, then the best option would be to entrust this operation to the employees of the service centers.

The process itself for a stationary computer at home
If you do not have specialized cleaning products on hand, you can use soap and water. There are two ways to clean your display using them.
It is best not to use tap water due to the poor quality. For the procedure, it is worth taking distilled water or water from a filter.
In the first case, you will need a soft, lint-free cloth. Microfiber, cotton, flannel will do. The material is wetted with water, then squeezed out well. Wipe the display gently so that no water gets into the corners of the display.
Before washing, the equipment must be disconnected from the power supply.
In the second case, a soap solution is used. This is how matte display surfaces are usually tidied up.
The procedure will require:
- soft lint-free fabric;
- soap without additives (for example, baby or household soap);
- water.
The LCD display is initially gently wiped with a cloth dampened in soapy water, then wipe well with dry material
Cleaning the monitor from dust
Cleaning the surface of the monitor from contamination is carried out in three successive stages:
Disconnecting the PC from the outlet. First you need to turn off the power to the computer and all the devices that are connected to it. Do not clean the connected monitor.
Wipe the surface. The monitor should be wiped with a slightly damp cloth

The surface should be rubbed carefully, without exerting any effort.
Repeated wiping of the monitor. When wiping the surface again, use a dry cloth or napkin.
Particular attention is paid to places where traces of stains are visible.
Instead of damp rags, you can use special napkins that are specially made for cleaning monitors personal computers and laptops.
Cleaning steps
The whole washing process is divided into several stages: preliminary preparation of equipment, cleaning procedure and assembly of parts. For everything to be successful, it is recommended to use the advice and tips of experts.
Preparation
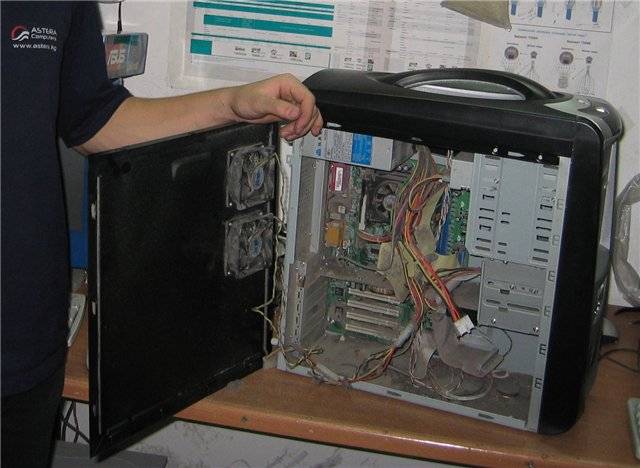
 Disassembling the computer before cleaning procedures
Before cleaning procedures, it is imperative to disconnect the computer from the power supply. This is necessary to prevent accidents. Now you need to disconnect all peripheral parts from the system unit: speakers, modem, printer. In order not to experience problems during assembly, the structure can be photographed in advance. When everything is disconnected, you can proceed to the system unit itself. Bolts are unscrewed from its back cover. Many people confuse the sides of the block and disassemble the part that is on the side of the motherboard.
For proper cleaning, you need another panel, which is located on the left side of the system unit. It is better to transfer all removed bolts to a separate container so as not to lose them. The unit must be placed on a horizontal surface, the operating card, video card, sound card, and floppy drive must be removed from it. Disconnect the parts with a screwdriver.
Important! All pulled out parts must be laid out on a flat surface in the order in which they were pulled out. This will help to avoid difficulties during the subsequent assembly of the system unit.
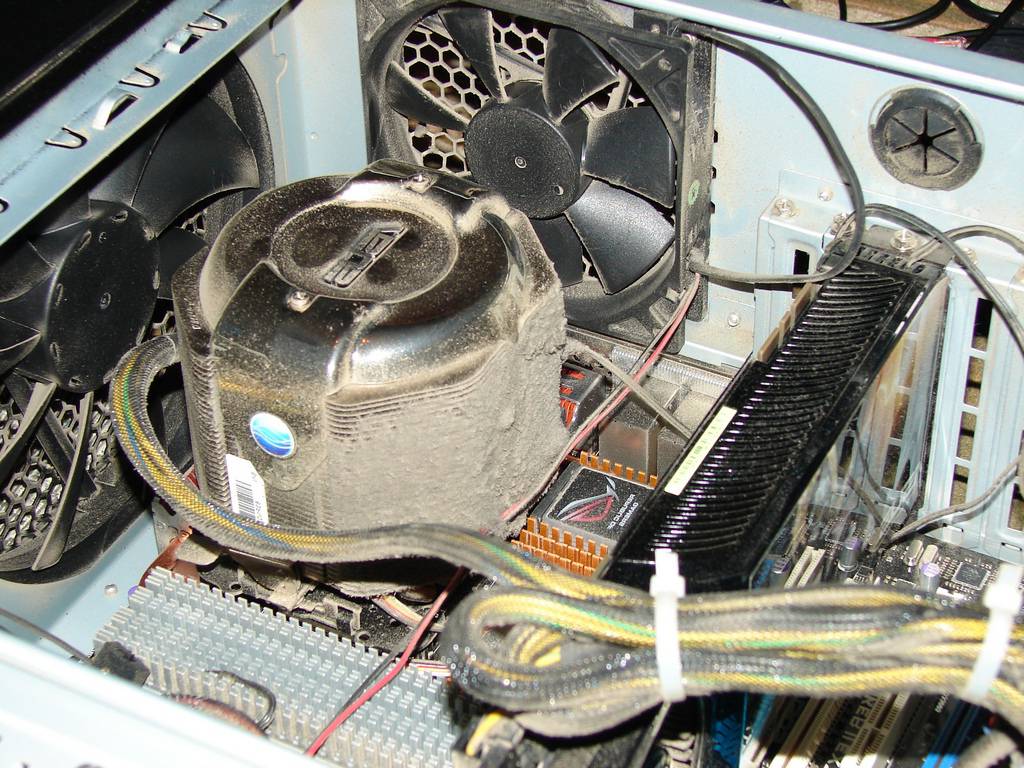
Cleaning the system unit, processor, motherboard
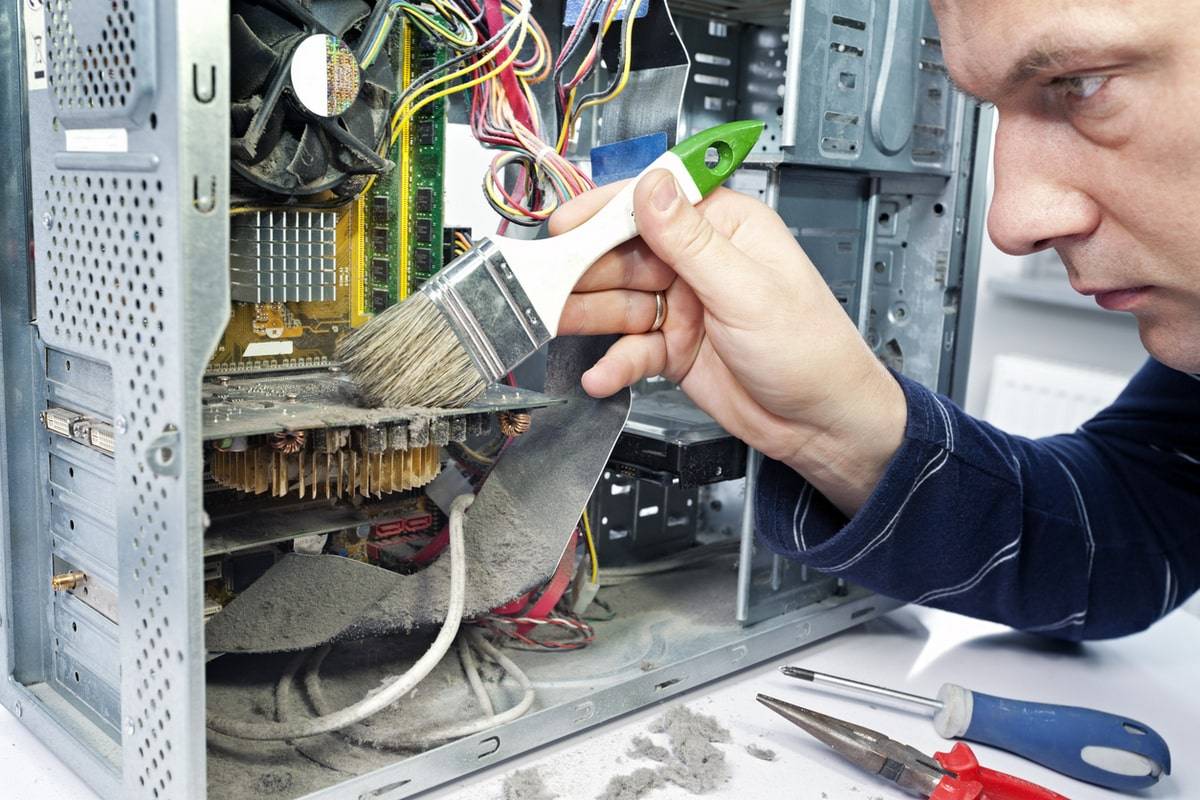
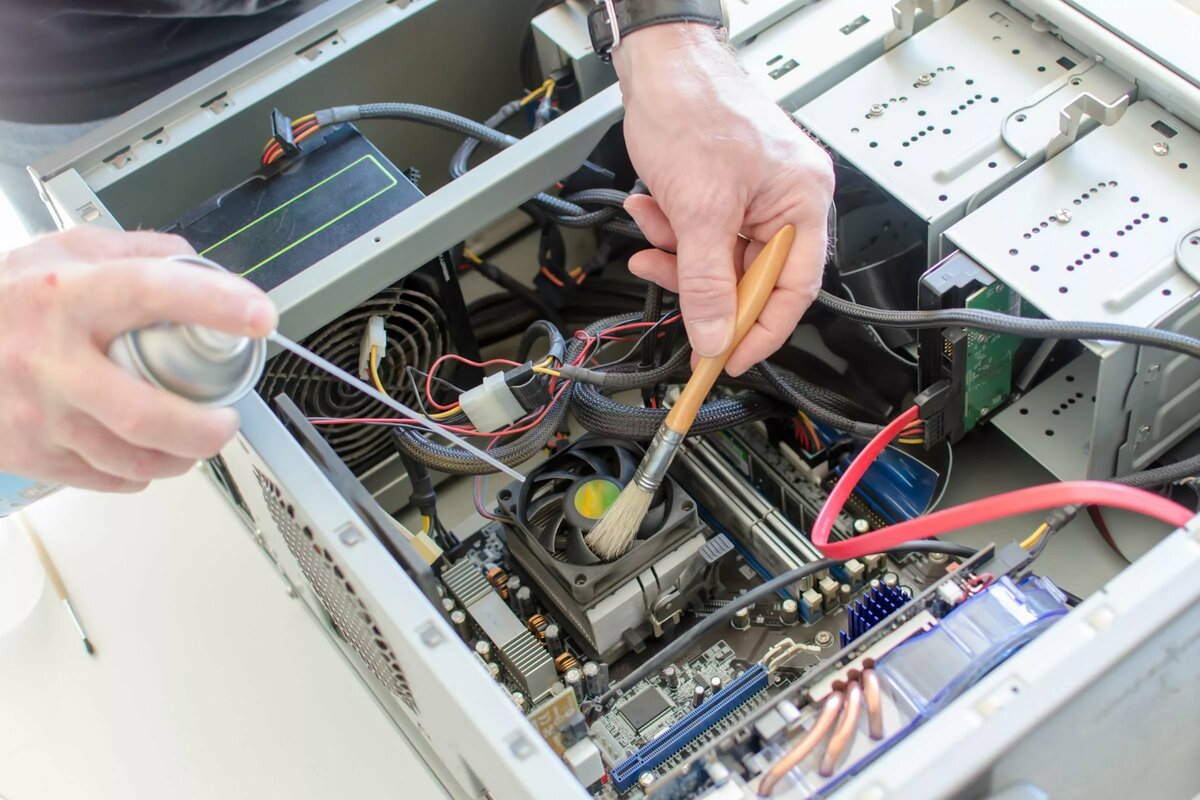
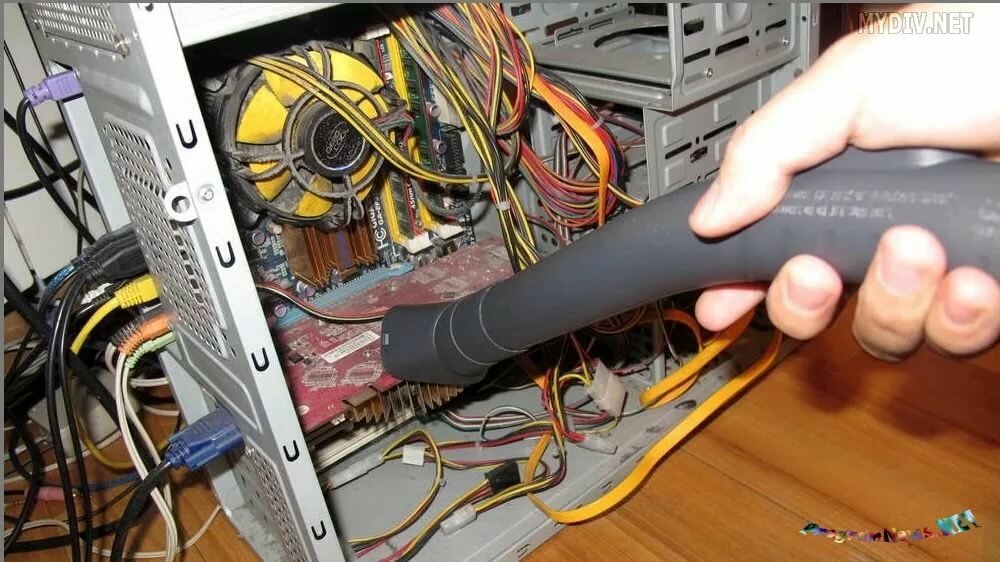
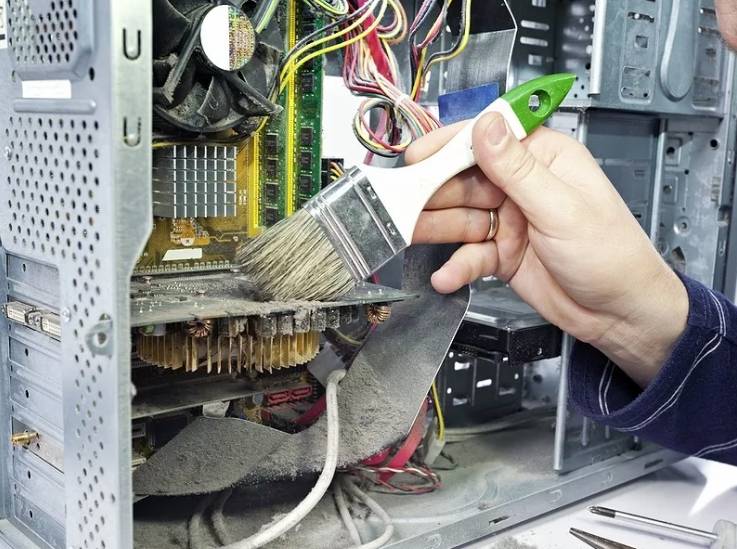
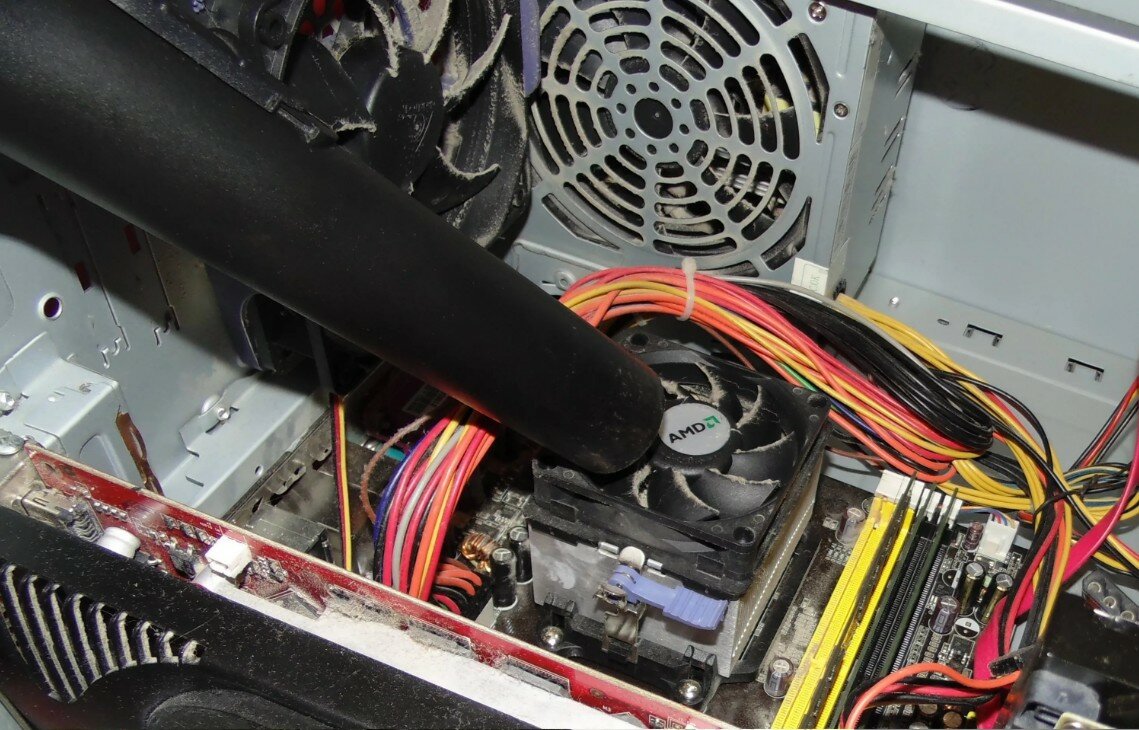
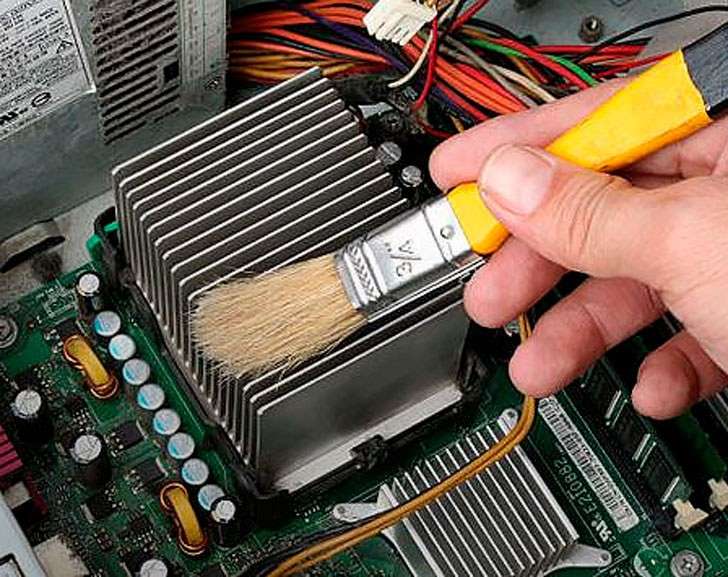
Before you clean your PC from dirt and dust, you need to prepare a vacuum cleaner. To do this, you need to disconnect the nozzle with the tube from it. As a result, there should be a hose and a handle. Now, using a prepared soft brush and a vacuum cleaner, you must thoroughly clean the surface of the computer parts. During washing, the tube must be held at least 5 cm above the parts. Initially, a layer of dust is rubbed with a brush, and then a vacuum cleaner is passed through this place. All actions are repeated for 5-10 minutes.
When cleaning the cooler and fan from dirt, you should pay special attention to them. It is here that a significant part of the dust accumulates.
When cleaning, the tube of the vacuum cleaner is brought close to the parts so that they begin to spin. When moving, accumulated dust particles fly out of them. While cleaning the motherboard, the tube is kept at a decent distance. The fact is that it can stick to the part and harm it.
After that, you can start cleaning the microcircuits, compressor and processor according to the above scheme. Some parts of the motherboard tend to oxidize during operation, this leads to unstable operation of the computer. To fix the problem, you need to walk with a simple pencil on the affected areas with gentle movements, and then remove it with a regular eraser. Movements should be as smooth as possible. There should be no particles of pencil or eraser on the parts. Otherwise, the work of the system unit will be disrupted.
Important! When the mechanism is cleaned, you can proceed to the cover of the system unit.It is also desirable to free it from the old layer of dust.
Assembly
 Assembling personal computer parts after cleaning
Self-cleaning from PC dust is completed by reassembling the parts. This process can get a little more complicated if the person has not previously photographed the technical layout. Because of this, many experts advise to lay out all the parts in the order in which they were disconnected. When assembling the PC, hands should be thoroughly washed and dried. Gloves come in handy at this stage. When everything is assembled, you need to turn on the device to the network and press the "Start" button on the system unit.
If nothing works, it means a wrong technical build. In such cases, you can try to repeat the procedure again or contact a professional. Experts advise not to take risks and ask for help so as not to harm the mechanism.
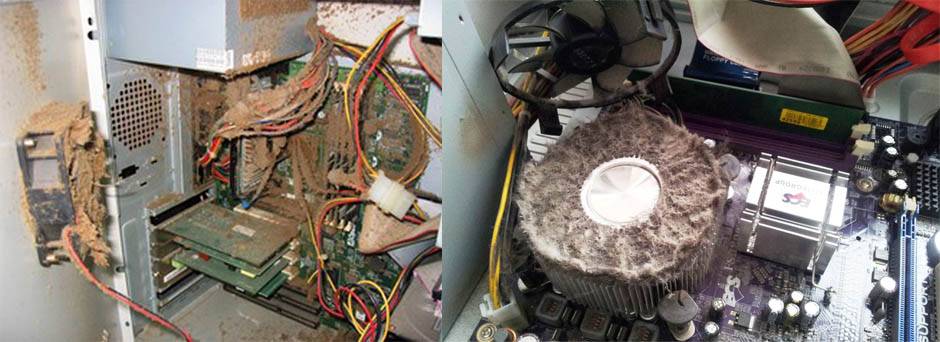
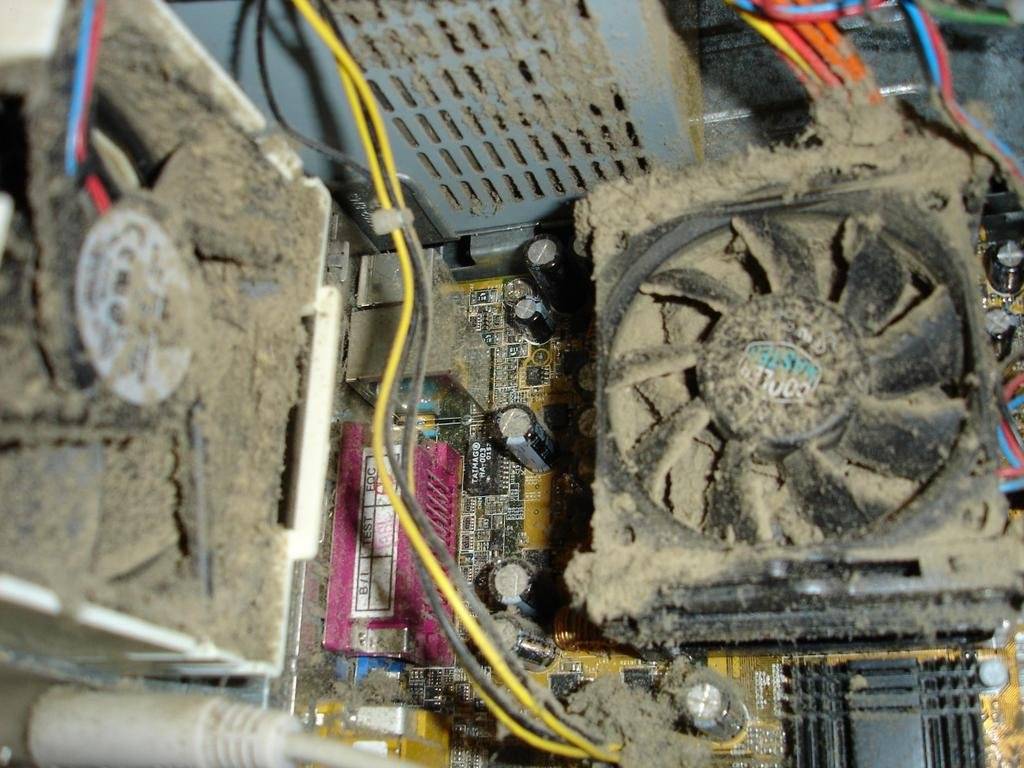
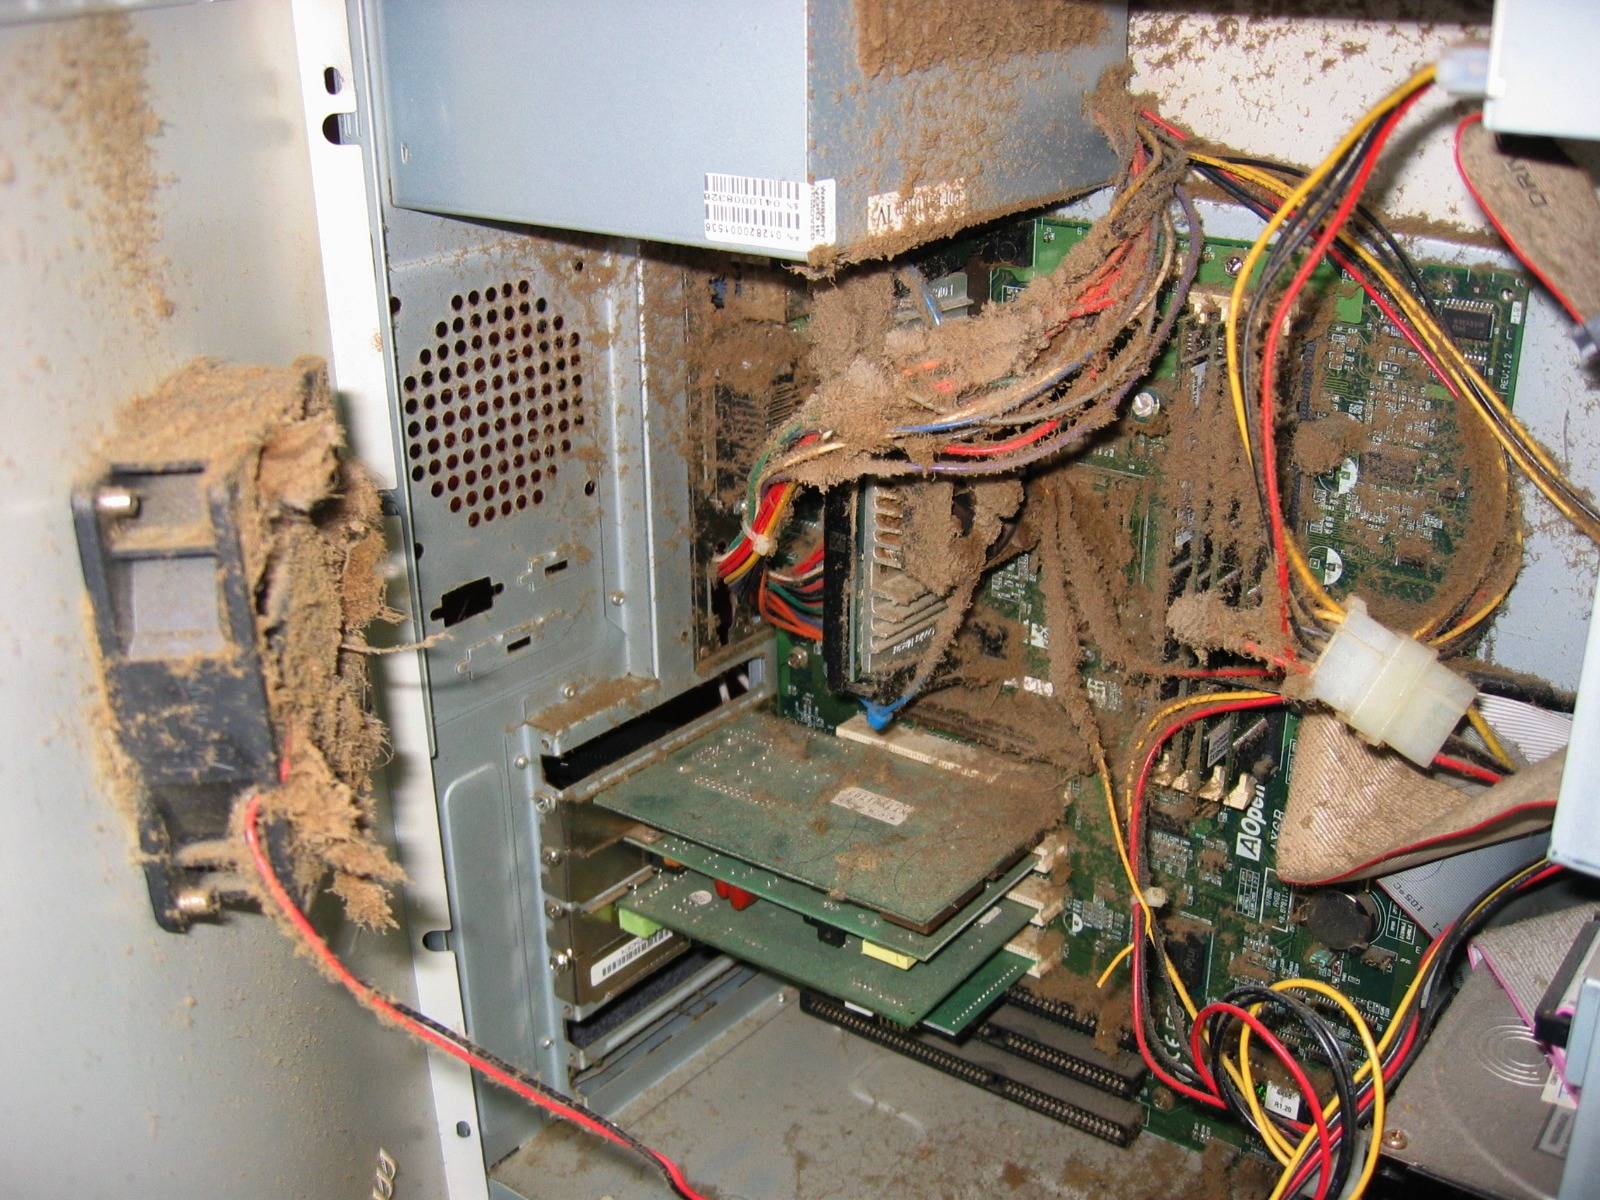
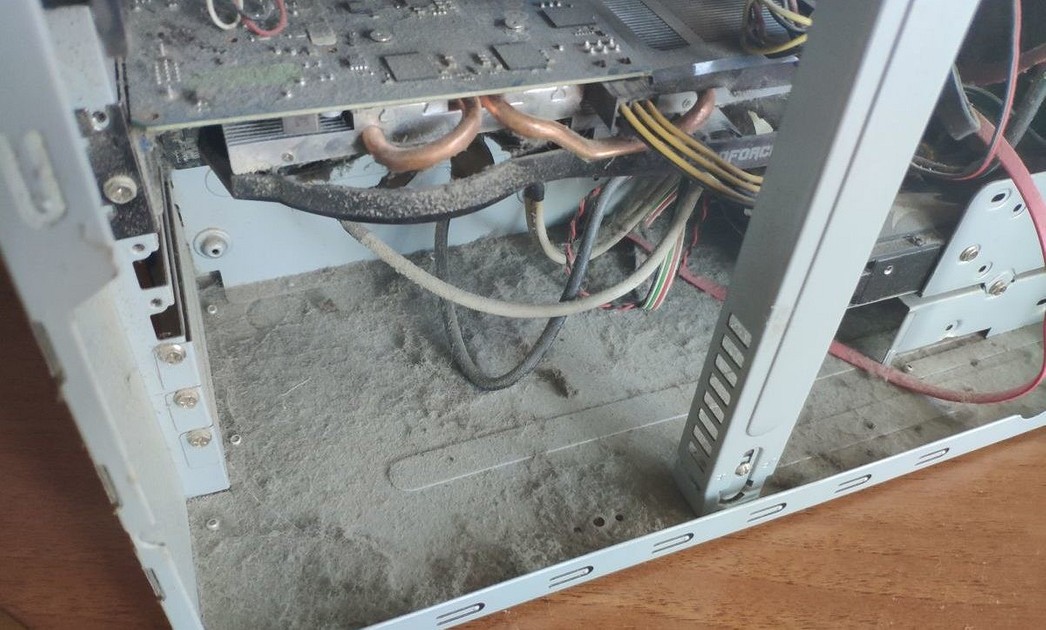
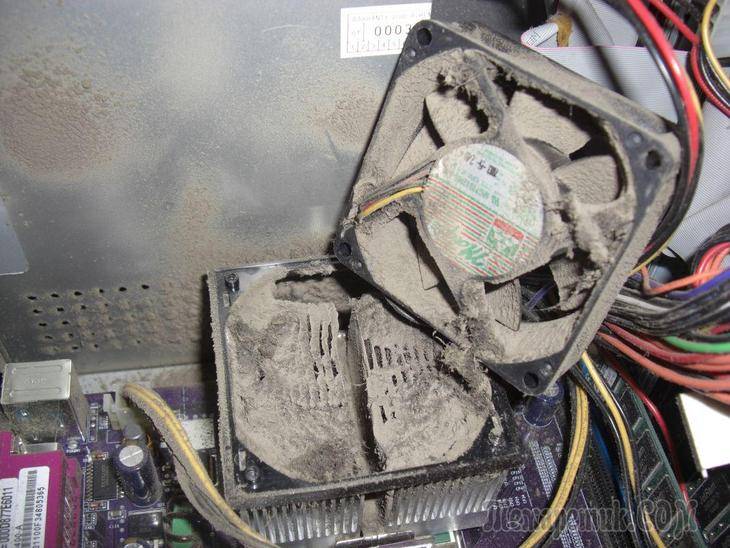
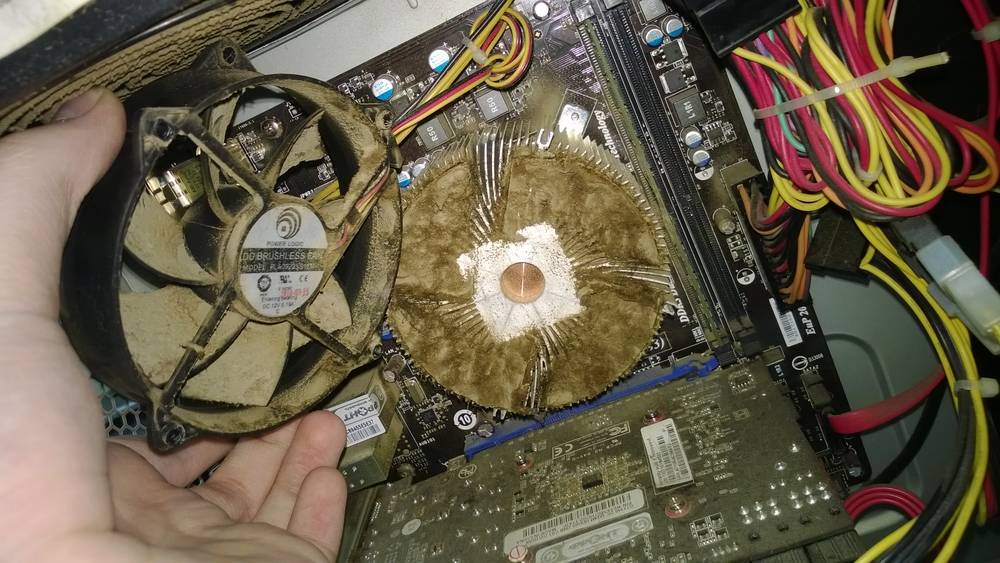
What can happen if dust has accumulated on the computer?
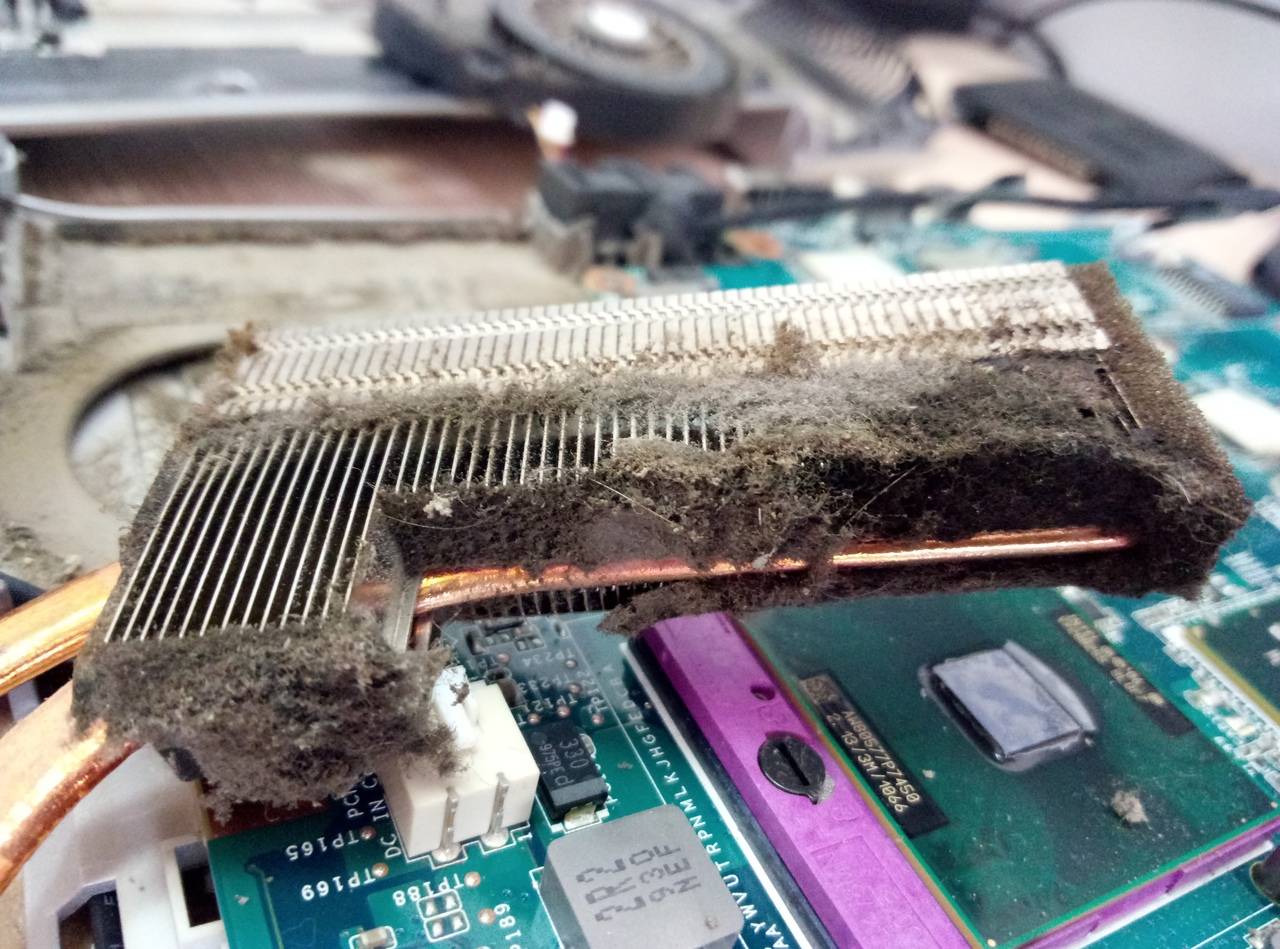
- Dust trapped in the heatsink of the processor, video card, chipset reduces its thermal conductivity. In this case, the sensors receive a signal that the temperature has increased, the fans start to rotate faster, as a result of which the noise increases greatly. If the air blown by the fans can no longer effectively cool the heatsink clogged with dirt, the processor begins to overheat, as a result of which the user may notice how the computer “slows down” and begins to process every action for a long time. When a certain temperature threshold is reached, the computer will automatically turn off, however, on some models, automatic shutdown when a certain heating threshold is reached is not provided, and in this case the device may simply fail and you will need to repair the computer. It is worth noting that the operating temperatures of various models of central and graphic processors are very different - for one device the temperature of 80 ° C may be quite normal, and for another 60 ° C it is clearly too much, so you should not be scared in advance by simply installing special software. and looking at the temperature
- As you know from physics, hot air can contain more moisture than cold air. Therefore, when the air is cooled, the vapor contained in it condenses and settles. For example, we can observe this process in winter, when warm air in a room, car or bus comes into contact with a cold glass surface and water condensation settles on it. The same thing happens in your desktop computer or laptop - hot air heated by microchips meets cold air that is blown by fans from the outside. As a result, condensation water may form in the system unit. If the computer is very dusty, then the likelihood of a short circuit increases greatly, since wet dust conducts electricity perfectly.
How to determine when it is time to clean the computer from dust?
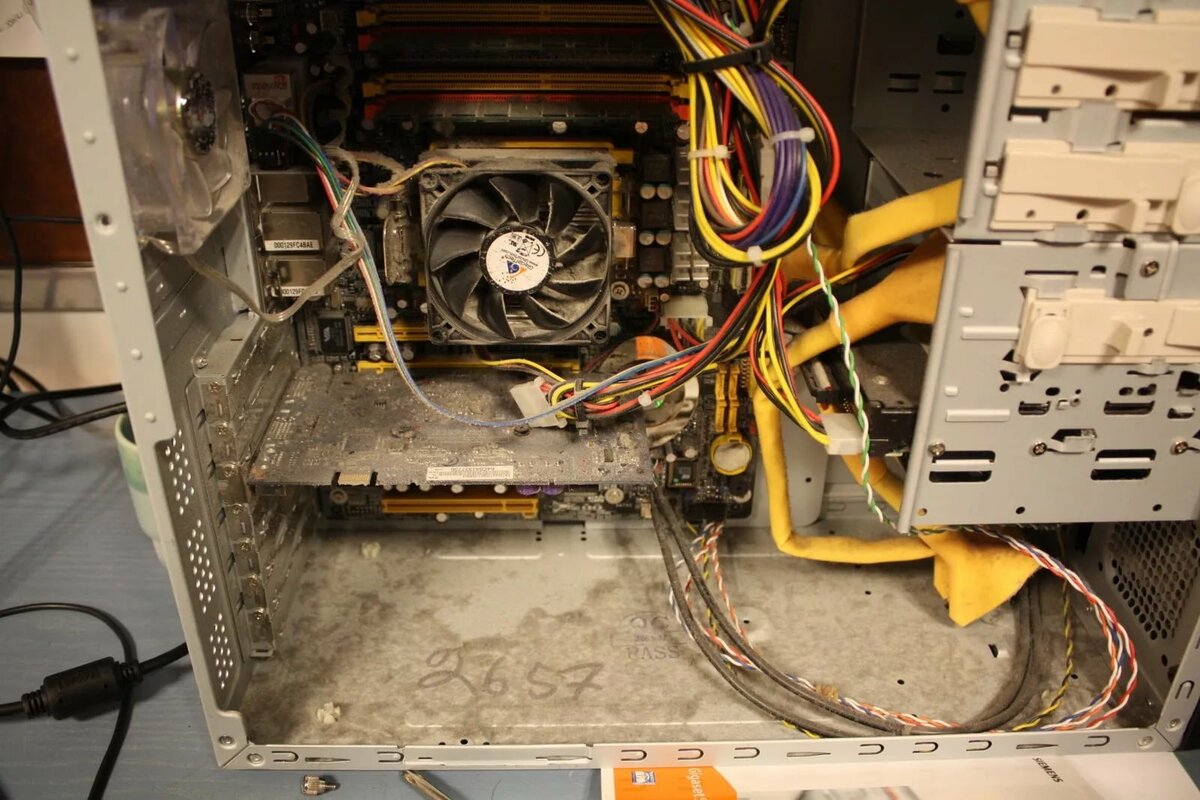
It's very simple - of course, dust settles everywhere, but this is most noticeable if you look at the uneven surfaces of the radiators, which are located above the central processor, on the video card, and possibly above other elements that get very hot. Also, dust often accumulates strongly in the power supply and on the fan blades. It is worth noting that static electricity makes your computer a dust magnet and is often much more dirty than other appliances and surfaces in the room.
How often should you clean your computer or laptop?
We recommend that this procedure be carried out at least once a year - this will avoid many problems with replacing iron, increase its performance and service life.
If you want to clean your computer yourself, but do not know all the intricacies of installing components, carry out this procedure very carefully and carefully, having read the corresponding article on our website.Alternatively, you can always contact the computer help service.
If you found this article helpful, please vote for it. This will help others find this article more quickly from many other less useful ones.
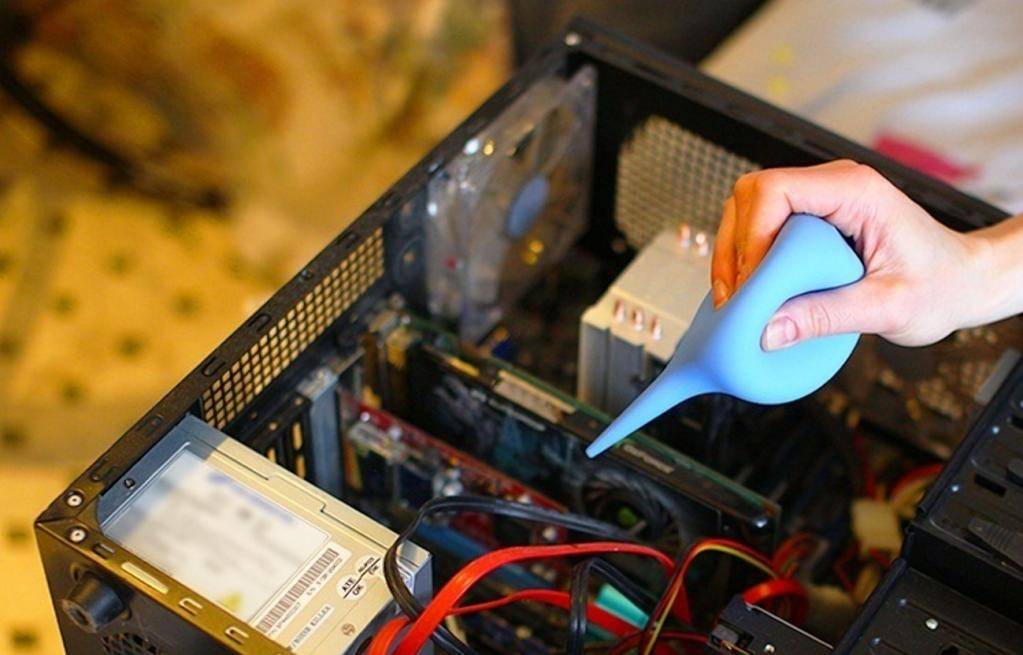
Method two - using a rubber bulb
A medical pear, a syringe is a good tool! Not just to give enemas. This is a serious thing - I can tell you ... It can blow dust! Its air flow is weaker than that of a vacuum cleaner. But the narrow end allows it to be directed more locally.
Blowing dust with a pear is also better outdoors.
Particular attention should be paid, as in the first case, to radiators and fans.
The rubber bulb is flexible, so its outlet can be bent at a certain angle. This allows the air flow to be directed to hard-to-reach areas.
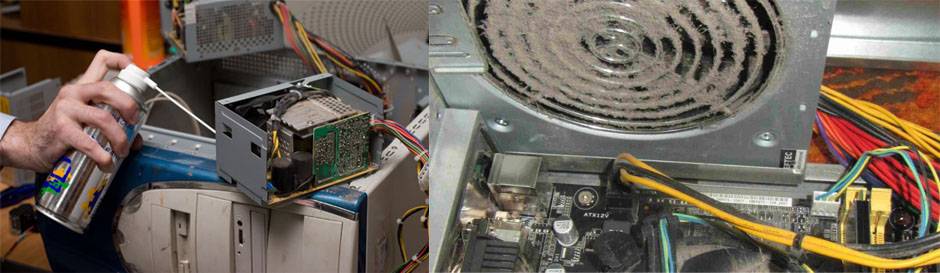
This approach allows you to efficiently remove dust from the processor heatsink. With the help of a pear, dust is removed longer than with a vacuum cleaner. This is a known inconvenience. But on the other hand, there is less chance of dust getting into the drive. With this method, you can also use brushes of different sizes.
A pear with a volume of at least 0.4 liters should be used. A small pear will not create enough airflow. It's all grown up here, isn't it? If you put an enema, put it like that :-)
Another advantage of this method is that you do not have to fiddle with the vacuum cleaner, rearrange the hose, unwind and rewind the power cable extension.
Finishing touches
Sometimes it happens that after such manipulations the computer refuses to work. This may be due to the fact that when manipulating the power supply, the contact in one of its connectors could weaken.
 Therefore, the first thing to do in case of problems that have arisen after the "general cleaning" is to remove and insert all the connectors of the power supply unit back into place.
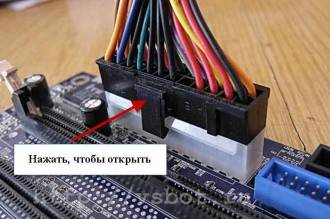
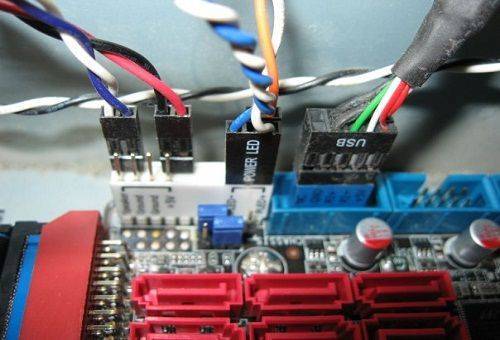
The main connector (with 20 or 24 pins) has a lock that must be pressed to disconnect it.
The connector must be put on tightly, all the way to the end, so that the lock clicks into place. A similar lock has a 4-pin 12V connector, which also connects to the motherboard.
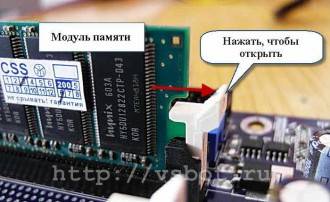
It also happens that even after re-docking the power connectors, the computer still "rests its horn against the wall" and refuses to work normally. In this case, you need to dock the memory modules, video card and other expansion cards.
The memory module has tabs on its side (short sides), and the connector on the motherboard has latches. To remove a memory module, you must open the latches on both sides of the memory module.
 Sometimes, after several years of operation, the contacts on not very high-quality modules or boards darken. Alas, they have not been covered with gold (as before) for a long time ...
Darkened contacts can be cleaned with a regular eraser (eraser).
But this must be done carefully so as not to tear the conductive tracks from the base. After cleaning, it is necessary to carefully remove the "pellets" of erased rubber from the contacts (with the same brush)
When installing memory or cards, take them by the edges and do not touch the contacts with your fingers.
We remind you that manipulations with modules and boards should be carried out with the power off. The power supply plug must be removed from the mains.
If you are afraid to look into a computer because you do not know how it works, check out the article. And yet, and with the end. And you will succeed!
If, after cleaning from dust, there are some overtones or noise increased, then most likely there are some problems with the fan. If we have already looked into the computer, then it would be nice to lubricate the fans!
How the fan works and how to lubricate it, we will tell you in the following articles. Subscribe to blog updates so you don't miss out. Do you want to know how to perform keyboard maintenance?
Victor Geronda was with you.
Until next time!
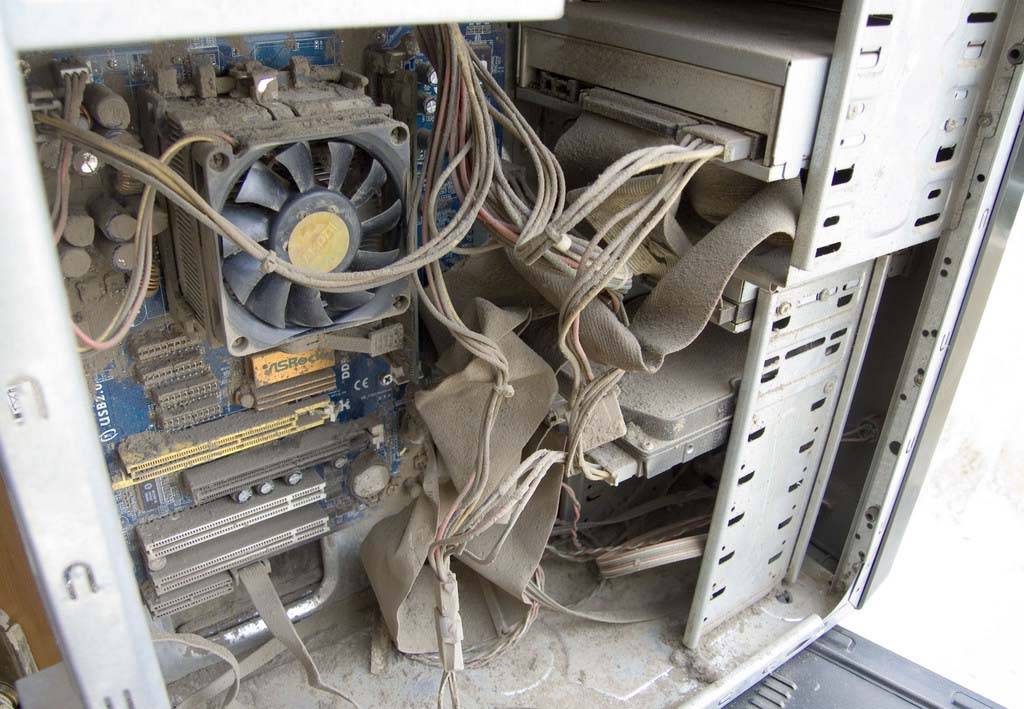
Why clean your PC
Some people think that cleaning a personal computer (PC) is unnecessary, but this is not the case. If you do not clean the system unit, then dust will begin to accumulate in the heatsink of the central processor, motherboard chipset and video card. Dusty coating on the surface of the heatsinks reduces its ability to conduct heat, which leads to an increase in the temperature of the PC components.
If there is a lot of dust, even an installed fan will not be able to normalize the temperature, and the computer will start to overheat. Therefore, in order to avoid overheating, they periodically clean the components of the system unit.
How to clean your computer
For convenient and quick cleaning of the system, you will need tools:
- dry flannel cloth;
-
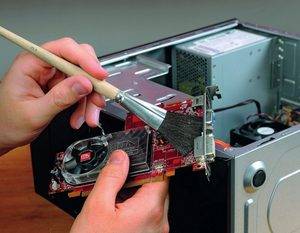
a large brush or a brush with a long handle. A narrow paint brush is best suited for this purpose. You should not take an artistic one - it is too soft and small, there will be little use from it;
- long tweezers (5–8 cm is sufficient). If later you plan to use it for cosmetic purposes, do not forget to thoroughly disinfect it after cleaning your computer;
- vacuum cleaner with a narrow nozzle.
The monitor should be cleaned with commercially available wipes, sprays, or foams. Be sure to select the correct product for your display type.
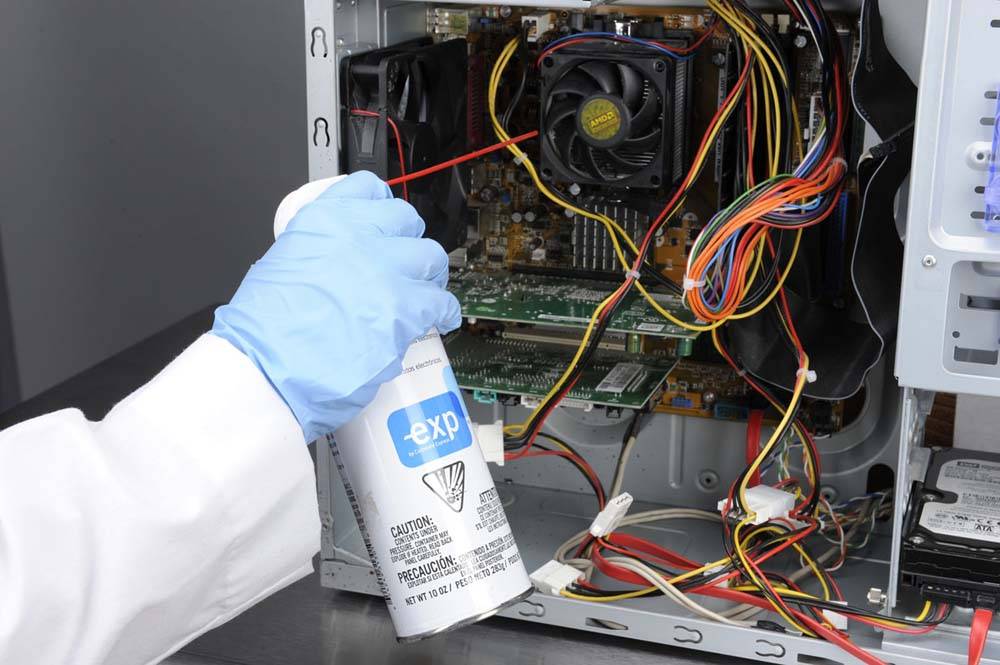
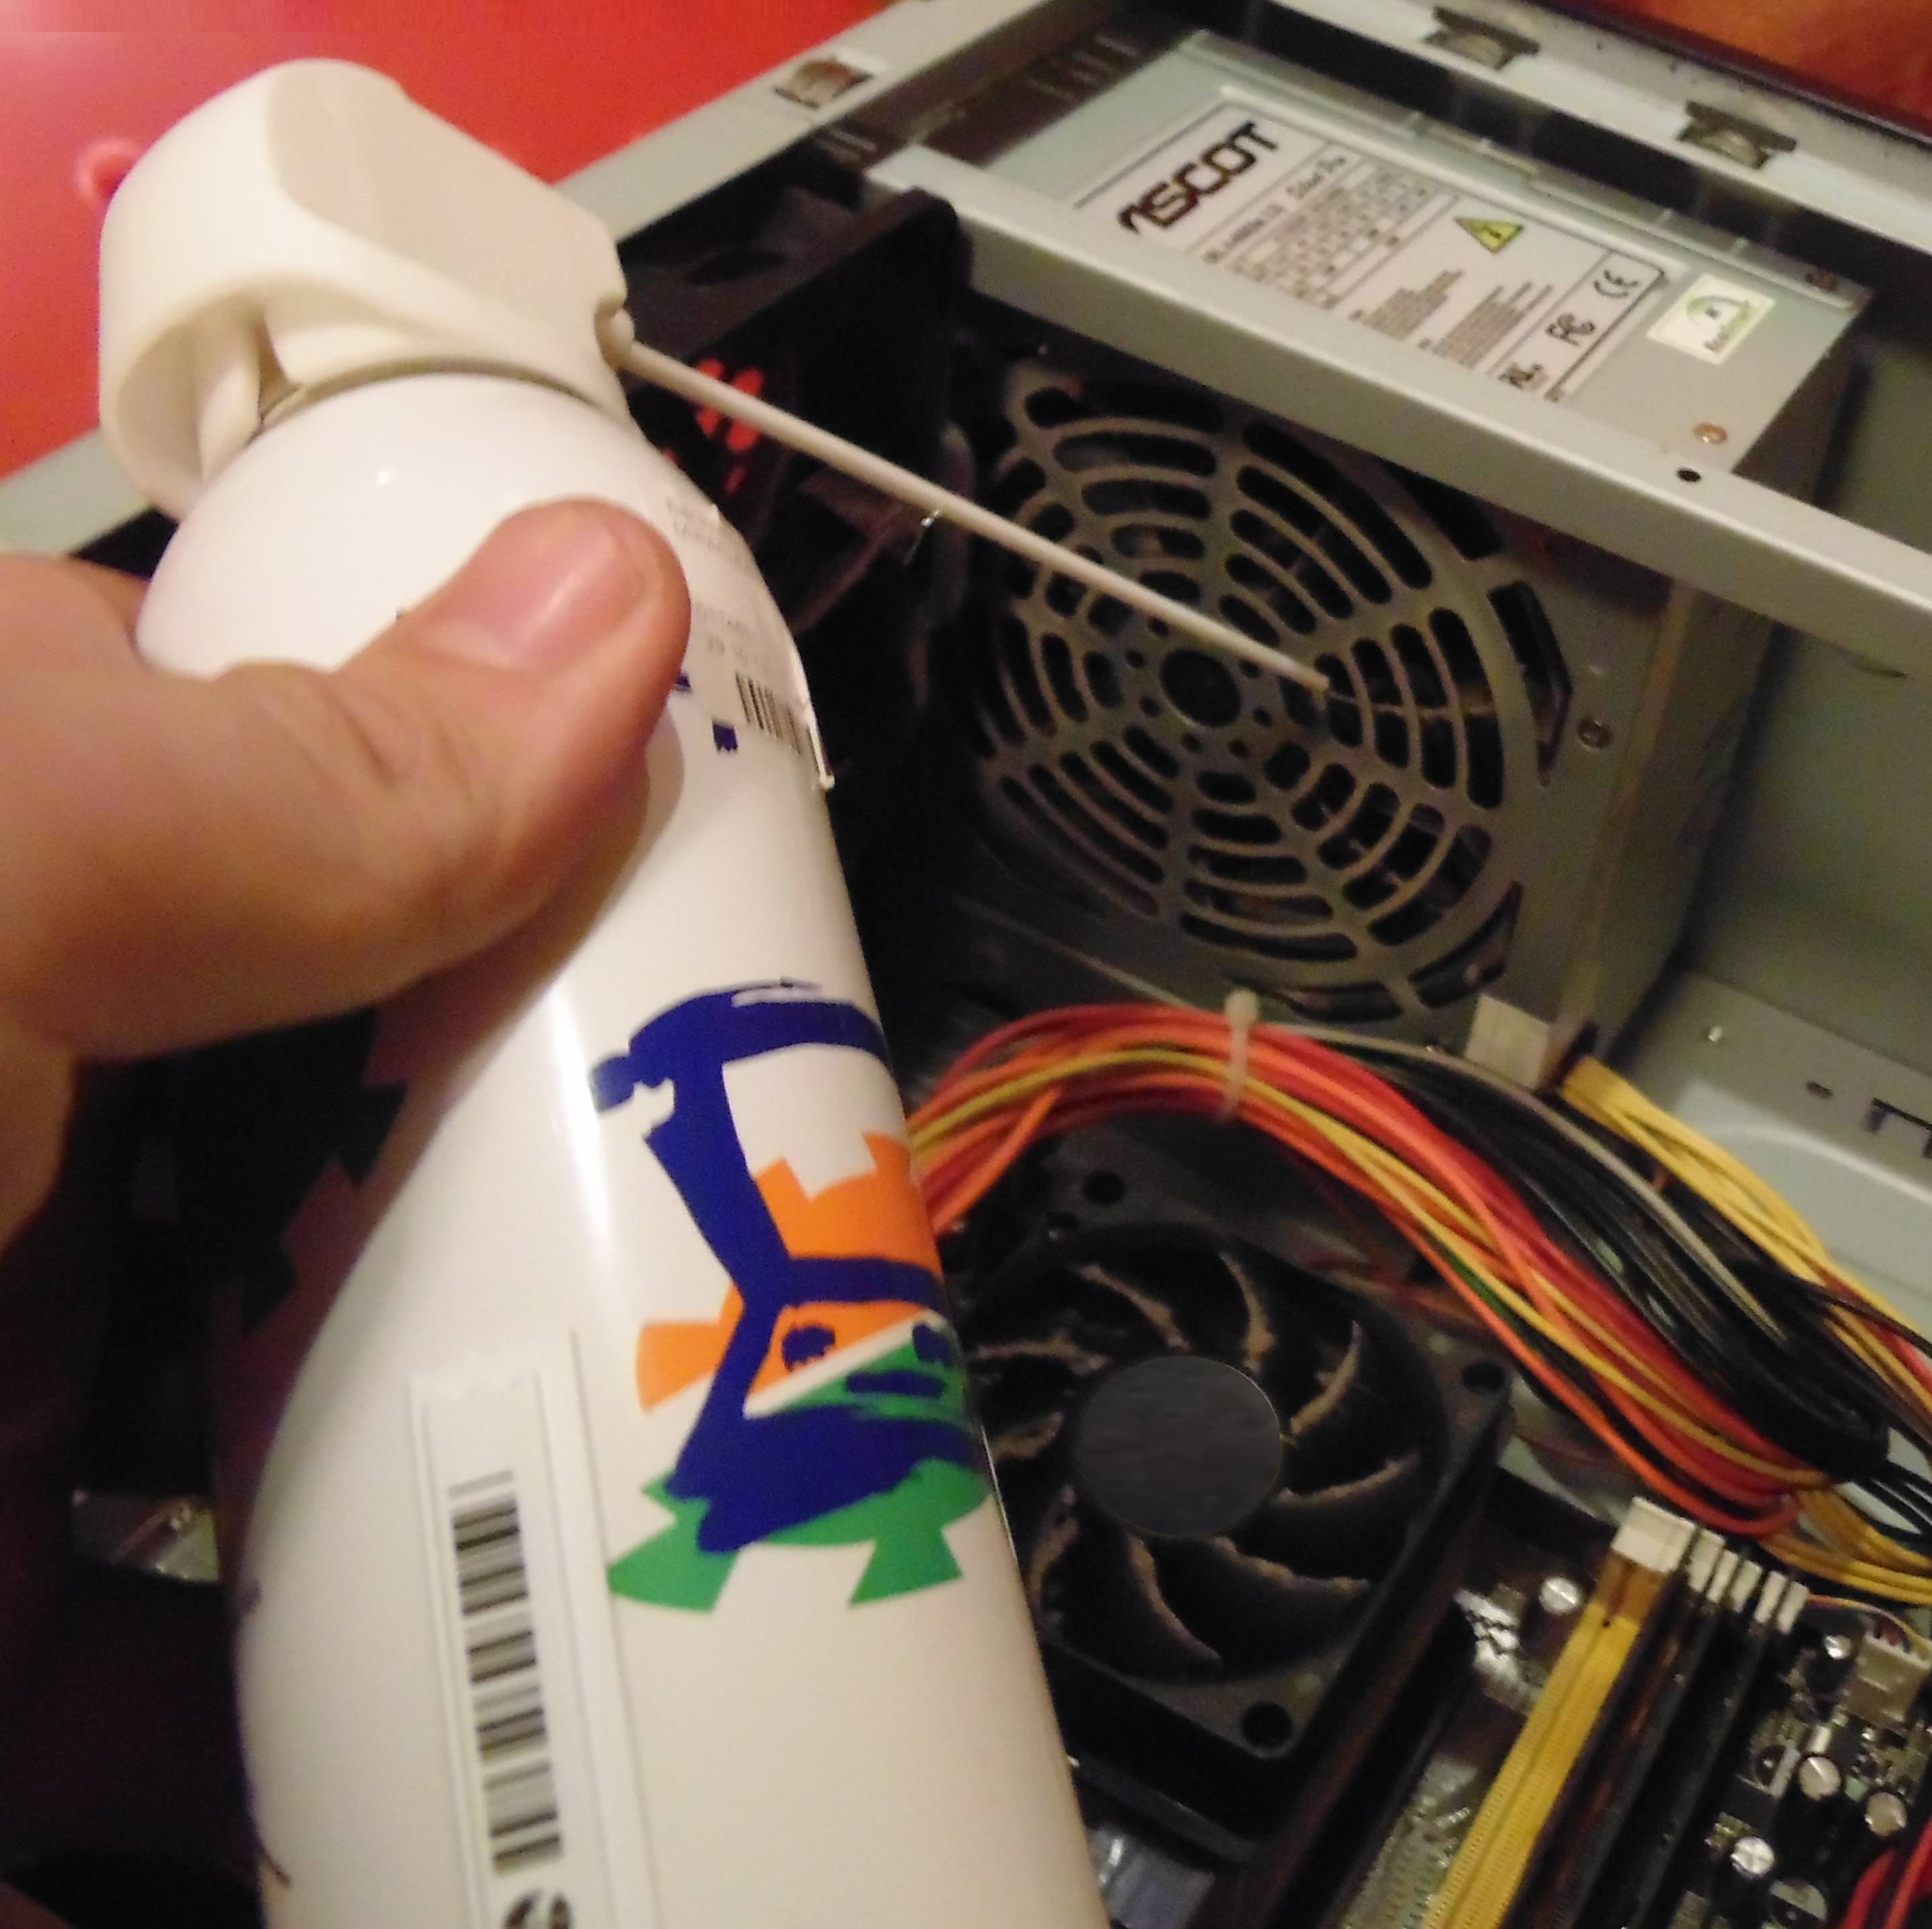
Professional dust removers
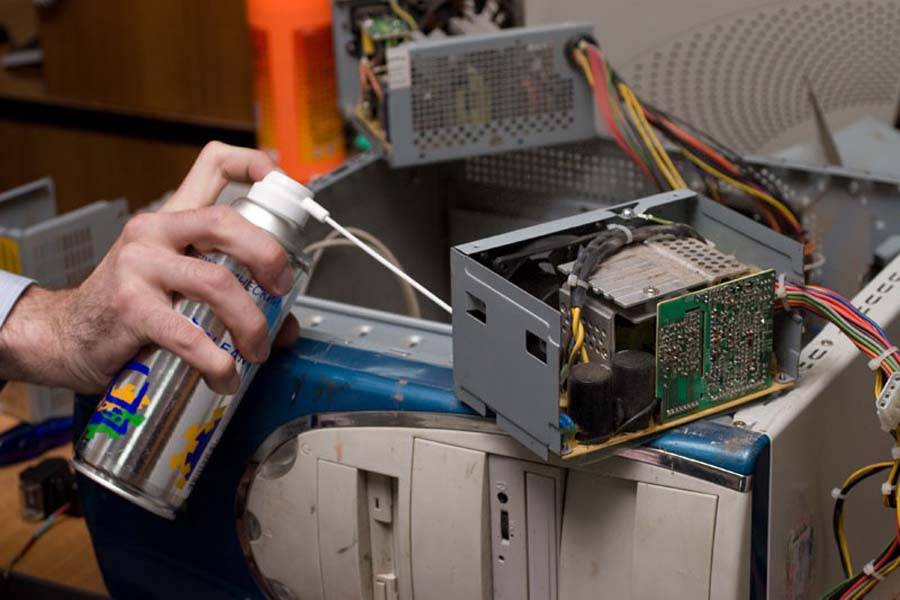
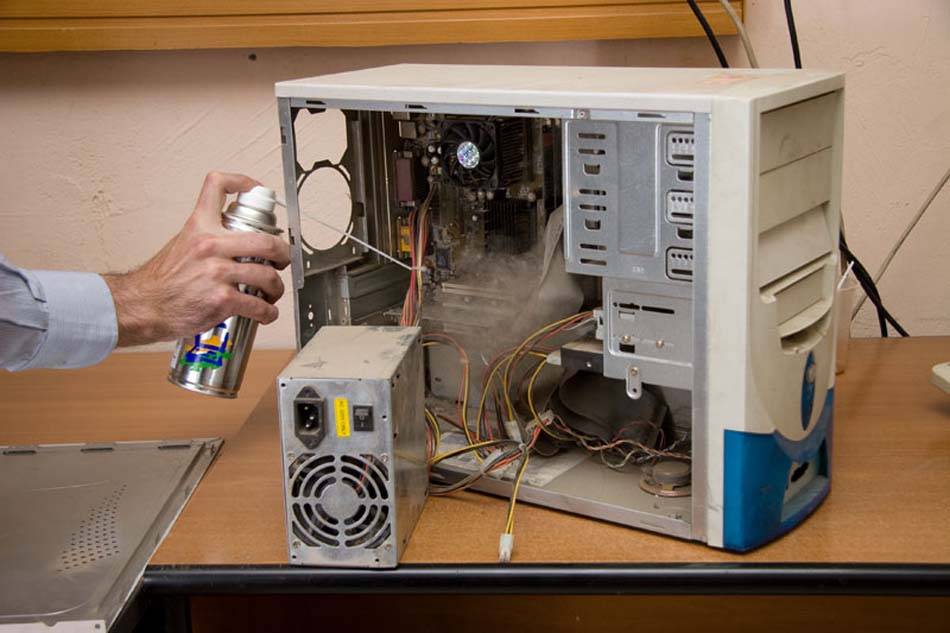
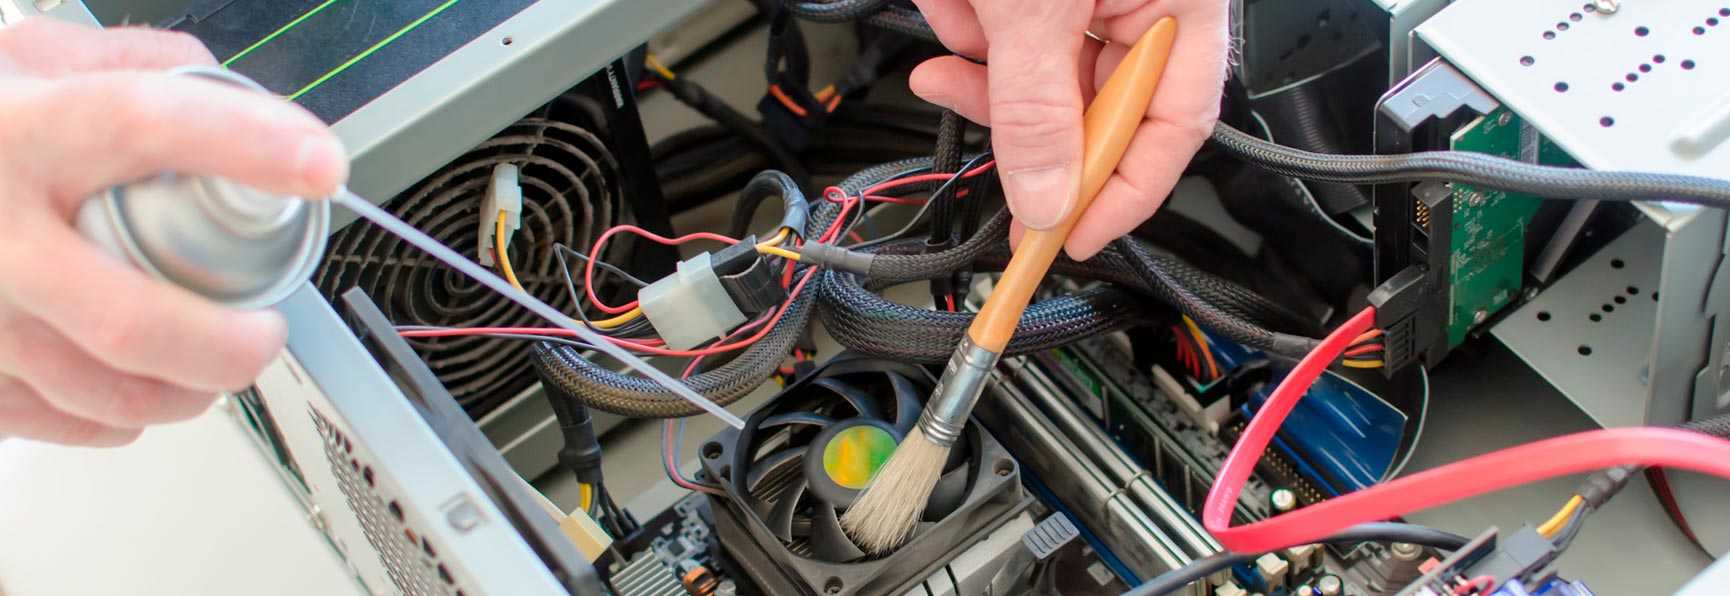
To clean the insides of the system unit, there is only one professional tool - a compressed air cylinder (also called a pneumatic cleaner). You can buy it at any hardware store for about 300-500 rubles. The principle of operation is simple - a high-pressure air stream escapes from the cylinder nozzle and effectively blows out dust. The tool perfectly complements the arsenal of tools for cleaning your computer - it allows you to quickly blow dust out of hard-to-reach places.
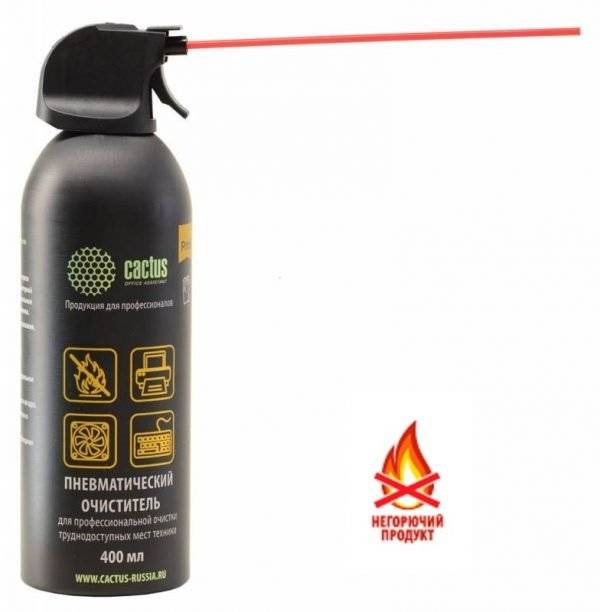
One cylinder is enough for several years of use, so the price is more than affordable
Video: how to use a pneumatic cleaner
What not to use
When cleaning your PC, eliminate damp rags and sponges from your arsenal. They are suitable for wiping the case from the outside, but not from the inside - so you risk damaging the boards.
If you do not have a vacuum cleaner, it is best to patiently pick up the dust with a brush, cloth and tweezers, but do not use a household hair dryer. Firstly, it will spread all the collected dust so that even a person without allergies will sneeze for about half an hour. Secondly, it will nullify all your efforts, because all this dust will again settle on the boards and the processor after a short time.
Avoid using cotton swabs when cleaning your computer. They are easily split into small fibers on contact with sharp parts. For the same reason, do not use regular paper towels. If you need to get to a hard-to-reach corner, it's best to wrap a flannel rag around the screwdriver.
When cleaning any part of the computer (be it a system unit, monitor or keyboard), do not use ethyl alcohol. It tends to oxidize the contacts and can easily corrode the anti-reflective coating on the monitor. The result is a rainbow-colored but not at all fun image.
Prohibited products also include washing powder, glass cleaners and other detergents, as well as products containing ammonia, acetone, toluene.
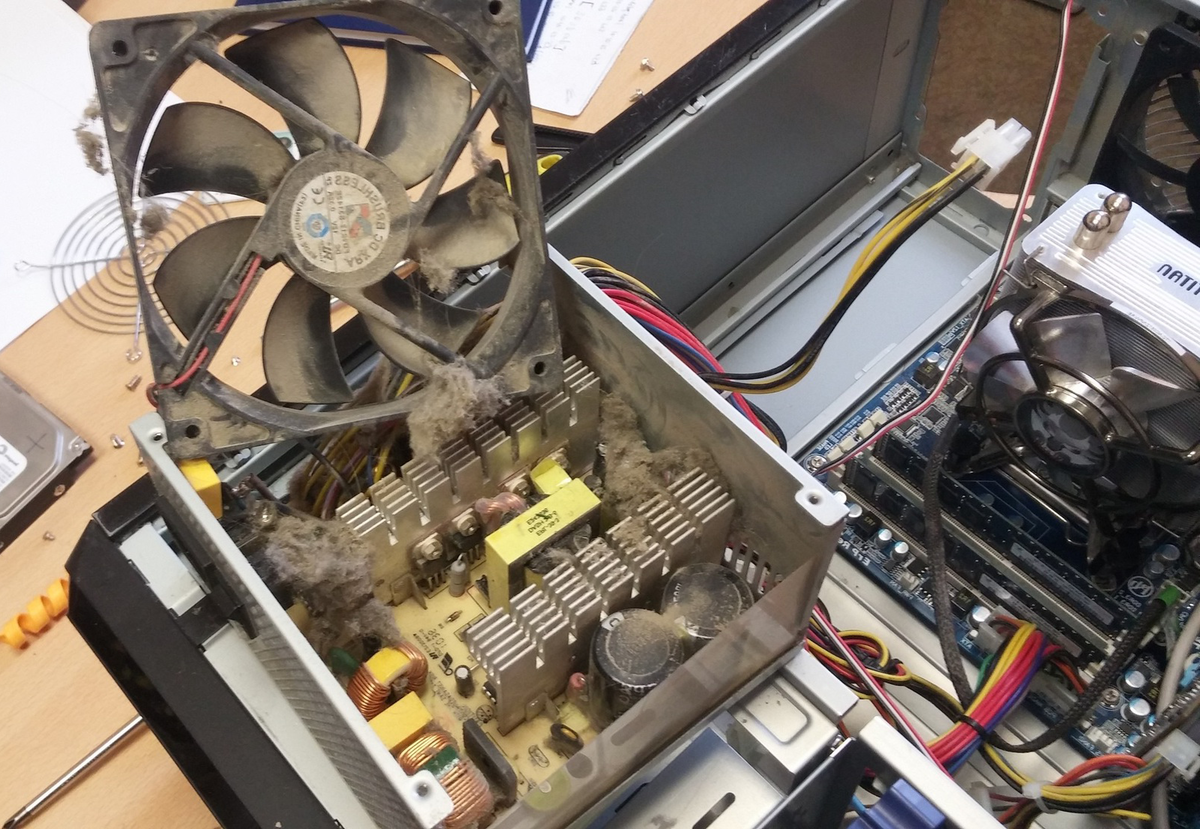
Cleaning the power supply
When cleaning a PC, the power supply is often left for later. But this should not be done. Dust is sucked into the device by the cooler together with the air. It settles on the board, covering parts, heatsinks and microcircuits like loose felt. This greatly reduces heat transfer. As a result, the device overheats, its performance deteriorates, and eventually it may fail.
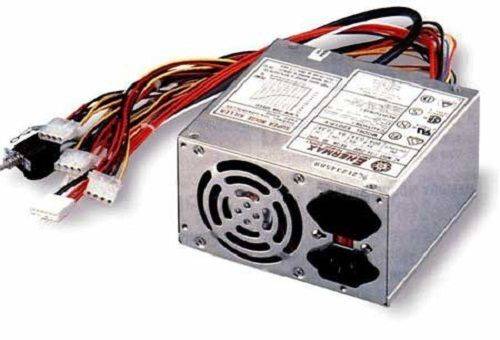
Computer power supply
Before starting work, you must disconnect the computer from the electrical network and disconnect the cable from the power supply, then you can proceed to dismantling and cleaning:
We put the system unit on its side, unscrew the bolts at the end (usually two) and remove the side cover.
We examine the bundle of wires extending from the power supply. Be sure to disconnect the connectors on the hard disk and the optical drive for reading CD-DVD discs.
Motherboard power wires are usually long enough to leave them unplugged.
But if you decide to completely disconnect the device, then the long connector should be removed from the socket very carefully, while holding the board, since it is usually difficult to pull out.
Unscrew the 4 mounting bolts on the rear panel and remove the power supply.
Find and remove the four small screws located in the corners on the side of the removed device. One of them is usually found under a paper sticker.
Remove the cover
It has the shape of the letter "P" and covers three sides at the same time.
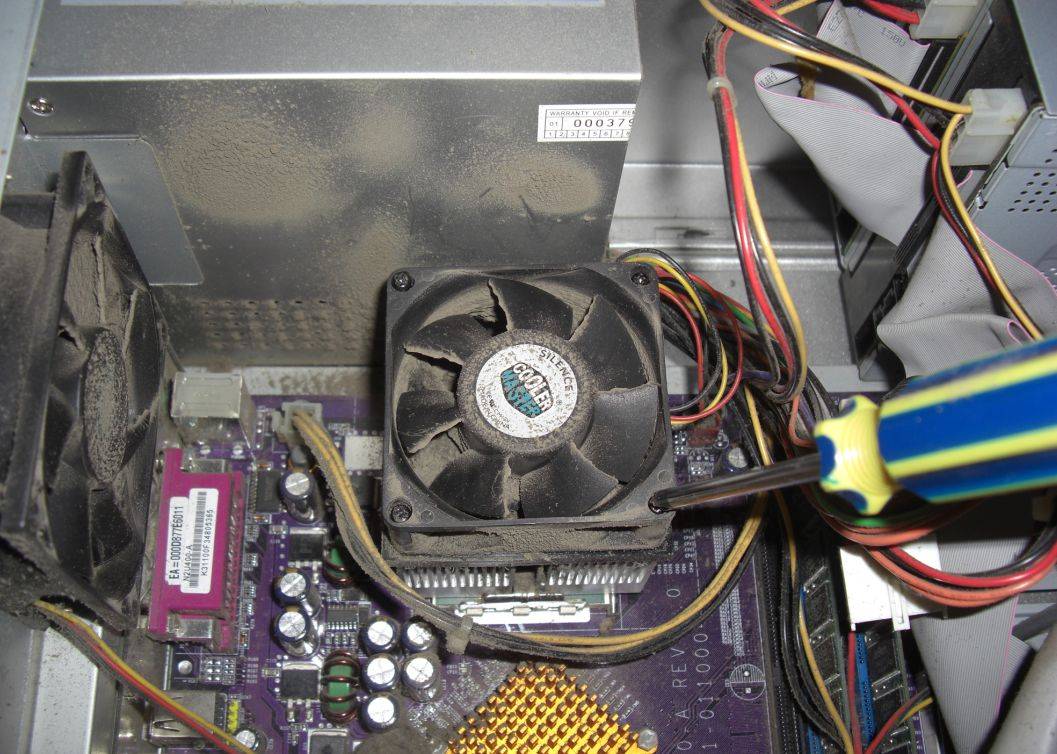
Using a brush or small vacuum cleaner, carefully clean the circuit board, parts and radiators from dust.
Clean the cooler with a brush. Do not touch the fan blades with your hands, as dust will stick to greasy fingerprints very quickly.
Assemble the power supply. All operations are performed in reverse order. If it does not interfere with access to the motherboard, then you can immediately install this node in place. And you can fix it in the system unit after cleaning all PC devices.
Motherboard power wires
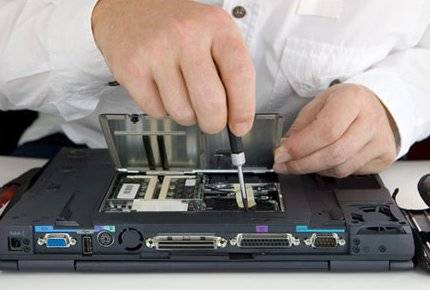
Do-it-yourself comprehensive laptop cleaning
If simple methods did not help or the equipment has not been cleaned for several years, complex cleaning with disassembly of the entire case will be required.
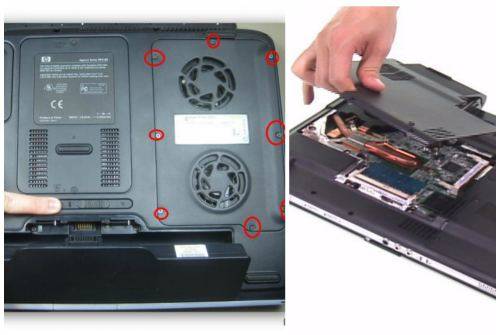
Removing the back cover
The first step is to open the laptop to get to the contaminated parts. To do this, unscrew the bolts holding the panel at the back using a Phillips screwdriver of the required diameter. Twist them counterclockwise. In some models, only a part of the panel above the ventilation can be removed, and not the entire cover. Collect the unscrewed bolts in a container so as not to lose them. If the cover does not give way, do not press down on it, but double-check that all bolts have been removed. After removing the cover, wipe it outside and inside.
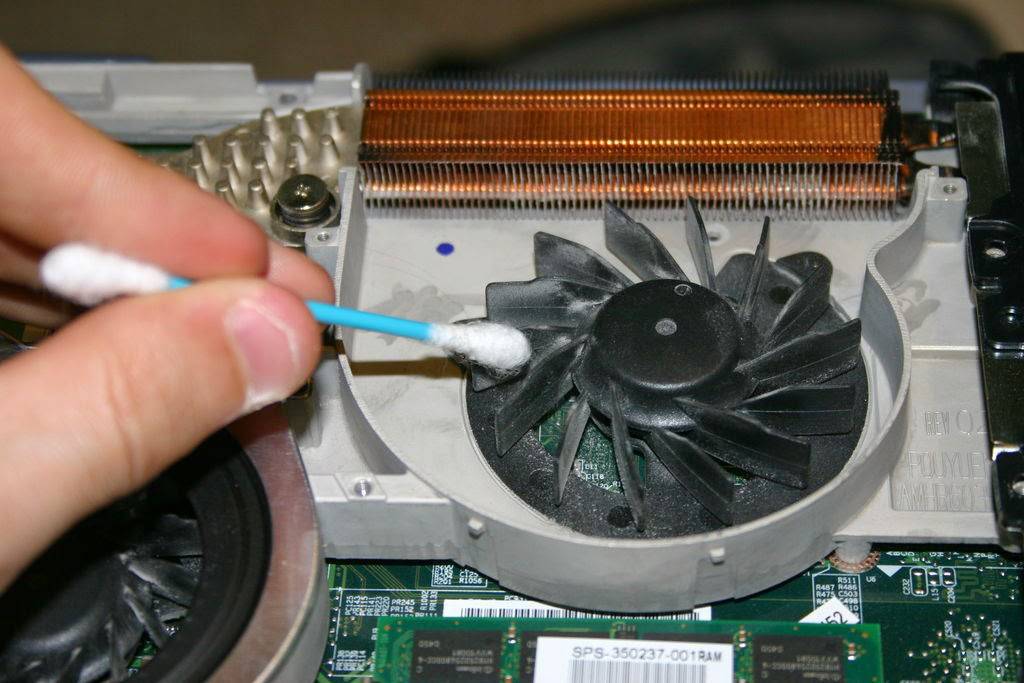
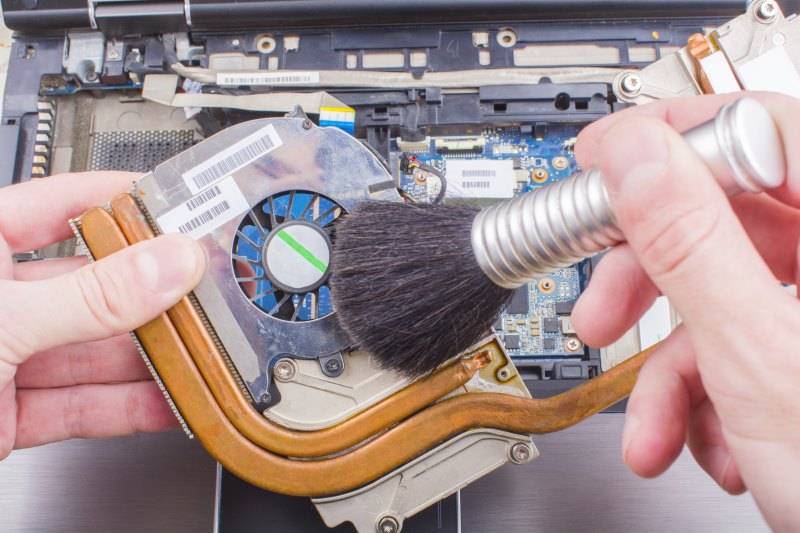
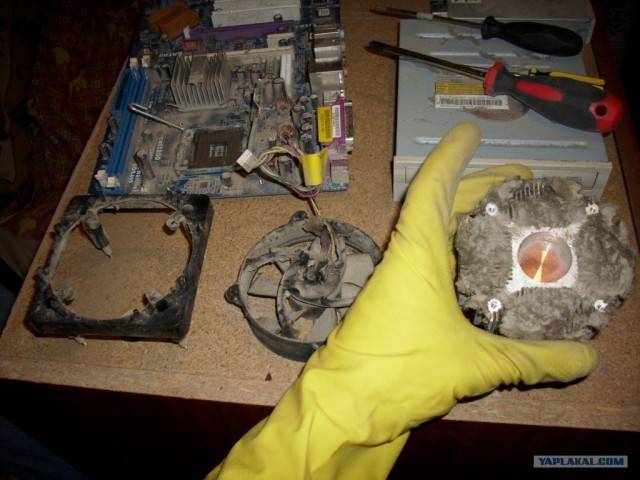
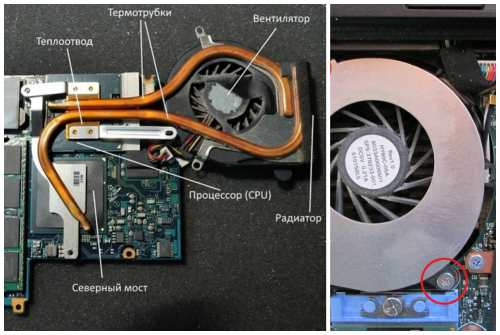
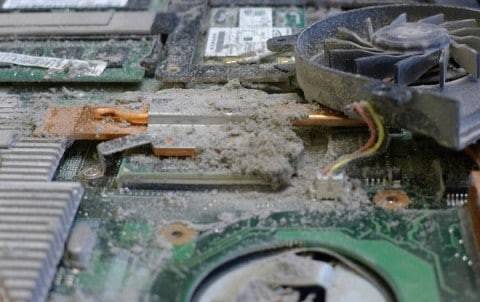
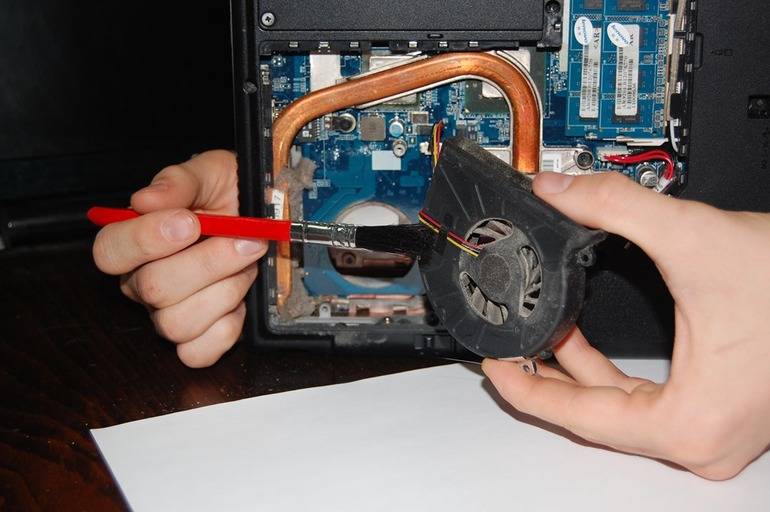
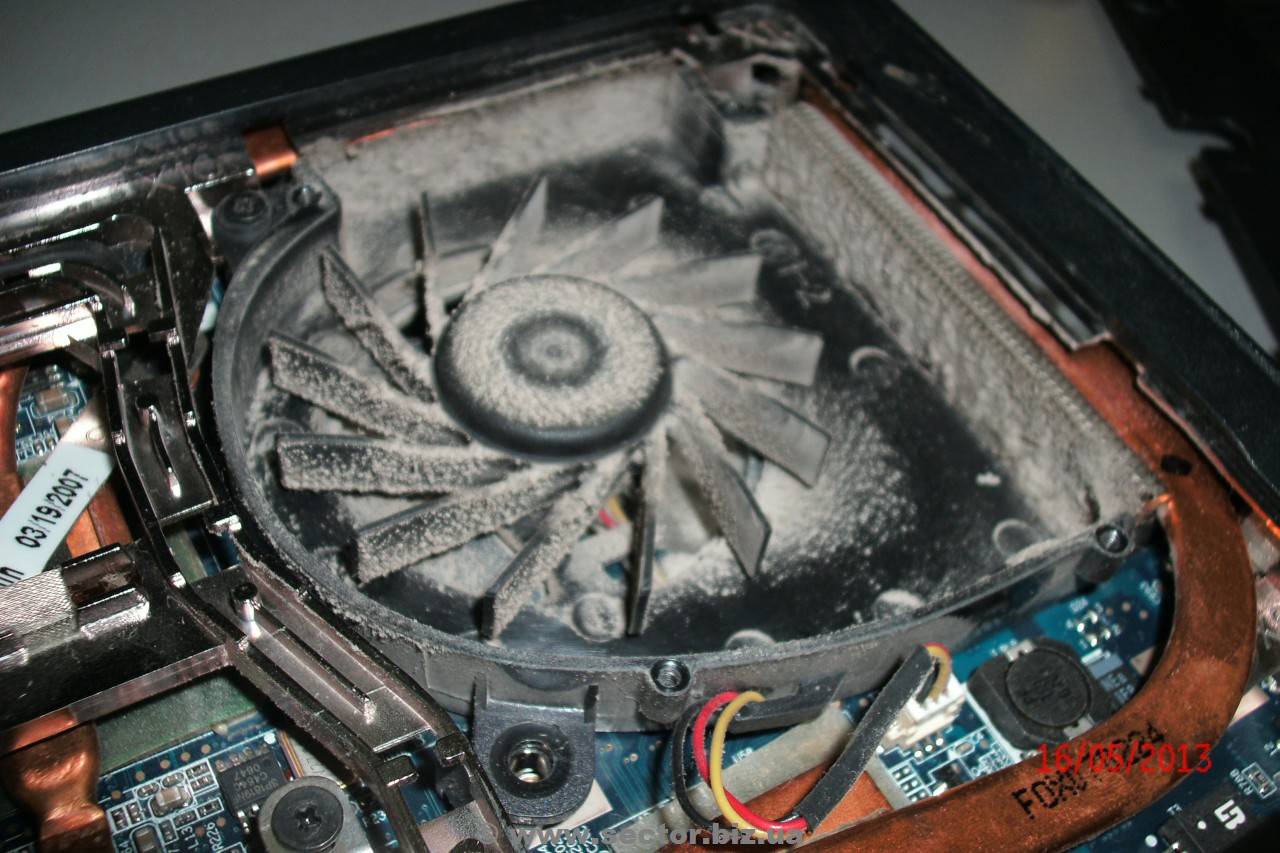
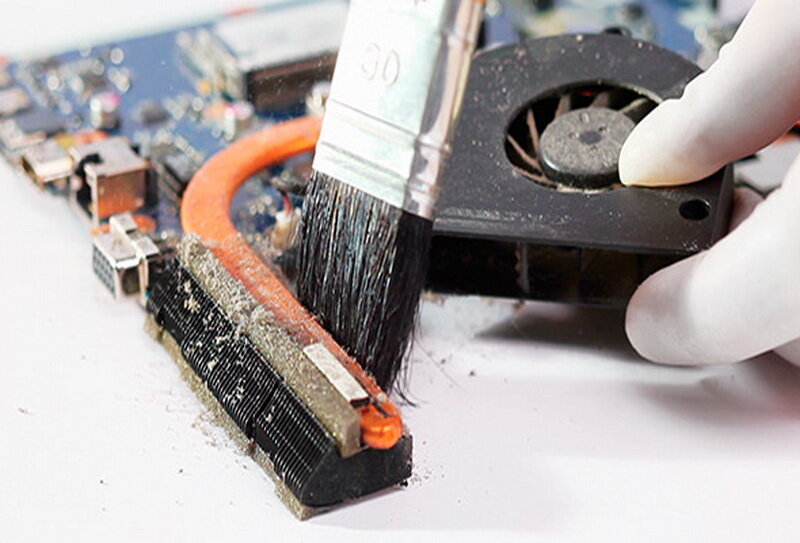
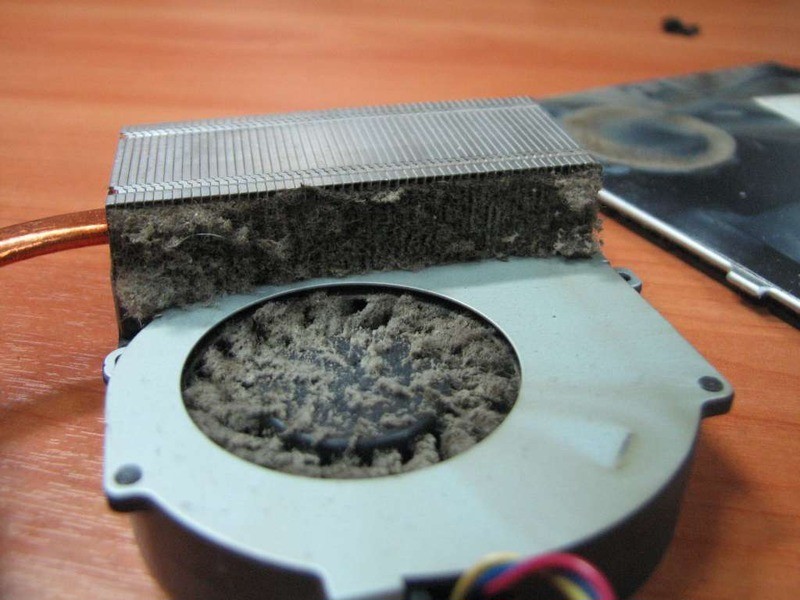
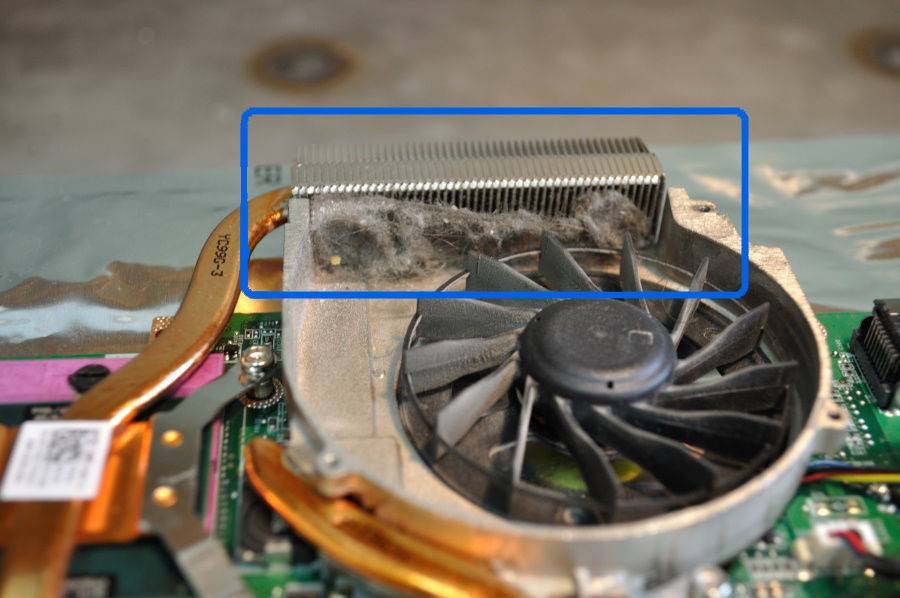
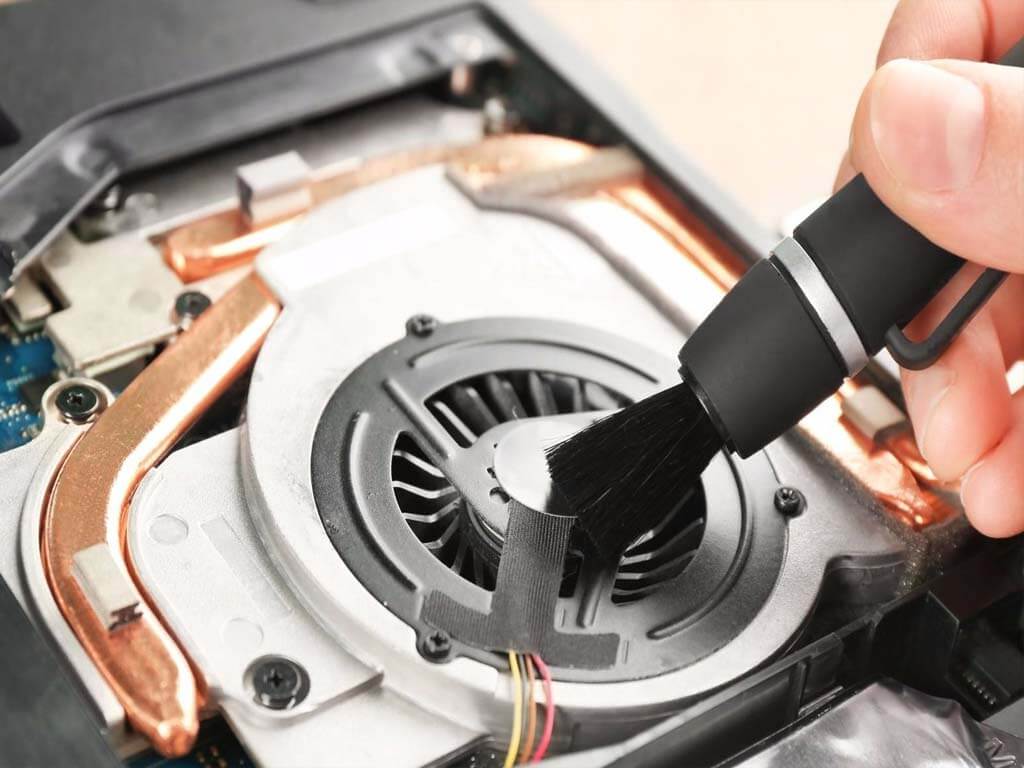
Radiator and cooler
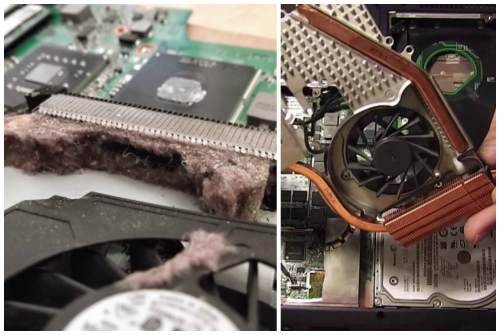
The first step is to find a cooler and heatsink. The cooler looks like a fan in a square or round frame, and a radiator is a box with a grill. They can be blown out with a vacuum cleaner or a spray can, and dust with microcircuits should also be blown
But you need to use a vacuum cleaner very carefully so as not to damage fragile parts. The handset must not be brought close to the circuits or touch them.
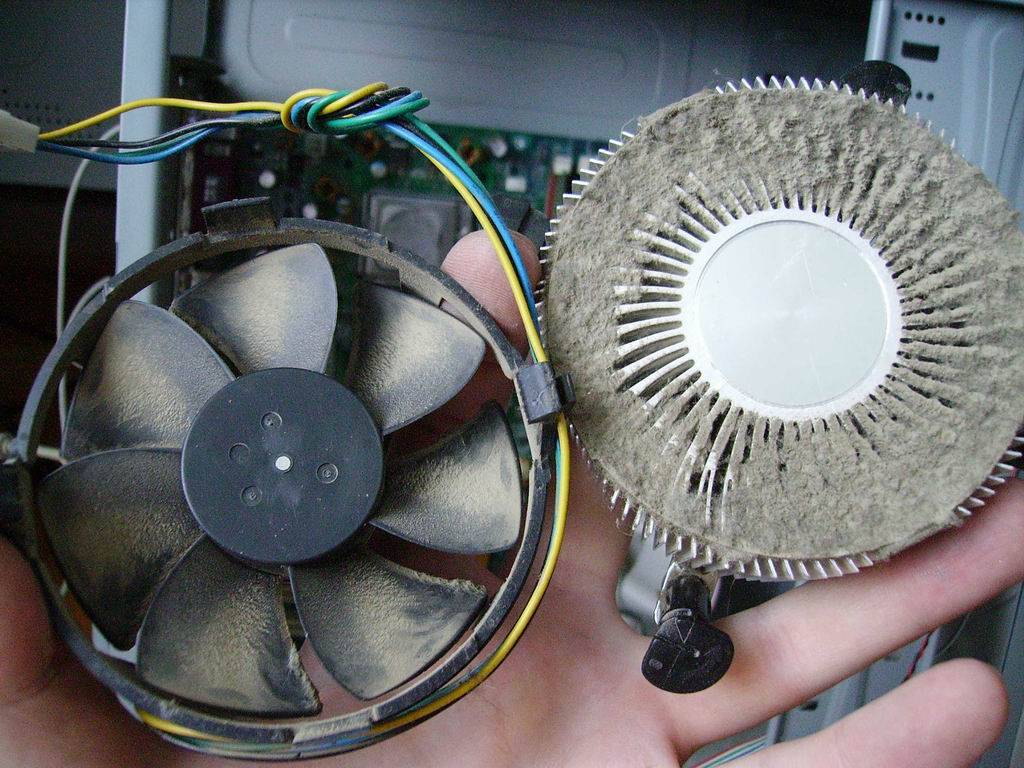
Unscrew the screws that hold the fan and set aside elsewhere
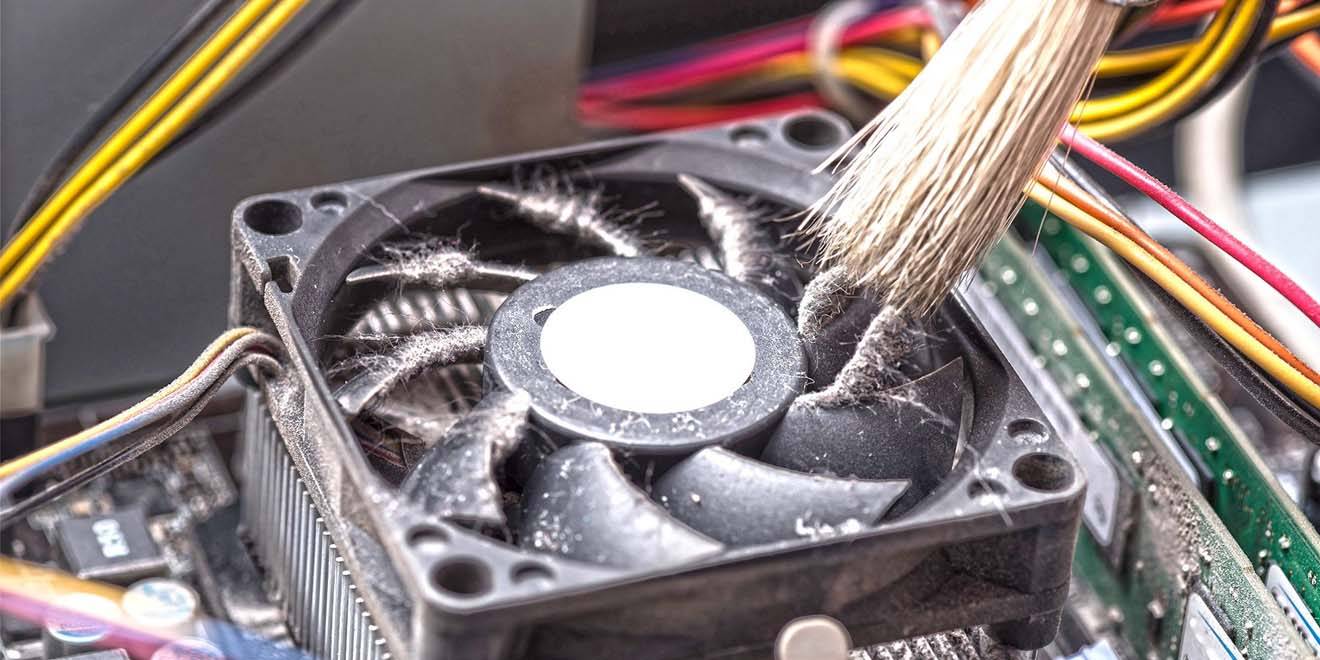
Remove the fan, disconnect the ribbon cable leading to the microcircuit. Wipe the blades with a brush and blow the place where the cooler was located with air.
For prevention, lubricate the engine with engine oil by dropping a drop inside. Put the device back in place, attach the ribbon cable and tighten the bolts.
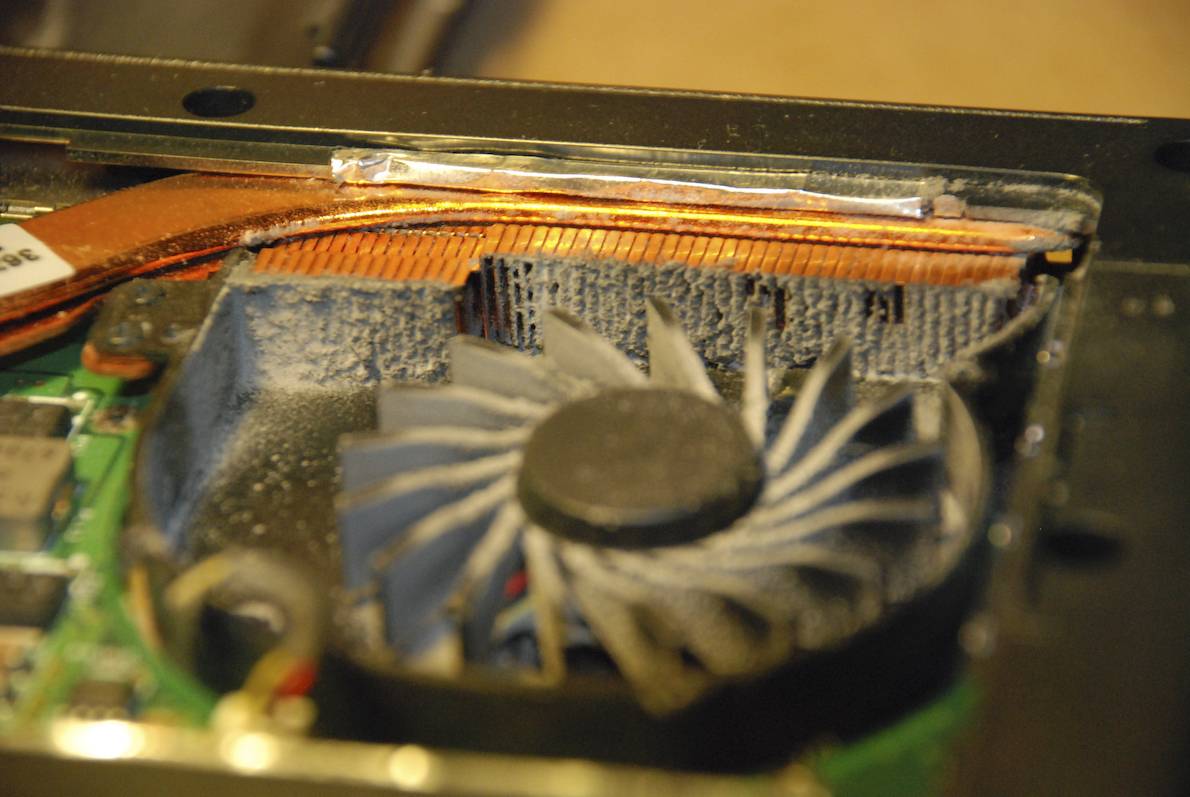
Thoroughly clean the radiator with a thin brush from old thermal paste and dust accumulations.
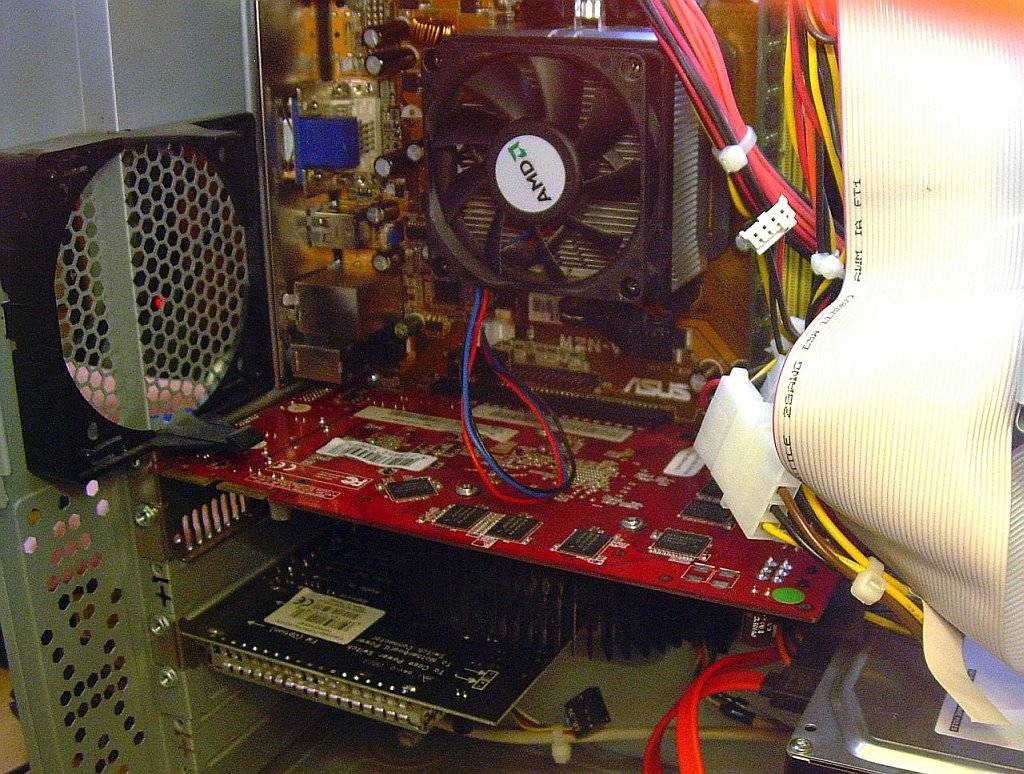
Video card and motherboard
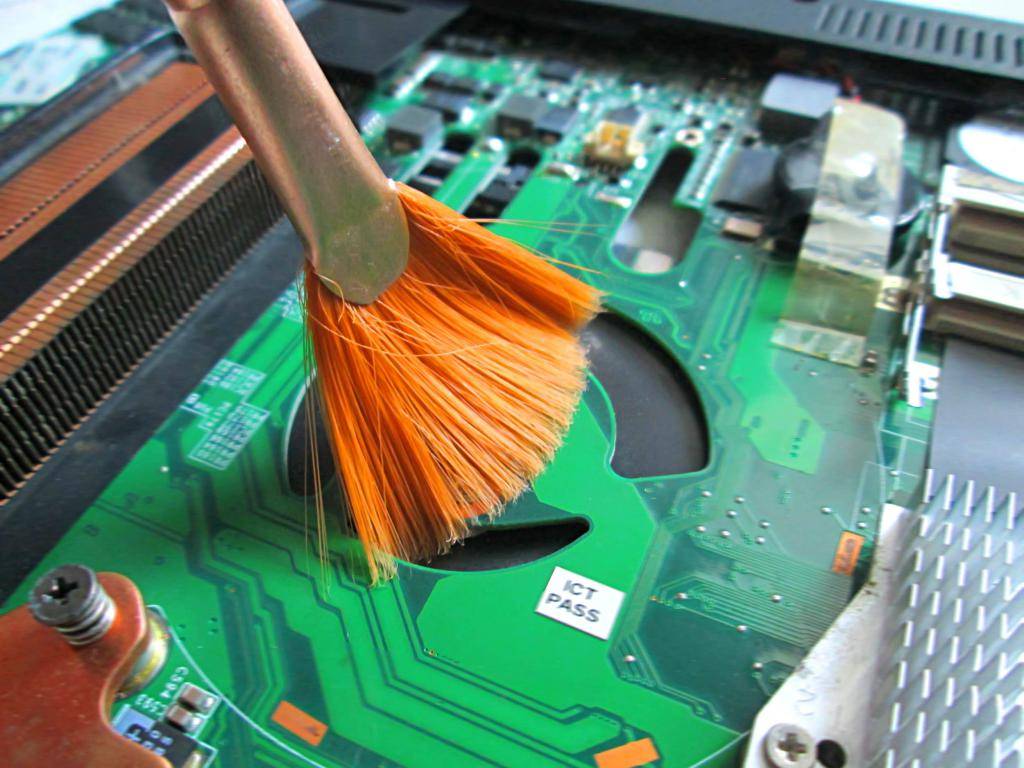
The motherboard is the most fragile part of the laptop, so you need to take it out very carefully. Walk over the surface with a soft brush slightly moistened with alcohol and blow off the microcircuits and contacts.
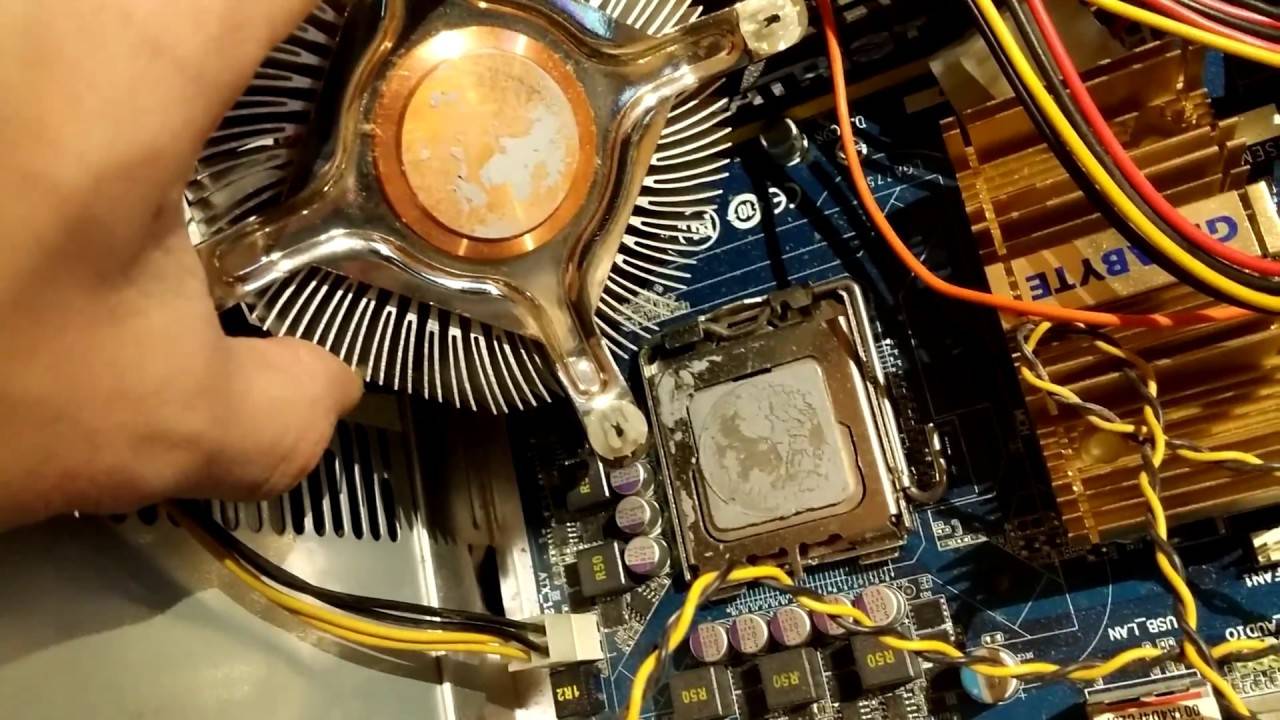
Take the processor out of the slot as carefully as possible.
Pull the socket pedal (the socket where the processor is inserted) slightly to the side and lift up. The pedal should be vertical, then take the processor by the sides and remove it from the socket. Go over the contacts with a cotton swab dipped in alcohol.
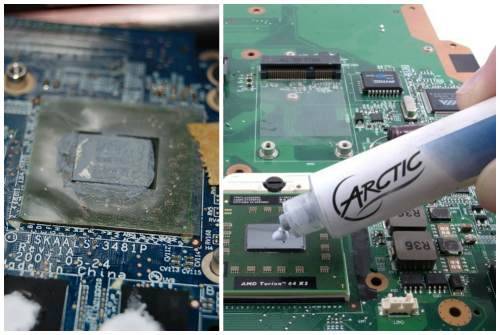
Replacing thermal paste
Cleaning the ventilation system involves changing the thermal paste. Remove its remnants. If it's dry, rub it with an alcohol wipe. Be careful, there should be no scratches left. Apply the paste a little at a time, spreading it with your finger or a spatula (included) over the heat sink plate.
Cleaning the keyboard
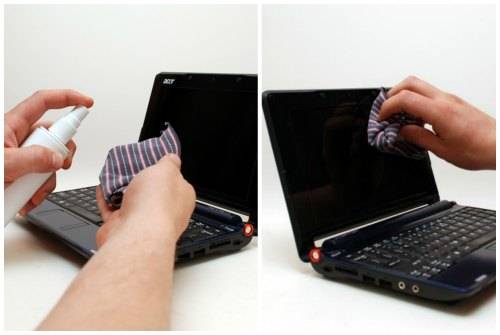
The keyboard is perhaps the dirtiest place on the computer.If it is not very dirty, wipe it from the outside with special technical wipes or a cloth soaked in soapy water. Wring out a cloth, lather buttons, rub to remove dirt and soap, wipe dry
It is important not to damage the markings or flood the keys.
Cleaning the connectors
The internet or USB connectors can also get dirty. From this periodically there are problems with connecting flash drives, phone and mouse. Take a long bristled brush. If the hole is narrow, then just cut a strip out of the plastic along the width of the slot, and glue it with double-sided tape. Dip the Velcro in rubbing alcohol and let it dry well. Wipe the ports lightly and blow out with compressed air.
Screen care
Do not rub the monitor with compounds that contain alcohol, as the screen may deteriorate from moisture. Buy alcohol-free LCD wipes or spray. Rub so that no streaks remain. A full cleaning is best done once a year.
Cleaning the laptop from dust
Since the process of completely disassembling a laptop is quite difficult, it can only be entrusted to a specialist. Of course, you can try to do this at home, but the chances are quite high that you will not be able to assemble the device back. And if it succeeds, it is not a fact that his work will be as stable as before.
If you are even a little unsure that you can disassemble and assemble a laptop without any effort, and also do not have much experience in this area, it is better to contact a service center. As a rule, the cost of such a service is about 500 - 1000 rubles, which is not so much for the safety and performance of your device.

However, there is a good option for how you can surface clean your laptop from dust. Yes, this method does not give such a high-quality result that can be achieved with a complete disassembly of the device, but it is not so bad either.
This method consists in partial disassembly. You need to remove the battery and the back cover of the laptop. Anyone can do it. You will need a screwdriver that will fit the screws on the back of your laptop. The way to remove the battery depends on the model, as a rule, it is located on the surface of the laptop, so there should be no difficulties.
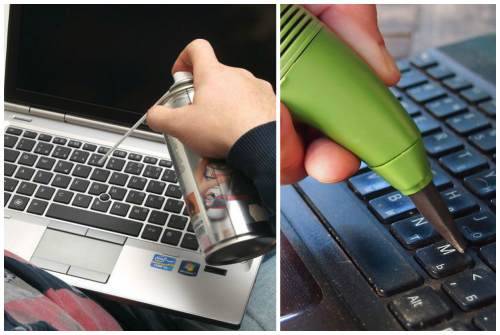
When the back of the device is "exposed", you need a can of compressed air. It can be found in any specialty store for a low price. With a small tube that lets out a strong stream of air, you can do a pretty good job of cleaning your laptop from dust. For a more thorough cleaning, again, it is better to contact the service center.
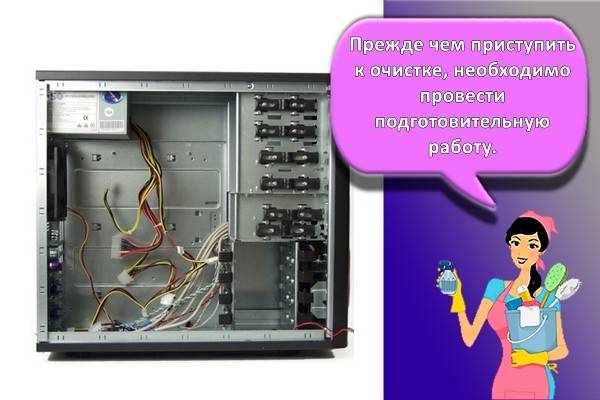
How to properly clean your own system unit
To properly clean your computer from accumulated dust, you need to familiarize yourself with the features of such work.
Preparation
Before proceeding with cleaning, it is necessary to carry out preparatory work.
Complete shutdown of all external components
People who have repeatedly cleaned the PC recommend that you disconnect all external devices from it beforehand. However, before doing this, you must disconnect the computer from the power source.
Components that need to be disconnected include speakers, a printer, a modem, a monitor, and other peripheral devices. In this case, you need to remember how everything was connected. This will help in the future to avoid problems with the connection of disconnected devices.
Remove the cover of the system unit
After detaching the external components, you need to get rid of the side case cover. To do this, you will have to unscrew the two bolts that are screwed to the back wall.
It is very important not to confuse the covers and unscrew the one opposite the motherboard. The removed cover is also wiped with a rag, as there may be dust particles on its inner side.
We collect all the bolts in one place
Quite often, people lose the unscrewed bolts that attached the side cover to the system unit. Therefore, it is necessary to put all fasteners aside or put in a small box so as not to lose.
We take out the RAM from the motherboard
Before removing the RAM from the slots, the system unit is placed on a hard and flat surface. Then you need to remove the memory sticks one by one. To do this, for each slot for RAM, you need to move the latches and carefully remove the strips
This must be done carefully so as not to accidentally damage the memory sticks.
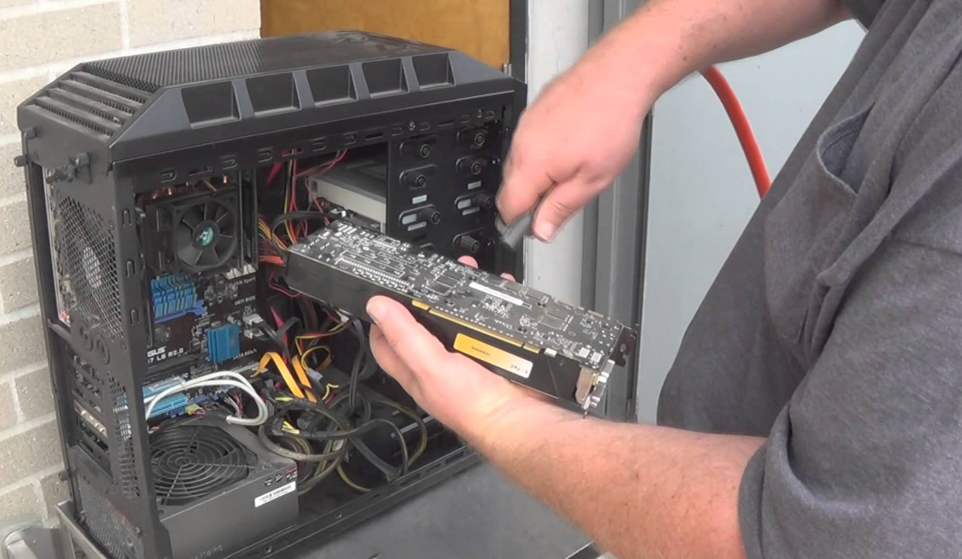
We remove the video card
Having got rid of the RAM, they start removing the video card. To remove it, you will have to unscrew the bolt that secures the video card to the computer case. After that, the latch on the motherboard is disconnected, which is also responsible for securing the card. In the process of removing the card, do not pull it with all force, so as not to damage the video card and the slot in which it is installed.
We take out other internal components, if any
In addition to RAM and a video card, there may be other components inside the system unit, which must also be obtained before starting dust cleaning. Therefore, it is recommended to disconnect Wi-Fi modules, sound cards, modems and other additional components from the motherboard.
Disconnect and take out the hard drive, floppy drive
Other components that need to be removed before dusting your PC are the floppy drive and hard drive. These components are connected to the power supply and therefore must be disconnected from all cords in advance. In some system units, hard drives with drives are attached with bolts. It is necessary to unscrew all fastening bolts and only then remove the components from the housing.
Removing and disassembling the power supply
The very last piece to remove is the power supply. It is attached to the system unit with screws located on the back wall. After removal, the power supply unit must be disassembled in order to clean its cooler from dirt. To do this, you will have to unscrew a few mounting bolts and remove the cover.
Cleaning
Having finished with the preparation, they begin to clean the personal computer from dust.
Initial cleaning with a vacuum cleaner
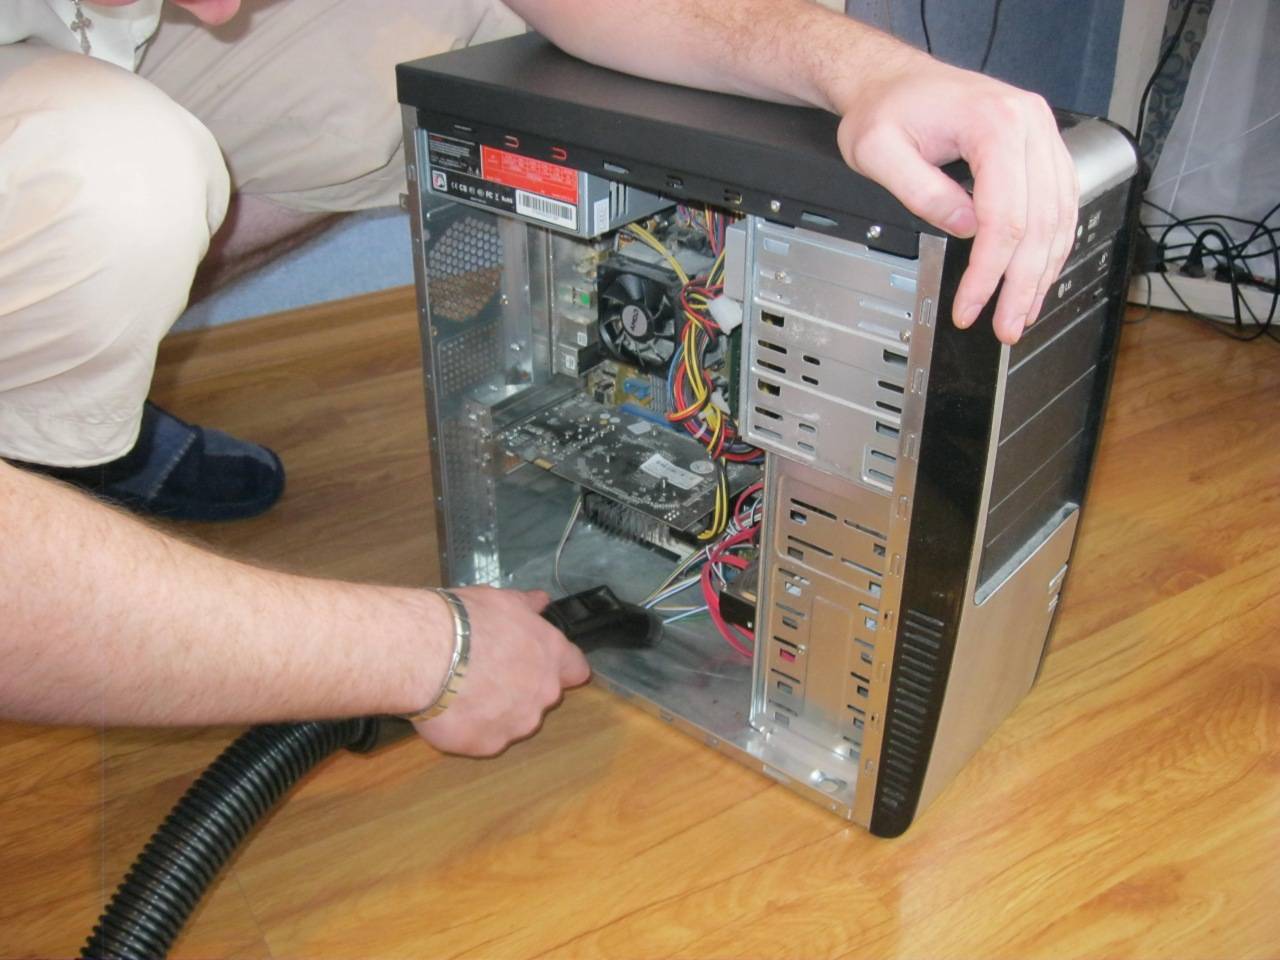
First, you need to blow the motherboard with a vacuum cleaner to get rid of the top layer of dust. First, the vacuum cleaner is connected to the outlet, then the nozzle is removed from it so that only the handle with the hose remains in the hand. Then a mode is set in which the vacuum cleaner does not blow in, but blows out air. Blowing is carried out for 5-6 minutes.
We clean hard-to-reach places with a brush
The processor fan and other hard-to-reach areas should be cleaned with a brush. In this case, a powerful vacuum cleaner is used, which will suck in all the crushed dust.
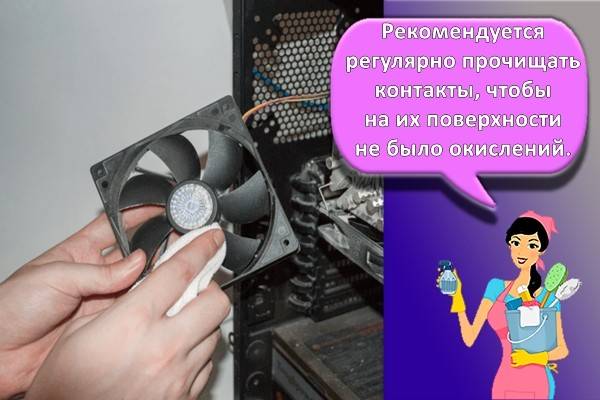
Gently rub the contacts with an eraser
Component contacts that are inserted into the motherboard connectors are oxidized. Oxidation causes the devices to malfunction. It is recommended to regularly clean the contacts so that there is no oxidation on their surface.
To do this, the surface is carefully rubbed several times with a regular eraser.
Assembling a computer
Having finished cleaning the PC from contamination, they are engaged in the collection of the system unit. Everything should be done in the same way as during parsing, but all actions are performed in a different sequence. After assembly, you need to check that all components are in place.
How to remove a video card
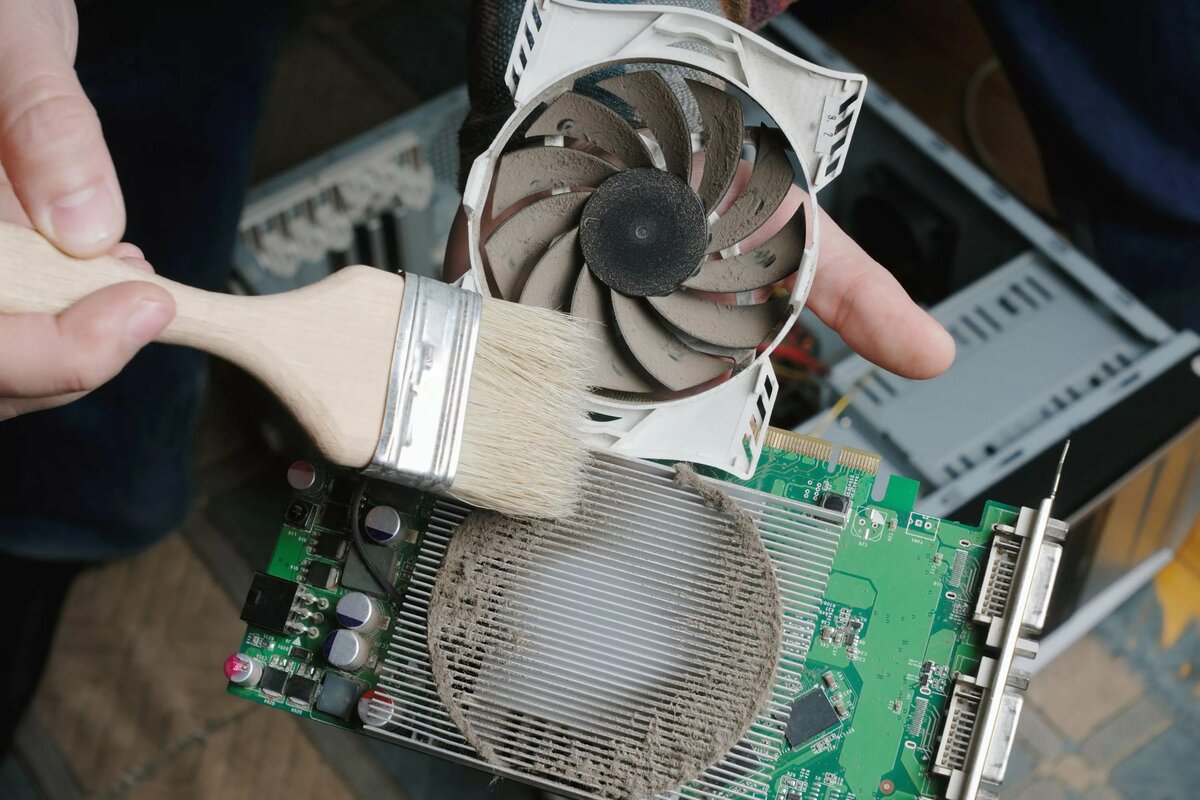
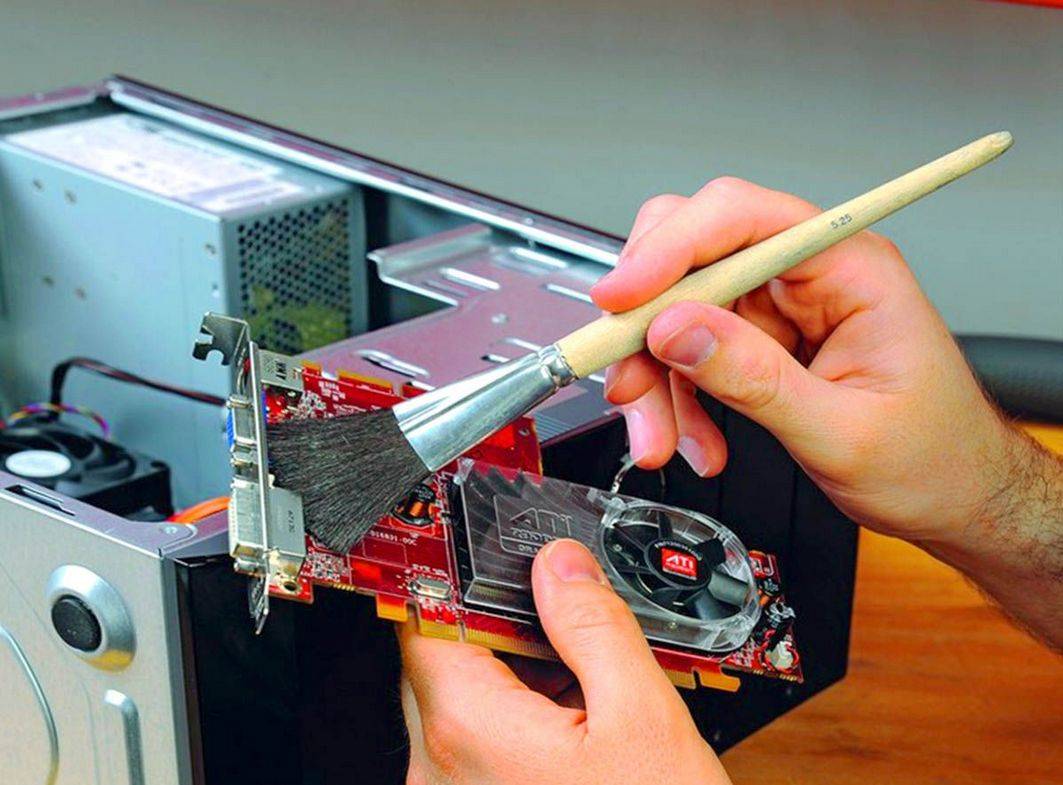
Many users do not understand how to clean the dust from the video card. If you have an external video card with active cooling, that is, with a fan, then it also needs to be cleaned. We remove the video card. To do this, unscrew the screws on the case that secure the board
Then, depending on the configuration of the slot, squeeze or move the clamp to the side and carefully pull the board up.You can make sure that there is also a lot of dust in this place.
That is why, using a vacuum cleaner and a brush, we carry out a thorough cleaning. Everything goes according to the principle of cleaning the cooler and the processor: we remove all the dust from the cracks with a special brush and raise it into the air, vacuum
We clean carefully so as not to deform the blades. We clean especially dirty places with alcohol
Features of replacing thermal paste
 Once all the parts are completely cleaned, you can start reassembling. Cover the processor with thermal paste again. Change thermal grease once every six months, but if you clean your computer more often, change it every time you clean it.
Apply the thermoplastic very carefully with the tip of the nail. It's not about saving, such a manipulation provides good thermal conductivity - the thermoplastic layer should be thin, so you don't need to overdo it
Smear the paste with a clean finger or a plastic card. It is necessary to cover the entire surface of the processor, while distributing the paste as evenly as possible, without gaps, and also without crawling over the edges. We collect excess paste from the edges with cotton wool or paper napkin.
We install the processor in its original place so that the corner marked with a golden triangle on it coincides with a similar corner in the socket. This is the only position in which the processor is positioned correctly. It is placed in the slot by itself, you do not need to click on it. Then we strengthen it with a clamp.
We fix the radiator in its place. To do this, you need to bring the grooves of the bracket under the hooks, hooking them, and pressing the radiator with your free hand. It should be tightly fastened and not loose at the sides.
If your heatsink is pressed against the motherboard with special screws, tighten them evenly crosswise. After that, it remains to fix the fan and connect it to the device.
After finishing cleaning, you need to make sure that the cables that you disconnected inside are back in place and firmly seated in the sockets. It is possible to test the PC without replacing the cover. After making sure that everything works well, rotates and does not emit extraneous noise, close the system unit and start comfortable and correct work with a clean computer.
Why is the screen black and the monitor does not work after cleaning the computer or laptop
After cleaning, the monitor may not function for the following reasons:
- power is not connected;
- the contacts are not tightly connected;
- the cable is connected to the wrong connector of the video card (if there are two of them);
- the refresh rate on the video card is incorrectly set (for older models of displays with a cathode-ray tube, a frequency of about 100 Hz is required, for LCD, 50-60 is enough);
- the monitor is defective;
- the laptop is switched to the mode of operation with an external monitor (keys on the keyboard);
- damaged video card;
- loop failure (you can check by connecting to an external display).
conclusions
To extend the life of a monitor or laptop, it must be kept clean. For this reason, it is necessary to promptly remove dust and other dirt from the surface of the screen during cleaning.
Advantages and disadvantages
Pros of self-cleaning:
- improved image quality;
- keeping equipment clean;
- the ability to wipe the monitor at any time at home.
Minuses:
the possibility of damage to the display by careless movements (strong pressure), moisture ingress into the corners of the PC monitor or on the laptop keyboard.
Video review