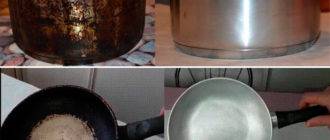
DIY repair methods
Samovar restoration is a painstaking and difficult process. If you are not interested in the appearance of the product, at home you can eliminate some of the causes of breakage of the dishes. To restore a samovar, so as not to lose the beauty of its body, is only within the power of specialists. Of the tools and additional materials for self-restoration of the product, you may need: tin, a hammer, an abrasive, sandpaper, tow.
Home repair steps:
- restoration of the case (patching up cracks, eliminating leaks, straightening (removing corrosion);
- cleaning the product from the inside (descaling, tinning);
- replacement of parts (if necessary);
- improvement of appearance (polishing).
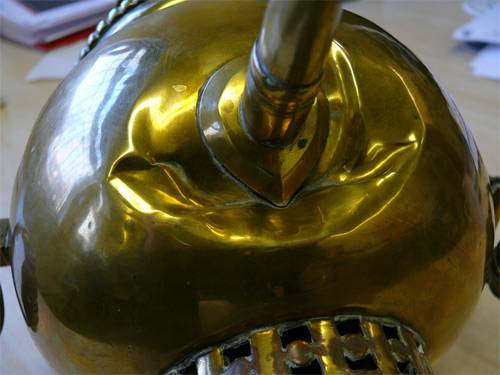
Rebuilding the hull
If there are dents on the samovar, you can straighten the product with your own hands. To make it easier to correct irregularities, it is recommended to unsolder the free pipe. This simple technique allows you to freely place your hand, as well as tools, inside the samovar. In this case, a wooden block will perfectly play the role of an anvil. To align the body, you need to use a rubber mallet and measure the impact force so that the dent is straightened. It is better to straighten the product by weight, so pressure will not be transmitted to the body of the samovar.
Cracks in the housing can be soldered if a burner is available. Often the samovar breaks from the bottom of the flame tube and, as a result, begins to leak. Restorers recommend soldering the body of the product from the inside - so the seam will be barely visible.
Crane repair
Lapping the faucet is quite feasible at home. If it leaks from the bottom of the product, then the key is located high in it. Conclusion: it must be lowered below, having treated it with lapping paste before that. Next, the samovar is filled with hot water. In smooth circular motions, turn the key in the tap until the liquid stops dripping. If it does not open at all, the bore hole can be machined with a "liquid wrench". After the time specified in the instructions, you need to lightly hit with a hammer on the stuck part of the structure.
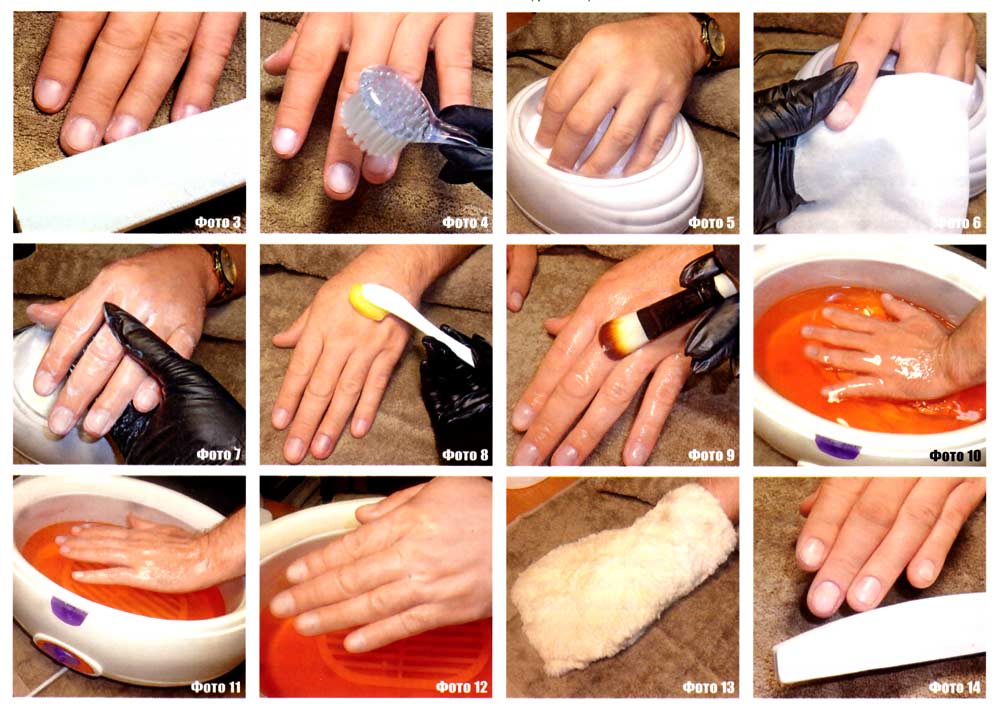
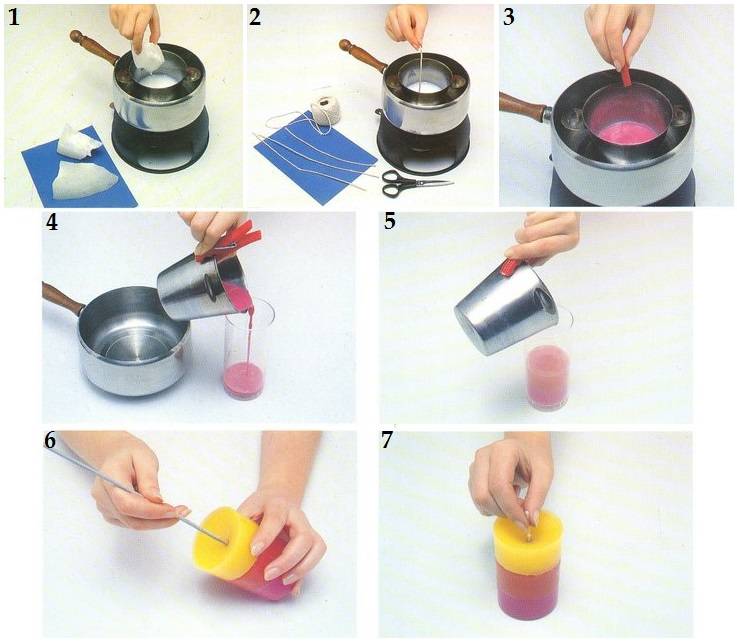
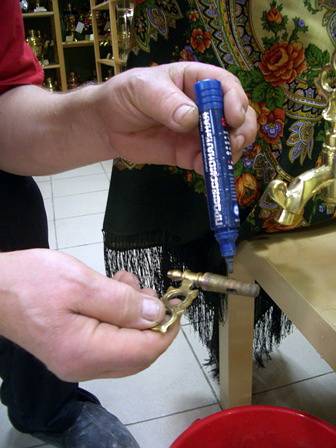 Lubricate the samovar key with lapping paste
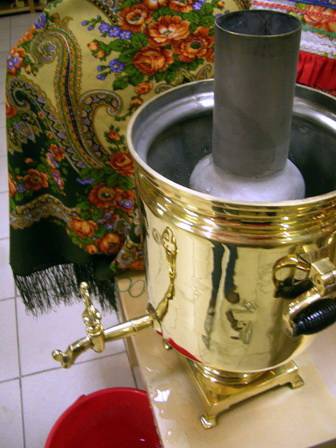 Then insert the key into the tap. Fill the dishes with hot water
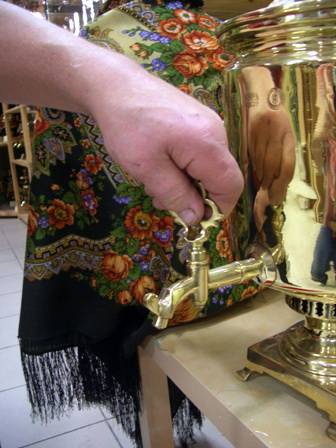 Turn the key several times
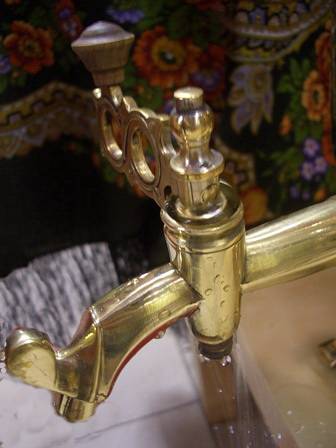 Ready
Ready
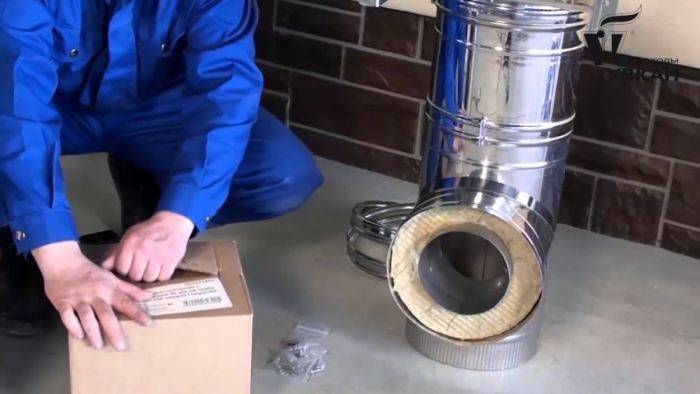
Replacement of internal elements
A large assortment of taps for samovars is on sale, so replacing this accessory is quite simple. An important step in this matter is to correctly measure the parameters of the part. After purchase, grease the faucet with vegetable oil or petroleum jelly. This technique increases the service life of the product.
Often grates fail in a samovar. Before replacing a part, it is necessary to unsolder the pipe. Its lower part should be checked for cracks. After these actions, a new grate is placed in the pipe, the body is cleaned. Further, the rest of the samovar parts are installed in their places.
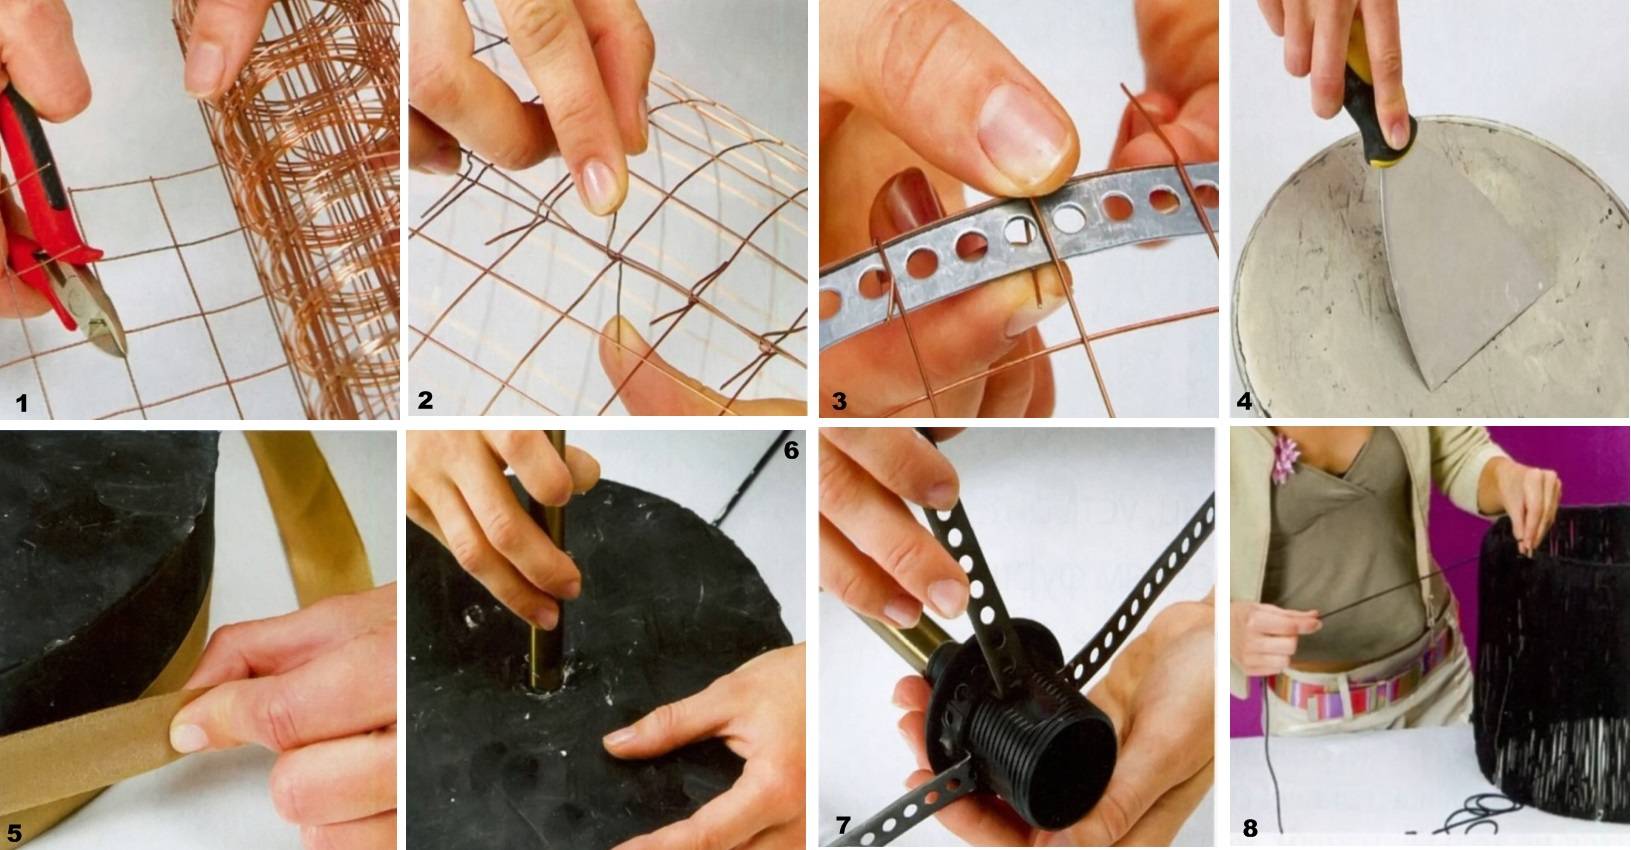
 Replacing the faucet
 We solder the pipe
 We mount the grate and seal the pipe back
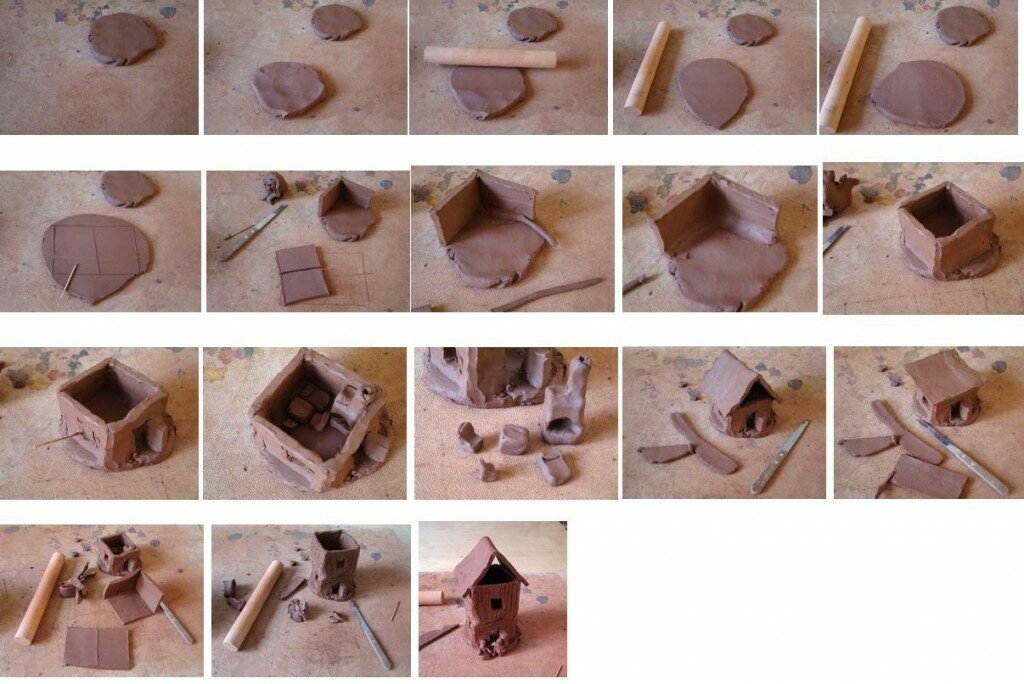
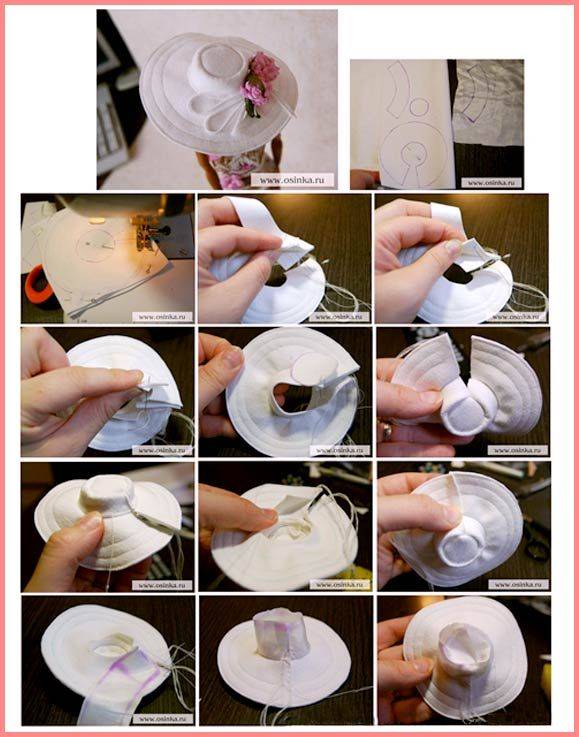
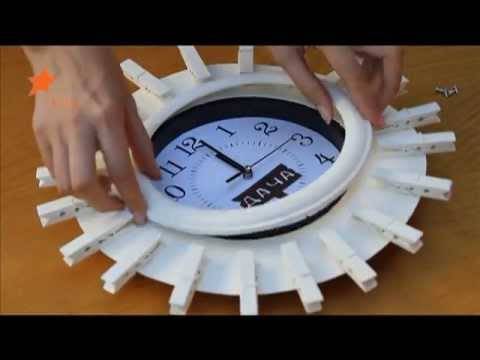
Cardboard clock
It is never boring in the house where children live. The same is in our case. We want to teach the kid to understand the meaning of the clock, which means we make a clock out of cardboard with our own hands.

First, we need an idea. Let our watch be presented in the form of the sun. We will prepare cardboard, scissors, arrows - they can be taken from an old watch or also cut out of cardboard. And also accessories for the decoration of the appearance - these are paints, pencils and felt-tip pens.

Cut a circle out of a large sheet of cardboard using a template or using a compass.Next, from the resulting circle, cut out rays of the same size, resembling flower petals in shape.

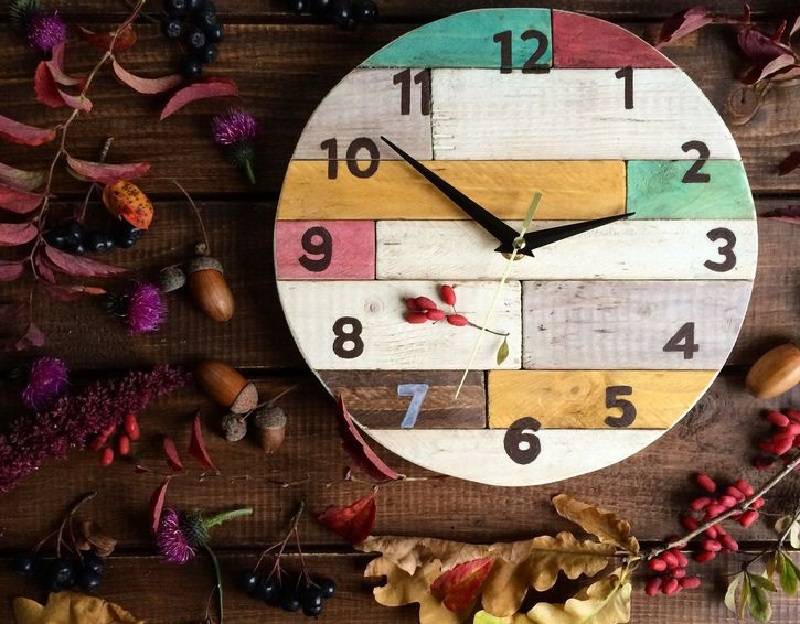
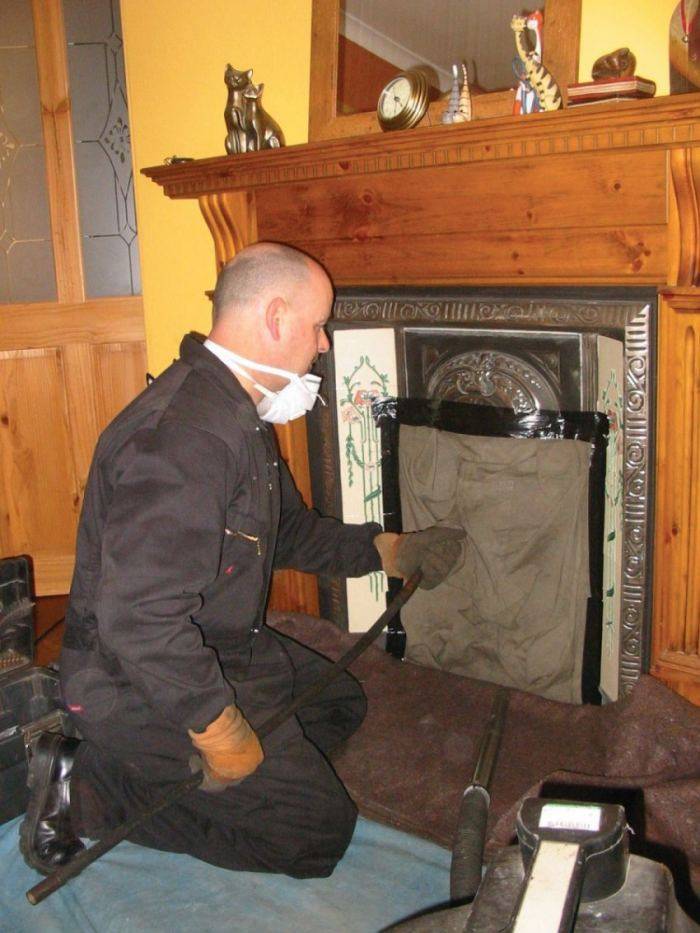
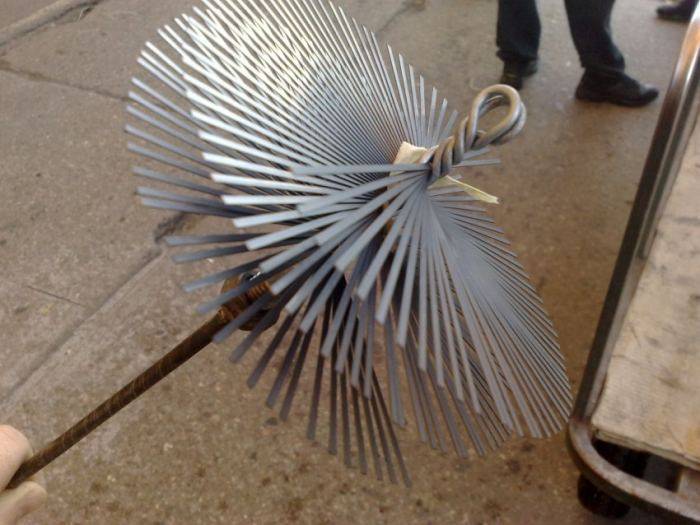
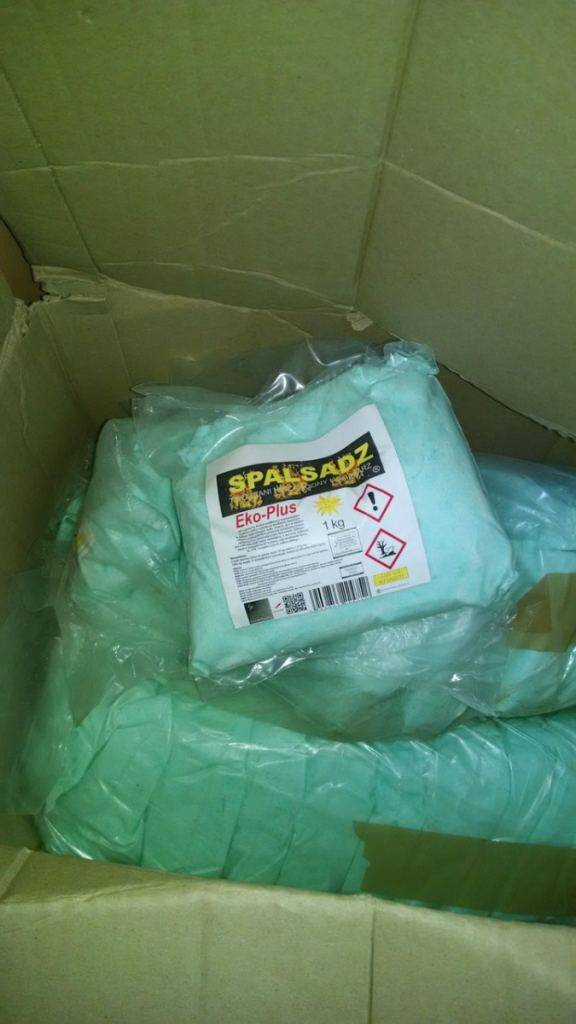
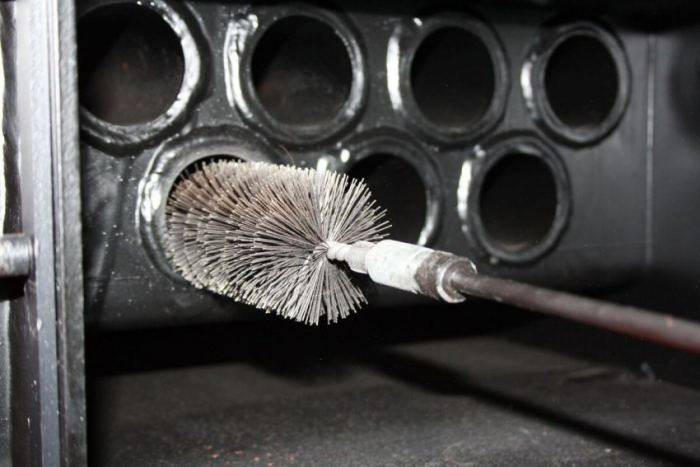
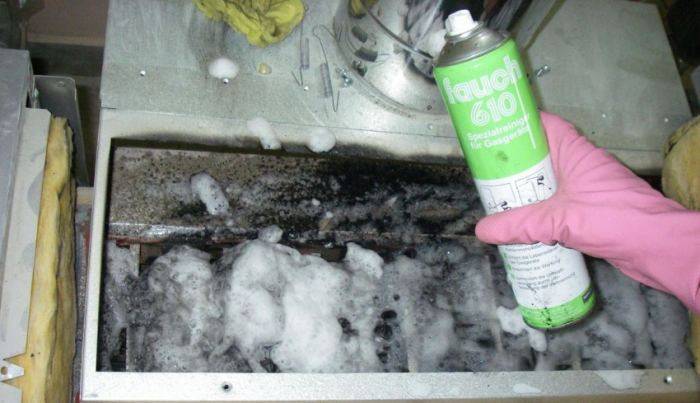
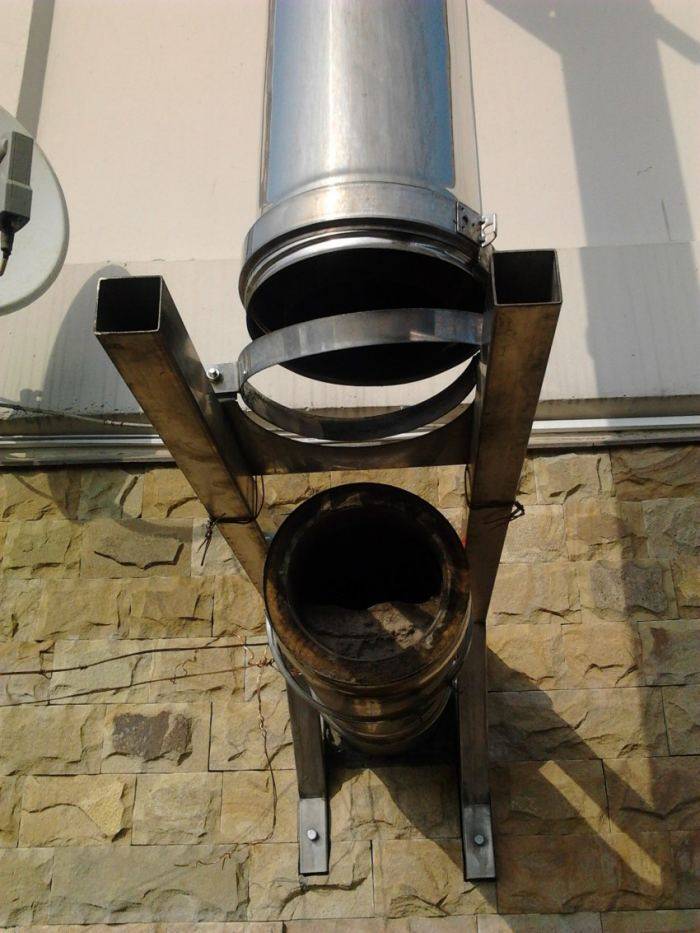
Photo of cleaning soot


We also recommend viewing:
- How to make a cold smoked smokehouse
- DIY smokehouse construction
- How to make a hot smoked smokehouse with your own hands
- How to make a wood splitter with your own hands
- How to make curtains for a gazebo with your own hands
- Efficient collection of rainwater
- We do water supply in the country with our own hands
- Instructions on how to make furniture from pallets
- Do-it-yourself pool cleaning
- Watering options for the site
- Instructions on how to easily remove the stump
- How to make a garage door with your own hands
- How to make a snow blower with your own hands
- Wood preservatives
- Simple drinker for chickens
- Good dry closet for a summer residence
- How to make a brazier with your own hands
- Good heating for the greenhouse
- Modern winter greenhouse
- Roof drainage system
- How to make a chicken feeder
- DIY decking
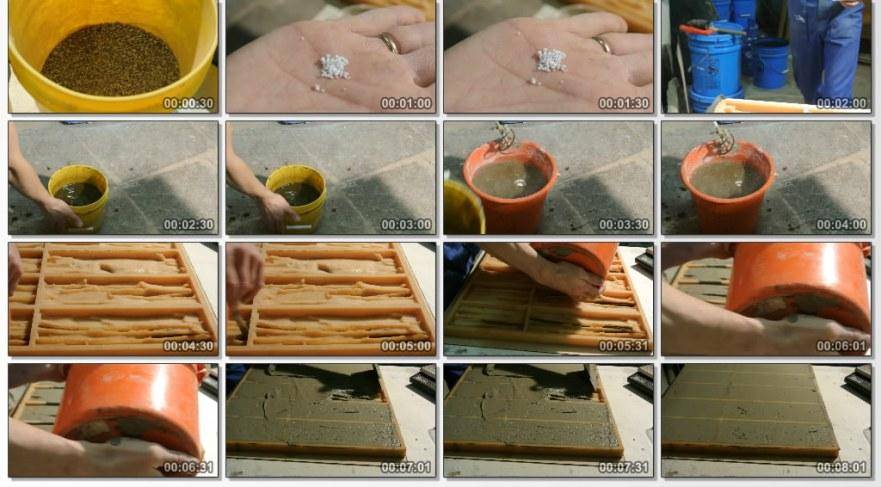
- How to make molds for paving slabs
- Instructions on how to equip a garage
- How to make grounding in a private house
- Gate lock
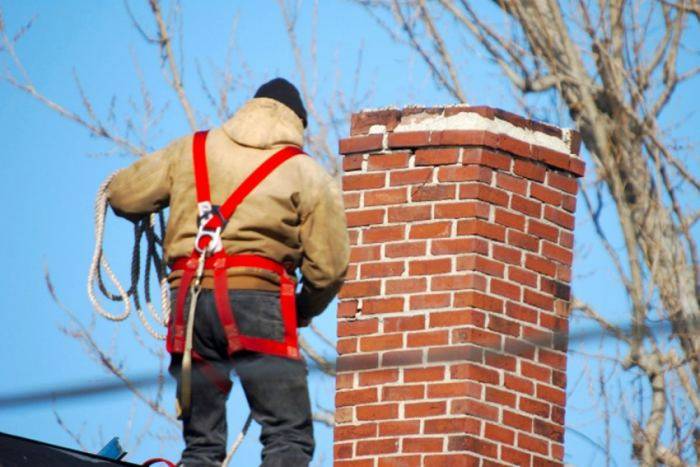
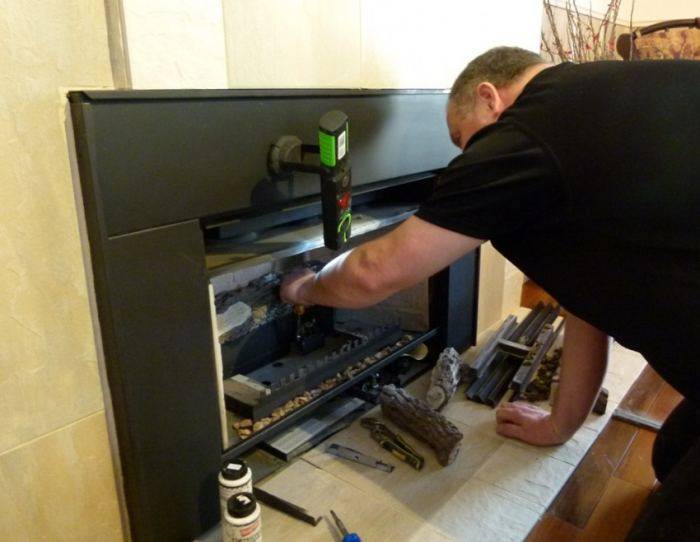
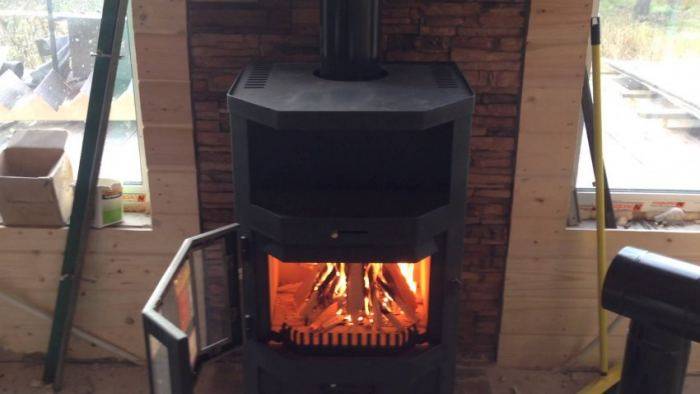
When and why is it necessary to repair the stove
Most often, stove repair is required when traction suddenly deteriorates. The following signs may also indicate the need for repair:
- the formation of cracks in the masonry;
- puffing the oven;
- loosening of the furnace door;
- burnout of the grate;
- cracking of seams in masonry;
- poor combustion of fuel;
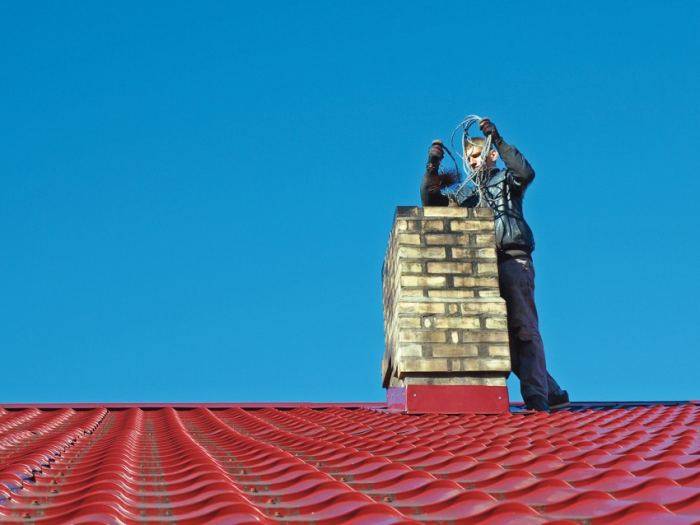
- leak at the junction of the roof with the chimney;
- damage to stove appliances.
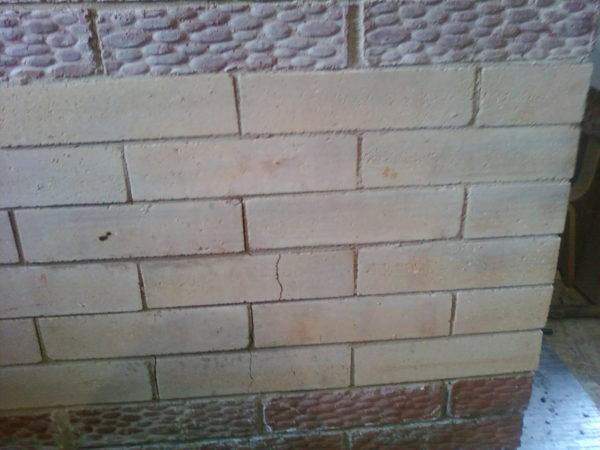
Cracking of the kiln masonry is a sign of the need for repair.
It is worth remembering that a stove is not just a technical structure in a private house. The design must comply with sanitary standards and fire safety requirements. If you do not pay enough attention to the maintenance of the stove, then a fire hazard or carbon monoxide poisoning of the residents of the house may occur.
Stove repair is essential for human health and property. If you need it, then you should not postpone
Special attention should be paid to maintenance before the start of the heating season. In the absence of experience in carrying out repair work on furnaces, it is recommended to entrust this task to a qualified specialist.
In some cases, the cost of repair work may make it impractical to perform them, so it is important to determine the breakdown first.
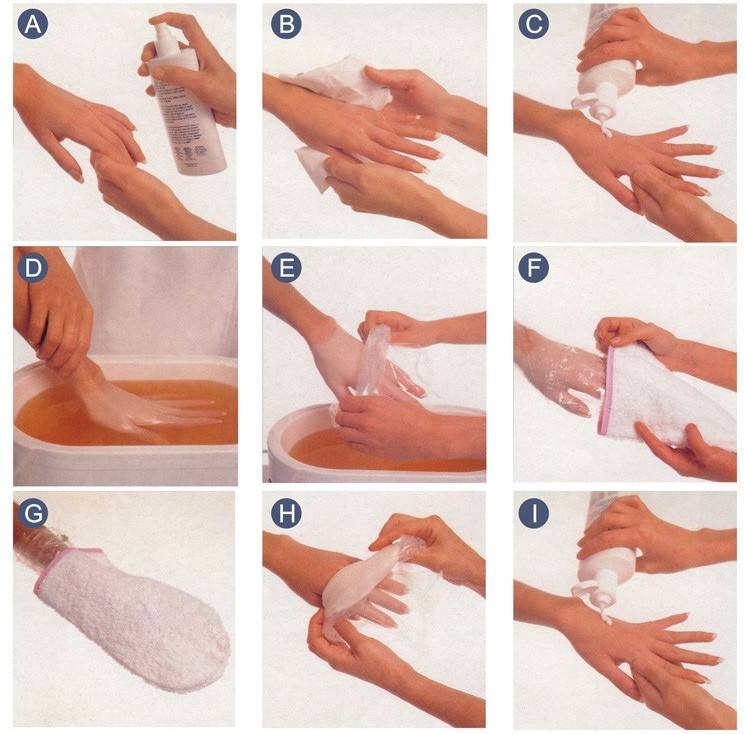
Facial cleansing at home: basic rules
The facial cleansing procedure requires certain knowledge. It is necessary to prepare for it in advance, having previously consulted with a doctor or beautician.
Sterility
This is an important rule that must be taken into account when carrying out this procedure. Since the skin becomes infected during cleansing and
the spread of bacteria, all materials used, including the skin itself, must be carefully sterilized with special means containing alcohol;
The epidermis should be free of inflammation, it can worsen its condition after cleaning.
To do the whole procedure correctly, cleaning is best done in the evening, before bed. The skin of the face will rest overnight and resume its functionality.
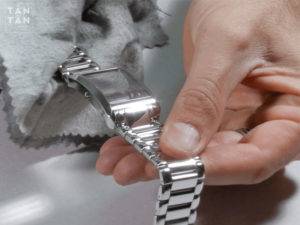
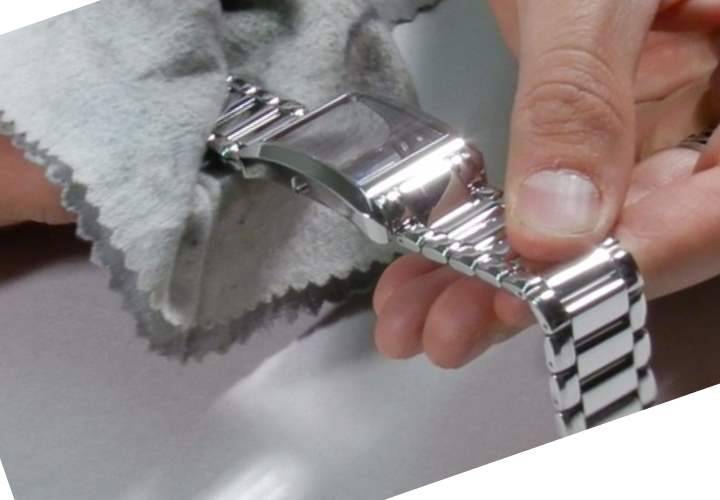
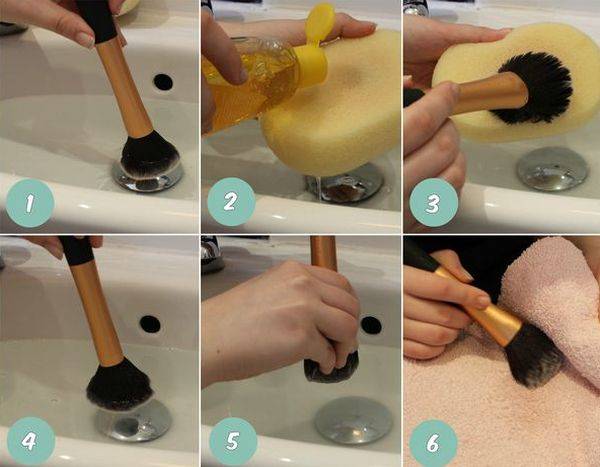
DIY bracelet cleaning
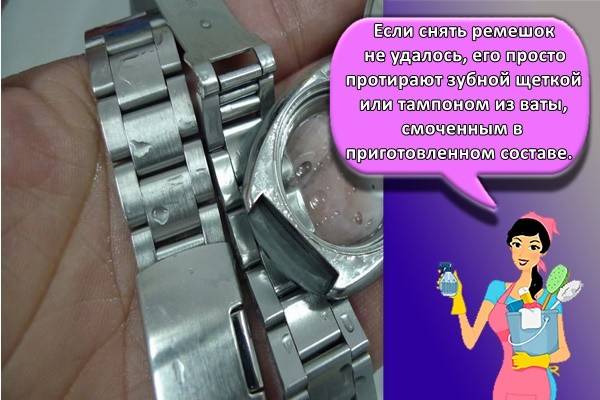
If it is not possible to remove the strap, it is simply wiped with a toothbrush or a cotton swab dipped in the prepared composition. With constant wearing of the watch, cleaning is performed after 1.5-2 months. The dial is treated with a damp cloth and then wiped with a dry cloth.
Bracelets are made of plastic, silicone, leather, metal. Not all materials can be cleaned with the same product, but you need to choose the right composition. The skin is wiped with a solution that is prepared from soda or ammonia, the rubber strap - with laundry soap, silver - with vinegar.
Normal
Plastic and rubber bracelets are cleaned of dirt and sweat with laundry soap.Half a bar is crushed on a grater, combined with a glass of warm water. The resulting gruel is smeared with the surface of the strap.
The cloth strap is cleaned of dirt and grease with dishwashing liquid. The composition is applied to the surface of the product, thoroughly rubbed problem areas, rinsed with water, dried with a towel.

Leather
A watch with a strap made of natural expensive material looks well-groomed and presentable, if you regularly take care of the bracelet and clean it from dirt. It is recommended to wipe the skin of dark shades with a paste made from the same amount of water and soda. The composition is applied to the surface of the strap, after an hour the dirtiest areas are treated with a sponge, rinsed under the tap, and dried indoors.
To clear lighten skin:
- A glass of milk is mixed with raw egg white.
- The mass is impregnated with the surface of the material.
- The strap is wiped with a sponge, rinsed under running water.
Remove contamination with soapy water, to which a few drops of ammonia are added. With a sponge dipped in the composition, the surface of the skin is treated on both sides, wiped off with a wet napkin, and then dried with a cloth. To eliminate odor, the strap is rinsed in water with citric acid. The surface is greased with glycerin or olive oil, rubbed with a dry cloth. The advantages of a leather strap include:
- strength;
- ease of care;
- long service life.

Products made from this material have all sorts of shades and look stylish. The strap is easy to wipe off, fits different watch models.
Gilded
Steel bracelets are washed with hair shampoo and Fairy dish liquid. To clean silver products, combine soda with vinegar or mix with ammonia. All chains are rubbed in turn with gruel, kept for half an hour and polished with a microfiber cloth.
A bracelet covered with gilding is cleaned with powder or crushed chalk from the inside and outside, and wiped until shiny with a dry napkin. It is not recommended to wet the metal surface with water. The titanium product is cleaned with an eraser, toothpaste is applied and polished.
White
A light-colored strap is treated with a product that is obtained by mixing soda and water. The mass is applied to the surface, removed after an hour and a half. To clean the stained material, a glass of milk is combined with an egg white and the strap is gently wiped.
Sequence of work
In order to perform the work of cleaning the watch qualitatively, it is necessary to follow a certain algorithm of actions. First of all, clean the case, and then the rest of the parts.
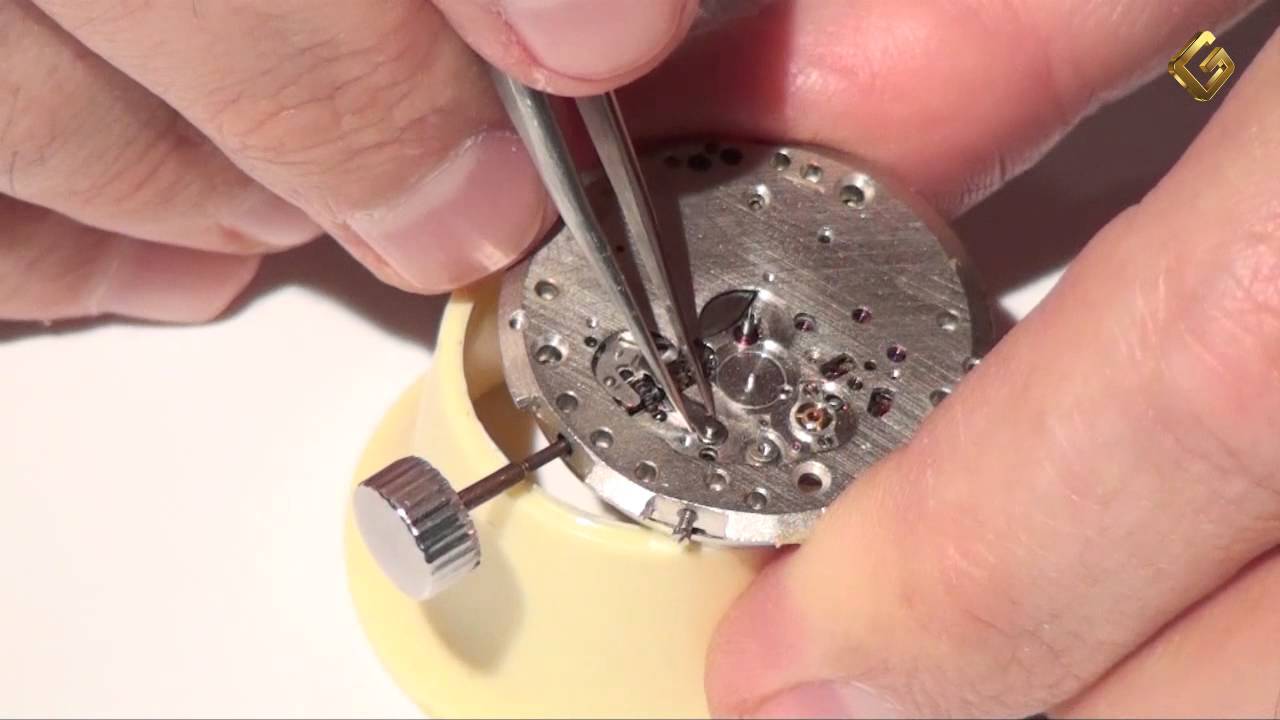
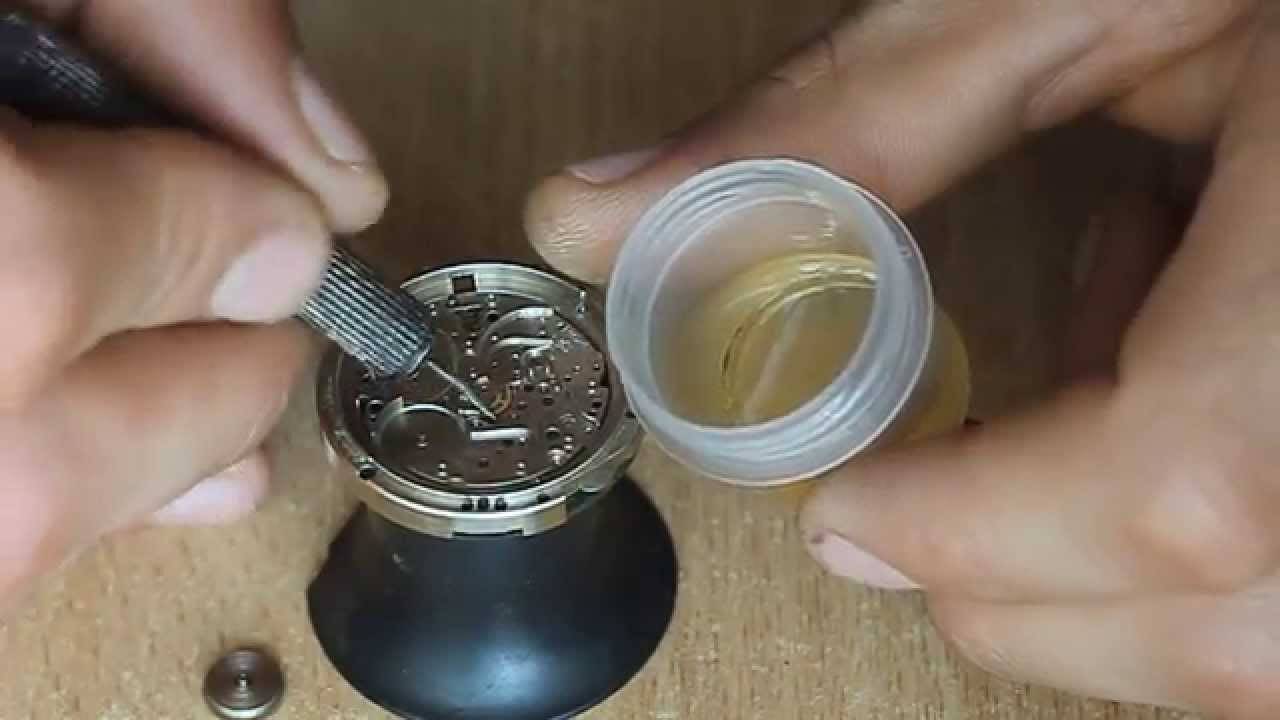
Parsing the device
Before cleaning the inner surfaces of the watch, you will need to disassemble the mechanism. To begin with, the crown is removed, which fixes the mechanical parts of the device inside. Then the watch is opened and the mechanism is taken out. The removed parts are then placed on a woven napkin.


We clean the case
Using a medical bulb, we clean the case from dust. Then we process the glass with a soft cloth. We clean the rest of the housing elements with cotton swabs soaked in alcohol. If there is tough dirt, use a toothbrush. Then wipe the dial first with a damp cloth, then dry.
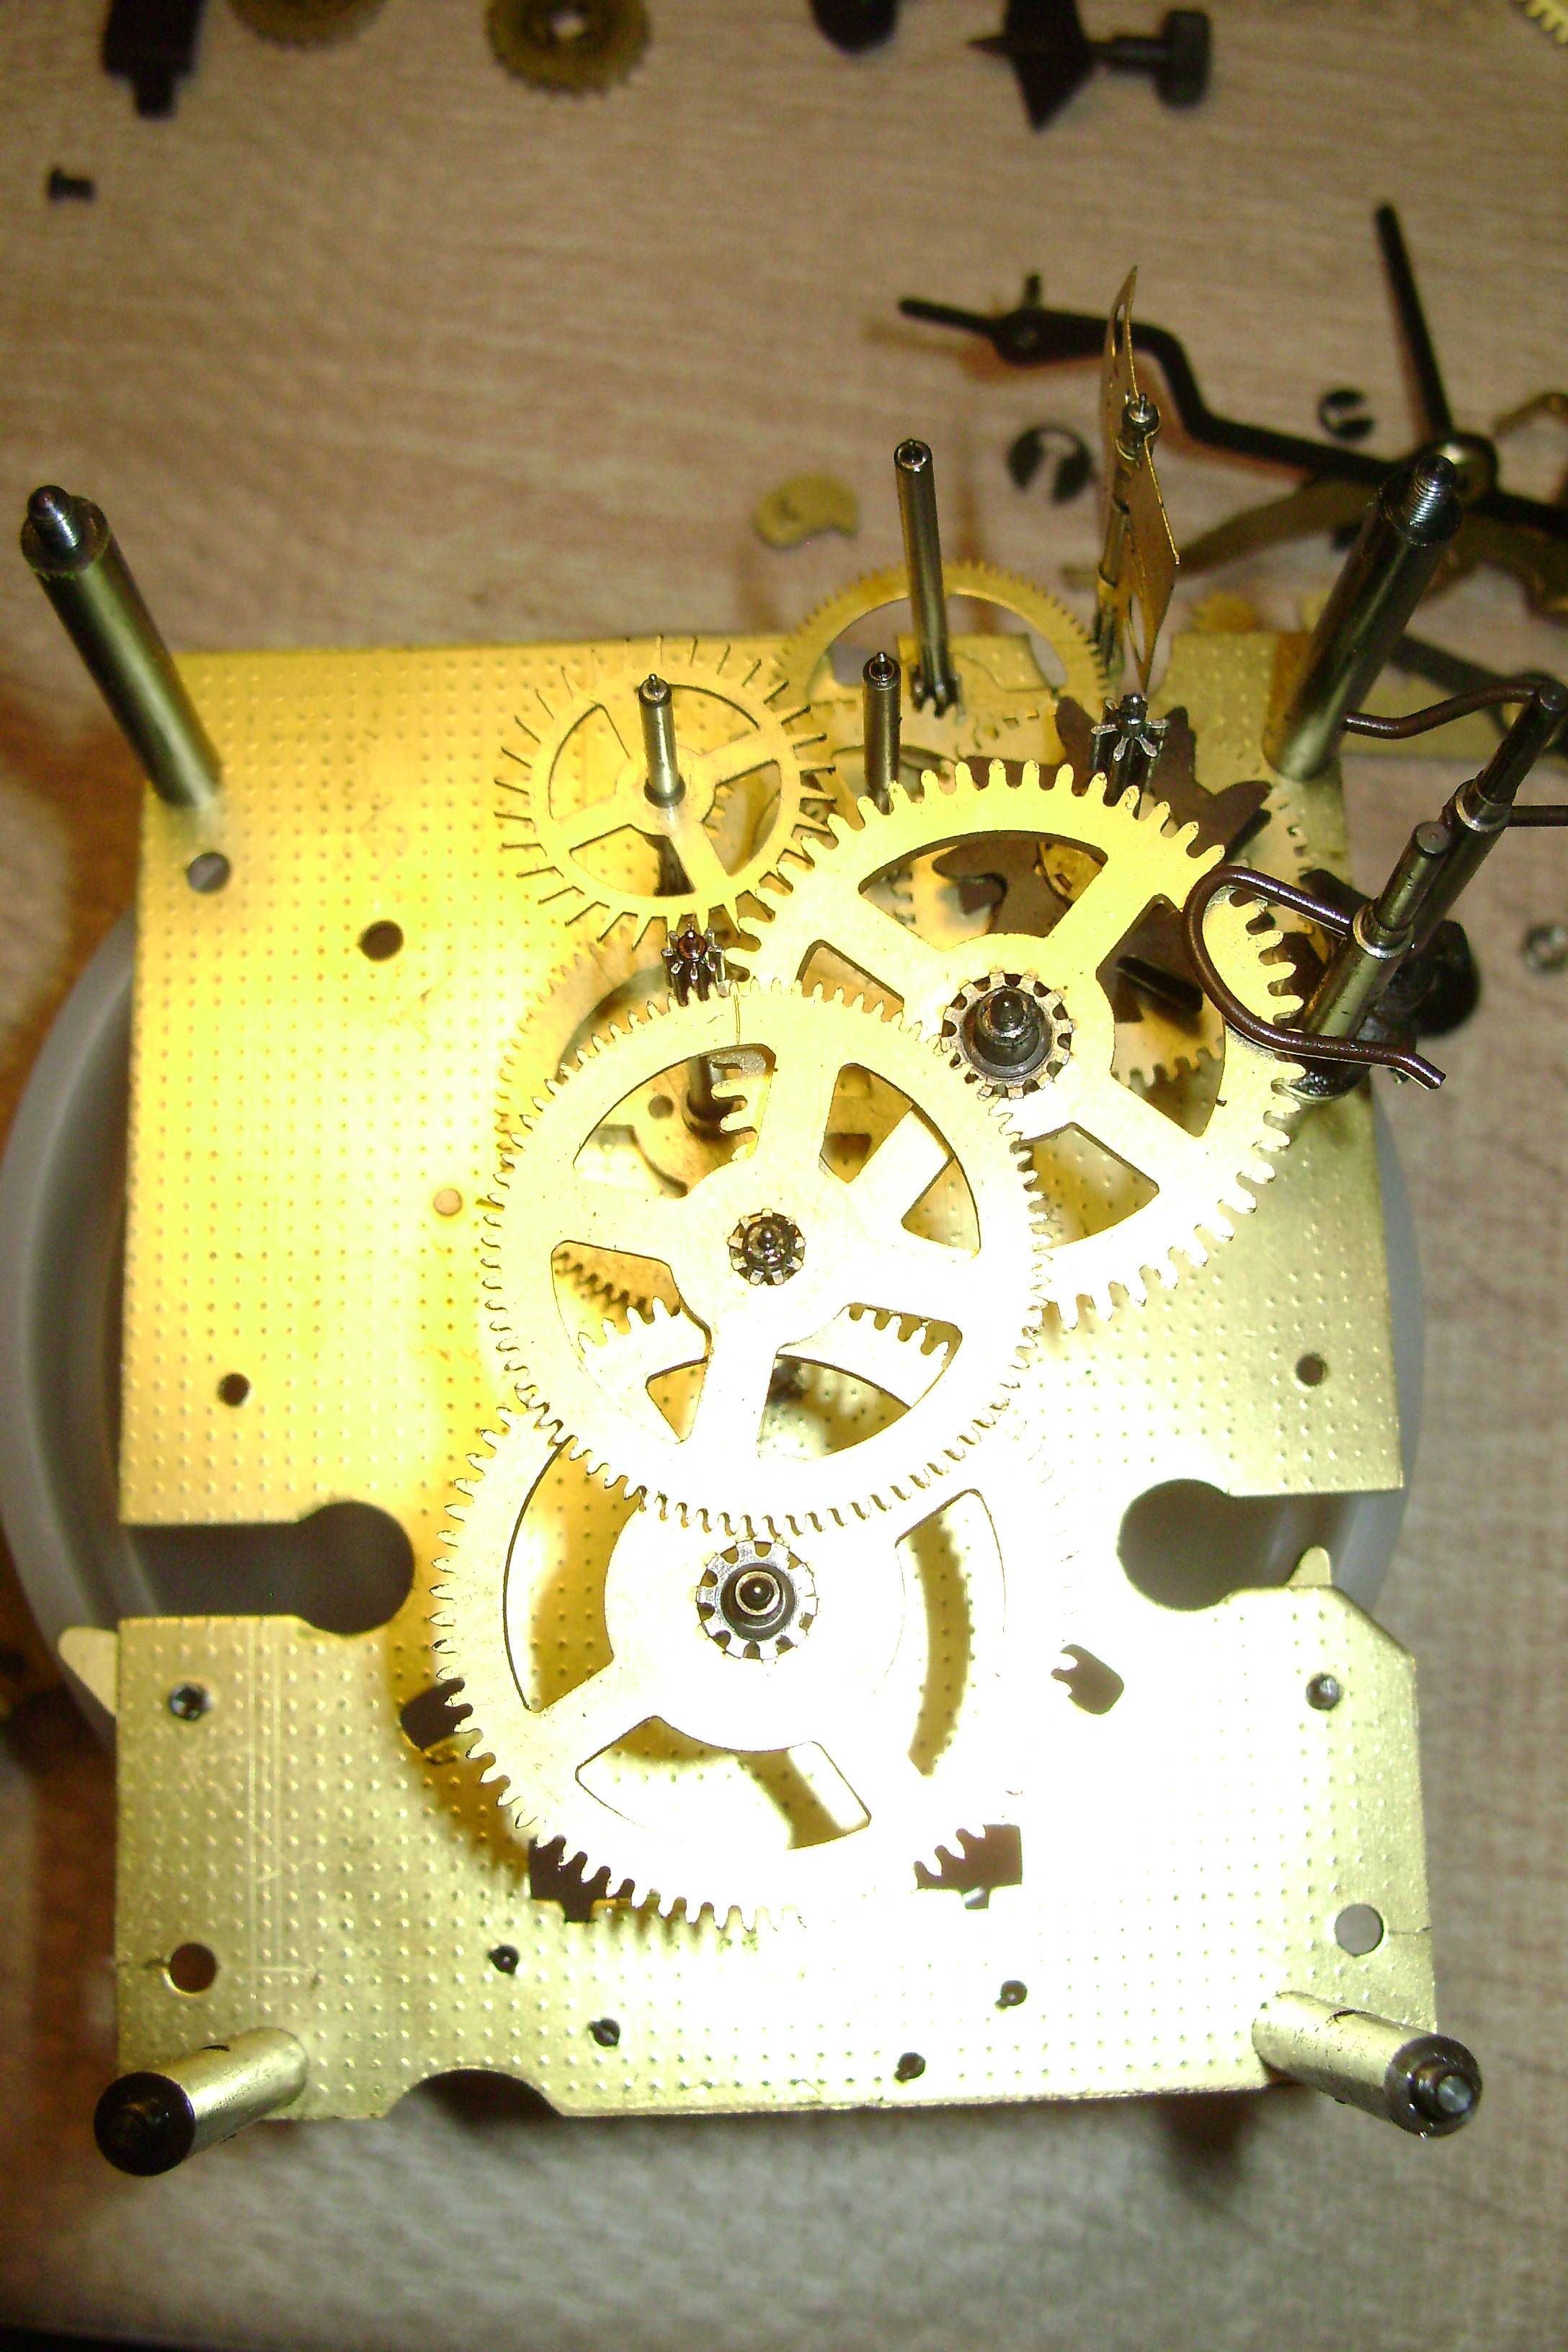
We clean the mechanism
Cleaning the mechanism requires careful action, excluding strong pressure on the parts in order to prevent their deformation.
Sequence of work:
We clean the strap or bracelet
The strap or bracelet is an integral part of the outer watch. They are made from various materials: from traditional metal, leather to ceramics, plastic and silicone, etc.
To clean the strap / bracelet, you must remove it from the watch.
The leather and silicone strap is cleaned with a cotton pad, which must be moistened with soapy water, to which a drop of ammonia is added. After that, the soap deposit is removed with a damp cloth.
It is recommended to clean light or white skin with a mixture of milk and egg white.
We recommend cleaning plastic, rubber or fabric straps with toothpaste or a solution of laundry soap.
It is recommended to clean the stainless steel bracelet with a mixture of vinegar and baking soda, or ammonia and baking soda.
We recommend cleaning the silver bracelet with shampoo or dishwashing detergent, then wipe it dry with a soft, lint-free cloth.
The gold bracelet can only be cleaned with baby powder, crushed chalk or powder, they polish the product on both sides, and then wipe it dry with a cloth.
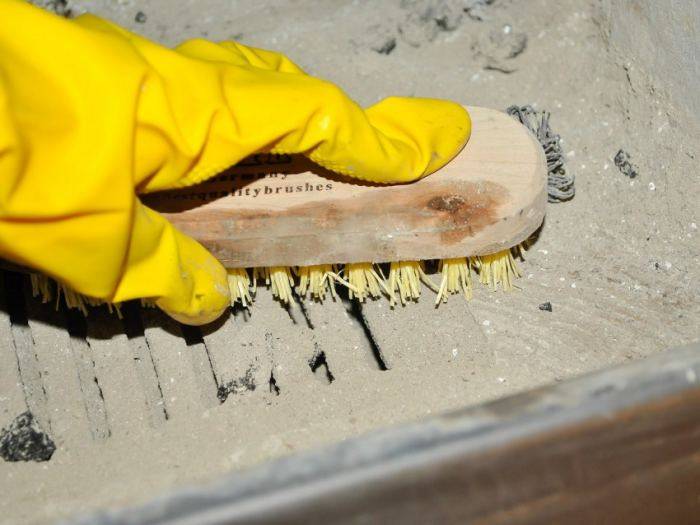
Folk methods
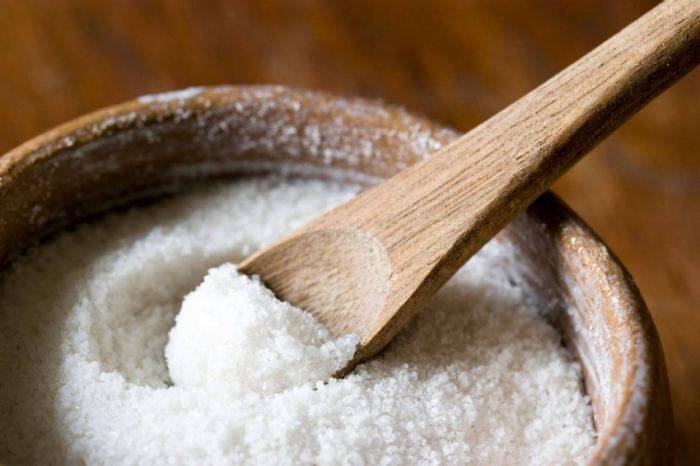
Cleaning with table salt
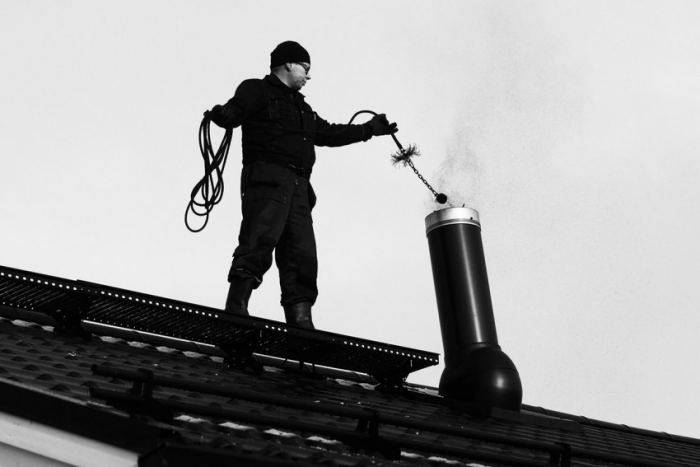
It is more of a preventive measure. If there is a lot of sediment on the pipe, salt is useless. To clear the pipe passage from the settled soot in a country house, you need to burn 1 large handful of table salt in the oven. When it burns, a chemical process begins, which prevents soot from settling on the walls.
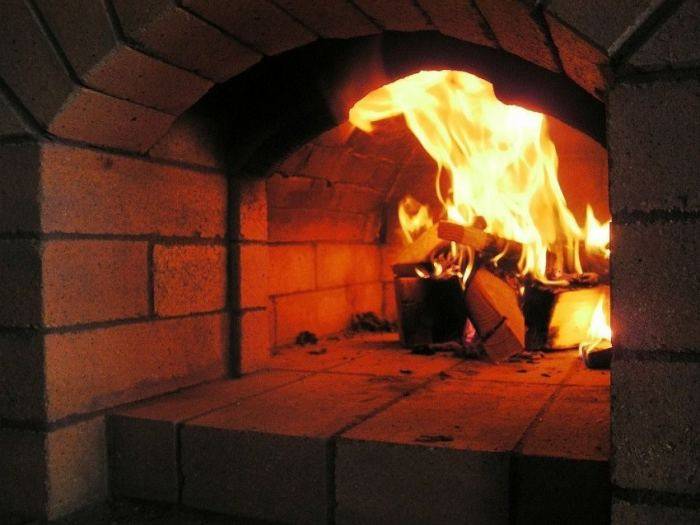
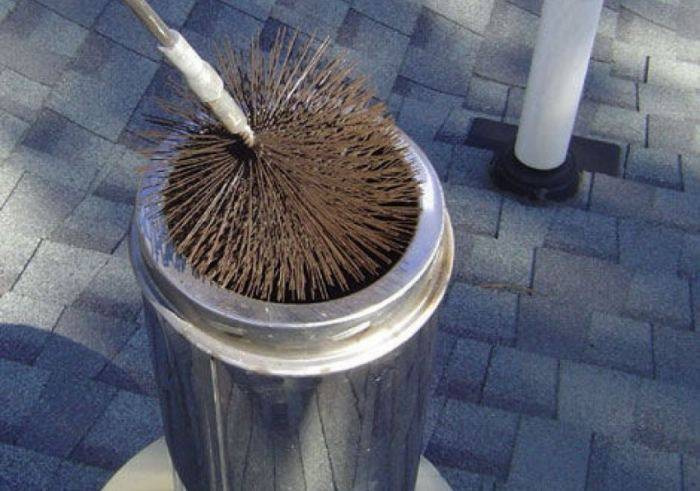
Burning out soot
When using this method, the stove is very heated and logs of such tree species as alder, aspen are laid. Heat the stove until white smoke appears.
Before cleaning the stove with this method, it is worth checking the chimney for integrity, making sure that it does not overheat. The use of igniting and combustible mixtures is not permitted.
Burning potato peels
When potatoes or their skins are burned, starchy substances adhere to the soot and penetrate inside it. The stickiness of soot deposits decreases and it falls off the walls.
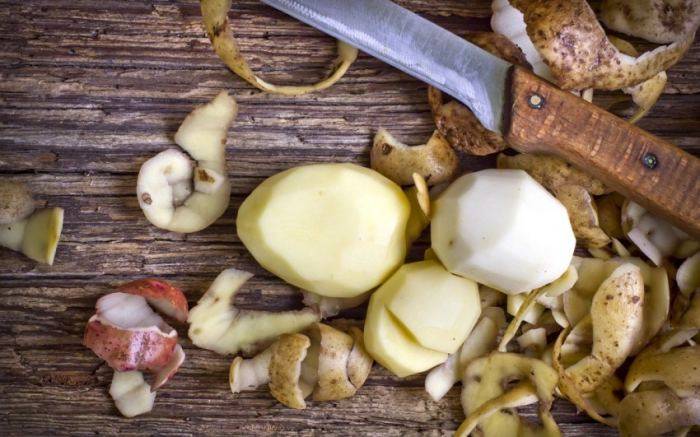
To completely clean the pipe, it is necessary to warm up the stove and completely burn about seven kilograms of potato leftovers. This scrubbing helps with small amounts of soot.

Advantages and Disadvantages of Home Dry Cleaning
Please note that this method is not a lifesaver. If you are dealing with complex (often already old) dirt, washed things or clothes that can be easily spoiled by inept actions, do not risk it - contact a professional dry cleaner.
Meanwhile, the dry washing method is quite popular as it has a number of advantages:
- suitable for those types of stains that, when interacting with water, "creep away" even more (the simplest example is banal street dirt);
- it is ideal for items with abundant decor;
- during the process, the product does not deform: it does not wrinkle, does not stretch and does not "shrink".
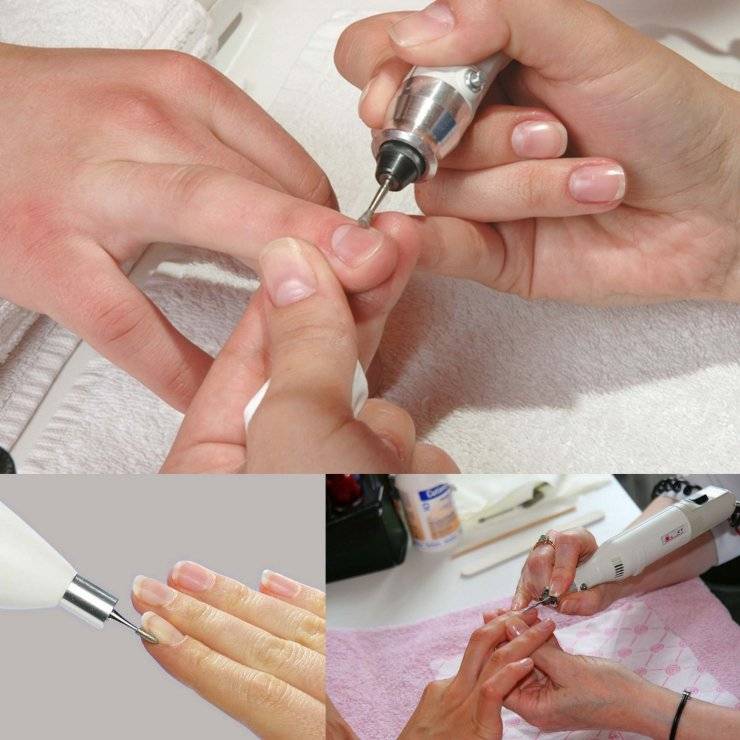
Mechanical cleaning of the face at home: stages of the procedure
 Mechanical face cleansing is the most effective way. Significant improvement in skin condition becomes noticeable after the first procedure. Mechanical cleansing is suitable for oily skin with clogged pores.
The procedure can also be carried out in the presence of acne, but not inflamed. The entire cleaning process does not take very long and is suitable for those who wish to cope at home with outside help or on their own.
Removal of dirt during mechanical cleaning is done manually using some special devices and cosmetics.
The disadvantage of this procedure is painful sensations when processing some areas.
Mechanical cleaning takes place in three stages.
Preparatory stage (preliminary cleansing)
The dermis of the face must be cleaned of makeup and dust. Toners, de-make-up milk or a cleansing mask are suitable for this. Such products should be suitable for the type of skin and its characteristics.
Next, you need to start steaming the skin. To do this you need:
- hot water (boiling water);
- herbal decoction;
- disposable paper towels;
- towel, always clean.
Bring the previously prepared broth to a boil in a saucepan. Next, steam the skin by covering your head with a towel over the steam. For oily skin, 10 minutes is enough, for normal skin - up to 7 minutes.
After steaming, treat the skin with an antiseptic again. Prepare the material that will be needed in the process:
- Sterile gauze;
- Disposable antibacterial wipes;
- Antiseptic for hands.
Cleaning
Thoroughly washed hands should be treated with antiseptic or alcohol. After that, you can proceed to the skin.
You need to start cleaning from cleaner areas of the skin and gradually approach the dirty ones.
To ensure sterility, experts recommend wrapping your fingers with antiseptic wipes, and changing them after every 5 squeezed comedones.
It is necessary to squeeze out black dots with extreme caution so as not to damage the skin and leave a wound
Final cleaning step
After the procedure done, you need to wash again, using an antiseptic. Then you should apply a moisturizing mask with a soothing effect. To consolidate the result, you can apply a pore-tightening product.
Who needs regular facial cleansing and why
Facial cleansing is an important and necessary procedure not only for women, but also for men. The more contaminated the skin, the less of its functions it performs, namely:
- protective;
- thermoregulating;
- tactile;
- respiratory.
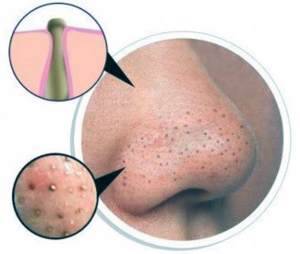 The untreated epidermis is subject to the appearance of blackheads, which in turn block the sebaceous glands. Clogged pores interfere with the work of sebum, and it is a kind of protective layer of the skin: it prevents it from drying out, softens and moisturizes.
Impurities on the skin are a good breeding ground for bacteria. The result is inflammation, acne and irritation. Regular cleansing of the skin contributes to:
- improving the work of the sebaceous glands and blood circulation;
- cleansing pores, removing plugs (blackheads);
- removal of the stratum corneum;
- restoring the balance of Ph.
After each cleansing, the skin becomes soft, healthy and well-groomed.
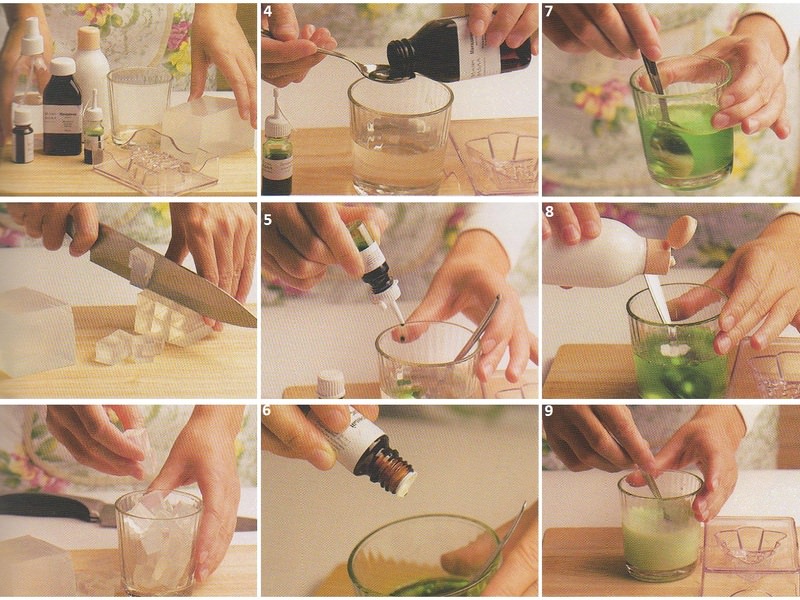
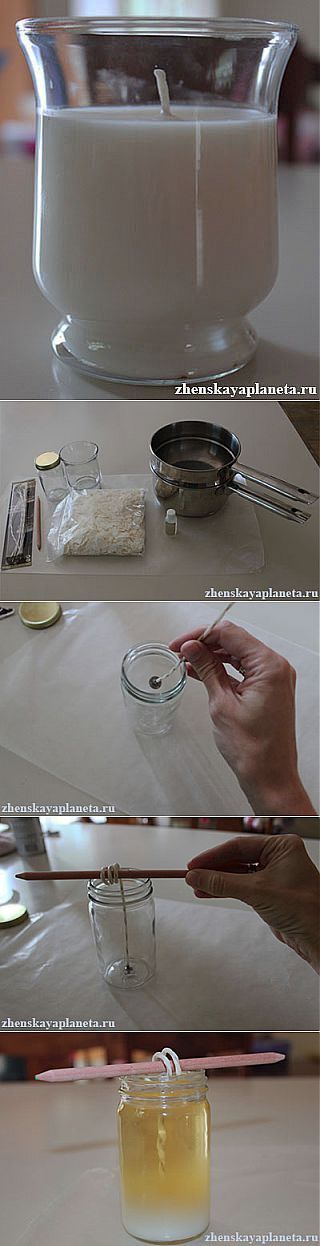
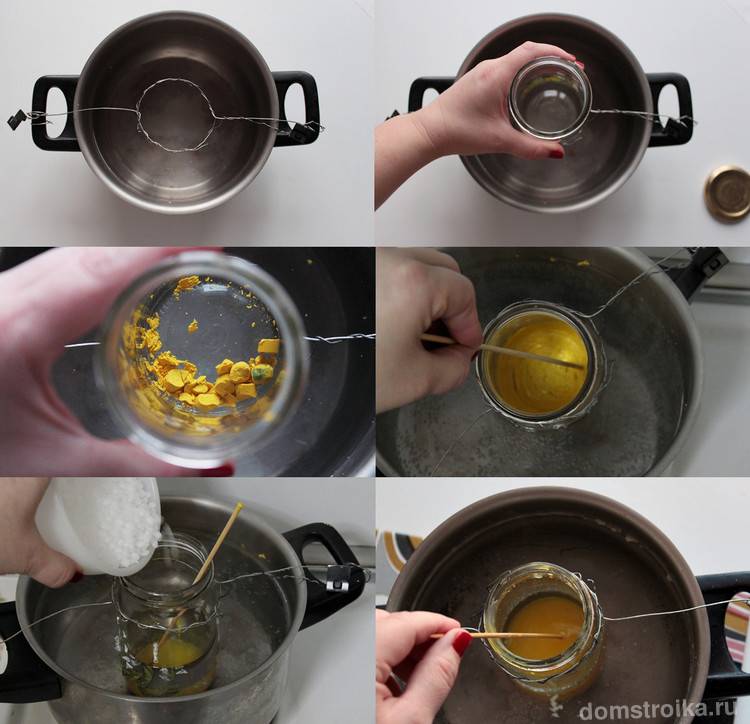
Candle cleaning step by step
How to properly clean the house using ordinary candles for this? It is necessary not only to pay attention to the choice of candles, but also to strictly follow all the cleaning steps so that the actions performed bring the expected result.
General cleaning is done before the rituals. Everything must be put in its place, the apartment must be well ventilated. After that, you should take a refreshing shower, but not a simple one, but with salt, which is an excellent conductor of energy. Salt dissolved in water quickly washes away the negative energy that has accumulated over the years. It completely removes all the energy dirt that has caused many failures in life. Such a shower requires adherence to certain, albeit very simple, rules. The body is rubbed with ordinary salt, but it cannot be rubbed in, and the hair is not affected either. After that, you need to turn on a cool shower, rinse off the salt.
Now you can start cleaning your home. It is recommended to take simple clothes for this, which will not hinder movement, distract with too bright colors. Jewelry should not be worn, they will only distract and interfere with energy flows. Cleaning should be carried out in a room where windows and, if possible, doors are open. All strangers must leave the house during the ritual. Using a damp and clean cloth, gently wipe the mirrors clockwise to remove the accumulated energy dirt. The number of circles should correspond as closely as possible to the period of use of this mirror. The number nine is considered optimal if the service life is not known exactly.
After that, you need to completely and without pity get rid of things that can spoil the energy. Broken dishes should be thrown away as they encourage positive energy to flow out of the house.
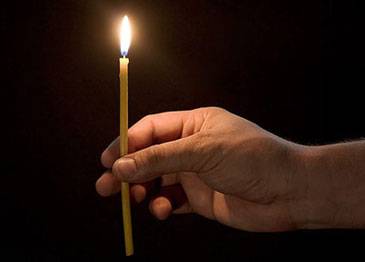
The next step is direct cleaning. To, you need to take a few new thin candles from pure wax, a couple of sprigs of heather, thistle or St. John's wort. You will also need a bowl of clean water.Every corner of the house should be sprinkled with this water a little, wash your face and hands in it. Next, you need to set fire to the branches of plants, go around the apartment with them clockwise, mentally imagining how all the worst burns out without a trace, how negative energy leaves. Now you need to take a candle, insert it into a small white cardboard circle to protect your hands from the negative, which will be absorbed into the melted wax. Hold the candle only by the lower, protected tip.
The candle should burn evenly, no carbon deposits should form. When walking around the apartment, you must make sure that the flame is not blown away. It is recommended to start from the front door from the outside, passing a candle from left to right along the perimeter. If there is a peephole on the front door, then it must be crossed three times.
Next, cleaning up the rest of the house begins. All parts of the apartment should be treated, including sockets, switches, furniture, windows, even shoes and street clothes. The candle should be led smoothly, along a sinusoidal line, bypassing from left to right.
Cleansing the House with a Church Candle
 How to carry out the ritual of cleansing the house itself using a candle bought in the church? In what sequence should all actions be performed?
- Take holy water, moisten your face and hands with it, and then sprinkle every corner of your house.
- Put paper circles on the prepared church candles so that the melted wax does not drip onto the floor and your hands.
- Begin cleaning from the outside of the front door.
- Light a candle and circle the door clockwise 3 times.
- Move the candle in a crosswise motion over the peephole, bell and door handle.
- Then do all the same manipulations, but from the inside of the door.
- After the front door has been processed, we proceed to cleaning the house itself, starting from the left and moving to the right.
- Draw a candle near the walls in wave-like movements.
- We circle all the sockets and door handles with a candle crosswise. Do not forget that all manipulations are carried out at some distance from objects in order to avoid a fire.
- If you notice that in some place the candle begins to smoke, crackle or even fade out, continue processing until all these phenomena disappear.
- Clean mirrors, bathrooms and toilets especially carefully.
- After you have cleared all the rooms, walk through them with a candle again. If the flame is even everywhere, the candle does not crack or smoke, and you, in turn, feel peace, the ceremony can be considered complete.
- Be sure to take all the cinders out of the house, wash your hands, take a shower, and wash the clothes that were cleaned.
Homemade face mask recipes for acne
Mechanical face cleansing is not enough to maintain a cleansed skin. Masks that act as a cleansing and anti-inflammatory agent for acne can be helpful.
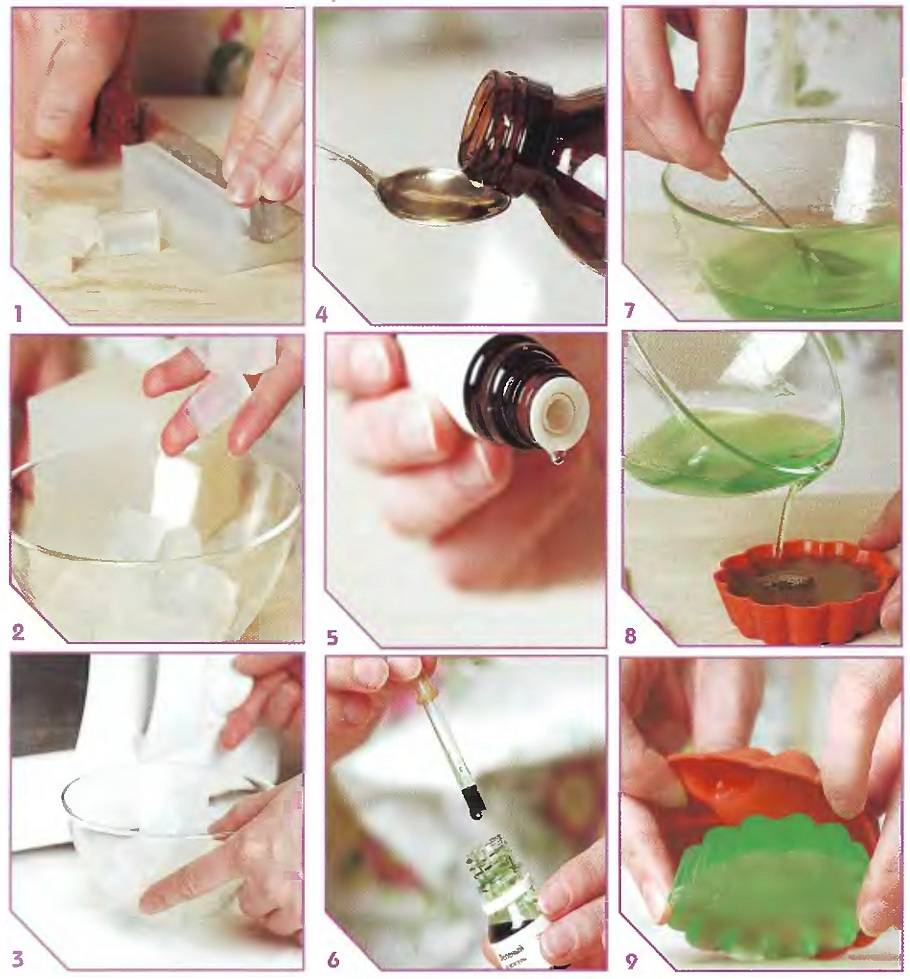
Masks based on cosmetic colored clay.
You can buy it at any pharmacy. Clay is selected for a certain type of skin. The powder should be poured over with warm water to obtain a creamy mixture. Then apply on face for 15 minutes and rinse with warm water. After the clay, you need to use a moisturizer.
Dry herbal masks.
Dry herbs with medicinal properties (calendula, chamomile, mint, sage, etc.) must be chopped, finely chopped or ground in a coffee grinder.
Pour 3 tbsp. tablespoons of the mixture with boiling water (half a glass) and let it brew for several minutes. Drain the water and apply the resulting gruel on the face for 20 minutes. Then rinse with warm water.
Oatmeal based masks.
 Oatmeal has good regenerating and emollient properties.
It can be used both in pure form, filled with hot water, and with the addition of cosmetic oils and honey.
You can also add sour cream, lemon juice, and more.
For greater convenience, oatmeal is ground into flour.
Features of working with ceramics
In recent years, companies have begun to produce watches not only from stainless steel, brass, precious metals, but also from non-standard materials. Stylish ceramic models do not get scratched, last a long time and do not irritate the skin. Such watches are very light, they are not felt on the hand, they do not heat up in the heat, they do not cool down in the cold.
Ceramic does not absorb moisture, and dirt can be wiped off with a wet cloth. If the watch is worn for 15 years, scratches appear on the surface, which are removed by ordinary polishing. Ceramic models in white and black, blue and gray tones are especially appreciated.
Spontaneous cleaning
Spontaneous cleaning allows you to selectively get rid of the negative that is getting in the way. A variety of attributes are used for this. It is possible to clean the premises with water, earth, salt. Only clean water should be used, preferably spring or thawed water. Herbs and salt crystals are used, previously dissolved in water, they make it possible to remove the bad energy that has soaked the walls of the house.
Experts recommend using fire cleaning, that is, the apartment is cleaned using wax candles. This method is one of the simplest and most reliable. It is enough to prepare ordinary thin candles, it is advisable to purchase them in the temple. You will need more branches of St. John's wort or a string. Before the ritual, the house should be properly cleaned, plumbing cleaned and the floor washed. When performing such a "fire" cleaning, it is recommended to ventilate. It is necessary to completely get rid of unnecessary old things, broken and cracked dishes and glass.
It is recommended to carry out the ritual during the waning moon, the mood should be good, the mood should be calm. Cleaning with fire allows you to return positive and well-being to the house in the shortest possible time.
What is needed
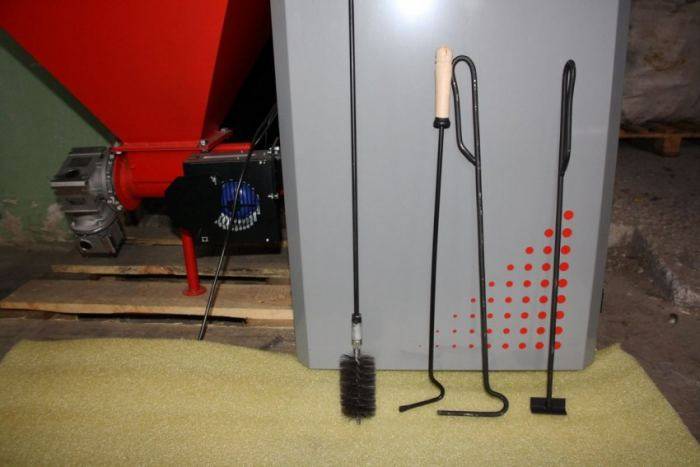
A number of tools are required for quick, safe and effective cleaning.

Several rugs
The rugs come in handy for storing collapsible parts. In this case, not a single part will be lost, and the structure will be assembled correctly.
Cotton pads and gauze balls
It is convenient to take care of the mouse with gauze balls or cotton pads. They are impregnated with an alcohol solution and the surface is wiped.
Wet wipes
Special wet wipes based on alcohol will help you take good care of the mouse body. Common wet wipes contain chemical components that can harm equipment:
- Miraclean viscose-based universal wet wipes are suitable for cleaning the entire surface of the computer. The composition has antistatic properties. It has a pleasant smell.
- Wet wipes BURO BU-Zsurface made of non-woven fabric. They are based on viscose and polyesters. Impregnation of napkins protects the surface from dirt for a long time, as it has an antistatic property.
Napkins must have a smooth, soft structure. There should be no long hairs.

Special liquids
Computer cleaners can quickly remove dirt. Most solutions contain components that not only clean, but also disinfect the surface:
- Defender CLN gently cleans the surface without damaging it. The composition contains no abrasive components.
- Spray ProfiLine Screen Clean helps to keep office equipment clean. The product is sprayed onto a dirty surface, and then wiped off with a napkin. The tool easily copes with greasy stains, old marks and stains.
Ethyl alcohol or alcohol solution "Chlorhexidine"
For better cleaning of the surface of the mouse and for its disinfection, ethyl alcohol is used. Chlorhexidine solution has a more gentle effect. A small amount of the solution is applied to a napkin and the surface is wiped.
crosshead screwdriver
If a lot of dirt has accumulated and you need to disassemble the device, you cannot do without a Phillips screwdriver. Using a screwdriver, it is easy to open the upper part of the manipulator.
Small plastic scraper
It takes a lot of effort to remove dried, perennial dirt. A plastic scraper comes to the rescue. Its dimensions are small, so dirt of any complexity can be easily removed with its help.

Soft dry wipes
After all procedures, you need to wipe the device dry. It is best to use special soft dry wipes.
Lens or magnifying glass
Use a magnifying glass or magnifying glass to achieve maximum cleanliness. With the help of these objects, it will be possible to see all the particles of dirt.
Negative zones in the house
There are especially negative zones in any home. Those in which all negative energy is especially accumulated
Before cleaning the house completely, these areas will need to be given special attention. What are these places?
- Places where dirty shoes accumulate. After cleaning your home, it is advisable to make it a habit to wash your shoes when you come home. This way you can avoid the accumulation of negative energy brought from the street.
- Places with dirty dishes. It is advisable to never leave the dishes unwashed for a long time, especially overnight.
- Pillow. Oddly enough, a large amount of negative energy accumulates on this subject of the bed. It has to do with your thoughts, dreams.
- Places where found things are. In general, it is better not to lift and even more so not to bring things that you found on the street into the house. However, if you already have such things, you must definitely clean up the place where they are stored.
- Mirrors. They are considered magical attributes and carry a lot of energy. And they "see" not only how you smile at your reflection, but also, for example, how you quarrel with your household members.
- Cracked, chipped dishes. To begin with, even before you clean the place where such dishes are stored, get rid of them. Firstly, you are clearly not inspired by its appearance, and secondly, such dishes carry a lot of negative energy.
- Trampled slippers. The same as the dishes. As much as you love your worn-out old slippers, get rid of them and clean up the place where they were stored when you were not wearing them.
- Jewelry made of precious metals. Such metals are capable of absorbing a large amount of information, including negative information. Therefore, not only they are cleaned, but also the place where they are stored.
- Artificial or dried flowers. Both those and others carry "dead" energy. Be sure to get rid of them, and clean the place where they stood.
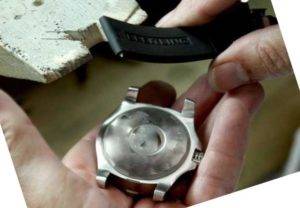
How to clean and polish your watch case at home
To remove dirt inside the accessory, the product is disassembled into parts, the head is taken out, and the mechanism is removed. All elements are folded on a napkin and dust is first removed from the case, and only then the rest of the parts are cleaned.
Normal
The cost of an accessory, its appearance is influenced not only by the number of functions, the complexity of the caliber, but also by the type of material from which the case is made, which protects the mechanism from damage. Withstands shocks, is not afraid of corrosion, tolerates temperature shocks, stainless steel is well polished. Some well-known Swiss companies, Chinese companies produce watches with cases made of this material.

After removing the dust from it:
- Wipe the glass with a lint-free cloth.
- Cotton swabs are dipped in alcohol and the rest of the parts are washed.
- The dial is wiped with a wet rag and dry cloth.
- Old dirt is cleaned with a toothbrush.
Domestic firms and foreign brands produce models of watches with a brass case, which is unpretentious in maintenance, is durable, but rusts and oxidizes. The zinc and copper alloy is cleaned from dirt and plaque with alcohol, polished with a dry cloth.
Silver
Wristwatches are made of precious metals, they fulfill their main functions and serve as a work of art. The silver case is cleaned using different means:
- A spoonful of ammonia is dissolved in a liter of water.The part is wiped with the composition, polished with a soft cloth.
- The protective coating of the watch is treated with lemon juice, dried with flannel.
- A paste or tooth powder is applied to the blackened metal with a brush, rinsed under the tap.
- The case, removed from the accessory, is left for an hour in a saline solution, the plaque is removed with a sponge.
The darkened silver is soaked in starch, cleaned with a damp cloth, dry cotton wool. The dial is wiped with a cloth, other elements of the watch are treated with alcohol.
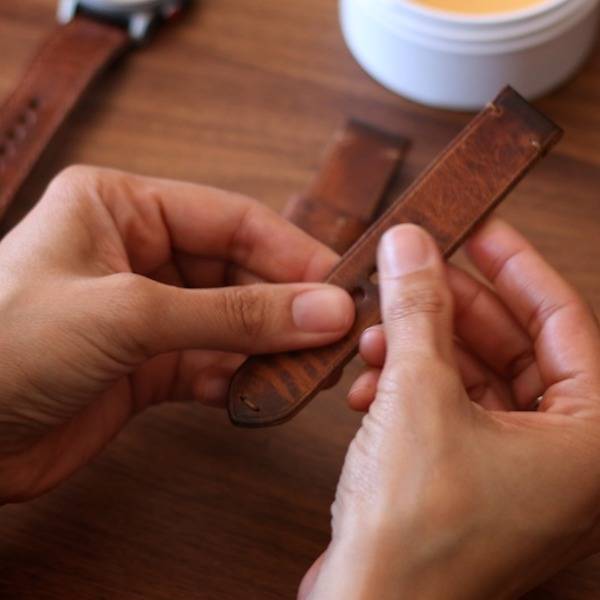
Preparatory activities
Wearing an accessory with a precise mechanism allows you to confirm that its owner is responsible and punctual. For a wristwatch to look presentable, the strap should also look well-groomed. The skin must be protected from moisture, ultraviolet rays. The material absorbs dirt and grease secreted by the sebaceous glands, collects dust, which contributes to the appearance of an unpleasant odor, accelerates wear.
At least once a week, wipe the leather strap with a damp material. Before cleaning, the object must be disconnected from the watch case so that detergents do not get into the mechanism.

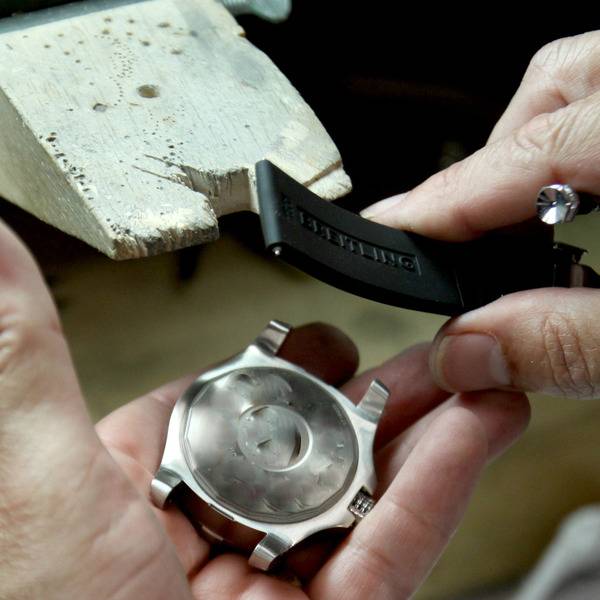
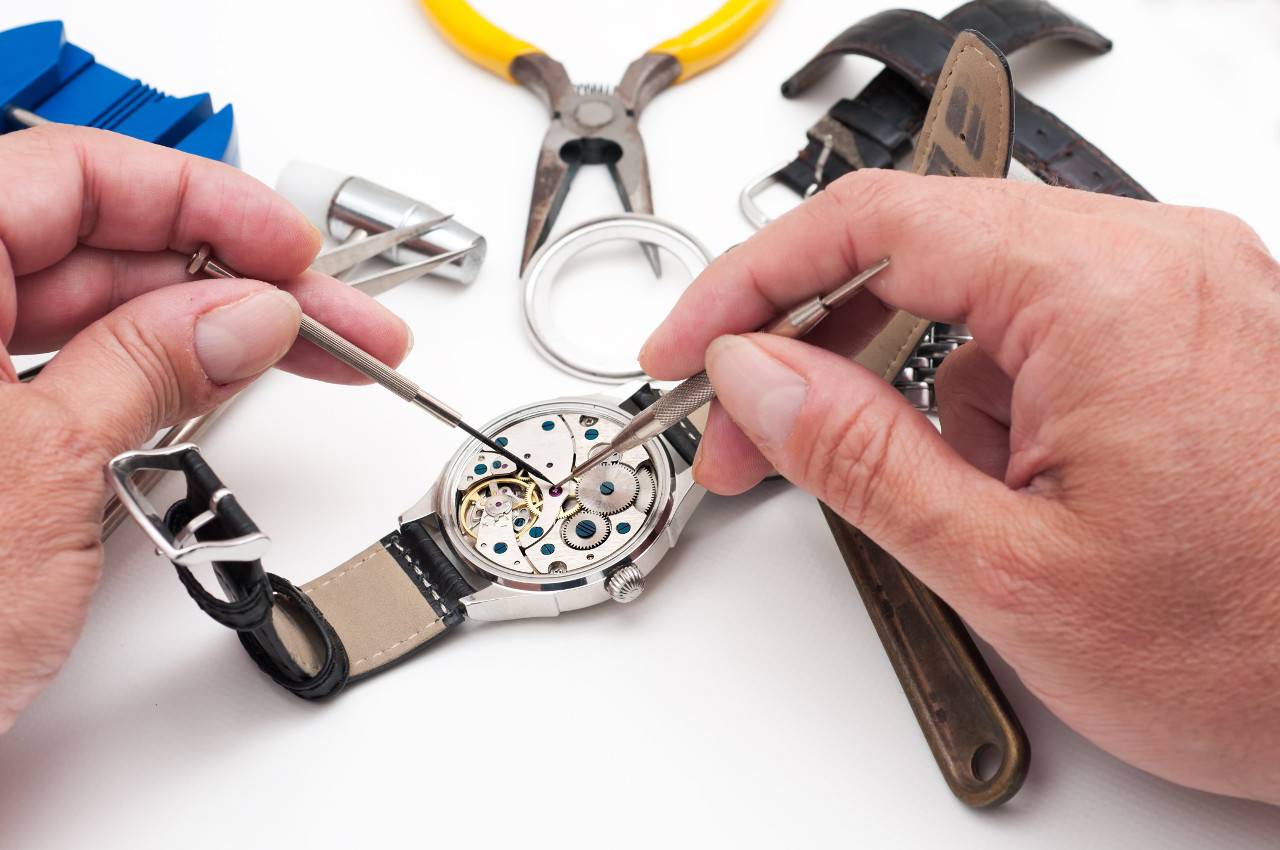
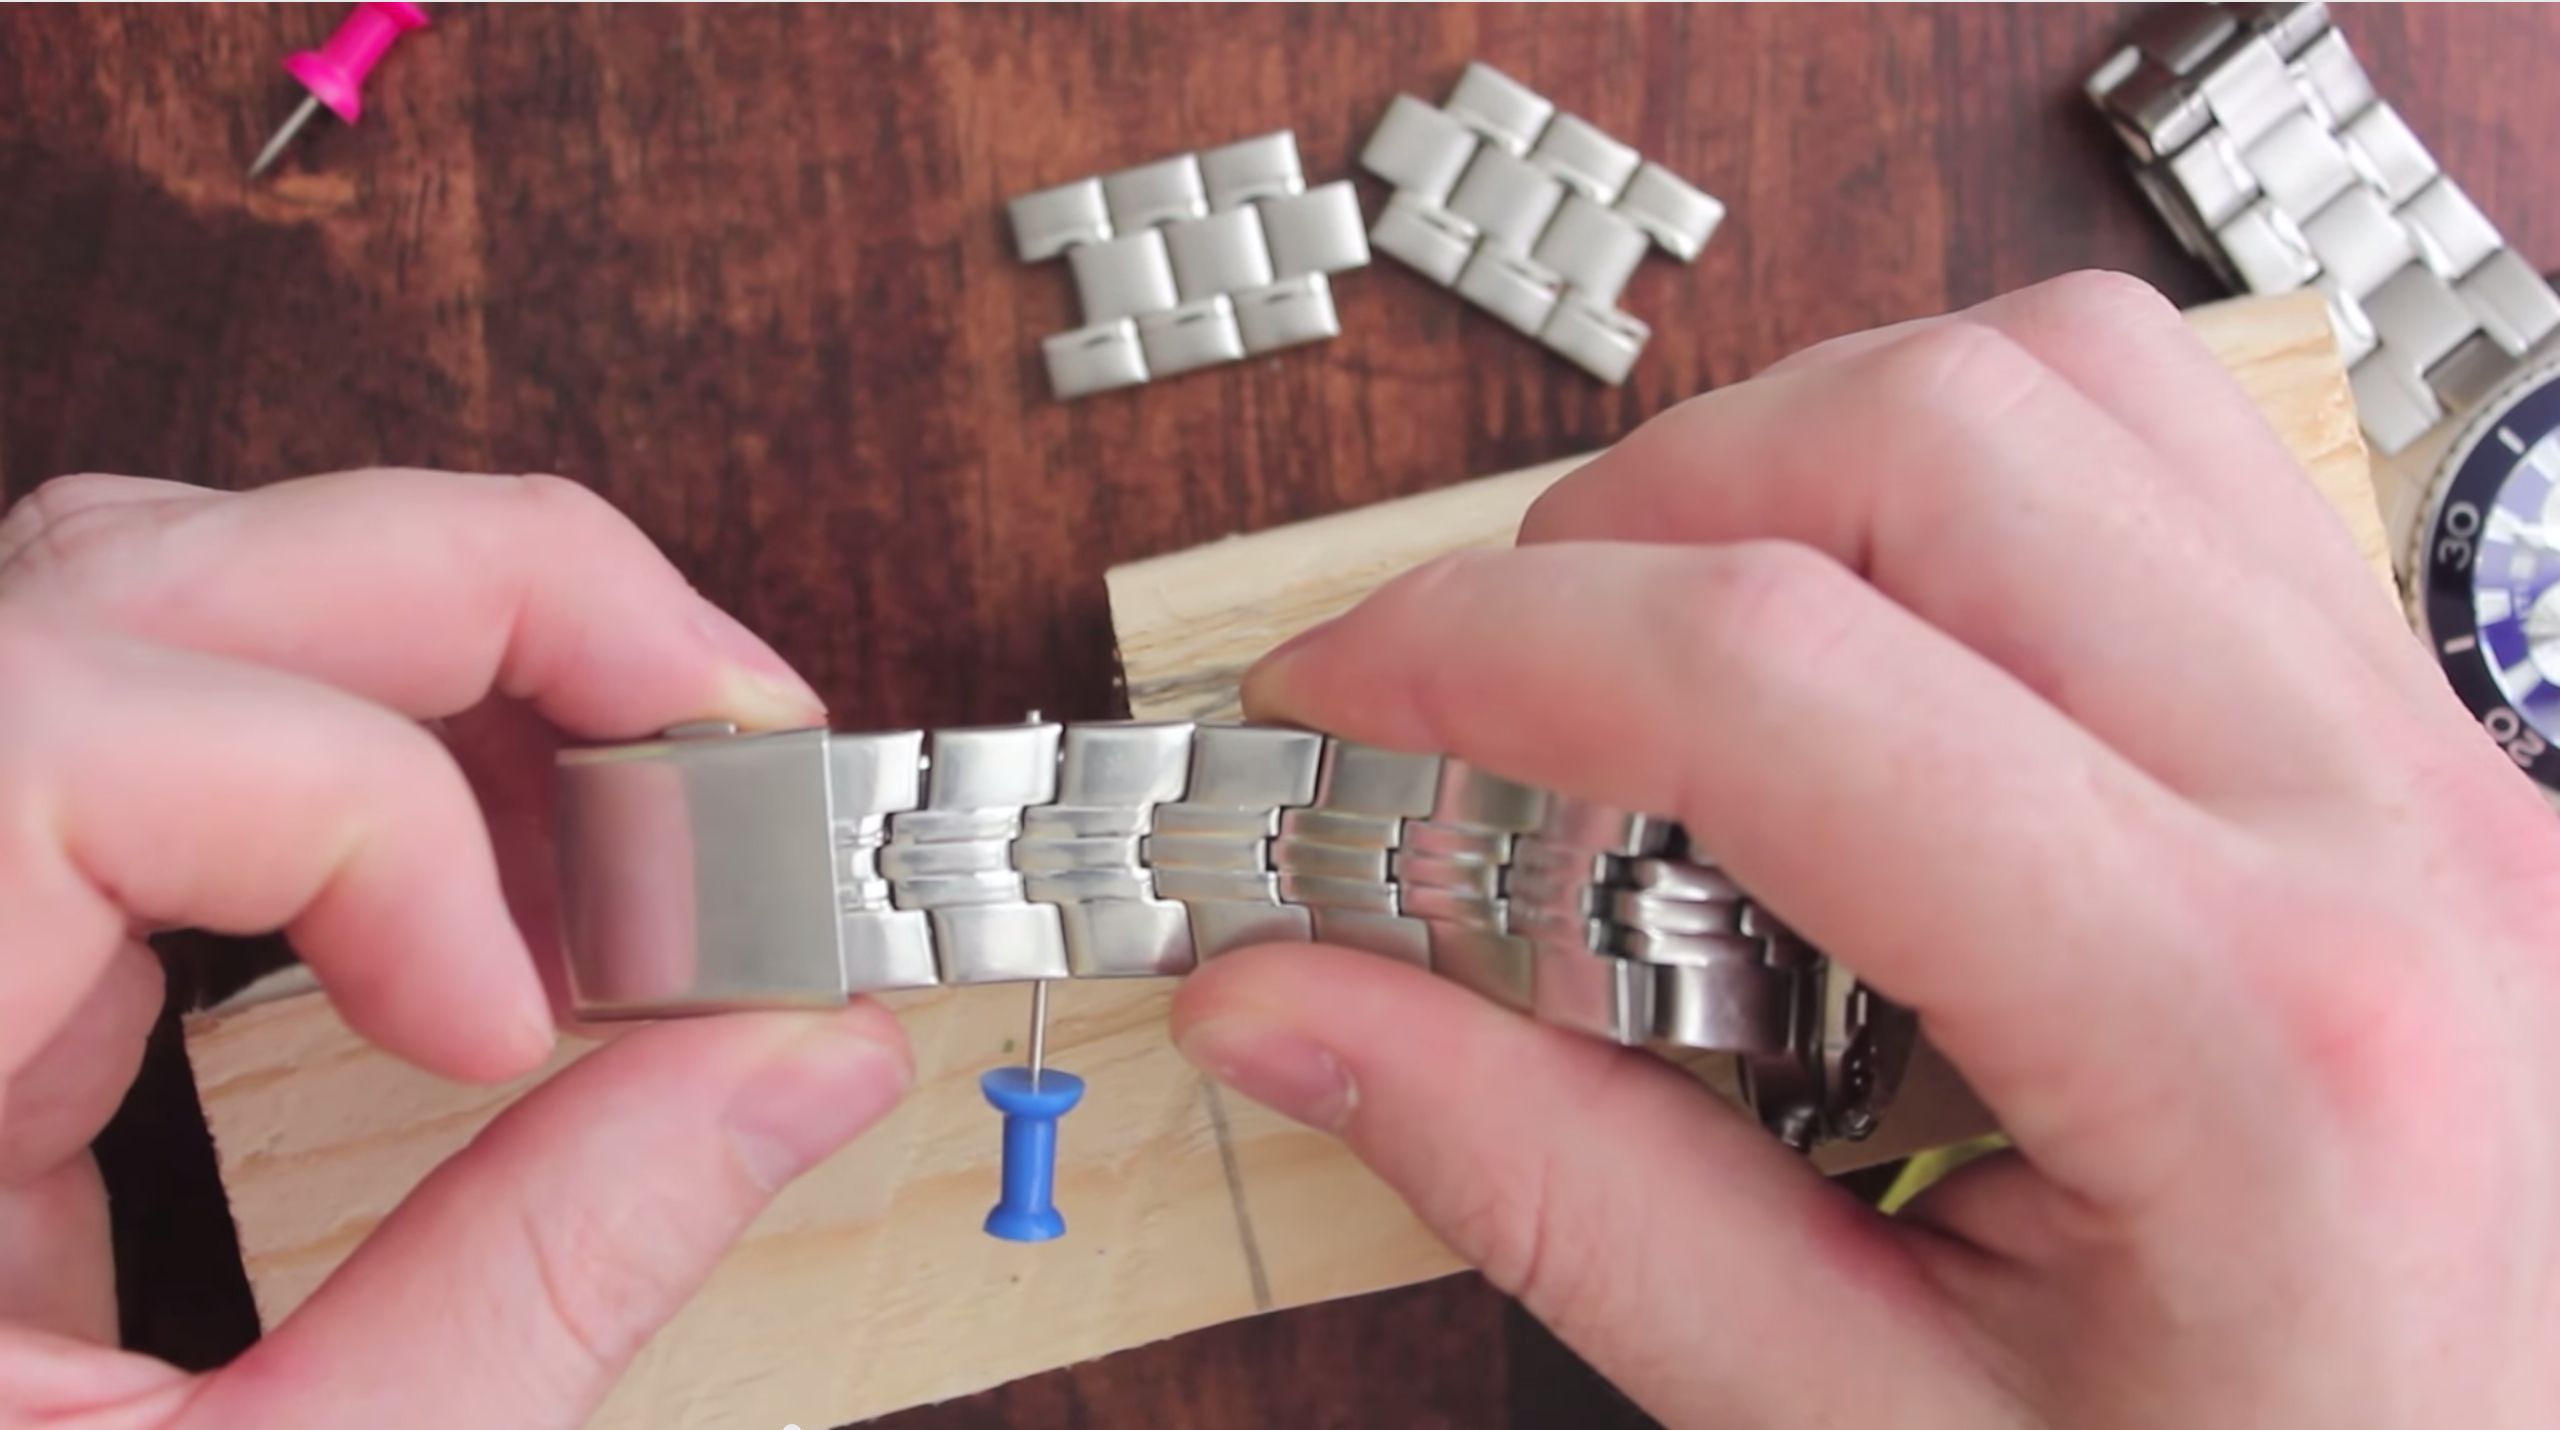
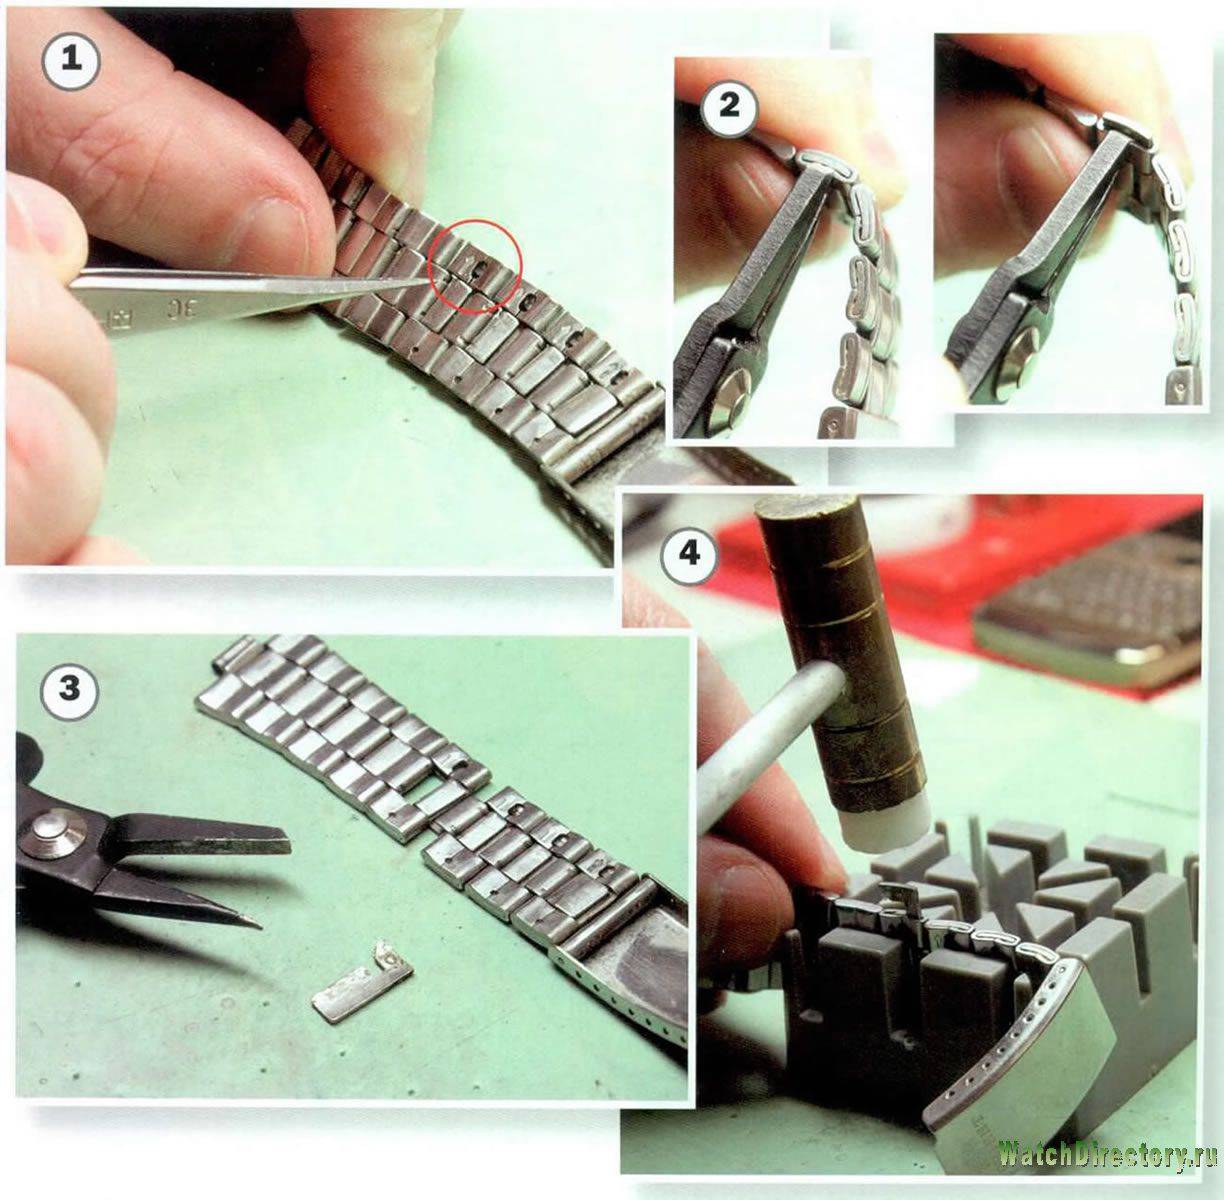
Disassembly
The strap is held in place with a pin. Inside such a hollow tube there is a spring and 2 tips, one of them secures the product to the body. To remove the strap from a mechanical watch, you need to move the pin to the side. To do this, with a needle or a thin knife blade, you need to pick up the tip by the corner and push the tube inside.
How to protect your home after cleaning
And now you have performed the ritual of cleansing the house with the help of a church candle, you feel peace and harmony. How to keep these sensations for a longer period?
- Try to leave all work problems, conflicts with friends outside the doorstep.
- Get rid of old, broken and unnecessary things without any regret. There is no benefit from them, and the flows of negative energy from them are the most powerful.
- Get in the habit of washing your shoes as soon as you come from the street. Thus, you will get rid of all the negative energy brought from the street.
- Do not put those things that were given or presented to you with your belongings. Wash them, even if they are clean, or better yet, clean them with a candle.
- When accepting gifts, even from the closest people, always listen to your feelings. If you are experiencing discomfort, it is better to get rid of such a gift.
- Try to avoid serious conflicts in your home. If possible, try to conduct all serious and unpleasant conversations on neutral territory.
- Keep your home clean. Do not allow dust or cobwebs, debris or dirty dishes to accumulate. Mirrors should be especially clean in your home.
- Try not to invite unkind, envious people. They will not bring anything good with their arrival.
- Hang an amulet-amulet over the front door. It will help to cope with negative energy coming from outside.
- When you come home, wash your hands immediately. So you will not only get rid of physical pollution, but also wash away all negative energy.
- Get cacti. Negative energy breaks down on their sharp thorns.
- Make it a rule to clean your home not from time to time, but 3-4 times a year.
If you heed the advice given above, you will forever get rid of negative energy in your home, and comfort, grace and peace will settle in it! Be happy!
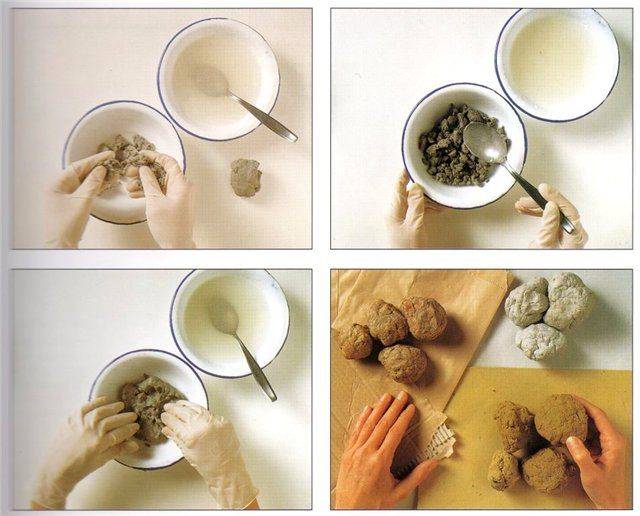
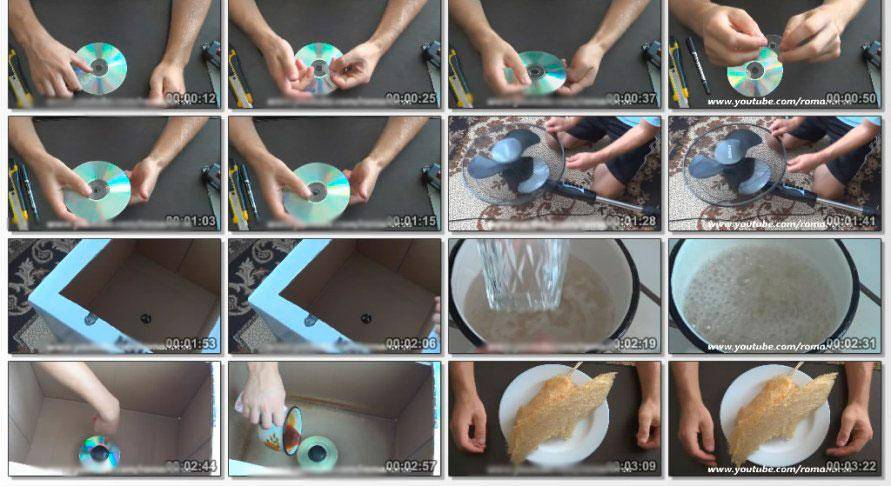
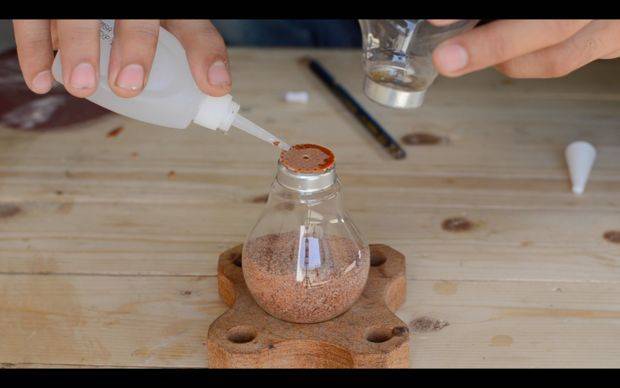
Sand
Remembering each of the varieties of watches, you need to figure out how to make an hourglass with your own hands. Let's prepare two small plastic bottles, absolutely identical to each other.

Naturally, we remove all labels from them. We glue the covers together with flat areas. Drill a hole in the center of the glued lids
When performing this movement, it is important to remember that the wider the hole, the faster the sand will pour out of it. We put one of the caps on the bottle in the usual way.
Pour dry sand into the second bottle. It must be poured in within one minute.
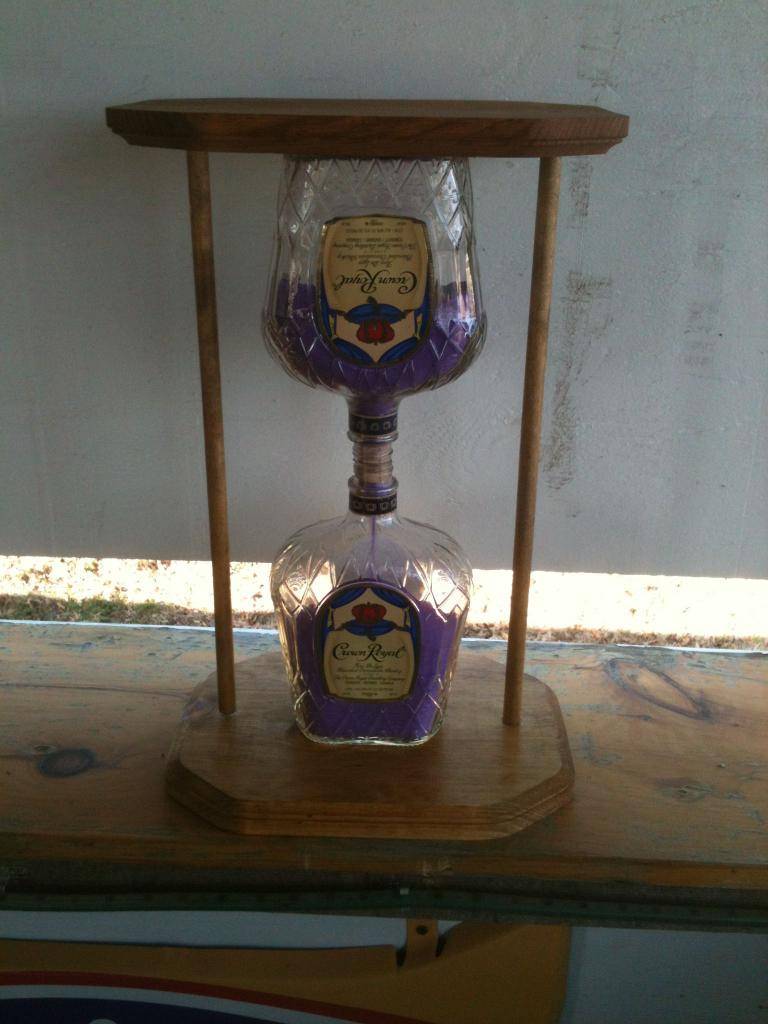
We put the second cap on the sand bottle. We tighten both covers tightly. This is the most common version of the hourglass, which can also be easily done with your child. And then together to experience their effect. If desired, such a watch can be easily improved with simple decorations.

In case none of the ideas came up to you, there are a lot of photos of watches made with your own hands. Therefore, do not be discouraged, but choose something for yourself.