Drilling square holes - Watts drill and the Reuleaux triangle principle
Almost everyone knows how to drill a round hole, but not everyone knows about a drill for square holes. In the meantime, you can drill a square hole in both softwood products and harder metal parts. To solve this problem, special tools and devices are used, the principle of which is based on the properties of the simplest geometric shapes.

Drill Watts
Principles of operation and design
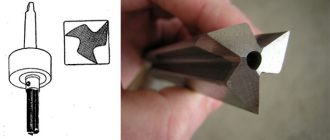
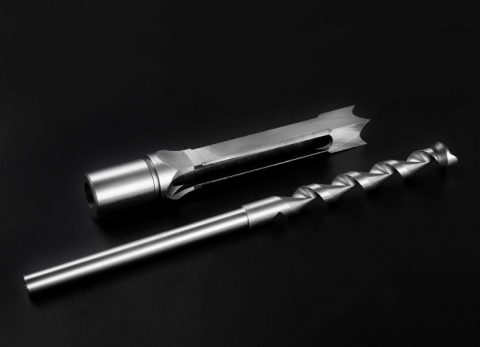
In order to drill a square hole, a Watts drill is usually used, the design of which is based on such a geometric figure as the Reuleaux triangle. One of the most important features of such a figure, which is the area of intersection of three equal circles, is as follows: if a pair of parallel support lines is drawn to such a triangle, then the distance between them will always be constant. Thus, if you move the center of the Reuleaux triangle along a trajectory described by four ellipsoidal arcs, its vertices will draw an almost perfect square, which will have only slightly rounded vertices.

Reuleaux triangle property
The unique properties of the Reuleaux triangle made it possible to create drills for square holes. A feature of using such a tool is that the axis of its rotation should not remain in place, but move along the above-described trajectory. Naturally, this movement should not be impeded by the equipment cartridge. Using such a drill and the corresponding equipment, a square hole is obtained with perfectly straight and parallel sides, but with slightly rounded corners. The area of such untreated corners is only 2% of the area of the whole square.
Making a device for drilling square holes
Using Watts' drills based on the Reuleaux triangle principle, it is possible to drill square holes in metal workpieces, even on a conventional machine that is not equipped with special attachments. For the same, to create a square hole in a wooden part, you can use a regular drill, but for this it must be equipped with additional devices.
You can make a simple device that allows you to drill square holes in wooden blanks according to the following recommendations.
- To begin with, using a sheet of plywood or a wooden board of small thickness, it is necessary to make the Reuleaux triangle itself, the geometric parameters of which should correspond to the diameter of the Watts drill used.
- The drill must be rigidly fixed on the surface of the manufactured triangle.
- In order for the Reuleaux triangle and the drill attached to it to move along the required trajectory, it is necessary to make a wooden guide frame. In the inner part of the frame, you should cut a square with geometric parameters that fully correspond to the dimensions of the hole you are going to drill.
- The frame is fixed on the drill with the help of a special bar, while the center of the Reuleaux triangle placed in the guide frame must coincide with the axis of rotation of the power tool chuck.
- In order to impart a torque to the drill for making a square hole, but without creating restrictions on the movement of the tool in the transverse direction, the shank is connected to the drill chuck by means of a transmission mechanism operating on the principle of a propeller shaft of a truck.
- The wooden workpiece, in which it is necessary to drill a square hole, should be securely fixed, while positioning it so that the center of the future hole strictly coincides with the axis of rotation of the drill used for processing.
Square Hole Drilling Fixture Parts Drawing
Table 1. Dimensions of guide bushings
Table 2. Drill sizes (click to enlarge)
Having assembled such a simple device, having securely fixed all the elements of its structure and the workpiece being processed, you can turn on the electric drill and start the drilling process.
As mentioned above, a square hole drilled with such a device will have absolutely even and parallel sides, but its corner sections will be slightly rounded. Solving the problem with rounded corners is not difficult: you can modify them using a regular file.
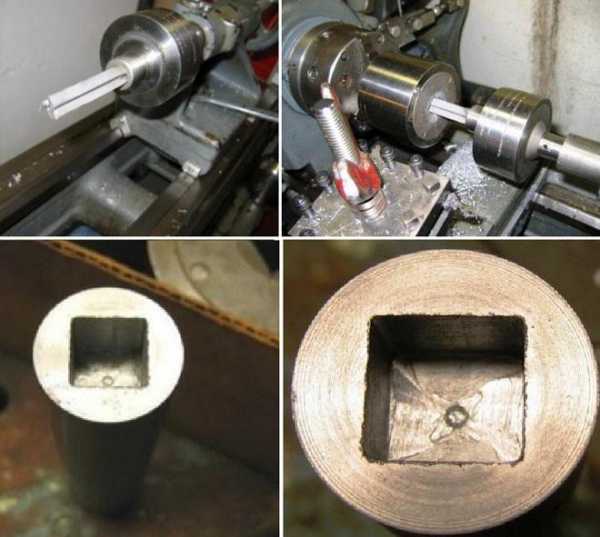
Watt's drill and a square hole made with it in a metal workpiece
Drill Chipbreaker Geometry (+ Video)
As noted earlier in this material, chip control is one of the most important points that are taken into account in the first place during machining.
Moreover, it is necessary to pay due attention to geometry, which will be discussed in this article. Despite the fact that the geometry of the chipbreaker is considered quite often in the thematic literature, the article stands out among similar materials.
The author, based on the accumulated experience, offers his own selection, which allows you to get acquainted with the main aspects and look at the geometry of the tool from a completely different angle.
To begin with, let's consider the main parameters of the geometry of the cutting part of the drill.
Back surface underestimation
Flank underestimation is the free space between the cutting edge and the outer diameter. The flank depression angle can be increased, albeit at the expense of the strength of the cutting edge, and in such cases the best performance is achieved when processing soft materials. When using a wide angle, be aware of the unwanted effect on the tip of the drill, which must be taken into account at high cutting speeds.
The angle of inclination of the helical groove
The angle between the axis of the drill and its spirals is called the angle of inclination of the helical grooves. The helix angle is the most important factor for optimal chip evacuation. The wide tilt drill is recommended for low strength materials, with a range of standard corner sizes 15-40 °.
Helical groove length
Helical flute length is measured from the tip of the drill, where all edges are located, to where the flutes end. The length of the grooves must be greater than the depth of the hole so that chips do not accumulate or get stuck inside. The author recommends using the maximum possible groove length.
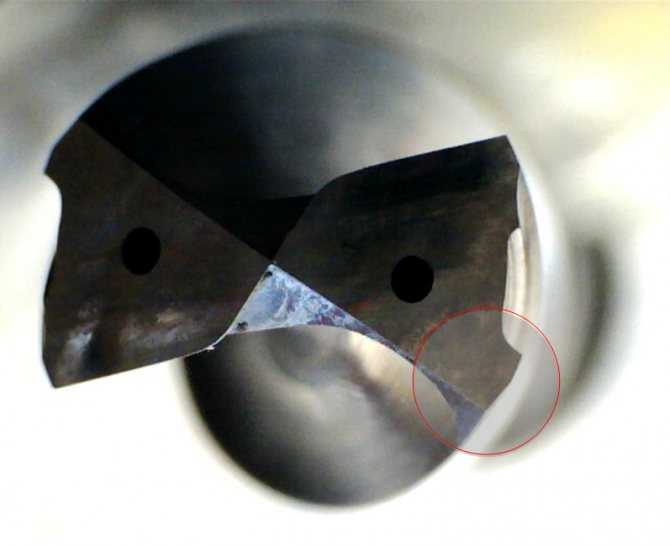
Groove with two fields
The double groove design provides stability and allows you to drill a hole with increased accuracy.
In some cases, when machining tough materials, a geometry with reduced fields should be chosen, for example, to improve drilling in aluminum.
Apex angle
The main purpose of the clearance angle is to reduce contact between the drill and the work piece.
The rake angle can be positive, zero, or negative, depending on the location to the drill axis. Usually this angle is positive and is about 12º.
Source of material: translation of the article Chip breaking geometries in drilling, Compositemachining.org
Original article author: Jose (JOSE)
Manual sharpening of twist drills
We invite you to familiarize yourself with the training video in Russian, found by us on YouTube
Criteria for choosing a quality option
Below we will consider the main types of devices for cutting holes in wood, but for now we will outline the criteria that any option must meet, regardless of its modification:
| Reliable material of manufacture | Of course, it is hardly possible to determine this criterion by eye, so it is best to ask the seller for a quality certificate for the product. Unreliable counterfeit variants from China most often do not have any documents. |
| Quality execution | Examine the product carefully: the surface must be flat without flaws and defects, the cutting part must be accurately sharpened. If you purchase a drill bit for wood of great length - check whether it is even, you can do it by eye or by rolling it on a flat surface - any violations are immediately visible on it. |
| Good packaging | Low-quality fakes are most often packaged somehow, moreover, there are mistakes in words. No well-known brand will allow itself a nondescript packaging, remember this. |
| Price | Price is also an indicator of quality, as a rule, the most budgetary options are short-lived, especially when it comes to drills and large-sized fixtures. After all, they are subjected to very high loads during operation. |
Cheap core drill sets are so unreliable that they can only last for a single use.
Alternative ways of making square holes
Obtaining radius arcs leads to a significant decrease in the quality of the resulting product. This is why other methods of making a square hole are often considered:
- Laser installations are widespread today. They can be used for processing along a given trajectory; when the beam is focused, the metal is heated, due to which the required surface is formed.
- The stamping method has been used for a long time. It provides for the use of special equipment that is capable of exerting high pressure on sheet and other workpieces. The disadvantage of this method is the high cost of the equipment, as well as the possibility of obtaining only shallow cuts.
- When using gas welding, it is also possible to form a rectangular shape. However, this technology is characterized by low practicality in use, the resulting products are of low quality.
On sale there are special sets of punches that can also be used in this case. The kit is presented by a combination of the following elements:
- Sleeve for guiding the punch.
- Special holder.
- Ring travel stop.
- Matrix.
Punch set
In order to exert a high load on the working tool, a hydraulic jack is used. This technology is characterized by the fact that the resulting figure has clean and even edges, that is, additional machining to improve the quality of surfaces is not required.
Cutting irregular holes
Projecting with Shape Merge
Now that we've moved on to more interesting methods, let's talk about projecting with the Shape Merge tool. Projection helps you "overlay" a free-form spline on the polygons of objects, and then manipulate them. Let's look at an example. Create a cube and.

Select the cube and choose Create - Compound - Shape Merge.
Press the Pick Shape button, the inscription is projected onto our cube.
Now the cube can be converted to Editable Poly, and then cut a recess by extruding the inscription using Extrude
Please note that when translating to Poly, a lot of unnecessary Edges appear. This is of course best avoided.

It is also worth noting that the spline cannot be correctly applied to a curved surface using this method. Lying down on the arc, the shape will be distorted.
Any design, whether in your home or in production, involves working with metal.
Often, during the operation of this material, the question may arise: how to cut a circle in?
It deserves attention, since the labor intensity of the process of performing the work and the quality of its result directly depend on the choice of the right tool and technology.
Metal can be thin, or thick and strong, so a variety of tools are used to cut it.
The choice of materials and cutting technology also depends on what diameter the circle is needed and how smooth it should be.
Using a jigsaw
If there is a need for a perfectly flat circle, you can use an electric one to cut it.
The work is carried out in several stages:
- First, the thickness of the metal is determined and the appropriate saw blade for the electric jigsaw is selected.
- Before cutting a circle in metal with a jigsaw, the outline of the circle that will be cut is outlined on the work plane.
- Using a drill and drill (with a diameter of eight to ten millimeters), a hole is cut out from which work will begin.
- A jigsaw saw blade is placed in the resulting slot and cutting continues as planned.
Cutting with this tool does not take much time and effort. Moreover, using a jigsaw, you can get a circle with perfect edges. But this tool is used only for working with metal of minimum or medium thickness (for example, 2 - 3 mm).
Grinder application
The grinder is used in working with metal of small thickness. You can form a round hole with this tool by following these step-by-step tips:
- Before cutting a circle in the metal with a grinder, a marking is carried out so that its contours are clearly visible.
- Along the entire length of the outlined drawing, short segments are cut with the grinder's disk, which will eventually connect.
- The shape will look more like a polyhedron than a circle. Therefore, after the end of cutting, the product is processed and cleaned until the edges are sufficiently even and smooth. For processing, you can also use a grinder. If the circle is wide, you can grind the contours with a large disc.
When processing a cut out circle with a grinder, you should be careful that the disc is inside the hole and, at the same time, is located in the same plane with the worksheet.
Drill steel
Today, high-quality drills that work quickly and for a long time are made from high-alloy steel grades. In their composition, such alloys contain more than 10% alloying additives such as tungsten, chromium, vanadium and molybdenum. Different percentages of elements and various methods of hardening steel form alloys with different levels of hardness, toughness, impact resistance, cost and other characteristics.
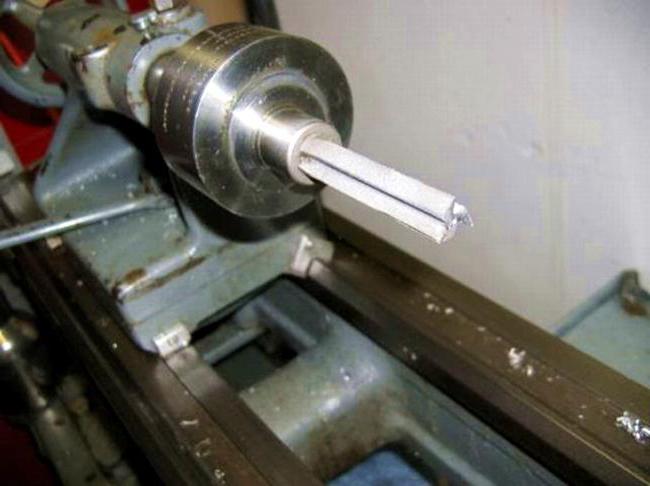 Metal drills are the most widely used consumable for electrical equipment for several reasons:
- Metal products most often need holes for fastening: threaded connections, rivets and other types of connections.
- Drills for metal can also be used when working with softer materials, for example, with wood.
- The production technology of this type of product is similar to the principles of production of drills for various applications.
In Russia and many other countries, the highest demand is for drills made of high-speed steel grade P6M5, which contains tungsten and molybdenum. The strength and price of products are significantly increased when cobalt is added to the alloy or the drills are coated with a cooling titanium-nitride sputtering.
Step 3: attach the hub holder


After you have removed the old cartridge, start installing the equipment from the kit.
First you need to install another cartridge from the kit.
- With the ejector head back in the recessed position, push the chuck up in a smooth motion until the cone locks into the headstock.To do this, insert the cone into the hole and twist until you feel the stroke become tighter. If the cartridge falls out when you remove your hand, repeat this step again.
- When the cone chuck is in place, hit it once with a hammer. When this step is complete, the chuck should work without the slightest extraneous movement. We fix the sleeve holder.
- After installing the new chuck, simply slide the bushing holder over it and tighten the top handle. When you complete this step, note at what height the spindle headstock is attached to the holder. If you fix it too high, then you simply cannot insert the drill into the chuck.
How to choose a drill bit for glass or ceramics
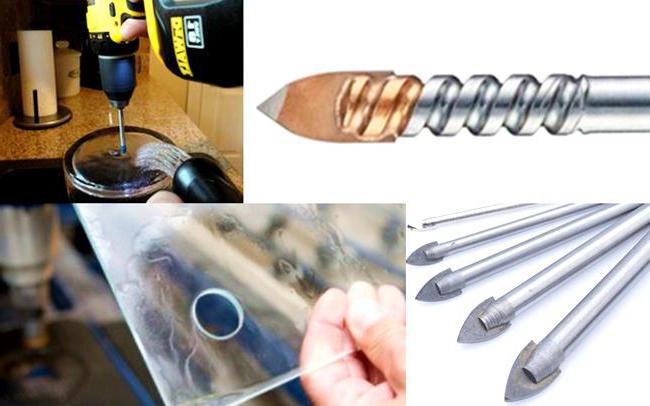
Professional craftsmen in their collection have drills for every material: brick and concrete, metal and plastic, diamond drill for glass and ceramics. Glass is an extremely capricious material and requires the use of a high-quality and durable drill. Glass and ceramic surfaces can be machined with diamond drills at the tip. The quality of such products is determined by the method of their manufacture. The thinnest and most inexpensive drills are produced by electroplating. Stronger tools are produced using a powder method. They are distinguished by durability and stability of work. Relatively inexpensive high-strength drills with increased abrasiveness are produced by the modern vacuum method.
It takes good skill to drill a hole in a glass surface. This long and painstaking process is carried out smoothly and slowly at maximum speed without pressure, only with a diamond drill set strictly vertically. The hole must be constantly wetted with water to cool. This action is more like scratching out a hole with diamond grains.
If you have the necessary tools and drills of the right size on hand, any repair work will be done quickly and efficiently.
A little history with geometry
Back in the 15th century, the legendary Leonardo da Vinci, studying the properties of geometric shapes, drew attention to the so-called geometric objects of equal thickness. There are an infinite number of such figures, but the simplest - in addition to a circle - is a rounded triangle, which can be formed as follows
An equilateral triangle is drawn, each of the corners of which is connected by a circular arc drawn from the center of the opposite side. The peculiarity of such a triangle will be that all its sides will have a constant width, which is equal to the length of the side of the original equilateral triangle.
A practical benefit from this fact was drawn by L. Euler, who three centuries later demonstrated the rotation of such a rounded triangle: first around its own axis, and then with some eccentricity, since the cardan mechanism was already known to science and technology of that time.
The German engineer F went even further in the practical use of this figure.
Reuleaux, who drew attention to the fact that the trajectory of the angles of a moving triangle with certain methods of its rotation is very close to a square. Only directly at the corners of the square, the outer surface describes an arc, however, of a small radius
In modern technical literature, such a triangle is called the Reuleaux triangle, although this figure actually no longer has any angles.

A few more decades will pass, and the Englishman G. Watts will come up with a device that can provide a guaranteed square trajectory for a metal-cutting tool. The technical solution for the Watts drill was patented in 1916, and a year later the serial production of such tools began.

Table - what materials at what speed to drill
just let us clarify that dissertation candidates do not drill with drills, but select the drilling mode, drill feed rate, coolant type and its consumption on a stationary installation for a rigidly specified sample. Can you imagine how the rolled metal of the Cherepovets plant differs from Magnitogorsk or Nizhnesaldinsky? They put a cheat sheet with numbers on a batch of metal for that examiner, and he picked it up. And in our case, what, going back to the beginning? A man bought a drill, there is a rusty piece of metal below, and it needs to be drilled ... ... ... ..
Still, I wonder what grade should be after drilling with a household drill? With computers, I have a different analogy. People are looking for all these tables and ready-made solutions, because the drill is stupid, neither Windows, nor even Android ... And how easy it would be (and most importantly you don’t need to think) - the drill sensor determined the type of material, reported the required type of drill, after installing the right type there is a calculation of speed, feed and even sprinkles coolant in the right intervals .... Well, in conclusion, I will inform you that such a miracle of engineering thought will be sold exclusively to amateurs with the needs of 20-30 holes per year …….
About Watts' drill and Reuleaux triangle

In order to understand how the Watts drill works, you need to take a short excursion into geometry. Back in the 15th century, mathematicians were interested in the interesting properties of flat figures with equal thickness. The most famous such figure is the circle. Another simple shape in this row is the rounded triangle.
This figure is obtained like this. An equilateral triangle is taken as a basis. Then, from each vertex of the triangle, a circle is drawn with a radius equal to the side of the triangle. As a result, you will get a new shape with arched sides (see the picture below).

A little later, scientist L
Euler drew attention to the interesting trajectory of rotation of the rounded triangle. Then the engineer Reuleaux saw that with a certain way of rotating the figure, the trajectory of its vertices describes a shape very close to a square.
To do this, it is necessary to rotate with some eccentricity. With this movement, insignificant roundings are formed only in the inner corners of the resulting square. Such a triangle is known today as the Reuleaux triangle.
At the beginning of the 20th century, the English scientist Watts was able to invent and patent a technical solution that would provide such a movement of a metal-cutting tool so that, as a result, a square hole was formed in the workpiece. The resulting tool became known as the Watts drill.
Equipment types
Choosing your type of machine begins with planning the volume of required products in the medium term. Based on this, they determine the necessary equipment for work:
- The production of building parts, joints of wooden elements at furniture enterprises involves the use of industrial machines of high performance.
- For one-off needs, you can get the result with a drill and a chisel. In this case, you will have to spend more time sampling wood and fitting the incoming thorn, but the homemade slotter will not be idle without work.
- In a private workshop, where the need for this type of processing periodically arises, it is better to put a homemade slotting machine, which makes it possible to quickly make several parts from wood.

Industrial equipment for small carpenters often has a vertical stroke of the working body in relation to the table. Do-it-yourself wood slotting machine uses a more convenient horizontal arrangement of the drill for manual operations. Exceptions are installations converted on the basis of a press, drilling or milling machine.
How to use?
When using Watts drills, there is no need for special machine tools with attachments. An ordinary machine is enough if you plan to work with metal.As for the wood taken as a processed material, a conventional drill is enough to drill holes in it, however, slightly improved with the help of additional devices.
To manufacture such a device, you need to follow a series of steps.
First of all, you need to get a plywood sheet or wooden board, but not very thick. Of course, you will also need a Reuleaux triangle directly with geometric parameters corresponding to the diameter of the Watts drill used.
To firmly fix the drill on the resulting triangle.
A wooden guide frame is required to move the triangle with the attached drill to the desired trajectory. A square hole is cut inside it, the parameters of which are the same as those of the hole that is planned to be drilled
The thickness of the frame is very important - it determines how deep the hole can be drilled.
The frame must be clearly fixed in the drill chuck so that there is a complete coincidence of the center of the triangle and the axis along which the electric drill chuck rotates.
The drill rotation must be correct. To do this, it must move freely along and across
To ensure this, a transmission mechanism is needed, which will connect the chuck of the electric drill to the shank of the nozzle. The principle of operation of the transmission mechanism is the same as that of the cardan shaft in any truck.
Securing the wood must also be careful. Position it so that the axis of rotation of the nozzle clearly coincides with the center of the planned square hole.


The design of the adapter (transmission mechanism) is simple. It has a body, floating shank, special swinging ring, mounting screws and bearing balls. A special feature is a replaceable sleeve - it is needed in order to be able to fix the chucks of various machine tools for metal processing. You can change the attachment pretty quickly.
Once the assembly of the device is complete, and each element is fixed, the electric drill is ready to start drilling. Yes, the corners of the hole will not be 90 degrees, but will be rounded, but this is a solvable problem. Roundness is finalized with the most common file. It must be remembered that such a device is applicable for working on wood, and on its not too thick sheets. This is due to the fact that the structure itself is not very rigid.
The Watts drill has a drawback - it will not work to process materials with a large thickness with it.


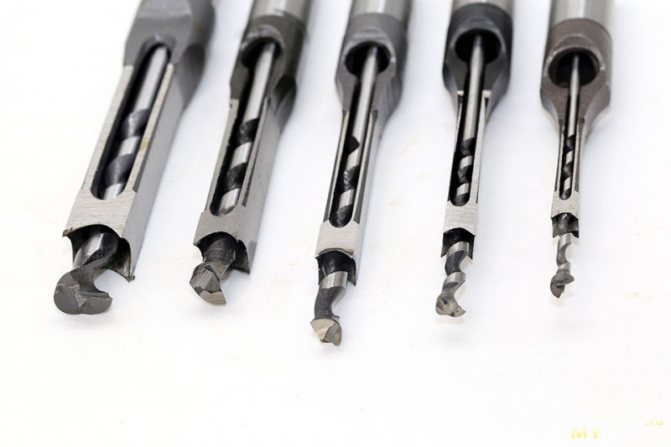
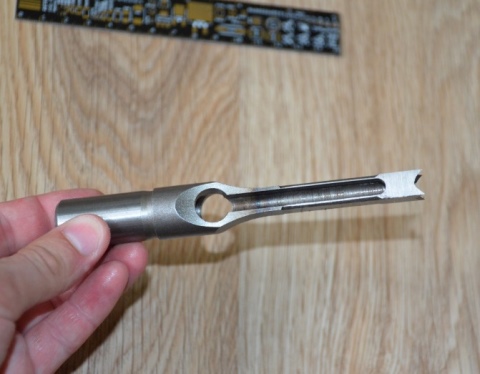
Square hole punches are sold in sets of various sizes and thicknesses. The kit includes (in addition to the punch itself) a matrix, a ring-shaped holder, a limiting element, and a sleeve with which the punch is guided.
To increase the impact on the die, it is effective to use a hydraulic jack. The holes are clean, even, and free from chipping. The tools of the Canadian brand Veritas are considered especially high quality.
If you are the owner of an inverter for welding, you can simply burn out a hole of any shape, including a square one, of course, when it comes to metal as a processed material. To get a square hole, you must first have a blank. It is a graphite square of the same size as you plan to drill. It is optimal to use EEG or PGM graphite.
The work begins by forming a round hole large enough to fit the graphite blank. After the workpiece is inserted and secured, it is scalded around the perimeter. Next, you just need to remove the graphite square, and then clean and grind the resulting hole.

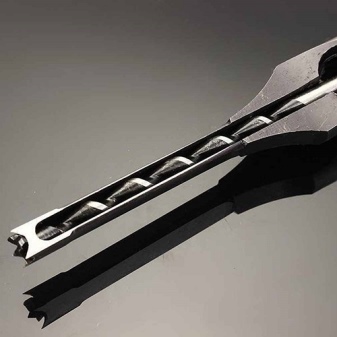
You can learn how to properly drill a square hole in the video below.


