What you need for corner clamps
Welding is often carried out by joining metal sheets at an angle. They need to be held motionless, how to do it for a welder, if his hands are occupied with an electrode with a mask.
Fixing device
A simple fixing device will help out.
Pre-assembled:
- 10 mm. thickness of metal strips;
- corners 40x40 or 50x50 (mm.);
- nuts - 4 pcs.;
- bracket.
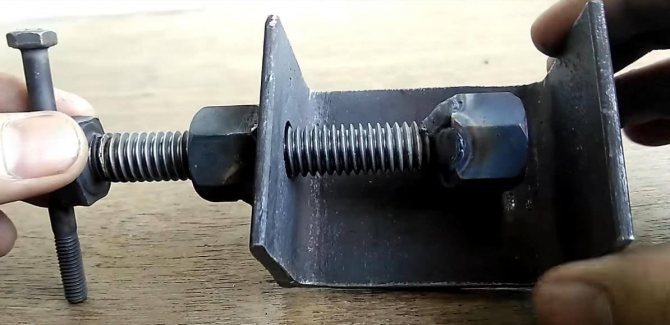
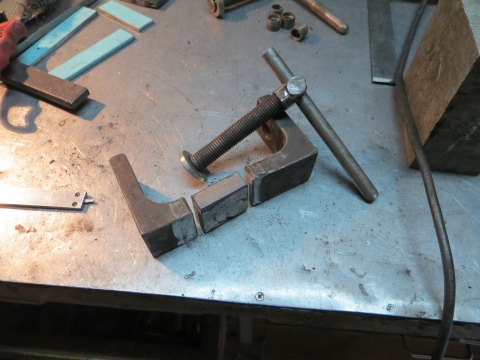
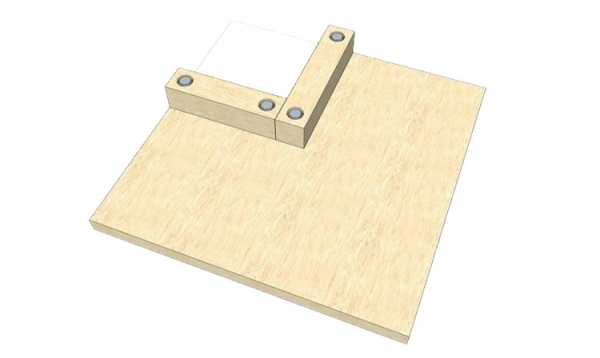
The corner is bolted or rigid welded. The clamping device will be nuts welded to each other or a cantilever support, in the holes of which the thread is screwed. The clamping mechanism will move on the installed guides. Drill holes, insert bolts, tighten nuts.
The next model is also not complicated, but it is attached to the workbench - it is more convenient to work this way. You need to prepare:
- 2 corners measuring 70 x 70;
- 2 sheets of iron;
- 2 steel studs;
- nuts - 6 pcs.
Production procedure:
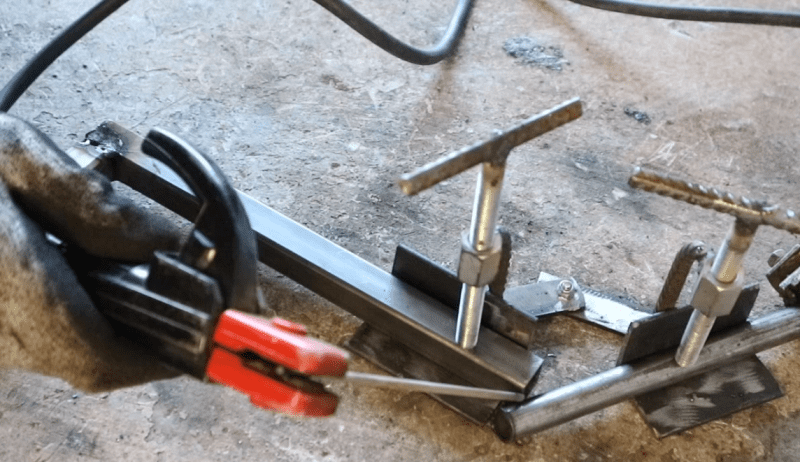
- The corners are welded at right angles.
- For rigidity, metal strips are placed.
- In the middle of the corners, 1 console is welded.
- A thread is cut in the drilled hole.
- A stud is screwed into the welded nut, it will fix the workpiece.
The nuts connected by welding are installed on the end of the stud, also welded.
Varieties of clamps
Nowadays, there is a fairly large number of varieties of clamps, which differ in size, scope and other parameters. For example, the following varieties of this tool are popular, which you can do yourself:
- Edge clamp. This type of tool is designed for gluing or securely fixing the edge of the product during carpentry work, and they are also used for convenient and safe transportation of sheet materials.
- G - shaped clamp. This tool got its name due to its external resemblance to the English letter G. This is a very common and popular type of clamp, which has several standard sizes. The most commonly used tools are with a working width of 100 and 150 mm. Such clamps are made of various materials, most often they are steel and cast iron clamps.
- DIY pipe clamp. In this version of the clamping device, a pipe is used as a base, at one end of which a thread is cut and a fixed head with a sponge is screwed on. Another head moves along the pipe, which can be fixed in the desired place and, using a screw clamp, squeeze the parts together. The advantage of pipe clamps is that the dimensions of the parts are determined by the length of the pipe and you can work with a wide variety of dimensions of the parts to be joined. Pipes are usually used at 1/2 and 3/4 inches in this case, the structure is quite powerful and durable.
- Tape clamp. With the help of this design, it is convenient to glue frames and boxes, repair furniture, frames, and so on. A distinctive feature of this tool is a leather or nylon belt, with the help of which mating parts are compressed. The clamping force is uniform and reliable. It is quite easy to do it yourself and will be indispensable for carpentry work.
- F - shaped homemade clamp. The main advantage of this type of clamps is a deep jaw, which makes it possible to fix a part at a fairly large distance from its edge. The design consists of a base with a fixed jaw, on which an adjustable head with a jaw slides.
- Do-it-yourself angle clamp for welding.This tool is the most useful and in demand, as it allows you to fix two parts at right angles to each other. It is very widely used in both carpentry and locksmith work.
This tool also differs in terms of clamping mechanisms:
- Corner;
- Screw;
- Quick-clamping;
- Lever.
Using the tool species and its device
There are no clamps that are one hundred percent suitable for our needs when doing housework. Clamps come in a variety of shapes, patterns and sizes. As a rule, there are not enough of them. Below is a short list of tools for solving the tasks in the processing of wood and metal:
- wooden;
- metal;
- F-shaped;
- C-shaped;
- corner;
- cam;
- G-shaped;
- clamps for fastening the wire;
- clips in the form of a tape.
Making a clamp yourself is quite simple. Of course, when carrying out work, this is not the tool for which there is a constant need. But it doesn't hurt to have it always at hand.
Universal tape clamp
One of the more interesting and unusual designs of the clamps uses a thick polyester belt as a strength element. A tape clamp is used where multiple parts need to be evenly tightened.
To make a band clamp, you need to make corner pieces and a tensioner for the polyester belt. Three corners are cut out of ordinary pine on the printed tracing paper. The fourth element - the tensioner is made of two blocks and a tensioning screw.
The tape is passed around the block, if you unscrew the screw with a wrench, the distance between the blocks increases, and the belt of the device is tightened, pressing all four blocks to the part.
3 Wooden clamp - we will make from the remains of boards
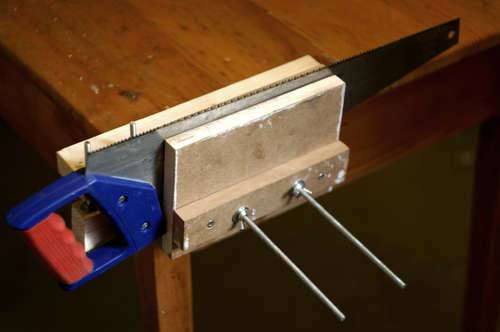
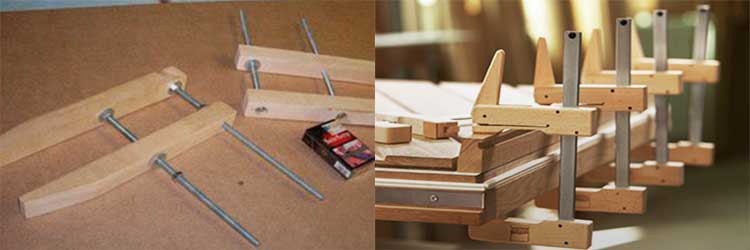
The most popular is a wooden quick-release clamp, but a tool of a similar design can also be made of metal. Despite the simplicity of the design, it is very convenient for various jobs.
For assembly, you will need to prepare the following materials:
- pieces of boards;
- pre-threaded studs;
- nuts and wings, corresponding to the thread of the studs;
- reiki.
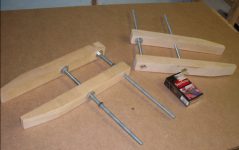
First, two threaded studs of the same diameter are prepared. They should be 200 mm long. The nuts are matched to the thread of the studs. Two slats are harvested, preferably from hardwood. The best choice would be oak, beech, birch, ash. The slats are adjusted to the same size. For this, the excess length is sawn off, and the cut is subjected to grinding. After that, two holes are drilled in each of the rails with a small tolerance. Moreover, the location of the holes on each of the blanks should ideally match, and their diameter should correspond to the diameter of the studs.

Plywood strips can be glued to the surface of the slats. They are adjusted to the size of wooden blanks, holes are drilled. The studs are inserted into the holes obtained and securely fixed with nuts on one of the rails on both sides. To prevent the material from being pushed through, washers are placed under the nuts. This bar will always be stationary, but the other will be able to move freely along the guides in the form of studs.
A different bar is installed. To do this, thread it through the pins, upset it in place. The clamp is carried out using ordinary nuts and an open-end wrench, but for convenience and increased productivity, it is necessary to install wing nuts. Check the progress of the clamp, if it is difficult or additional adjustment of parts is required, other defects are found, then they are eliminated. The work on assembling the wood clamping device can be considered complete, it remains to test it in action.
Correctly assembled hold-down devices allow you to securely fasten wooden parts during carpentry work.The designs of the listed types of clips are popular and are so simple that they can be made independently from scrap materials using a minimum number of tools.
Homemade quick-clamping clamp
Consider the option of making a quick-clamping clamp with your own hands, with which you can quickly fasten the parts to each other with one hand and fix them on the workbench for further work. This design can be used for woodworking, furniture repair, shoes, and so on. Alternatively, quick-clamping tools can be used not only when compressing workpieces, but also during work when a spacer of parts is needed.
To make a clamp with our own hands, we need a sealant gun, a wooden block measuring 500x50x40 mm. For the manufacture of sponges, we will use two rectangular bars measuring 10x80x20 mm. To use the gun, it needs to be modified, for this you need to cut off the part in it where the nose of the sealant bottle rests and align with a hammer the plate that connects the gun itself with its removed part. Then we attach the pistol with this plate to the wide side of the 500x50x40 mm bar. using self-tapping screws.
In this design, the sponge bars will move along the 500x50x40 bar, for this we make through square holes in these bars. Putting one of the sponges on a large block, we securely fasten it to the pistol press circle with self-tapping screws. Next, putting on the second sponge, we drill several through holes through the clamp into a large block. Several holes are made in order to be able to adjust the width. For fixing, we will use a bolt with a nut of a suitable diameter.
As a result, it turns out that when you press the trigger mechanism of the pistol, the press will move one sponge to another along the bar. In places where the jaws come into contact with parts, insert inserts made of soft material, such as rubber or plastic. The compressive force of a self-made clamp can reach 300 kg, the installation of the tool can be carried out with one hand. The clamp is also removed with one press.
Angle welding clamp
A fairly simple design of an angle clamp can be made with your own hands in a home workshop, since a factory analog is quite expensive. The material from which this type of clamp will be of the highest quality is iron.
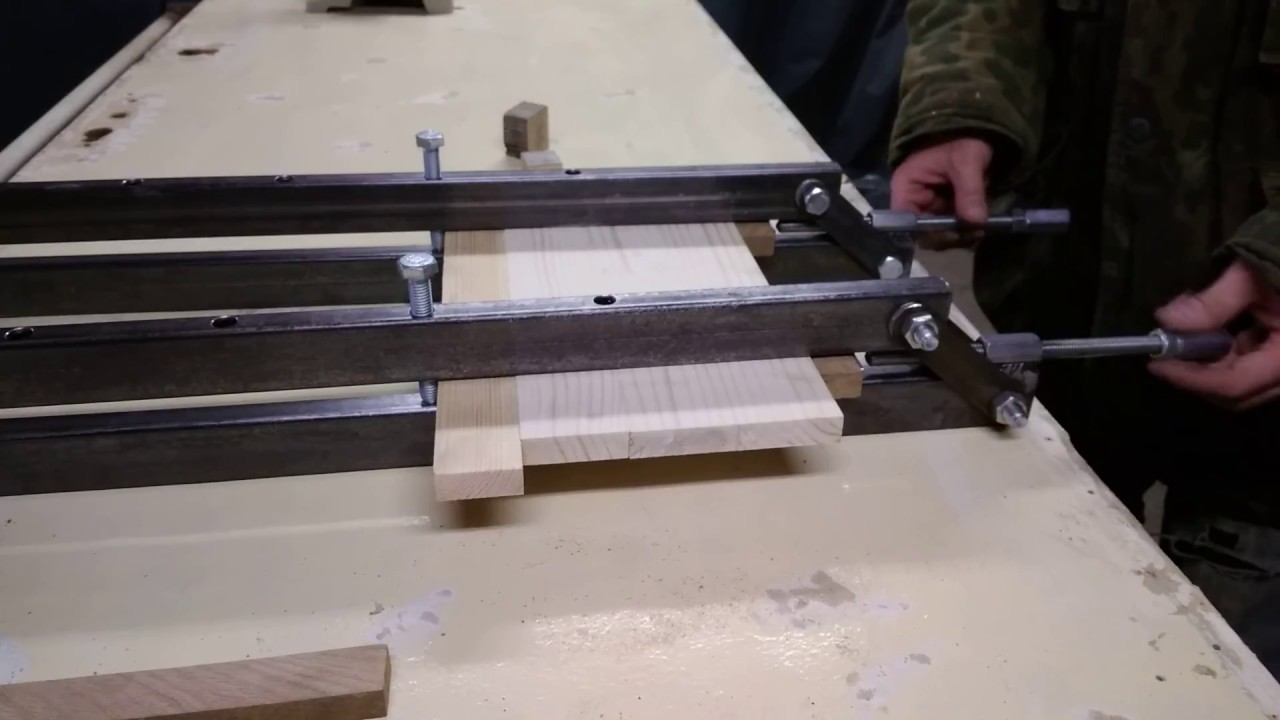
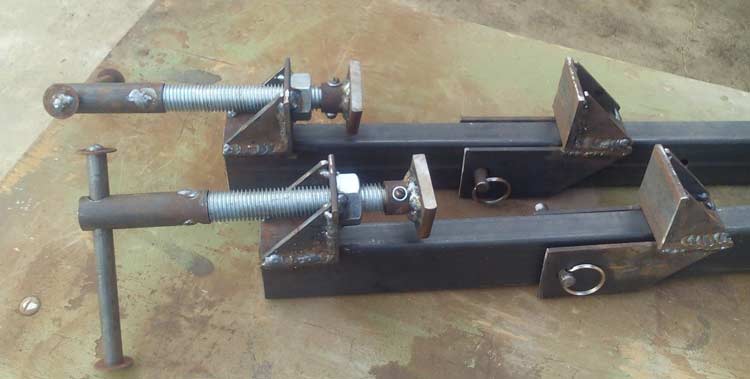
Initially, we make the base of the structure from sheet metal approximately 10 mm thick. Next, the foundation of the design is made. To do this, we weld two corners to each other at an angle of 90 degrees; in the manufacture of this structural element, accuracy is needed due to the fact that these corners act as fixed clamping jaws. Before welding the corners, you need to weld nuts to each of them, which will serve to move the movable jaws. Bolt holes are drilled in two more corners. Further, these bolts are screwed into the nuts and with their head they pull the movable corner, thereby achieving compression and stretching of the fasteners.
In order to increase the length on the sides of the grip, a structure resembling a compass can be made of two metal profiles connected at the end by a sleeve and a bolt. Having made two sleeves that coincide in shape with the profile, a clamping screw is made on one side of the sleeve, and on the other, they are attached to the existing corners. It remains to put the bushings on the profiles and fix them with screws. This achieves a large distance between the grippers and makes it possible to work with large objects.
The do-it-yourself corner clamp created has an advantage over factory models, primarily in variety and cost. And also such a tool will have increased strength and reliability.
1 Making a screw metal clamp
Before starting work, you will need to prepare the necessary materials.For the base of the structure, a steel sheet one centimeter thick is suitable, any even trims of the same thickness. The length of the workpiece is arbitrary, but they try to choose it taking into account the working distance of the clamp.

Main materials of manufacture:
- steel sheet;
- long bolts;
- nuts.
A drawing is drawn up. On the material of the workpiece, the future body of the tool is marked, which in appearance resembles the letter "C". Instead of a steel sheet, you can use a piece of profiled pipe, bent in the form of the letter "C". There are no special requirements for the thickness of the workpiece, but the design must be reliable. The choice of length is made taking into account the size of the working area, workpieces.

After applying the markings, the part is cut out of metal. At home, small-sized blanks can be cut with a grinder. But when making large clamps, it is recommended to use a gas cutter, acetylene torch. The next stage is processing, grinding the workpiece. All sharp edges, nodules formed when working with gas welding equipment are knocked down with a file, and the surface is sanded with sandpaper. This must be done so that, when clamping the workpieces, you do not cut yourself on sharp edges.
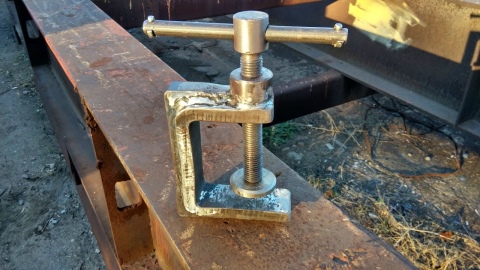
Having prepared the long bolts M 8, M 10, proceed to the fastening of the movable element. For this, nuts are welded on one side of the workpiece for the selected bolts. In the absence of bolts, you can pick up hexagons, steel rods of the required length with a pre-cut thread.
On the inner working end of the screw, a flat, flat piece is welded, on which the function of the jaws is assigned. On the reverse side of the screw, a lever is attached by welding from the trim of the stud. Its presence will speed up the process of clamping workpieces, further reducing the amount of applied forces. This completes the assembly of the clamp with your own hands.
DIY quick-clamping clamp
Sometimes in working with wood, clamps are required with which you can fix or grip the part to the work table or place within literally a few seconds.
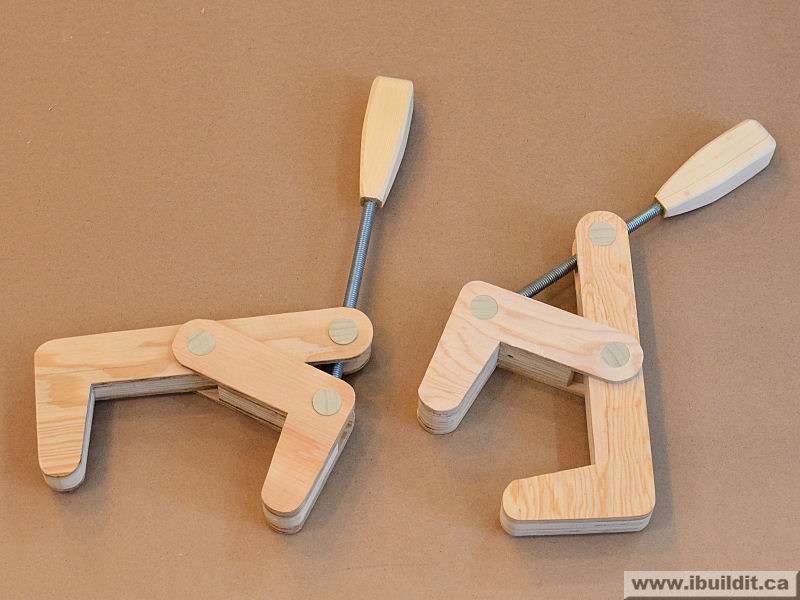
In order to make a quick clamp, you will need wood planks or plywood with a thickness of 16-18 mm. Initially, the tracing paper of the parts is transferred to the wood and cut out with a jigsaw. In the driven parts, it will be necessary to make cuts for the entry of the counterpart.
Along the marked points of the axes, holes with a diameter of 20 mm must be made.
Hinge axes are cut out of a round workpiece, ground and pressed into holes. It turns out the construction of a clamp, somewhat reminiscent of scissors. The drive uses a standard 6 mm lead screw.
Clamp for holding and fixing small parts
In a similar way, you can make a clamp for fixing especially small parts. You will first need to mark and cut out two halves of a device, similar to tweezers or a medical clip, from OSB or plywood.
The sickle-shaped workpieces are connected to each other using a wooden axis, therefore, a hole of the corresponding diameter must be made in each of the clamp parts. For the body of the clamp, you can use ash or spruce, the axle must be made of a harder material - oak or beech.
Clamp from a rod of rebar and wood
Using a reinforcing bar with a length of 50-60 cm and a diameter of 8 mm, you can make a very strong and at the same time lightweight frame for universal use.
The structure is based on a hardwood supporting block. Block dimensions 150x50x30mm. Dimensions may vary depending on the thickness and bending radius of the reinforcing bar. A hook made from a piece of rebar can be bent with a heavy hammer on a steel pipe. The bend must be done so that the bent reinforcement is flat.
Next, a 7.5 mm through hole is drilled in the block, and the finished reinforcing hook is hammered, along the line you need to make a hole for the lead screw and assemble the clamp.
From wood and steel
 This model assumes the use of special steel, which is indispensable for working with important parts. Here, both the durability and strength of the metal are essential. The goal is to provide a lightweight clamp that is not overly bulky, yet fairly strong and easily customizable. The hardest part is making the plate where the bar is inserted.
It is best to arrange a few holes and then cut out the material. It remains in the form of a small circular file. When the main part is cut, use a grinder to clean the work area. The result may not be as perfect, but the bar will pass with ease.
A hole must be drilled at the opposite end of the plate. It must match the helix. Another final piece of metal is the lock plate. Its end should be oblique and match the cutout.
This is interesting: Do-it-yourself shovel miracle - drawings and dimensions, how to do it?
Special designs of clamps
Having mastered the skills of making clamps of a simple form, you can improve them and make adaptations for connecting complex parts.
There are homemade clamps made from a wooden hanger, which is sawn into pieces. Combines wood and steel, makes more comfortable handles that allow you to quickly tighten the screw
This is especially important if you need to change position frequently or use several clamps at the same time. In the case of complex workpieces, you can first cut them out of paper and then transfer them to plywood
Although welded metal products are more reliable, wooden structures are also used not only for joinery, but also for turning, carpentry works. You do not need to have special skills to create a clamp. You can make such a product out of wood in unlimited quantities with your own hands. You just need to devote some time to the manufacturing process.
Oak models
For such a product, an octagon pattern is first imprinted. It must match the required width. After that, the workpiece is placed in a vice and a plane is used to round off the resulting corners at both ends. Holes are arranged on the handle in the central part of the workpiece. In this case, it corresponds to the bolts on the clamp.
The shelf is dimensioned according to the desired length and the available equipment. After that, the components of the system are sawn to the required size, the sponge pads are cut out and the necessary holes are drilled, the handles are glued with a five-minute epoxy resin. When the shaft of the screw is serrated with a file or sandpaper, fix the handles with epoxy glue.
Improvised clamps
Often, in carpentry or when assembling wooden structures, there is not enough time to make full-fledged clamps and clamps. Then ingenuity and experience come to the rescue.
For example, a round blank can be secured with several rings stuffed onto a frame.

A rebar or water pipe can be clamped using an impromptu clamp made of several bars and tape.
The usual luggage compartment lanyard will help to tighten a set of ten wooden planks like a band clip.

You can easily make a real clip under the board from a syringe gun for sealer and tape.

