Nuances:
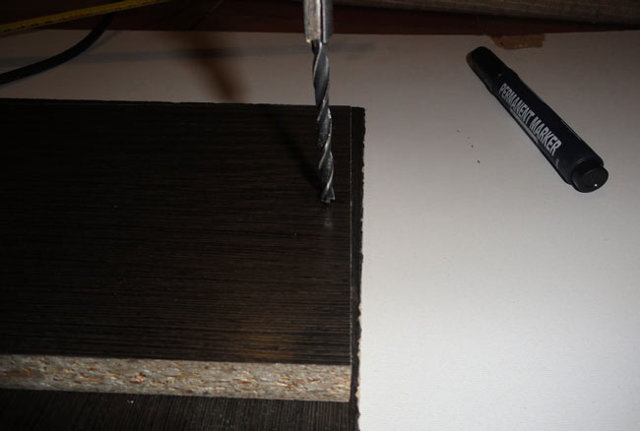
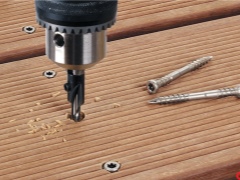
- When drilling holes from the flat side of the part, do not press too hard on the drill, otherwise, when exiting from the opposite side of the part, the drill may chip off the laminate around the hole.
- The worse the drill is sharpened, the more likely it is to chip off the laminate.
- When drilling a hole from the end of a part, make sure that the drill is pointing towards the center of the part, and not "pointing" up or down. That is, you need to drill strictly in the center of the part, do not tilt or lift the drill relative to the part. Otherwise, if you drill the hole at an angle, the drill may "come out" from the flat side of the part and ruin your workpiece.
Confirmation
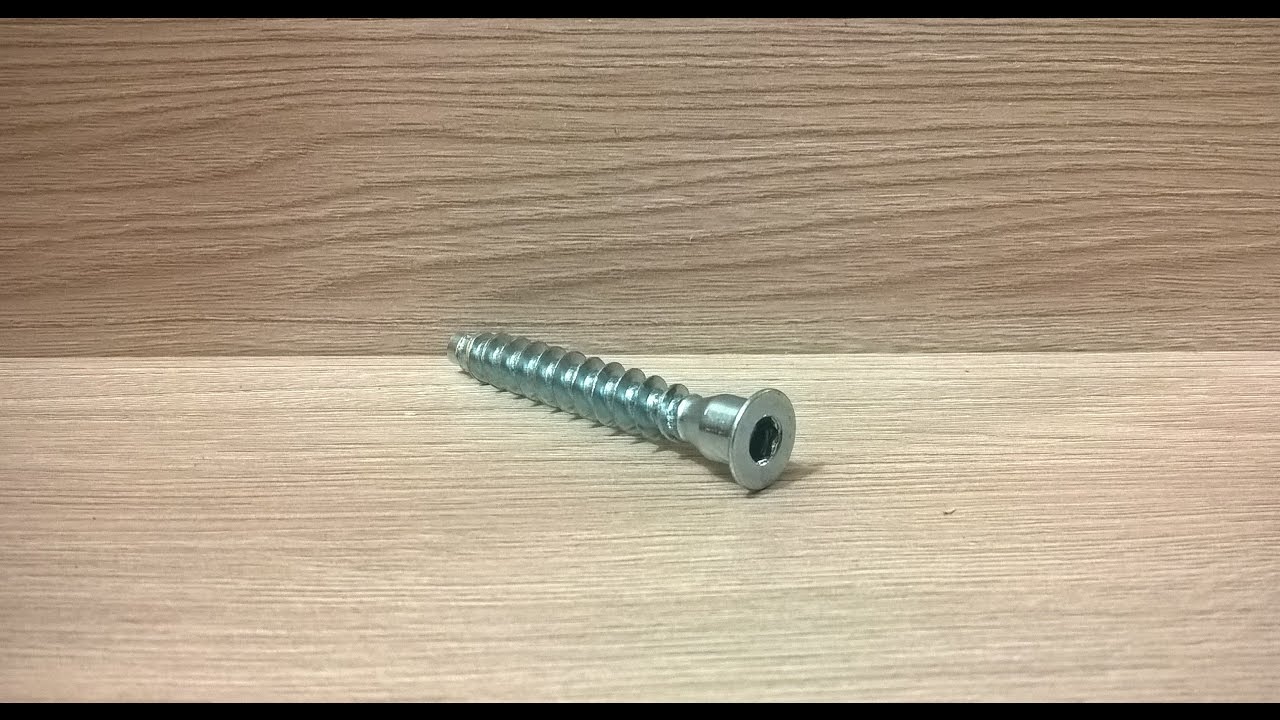
he is Euroscrew
he is Euro screw
he is screw tie
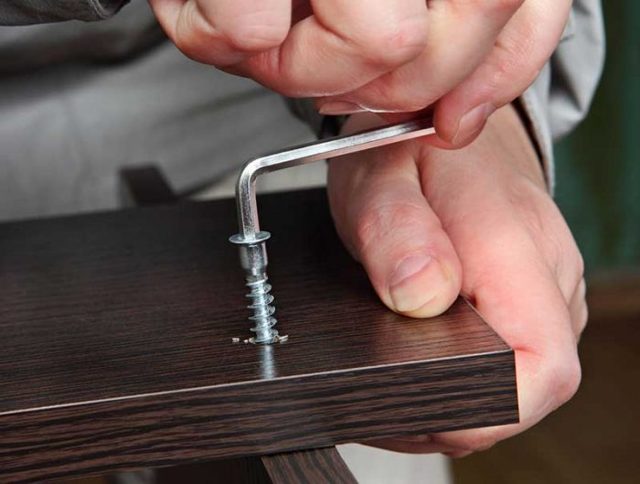
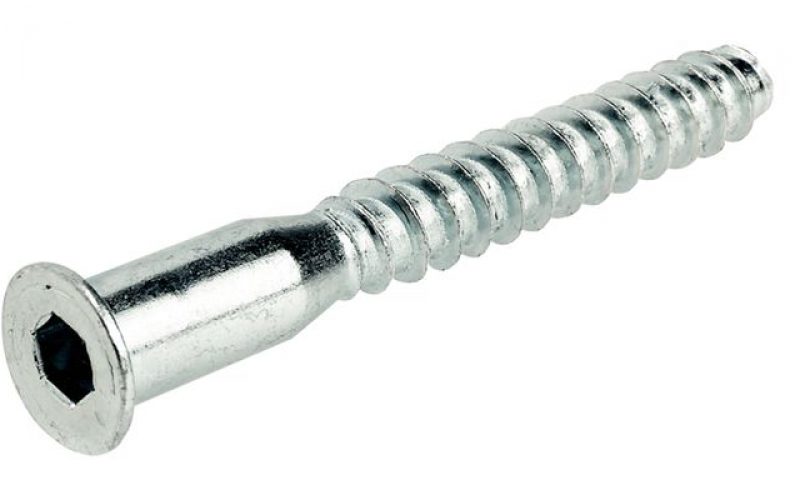
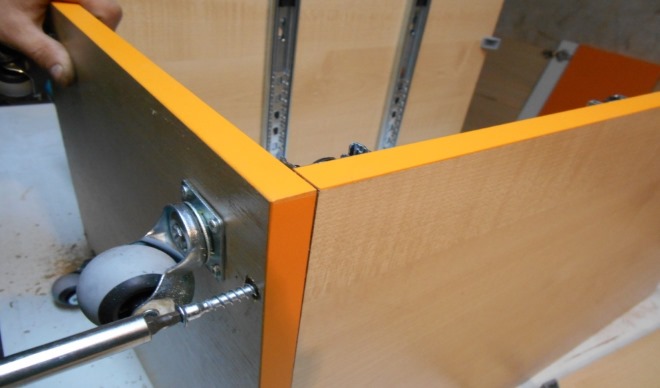
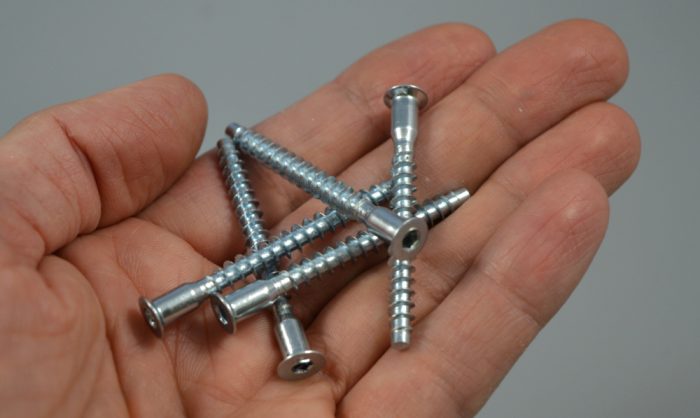
Is, simply put, a furniture screw. Loved by furniture makers for ease of installation and does not require special precision when adding - you only need a drill and a hex key for confirmation.
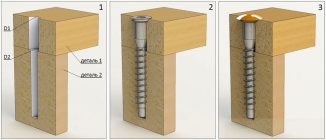
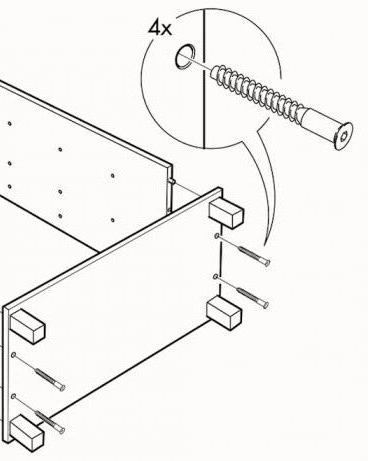
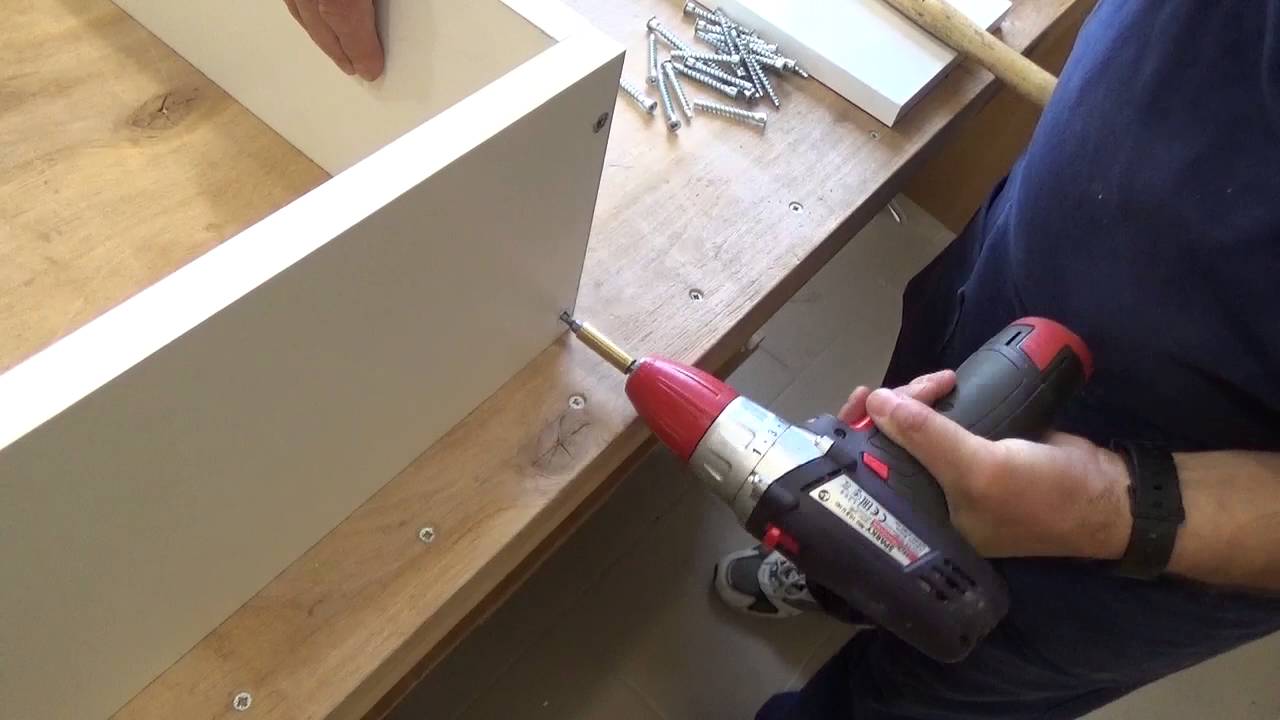
To install this tie, two holes are needed: one is drilled at the end
the main part, and the other is in the face
part that joins the main one. Confirmate is so simple to add that you can drill holes for it even in place during the assembly of the product. A beginner furniture maker will also cope with this.
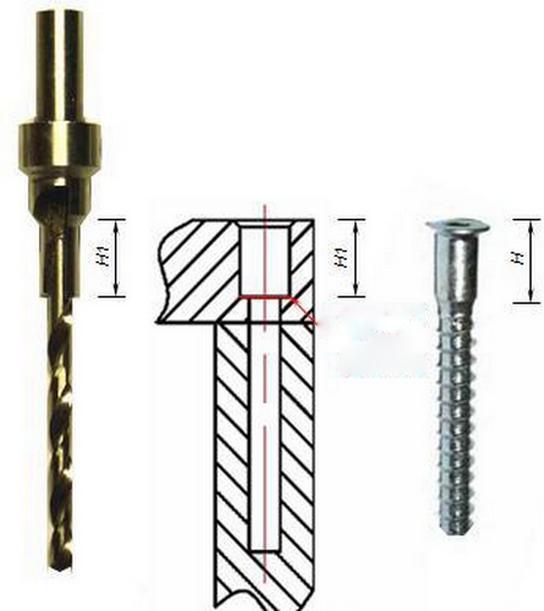
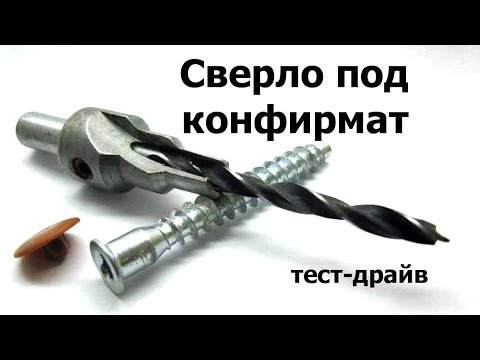
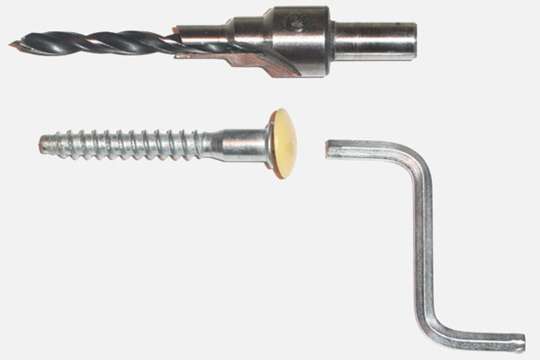
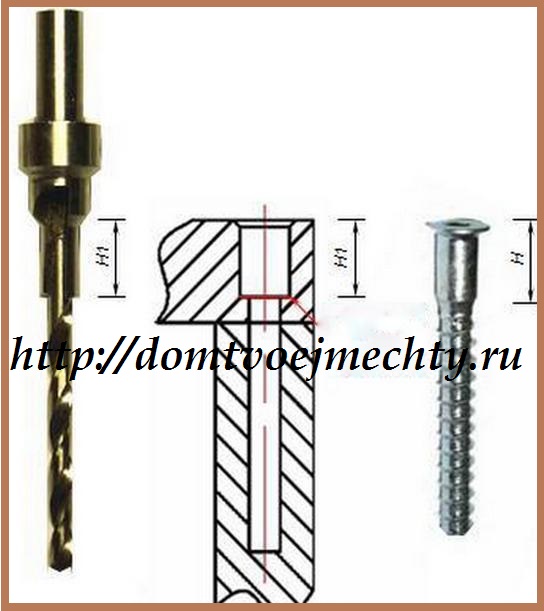
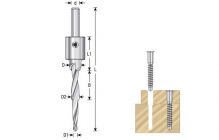
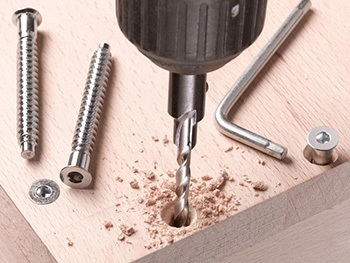
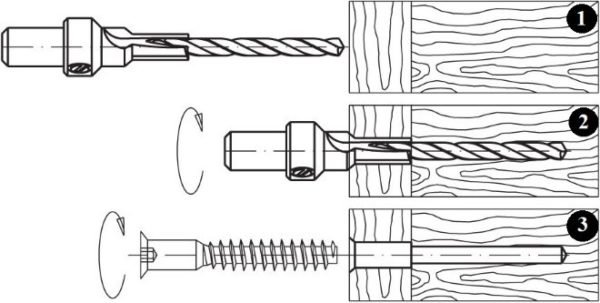
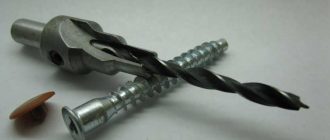
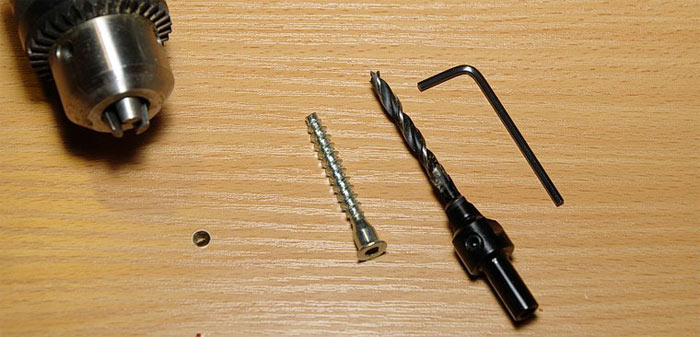
In order to simplify the drilling of holes for the Euro screw, a special drill is produced. consists of a cutter and a conventional drill. The cutter is designed for drilling a hole with a diameter of 7 mm (for the confirmation neck) and countersinking (for the confirmation head). The drill is inserted into the cutter skirt and clamped with a screw.

It is often not so easy to find such a drill on sale, especially in small towns. But even if you don't buy it, don't be discouraged, it has some drawbacks. This is my personal opinion.
The first thing I encountered when working with a drill for a confirmation is that with a large amount of work, sawdust gets clogged between the drill and the cutter skirt over time. This quickly leads to the failure of the drill. The clamping screw is loosened by vibration. We have to clamp it more often, so the edges on the key and, as a result, on the screw itself lick off.
I don't use a confirmation drill. I use two conventional drills (different sizes for thread and screw neck) and countersink.
An important nuance:
When drilling a blind hole in the end of the plate, it is important to maintain perpendicularity so that the drill does not pierce the wall of the part! Speaking my own
But, I digress a little. An article about the confirmation….
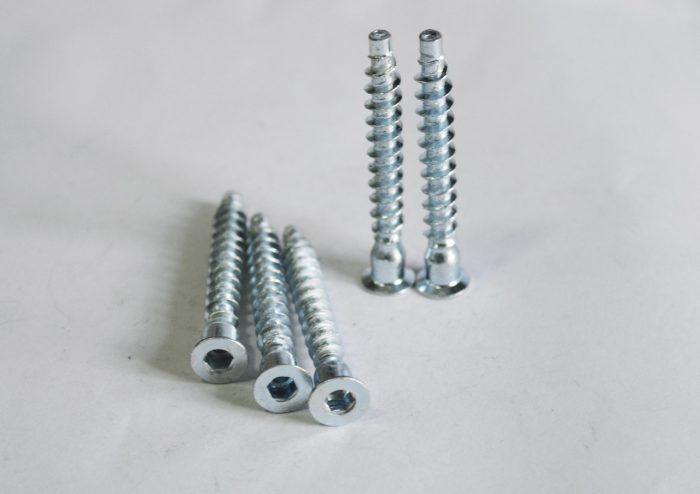
The most popular confirmation is 7x50. The screw tie is twisted with a special key by hand or with a hex bat using a drill or screwdriver.
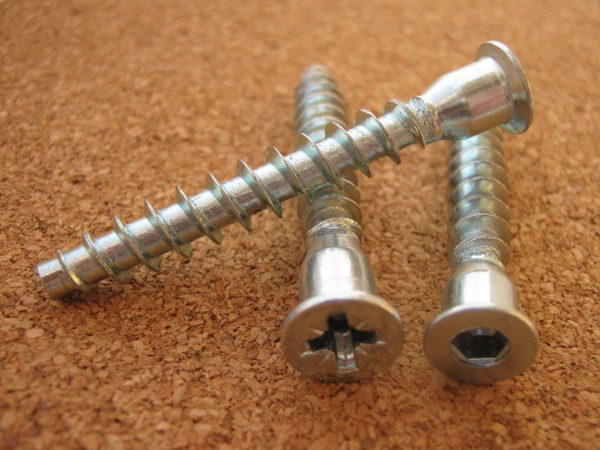
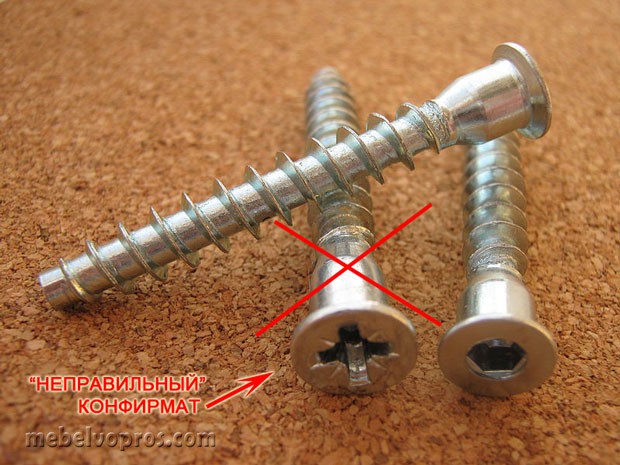
Do not buy confirmations made for a Phillips screwdriver under any circumstances! With such a Euro screw, you will not be able to tighten the parts as tightly as possible. This can lead to loosening of the product.
Cons of confirmation:
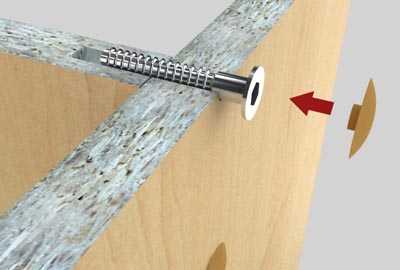
- this is not a hidden fixture. The hat is visible. It is usually closed with either a plastic plug or a sticker, matching the chipboard color.
- furniture that is assembled at confirmations does not withstand repeated assembly and disassembly (no more than three times). This is due to the fact that the confirmat cuts threads in chipboard - a relatively soft material. And with frequent disassembly, the threads can break.
Advantages of the confirmation:
- Confirmate is easy to install and does not require special equipment and precision when adding (as is the case with minifix). But you shouldn't relax. To make high-quality furniture, you need to accurately drill for any fastener.
- the confirmat tightens the parts tightly and reliably enough. It "sits" well in the material.
- withstands heavy loads.But in the case of fixing the shelf, which is expected to be well "loaded", the confirmat + dowel fasteners are used.
- can be corrected with a mallet. For example, align parts to ends. But in this case, it is better not to twist the confirmation from there.
In my opinion, the confirmation is convenient, reliable, and quick to use. But if the opportunity arises to use hardware or a device for more complex fasteners, I would choose an eccentric coupler.
P.S.
To help people who want to make quality furniture with their own hands, I am developing a chipboard device for drilling holes for an eccentric and a hinge (). Hope to post it on the site soon.
How to drill a hole for the confirmation
The confirmation is screwed into a previously prepared hole, so the question of how to drill such a hole is quite relevant. This will require the following tools and materials:
- screwdriver or electric drill;
- a bit of the appropriate size;
- drill for confirmation;
- a measuring tool, which can be used as a ruler (or construction tape);
- pencil;
- awl.
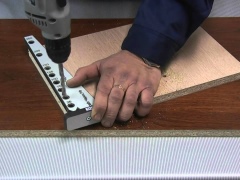
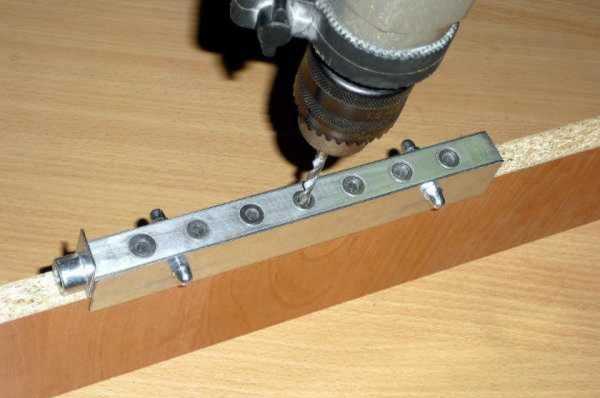
To facilitate marking and maintaining a strictly perpendicular position of the drill, use a template for drilling holes for confirmation
Hole dimensions for Euro screws
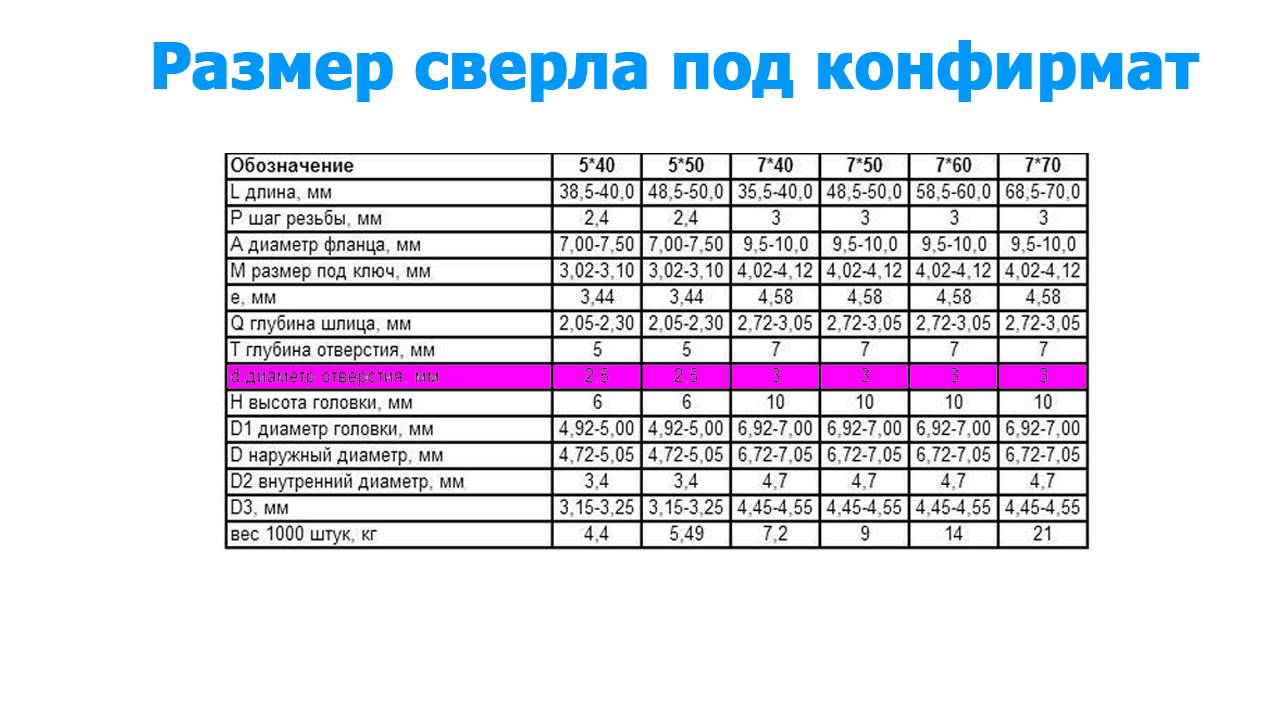
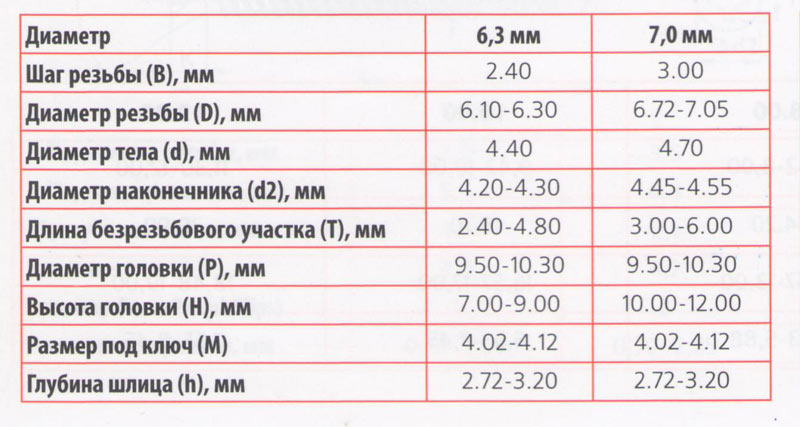
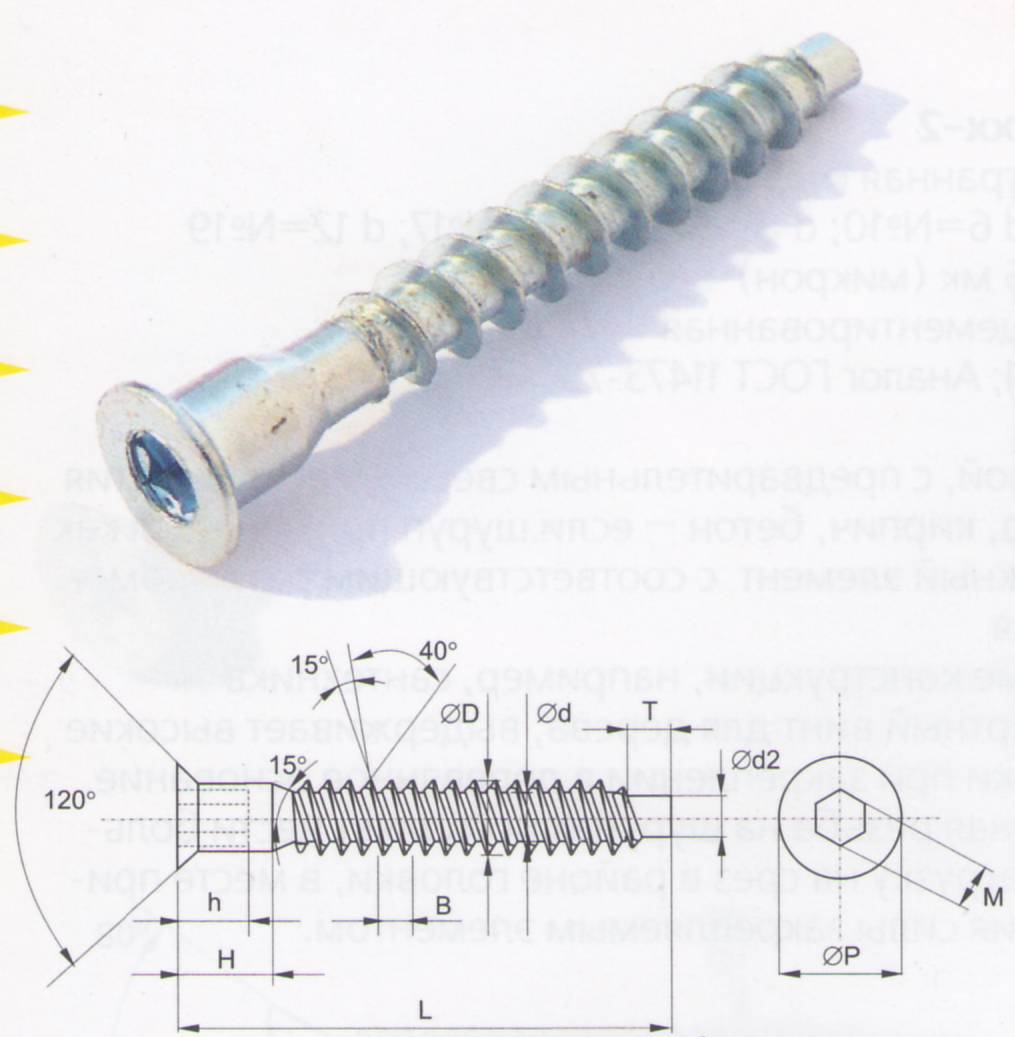
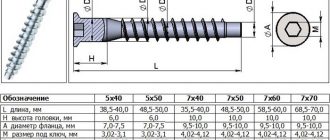
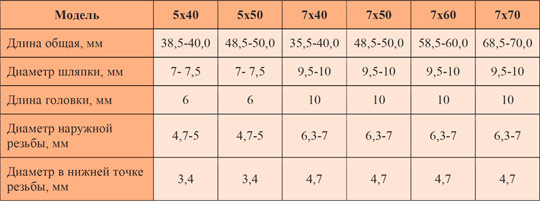
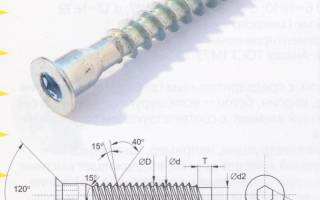
For the assembly of furniture, Euroscrews are usually used, the dimensions of which are 6.4x50 mm. To make holes for such a confirmation, the outer thread diameter of which is 6.4 mm, and the cross-sectional dimension of the screw body is 4.4 mm, a drill with a diameter of 4.5–5 mm is used. The holes for this type of confirmation must be drilled to a depth of at least 50 mm. If the hole diameter is greater than the specified value, then the Euro screw simply will not hold, if less, it can break the furniture element into which it is screwed.
The stepped drill is selected based on the dimensions of a specific model of Euro screw
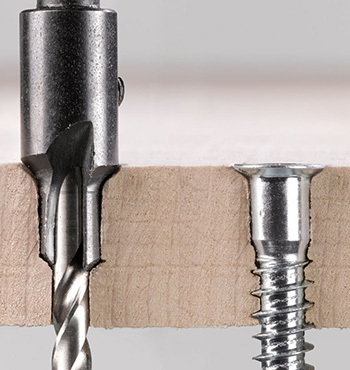
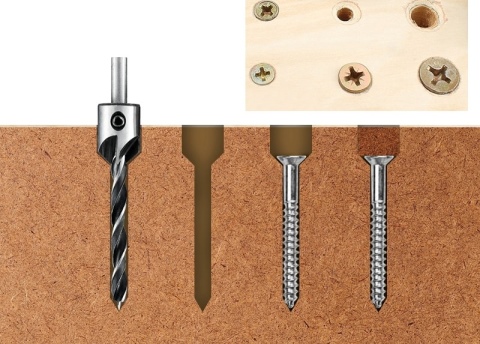
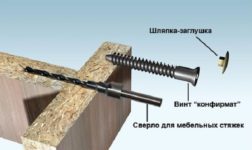
The drill, with which the holes for the confirmation are made, must be equipped with a special working head. On the one hand, it prepares an enlarged hole for the screw neck, on the other hand, it countersinks the place where its head will be placed. A conventional drill can be used to place the confirmation, but in this case it is necessary to prepare places for the neck of the fastener and its head.
Drilling location marking
The reliability and quality of the connection made using confirmations largely depend on the accuracy of the marking of future holes for them. On the element that will be superimposed on the end of another element of the furniture structure, two types of markings are made:
- drilling depth (5–10 cm);
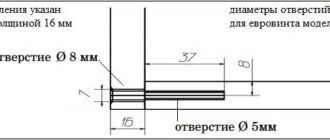
- the center of the future hole (if the thickness of the part to be joined is 16 mm, it should be at a distance of 8 mm from the edge of the plate).
Drilling pattern for Euro screws
To mark the drilling points as accurately as possible, you can use the following simple technique: in the superimposed part, after preliminary marking, a through hole is made through which, by attaching the first part to the second, a rotating drill marks the location of the second hole for the euroscrew.
Making holes
In order to make the holes for the placement of confirmations as efficiently as possible, it is advisable to follow the recommendations below.
- Before drilling the part, it is necessary to put a piece of unnecessary chipboard under it: this will avoid the appearance of chips at the exit of the hole being created.
- The formation of places for the neck and head of the confirmat in an already made hole can be done by holding the workpiece on the weight.
- When drilling both in the layer of the part and in its end face, the drill is placed strictly perpendicularly. This will allow you to get a high-quality result and not damage the part.
- When drilling two parts at the same time, they must be securely fixed in the desired position, for which you can use clamps and other clamping devices. This is the most accurate and fastest way to create confirmation holes.
- When drilling holes for dowels, it is advisable to equip the used tool with a depth stop, which will allow not to spoil the workpieces by drilling them through.
Recently, the confirm screw, or as it is often called, the Euro screw, has become a common furniture fastener. This is a simple but rather reliable type of fastener that can significantly speed up the furniture assembly process. However, despite the simplicity, in working with Euro screws, there are certain subtleties regarding the preparation of holes for them.
Assembly of coaxial shelves by confirms by "helicopter"
The shift principle is also used when it is required to fix the planks in a row. For example, for fixing a tabletop in a cabinet.
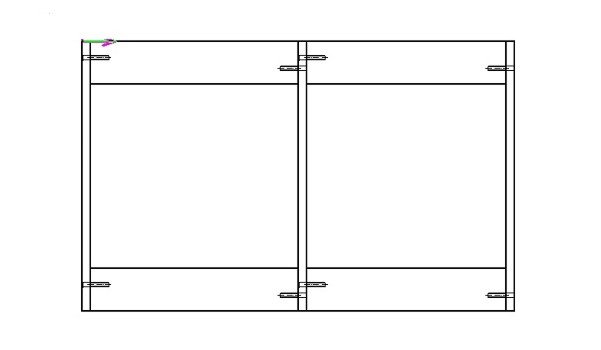
This principle of assembly on confirmations is called "helicopter". To tighten the fasteners on the adjacent bar, the first one must be rotated about the axis of degrees by 90. The same "helicopter principle" is used to fasten the coaxial shelves, albeit in a slightly different form.
In words, three holes are drilled into the front one, one in the center, two along the edges. The assembly by confirms is carried out as follows: the beginnings are fastened, for example, to the shelf on the right through the central hole. Then it is unfolded about the axis and attached to the two confirmations of the left shelf.
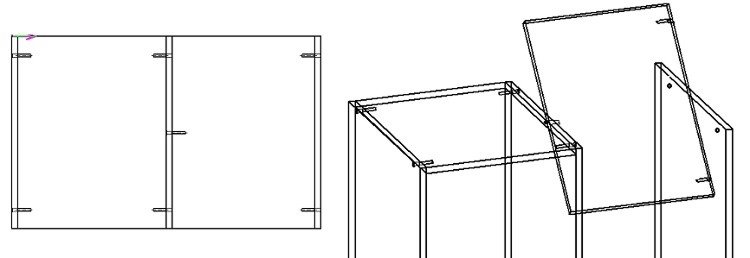
And then the right shelf is returned to its original place. Opposite parties are collected for confirmation in a standard way. As a result, it turns out that the shelf on the right is supported by three fasteners, and the left shelf - on four. If the shelves are wide and there are doubts about the strength of the side fixed to the three confirmations, you can strengthen the shelf with a stiffener or additional fasteners in the form of corners or eccentrics.
How fasteners are made using Euro screws
To use confirmations, certain skills are required in working with such fasteners, as well as knowledge of the characteristics of the material from which the products to be joined are made. Drilling for confirmation is performed with a tool with a diameter of 4.5–5 mm. In this case, it is best to use drills on which a stepped cutter is fixed, which allows you to immediately chamfer the screw head location. Using such a tool, you can get a finished hole in one pass. In this case, the cutter forms an ideal surface for the screw head, which cannot be said about the drill, which, when removed, can leave chips at the edges of the hole (however, they will be covered later by the confirmation head).
Euro screw installation sequence
Euroscrews, when compared with other types of fasteners, provide a more reliable fixation of the parts to be joined. This is explained by the wider arrangement of the threaded elements, which reliably cut into the material. Confirmates are installed manually, as well as using an electric drill with appropriate attachments or a screwdriver. For those who do not have experience with such fasteners, it is better to install them manually, so that in case of excessive resistance of the screw, it will be possible to remove it from the furniture elements to be connected at any time.
Device manufacturers
The correct name for the fastener is single piece tie. They use this term to fill in data when ordering, to draw up reporting documentation at specialized enterprises. In everyday life, it is more common to hear other names, for example, "Euro screw", "Euro screw".
The word confirmat originated from the trade name of the company Hafele from Germany Confirmat. This category of fasteners appeared in the 70s of the last century, but they gained real popularity in the 90s.Since then, products have been produced by many domestic and foreign manufacturers, including the Hafele company, which has been successfully operating to this day.
The demand for products is covered in large volumes by Russian enterprises. These are CJSC Izhevsk Furniture Accessories Plant FMS, JSC Metallist and many others. Products of Chinese manufacturers are widely represented on the market, the quality of which is not always up to the mark. But one of the oldest enterprises in China, Haining Yicheng Hardware Co., Ltd. you can trust.
Marking of places for drilling holes for confirms
In order to qualitatively fasten the two parts, you need to mark the places of their attachment as accurately as possible.
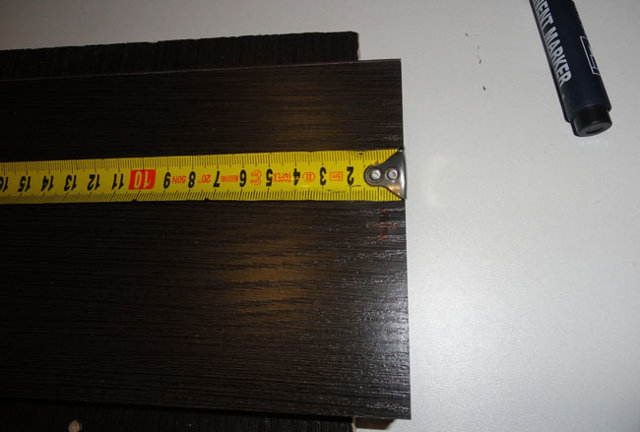
For example, for parts that fit on the end, these are those on which there will be through holes, you need to make two measurements, one in length is usually 5.0-10.0 centimeters, and the second from the edge is exactly 0.8 centimeters (since the thickness of our part with chipboard is 1.6 centimeters, you may have another).

A hole in the part, which lies perpendicularly to be drilled at the end face, respectively, and the marking occurs at the end face of the part. Therefore, we maintain exactly the same distance along the length, namely 5.0-10.0 centimeters and along the width strictly in the center of the end face of the part 0.8 centimeters from the edge, respectively.
The most accurate marking is needed not only for a high-quality connection of parts, but also in case of incorrect marking, and subsequently the joining of parts, there may be unnecessary protrusions or gaps.

Therefore, in order not to be mistaken with the calculations, drill a through hole, then correctly join the parts and mark the drilling point at the end with a drill. Then remove one part and confidently drill a hole in the end of the part.
Drill manufacturers for confirmation
A drill for Euro screws is a more complex tool than conventional cylindrical twist drills. Therefore, his choice should be approached responsibly. There are many manufacturers on the cutting tool market today.
Among this diversity, the following characteristic groups can be distinguished:
- domestic production tool;
- cheap Chinese instrument;
- quality Chinese instrument;
- especially high-quality tool of recognized European manufacturers;
- especially high quality tool from North American companies.
It should be said right away that a cheap Chinese instrument can be identified by its appearance. It often lacks even markings, and the surface of the tool may have irregularities and chips.
And if the cutter can withstand a large number of work cycles, then the drill itself quickly fails and needs to be replaced. In a cheap Chinese tool, the fastening screws very often do not fix the drill in the cutter, and it turns during operation. This leads to the formation of a poor quality hole in the wood. The connection of parts with such processing will not be reliable enough.
But there are also good drills made in China. Finding a good Chinese drill for furniture ties can only be done by trial and error, or by getting advice from the lucky owner of such a tool.
The drill for furniture screed of domestic production is slightly better than the cheap "China", since good grades of steel are used in the production.
If you use the tool in your professional activities, you should probably pay attention to American, Western European and Scandinavian brands. These companies produce a reliable tool and provide a guarantee on it for up to a year.
Such brands as "Brigadier", "DeWault", "Hafele", "Archimedes" are definitely trustworthy and time-tested.
How to choose a drill?
Two things are decisive - the drill size and the manufacturer. Let's start with the latter.
On sale there are often drills for confirmations made in China. At an outwardly attractive price, such a tool does not have a stable durability.The reasons are the inadequacy of the steel grade to the conditions under which it will operate, and the violation of the heat treatment of the material.
A Chinese drill for confirmation can be made of ANY tool steel (it is also good if from 9XC, but there is a tooling made of U7 or U8 steel). Such a drill is released quickly enough during operation, as a result of which its hardness (initially, it seems, and corresponding to the above values) decreases, and the tool becomes dull. The worker instinctively increases the pressure on the tool, but the result can be chipping or even destruction of the material in the hole area. An inappropriate heat treatment mode leads to a possible bend of the drill during operation, and this will not appear immediately, but when trying to sequentially get several holes for confirmation. Therefore, it is safer to purchase drills under the confirmation of domestic production (products of the Tula Tool Plant are quoted, as well as products from OOO BSI-instrument), or made in America (DeWalt trademark) or Switzerland (Archimedes brand)
Prices for the goods under consideration are as follows: for domestic drills for confirmation, depending on the diameter and length - from 150 to 220 rubles, for imported - from 520 rubles.
When choosing a drill for a confirmation, it is worth paying attention to its technological characteristics:
- The depth of the seating part of the drill should correspond to the size of the smooth part of the confirmation rod.
- The angle of the countersink part of the stop should be 45 °, with a small radius transition to the threaded part of the drill.
- The feathers should have minimal roughness.
- The drill for confirmation can have a collapsible and non-collapsible design (in the latter case, the drill is pressed into the stop). This will not affect the quality of the hole, but the one-piece version is less versatile. In turn, the fastening of the collapsible drill should be periodically tightened with the locking screw.
- To work with confirmation drills, only a high-speed tool is required.
Drilling rules
Drilling holes for confirmations requires following certain recommendations and occurs in the following order:
Prepare wooden parts, clean their surface from chips and dirt.
Pre-mark the hole.
Align the parts in relation to each other and fix them securely. If these are small parts, you can do it on a workbench. There are special clamps commercially available that orient flat parts at a 90 degree angle. If they are large, it may be advisable to fix them with dowels.
Check the correspondence of the selected drill to the used standard size of Euro screws.
Drill for confirmation. The drill should be oriented at right angles to the face of the part. Even a slight misalignment can ruin the hole. We recommend using special drilling templates.
Screw the confirmate into the hole obtained using the hex wrench.
Alternatively, if it is difficult to orient the parts and drill in both at the same time, you can drill round holes in each separately. Then align their axes and carry out the final drilling with a special tool
In this case, it is important to make high-quality markup.
What is a confirmatory, what does it serve
Confirmation is the same screw that has its own design features. The body of the screw is more massive, made of high quality steel with an anti-corrosion coating. The grade of the material allows the screed to not break during twisting and under bending loads. Self-tapping thread with wide pitch. The cap has a countersunk design, and the screw head is lengthened. The slots for the tool come in two versions - for a figured screwdriver and a hex key. There is no usual sharpening at the end, it is blunt.There are modifications of Euro screws, in which the head has a cutting surface.
Single-element screed (confirmat) is suitable for joining wood blanks, boards made on the basis of wood waste (OSB, chipboard, as well as fiberboard, MDF), and plywood. In addition to connecting the elements, the Euro screw performs a frame-forming function, because it replaces the traditional corner, withstanding all bending loads. Furniture confirmations are supplemented with special plastic plugs. They mask the visible part of the hat to match the color of the furniture.
Homemade jig for drilling the ends of parts
When assembling any structures from chipboard or MDF, there are always parts that fit at right angles.
And in this case, some of them are drilled (for fasteners) along the outer plane, and others (those that are joined to them) - from the ends.
The end face of the part must be drilled exactly at right angles.
This is very important for the following reasons:
When the end face is drilled at a right angle, this is a guarantee that internal stresses will not arise in the fastener that violate the geometry of the entire structure.
With accurate drilling, you will always get an even (correct) joint (this is especially important for connections using dowels, since they cannot be adjusted).
These are purely technical reasons.
But there are also organizational ones….
Often, furniture makers drill the end holes by hand (for example, I always do this). I don't know, maybe whoever turns them out perfectly correct, I still get a slight bias. But, whatever you say, but "the hand is full", and the whole process is done "automatically."
Problems arise when helpers (collectors) are needed.
Without proper skill, an inexperienced assembler can not only crookedly drill the end face of the part, but in general, spoil it (the drill can "crawl out" from the front side of the part). In short, this is one of the most "shoddy" moments for inexperienced collectors.
Also, with a large volume of production, it is not advisable to drill the ends of the parts by hand for the reason that it takes quite a long time.
Therefore, sooner or later, people involved in the manufacture of furniture come to the idea of mechanizing this process. And thought, as you understand, is always followed by action.
This question, of course, in any case we solve: you can buy a ready-made drilling and filler machine, and work for yourself in pleasure.
But these machines are not cheap.
If you read my blog, you probably "caught" that the whole point of furniture production (in particular, the production of cabinet furniture) is that it can be organized, with practically no investment. And if so, then any furniture maker will be more interested in the opportunity to make such a device himself (when the cost of which will tend to zero) than to buy a ready-made factory machine.
Here, we will talk about similar products that can be made from scrap materials.
So, the first device is a piece of a tabletop on which a drill is permanently fixed. The part is fed to the drill.
To make such a jig, you need to make grooves for the guide and for the ruler (on a milling machine). The larger the ruler fixing the part, the larger parts can be processed on this device.
The drill itself is fixed between two pieces of chipboard (tightened together with screws), and set in height (so that the drill exactly hits the center of the part).
The next option is more versatile and "advanced".
A drill is installed on the table, which is fed to the desired depth by pressing the pedal (under the table).
This device is capable of processing large parts.
Next is a table with a ruler.
On the carriage, the engine is fed to the desired depth from the washing machine, on which a chuck with a drill is installed.
The principle of operation is simple. Pull the lever - and the drill enters the desired (pre-set) depth into the part.
Well, in conclusion - a small device that is suitable for those who simply do not have a place to install stationary templates, because of the small workspace.
In the end, I would like to note that there is a "sea" of such self-made conductors. This overview is provided simply as an example. Everyone comes up with what is more suitable for him (based on the possibilities) to facilitate work and save time.
Conclusion
For those who just want to learn how to assemble furniture with their own hands, the ideal way to master this business is to apply a confirmation. The dimensions here must be kept as accurate as possible. In order for the ends of the parts to be connected to be even, it is necessary to have an exclusively right angle with respect to the plane. Then the assembly of furniture with Euro screws will simply delight and enthrall.
Confirmation he is Euroscrew he is Euro screw he is screw tie Is, simply put, a furniture screw. Loved by furniture makers for ease of installation and does not require special precision when adding - you only need a drill and a hex key for confirmation.
To install this tie, two holes are needed: one is drilled at the end the main part, and the other is in the face part that joins the main one. Confirmate is so simple to add that you can drill holes for it even in place during the assembly of the product. A beginner furniture maker will also cope with this.
In order to simplify the drilling of holes for the Euro screw, a special drill is produced. consists of a cutter and a conventional drill. The cutter is designed for drilling a hole with a diameter of 7 mm (for the confirmation neck) and countersinking (for the confirmation head). The drill is inserted into the cutter skirt and clamped with a screw.
It is often not so easy to find such a drill on sale, especially in small towns. But even if you don't buy it, don't be discouraged, it has some drawbacks. This is my personal opinion.
The first thing I encountered when working with a drill for a confirmation is that with a large amount of work, sawdust gets clogged between the drill and the cutter skirt over time. This quickly leads to the failure of the drill. The clamping screw is loosened by vibration. We have to clamp it more often, so the edges on the key and, as a result, on the screw itself lick off.
I don't use a confirmation drill. I use two conventional drills (different sizes for thread and screw neck) and countersink.
When drilling a blind hole in the end of the plate, it is important to maintain perpendicularity so that the drill does not pierce the wall of the part! Speaking my own
But, I digress a little. An article about the confirmation.
The most popular confirmation is 7x50. The screw tie is twisted with a special key by hand or with a hex bat using a drill or screwdriver.
Do not buy confirmations made for a Phillips screwdriver under any circumstances! With such a Euro screw, you will not be able to tighten the parts as tightly as possible. This can lead to loosening of the product.
- this is not a hidden fixture. The hat is visible. It is usually closed with either a plastic plug or a sticker, matching the chipboard color.
- furniture that is assembled at confirmations does not withstand repeated assembly and disassembly (no more than three times). This is due to the fact that the confirmat cuts threads in chipboard - a relatively soft material. And with frequent disassembly, the threads can break.
- Confirmate is easy to install and does not require special equipment and precision when adding (as is the case with minifix). But you shouldn't relax. To make high-quality furniture, you need to accurately drill for any fastener.
- the confirmat tightens the parts tightly and reliably enough. It "sits" well in the material.
- withstands heavy loads. But in the case of fixing the shelf, which is expected to be well "loaded", the confirmat + dowel fasteners are used.
- can be corrected with a mallet. For example, align parts to ends. But in this case, it is better not to twist the confirmation from there.
In my opinion, the confirmation is convenient, reliable, and quick to use.But if the opportunity arises to use hardware or a device for more complex fasteners, I would choose an eccentric coupler.
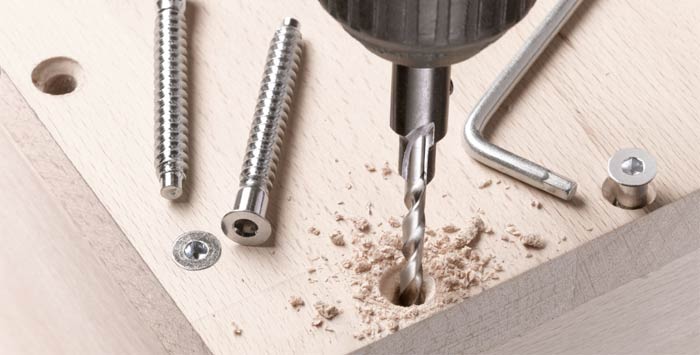 For the purpose of accurate and reliable fastening of corner pieces of furniture, confirmates are used - screw-like fasteners, with the help of which the coordinated mutual position of the individual parts of the structure is ensured (the word, apparently, comes from the English. To confirm - to reinforce). Sometimes the confirms are called Euroscrews. For frequent production of holes for confirmations, it is better to have a specialized drill.


