Lamination of interior doors: which film to use
When pasting a door, it is better to refuse to use cheap PVC film. It is advisable to apply the "self-adhesive" D-C-FIX, it is strong enough and will last over 10 years. This decorative coating does not crack over time, does not fade from sunlight.

D-C-FIX foil for door lamination
On sale you can see the film in rolls. The width of such a roll is 45 cm, 90 cm, 67.5 cm. The retail price of high-quality German film is on average 1.7 thousand rubles.
Various variations are offered, you can choose:
- the semblance of a stone;
- imitation of wood;
- another pattern.
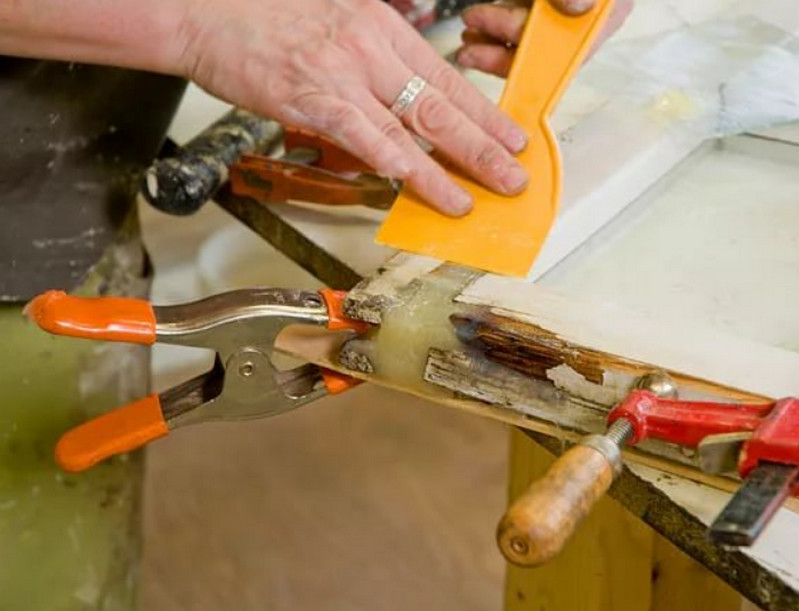
It is undesirable for one to glue the film, it is better to enlist the support of someone. When cutting out the material, it is advisable to use patterns. If small bubbles form, they should be removed immediately with a wide plastic spatula. When the bubble cannot be removed by squeezing out the air, it is pierced with a thin needle.
Video: Restoration of an old door from A to Z:
Interior door restoration
If the interior structure is fully functional and durable, then no repairs are required. In this case, you may need to carry out a small restoration with your own hands. This process involves restoring the appearance and structure of the canvas.
The restoration is optimal in situations such as:
-
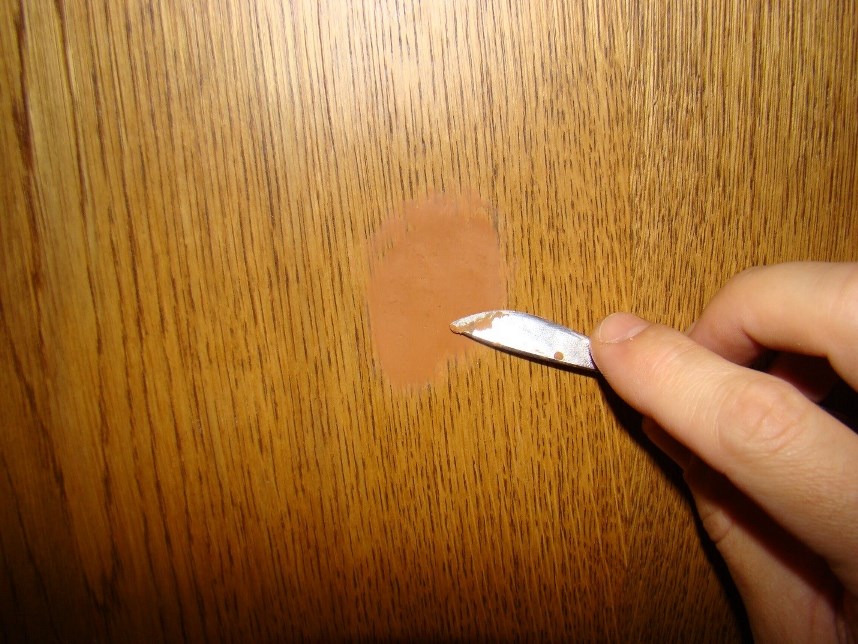
scratches, small abrasions on doors made of natural wood or veneered, laminated models can be easily removed with a furniture marker, wax or corrector. Funds must match the color of the canvas. A small amount of the composition is applied to scratches and rubbed lightly, and the excess is removed with a napkin;
-
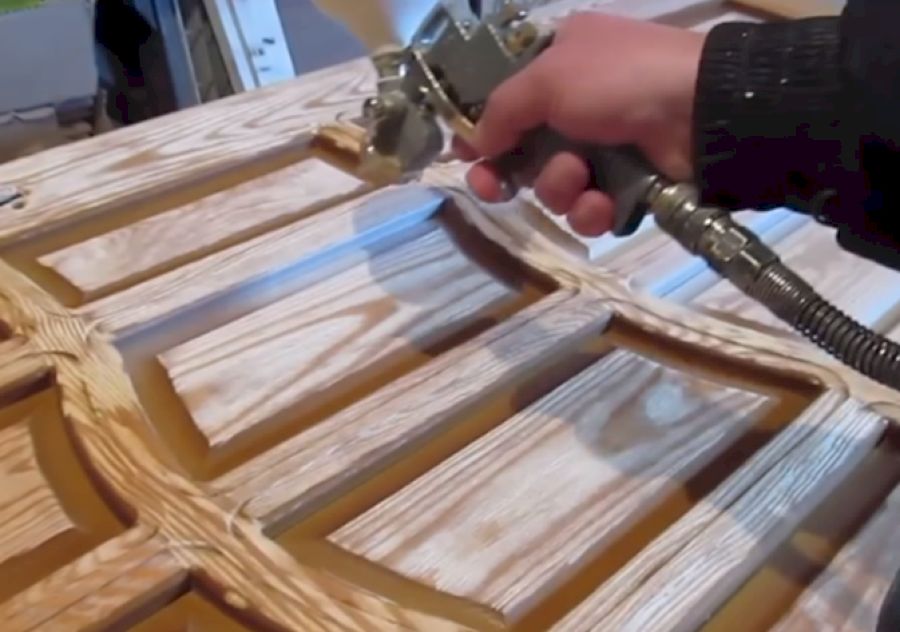
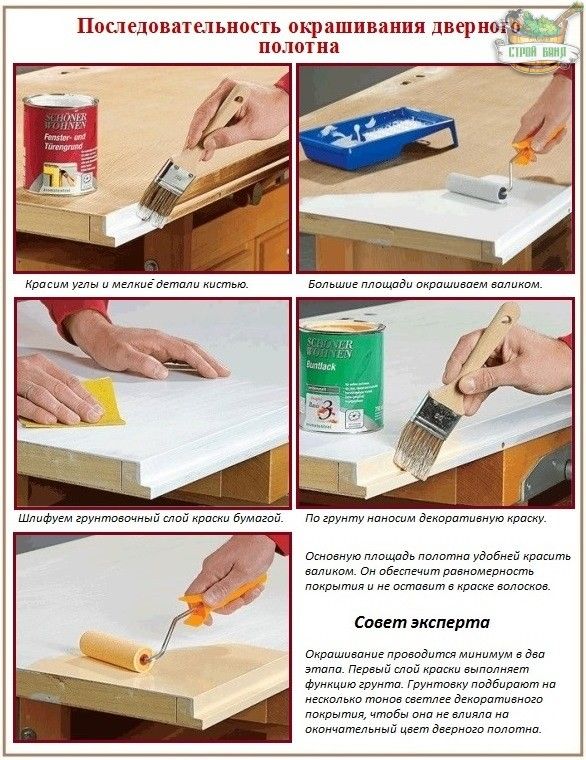
painting of the interior linen is carried out only for wood products. Options with a laminated or veneered layer are not subject to this procedure, because the paint on such a surface will be unethical. Painting can be done with a brush or spray gun. In any case, the door must be prepared: remove the old varnish with a grinder or remove the paint with a spatula and a hair dryer. The surface is sanded with fine-grained sandpaper, dust is removed with a brush and a new coating is applied in 2 - 3 layers;
-
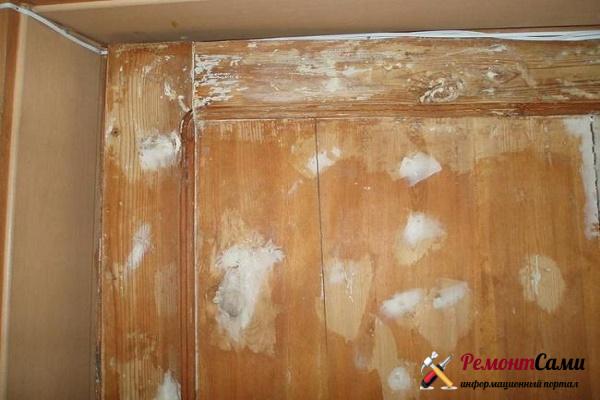
cracks, cracks and holes up to 1 cm can be masked with acrylic filler. The color of this product should match the shade of the canvas. The composition is applied and distributed over the crack, leveled and removed with a napkin. After drying, you can repeat the procedure, as the putty may settle. Further, it is possible to paint this place, varnish;
-
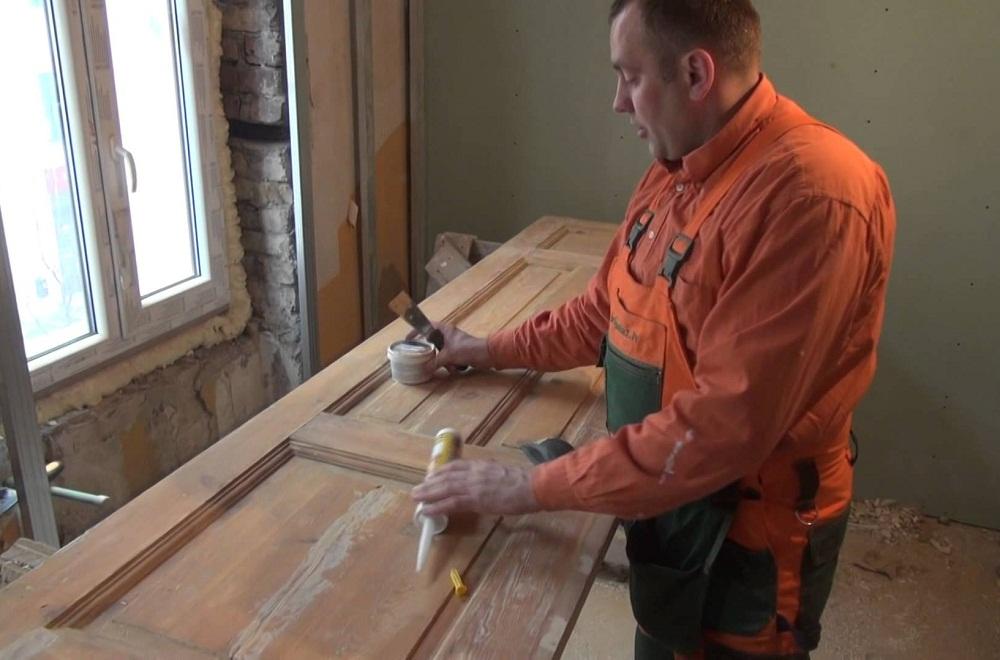
peeled veneer or laminated film can be glued with PVA glue. To do this, an adhesive is applied under the peeled surface with a brush, and then this part of the web is clamped with clamps or placed under the load. Such actions are required to remove the door from the hinges.
Restoration of wooden, veneered or laminated canvases involves the elimination of minor flaws. If the frame is damaged, there is a large detachment of the film and other volumetric defects, then it is best to replace the door with a new one or contact a professional about the restoration.
Which windows makes sense to restore
It would seem that a completely damaged window frame is still fully subject to restoration.
In order to assess the feasibility of the restoration, it is necessary to take into account the material from which the frames are made. Larch and pine have a life span of 25–35 years, and beech and oak have more than 50 years.
The restoration will not meet your expectations if:
- there is a complete loosening of window frames in the openings;
- the wood of the windows is dry;
- the structure of the tree looks loose, when pressed, dents remain;
- dark spots appear under the paint (under them, as a rule, dust and rot);
- windows are seriously damaged (frames are split, etc.);
- visual inspection shows that the frames are bent or strongly deformed during operation.
Before restoring, also pay attention to the fact that the wood must be dry.
Masking scratches

Veneered doors can be scratched with claws by pets, playing kids. They also suffer from moving furniture, bicycles and strollers. Scratches are conspicuous and spoil the look. Veneer door wax for minor damage is the best option. To do this, it is worth acquiring a material that matches the color of the finish.
Damage can be repaired in the following ways:
If the scratch is small, then before restoring the veneered door, you need to cut off a small piece from the wax pencil, literally a pinch, hold it in your hand for half a minute, so that the material becomes soft and begins to melt. After that, the wax must be rubbed into the scratched place, and then the veneered door must be polished. To add shine, it is worth using polishes, they also include wax.
If the scratch is significant, then it must first be cleaned
This must be done carefully so as not to damage the upper protective coating (varnish). Sandpaper with minimal grit is suitable.
Then wipe off dust, degrease a well-protected scratch. Then you need to drip melted wax into the grooves. Immediately, until it is completely frozen, its excess should be removed.
The restoration of veneered doors with wax has one nuance. If there were a lot of scratches, they were filled with wax, then such a sash then cannot be painted or covered with any varnish. Paints and varnishes do not “stick” to such material, and the wax itself will gradually begin to pour out of the scratches.
Door restoration step by step

Most often, after repair, wooden doors are treated with paint or varnish. Consider how, in this case, repair and restoration should be carried out.
Preparatory stage
Before repairing a wooden door, it must be removed from its hinges, placed on the floor or table, so that it is convenient to work. The upholstery should now be removed, if any.
Removing the blade from the hinges is carried out using a screwdriver and a hammer. Look at the hinges attached to the door frame, perhaps they should be reinforced with longer screws or changed altogether.
Removing paintwork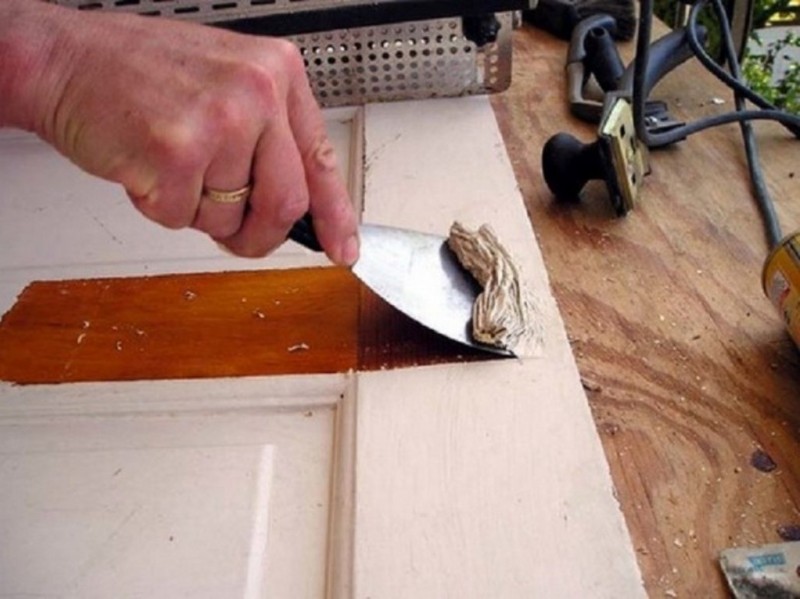
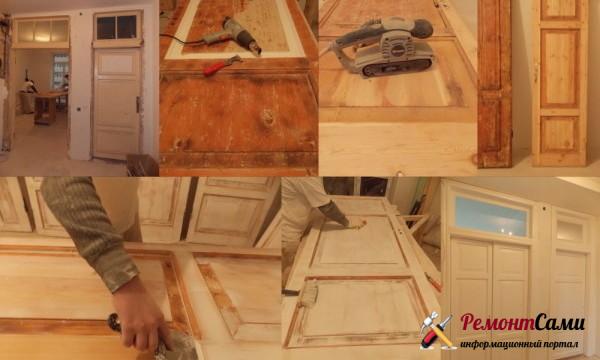
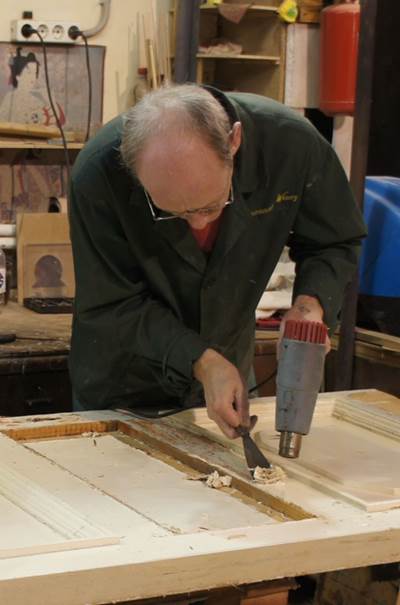
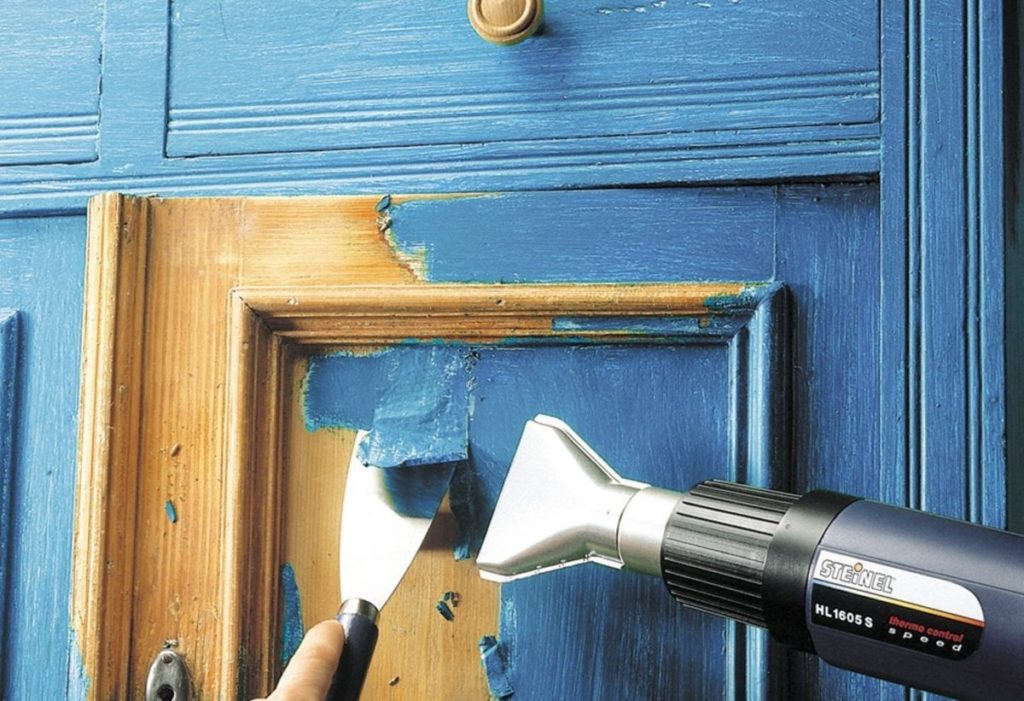
Before you repair a wooden door, you should get rid of the old coating. The easiest way to do this is with a construction hairdryer and a spatula. We pry the paint with a spatula, and heat it up with a hairdryer to such a state that it quickly falls behind. Remember that the appliance heats surfaces quickly and very well, so do not get too close.
Every 15 minutes, the hair dryer needs to be given a rest, otherwise the instrument will quickly become unusable. In hard-to-reach areas of the door leaf, for example, in the corners, you need to remove the paint layer very carefully so as not to damage the door base.
Grinding

After removing the paint with a spatula, sand it. This process will help get rid of any residual finishing material. You can perform the action manually using sandpaper, or you can use a grinder.
Elimination of defects

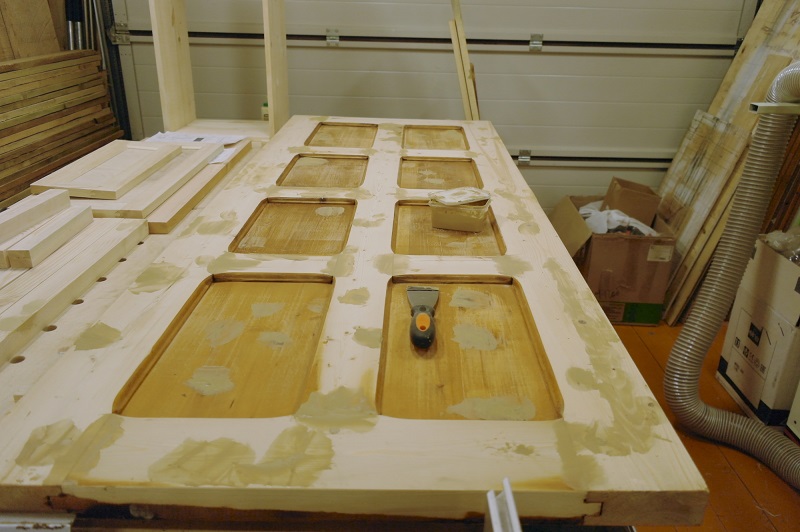
At this stage of repairing the entrance wooden door, we start using putty
We apply the composition in an even layer on the canvas, paying special attention to depressions and irregularities. After the surface is completely dry, you should once again walk over it with medium-grained emery paper.
It is convenient to do this by attaching emery to a wooden block. Perform the action in the direction of the wood fibers so that in the end there are no traces of sanding.
If you plan to varnish the door, sand very carefully and efficiently. Because when treating the surface with a transparent compound, all defects will be visible.
When you are finished sanding, wipe the door with a sufficiently damp cloth, and then again go over the surface with fine-grained sandpaper.
Painting

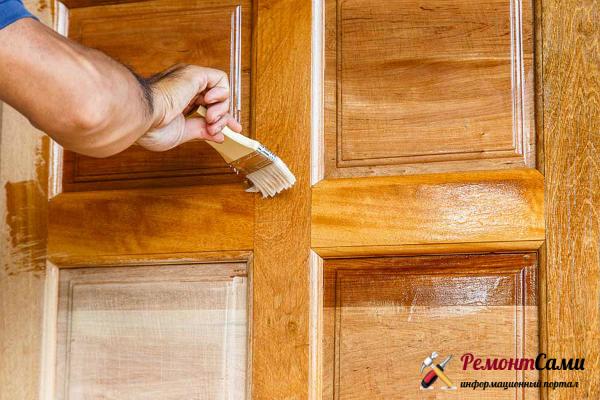
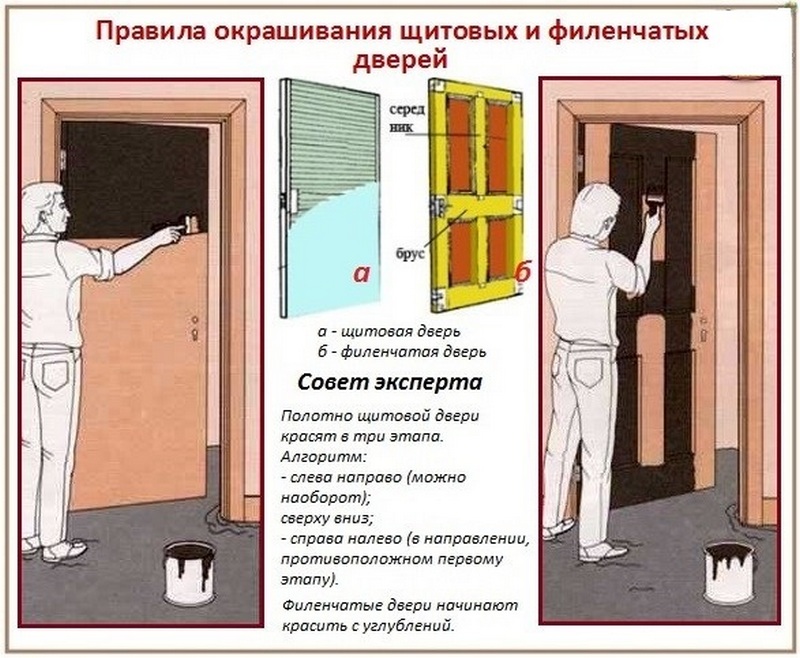
The final stage of the restoration of the entrance wooden door. Painting needs to be done in several layers. Apply the first ball with a brush or roller, moving along the line of the wood fibers. It is enough to apply the paint in two layers if it is thick and saturated. We begin to apply the second layer only after the first one has completely dried.
In the case when the color is not saturated enough, the wood should be treated with white enamel before painting. The color composition will fit well on it, and will not look transparent.
It is best to apply both coats of paint in the same direction. For example, if you applied the first ball from left to right, then the second must be done in the same way.
Toning
 This stage can be performed if you want to make the door especially original and beautiful. Toning is done with very liquid paint, and therefore all work must be done very carefully. We apply the composition with a brush, the number of layers will depend on individual preferences.
The tinting paint dries in about 8-12 hours. More details can be found in the manufacturer's instructions. After the surface is completely dry, you need to walk over the door with zero sandpaper.
The finish
When the repair and restoration of wooden doors is completed, you need to put all the fittings in place - handles, locks, latches, and so on. After that, we return the canvas to its place, securing the loops.
Do-it-yourself door repair: step-by-step instructions
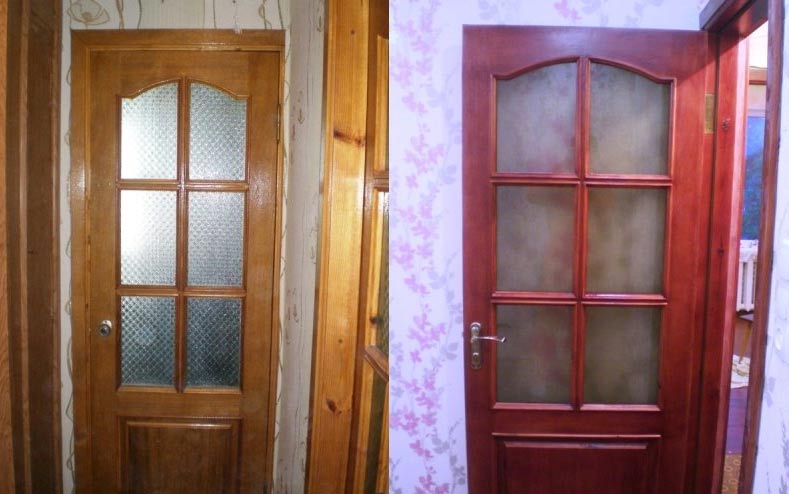
To make updated doors with your own hands, you will have to remove the existing layers of paint and varnish coatings, putty the defective spots, sand and then paint. For painting, prepare white enamel with a matte shade and color scheme with the desired shade.
Materials and tools for repair
- drill with a set of drills;
- saw-hacksaw with medium-sized teeth;
- sandpaper of varying grain size;
- building hair dryer (paint remover);
- wood putty;
- white enamel;
- brushes.
Tools for the restoration of a wooden door.
Repairs are carried out both in the workshop and in the fresh air. The second option is more preferable, since a lot of dust arises during the processing of the structure. Sequencing:
Preparing doors. The first step is to remove the door from the hinges with your own hands and lay it on a flat surface. They remove all kinds of upholstery so that the door takes on its original appearance.
Removal of previous layers of paint and varnish. To remove old coatings, you must use a construction hairdryer.
Please note: buy a hair dryer at the average price of a regular model, since the principle of operation for all hair dryers, including expensive ones, is the same. Manipulations with such a device are performed quite carefully and accurately, since it is capable of heating the material within 6000 ºС
Therefore, they try not to bend over the heated object. The work is carried out as follows: they heat up a certain area of the old coating and remove it with a special spatula, which comes complete with a hairdryer. In order to exclude overheating and failure of the hair dryer, every quarter of an hour they pause for 5 minutes
In difficult places and at corners, take great care not to damage the wood structure with a sharp trowel.
Manufacturing of a polished surface. After removing the main layer of paint, they proceed to grinding to rough
It is important to understand here that the main purpose of sanding is to remove the remaining patches of paint from the door surface.
Elimination of defective conditions
Defects are well masked by wood putty
After it dries, the surface is sanded with medium-grained sandpaper. For greater performance, use a block of wood with an attached sandpaper. In order to exclude leaving marks on the surface, grinding is carried out in the same direction as the fibers. When planning the application of a clear varnish, sanding should be done as diligently as possible, since all surface imperfections will show through the varnish quite well. When sanding is complete, the surface is moistened to lift the fine pile in a similar manner and remove it with fine grain paper (nulls).
Painting doors. The penultimate stage of self-restoring production of room doors is their painting. Painting is performed in 2 passes. First, the door is covered with matte enamel with a white tint. Then she is tinted with Belinka composition. Any paint with a matte effect is acquired, but not excessively liquid. Before painting, rub the surface with a slightly damp cloth to remove dust. The paint is applied with a brush in accordance with the direction of the fibers once. After drying, the surface is treated with fine-grain sandpaper to make it even and get rid of dust.
Toning is the final step in restoration activities. For this, Belinka Lasur or TopLasur formulations are used. The difference between these paints is in the price, and also the last paint creates a little more gloss.
They work with the paint carefully, because the wateriness of the composition can easily form smudges. The paint is applied with an ordinary brush
The number of layers is determined by the intention to obtain a certain color saturation. After each layer, wait for the drying of the coloring composition (about 6-12 hours). Then they are also treated with a zero. Sometimes two layers are enough.
Restoring a wooden door is a simple process. The main thing is to prepare everything you need.
Preparatory stage
Before painting the door or making other manipulations to restore it, it is important to prepare the surface with high quality. Some old doors are already varnished, others are painted, others are finished with veneer
Under a layer of paint or varnish there is a natural or artificial material that must be completely exposed, otherwise the quality of the restoration work will be low.
To clean the door leaf from the old coating, you need to prepare:
- construction hair dryer;
- grinder;
- sandpaper (sheets with different grain sizes);
- metal spatula;
- solvent (wash);
- brush;
- rags.
First, you should remove the door from the hinges so that it is convenient to work. It is imperative to remove the accessories - hinges, handles, locks, and parts that are outdated or not suitable for the new look will have to be replaced. For the convenience of work, the door is placed horizontally on two installed stools
It is important to carefully remove the glass and set it aside for a while, otherwise it may break during the grinding process.
There are several methods for removing varnish and paint from a door leaf:
Warm up the base with a building hair dryer. This will help the coating to soften, after which it can be wiped off with a rag, scraped off with a spatula.
It is important to drive the hair dryer on the canvas evenly, without lingering in any areas, otherwise the paintwork will catch fire. Due to the risk of release of toxic fumes when heated, all work must be carried out using personal protective equipment and in a ventilated area.
Apply to the door a universal cleaner suitable for wood
Such funds are made on the basis of acids, alkalis, organic solvents. They are applied with a brush, and after the expiration of the action time, the paint is cleaned and the base is washed.
Wipe off the paint with sandpaper, scrape off with a spatula. Such methods can be performed if the paint or varnish has already begun to flake off in pieces.The work will require neatness (it is important not to scratch the door) and a lot of free time.
Clean the door with a sander. This is the method used by professionals. With the help of a special tool, you can quickly and efficiently clean the door leaf from any old paint and varnish coatings, as well as give it smoothness.
After eliminating unnecessary contamination, you can proceed to the next stage of work.
It is important to get rid of all cracks, cracks that appear on the old product. The door must be carefully processed in the area of any defects using a special putty on wood of a certain color
For this purpose, pencils, putties are suitable, in the presence of shallow gaps, furniture wax. The latter must be melted before application to soften. You can use a homemade putty made according to the following recipe:
- take wood dust, which was obtained by sanding the top layer of the wood panel;
- dilute the dust with furniture varnish to the desired density.
You can also connect equal parts of sand, alabaster, cement to each other, apply the resulting product to the defective areas of the door. After drying, the excess grout should be sanded with sandpaper. For this purpose, it is advisable to use a sander, especially if the treated area is large in size. Do not press down on the machine too much, as this can leave depressed stripes. As a last resort, you can use sandpaper with the finest grain. After the end of the preparatory activities, you must:
- wash the door thoroughly;
- dry the product;
- apply drying oil or stain (when required).
If in the future the door is processed with white, other light paint, artistic painting will be performed on it, only a colorless stain should be used.
Restoration of wooden and interior doors
Solid wood doors are worthy of all praise: they are reliable, environmentally friendly and simply gorgeous. However, solid wood structures are rather bulky and therefore difficult to restore, but the result is worth the effort: with strict adherence to all repair technologies, solid wood doors are capable of 100% restoring all their characteristics.

Preparatory stage
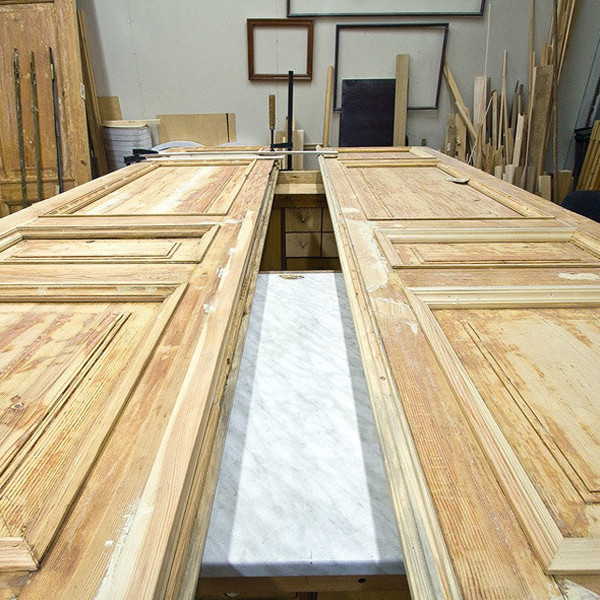
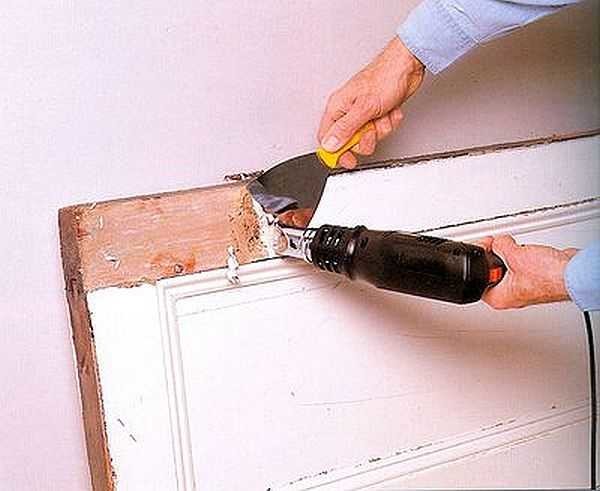
It is necessary to remove the old door and place the canvas horizontally on a flat surface. Further, if necessary, you should remove the upholstery and glass inserts, and then proceed with the removal of layers of paint. To do this, you need a building hair dryer - with the help of it, the paint heats up to a swelling and can be easily removed with an ordinary spatula. If there are any untreated areas left, you can sand them well with a hand skinner. At the end of the preparatory work, we process the material with a primer.
The main stage
At the end of the preparatory work, minor flaws could remain. To eliminate them, putty is needed. Depending on the condition of the old door, the leaf is partially or almost completely processed. After the putty is dry, you can easily sand the desired area with sandpaper. This delicate process must be carried out very delicately so that no sanding marks remain.
It is very important to thoroughly remove dust and dirt from interior doors before painting. It is advisable to paint in two stages: first, covering the door with enamel, then the painting process itself

The final stage
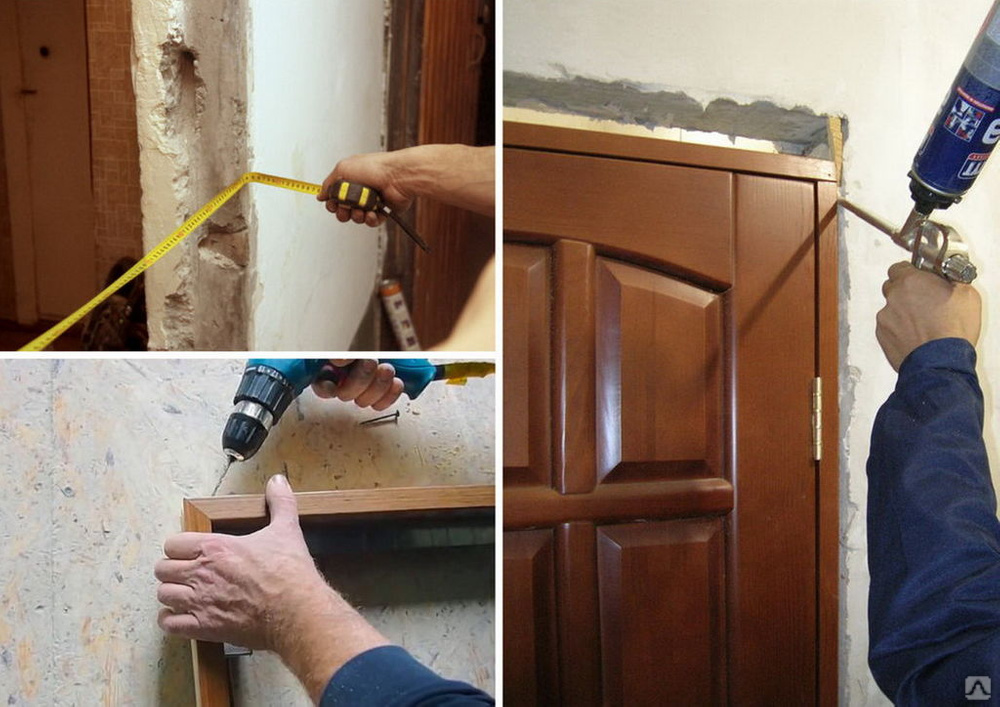
The process of installing a door is not only about putting it on the hinges and leveling it. You can reinforce the structure with reinforcing bars or anchor bolts. Moreover, this part of the work should take place when the door is closed! Having installed and secured the door, it must be treated with polyurethane foam and left to dry for a day.

Other types of repair work
In practice, repair work is not limited to only one restoration of the door. During the operation of a wooden door, a variety of breakdowns can occur.Some of them can be eliminated without any problems with their own hands, while others cannot be dealt with on their own.
We bring to your attention short instructions on how to fix simple problems with doors of different types on your own.
Laminated doors
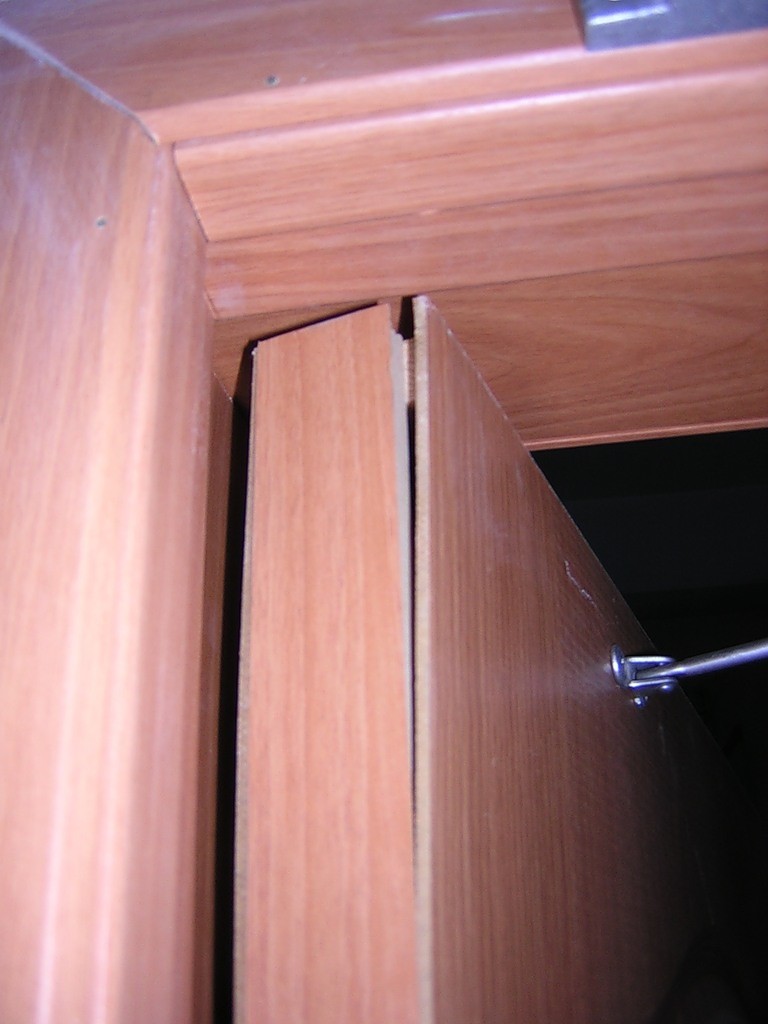
The most common problem with laminated doors is flaking. This defect is especially common in the case of low-quality products of dubious production. Therefore, it is better to try to avoid excessive savings initially and buy high quality wooden doors.
Repair of laminated doors
If the problem does arise, the only possible solution is to completely replace the decorative edge. The edgebanding itself can be purchased from a specialized door and coverings store.
Dismantle the old edge and attach the new trim in its place. It is recommended to use the same method for fixing the new edge as the old finish was fixed.
Sliding doors
A traditional problem with all sliding doors is that the top rollers pop out of the guide rails. The videos can pop out for the following reasons:
- due to loosening of the bar to which the upper guide rail is attached;
-
due to the weakening of the adjustment mechanism of the carriages.
In the first case, for repair, it will be enough to re-fix the upper bar. Remove the old fasteners and fix the product again with new dowels and self-tapping screws. The bar can be shifted or fixed in the same places - be guided by the situation.
To solve the second mentioned problem, it is necessary to re-adjust the door and place the locknuts under the adjusting bolts.
Door stops
The importance of a door stop is often underestimated, and in vain. The presence of this simplest element can significantly extend the service life of a wooden door, especially its handles, hinges and other fittings. Therefore, you should not refuse to install the limiter.

Door stops
If the door stop is broken, it is enough to simply dismantle the old product and install a new one instead.
The door is twisted

The door is twisted
Often the wooden doors are warped. This may be due to the following reasons:
- loosening of loops;
- swelling of wood.
In the first case, all repairs are reduced to adjusting the hinges to a normal state. In the second situation, you will have to make much more effort. You will need to remove the door from its hinges, remove excess wood with a planer, and then re-grind and paint the treated areas or the entire door, depending on the location of the treated areas and their size.
Thus, with very little effort and imagination, you can fix your wooden doors and update their appearance without any problems. Follow the recommendations received and everything will definitely work out.
Happy work!
Door leaf repair: troubleshooting
Often a situation arises when, when closing, an old wooden door rests against a box. The most common reason for this is excessive swelling, which is later replaced by the drying of the wooden canvas. As a result of this process, the door frame is deformed. Therefore, it is she who is the reason that the doors stopped closing normally. This problem can be solved quite simply. You just need to know how to do it correctly.
First of all, you need to find out which of the racks of the box is most deformed. To do this, you need to compare the gaps between the canvas and the box in the places where the awnings are installed. If one rack has a size of at least 3 mm, it means that the problem is in the other rack. The door may not close tightly for another reason, namely, due to improper fixation of the awnings.To find out, you should inspect the screws with which they are attached. If protruding caps of fasteners are found, then they only need to be tightened more tightly.
In general, the following two methods of solving the problem of door leaf subsidence are most often used:
- Deepening of planting sheds.
- Forced deformation of the door pillar.
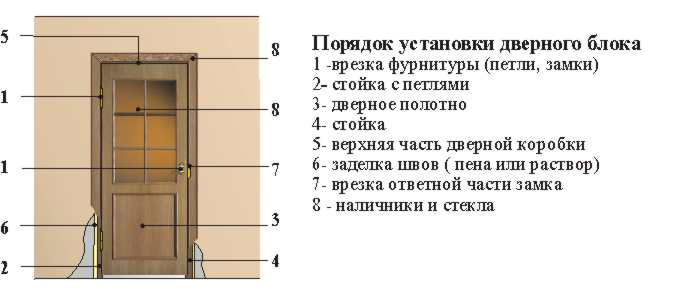
The first method is suitable when the door leaf strongly touches the frame of the frame. That is, in the case when it takes more effort than usual to close the interior wooden door. This method consists in deepening the seats under the sheds. This is done as follows:
- Initially, you need to remove the door leaf from the hinges.
- Unscrew the canopy pieces from the door frame.
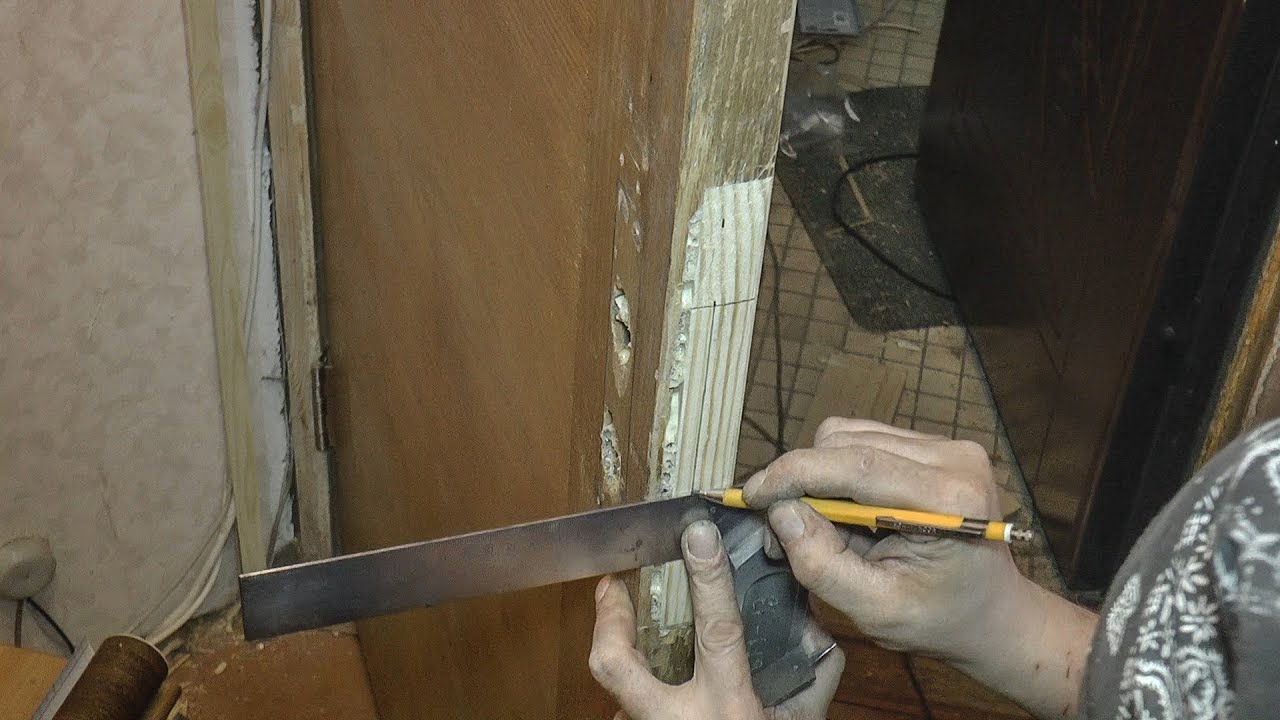
- Further, using a chisel and a hammer, we deepen their seats by 4-5 mm.
- Then the doors can be assembled back. After that, the door structure should work normally.
If the door continues to close and open with difficulty, then more extensive repairs are likely to be required. Alternatively, you can simply reduce the dimensions of the doors. This is best done from the side of the awnings. This radical way of solving the problem should be used only as a last resort.

In order to solve the problem in the second way, you will need a certain list of tools and materials:
- Drill.
- Perforator.
- Wooden block to be used for wedging.
The procedure for performing forced deformation of the door frame post when repairing wooden doors:
- Initially, you need to remove all elements that may interfere with work. So, for example, platbands are removed. In addition, you should free up the space between the door frame and the opening from all that is superfluous.
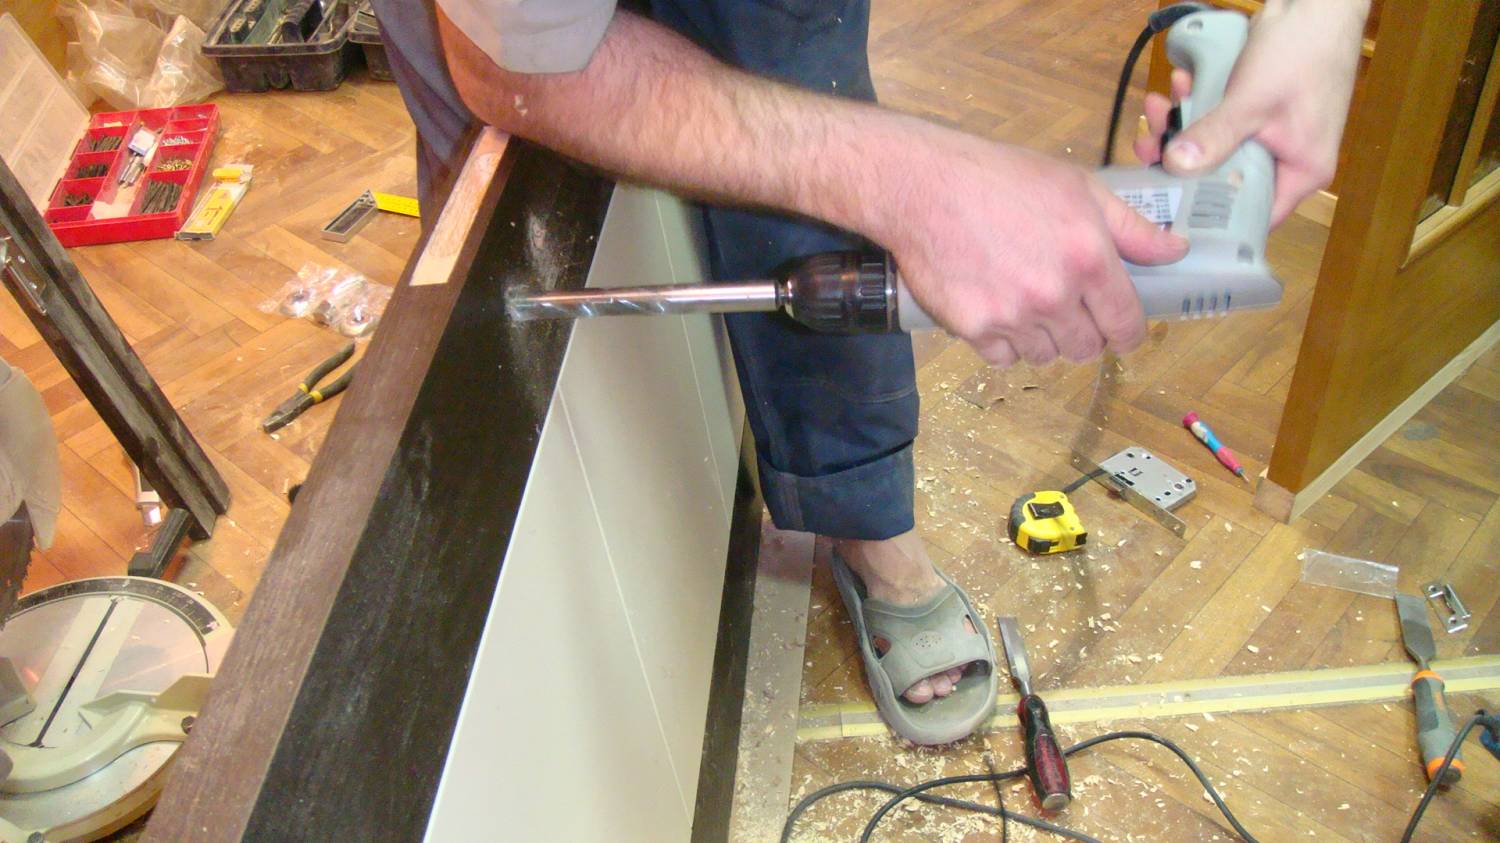
- When this is done, you need to close the door and see where the door leaf rests against the frame. In the discovered "problem" area, you should drill a hole in the box from the inside.
- After that, you need to take a punch and drill another through the previously made hole, but already at the end of the door opening.
- Then take a piece of wood and place it between the posts. Thus, we wedge the door frame.
- A long dowel or self-tapping screw should be installed in the previously made hole. Then the bar must be removed.
- If after that the door began to close freely, then everything can be put back in place. It is better to fill the gap formed between the door frame with polyurethane foam.
When is it required?
When the door loses its former appearance, the thought of replacing it immediately arises, and few people think about its restoration.
Let's take a look at the cases in which an upgrade would be a profitable solution:
- It is cheaper to repair a canvas from an array than to buy the same new one;
- It is rational to restore an old door if the replacement of the interior as a whole is expected;
- Updating an old wooden door is reasonable when it was made by hand and most likely it has an original pattern applied on it. Then it is a full-fledged antiques, which is stupid to throw away;
- Hand-made repairs make it possible to make an inimitable product that will be the center of the interior;
- If the door is of non-standard dimensions, then it is easier to repair it than to buy a new one;
- Do-it-yourself repair is a very entertaining and interesting job.

