Ironing devices
Today there are a huge number of ironing devices for the care of various items of everyday and festive wardrobe. All of them can be used to give shirts a well-groomed look. We suggest considering the most popular and current devices from this category.
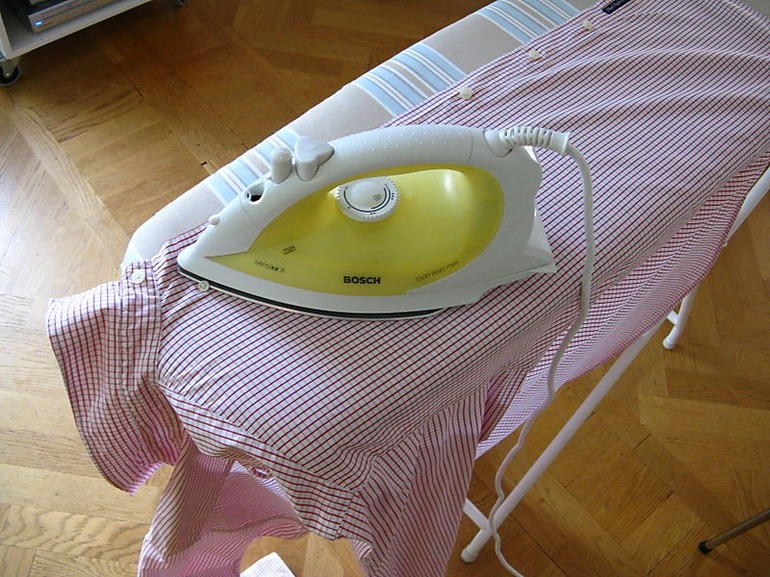
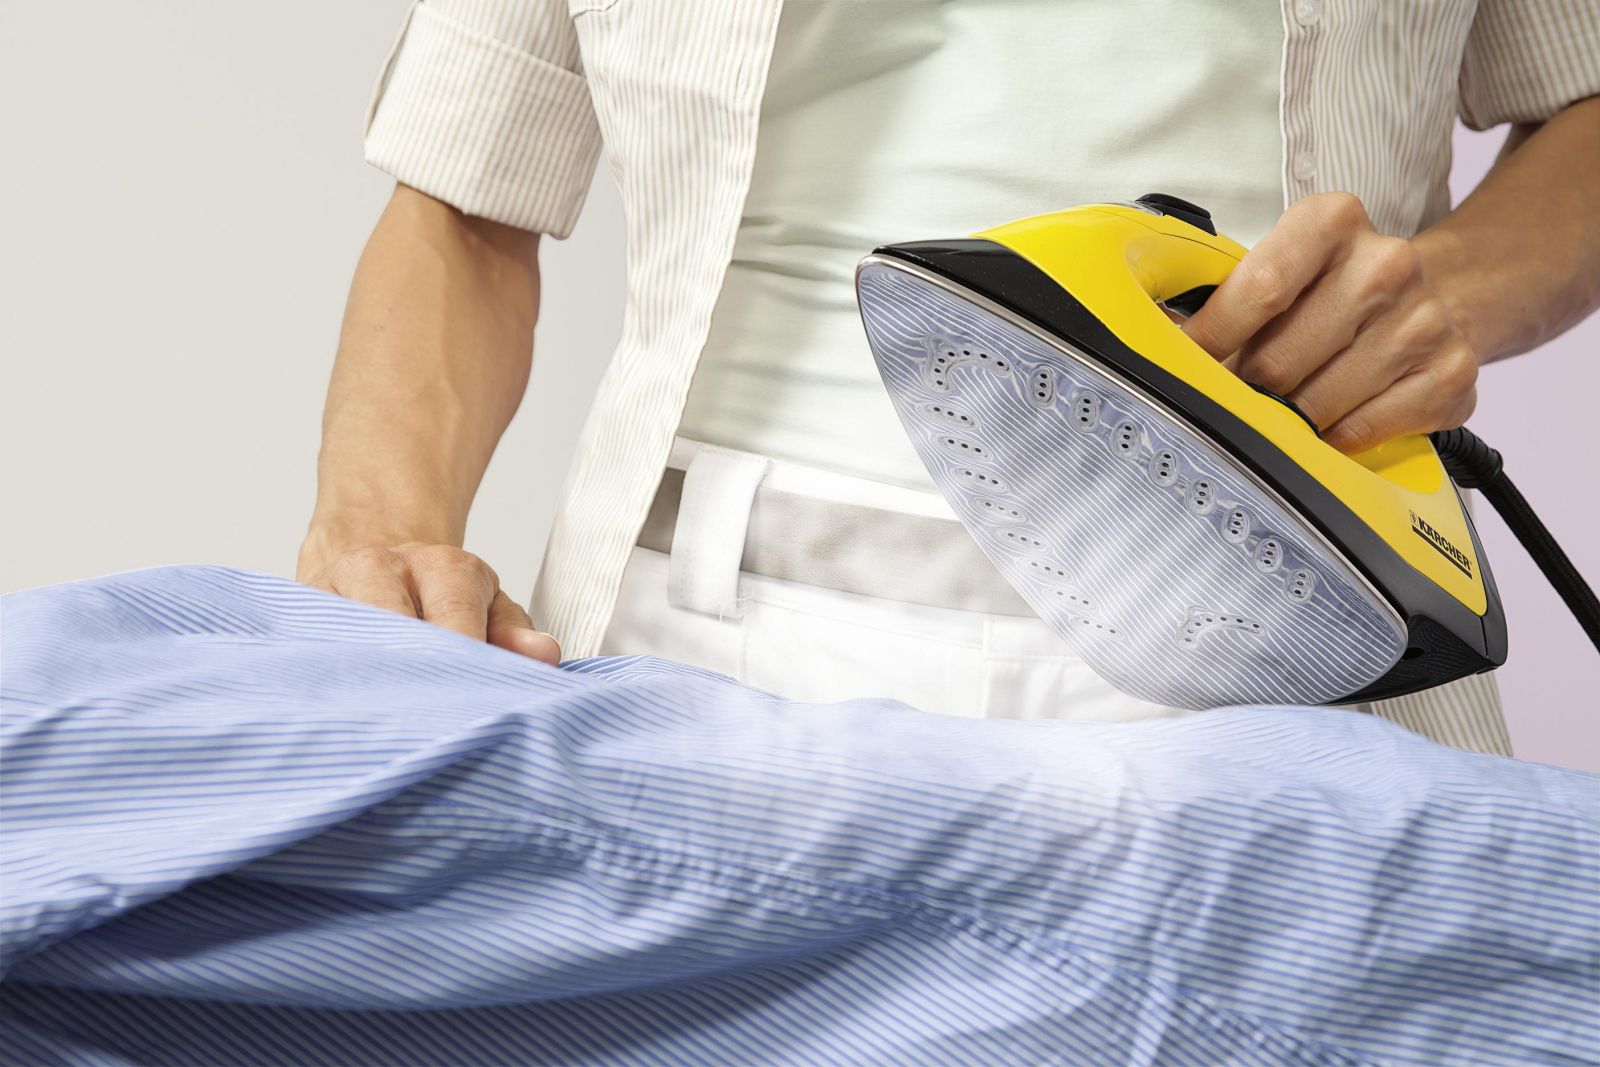
Iron
This type of technique is present in every family, since it is impossible to imagine caring for clothes without it. Almost all recommendations from the manufacturer refer to the iron, so housewives will have no problems determining the correct ironing mode. This article presents all the rules and tips that you need to follow in the process of caring for blouses and shirts. We will also share step-by-step instructions on how to properly iron the collar, sleeves and cuffs.
Most modern irons are used both for dry ironing without steam and for steaming.
Steam generator
This kind of technique almost resembles an iron, but with minor distinctive features. The steam generator operates with a constant supply of dry steam in the form of a powerful jet. The use of such equipment guarantees the alignment of heavily wrinkled items.
The steam generator is much more efficient than conventional irons in terms of ironing quality.
Steamer
A steam steamer, as the name suggests, iron clothes with hot steam. This type of device also disinfects the product, as it offers rather high temperature working conditions. Before ironing the shirt, it must be carefully hung on a trempel
It is important to bear in mind that not all types of fabrics can lend themselves to this method of ironing.
The steamer can be useful for lovers of fine and delicate fabrics, products with complex cuts or a lot of decor.
Steam dummy
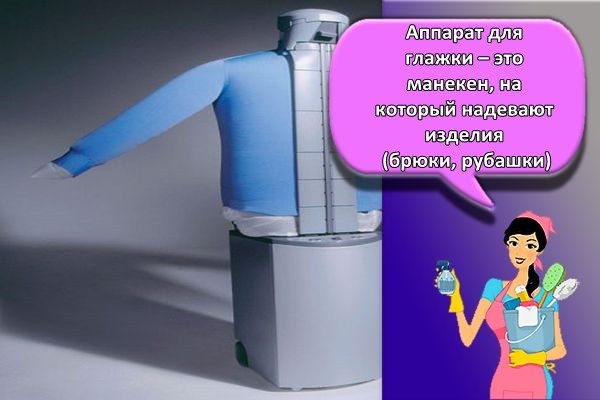
This option is considered the most innovative. The steam dummy is represented by an ironing robot that has the shape of a human torso. The purpose of the device is to quickly dry and smooth wardrobe items that are worn on the upper part of a person's body, for example, shirts, blouses and shirts.
The ironing system consists of an inflatable mannequin (doll) with hot air supply and various accessories.
Washing
Unbutton all buttons before washing, this will reduce stress on the seams holding the buttons on the shirt. Also remember to remove the ribs of the collar before washing. This will avoid uneven wear on the collar points.
You also don't have to look for them at the bottom of the drum or in the rest of the wash if they fall out.
Turn all shirts inside out. This protects the mother-of-pearl buttons from chipping on the steel drum and gives cleaners direct access to underarm stains.
Wash in water at a temperature of 40 to 60 degrees, trying to read the washing instructions on the shirt label - if there are other important recommendations there.
How to choose the right temperature?
Having determined by the label the composition of the material from which the product is sewn, it is necessary to set the temperature regime on the iron, suitable for ironing this material.
If the label has been worn out for a long time and you only have to guess about the composition of the fabric, you can use the following information:
- Cotton is ironed at a temperature of +150 ° C with a supply of wet steam, pressing firmly on the iron.
- Wrinkled cotton - +110 ° C, no steam.
- Cotton with polyester - +110 ° C, steam can be activated.
- Cotton with linen - + 200 ° С, powerful steam boost.
- Flax is ironed at a temperature of + 230 ° C, you can moisten the product from a spray bottle.
- Polyester, viscose, acrylic can withstand temperatures no more than +120 ° C.
- The wool is ironed from the wrong side at +170 ° С.
Shirts decorated with embroidery, relief designs, emblems, as well as black items should be ironed exclusively from the wrong side.
Useful Tips
Remember that you can iron an exceptionally clean, fresh shirt - under the influence of high temperatures, even a subtle smell tends to intensify many times over.
Never iron on the sofa: in this case, parts of the upholstery or bedspread run the risk of literally sticking to the thing.
On the eve of ironing, wrap the soaked shirt in a plastic bag. Within half an hour, the fabric will be evenly saturated with moisture and will be much easier to iron.
A cardboard blank will help maintain the exemplary shape of the collar. Fix a rectangle under the collar - and the shirt will retain a business-like, elegant look for a long time.
Learning to iron a shirt is a simple matter. By adopting this skill, you will not only save a lot of time and effort, but also make the most favorable impression on those around you - like a skillful hostess who knows a lot about home economics!
Using the ironing machine
An ironing machine is a mannequin on which products (trousers, shirts) are put on, and then heated air is injected.
How to use a mannequin
The work is performed in the following sequence:
- the shirt is put on a mannequin and fastened with clasps;
- turn on the blowing and wait for the straightening of all parts, additionally fix it;
- turn on heating, a signal will signal the end of the process;
- cool the product with cold air.
Next, the finished product is detached and removed from the dummy.
Advantages of the adaptation
Owners of household ironing devices highlight the following advantages of the device:
- speed and safety;
- no damage to fittings and decor elements;
- products can be ironed on a mannequin, bypassing drying, immediately after washing.
Important characteristics
Here are the main characteristics of most household appliances:
- ironing time - 6-8 minutes;
- mains voltage - 220 V;
- power - 1.5 Kilowatts;
- weight - more than 10 kilograms;
- height - about 1.5 meters.
The set usually includes steam generators, devices for stretching collars and cuffs.
Care Tips
Today, not everyone can spend time ironing things due to being busy. In order not to burden yourself with additional tasks, you can use some useful life hacks.
- The easiest way to avoid ironing is to keep your shirts from wrinkling during the wash. After washing, you should set the gentle spin mode and do not wring out the clothes by hand. Further, the products just need to be hung on a hanger and placed on the balcony or in a well-ventilated area.
- The folds can be straightened by putting the shirt on the person. To make the product look beautiful, you need to douse it a little with water from a spray bottle, and then put on, carefully adjusting the sleeves.
- There is a possibility of manual steaming with hot water. The item must be hung on a hanger and secured in the bathroom so that drops of water fall on it. To obtain the desired temperature, you need to open the hot water tap and direct the stream into the wall. After a few minutes, the shirt can be put on the body, and after a while all jams will disappear.
The nuances of storing ironed shirts
Basically, people prefer to keep clean and ironed shirts in the closet on hangers. But not everyone has a dressing room of optimal dimensions. In this case, you need to know simple storage methods:
- All buttons should be buttoned on the shirt.
- Then turn the product with the buttons down.
- Next, you need to fold the sleeves. To do this, one of the sleeves with a shelf must be lightly laid over the second sleeve, then, bending it, lower it along the side bent shelf. The second part of the shirt is folded in the same way.
- The lower part of the shirt is folded several times and turned over.
Some more useful recommendations
For a better ironing shirt, start treating it while it is still damp. If the fabric is slightly dry, you can use steam ironing.
You can spray a little starch spray on the collar to maintain the shape of the collar. At the same time, it is more practical to iron several similar shirts at once, so as not to drive yourself into your daily routine.
With regard to handling the iron, drain the water after each ironing (this will keep the bed clean). The steam holes should occasionally be cleaned with a 1: 1 solution of water and vinegar. Steam is of high quality if pure water without impurities is poured into the iron.
How to iron a men's shirt correctly
After washing, the shirt should be dried flat and ironed better when it is still damp, and not dry in the sun. Ironing a damp shirt is very easy and much faster. But if you already have a dry shirt, then don't worry, everything can be fixed. Take a homemade flowerpot sprayer, dampen your shirt with it, and place it in any bag for an hour or two so that it is well and evenly moistened. If you iron a dry shirt, it will take a very long time to iron, and the folds may remain unchanged.
If you need to iron silk clothes, it is better to iron them dry, but through a thin, slightly damp cloth. Also, do not wet a rayon shirt, as water marks may remain.
To make ironing easier, buy yourself an ironing board, and a good branded iron that has all the functions and the right temperature to perfectly smooth out all the creases and keep your clothes perfectly even. To avoid stains, do not hammer change the water in the iron, and clean the soleplate. Better buy distilled water, it will definitely not leave marks.
Mostly shirts are ironed from the front side. And from the inside, they iron shirts of a dark color, with a pattern, embroidery. If you iron on a black fabric from the front side, then there is a possibility that shiny stripes will remain, but if there is a need to iron from the front side, then you can lightly walk on the surface with steam without touching the fabric. Also, from the inside out, you need to iron products made of shiny fabrics so that they do not become dull.
Which mode is better for ironing shirts
The choice of the mode depends on the quality of the fabric in order to burn it and not spoil the product. If you have to iron a cotton shirt, then iron it at a temperature of 140-150 degrees with steam, and lightly pressing the iron.
Iron a shirt with cotton and polyester at a temperature of 100-110 degrees, and use a little bet. If the fabric is from flax, then set the temperature to 200-230, and apply a little steam, and if cotton with flax, then you need to turn it on 180 -200 degrees, a lot of steam and press the iron strongly. Iron the viscose shirts at 120 without steam.
Ironing procedure for men's shirts
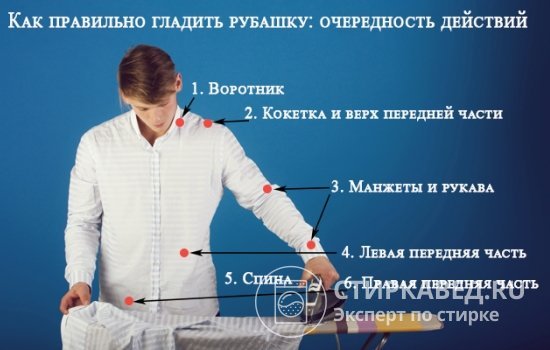
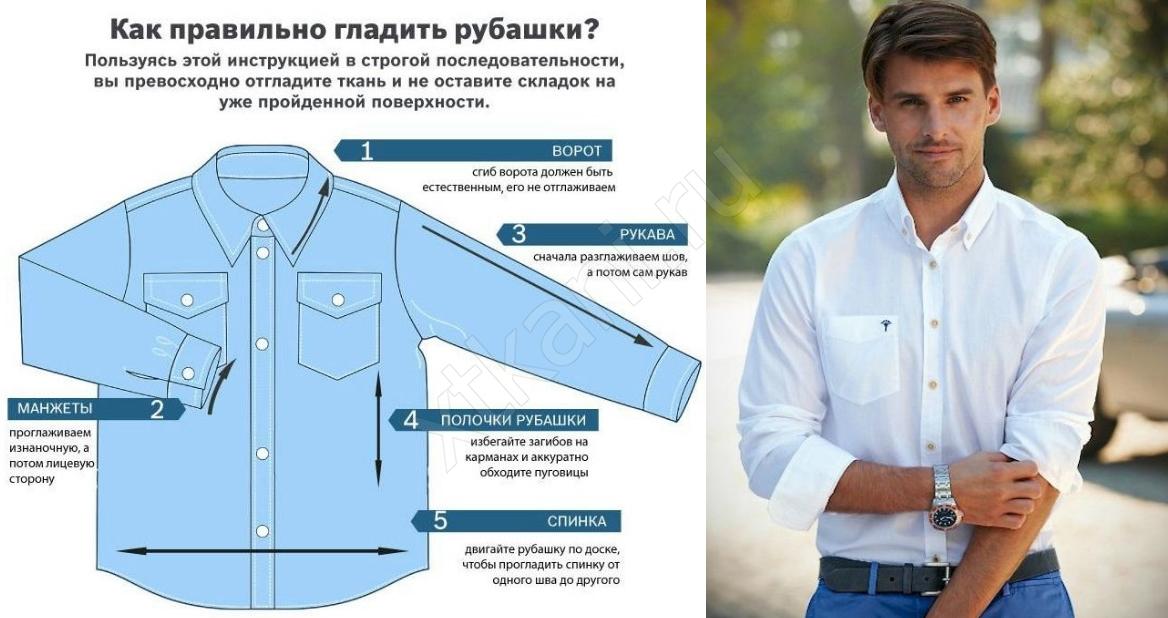
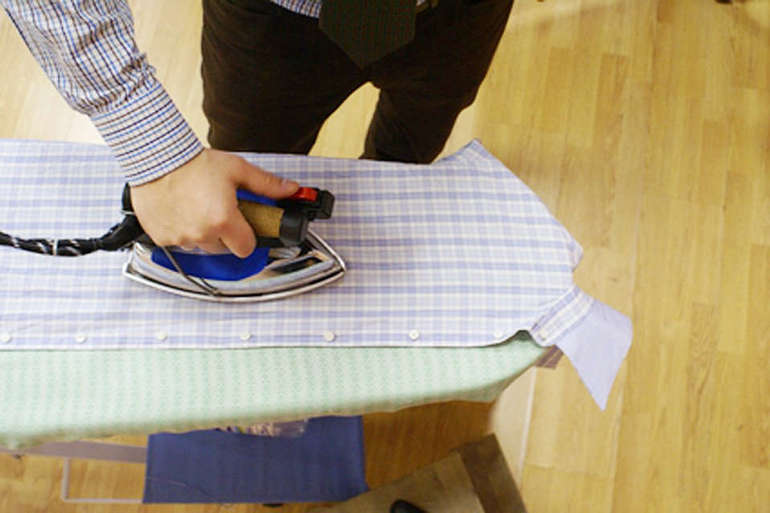
Men's shirt, you need to iron starting from the collar, then cuffs, sleeves, placket, shelf and at the end of the back. Always iron the small parts first, and then the big ones. When ironing large parts, make sure that the product lies flat, and guide the iron in the direction of the shared thread.
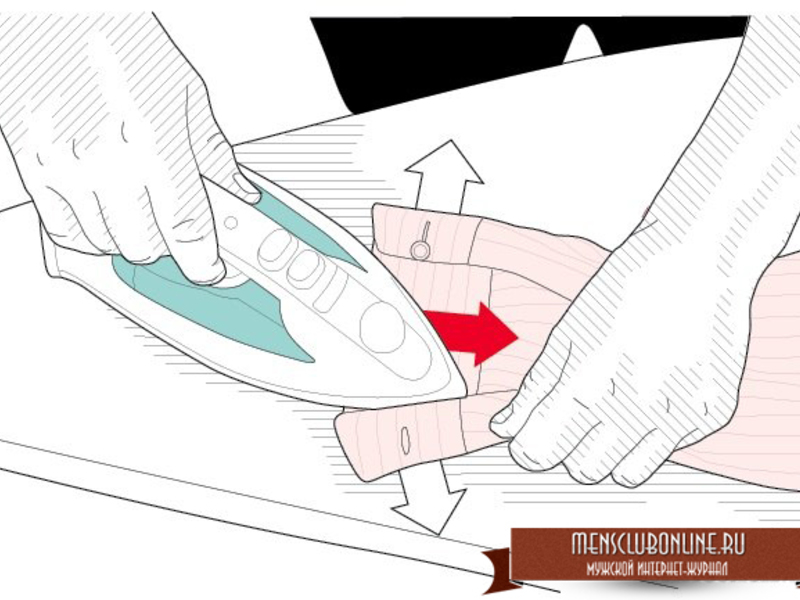
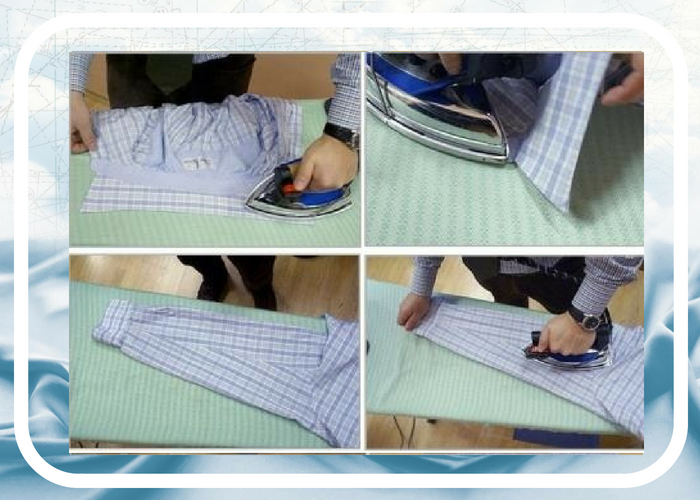
The collar is ironed from the inside out from the corners to the middle, and then do the same action from the front side. Do not bend or iron like this. Long sleeves should be ironed with cuffs on both sides. If the cuff is double, then it should be unfolded and ironed on all sides along the bend, folded to the desired width, and smoothed along the bend so that the loops lie one on top of the other.
During ironing, the sleeve must be folded in half so that the seam is in the middle, the first step is to smooth the seam, and then the sleeves on both sides. If the ironing board has a board for ironing the sleeves, then they can simply be scrolled in a circle. The front of the shirt is ironed immediately from the front, on which the buttons are ironed and the top is ironed with a yoke. Iron the other side of the shirt in the same way.The back should be ironed from the right side of the seam to the left, from the left to the right.
Ironing classic suits
In order to avoid a shiny effect, suits with a classic cut should be ironed using a damp gauze that is used to cover the fabric.
For ironing the sleeves, an auxiliary part of a small board is used, first they are ironed from the inside out, then from the front side.
Next, proceed to ironing the rest of the jacket or jacket in order: top, floors, collar, back, lining, sides. However, if you hang the jacket in the bathroom over the steam and leave it for a while, then it is quite possible to do without ironing.
If you have to iron the jacket once and wear it for a long enough time, then the trousers will have to be ironed almost constantly, carefully ironing the arrows. First, the trousers are ironed from the inside out, starting with the pockets and seams. The trousers are ironed separately, starting from the bottom: first the inner seams, then the outer ones. Then shuffle onto the waistband of the trousers.
Important nuances
Let's note a few additional points to which you should pay attention:
- After washing, the shirts are thoroughly shaken, straightened, dried on a hanger, placing the collar in a natural position and stretching the sleeves without folds.
- If ironing does not work right away, the shirts are carefully folded so that the collar and cuffs do not wrinkle - they are the most difficult to iron.
- Ironing sleeves is the longest and most difficult. If the shirt is only worn under the jacket, you can leave the arrows. In any case, the cuffs are brought to perfect condition.
- It is better to iron dark shirts from the wrong side so that they do not remain shiny and greasy.
Embroidery, labels are ironed carefully, through the fabric, from the seamy side. It is better not to touch them with a strongly heated iron.
Ironing step by step
The collar is the first thing people will pay attention to. When you put on the shirt, it is necessary that it is standing and carefully ironed.
When ironing a long-sleeved shirt, avoid forming arrows, they are not needed for shirts.
Collar
- start this process from the inside to avoid smoothing out the folds;
- smooth the front of the collar;
- do not iron on the fold.
The collar is the first thing people will pay attention to. When you put on the shirt, it is necessary that it is standing and carefully ironed.
Cuffs
- cuffs must be ironed from the front and the wrong side;
- give the required shape to the cuff;
- iron along the fold.
The cuffs are one of the first places on the shirt to pay attention to, so they must look impeccable.
Sleeves
- fold the sleeve along the seam and lay on a flat surface;
- start ironing the thing from the shoulder to the cuff;
- turn over the other side and iron again;
- do not iron the sleeves close to the edge to avoid arrows;
- repeat all steps with the second sleeve.
If in the office or other place, there is no dress code for wearing jackets, then your sleeves will be visible to everyone
It is important that the sleeves are ironed and there are no arrows on them.
How to choose the temperature regime?
If the temperature of the iron is set incorrectly, there is a risk of finishing the ironing ahead of schedule, and, alas, not because of good dexterity. Each fabric underlying clothing has its own characteristics, so an individual approach is very important here.
- If the shirt is made of a mixed material (for example, cotton + polyester), it makes sense to play it safe and limit the mode to only 110 degrees;
- viscose shirts can easily withstand an increase up to 120 ° C;
- natural fabrics respond to at least 150 ° C (this is the optimal heating for cotton), and in the case of linen, even at 220-230 ° C. The combination of both types requires compliance with the "golden mean": from 180 to 200 degrees;
- ironing silk shirts is a delicate and delicate matter. In this case, only 80-110 ° C should be adhered to, depending on the specific type of matter.By the way, the same rule applies to chiffon blouses;
- denim is subdivided into softer and rougher. Accordingly, the temperature will be 150 or 190 degrees;
- woolen shirts are always ironed through the fabric at 110 degrees. In this case, contact with the soleplate of the iron is tried to be minimized - it is preferable to steam in an upright position.
It should be noted that steaming is not applicable to all types of fabrics - for delicate silk, polyester and chiffon, such an effect will be disastrous. A moderate amount of steam is used to process viscose, but you can not worry about linen or cotton shirts at all: they always withstand the procedure with dignity.
Ironing the front and back of the shirt
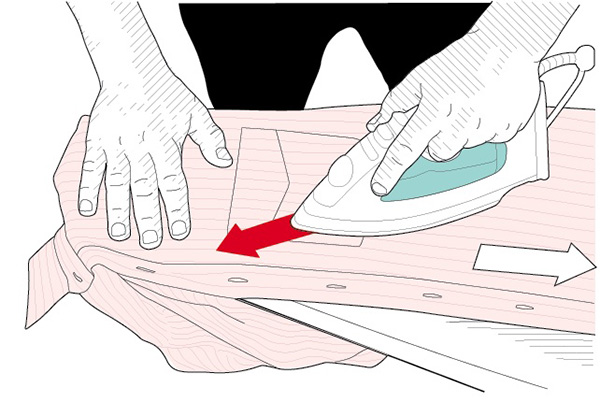
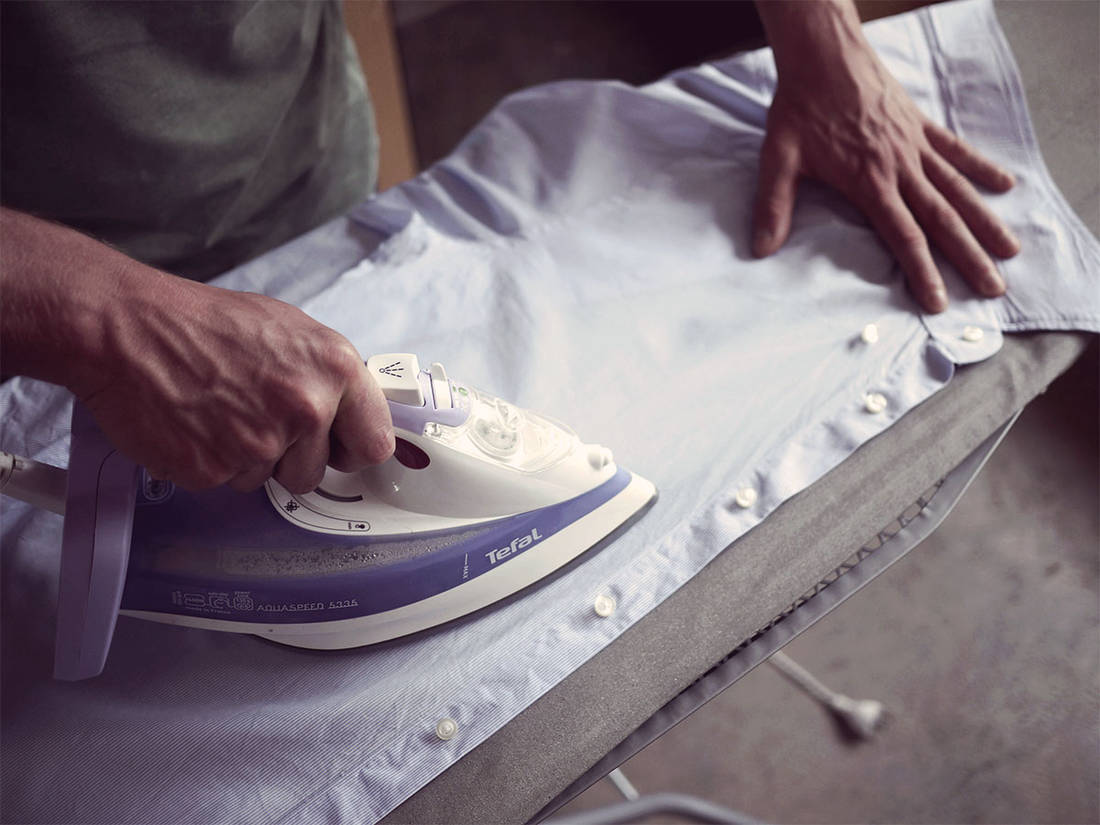
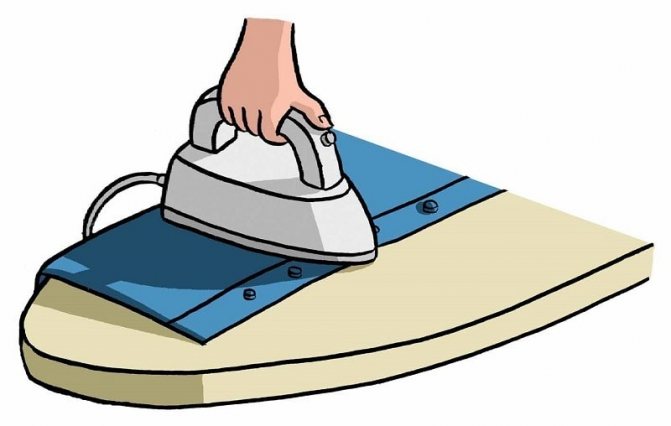
When processing the shelves and backrests, you need to carefully iron the seams. Tighten the fabric slightly to avoid creases. Before you start processing the back, you need to iron the shelf on the side of which the buttons are located. To do this, you need to walk along the space between them with the nose of the iron. In some products, the bar is also ironed from the inside out.
Then put the product with the wrong side up, iron the seam near the collar and start moving the device down, with the blunt side of the sole forward. This will stretch the material a little and remove the “waves” that appear on the plank.
After ironing the shelf, move the shirt so that the side seam of the armhole is located on the ironing board, iron it out. Then, moving the product, iron the side seam, back. To avoid the formation of folds in the area of the seams, the material should be slightly pulled. Having ironed the back, you should go to the shelf with loops: iron it at the very end.
What do you need?
It is impossible to iron a shirt without special devices. Therefore, before you start ironing the product, you need to prepare the following:
iron with steamer. If this function is not available, you can use a spray bottle with water
It is important that the soles of the appliance are clean, free of carbon deposits, limescale and rust. A dirty iron can ruin a shirt, especially a light-colored one.
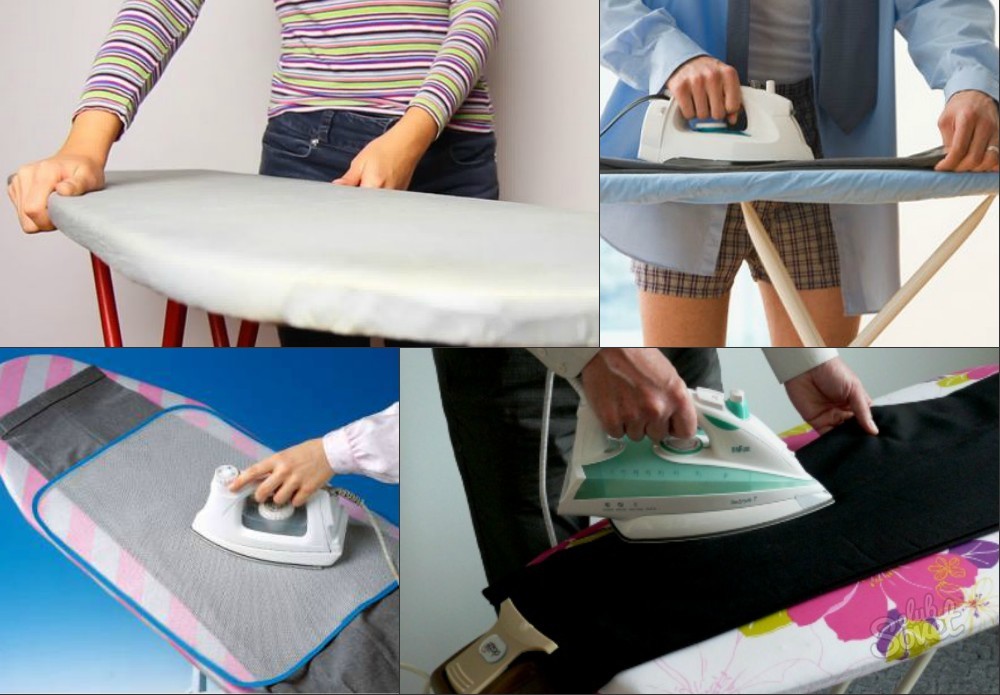
ironing board with cover
An additional plus will be the ability to adjust its height. If you can't use the board, you can replace it with a flat table covered with a light dense fabric without a pattern.
stand for ironing sleeves of shirts and sweaters. It usually looks like a small ironing board and comes with it. This is not an obligatory device, but ironing the sleeves and cuffs will be much easier, faster and better with it.
spray for ironing linen. These funds can be bought at a household chemicals store or made independently from improvised components (solution of 1 tablespoon starch in 1 liter of water). Thanks to them, the ironing effect lasts much longer, and the process itself becomes easier.
vertical steamer. They can easily smooth out wrinkles and wrinkles without the risk of burning the product.
stationery clips. It is not necessary to use them. The clamps will help to fix the sleeves evenly if you need to make arrows on them.
You will also need a little patience and free time. There is no rush in this matter, because there is a risk of badly ironing the shirt or burning it.
Shirt smoothing options
And here is a crumpled shirt in front of you, and an iron in your hands. If the shirt is overdried, ironing it will be a troublesome task, and you will not do this work quickly. This problem can be solved in several ways: the best solution to the problem is when you have an iron - steam generator at home, ironing your shirt will not be difficult for you, the thing will be easily and simply ironed perfectly, without much effort. You can use a spray bottle, or hang up your shirt for a couple of minutes in the bathroom, turn on hot water, and the steam effect will moisten the thing and make it easier to iron.
Steam will make your shirt flatten much easier.
How to iron a shirt as quickly as possible
You don't have to learn how to iron a shirt, but what if there is little time and the shirt needs to be ironed. With simple tips, you can easily deal with this problem:
- When washing, do not spin. Having taken the shirt out of the car, you do not need to wring it out, just hang it up. During natural drying, it is unlikely to wrinkle and you do not need an iron.
- Slip the damp shirt over yourself as it dries, straightening any wrinkles without assistance.
- Exposing the shirt to steam is a good option in this case. Steam the shirt with an iron and it will quickly smooth out without leaving any creases.
Solving common problems
Shirts made of compressed fabric are never ironed, but if such a mistake has already occurred, there is a sure way to save your favorite thing.
- Dip the shirt in a bowl of cool water - when it gets completely wet, wring it out and lay it out on a flat surface.
- Smooth out the details of the product, and then begin to manually form the folds, starting from the center of one of the sides. The depth of the "wrinkles" should be approximately 2.5 centimeters.
- Now you need to involve an assistant in the process. Twist the shirt with a tourniquet in opposite directions - as a result, a tight spiral is formed. To prevent it from falling apart, secure the ends with cotton string.
- Let the shirt dry right in this state, it is recommended to put some kind of weight on top.
It is not uncommon for the fabric to form shiny spots after ironing. You can also successfully deal with them:
Rub the overgrown area with dry salt. If this does not help, mix a spoonful of salt with the same amount of ammonia and two tablespoons of water: treat the affected tissue with a dampened sponge, then rinse with warm water and iron through a dampened napkin.
If we are talking about delicate fabrics, you can try onion juice: divide the peeled onion into two halves and rub the shiny areas. The shirt will then need to be washed again.
Prepare a vinegar solution (for 3 cups of water, 1 cup of vinegar is calculated). Dampen the shiny prints, and then, during ironing, spray the cloth again from the spray bottle (put the iron in the steaming mode).
The baking soda will take care of removing the gloss from silk and woolen fabrics: stir in a little water and spread the gruel over the stained area. When the composition is dry, brush off the powder with a soft brush and rinse with cool water.
An ordinary soap solution allows you to remove excess shine from black fabric: moisten the gauze and lightly, without pressure, iron the shirt. After that, the thing should dry naturally.
Lemon juice is also great for black shirts - just sprinkle a few drops on the markings and rub lightly.
The old newspaper is very good at removing burn marks, but you need to be extremely careful. When ironing the item through the newspaper, make sure that the paint does not cling to the fabric.
In many cases, it is possible to correct the situation with a strong tea infusion.
Brew loose black tea, wipe the cloth and gently "walk" with a non-hot iron. There will probably be no trace of the flaw!
Features of ironing polo shirt
Polo shirts are sewn from knitwear, before ironing, you need to familiarize yourself with the composition of the material in order to correctly set the temperature of the iron. The product is turned inside out so as not to spoil the color.
It is convenient to iron the polo on the ironing board by simply pulling it on and turning it gradually to the desired area. Use a small board or folded cloth to iron short sleeves.
The collar and fastener are ironed first from the wrong side, then gently from the front side.
When ironing on the table, the polo is folded in 2 layers, it is important not to run the iron on the fabric, under which the seam is located, so that it does not get imprinted on the canvas. Reference: modern polo shirts are made of low-wrinkle fabrics, with proper drying on hangers, ironing is not required
Reference: modern polo shirts are made of low-crease fabrics, with proper drying on a hanger, ironing is not required.
How to iron as quickly as possible
A few simple tricks can help you iron your shirts quickly:
- Wash shirts on a delicate cycle without spinning.
- Dry only on a hanger, carefully stretching all parts and seams.
- Iron slightly damp products, not overdried - steaming is not required in this case. Excessive moisture will also lengthen the ironing process.
- Use the steamer, walking only over crumpled places.
The best advice for quick ironing of men's shirts is to stock up on a comfortable ironing board, a quality iron with a protective sole, gain a fair amount of experience and play good music. Ironing time will fly by.


