Secrets of planting at home
Lobelia is propagated vegetatively in two ways - by cuttings and seeds. As a rule, highly decorative varieties are bred in the first way in order to transfer and preserve varietal characteristics.
There is nothing difficult in growing lobelias from seeds, but it is important to consider one point. The use of self-collected seed increases the likelihood of producing flowers with a color that differs from the previous color
It should be noted that the shelf life of such seeds is limited to 3 years, after which they lose their viability.
Lobelia needs light, well-aerated, medium-fertile soil with a neutral alkaline reaction. For growing seedlings, you can use ready-made flower soil or homemade soil mixture: garden soil + sand + vermiculite. The resulting substrate is poured into a planting container, at the bottom of which a drainage layer is preliminarily formed. Then the earth is leveled, slightly compacted and moistened.
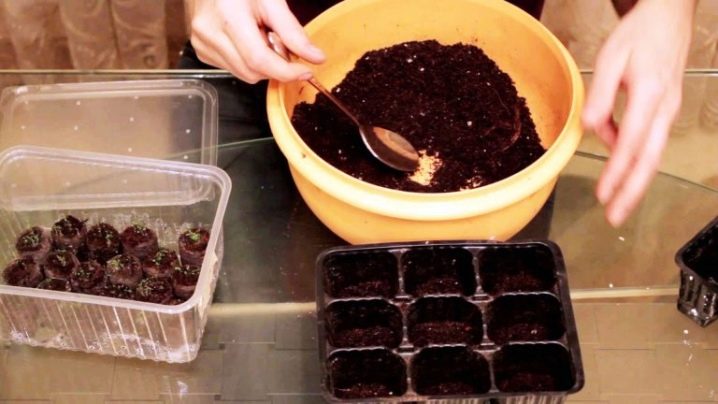
The main difficulty in sowing this flower crop is the too small size of the seed, resembling dust particles. The florist is faced with the task of achieving uniformity in their planting. There are several sowing methods that ensure uniform distribution of the seed over the soil and a high germination rate.
Sowing with snow. This method is used to sow those crops that have "uncomfortable" small dusty seeds. To do this, a thin layer of snow is spread on the prepared soil, and then seeds are poured onto it. As the snow melts, they will gradually deepen into the moist soil. Another plus of this method is the natural stratification of seeds during the time that the "snowdrift" melts.


It is important that in this case you will not have to dive the seedlings, since the seeds sprout in bunches. Cons - high cost and the need to constantly control the moisture content of peat due to its rapid drying
Separately, it must be said about sowing seeds in a hydrogel. This eco-friendly polymer in the form of granules has the unique property of retaining large volumes of moisture: 1 g of the substance can absorb up to 400 g of liquid.
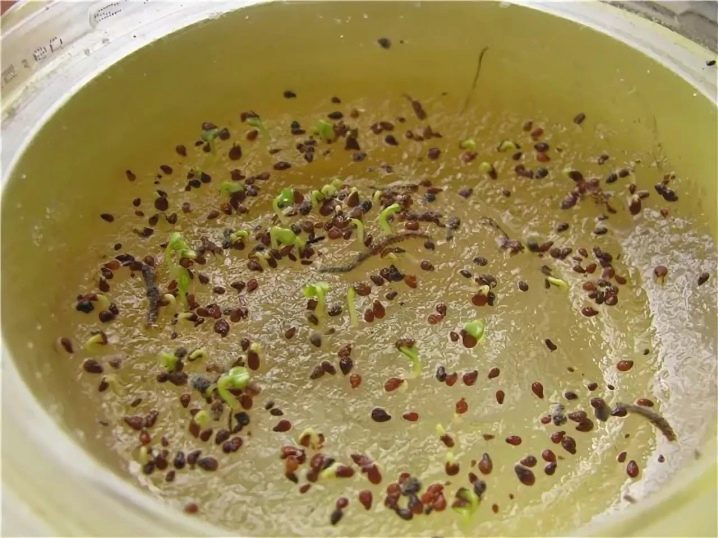
This material is used in two ways:
- mix granules with ready-made or home-made soil in a ratio of 1: 4;
- the capsules are placed at the bottom of the planting container as a drainage layer 1-1.5 cm thick, and then filled with a substrate to the edges.
The main advantages of growing seedlings in hydrogel capsules:
- maintaining the optimal water balance of the soil during the entire period of growing seedlings;
- no problems with an excess or lack of moisture in the ground, since the plants themselves will take it from the granules in the right amount;
- seeds in "jelly" germinate much more actively than when sown in the ground, due to the full nutrition of the roots of seedlings;
- picking without damaging the root system of the sprouts - since the seedlings are easily removed from the jelly-like mass, in this case it is possible to avoid injury or breakage of small roots, in the future this guarantees the receipt of developed and powerful roots;
- early flowering, since seedlings grown on a hydrogel are better transplanted to a permanent place.
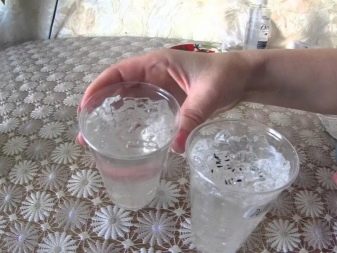
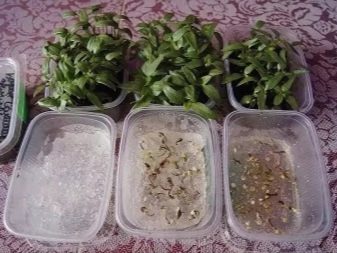
To facilitate the germination of small seeds on the hydrogel, they are sown using additional devices. The hydrogel layer in the planting container is covered with a piece of gauze, a sheet of filtered paper, or covered with a light coconut substrate, after which the seeds are poured. This prevents the seed from getting stuck between the hydrogel beads.They are engaged in picking seedlings when they have cotyledons or the first true leaves, as it is more familiar to whom.
At t 17-21 ° C, the appearance of the first shoots can be expected after 1-2 weeks from the moment of sowing. During this entire period, it is necessary to promptly get rid of the condensate accumulating under the greenhouse. Otherwise, under the pressure of large drops of moisture falling from above, the seeds will sink into the soil.
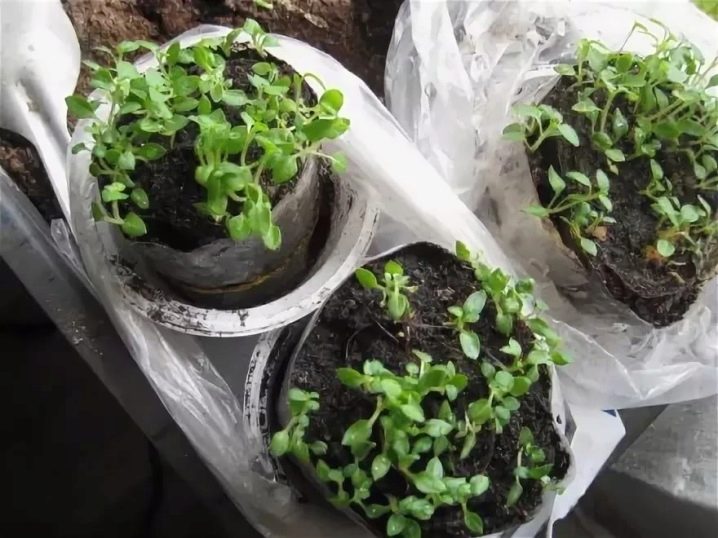
Special care
After the shoots, the most stressful time comes - trying not to destroy the seedlings. They will be crowned with success if:
- do not water the seedlings in the traditional way, but do it in a tray or with a syringe;
- to light up seedlings in March - plus 4-5 hours by daytime, in April - plus 2-3 hours;
- monitor the constant air temperature in the range of + 17 ... 18 ° С, prevent drops and drafts.
Picking
This is another "jewelry" operation that growers hate. Many people use tweezers, toothpicks, trying to separate the tender sprouts from each other, which have merged into a solid rug. It is easier to “cut” the resulting “sod” into small pieces with a spoon or other suitable tool and place it in small personal pots (always with drainage holes). For those who sow a flower in peat tablets, it will be easier to survive the stage of painful picking.

Lobelia pick
The picking is carried out no earlier than a month after the emergence of shoots.
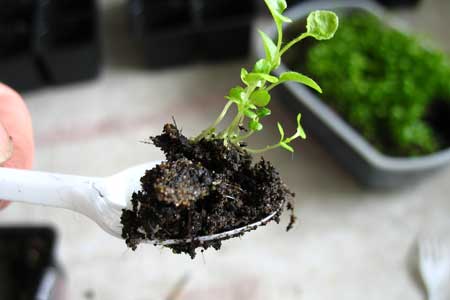
Lobelia pick with a spoon
Pinching
So that the seedlings do not stretch, and in the future compact bushes, abundantly strewn with flowers, develop from it, the seedlings need to be pinched or trimmed.
As soon as the seedlings reach a height of four centimeters, all the upper tips must be cut or pinched off.
Sowing methods
There are many ways to plant Lobelia seeds. Each of them has its own characteristics and is often used in practice. The flower grower has the right to choose a method convenient for himself, which will allow him to get healthy seedlings in the future:
- With sand. Since Lobelia seeds are small in size, they should be mixed with sand before planting. Then it is enough to distribute the resulting mixture over the soil surface.
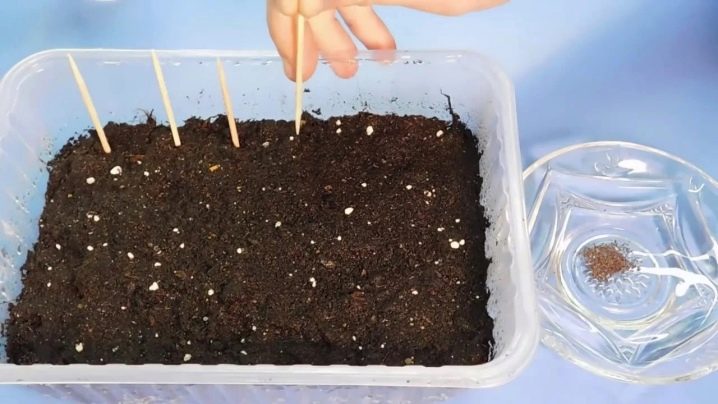
- With a toothpick. To use this method, you need to prepare a toothpick. Its tip should be placed in water and immersed in the planting material. After that, it remains only to distribute everything over the surface of the soil.
- On the snow. To start growing Lobelia from seeds at home, you need to fill the container with earth, then lay a layer of snow on it and fill in the seed.
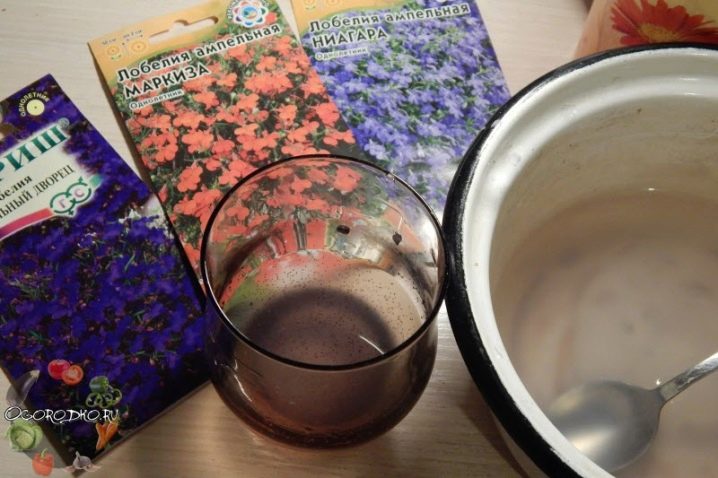
- With hydrogen peroxide. To use this method, you need to pour seeds into a glass, fill them with peroxide, remove the container with the contents to the side for 10 minutes. Next, pour a little water into the glass, mix everything and pour the soil.
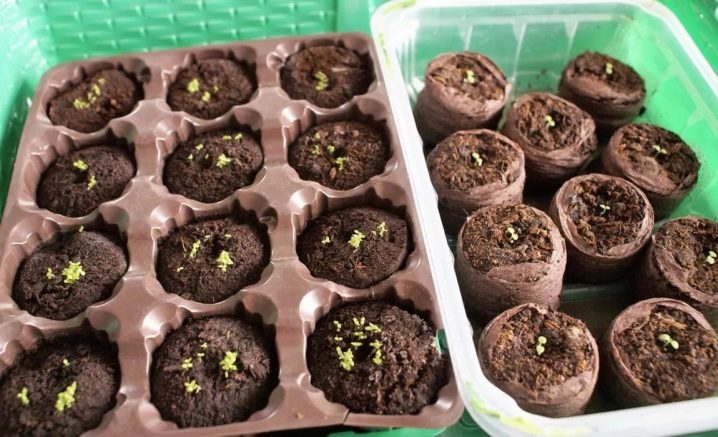
- In peat tablets. The easiest way to get healthy seedlings is to grow them in special pills. First, you need to fill them with hot water, and then plant the seeds. As soon as the seedlings grow up, they should be transplanted into containers.
- In tea bags. If the grower does not mind the tea bags, then you can plant the seeds directly in them. First you need to cut the thread and break the bag. It is undesirable to extract the tea leaves, it will serve as a fertilizer. Pour potting soil into the tea leaves and put everything in a pot. Place a seed in each bag, be sure to water.
Such methods of planting Lobelia are popular. Even a beginner will be able to master them and get healthy and strong seedlings.

5 main rules of care
Long-lasting and beautiful flowering can only be achieved if the daisies are properly looked after:
- Watering. Daisies have short roots, so the moisture in the soil must be carefully monitored. In a warm summer without rain, it is recommended to water the plants daily. If it rains regularly, watering is carried out as needed.
- Top dressing. Daisies planted in nutrient soil do not feed for the first month. Then, twice a season, the flowers are fed with mineral fertilizers for garden blooming flowers. You can make a nutrient solution yourself from 10 liters of water, in which two tablespoons of Agricola-Fantasy and Nitrofoski are diluted. Each plant is watered with a liter of this fertilizer.
- Removal of faded flowers. In flowers that have already bloomed, seeds begin to form, which takes away strength from the plants. Therefore, they are removed immediately after flowering.
- Disease and pest control... Daisies are rarely affected by diseases and pests. If you notice signs of rust, powdery mildew, or rot, treat the bushes with Topazop. Severely affected plants are removed. Of the pests, daisies are loved by slugs and caterpillars. They use special means (for example, Hom).
- Preparing for winter... It is recommended to cover the soil around the daisies in autumn with peat, sawdust or other mulch, the layer of which should be about 8-10 cm. Otherwise, if it is frosty in winter and there is little snow, the roots of the flowers may freeze out.
Description of lobelia
Lobelias are lacy, lush, surprisingly "plastic" annuals that create blooming clouds of delicate texture or uniquely lush spots. Lobelia grows in the form of a creeping plant with thin, flexible shoots. In the soil, it spreads out with carpets or grows in spheres-bushes, in containers it hangs gracefully (respectively, the varieties are divided into border and ampelous).
The most valuable feature of lobelia, like any other stellar flyer, is rightfully considered a long, relentless, abundant flowering. But lobelia and foliage are more than good: small, but dense, it always forms a fresh-looking and lush green background for a massive scattering of flowers. They literally shine, small, delicate, but very beautiful.
In the genus Lobelia there are more than 300 plant species. The general favorite of the black lobelia (lobelia erinus) can boast of the greatest beauty of flowering. But other, rare species are as easy to reproduce as this beauty. Lobelia: ampelous, thinnest, strong and even beautiful can be grown from seeds without hassle and expenses. These beauties are not sown in open soil, but grown only in seedlings.
How to sow?
Mallow seeds can be planted both in open ground and in seedling containers. The planting technology is so simple that even a novice summer resident can cope with it.
Sowing in open ground
Seed material is carefully laid out on a previously dug ground, after which it is sprinkled with a nutritious substrate. Some gardeners make shallow holes in the soil, where they place the seeds. The sowing scheme is as follows: the distance between two tall species of mallow should be 50-70 cm, between the undersized ones, such as the low mallow, - 45 cm.To obtain guaranteed shoots, instead of one seed, it is better to plant three at once, placing them in a triangle at a distance of 5 cm apart.
After sowing, the flower bed is carefully moistened, trying not to wash the seeds out of the ground, and covered with agrofibre. Every day, the material is removed for 10-15 minutes and the planting is aired. Watering is done as needed, keeping the soil moist. The first shoots appear on the 14-20th day, depending on temperature conditions and care. After sprouting the sprouts, the film is removed, not forgetting to regularly water the planting.
If all the seeds have sprung up and the shoots grow too densely, they must be thinned out by transplanting the dug out shoots to another flower bed. However, due to the very vulnerable roots, there are no guarantees that the sprouts will take root. You should also know that when planting seeds in open ground, only annual species bloom in the first year.
Planting seedlings
Planting seeds for seedlings is the same as sowing in open ground.If a common box is used, then the seeds are placed at a distance of 5 cm from each other, sprinkled with a nutrient mixture and moistened with a spray bottle. Then the planting is covered with polyethylene and germinated in a bright place at a temperature of 20-22 degrees, watering and airing.
After the sprouts appear, which takes 10 to 12 days, the film is removed. Sowing seeds in peat pots is performed in the same way, with the only difference that glass jars or cut plastic bottles are used instead of plastic wrap. It is recommended to plant two seeds in each container.
After the young sprouts grow a little and get stronger, they begin to harden and prepare for transplantation to a permanent place. To do this, boxes or pots are taken out into the street, and every day they increase their time in the fresh air. Mallow tolerates picking very badly, therefore experienced gardeners recommend not to carry it out at all, or to plant only the largest and most powerful sprouts.
Young plants are transplanted to a permanent place at the end of May, after the threat of night frosts has completely passed. The transplant is performed very carefully, trying not to destroy the earthen lump. Seedlings from peat pots are planted together with the pots.
Sowing seeds for seedlings
The race for a certain variety can be started as early as December, but the seeds should be sown in late February - early March. If there is a phytolamp at home, then disembarkation begins in January. Otherwise, the sprouts will be elongated and weak.
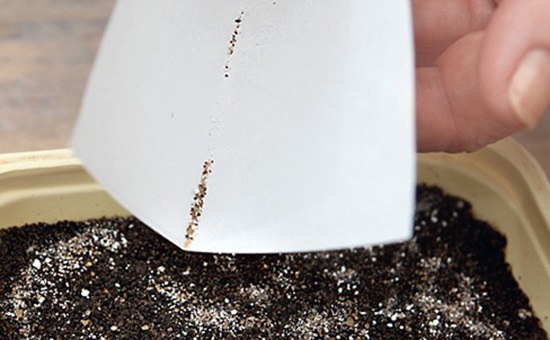
Lobelia seeds are very small, like dust, so you can use the following simple methods to evenly distribute them over the surface of the soil:
- plant "on the snow". Those. just bring a bucket of snow from the yard, put a layer of it on the ground and pour seeds from the pack onto it. At the same time, the seeds will undergo a so-called stratification;
- mix seeds with sand and sprinkle evenly;
- just buy granulated seeds.
But this is unprofitable: they are more expensive, and the number of seeds in a pack is much smaller, and there is still the possibility of an empty pellet without a seed inside.
Tanks for planting need shallow (3-4 cm) and can be anything you like, but there is one important condition - drainage holes must be present. They can be burned out in any plastic container with the hottest nail, for example
So, if the landing “on the snow” is chosen, then watering will not be required in the near future. If you plant seeds mixed with sand, then the soil is moistened before sowing.
When sowing with granules, it is better to plant them in peat tablets. Before sowing, these tablets are soaked in water until they swell. On one side, a hole will become visible, in which the granule will sit.
Note: watering in this case in a pan, and not on top, and more frequent, since the tablets are very fond of drying out. But they also have their advantages - in this case, a transplant is not required.
How to care for seedlings?
To get strong and viable seedlings, she will need simple, but regular and competent care (you can learn more about planting and further care of lobelia here).
Watering
Before the first shoots appear, watering should be done only through spraying. The water temperature should be at room temperature. You need to focus on the condition of the soil - it should be slightly damp. If the top layer is dry, it's time to water the plants.
Lighting
The lighting should be good. In the shade, seedlings may not appear at all. It is better to place the container with seedlings on the windowsill of a window overlooking the sunny side.
Attention! The influence of direct light on the seedlings should not be allowed, organize by shading. This could be a light curtain or a sheet of white printer paper.
Temperature
The temperature in the room where the lobelia seeds are planted should be maintained between 20 and 23 degrees Celsius until the first shoots hatch.After their appearance, the temperature regime requires a decrease in indicators to 10-15 degrees.
The first sprouts of lobelia are very tender and cannot stand the cold. If the window sill is too cold, it is recommended to insulate it with foil or foam rubber.
Humidity
It is important to control the moisture level inside the container. Waterlogging is as destructive as drying out
To prevent condensation on glass or film from causing fungal infections of seedlings, the shelter must be removed daily for 15-30 minutes and the accumulated moisture must be removed.
It will be possible to completely remove the protective coating when the seedlings grow a little, and until that moment it will be necessary to gradually increase their time in air for hardening
After removing the film, it is important not to allow the soil to dry out, this can destroy young sprouts
Picking
Diving seedlings planted in a common container should be done about a month after germination of the seeds. By this time, the young plant will have a second pair of true leaves.
Before starting the process, the soil should be well moistened, so the roots will be less damaged. Seedlings are transplanted not one plant at a time, but in groups of 5-6 flowers. The containers can be peat tablets or food grade plastic cups.
Important! Care after picking should be especially careful and careful until the plants get stronger. It is important to keep the seedlings cool and at an optimal moisture level.
If these indicators are exceeded, seedlings may be affected by rot and die.
Watering is carried out in a moderate mode only after the drying of the upper layer of the soil is found.
Top dressing
The first feeding is carried out a couple of weeks after the picking of the grown seedlings. For this, universal preparations for flowering plants are used. The second time fertilization will be possible after pruning the plants, which is usually done in August, provided that it grows in the open field. Indoor plants can be fertilized every two weeks. Such measures contribute to the abundant flowering of lobelia.
Sowing daisies in the ground on a flower bed
If you don't want to mess with seedlings, as soon as the soil on the site warms up to +15 .. + 20 degrees, you can sow daisy seeds directly into the flower garden.
Choose a well-lit area for daisies, but the ground can be anything.
The soil in the flowerbed must be dug up, moistened and leveled. The seeds are spread over the surface of the soil, sprinkled with a little sand and covered with a film. If the weather is warm outside, seedlings will appear in about a week.
Attention! Drained seeds require more moisture, so the crops will need to be moistened daily (or every other day). After the seedlings appear, the film is removed
When young plants grow up, and several real leaves appear on them, a picking procedure is carried out. Daisies are seated according to the scheme 20x20 cm
After the seedlings appear, the film is removed. When young plants grow up, and several real leaves appear on them, a picking procedure is carried out. Daisies are seated according to the 20x20 cm scheme.
Despite the fact that daisies grow quickly, in the first year they will form a rosette, and will bloom only next spring.
Seedlings of pansies at home
When cultivating pansies, growing seedlings from seeds will accelerate the start of budding. For sowing, shallow boxes are selected and purchased soil for violets. You can independently prepare a substrate from 1 part of garden soil, 1 part of sand and 0.5 part of humus or peat. Before planting, the soil is steamed in a water bath and spilled with a fungicide to destroy pathogens and weeds. In the form of a disinfectant, a dark solution of magrantzovka is suitable.
How to plant pansies for seedlings?
Planting pansies for seedlings:
- The easiest way to touch it is to put the seeds on top of the soil in containers and put them in a dark place at a temperature of + 20-22 ° С.
- The seedlings are covered with foil and aired for 10 minutes every day. Water the crops with a fine spray.
How many days do pansy seeds germinate?
When asked how many pansy seeds sprout, experienced flower growers answer - if the sowing is done with high-quality material, then after 1-2 weeks the seedlings will sprout. Sometimes (depending on the variety and quality of the seeds) germination can take 3-4 weeks. Before that, it is better to cover them with a dark dense garbage bag - the seeds love to sprout in the dark.
Pansy picking
Boxes with green shoots are placed on a lighted window. When growing, the seedlings are taught to air for the initial 7 days. To do this, every day, the cycle of its open location is increased from 10 minutes to 5-6 hours, then it can be removed from the seedlings by covering it. Watering is done when the top layer dries. When to dive pansies after germination:
- When 2-3 true leaves appear, the seedlings dive into separate containers or a common box according to the 5x5 cm scheme.
- When diving, young plants are buried to the cotyledons.
- When growing viola, when there are 6 leaves on young shoots, pinch the top of the central stem so that the violets form a lush bush.
- The viola is fed once every 2 weeks with fertilizer for seedlings, the moisture of the substrate in the pots is monitored.
With quality care, in a month (by the end of May) the viola blooms and is ready for planting in the garden. Before transplanting the sprouts to an open area, they are hardened. To do this, the seedlings are placed in the sun, start from an hour a day and increase the time by an hour every day. The scheme of planting pansies in a flower garden - 20x20 cm.Care for pansies:
- For a generous flowering, the plant needs frequent watering, especially in the heat. After moistening, it is better to mulch the bush.
- Fertilizing with mineral supplements, such as nitrogen, potassium, phosphorus, has a beneficial effect on the development of viola. It is advisable to start fertilizing flowers 2 weeks after planting with a solution of ammonium nitrate or superphosphate at the rate of 20-40 g per 1 m2.
- The dried flowers and leaves of the viola must be removed. If these simple requirements are implemented, then a bright carpet will delight the eye until frost.


