Preparing for landings
There are 3 ways to grow the future beauty and pride of the garden:
- Seedlings on the windowsill
- Landing in open ground
- Seed or dividing the bulb
Seedling
Adequate lighting is required at all times. If there are already seedlings of other crops on the windowsills, then the children may not have enough light, and then the sprout will be weak and pitiful.
The second difficulty is that it is not advisable to grow gladiolus for seedlings in common boxes. When transplanting into the ground, you will have to separate the roots, and this, in turn, will weaken the plant, and it will take longer to take root and hurt.
Landing in open ground
This option is best suited for the propagation and development of the garden skewer!
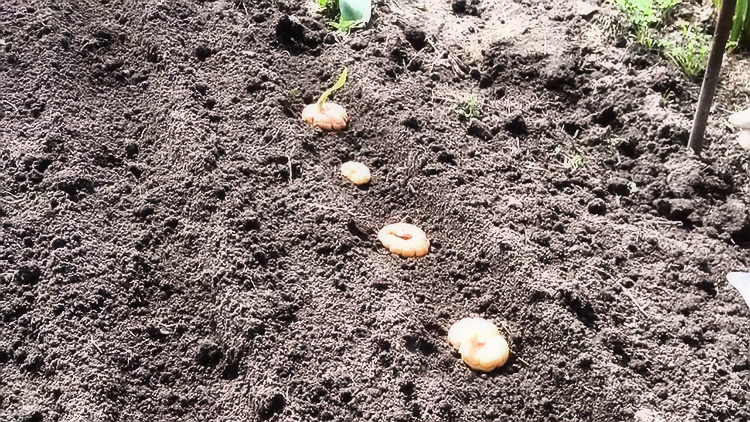
Adult bulbs and young overwintered children are planted when the soil warms up to + 10 * and the threat of frost has passed. Approximately mid-April to mid-May. For planting the bulbs must be prepared!
10-15 days before instillation, it is recommended to clean them of scales. For what?
- This will speed up the germination of the shoot by about 7-10 days.
- It will allow you to reject bulbous babies that have not survived the winter.
- Freed from the shell, tubers will be able to assimilate nutrients in full.
- If pests have hidden under the crust, then we will not give them a chance to get to the planting beds!
Selected bulbs should arrange a daily bath in a solution of potassium permanganate: 2g per 10 liters. warm water.

By the time of planting, the children should have 2-3 root tubercles - the key to a healthy and powerful plant. The more such bumps, the better.
When planting in open ground, we will process our bulbs again. This time - karbofos.
It would be good to spill the earthen grooves with an aqueous solution of chicken manure.
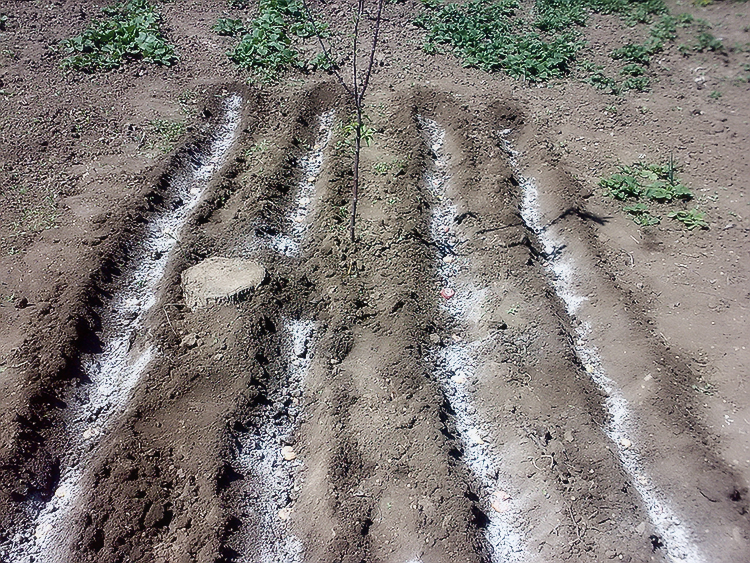
In the soil, which has been properly prepared since autumn, the children need to be planted according to the scheme:
- the distance between tubercles is at least 7 cm;
- planting depth - 3-5 cm (large ones can be planted deeper - up to 7 cm);
- the distance between the rows is at least 20 cm.
After planting, the soil is mulched with 2-3 cm of humus.
It remains to cover the plantings with non-woven material or greenhouse film, in order to obtain friendly shoots and to protect against suddenly returning frosts.
The first feeding is 30 days after the appearance of the first leaves.
Seed or dividing the bulb
Over time, the mother's bulbs of gladioli grow, become large, flat and "lazy" - they give fewer children, drive out weak flowers. Some gardeners recommend cutting such a bulb, brushing it with brilliant green or cinnamon, and replanting the rejuvenated "madam" in the spring. But such an experiment could end in complete fiasco. It is better to collect the tubers from it and plant them.

But if you wish, sow the seeds in February in the soil of leaf humus + 30% coarse sand (preferably river). Soak the seeds for 3-4 hours in Kornevin or sodium humate. It is necessary to sow in such a container so that it can be dug into the garden along with the seedlings - in no case should the roots be damaged. Feed often and wait for the corms by fall.
What you did, you can find out in 2 years.
Description of gladiolus seeds
Gladiolus fruits look like a membranous box. The upper part is slightly cracked. There will always be winged seeds inside the capsule. On average, their number reaches 250. The seed material of the gladiolus flower has no physiological rest. Therefore, they can be planted immediately after harvest. As a result, they will begin to sprout in a few weeks.
Important! It is necessary to store gladiolus seeds in a room with a fairly high level of humidity. In a dry environment, seed may lose germination.
Most gardeners, even experienced ones, cannot answer the question of what gladiolus seeds might look like. Everyone knows the description of the flower bulb, but certain difficulties arise with the appearance of the seed material.
The main characteristics of seeds include:
- shape - flat;
- Brown color;
- size - about 2 mm.

Subtleties of plant care
As already mentioned, gladioli are delicate plants that require some care.
Diseases
Gladioli have many different types of diseases:
- Fusarium. A common fungal disease that causes plant death. It can occur even during storage if the bulbs are heavily infested. If the disease is poorly developed, it may not appear outwardly, but seedlings will not appear. With a late onset of the disease, yellow stripes appear on the leaves of gladioli, and they dry out quickly.
- Heart rot. A common fungal disease. When it is affected, brown spots appear on the leaves, and they quickly disappear. Wet streaks form on the flowers. Heart rot spreads when harvesting in wet weather. It also provokes storage in very humid rooms.
- Less common diseases such as sclerotinia, hard rot, bacterial scab, yellow.
Pests
Gladioli are an attractive treat for some pests. These include spider mites and thrips.
In order to get rid of spider mites, plants are sprayed with formulations containing sulfur and phosphorus. Measures to prevent infection with thrips are to treat the bulbs with karbofos. They are placed in a solution of karbofos (0.4%) for half an hour, dried and stored in the refrigerator. They do the same before disembarking.
Watering
Soil moisture is also very important, as for most plants, including the nemesia flowers described in the article.
This contributes to the good development of the root system and the correct formation of the inflorescences.
How to grow gladioli from seeds
Growing gladioli from harvested seeds
Seeds of gladioli from autumn must be stored until February or March. Usually, during these periods, they are planted in boxes or special containers.

IMPORTANT! For seedlings of flowers, it is necessary to provide good lighting (supplementary illumination with fluorescent lamps). If this is not possible, then it is better to sow gladioli later, in the middle or end of March.
It is advisable to carefully clean the seeds from the impeller (shell), then soak in humate (you can also use heteroauxin, root) for several hours. Heteroauxin is a "magic" drug that stimulates the growth of a healthy and strong root system of gladioli. Proportions:
- heteroauxin: 0.6 grams of the drug is diluted in a liter of water, the seeds are soaked for 6 hours;
- root: 1 gram is diluted in a liter of water.
Prepare containers in advance for seedlings and soil. The best soil mixture will be mixed sod land, humus and river sand. Some growers use ready-made soils, such as Violet, Torfolin, but washed and calcined river sand (2/3 of soil and 1/3 of sand) must also be added to them.
After soaking, the seeds must be germinated until a sprout appears, after which they are sown in pots or boxes.
Further care is simple:
- moistening the soil;
- gentle loosening of the soil in boxes.
In May or early June, with the onset of stable warm temperatures, boxes with plants are taken out into the air. At first, the residence time of gladioli on the street is short, then the duration is increased. At first, they can be slightly covered from bright sunlight. It is also advisable to close the plants at night, especially if it is cool at the beginning of summer.

Then they act based on the situation. Some growers leave gladioli in boxes or pots all summer long for routine maintenance. Others prefer to transplant plants into the ground, especially if there are free ridges on the site for this. Some gladioli can produce an ear in the first summer, but usually plants grown from seeds do not bloom in the first season. The gladiolus directs all its forces to the formation of onions.When sowing in February, by the fall, you can get strong and healthy baby onions, which will need to be planted in the ground next year.
Gladioli seeds planting and care
In the fall, small bulbs are dug out of seed-planted gladioli, carefully separating them from the stem. The timing of harvesting baby bulbs depends on the climate and weather conditions, usually in September.
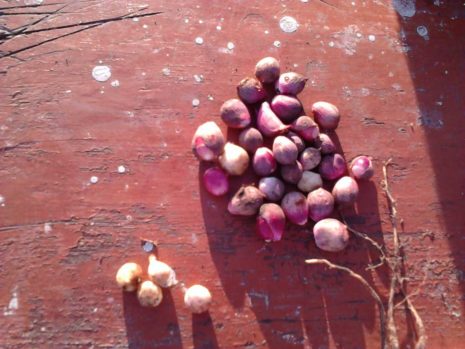
The collected children are treated in a solution of potassium permanganate, then dried and placed for the winter. Children can be stored in boxes, boxes, providing a temperature of about + 4… + 8ºC.
ON A NOTE! Seed material should be regularly inspected to remove damaged bulbs. If the babies are wet, they must be dried.
In the spring, in April, the baby is taken out of storage, sorted out and removed from the scales. Then they are soaked in any growth stimulant, and then planted on the prepared beds.
The landing of gladioli is carried out in May (in the northern regions - at the beginning of June), when the threat of recurrent cold snaps has passed. Children are small, so it is most convenient to plant them in grooves sprinkled with river sand. In such soil, they get sick less, give strong and high-quality plants.
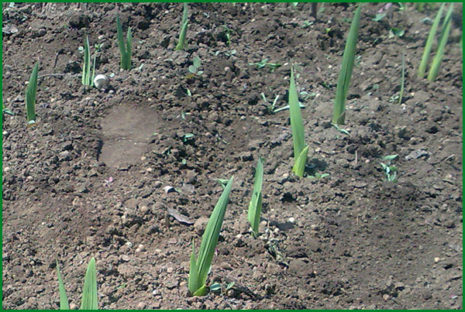
The grooves are made up to 5 cm deep, spilled with a solution of potassium permanganate, sprinkled with sand and then the gladiolus bulbs are planted.
IMPORTANT! The distance between the children is 15 cm.On top of the onion, sprinkle with sand again and gently irrigate with water
Sprinkle sand on top of the onions and gently irrigate them with water.
Subsequent care comes down to regular watering, loosening. You can water the plants with a boric acid solution after about a month. This drug helps to strengthen gladioli, the formation of a high-quality bulb.
If everything is done correctly, then in the second year the baby gives a peduncle. To obtain a full-fledged bulb in the fall, break off the arrow so that all the plant's forces are directed to the growth and nutrition of the tuber. You can fully enjoy the flowering of gladioli grown from seeds in the second or third year. And who knows, maybe it will turn out to grow a completely unique hybrid of this regal flower that will delight you and those around you.
Zinnia - growing from seeds is available to everyone
The main breeding method for an annual such as zinnia - growing from seeds. The process itself, as a rule, does not cause any particular difficulties, but one very important point should be taken into account - young seedlings do not tolerate even small frosts. Therefore, only in the southern regions of the country it is possible to sow directly into the ground in April and not use covering materials.
But lovers of such a wonderful flower as zinnia have mastered growing from seeds even in rather cold regions. For this, greenhouses, modern covering materials are used, which give very good results. You can grow seedlings in boxes or pots in your home or balcony. Thus, it is possible to achieve a longer flowering.
For a flower such as zinnia, seeds can be obtained mainly in the southern regions. But proper care and hot summer make it possible to achieve such a result in the middle zone of our country. They mature about 60 days after flowering begins. The best qualities are possessed by seeds that are obtained from the apical basket located on the central shoot.
Zinnia seeds remain viable for 2-3 years. If the seeds are not very fresh, then it is better to soak them in order to plant only the hatched specimens. You can plant in boxes, but to avoid picking, you need to do this not very thickly. Some gardeners prefer to plant in peat pots, which is quite convenient. You need to cover the seeds to a depth of 1 cm. After about a week, if the ambient temperature is at least 22 degrees, seedlings will appear.
When the last cold weather has passed, you can plant the zinnia in a permanent place. These flowers love light and well-fertilized soil.But this plant does not tolerate stagnant water. It is advisable that the area where zinnia will grow is protected from the wind. Depending on the variety, the seedlings are planted at a distance of 25 to 40 cm. Then care consists in watering, without which the plant most likely will not die, but the flowers will be much smaller. 2-3 dressings are also desirable, which will allow you to get larger and more beautiful flowers.
In order for a garden to be decorated with such a magnificent flower as zinnia, growing from seeds is not difficult. A beginner can do all these works, but you can achieve success in an even simpler way. Only in this case flowering will come a little later. The seeds are planted immediately to a permanent place at the beginning of June, when the danger of returning cold will disappear. But this method has its drawback - the flowering period will become much shorter, because the flowers are very thermophilic and with the first autumn frosts they will lose their beauty.
However, connoisseurs of such an original flower as zinnia, growing from seeds, even at a late planting date, were able to turn them into an original way to decorate greenhouses or a house, and then, if the weather is good again, put it out again. For many regions of our country, rather unstable weather is characteristic, especially in spring and autumn. In the middle lane, return frosts and even snow occur even at the beginning of June, but at the same time April and May can be very warm. In autumn, frosts in this region, albeit short-term, occur at the very beginning of September, and then the weather is usually warm for a long time. Therefore, many people grow zinnias in pots, containers, etc. This plant feels very good in such containers, and if there is a threat of cold snap, they can easily be brought into the greenhouse and even the house, thereby prolonging their beautiful flowering.
.
Zinnia care, cultivation, watering, planting at home
From mid-summer to late autumn, my eye is pleased with the bright spectrum of colors, this is the bloom of zinnia. I use low-growing varieties of zinnias (up to 30cm) to decorate borders, and medium-sized (40-60cm) full-fledged residents of my flower beds. I propagate zinnia by seeds, which I sow for seedlings in March in boxes. I plant seedlings in a permanent place in ...
yunost
There is no indifferent grower who does not plant at least one type of zinnia on his flower beds. With its beauty, this plant will bribe anyone, even a person far from floriculture. I always grow several types of zinnias on my site: high, medium-sized and low. Various colors of zinnias allow you to combine them practically ...
masko4
How to work with seeds?
Over time, gladiolus bulbs lose their properties:
- become flat;
- give fewer children for reproduction;
- they throw out weak peduncles in small quantities.
In this case, some gardeners resort to seed propagation of gladioli. This technique is considered risky, costly and unjustified, but it still takes place. When growing bulbs from seeds, all the varietal properties of the mother plant are often lost, the cross-pollination that occurred during the flowering period is strongly affected. The result of such processes is unpredictable.
In gladioli, after pollination, the formation of seed pods occurs, in which the seeds then ripen. According to their external characteristics, they resemble small flat plates, the size of which is 2 mm. After ripening, the seeds acquire a brown color. A barely noticeable embryo of the future gladiolus is visible under the shell. Up to 200 seeds are formed in each seed box. After ripening and collection, they are successfully stored in room conditions, however, the storage place should not be allowed to be too dry. In this case, germination is greatly impaired.
In March-February, the harvested seed is planted in containers or boxes.During this period, flowers need to provide a sufficient level of illumination, using fluorescent lamps for this. If this is not possible, the sowing dates should be postponed to the end of March.
Before sowing, the seeds are soaked in a growth promoter for several hours. The containers and soil mixture are prepared in advance. The ideal option would be to mix in equal proportions:
- sod soil;
- humus;
- river sand.
Florists also use a ready-made commercial mixture, but in this case, calcined sand should be added to it. Seeds of gladioli are germinated and then sown in boxes or pots. Subsequently, they only need regular moisture and gentle loosening of the soil.
With the onset of warm weather, boxes with young shoots of gladioli gradually begin to be taken out into the street and hardened. Initially, they are left in the fresh air for a couple of hours, and then this time is gradually increased. To prevent the sprouts from getting sunburn, they are covered from direct rays.
After the threat of night frosts has passed, gladioli can be planted in open ground. Although some florists leave them in boxes for the whole summer, while carrying out standard care procedures. As a rule, in the first year of life, a flower grown from a seed does not bloom. All his strength goes to the formation and development of a strong and healthy bulb.
In autumn, gladioli planted from seeds are dug out, small bulbs are separated from the stem and prepared for storage. The timing of harvesting flowers depends on climatic conditions, but most often it is done in September. The next year, the collected bulbs are planted on the site in grooves. They may well already bloom, although professionals recommend cutting the peduncle so that the plant has enough strength to further form the bulb. Care for gladioli grown from seeds is no different from that which is carried out when growing them from bulbs or children.
Growing gladioli with seeds is usually preferred by professionals. For amateur gardeners, this planting process can be too time-consuming and laborious. If you figure out how to properly reproduce gladioli by seeds, you can not only grow plants annually, but also develop new hybrid varieties of these beautiful majestic flowers.
Before growing gladioli from babies or seeds, you should study as much of the available information on this issue as possible. Not only books will help, but also the live experience of professional gardeners. The collected information will be especially useful if you want to create a new variety yourself. After collecting seeds for gladioli, planting should be successful. When choosing planting material, one must take into account that hybrid varieties in most cases do not acquire seeds.
When the desire to get your own personal variety is great, growing gladioli from seeds can become extremely interesting, despite the laboriousness and scrupulousness. The first step is independent artificial pollination of gladiolus flowers. This is a complex process that requires sufficient time. Hastily, without understanding, it is not worth producing it, since you can ruin the mother plants. Pollination is usually carried out in order to bring out a new early flowering plant or flowers of an unusual shape and color.
Care basics
When growing a crop, you should pay attention to the following points. Watering
It is important to regularly moisten the flower bed. The recommended moistening depth is 30-35 cm, it is at this level that the roots are mainly located
Surface irrigation should be avoided, since such a procedure can provoke the active development of weeds and damage to the tissues of the root tubers. Watering is carried out in the amount of 1-1.5 buckets per 1m2. It is best to water the plant along the furrows or aisles
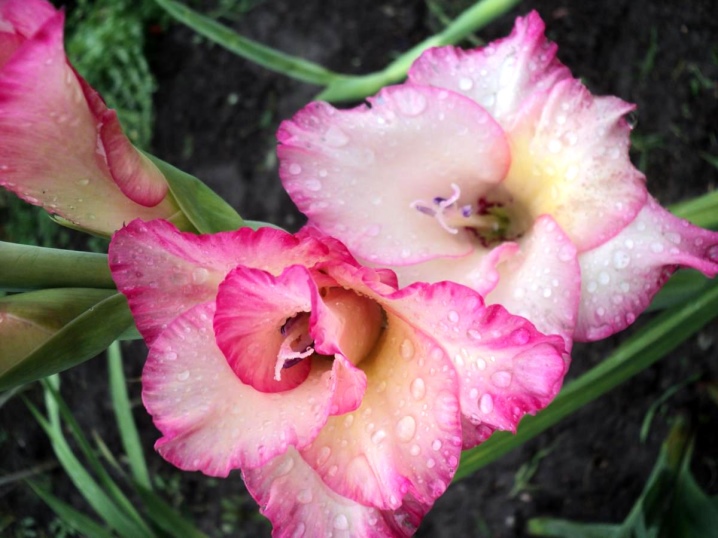
Watering
It is important to regularly moisten the flower bed.The recommended moistening depth is 30-35 cm, it is at this level that the roots are mainly located
Surface irrigation should be avoided, since such a procedure can provoke the active development of weeds and damage to the tissues of the root tubers. Watering is carried out in the amount of 1-1.5 buckets per 1m2. It is best to water the plant in furrows or aisles.
Loosening
After each watering, it is important to loosen the soil, this manipulation will prevent crust formation and will maintain good ventilation, which is very important for the roots, and an even distribution of moisture in the ground. After loosening, you should slightly spud the crop with soil and make furrows for irrigation
The plant needs loosening after precipitation, and on average, the procedure is carried out once every 10 days.
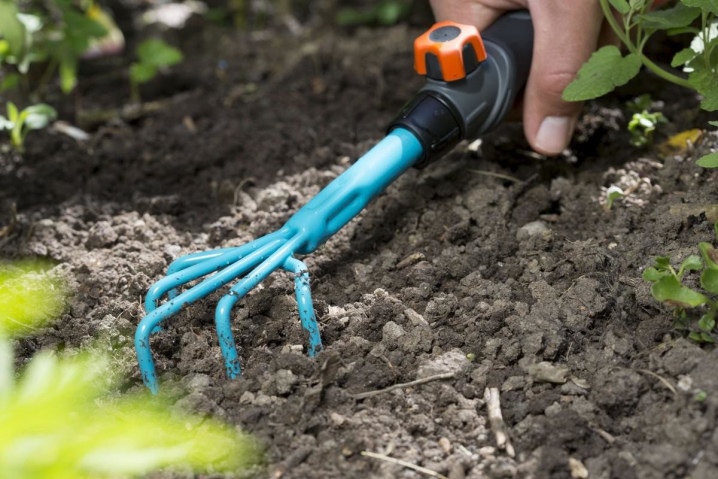
Mulching. This process protects plants from bad weather, retains moisture for as long as possible, and reduces the frequency of loosening. Experienced gardeners recommend using a mixture of humus, peat, compost, pine needles, grass or straw as mulch. Mulching is carried out with the growth of seedlings at a level of 10 cm.
Weeding. With regular loosening and mulching, this representative of the flora needs only 3-4 times per summer. The procedure is carried out as a prophylaxis against weeds. Try to prevent the development of weeds under the flowers, remove young shoots in time, since the presented culture does not tolerate the rivalry that is inevitable when adjacent to weeds. Timely removal of weeds will prevent the risk of pests and diseases.

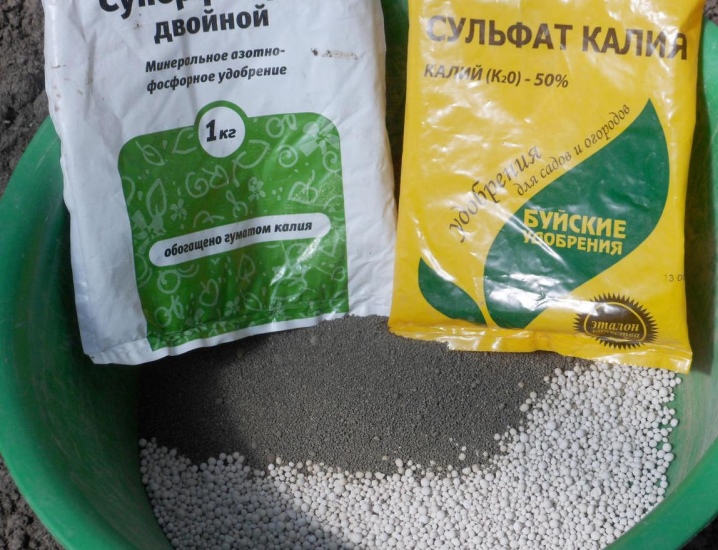
Top dressing. This plant accumulates nutrients in the bulb from the beginning of flowering to the end of the growing season. During the growing season, at the beginning of the development of the flower shoot, it is recommended to fertilize the culture with a mixture containing phosphorus and potassium. Phosphorus promotes abundant and lush flowering, and potassium is needed for the rapid formation of a large tuber
It is very important to avoid when feeding nitrogen-containing compounds, which slow down flowering and dull the development of tubers.
Preparing gladioli for planting is presented in the following video.
How to propagate?
Seed propagation is quite risky, laborious and costly, but some daring gardeners who are ready to experiment still prefer this method. The main problem with growing is that the varietal characteristics of the mother plant are often lost, and the result is unpredictable. Usually this method is carried out by breeders when writing scientific papers or for breeding new varieties. Sowing in open ground is possible under the following conditions.
Planting of seed takes place in February in a greenhouse. Here, young seedlings will be able to enrich themselves with strength for transplanting into open ground.
Before sowing, the seeds should be kept in a weak solution of sodium humate or in heteroauxin for 2.5-3 hours.
A favorable substrate for seeds is a mixture of humus and sand in proportions of 2: 1.
Sowing is done shallowly, from above the planting site is sprinkled with light soil.
Moistening of the sowing site is carried out simultaneously with fertilization, while solutions based on mineral preparations are used.
Planting can be carried out not only in a greenhouse, but also in boxes or in room conditions, however, high-quality lighting should be organized. If it is not possible to install lighting devices, then the seeds should be planted later than February. Further care does not differ much from growing other crops.
With the arrival of warmth, boxes with seedlings are placed in a greenhouse, where they are left open for the whole day, creating a shade for the first time in bright sunlight. If frost is likely, it is recommended to cover the plants overnight. So, in boxes or in a greenhouse, seedlings are grown until autumn, after which they are transplanted to a summer cottage.
Before the cold weather arrives, miniature bulbs should be dug up and stored.
It is customary to store them in gauze bags in a cool room. For good ventilation, it is recommended to hang the bags or put them in a box, folding them in a maximum of 4-5 cm. If the gardener has followed all the rules for seed propagation, then the next year the resulting hybrid plants can bloom.
How to get gladiolus seeds
The seeds of gladioli are formed in the seed pods and only after the pollination process has passed. In nature, the process of self-pollination of these flowers is difficult, since there is a difference in the timing of pollen ripening in the stamens of the flowers of male plants and the opening of the pistil in female flowers.
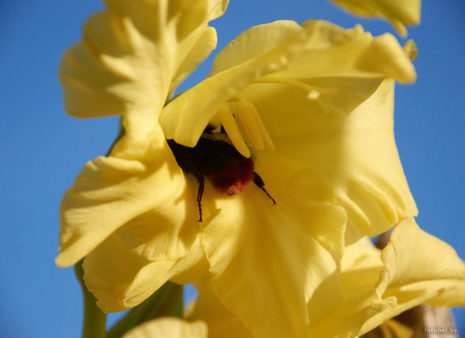
Insects, as well as the wind, can "help", although in these cases it is not necessary to talk about the purity of pollination. Bees and gusts of wind carry pollen through different flowers of gladioli, not really thinking about breeding work. Therefore, to obtain seeds, you will have to carry out pollination, and then wait for the seed capsule to ripen.
What gladiolus seeds look like
For many people, and even experienced summer residents, the question of what gladioli seeds look like can be confusing. Indeed, everyone knows about the bulbs of these flowers, their babies, but there is a problem with the seeds. Outwardly, they look like small flat brown plates, no more than 2 mm in size. Upon closer examination, the plate can be seen inside, under the shell, the embryo of the plant.
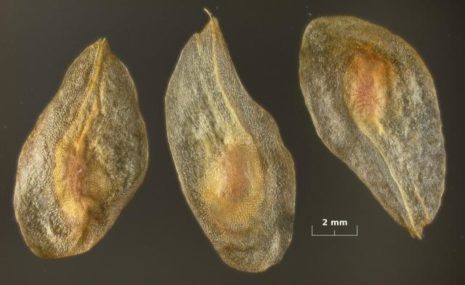
The number of seeds in a seed capsule reaches 180-200 specimens. After collecting, they are fairly well preserved in room conditions.
ON A NOTE! Do not store gladiolus seeds in a very dry place, as if they dry out, they can lose their germination.
Pollination rules
Manual pollination allows you to cross selected plants with each other. For this, the necessary flowering bushes are selected in advance, while it is desirable that the pairs have more or less uniform shades. Professional breeders know certain crossing rules, the percentage of hybrids obtained according to given characteristics.
It is difficult to obtain gladiolus of certain parameters, since genetics have their own laws and characteristics. In general, it is noted that gladioli most often produce plants with the next arrangement of inflorescences, with flowers of an overhanging upper lobe (and not open, such as Edel), with a non-crimped edge.

By color: the color of the flowers of the parents will be summed up in the color scheme of the new variety. In this case, there are dominant colors: purple will exceed the lilac color, crimson - pink, and so on. That is, a more saturated color will "cover" a more delicate one.
To carry out pollination, first the "daddy" plants are selected, and their anthers are carefully cut off. They are placed in a dry room (on shelves, table) and on clean paper until ripe. As soon as the pollen matures in the anthers, it spills out onto a sheet of paper. It needs to be collected and then used to apply on the stigma of the pistil of the "mother" plant.

Previously, in the inflorescences of those gladioli from which the seeds will be taken, the anthers are removed, and the flower itself is covered with a fabric bag (gauze can be used).
This is done so that pollen from other plants is not accidentally brought onto the pistil ahead of time.
As soon as the stigma of the pistil opens, the collected pollen is placed on it with a brush. After that, the inflorescence is again covered until a seed capsule is formed.
IMPORTANT! No more than two or three inflorescences can be pollinated on one gladiolus plant.

Usually, after about a week, the flower withers, and the ovary noticeably increases in size. Seeds ripen in capsules for about a month (35-40 days). Externally, the ripe box begins to change color (turns yellow, brown) and even slightly cracks on the sides.
You may be interested in:
What if the seeds are not ripe, and according to the weather forecast, a cold snap is expected? Peduncles are carefully cut and placed at home in containers of water. The seed pods also ripen successfully at home, then you just need to pick them off and put them in storage.


