Hello dear readers!
Peonies are noble and lucky flowers, some of the most attractive in the garden.
No wonder the ancient Greeks were actively engaged in the reproduction of peonies, considering these beautiful centenarians (flowers bloom profusely and magnificently for many decades) as powerful amulets from evil spells, protectors from adversity and misfortune.
The kings of the garden area begin to savor in the last spring month and delight us with their lush flowering until mid-summer.
There is never too much beauty! How to properly propagate exquisite flowers?
Saplings of these wonderful flowers are quite expensive.
Therefore, if we want to plant more bushes of this plant in our garden, let's master the reproduction of peonies ourselves.
The topic of our article today will be the reproduction of peonies in several main ways.
It's time to deal with this interesting and important question.
Is it possible to propagate peonies by seeds
Seed propagation is used exclusively for breeding peonies.
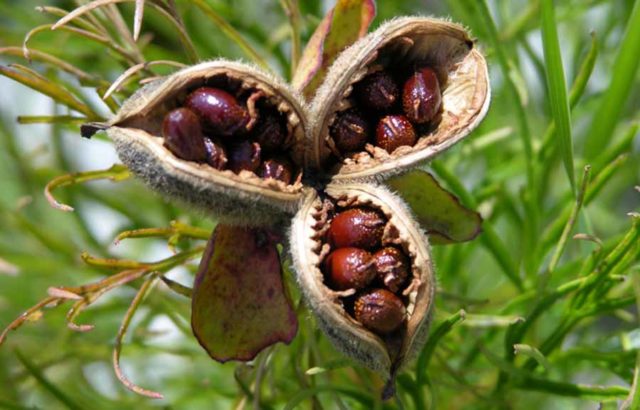
Peony seed box
Description and disadvantages of this method
Before you breed peonies with the seed method, you need to know about all the pros and cons of the technique.
Disadvantages:
- low percentage of germination - about half of the seed does not germinate;
- the flowering of plants planted by this method occurs no earlier than after 5-7 years;
- germination duration - from 1 to 5 years;
- low decorative characteristics of flowers - a decrease in color brightness and doubleness of flowers in germinated peonies.
The seed method can only be used on wild-growing varieties.
Additional Information! Seed propagation is rarely used by gardeners, because this method has a lot of disadvantages and practically no advantages.
Seed preparation
The seed box of the peony is star-shaped and painted in a pale green color. To get seeds, you need to leave a flower on the plant. Seed material will be formed around August. The seeds are collected and stored in the refrigerator.
Stratification
The slow germination of seeds is due to their thick shell. To increase the chances of obtaining sapling seedlings, a stratification technique is used, which can be carried out in two ways, alternately:
- Thermal. The seeds are dipped into wet sand in a shallow container that is placed on an electric heating pad. The sand temperature should be +30 ° C. The sowing is regularly moistened, once a day the sand is cooled, then it is heated again. This phase lasts from 2 to 2.5 months.
- Cold. This method is used if it is necessary to activate growth points on the embryo. The seeds must be removed from the sand and placed in separate containers with peat. Peat is sprinkled on top with a thin layer of soil. The temperature of the seedlings is from +5 ° C to +10 ° C. The phase lasts 3 months.
The seeds can be opened to speed up the germination process. For this, the part of the stem that is located under the cotyledons is moistened. A piece of gauze is impregnated with a 0.01% solution of any growth stimulant, and placed on the stem, fixed on top with a piece of cloth. The first shoots will break through in about 7-10 days.
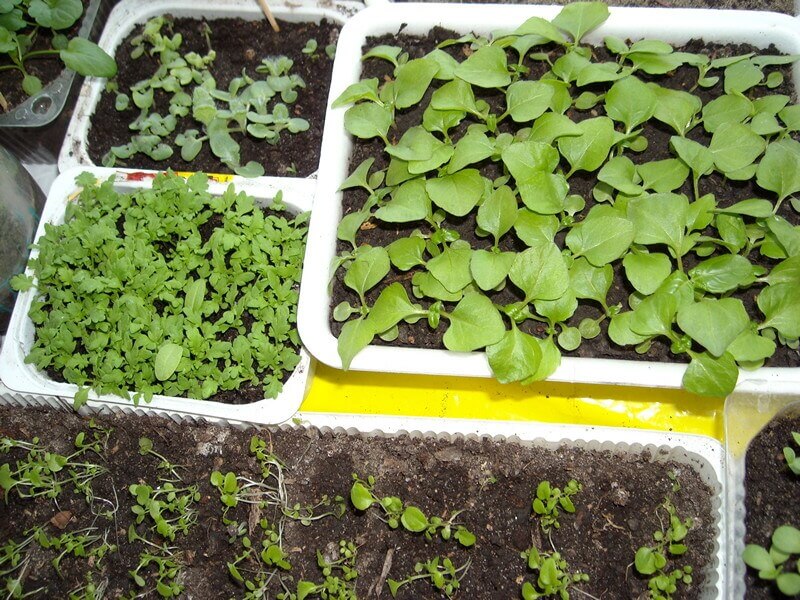
Peony seedlings
Care of young seedlings
After the first seedlings appear, when the stratification is completed, they must be placed in a warm place, with a temperature of +16 ° C to +18 ° C. Provides regular hydration.
Attention! Landing in the soil is carried out no earlier than in the month of May
Blooming peonies care
An adult tree peony bush blooms annually, forms many buds, which open as the flower ripens. The very peak of flowering, when the shrub is literally strewn with fragrant flowers, occurs in early and mid-July.
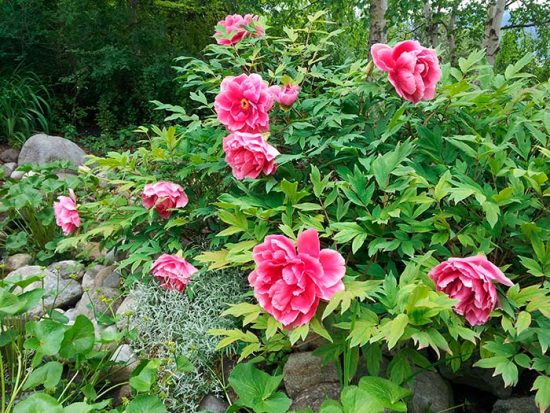 It is better to tie a flowering peony bush to a support
If you want the flowering to last as long as possible, try not to flood it with water during this period: one watering per week is enough. Top dressing is done before or after flowering. Dried inflorescences should be cut off regularly so that the plant has enough strength to open new buds.
At this time, they also remove the large lower leaves, loosen the soil, thin out and tie the stems to the pegs so that they do not lie on the ground.
Flowers adorn our existence, give moments of pleasure and enjoyment of their beauty and fragrance. Always decorate the Earth, we wish you good luck.
Breeding a tree peony
Treelike peonies are especially common in horticulture. They reproduce in the same ways:
- seeds;
- cuttings;
- layering;
- dividing the bush.
The first 2 options are most often used.
Tree peony: germinating from seed
The peony grown from seeds is distinguished by enviable health and resistance to external negative factors. The method is simple to implement, so even a beginner can handle it. You will need freshly harvested seed, which is previously scratched to break the integrity of the shell. Then they are planted in a loose, breathable substrate. Wet sand is usually used.
Seedling containers are kept warm under lamps. Maintain a certain temperature regime: 4-5 hours - up to +19 ° C, 6 hours - +30 ° C. As soon as the sprouts hatch, pinch the tops. Then they are transplanted into garden soil, 0.5 cm deep.
Until the leaves appear, the crops are kept cool, at a temperature of 5-10 ° C. With the first heat on the street, they begin to harden: they take it out for half an hour every day, gradually increasing the time. They are planted in open ground after 2-3 weeks of similar hardening. Maintain an interval of 70 cm between plantings.
Cutting tree peonies
Reproduction of a peony by cuttings is the simplest, but less effective option. Such plants bloom only for 4-5 years. The procedure can be carried out throughout the summer season. For this, a plot of 15-20 cm long is cut from the shoots, with at least two live ovaries. Slices are made under bevel, exposed areas are treated with any growth stimulant. The leaves are shortened by a third.
The harvested cuttings are planted in a prepared substrate, a mixture of river sand and peat (1 to 1). Placed at an angle of 45. Sprinkle with sand on top. Cover with glass or plastic caps to create a greenhouse effect. After rooting, they are seated in different containers and grown until spring. They are relocated to the garden when the weather is stable, without sudden night frosts.
Top dressing
The first two years are not fed. The bush has enough nutrients, which are put into the pit during transplantation. Subsequent years in April, horse or cow manure (rotted) mixed with nitrophos (100 g / m3) is scattered around the bush. Then digging is carried out, the soil is covered with a layer of humus.
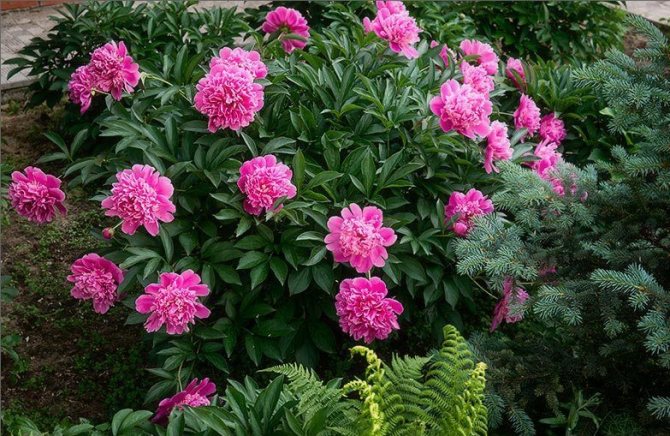
The first two years do not feed peonies
After 2-3 weeks, the plants are fed with liquid fertilizer prepared according to this recipe:
- mullein infusion - 10 l;
- phosphate fertilizers - 40 g;
- potash fertilizers - 20 g.
This portion is for 3-5 bushes.
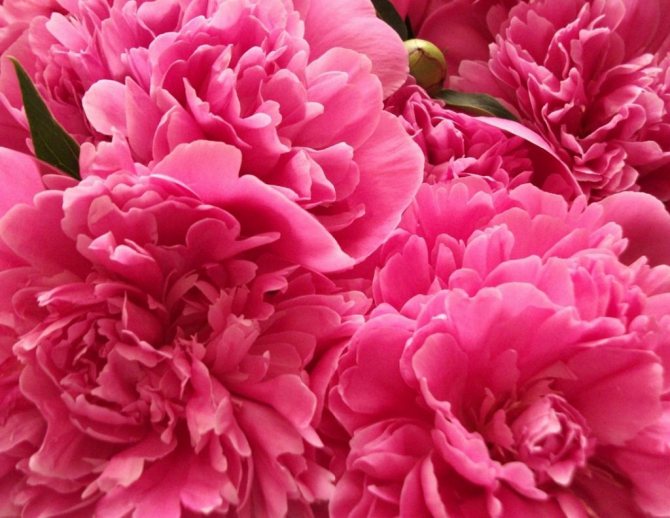
Gorgeous flowering of peonies is impossible without fertilizing with organic and mineral fertilizers
The last time a year, feeding is carried out after flowering. To process 1 m2 of land, mix:
- 10 liters of pure water or the same amount of mullein infusion;
- 15 g of potassium sulfate;
- 25 g superphosphate.
The first year, two foliar dressings are carried out - first in May, then in June or July. Mineral fertilizers diluted in water, the bush is watered from a watering can with a fine sieve or sprayed.

Peony bush depending on age
For the May treatment, a solution is prepared from 50 g of urea and 10 liters of water. For June, one tablet of complete micronutrient fertilizers is added to an aqueous solution of urea.The next year, the peony is fed three times, but for the third procedure, two micronutrient tablets are diluted in 10 liters of water.
7 STEPS TO FLOWERING LONGEVITY OF PIONES
In my garden, herbaceous peonies have been growing for more than a dozen years, and all this time they delight with regular lush flowering.
In my opinion, these are the most unpretentious perennials, able to put up with even some errors in care. But still, there are several conditions that must be observed when growing peonies.
DELETE BUD
For the first two years after planting, I do not allow the peony to bloom. During this period, the main task of the plant is to take root well and form young roots. If buds appear, then I immediately remove them so that they do not draw away all the forces of the plant. I expect full flowering in the 3-4th year.
ABUNISHING IRRIGATION
The peony requires infrequent but abundant watering. Under an adult bush, I usually pour 2-3 10-liter buckets. The interval between watering, depending on the weather, is from 10 to 15 days. Irrigation is especially important during the period of leaf regrowth.
FEEDING FROM THE FIRST YEAR
Many people believe that it is not necessary to feed peonies for the first two years after planting, they have enough nutrients introduced into the planting pit. But I have a different opinion: it is difficult for the growing roots to reach the fertilized soil layer, so the young plant needs to be fed. And this is best done from the beginning of the growing season until the end of June. For top dressing, I use a mullein solution, which promotes the development of the root system, the formation of stems, leaves and renewal buds. Or I use a complete mineral fertilizer, having previously dissolved it in water. In the future, in the first half of the growing season, I do nitrogen and complex fertilizing, and after flowering I apply phosphorus-potassium fertilizers.
KIDNEY CONTROL
For normal flowering of a peony, the distance from the uppermost bud of renewal on the rhizome to the surface of the earth should be 3-7 cm (on heavy soils - 3-4 cm, on light soils - 5-7 cm)
It is important to monitor this indicator, since the rhizome of the plant grows up, and during weeding and loosening, the earth is raked away from the buds, and over time they may appear on the surface
The buds that have come to the surface suffer from frost and heat, the plant weakens and does not bloom well. Peonies with too deep bud grow well, but do not produce flowers. I regularly check the position of the upper bud and, if necessary, huddle or unroll the plants.
CAREFUL CUTTING
Renewal buds are laid at the base of each stem - a guarantee of powerful development and abundant flowering of the plant in subsequent years. Therefore, I cut peonies for a bouquet from no more than one third of the bush, and I do it very carefully.
It is important to keep at least a couple of lower leaves on the stem.
DISEASE PREVENTION
Peonies often suffer from fungal diseases.
Fallen petals of flowers lying on the leaves of a peony provoke the appearance of gray rot in the plant. This disease is especially common in wet weather. Therefore, I try to immediately remove wilted flowers: I cut off the heads to the first green leaf. If the gray rot overtook the bush during the flowering period, then the young buds die first, the infection spreads very quickly and can destroy the entire plant.
With leaf spot, fungal spores can be seen on the underside of the leaves, while purple or light brown spots form on the upper surface of the leaf blade. The disease most often occurs with a thickened planting of peony bushes, as well as with a lack of nitrogen fertilization.
For fungal diseases, I usually do sprays with fungicidal preparations. You can also use soda ash (50 g per 10 l of water), copper sulfate (50-70 g per 10 l of water), colloidal sulfur (60-100 g per 10 l of water).
WINTER SHELTER OF HERBAL PIONES
After the first frost, but not before the stems fall, I prune the plants, leaving about 7-10 cm above ground level. Pruning too early is harmful to the peonies, because the outflow of nutrients to the roots must occur from the leaves and stems.
When a constant negative temperature is established, the plant can be covered with earth or needles. I also use sphagnum moss for cover. It contains carbolic acid - an antiseptic that reliably protects peonies from fungal diseases. In the spring, as soon as the soil thaws, I immediately rake off the warming layer of mulch from the plants.
Photo by V. Makhankov
Reproduction of peonies by layering
A very simple way of vegetative propagation of peonies is the formation of layers.
Sufficiently mature bushes, with a growth duration of about 7 years, are well spud for the winter. In early spring, they remove all the ground around the bush to a depth of 15 centimeters, maximally exposing the buds of renewal, which have begun their active growth. Around the bush, a wooden structure is made with walls and without a roof. For these purposes, you can adapt an old wooden box by first removing the slats from the bottom. We sprinkle the walls of the box standing on the bush with earth to prevent the roots from drying out. Fill the soil enriched with mineral and organic fertilizers in the middle of the box. As young stems grow, compost, bone meal, a little superphosphate and rotted manure must be added to the box. This mixture is poured 30 centimeters from ground level. The peony bush grows and requires regular watering, which must be done without allowing the soil to dry out. Leaves and stems will develop as usual, but the buds that appear must be pinched. Closer to autumn, roots will appear on the stems covered with enriched soil. The box is carefully removed, the soil around the stems is removed, and the rooted stems with the formed renewal bud and small roots are cut off from the mother bush. Such shoots are planted in a separate place where the process of growing the rhizome of a young bush takes place. For the winter, young bushes must be covered with peat or rotted manure, which will serve not only as a shelter from frost, but also as a good feeding. At this point, a young bush should grow for about two years. After it is transplanted into a flower bed, flowering is expected, which will come after a year of life in a new place.
Transplanting peonies - advice for novice summer residents
Peony bushes tend to grow, so it becomes necessary to divide them, although in one place they can grow for more than ten years. Experienced gardeners advise dividing and replanting peonies in the fall, when the bushes are at least three years old.
The best time for transplanting is the second half of August - September. By this period, the rhizome is already actively giving out processes, which, when transplanted, are a good guarantee of survival in a new place.
There are several recommendations for transplanting peonies:
Location. Prepare the hole in advance, as the flower does not like if the soil is not settled. The well is prepared for two weeks before the transplant. Small pebbles are poured at its bottom as a drainage layer. A mixture consisting of earth, sand and humus, taken in equal amounts, is poured on top. Additionally, a glass of ash is added to the bucket of the mixture. The mixture should be prepared in the spring to mature by the time of planting. Then you need to pour a bucket of water into the hole, and leave for a week.
Pruning. In autumn, a bush of peonies is tied into a bunch and the leaves and stems are cut off, leaving about 20 centimeters from the rhizome. Around the bush, you need to dig up the soil and water it well. Digging is carried out the next day.
The soil. The root system of an adult plant goes to a depth of 90 centimeters, so you need to be very careful when digging out the rhizome for transplantation. In order to dig it up, use a pitchfork, since you can crush the root of the peony with a shovel and it will hurt for a long time.If the transplant is carried out in the fall, then the root is cleaned of the earth, and if the soil is acidic, then it is also washed in a weak solution of potassium permanganate. With a spring transplant, the earth is not removed, on the contrary, the larger the lump, the better.
Watering. In the prepared hole, the rhizome is placed in the middle so that the young roots can straighten well and feed the entire root in the future. The flower is watered, and then sprinkled with earth, so that a hole is formed in which water will accumulate.
The buds of the plant should not be more than 3-5 centimeters underground, otherwise they may rot. If the peony takes root after deep planting, then there is a high probability that one large bush without buds will grow. Whether the peony will bloom next year depends on the presence of buds and their quality.
When dividing a bush, it is important that there are at least three buds on each planting root. The more buds, the better the flowering for the next year.
You can plant a tuber without buds, but then flowering will come only after three years.
Conditions required for breeding
Breeding orchids requires a number of skills and can be challenging for beginners unfamiliar with plant cycles. It is recommended to provoke the appearance of children with various stimulants only in healthy flowers, since a plant with weak or diseased roots may not withstand the load and die.

The season is also important, as light, temperature and humidity create good conditions for both flowering and the formation of new shoots. Most often, orchids at home begin to multiply in the spring: after a short day of light in the winter season, an increase in light signals the plant that a favorable period is coming. If the other conditions are suitable for the plant - temperature and watering regime, then the plant will begin to give new shoots.
Next, let's talk about what methods of reproduction of orchids are acceptable for home conditions, and how the owner of these beautiful flowers can be influenced by the continuation of their genus.
Germinating seeds
It is not too difficult to grow peonies at home from seeds, but this process has its own characteristics. The reason, again, is the slow germination of seeds. But we said that flower growers have found a way to "rush" nature a little. What is required for this? First, you should only use your own seeds, not store-bought seeds. They must be immature: in the very early stages of ripening. During this period, they are not hard and are colored light brown with tiny yellowish specks, and the leaflets begin to crack at the seams.
It is important that the seeds do not dry out, so they are either sown immediately or stored in the refrigerator in damp sand for 1.5 months. It is best to do this from the last days of August to mid-September.
If you decide to sow them right away, you need to prepare containers in which the seeds are sown to a depth of 5 cm.
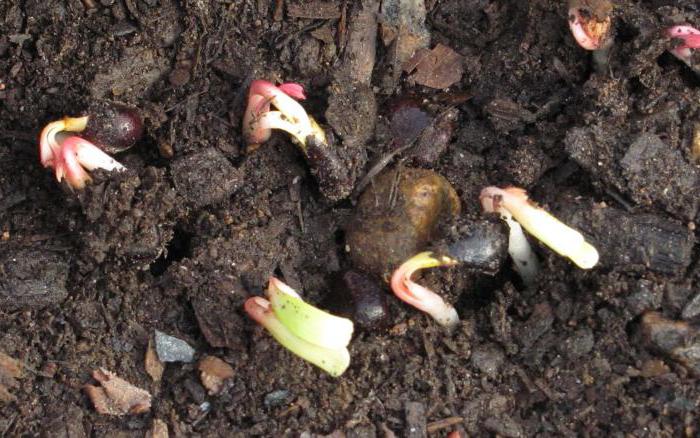
Some growers plant seeds at this time directly in the beds. In this case, they go through two stages of stratification - warm (+ 15 ... + 30 ° C) and cold, lasting about two months (+ 5 ... + 10 ° C). This will allow you to germinate your planted seeds for the next summer. But you need to be prepared for the fact that a maximum of 1/3 of the total will rise. Some seedlings may appear a year later.
Indoor flower care
In order for the seedlings to bloom within a season after rooting, all recommendations for the care and maintenance of gardenia must be followed.
Light mode

gardenia needs sunlight almost 24 hours a day
Of course, the plant on the south side will have enough light, but there it is threatened by direct sunlight, which can damage or kill the flower.
There is much less light on the north side, so it is best to leave the gardenia on the west or east window.
Important! In winter, the plant cannot be twisted every now and then in different directions or transferred from one place to another.
Temperature
In the warm season, for abundant flowering, a temperature of + 24 ... + 25 degrees is needed. In the cold season, the plant actively lays buds for future flowering, so it is best to lower the temperature to + 17 ... + 22 degrees.
Watering and humidity
Gardenia needs careful water balance. During the active growth and development of the bush, you need to water it abundantly, however, you need to add a new portion of water only after the top layer of the soil has dried.
- In spring and autumn, you need to water the plant after about 2-3 days.
- In winter, watering is significantly reduced.
For humidification, use slightly warm settled water (it is best to choose rainwater). Lemon juice can be added periodically.
As long as the gardenia inflorescences are closed in buds, you need to spray it daily. However, after they open, you need to stop spraying.
Top dressing
You need to feed gardenia only with liquid mixtures. Choose complex formulations that are suitable for flowering plants (however, use a reduced dose of half the recommended amount).
How to stimulate flowering?
Sometimes correct and timely feeding can stimulate the formation of buds. For example, it is worth choosing such liquid mixtures that contain a large amount of potassium, but no more than 4% phosphorus.
Transplanting a young plant
You need to replant young gardenias in the spring and only after they have faded. Usually, the transplant is carried out every two years. The size of the new planting container should be slightly larger than the size of the old pot.
During transplantation, the plant is removed, the substrate is removed from the root system. Fresh soil is poured into new planting tanks and a gardenia bush is planted in it.
Important! You can not transplant those plants on which there are buds, they may fall off.
Gardenia is an extremely moody and demanding flower. To successfully propagate and grow it, you will need to observe all the subtleties and nuances. However, if you do overcome all the difficulties, gardenia will delight you with a lush and spectacular flowering.
Previous
Breeding methods of a fat woman: how to properly propagate a money tree at home?
Features of seasonal breeding: what is the best and what methods are suitable
To successfully propagate beautiful peonies, you need to know that each method has its own suitable season.
In the spring
In the spring, it is recommended to resort to the method of dividing the rhizome. Before dividing the peony, you need to remember that this procedure is carried out between the last days of April and the first week of May. At this time, active root growth begins.
Only in spring, early, as soon as the snow melts, do peonies propagate by the method of air cuttings. Before propagating peonies in spring, you need to make sure that there are no risks of frost return.
In autumn
In the autumn, at the beginning of September, any breeding method can be used. Landing in open ground should be carried out before the onset of frost. As soon as frost has begun, the seed should be kept in a warm room.
Knowing how perennial peonies reproduce, every gardener can create bright flower beds of beautiful flowers on his site. There are many ways to propagate perennial peonies, they are quite simple to perform, and young seedlings are not capricious in their care. Every flower lover can choose a suitable way to plant peonies. The exception is the sowing method, which is used only by experienced gardeners for breeding purposes.
vote
Article Rating


