When is it better to share to the host
Inexperienced growers are often interested in when it is possible to share and plant the host. The division of the bush should be carried out if it has already reached its normal size. In this case, the division process will only improve the appearance of the hosts. For example, if the center of the crown is no longer growing, but only shrinking, it means that it is time to divide the plant. The main thing is not to overdo it.
It can take 5 years, sometimes even more, from planting parcels to a fully formed shrub. Varietal traits of a plant appear as it grows; as a rule, they are not noticeable in a host that begins its development. If you often divide the bushes, then you may not see all the features of the variety.
Many people prefer to divide the plant into seedlings exclusively in the spring. But in the dacha literature it is said that the best time to share the host
- Spring - early May;
- Summer - any month;
- Autumn - early September.
The easiest way to share the hosta is in the spring, while in the summer it is preferable. If necessary, you can divide the shrub in the fall, 30 days before frost, so that the plant has time to take root properly.
Note! When dividing hosts into seedlings in the fall, when the plant is in a dormant root stage, it will suffer the least damage.
The division of the bush should be carried out if it has already reached its normal size
Usually, adult shrubs (4-5 years old) easily tolerate this procedure, this does not affect their development. Dividing the bush at an earlier age can inhibit the growth of hosts.
How to properly partition the host
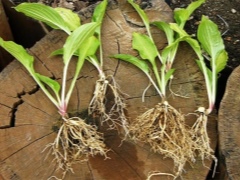
Novice gardeners often ask how to propagate hosta by dividing the bush and when. Fortunately, the plant is easy to divide into seedlings. How to properly share the host:
- Choose the best time of the year. The shrub can be divided in May, any month of summer and early September;
- Use the correct gardening tools. For example, if the bush is large, then it is better to separate the seedling with a spatula. If the soil is light and the plant is not large, then a knife with teeth will do. If the root is large, then you can use a hacksaw for metal. The cut must be treated with ash so that the process of root decay does not begin;
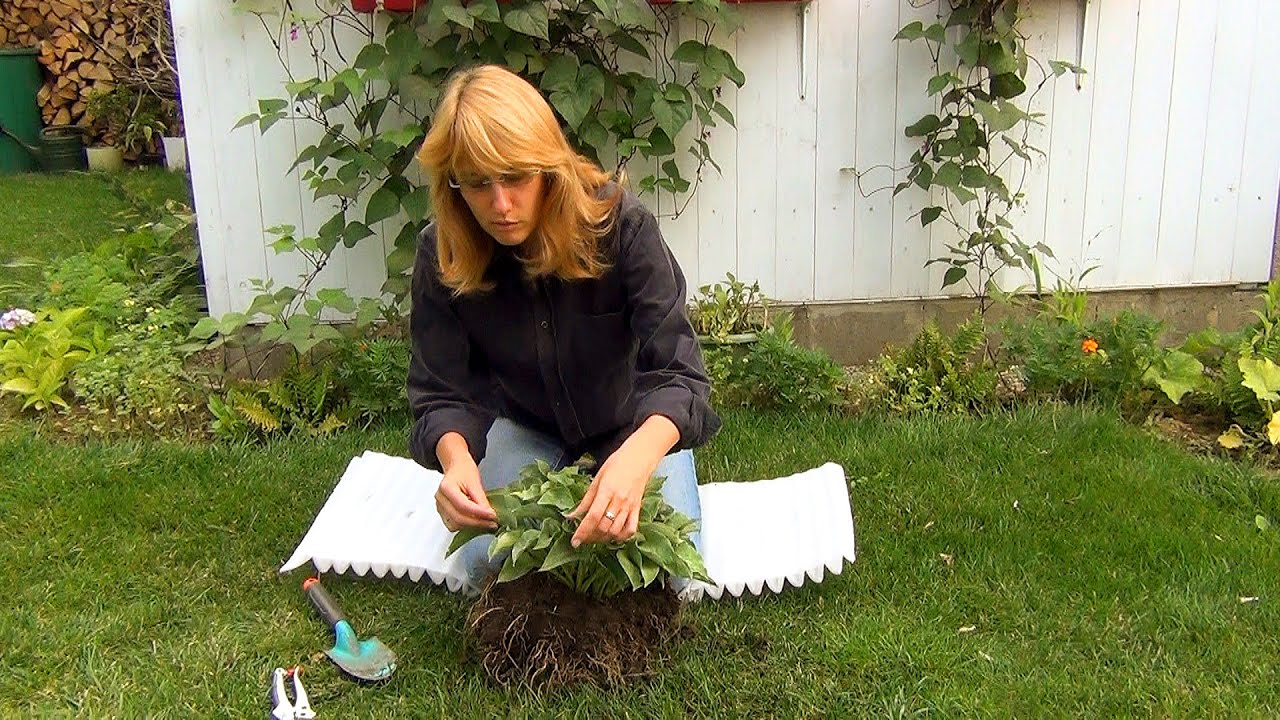
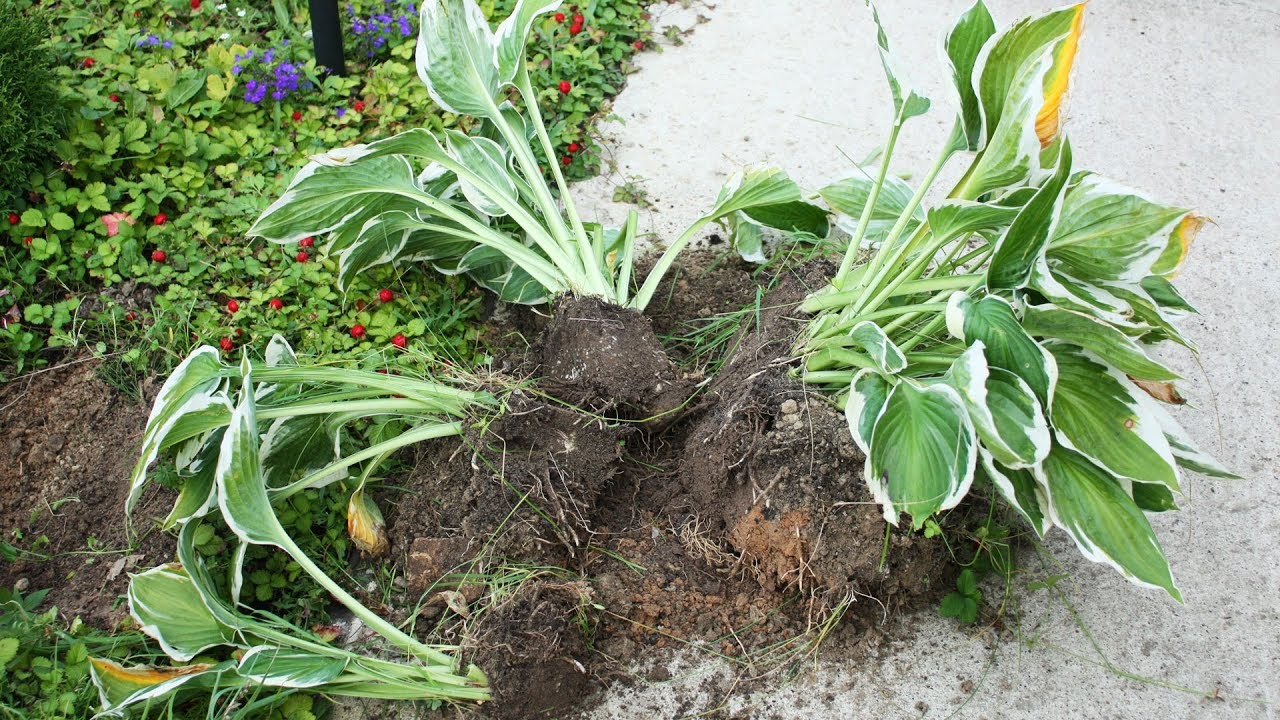
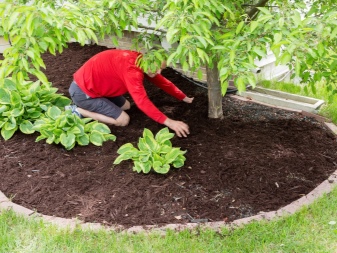
- You need to dig or cut the plant 10 cm from the base of the small hosta, and from the large one - 35 cm. After the circle around the bush is cut, you need to dig under its root with a shovel and carefully remove it from the ground;
- For better separation of the perennial, you can wash off the soil from the roots to see where the roots of individual plants grow from. This will protect the seedlings from being cut in half. It is impossible to damage the roots of the culture with water, since they are quite tough;
- Then you need to divide the shrub into seedlings of 4-5 divisions, trying not to damage the root system. If the hosta has a small root, then you need to carefully separate the sprouts with your hand. To separate the stems from the base of the shrub, you need to move back and forth, and not to the sides. If the seedling is too large, you will need to cut it with a serrated kitchen knife. In order for the sprout to start well, you need to save more leaves and roots, cut not the roots, but the base.
- The top must be removed from the seedlings in order to minimize evaporation from its surface and thus increase its survival rate;
- To reproduce the plant, you need to plant it according to the scheme - 20x15 cm. After the seedling grows, it is planted in a permanent place;
- After planting, the host needs to water abundantly. This is necessary so that the host that starts its development will quickly adapt to a new place;
- At the final stage, wet soil around the plant should be mulched.
After planting, the host needs to water abundantly
Growing hosts from seeds
The seed propagation method for the host is considered the most unpopular due to the long time it takes to grow the plants. The seedlings reach even a minimal decorative effect only from the age of four, and full-fledged bushes are formed only after 6 years.
But the main reason for the rare use of this affordable, but requiring a lot of patience method is that varietal hosts do not retain their characteristics and color features, give offspring with a wide range of colors and leaf sizes with this method of reproduction.
The seed method is used for host species and if you need to get a large number of seedlings with any characteristics (for example, when filling the soil in ornamental tracts).
Hosts are not sown in open soil, or even in greenhouses or hotbeds. Sowing seedlings with controlled growing conditions is preferred for this crop. For the plant, use low, wide containers with good drainage holes.
For diving, choose containers with a depth exceeding the diameter and allowing bottom irrigation. The hosta substrate is suitable for a standard one, from a number of ready-made universal substrates for growing seedlings with neutral pH values and good water permeability. The soil must be treated with a solution of fungicides, calcined or disinfected in any other convenient way.
For this plant, it is advisable to use freshly harvested seeds, because they very quickly lose their germination. Typically, varietal host and self-harvested seeds are characterized by a wide variation in quality and viability, so seeds are selected and sorted: it is believed that only dark seeds are suitable for sowing.
Hosta seeds do not need stratification or any other processing, but if the freshness of the seeds is doubtful or there is a desire to accelerate germination, you can resort to two methods:
- carry out stratification at a temperature of about 5 degrees Celsius for 1-1.5 months;
- treat the seeds with growth stimulants just before planting, soaking them in a warm solution according to the manufacturer's instructions for the preparation for 30 minutes.
The sowing process is quite simple:
- The substrate should be slightly damp. It is advisable to lay drainage at the bottom of the containers. The soil is not tamped, but leveled.
- Seeds are laid out in 2-3 pieces. in small holes or superficially on leveled soil. The seeds are buried or covered with soil by 6-8 mm and re-sprayed.
For hosta seedlings, it is necessary to maintain a temperature of about 20 degrees Celsius and light soil moisture using the method of bottom irrigation. Covering with foil or glass is desirable, as is good lighting. Seedlings appear unevenly, the first - after 2 weeks.
The dive is carried out after the appearance of the first leaf. The top layer of soil is always poured from sand. Seedlings prefer bottom watering, moderate temperatures and hardening.
In the first two years, hosts form miniature leaves and require very careful maintenance. It is possible to plant hosts on seedling beds for growing in the garden in the first year, but it is easier to grow plants as container plants during the first year, and to transplant them into the ground in the second.
Seedlings are transplanted into the soil when growing by seedling method after late return frosts disappear and after prolonged hardening (in June). Only in the third year can they be transferred to a permanent place, but it is better to grow hosts on a seedling bed until the fourth year and the formation of at least small, but decorative rosettes.
Caring for seedlings after transplanting is similar to caring for delenki.
Breeding rules for hosts - tips and tricks for home and garden from.
Division of hosts
1.Although hosts become more magnificent and more beautiful with age and retain their decorative effect up to 20-25 years, if necessary, they are rejuvenated and divided into new bushes. Dig around the perimeter of the plant first.
2. Gently remove the bush from the ground and shake it well or tap it several times on the surface of the soil to clear the root system of soil residues.
3. Now, with your hands or with a knife, divide the bush into several seedlings of 4-5 divisions. Try to do minimal damage to the root system while maintaining its integrity.
4. From the tops of the seedlings, the upper part of the vegetative mass should be removed in order to reduce the evaporation of moisture from the surface of the plant and, accordingly, increase its survival rate.
5. If you are pursuing the purpose of breeding, and not just divide the hostu into several bushes, you can divide the seedlings up to the size of one division.
6. It should be noted that during spring planting or division into plants, you can leave a few young leaves for photosynthesis.
7. For reproduction, the hostu is planted according to the 20 × 15 cm scheme. Over time, when the seedling grows, it is transplanted to a permanent place. After transplantation, the host does not gain volume for a year.
8. After planting, the plant should be watered abundantly so that the root system can quickly adapt to new developmental conditions.
9. At the final stage, the moist soil around the plant must be thoroughly mulched with dry soil or other mulching materials.
Often the plants "shadow lovers" delight the eye with beautiful leaves, but they do not want to bloom in any way. The host bushes have very beautiful flowers with a high peduncle, very much like bells in shape. Pink, white, with shades of blue, lilac, small and large, simple and terry, and even arachnoid (spiders) - this is when the petals are strongly apart in space. A significant part of fans of these flowers still love them for their very beautiful leaves. Nowadays there are a lot of host varieties, about 4 thousand varieties, but soon the same number will be added. It remains to find out how and when you can transfer to the host.
Another reason for the widespread distribution of hosts is their unpretentiousness. Even an inexperienced gardener can successfully grow this plant. For busy people, host-type perennials allow for a minimum of gardening. mature bushes of this plant form thickets and into which weeds simply cannot break through.
English gardeners recommend scattering organic fertilizers (leaf or compost soil, peat, well-ripened manure) before planting the host on the soil surface, apply a layer of about 10 cm and dig at least 30 cm deep. The flower bed should be slightly raised above ground level for better air exchange.
The roots of the host grow horizontally, and the wider the hole in which you plant the host, the more they will grow. This means that the plant will be lush, because it will receive more nutrients and water. This plant needs a cold stage to develop and grow. Because of this, the hosta is not grown at home.
The most optimal time for dividing, planting and transplanting plant bushes is spring and the very beginning of calendar autumn. Skilled gardeners believe that hosts can be planted and replanted all summer long. But again, the best time for transplanting hosts is spring, when only the beginning of root growth and leaves have not yet begun to form. In the spring, it is not allowed to share only the Tokudama host and Siebold host and its hybrids. Because new roots do not grow before the leaves have blossomed. Because of this, the transplant is destructive for them during this period, the plant may not take root.
Separating a bush and planting it is not difficult. Do not forget to water the area half an hour before planting.
When can I transplant to the host? Planting is stopped in the 1st half of September, so that the host has time to take root and take root before the cold weather arrives in a new place. The plant needs no more than 4 weeks to strengthen. Small and medium-sized plants are planted at a distance of 0.2-0.3 m from each other, and large-leaved about 0.3-0.4 m. The planted bushes are watered every day for 2 weeks.
Hosta is one of the perennial plants that are often used in the design of suburban areas. Landscape designers love the plant for its shade tolerance and amazingly decorative foliage.
The flowers of the hosts do not differ in particular sophistication and outwardly look somewhat like a bell, but the color of the foliage is really beautiful. Leaving and planting hosts will not become problematic even for novice florists, since the flower is quite unpretentious.
Host breeding methods
Hosts retain their decorative effect for an amazingly long time, growing more and more spectacular bushes and compactly spreading from year to year. They release new rosettes relentlessly, creating stunning spots, borders, foregrounds, finishes and lines.
It is believed that hosts without a transplant in one place feel great even after 25 years. But, unlike many other durable plants, they are not afraid of transplantation, separation and change of place, which allows reproduction as often as necessary.
Garden hosts cannot be called plants that are difficult to reproduce. They provide a wide range of methods that will suit both experienced and novice gardeners, require years of waiting, or get ornamental plants faster.
In many respects, the choice of breeding methods should depend on the characteristics of the variety and type of hosta. Slow-growing and common, species and varietal, large-leaved and small-leaved hosts reproduce in different ways.
Hosts, like most herbaceous perennials, can be propagated both by seeds and vegetatively. The latter option is considered preferable for all varietal plants that actively form children and grow well the volumes of bushes and sods. And the host, actively releasing new rosettes of leaves, is no exception.
Vegetative propagation allows you to get large, showy plants in two to three years. And this is the minimum period that will have to be spent on waiting. After all, hosts do not grow bushes as quickly as other perennials. In general, with any method of breeding hosts, one should expect that the offspring will be able to compete with the mother plant in 4-5 years.
The main methods of breeding hosts include:
- in vitro, reproduction from the meristem (used only in industrial conditions due to the difficulties of working with tissue culture);
- reproduction by dividing the bush;
- propagation by cuttings (rooting of young shoots);
- sowing seeds.
 Vegetative propagation allows you to get large, showy hosta plants in two to three years
Hosta sapling (rhizome): how to choose, save, prepare
Funkcia is a fairly popular horticultural crop in our country, so you can buy it in various centers and shops. It is most convenient to plant the hosta rhizome, most often it is sold in bags with a nutrient substrate (example in the photo below).
A high-quality funky rhizome must meet the following requirements:
- There should be two or three growth buds on the rhizome (or at least one, no less)! Moreover, such buds should not be overgrown.
- There should be a well-developed root system, the normal length of the roots is about ten centimeters.
- In this case, you should choose specimens with live, elastic roots.
- There should be no traces of mold or rot on the rhizome of the hosta, it should not be dry.
- Also, the rhizome should not be too moist (that is, no condensation drops should be seen on the package).
It is recommended to study the characteristics of the plant before buying.This will help you decide which variety is right for you.
Rhizome processing
Before planting hosta rhizomes to open ground or in a pot for temporary storage, it is important to prepare the planting material. First of all, you need to carefully examine the seedling.
If you find rotten, moldy, dead, sore areas on the roots, then they should be cut off with a sharp, disinfected knife. After that, be sure to disinfect with a fungicide.
First of all, you need to carefully examine the seedling. If you find rotten, moldy, dead, sore areas on the roots, then they should be cut off with a sharp, disinfected knife. After that, be sure to disinfect with a fungicide.
Also, roots that are too long should be trimmed a little, the cuts should be powdered with wood ash or soaked in fungicide.
In any case, it is useful to disinfect the rhizome by soaking it in a fungicide (for example, treat it in Fitosporin-M solution).
If the roots are too dry and look lifeless, then as a preparation it is useful to soak them in a growth stimulant solution (for example, Epin or some other).
How to preserve the rhizome before planting
Already at the end of winter or at the beginning of spring, planting material of this plant can be found on sale. Many summer residents and gardeners buy it in advance. If you are one of them, then you need to take care of storing the hosta rhizomes after purchase and before planting in open ground.
The pot should have a volume of about one to two liters; there must be drain holes at the bottom of the container.
Soil for temporary planting can be used universal for seedlings, or you can do it yourself (mix in equal proportions non-acidic peat, sand, leafy or sod soil).
You can plant the rhizome of the funkii for temporary storage using the following technology:
- Put a 2-3 cm drainage layer on the bottom of the container (for example, expanded clay, perlite).
- Fill the pot with soil, make a volumetric hole the size of the rhizome.
- You need to plant the rhizome in such a way that it is normally located in a pot with soil, the roots do not bend.
- The tip of the rhizome should remain slightly on the surface of the soil.
- Then generously pour clean water over the ground. It is advisable to spill the earth with Fitosporin solution after ordinary water.
- It is advisable to sprinkle soil in the pot with soil to avoid the appearance of an earthen crust.
To prevent the plant from growing too intensively, it is recommended to put it on a northern windowsill or just in a place with diffused light. It is also advisable that the place is cool enough.
Before planting the hosts in the open ground, the soil in the pot should not be allowed to dry out. Watering is necessary if necessary. However, you need to water very carefully, the ground should be slightly moderately moist.
If you do not have the opportunity to plant the rhizome in a temporary container, then you can put it in the refrigerator. However, they can only be stored refrigerated if the kidneys are at rest! However, this storage method is bad in that if the planting material is kept in the refrigerator for a long time, it can rot.
Hosta - planting and care: when and where is it better to plant
Originally from distant Japan, the unpretentious hosta has long settled down in our open spaces. She belongs to the asparagus family, and is a long-liver among flowers.
Undoubtedly, this is another advantage of hosts. But its main advantage is foliage with various colors.
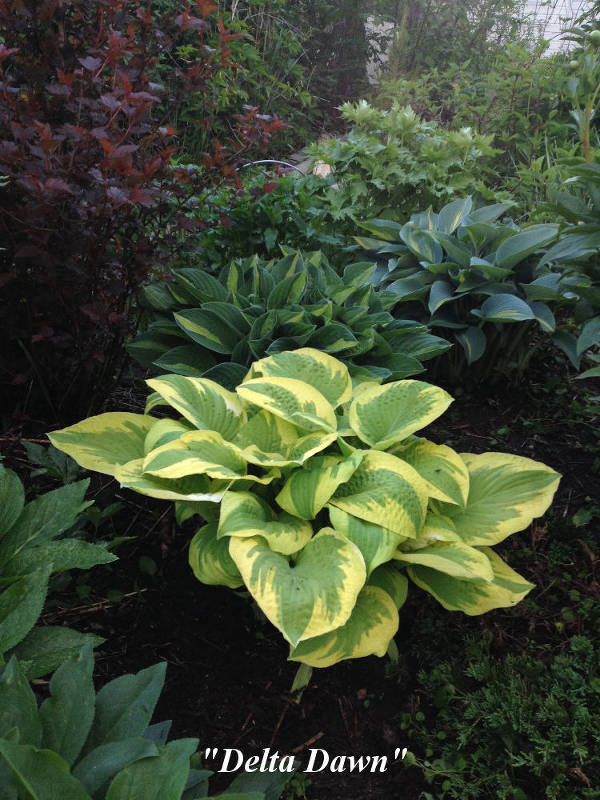
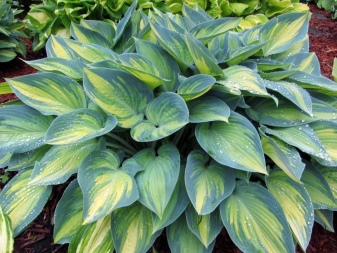
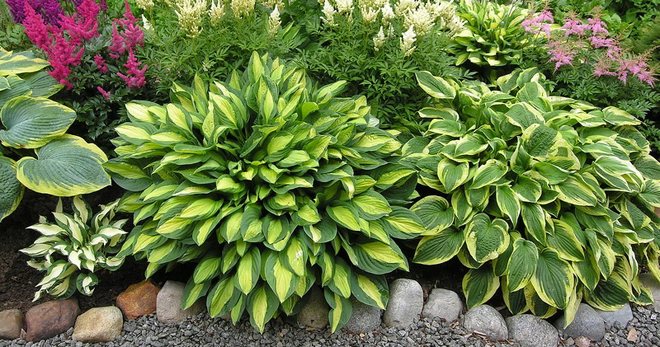
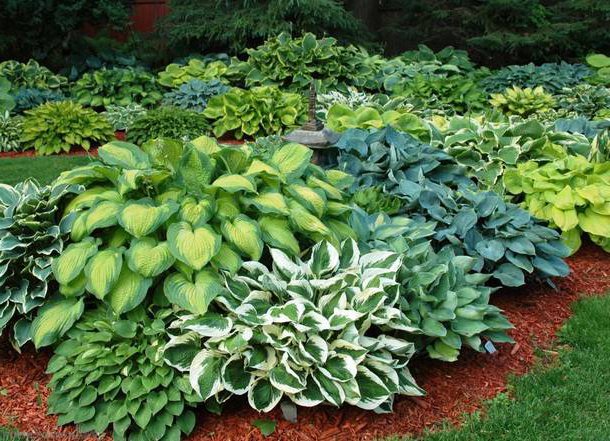
There are many varieties and hybrids of the plant. They differ not only in the color of the leaves, but also in the size of the bush. There are miniature hosts no more than 15 cm in height and real giants over 1 m in height. The breeders managed to change the classic green color of the foliage by adding contrasting colors. Variegated, white or yellow hosts look gorgeous. And varieties with blue foliage will become the main decoration of the garden.
The perennial has a strong root system, takes root well and quickly. But in order for the bush to please with a lush rosette and flowering, choose a suitable place for it with good soil. And do not rush to plant so that the seedlings do not freeze from too early or late planting.
On this topic:
BACK
FORWARD
1 in 201
Landing dates
Hosta can be planted both in spring and autumn. However, in regions with a cold climate, it is better not to risk it and wait for spring. As soon as a stable above-zero temperature is established, you can proceed to spring planting. In the middle lane, flowers are planted no earlier than mid-May, and in the south, planting is possible already at the end of April.
With regard to the autumn disembarkation, it is carried out from the end of August to the middle of September. It is not worth planting later. The bushes must have time to take root, get stronger and make a supply of nutrients.
Seat selection
When choosing a place for hosts, keep in mind that none of its varieties will grow under the scorching rays. Only in the spring, on a site illuminated during the day, the bushes will be fine. But by the summer the situation will change dramatically. From excess lighting, the leaves will begin to lose color, fade and even dry out. Yellow varieties turn almost white, and blue ones become green-leaved. Also, the moisture so necessary for this plant quickly evaporates from the soil.
When purchasing seedlings or seeds, immediately find out what the variety is called and what color it will have leaves. It depends on how much light he needs, for example:
- multi-colored species will retain their pattern only in the midday partial shade, and in the morning and evening they need the sun;
- blue and green hosts feel better in shady areas;
- yellow species can grow in a sunny flower bed, but on condition that the sun is there only until lunchtime;
- blue varieties have enough sun for 2 hours a day.
If you are unsure of which variety your flower belongs to, watch the leaves carefully. They instantly react to excess sun by darkening along the edge, faded spots and matting colors.
Hosta tolerates the procedure well and quickly takes root in a new place. It will be much worse for her if she does nothing and leave the flower under the scorching sun.
What kind of soil is needed
Hosts love fertile, moist and slightly acidic soil that allows water and air to pass through well. In natural conditions, they can be seen near water bodies. But, despite the love for moisture, they will not grow in the "swamp", they will rot.
In problem areas, it is better to prepare soil mixture for planting holes. To do this, mix in equal parts:
- ordinary soil from the garden, but not clay, but fertile;
- deacidified peat;
- chopped bark (preferably composted).
For drainage, pour expanded clay on the bottom of the hole. It will protect the root system from waterlogging.

