Seed propagation
The seed method is used when multiplying annual phlox and when breeding new varieties. The seed propagation process is quite simple. In autumn, before frost, the stems with almost ripe seed pods are cut off, until they crack (cracked pods scatter seeds on the sides with their open leaves). Cut boxes are lightly dried and placed in gauze or paper bags, which are hung in a dry, ventilated place. After a while, collect the seeds that have spilled out of the boxes. Seeds freshly harvested in this way should be sown in autumn and sown in open ground or boxes 1.5 cm deep. Seed boxes are pre-filled with greenhouse soil 5 cm deep. After the snow falls, they are taken out with the sown seeds under the snow and left until spring. In the spring, the snow in the boxes will begin to melt, moistening the soil. The boxes are brought into a dark room, and when (after about 20 days) shoots appear, they are rearranged in a bright, warm place. Seedlings dive twice into the same dive boxes. The distance between the plants is left at the first pick of 3 cm, at the second - 5 cm. Boxes with phlox seedlings are kept in greenhouses or placed on a bed under a film. They are periodically ventilated. Before planting seedlings in the ground, it must be hardened by periodically removing the film or frame of the greenhouse. Phlox seedlings are planted in open ground in late May - early June, at a distance of 20x30 cm. If the seedlings are planted in loose, humus-rich soils, they develop rapidly, and the plants can bloom in the same year. Phlox reach the most lush flowering and color in the 2nd year of growth. Care is normal.
Planting phlox
The soil for these flowers should be loamy, sufficiently structural and coherent, however, heavy clayey, blocking acidic variants are contraindicated for phlox. If there is just such a soil for planting phlox, it is recommended to make drainage of sand and gravel with a layer of 10-15 cm. A mixture of leaf and garden soil is poured onto the drainage, adding up to 1/4 of the volume of sand. Such a layer should be at least 15 cm thick.
As fertilizing additives, compost is suitable at the rate of 5 kg / m2, peat soil - 4-7 kg / m2, wood ash - 150-200 g / m2. It is also useful to bring rotten and semi-rotten needles under them. The introduction of fresh manure under phlox, even in small quantities, is contraindicated: it causes diseases and, above all, rot.
Phlox are planted in open areas and in partial shade, where they bloom longer. Some varieties do not tolerate open sun at all. These flowers are hardy, but in winters with little snow they can freeze out.
During the growing season, phloxes are fed with full mineral fertilizer. In summer, the soil is regularly loosened shallowly under them, weeds are removed, watered and fed with weak solutions of mineral fertilizers (nitrogen: phosphorus: potassium = 2: 1.5: 1). Three-time dressings are effective: during the regrowth period - with nitrogen fertilizers, during the budding period - with complex mineral fertilizers, after flowering - with organic fertilizers. The soil in rows and aisles is mulched with peat, compost, humus. This allows for abundant flowering every year. Phlox are demanding for watering during the period of growth and budding.
The requirements of ground cover (creeping) phlox to growing conditions have a number of features.
Creeping phlox is recommended to be planted on sufficiently moist, lighter nutrient soils than those intended for paniculate phlox. In addition, the styloid phlox needs to provide a well-lit sunny place, the splayed phlox develops better in areas slightly shaded at midday.He has a slightly greater need for moisture and nutrients, he hibernates under light shelter.
Reproduction of phlox by dividing the bush
It is better to start dividing and planting phlox rhizomes from mid-August, and end planting at the beginning of the second decade of September. When planted at these times, the plants have time to take root enough and overwinter well, and in early spring they immediately begin to actively grow.
The mother bushes are carefully dug in from all sides and removed from the soil. Shake off excess soil
Stems after digging the plants are shortened by 1/3 - ½ of the height. When dividing the mother bushes, it is taken into account that, as a rule, 1-3 vegetative buds are formed at the base of the stem, from which shoots develop the next year. The standard cut of the rhizome in the first year of growth and development should have 7 - 8 shoots.

Reproduction methods of perennial phlox
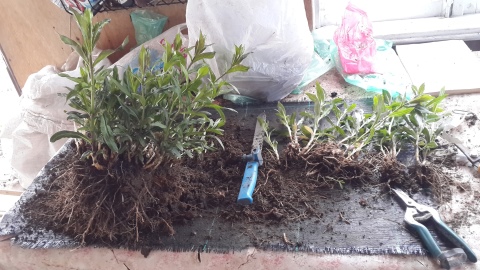
Divide the bushes with their hands and try to damage the small roots as little as possible. They rarely resort to using a knife. After shaking off the earth, the rhizomes are broken into large pieces. At each part, the roots are carefully straightened, trying not to break them off, then the parts are finally divided so that each part has a sufficient number of established vegetative buds. Parts of the rhizome without vegetative buds die. Usually, vegetative buds are not laid at the base of the stems developing in the central part of the rhizome, since the tissues of the stems are firmly lignified, which leads to their gradual withering away along with the root system. On young roots, vegetative buds are laid not only at the border of the root collar, but also at the very root. These buds grow in the spring of next year.
When dividing rhizomes, old lignified parts are removed along with dead and diseased roots. The peripheral part of the rhizome is more viable. With a sufficient amount of planting material, it is better to discard the central part of the rhizome. The rhizome divided into parts can dry out quickly, therefore, the uterine bushes are divided in a shaded place, and the delenki are added dropwise on a separate ridge. If the cuttings dry up, they are placed in water for 6 - 8 hours and planted. If the landing is postponed, then the delenki are added dropwise.
Phlox paniculata.
Phlox paniculata
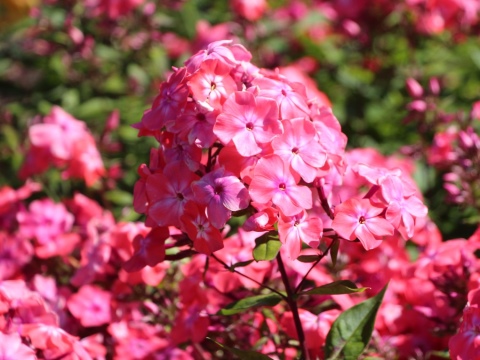
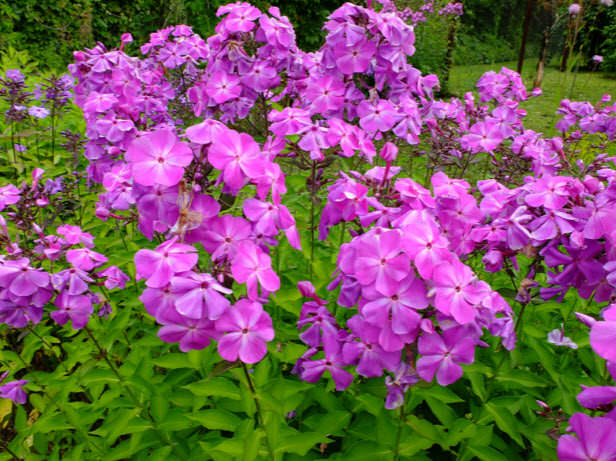
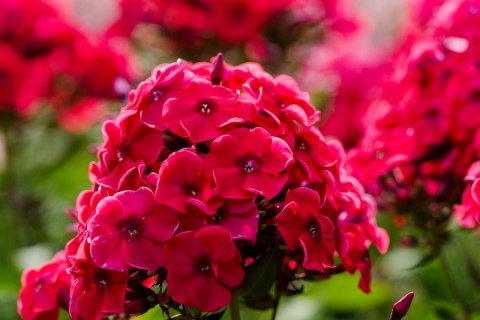
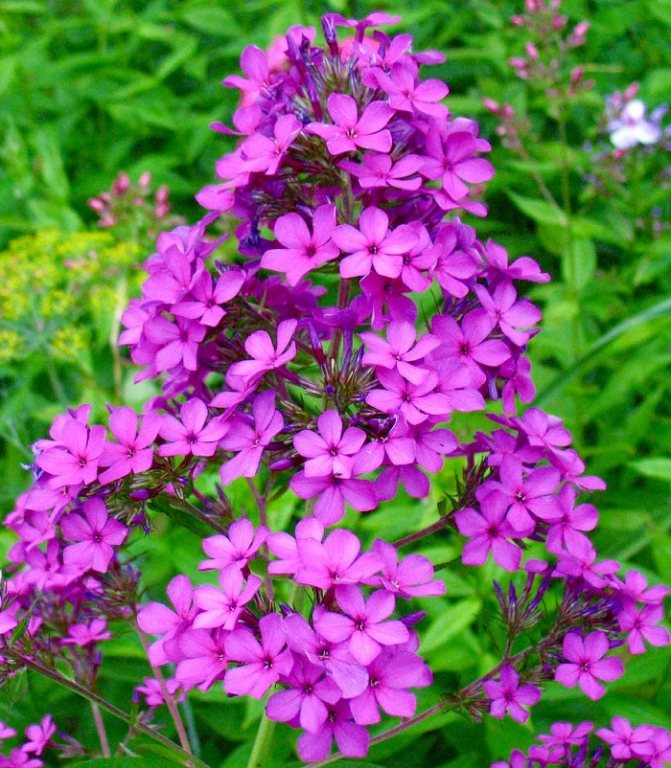
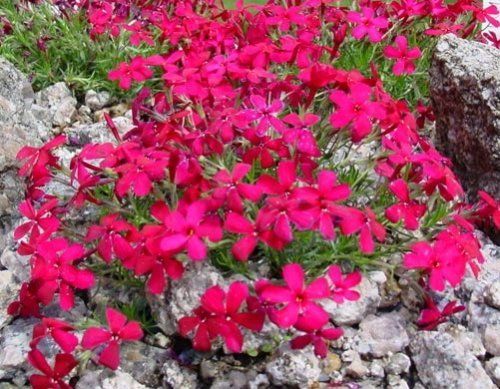
When fragrant flowers of phlox paniculata bloomed in my garden, I admired them and breathed in a delicate aroma. They bloomed in turn, revealing delicate pastel petals. Phlox blooms luxuriously. Well, how can you resist not to take numerous photos. Opened pink, then coral, lilac, with a pink center ... And now all 8 varieties are blooming. They bloomed in July and some delight me until the beginning of October. The best part is that the reproduction of paniculata phlox is not difficult. Moreover, this is done in various ways.
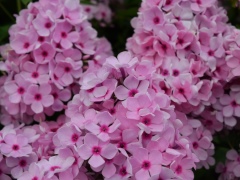
Phlox paniculata is the most beautiful perennial flower in the garden, the best decoration for flower beds. Its advantages include: beautiful flowers with a pleasant smell, long flowering, a variety of bright and juicy colors, unpretentiousness, winter hardiness and ease of reproduction. A huge number of different varieties allows you to choose plants with different flowering periods, different heights and colors. The main value of these spectacular flowers is that they bloom when peonies, delphiniums and other perennial flowers have faded, and dahlias and gladioli bloom later.
Phlox paniculata
Reproduction of phlox by cuttings. Photo. -
Reproduction of phlox by cuttings. Photo.
Views: 0 Category: Humor
Perennial phlox flowers are very beautiful. Moreover, they are unpretentious and easy to breed. Two methods of propagation are usually used: by dividing the rhizome and by cuttings. In the first case, in May or August, we carefully dig up a phlox bush and disassemble it into pieces with 1-2 green shoots (maybe more) with minimal damage to the roots.Then we plant the new flowers that have formed in our "school" for survival and growth, and transfer them to a permanent place for the next year.
There is more work with cuttings, but sometimes the flower is still small, but you need to propagate it. Or, for example, they presented a beautiful bouquet of phloxes - I wanted to breed these at home.
Phlox is usually propagated by cuttings before flowering, in May-June. Cuttings from freshly cut shoots are best rooted. But, if you believe everything you read on the forums and sites about phlox, this breeding method can be used throughout the summer, and not only in relation to freshly cut shoots (I already wrote about the bouquet above). The cuttings will simply take root worse and, perhaps, not all.
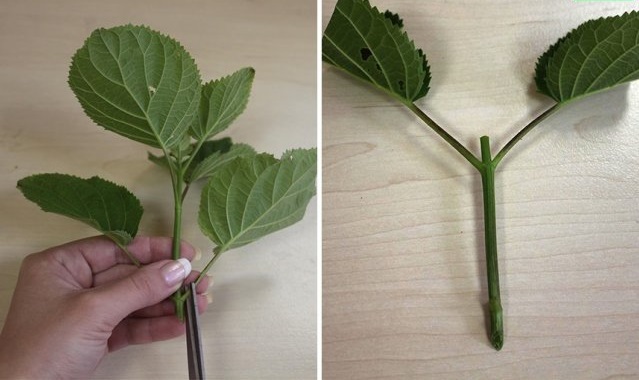
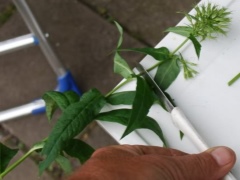
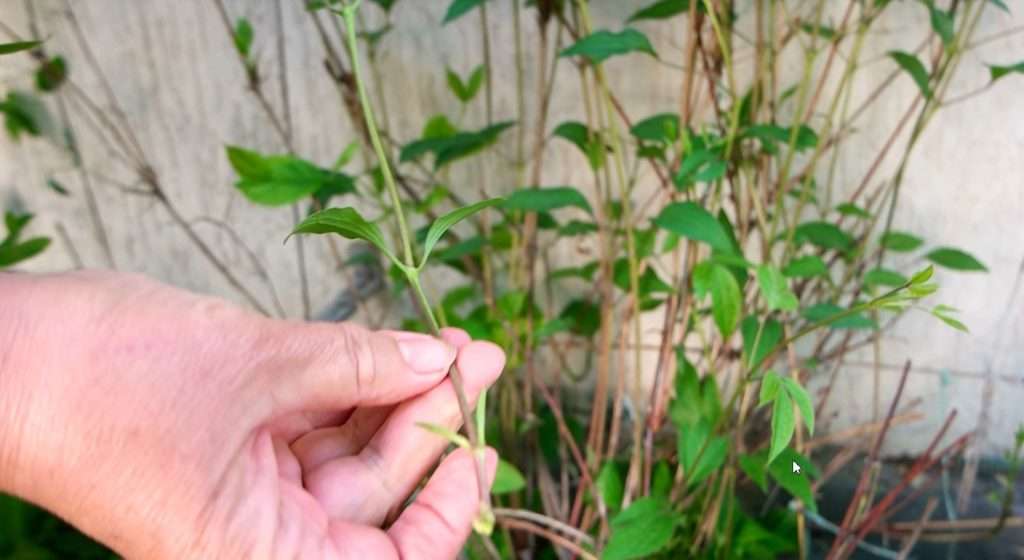
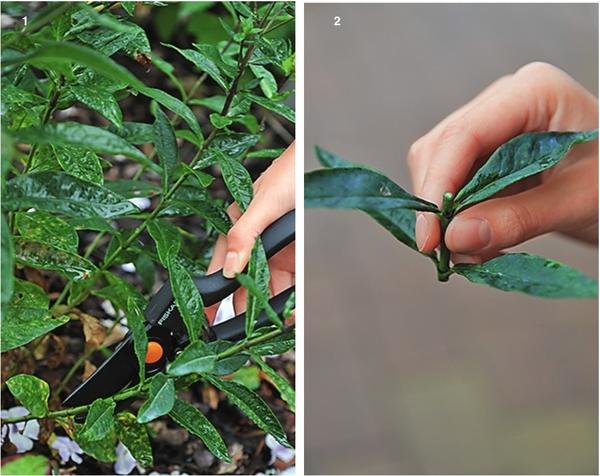
This spring, I propagated phlox by cuttings for the first time. To do this, I first cut off several green shoots:
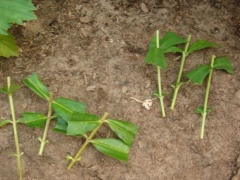
From these shoots, I got 9 cuttings:
You could cut the shoots later when they are longer. Then there would be more cuttings. In general, I realized that I was in a hurry.
The principle of cutting cuttings is as follows. One cutting should have two nodes with leaves. The first cut is made directly under the lower node and cut off the leaves on it. The second cut is about 0.5 cm above the second knot. I got 6 properly prepared cuttings and 3 cuttings from the tops. I was not sure of the rooting of the latter, but I decided to plant them anyway.
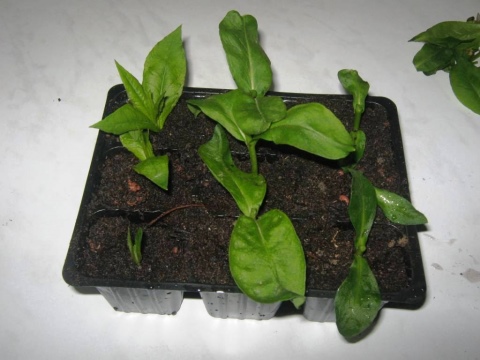
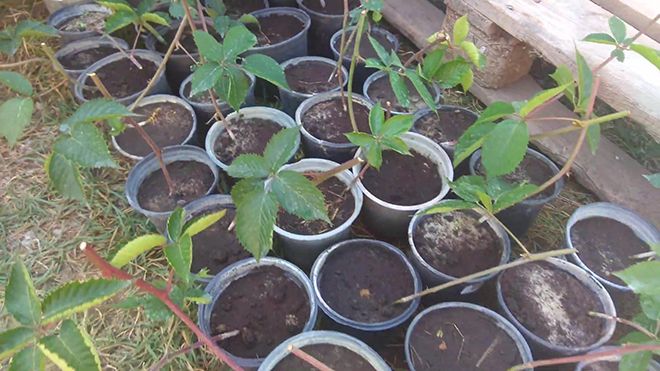
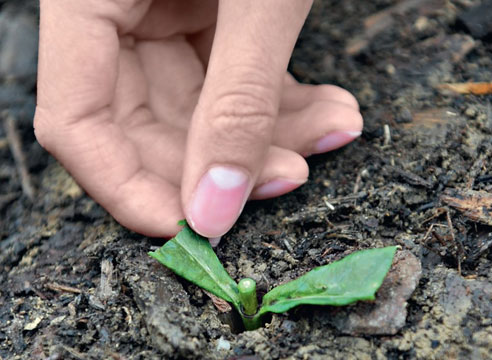
I planted the prepared cuttings in containers with moist soil and made a mini-greenhouse, which was sent to a bright place, but not in direct sunlight:
A week later, leaves appeared in the upper nodes of the cuttings, which means that the cuttings took root. In the photo cuttings of phlox a week after disembarkation. If you look closely, some of them show new shoots in the nodes of the leaves. Also, while the cuttings from the top "sit" well, in my opinion, some of them have grown:
After another 1.5-2 weeks, I will plant these cuttings on a flowerbed in a so-called "school" for growing. And I will transplant new phlox bushes to a permanent place next spring.
And a few more comments. I used a simple food package for the "greenhouse". She did not cover it tightly so that there was access to fresh air, sometimes she opened it completely for an hour or two a day.
Reproduction by root suckers
This method is based on the ability of phlox roots to develop buds on their roots. Reproduction by root buds is done as follows
In autumn, when the aerial part of phlox dies off, the bush is carefully dug up, shaken off the ground and all thin roots are removed
Thick, non-lignified roots are cut and cut into pieces of 3-5 cm, then they are laid obliquely in distribution boxes filled with nutritious soil. From above, the cuttings are covered with a 3-4 cm layer of clean river sand. In this case, the thicker part of the roots should be at the top, as usual, and the root grows. The composition of the soil in the boxes is about the same as when phlox is propagated by leaf cuttings.
Boxes with root cuttings for the winter are placed in a dark room or basement, in which the air temperature does not rise above 2 ... 3 ° C. The soil in the boxes should be moist all the time so that the cuttings do not dry out. At the end of winter (February-March), the cuttings are brought into a heated room or greenhouse, the boxes are covered with plywood and the temperature is gradually raised.
When the sprouts appear, they begin to accustom them to light. In the spring (May), the developed plants are planted in open ground for growing, and in the first half of September or better in the spring of next year, they are planted in a permanent place.
Phlox can be propagated by root cuttings in early spring. In this case, the boxes with cuttings do not need to be monitored all winter.
Spring grafting of roots usually accompanies reproduction by dividing the bushes in early spring, since with this division up to 1/3 of the roots can be taken from the rhizome and used for propagation.
Root cuttings during spring propagation are planted in distribution boxes, which are installed in a greenhouse or some other room with an air temperature of 10 ... 15 ° C, having previously covered them from light. After 10-15 days, the temperature is increased to 18 ... 25 ° C. When the shoots appear, the shading is removed, the plants accustomed to the light are planted out of the boxes in the open ground.
Sprouts do not appear on all root cuttings, and they develop unevenly, therefore, plants are planted on the garden bed selectively, allowing the remaining ones to germinate.
The roots of phlox remaining in the ground are able to form new above-ground stems, which also allows the mother bush to be preserved.
To prevent freezing of weak shoots that appeared after cutting the rhizome in late autumn, it is advisable to mulch the plots.
In spring and summer, the shoots must be fed with a solution of a mullein 1:15 or 15-20 g of saltpeter per bucket of water in order to accelerate the growth and development of new bushes.
Phlox - planting and care
Phlox paniculata prefers sunny places with sufficiently moist fertile soil. In the shade, it also grows normally, only the flowering is not so abundant and the flowers are smaller. For these flowers, it is best to add to the soil a deciduous semimetric from birch leaves, which is obtained if the leaves lie in a heap for the winter. In addition, peat and wood ash are added.
Phlox is transplanted in early spring, as soon as the ground thaws. And also in the fall, before the end of growth, so that the plants have time to take root before winter. When planting in autumn, it is better to mulch these flowers so that they do not freeze. Phlox paniculata even tolerates a neat transplant in summer during flowering. By keeping the soil moist under a layer of mulch, you can achieve abundant, long-lasting flowering. In hot weather, it is advisable to water the plants at the root 2 times a day.
Liquid fertilizers from organic and inorganic fertilizers are useful for phloxes until mid-August. They feed on a cloudy day or late in the evening. In dry weather, 2 hours before feeding, these flowers should be watered.
Phlox paniculata
Various varieties of phlox paniculata are widely used to decorate flower beds in gardens and parks. Gardeners love to grow them on their plots. In flower gardens, these wonderful flowers look very impressive when planted in single-color stripes and with a different combination of colors. Low-growing varieties are good for curbs. In addition, tall varieties are favorite cut flowers. Some varieties can stand in water for up to 9 days.
In addition to paniculata phlox, there are other, no less decorative types of phlox that bloom in spring and are used to decorate gardens and parks. Reproduction of other species is the same as paniculata phlox.
Peacock eye on phlox
The last 2 photos can be viewed in enlarged form by clicking on them with the mouse.
Author Olga Bogach
You can also read about flowers and beautifully flowering shrubs and trees on the site by selecting the picture in the slider below. Click and read.
.
Propagation by green cuttings
Cuttings can be carried out in spring and autumn. First, special dive boxes are prepared and filled with nutrient soil as follows: a layer of nutrient soil 6 cm thick is poured onto the bottom of a clean box and a layer of clean sand 2 cm thick on top, cuttings are leveled and planted in rows.
For cutting stem cuttings take green, well-developed stems. The plant intended for propagation by cuttings must be healthy. In May-June, when the stems are in a state of intensive growth, the entire stem can be used to harvest cuttings. By the end of growth and bud formation (July-August), the stems in the lower part are lignified and the lower parts are not suitable for cutting cuttings, since they are poorly rooted. In late summer and autumn, cuttings are cut from the top 2/3 of the stem.
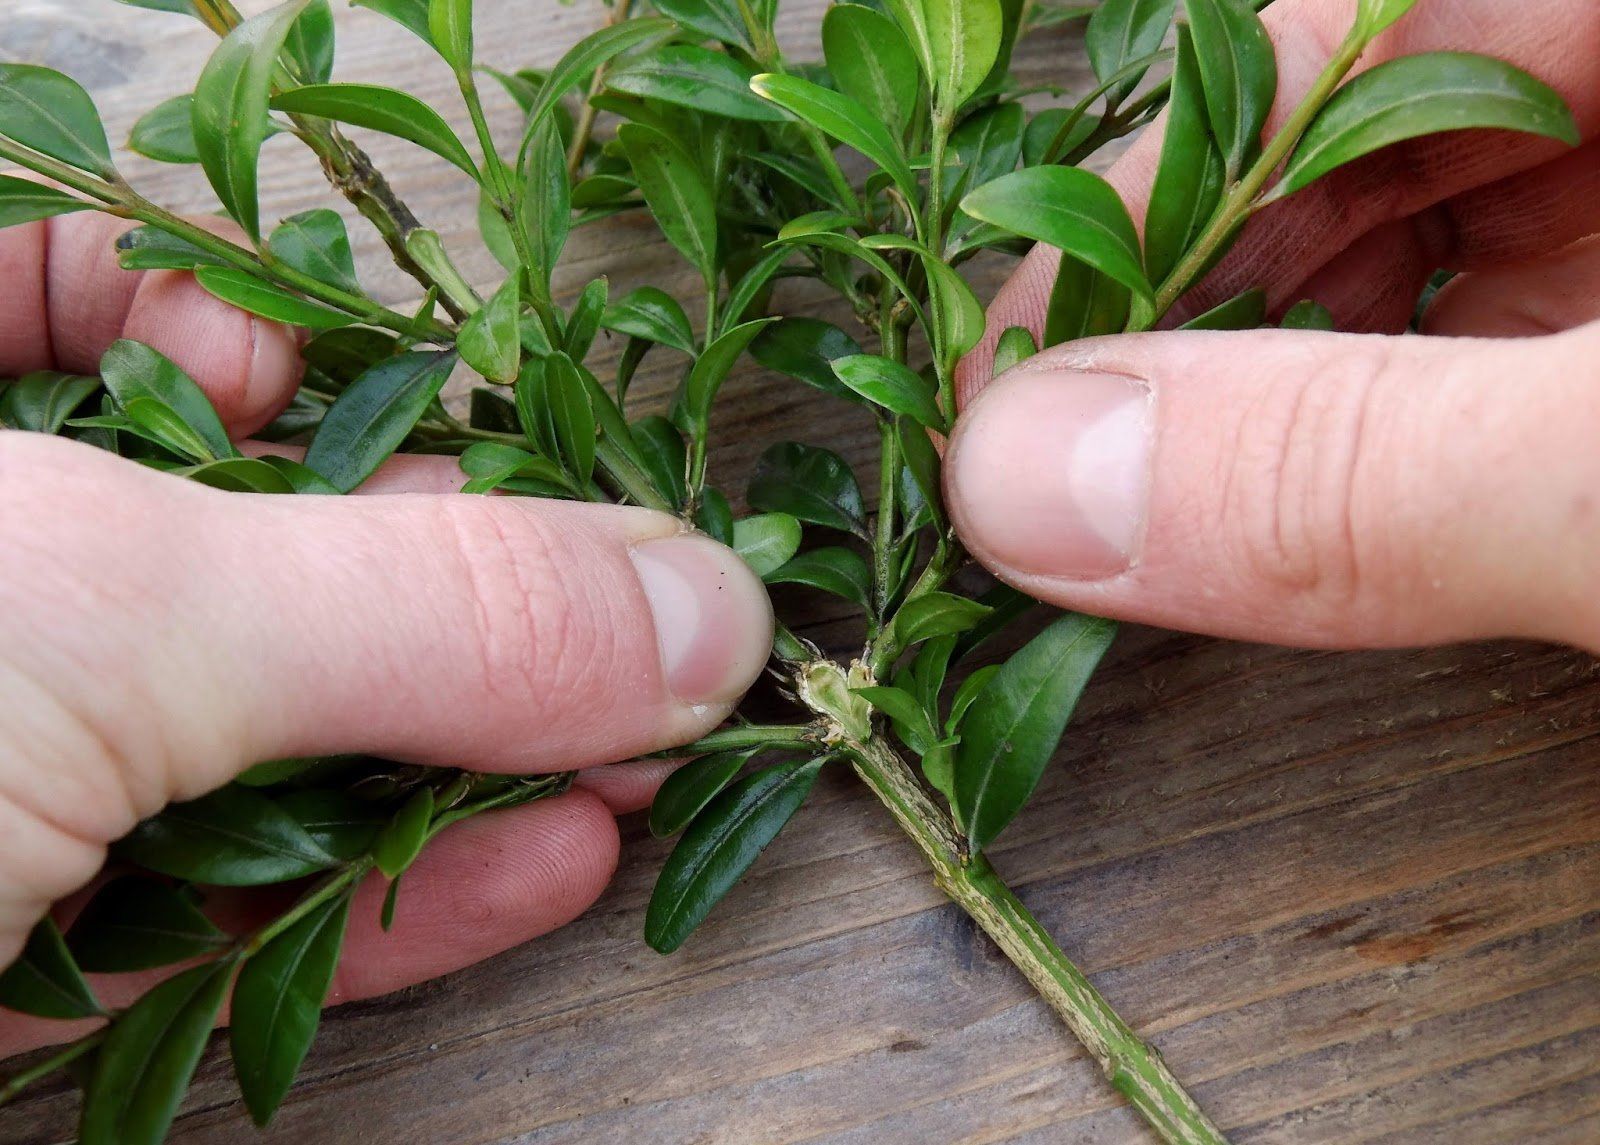
Cuttings are prepared as follows.The stem with leaves is cut into pieces with a sharp knife in such a way that there are two nodes on each cutting. In this case, the lower cut should be made directly below the lower knot, and the upper one should be approximately 5-10 mm above the upper knot. Then, on the handle, the lower leaves are cut with a knife, while maintaining the axillary buds. The top leaves are cut in half to reduce the drying out of the cuttings.
Technique of cutting and planting stem cuttings of phlox: 1 - places of cutting the stem into cuttings; 2 stalk; 3 - sand; 4 - ground
Planting cuttings with a dive peg
Cuttings should be cut in the shade if the day is sunny, but it is best done in cloudy weather. The stems should be kept in a box with damp bedding.
Cuttings are usually planted in transverse rows with a distance between rows of 8 cm and between plants 5-6 cm.
The planting of cuttings is carried out using a small dive peg, with which a hole is made, into which the cutting is then inserted. It should be submerged in the soil up to about the top knot. Having planted a stalk, stick a peg next to it and press the earth against the stalk with it.
Cuttings with two knots are usually planted without a dive peg, since with little effort they enter the soil quite easily and sit tightly in it if the soil is pressed against the cutting with two fingers.
After planting, the box with cuttings is watered and shaded if there are no natural shades. Shading is left until the cuttings sprout.
The first 5-7 days, cuttings should be watered 3-5 times a day and make sure that they do not wither. In the future, watering is carried out as needed. Water the cuttings with warm water (25 ... 30 ° C), cold water delays rooting.
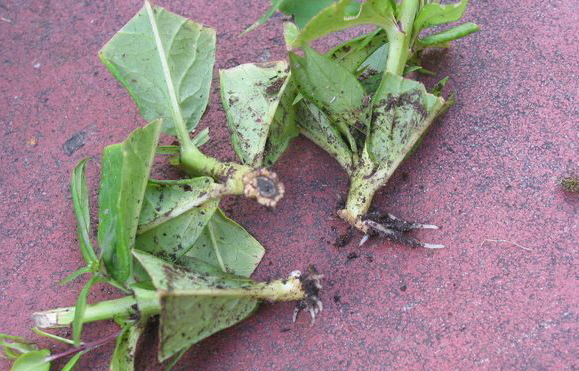
Phlox plant grown from stem cuttings 5-6 weeks after cuttings
3-4 weeks after planting, roots appear in the cuttings, and one or two shoots form in the leaf axils of the upper node, which develop into stems. If grafting was early and good care was provided, the plant can bloom by autumn.
After the cuttings are rooted and grow, they are watered 2-3 times in the summer with slurry or a solution of nitrogen mineral fertilizers (1/2 tablespoon of saltpeter or urea in a bucket of water).
Rooted cuttings of early cuttings in July-August are planted in a garden for growing.
The soil in the beds should be about the same composition as in the box. Sand is not poured onto the surface of the ridge. The distance between rows should be 15-20 cm and between plants in a row 10 cm.
Cuttings harvested in the fall (from August to September) are planted in cold greenhouses or on racks in unheated greenhouses, since cuttings root poorly in the open field at this time and often die in winter.
In order for the cuttings to root better and faster, they can be pretreated with growth stimulants (heteroauxin and other substances). A solution of heteroauxin is used at a concentration of 50-100 mg per 1 liter of water, the cuttings are immersed in the solution for 2/3 of the length and kept for 8-12 hours.
For the same purpose, you can successfully use pure aloe juice, diluted in half with water, dipping cuttings in it during planting. The survival rate of cuttings reaches 100%. Cuttings develop very well. The juice must be fresh, so it is squeezed out of the aloe leaves on the day of cuttings.
Terms of cuttings and further care
Phlox is propagated vegetatively from spring to autumn. Each method has its most favorable time of the year for the procedure. Plants are constantly looked after from spring to autumn: they water, feed, loosen the soil, weed weeds. To make the bushes lush, pinch the tops of the plants over 4-5 pairs of leaves. The inflorescences that begin to dry are cut off.
Propagation by spring cuttings
In May, phloxes can be propagated in several ways: by growth shoots, stem and root cuttings, by dividing the bush.
If the shoots are cut before budding, the survival rate will be higher: in late spring and early summer, the plant is most active and rooting is easier.
Reproduction of phlox by summer cuttings
Before propagating phlox by cuttings in the summer, you need to carefully select the source material. The selected shoots must be green and healthy. At the end of June and at the beginning of July, you can propagate the flower with leaf and stem cuttings, layering.
Important! Cutting phlox in summer is best done before flowering.
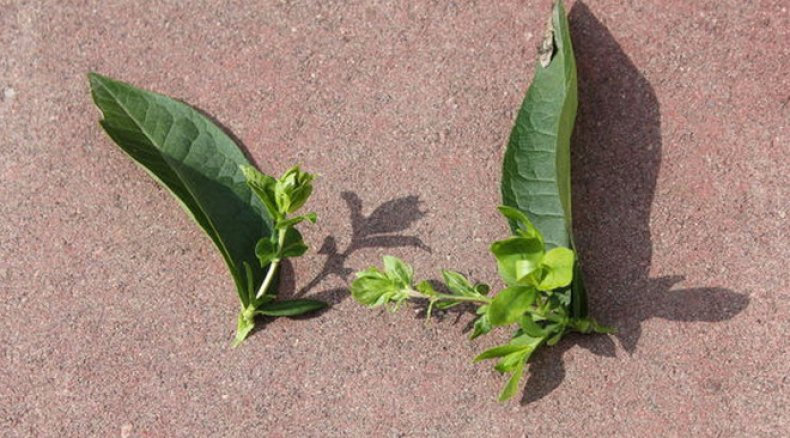
Shoots selected for cuttings must be green, healthy
Reproduction of phlox by autumn cuttings
In September, they begin to reproduce phlox with stem cuttings. They are planted at an angle of 45 °.
For the winter, plantings are covered with mulch, consisting of sawdust, peat, needles. In September or early October, bushes are planted, propagated by layering. At the same time can be divided and seated overgrown plants.
how to propagate phlox?
Noise Maker
Phlox is propagated by dividing bushes, stem cuttings, spring growth shoots, root cuttings and seeds.
Dividing a bush is the most common way of phlox breeding. Phloxes are divided both in spring and autumn. In the spring, the bush can be dug up and divided into smaller pieces. They all take root successfully. If after dividing it is necessary to obtain good flowering, then the plant is divided into large parts. You can divide the bush without removing it completely from the ground. To do this, a part of the bush is cut off with a shovel, and fertile soil is poured onto the vacant place. The bush is watered. The cut off part of the bush is divided into smaller parts or completely planted in a new place. With the autumn division, the bush is divided into larger parts. This is due to the fact that the smaller parts of the plant do not have time to take root and die.
The most effective and simple way of phlox propagation is propagation by stem cuttings. Cuttings are cut from the stem in such a way that each cutting has two nodes. The bottom cut is made just below the bottom knot, and the top one is made 0.5-1.0 cm above the top knot. We cut off the lower leaves of the cutting so as not to hurt the bud, the upper leaves we shorten by about 1/3 of the leaf. Cuttings can be treated with any rooting stimulants, for example: heteroauxin, root, etc. Then they are planted in a greenhouse. The land for cuttings must be fertile and meet all the requirements for this crop. If there is no greenhouse, then you can root the cuttings and just under plastic bottles. The main thing is to create a favorable microclimate for the cuttings (this is heat and moisture). After planting, the cuttings are sprayed frequently (3-5 times a day). With this care, they quickly take root.
Reproduction by spring growth shoots is a type of propagation by stem cuttings. This method can be used when normalizing the number of stems in thickened bushes.
Shoots break out carefully with the "heel". The planted shoots take root and bloom in the same year.
Propagation by leaf cuttings is used if you need to get a lot of planting material
This method is used in the summer. A sharp razor cuts off the flap (up to 1.0 cm) with the axillary bud and with the leaf. They are planted so that the kidney is buried by 1.5 cm, and the flap is located vertically. If the leaf is very large, then it can be shortened by 1/3.
The method of propagation by root cuttings. Can be done both in spring and autumn. The simplest way of doing this is as follows: the blade of the shovel is set at a distance of 10 cm from the bush and phlox is dug out, while cutting the roots at a depth of 8-10 cm, and the freed hole is covered with fertile soil. Young shoots will grow from the roots remaining in the ground. Divide and plant the previously dug bush.
Seed reproduction. Phloxes are easily pollinated.When growing on a plot of various varieties, there is a high probability of obtaining seedlings from seeds with characteristics that differ from the original varieties. Therefore, the method of seed propagation is used mainly for breeding purposes to obtain new varieties.
Mars
If you have a perennial, then the Bushes and nests are divided in spring or autumn, if an annual, then the seeds are sown in February-March, the seedlings are planted in open ground in late May-early June.
Kitzyunya
I know we have always shared heavily overgrown bushes in the spring. They just chopped up the bush with a shovel and planted it. Grandma's Phlox still has a full yard.
Alyonka
that's a good article
- How to propagate phlox by cuttings
- Reproduction of phlox
- Phlox reproduction
- Reproduction of phlox by cuttings
- Phlox reproduction
- Phlox perennial reproduction
- Reproduction of phlox by cuttings
- Reproduction of phlox seeds
- Phlox care reproduction
- Phlox propagation by cuttings
- Phlox care reproduction
- Reproduction of phlox
- How to care for phlox
- Phlox care planting
- Plant phlox
- We grow phlox
When to cut phlox cuttings
To get new plants, phlox cuttings are taken almost at any time of the season. Of course, there are periods most indicated for this event. The breeding season begins in May or early July, at this time the shoots of these flowers are up to about 15 cm.Just break them off the ground (preferably with a heel) and plant them in a prepared area, or better at first in a greenhouse. It is not advisable to thin out the growing bush strongly, otherwise you will greatly weaken it. The maximum that can be taken from an adult plant is 1/3 of the shoots.
Cuttings are effective from mid-summer and early August. In this case, the cuttings must be planted under the film, but be sure to leave a hole for air circulation.
If you decide to cut perennial phloxes in the fall, do it in the second half of September. There is no time to plant cut cuttings in pots - while they are rooted, the cold will come. Therefore, we plant them immediately in open ground, but so that at any time it can be covered with a film. Landing is inclined, at an angle of up to 40 degrees.
Immediately after planting, we mulch the plot: you can use peat or earth, half with humus.
Propagation by root cuttings
This method is used in extreme cases, for example, if nematodes have settled on the plant, or it begins to rot. The plant must be at least three years old. Reproduction of phlox by root cuttings will preserve the variety and increase the number of flowers.
Important! The best period for root cuttings is autumn, because at this time there is a large amount of nutrients in the soil.
How to properly cut phlox roots
At the very beginning of autumn, you need to remove the plant from the ground. The most voluminous roots are suitable for division. They must be divided into pieces of 6-7 cm and planted with the thin end down. Then the cuttings are covered with a layer of sand (about 5 cm) and slightly moistened. The box is removed into the room without access to sunlight. The recommended temperature is around 12-15 ° C. To stimulate shoot growth, the temperature is raised to 20 ° C after 3 weeks.

Phlox root system
When the first shoots appear, the plant is taken out into the street so that they get used to the heat
It is important to avoid direct sunlight on the plants.
Towards the end of spring, phlox can be transplanted to the garden bed. You can transplant a plant to a flower bed in a year.
Reproduction: seeds or cuttings?
Most garden plants reproduce by cuttings, division, seeds, phlox is no exception. For dividing, you must choose an adult bush of three to five years of age. It can be divided into 15 - 20 parts and planted in the spring, in the fall it is better not to carry out such experiments and divide the phlox into four to seven parts. In springtime, the plant takes root better.
Harvesting cuttings
It is necessary to carry out the operation from May to mid-summer. At this time, the survival rate is highest. The stalk can be isolated from any part of the stem, each should have two nodes, the tops are removed. This is best done in cloudy weather. Cuttings are planted in the ground immediately, it must be well moistened. It is better to prepare the soil mixture yourself: mix humus, sand and earth in equal proportions. The plantation is regularly watered, you can cover the planting with foil. The phlox root system will begin to form a month after planting.
Reproduction of phlox by cuttings.
Autumn chores
If it becomes necessary to start breeding phloxes out of season, this can be done in the fall. Manipulations are carried out in rooms with a cool, constant temperature, for example, in a greenhouse or cellar. Such cuttings cannot be planted in open ground, they will not tolerate frost. The best way is to place the plants in a flowerpot or container in which the phlox will take root and grow until the warm season. You can plant bushes on the site in May, when there is no risk of night frosts.
Seed propagation
Seed phloxes are gardening classics. This type takes more time than grafting or dividing a bush, but it has a serious advantage. Flowers grown from seeds adapt better to the characteristics of the soil and climate. The disadvantage is the possible loss of individual varietal traits.
The seeds can be purchased at a specialty store or grown on your own. They are harvested when the foliage begins to fade, and the boxes turn brown. The young generation of plants is planted immediately on the site or indoors. If germination takes place in containers, a soil mixture of sand, earth and humus is laid in them and covered with a layer of soil of 1 - 1.5 cm. In the first winter month, the containers are covered with snow, and in the first spring, they are transferred to the greenhouse. Young plants are planted at the end of April, first - in a greenhouse, a month later - on a plot.
Reproduction of phlox by seeds.


