Reproduction using a leaf
1. How to choose a sheet
In order for the future flower to be healthy and beautiful, you need to select the right leaf for propagation.

For this, several conditions should be taken into account:
- The leaf is plucked from the second or third row of the plant. The first is considered the one closest to the roots, you should not pinch off it, since the leaves are old, and in the center they are too young. And in the second and third tiers, quite young and strong leaves.
- During visual inspection, there should be no damage, yellowness, cracks, or signs of disease on the leaf plate. A healthy flower will not grow from low-quality planting material.
- The color of the leaf should be a rich green color, elastic to the touch.
2. Preparing for landing
It is also necessary to separate the sheet correctly:
- You can tear it off with your hands, but it would be more civilized to cut it off with a sharp knife or blade. The instrument should be disinfected before use.
- It is advisable to rinse the leaf, and especially the base with a pale solution of potassium permanganate and dry, but not dry.
3. Strengthening the sheet
There are 2 methods of rooting violet leaves: in water and in soil. Each method has its own advantages and disadvantages.

Rooting in water is as follows:
- The container is thoroughly washed, it can be a bottle with a narrow neck from dark glass or plastic drugs, or a glass or disposable cup.
- Purified, or better, distilled water is poured into the selected dishes. For greater sterility, an activated carbon tablet is added to the liquid.
- The base of the leaf should touch the water quite a bit. The glass is placed in a warm place, well lit, never in the sun.
- Roots appear in one, or even two weeks, and babies - in a month. During this time, the liquid in the dishes does not change, only it is added in case of evaporation.
- When the roots have grown to a size of 1 cm, they should be transplanted into the soil.
The second method involves the following sequence of actions:
- Holes are made in the bottom of the plastic cup to avoid waterlogging of the soil.
- Drainage is filled up in the form of pieces of foam plastic, expanded clay. Then you should fill the container with light and loose soil.
- A small depression is made, and the base of the leaf is sprinkled with earth.
- The soil is moistened with a little water. From above, the container is covered with a glass of larger diameter and placed in a warm place.
- Overdrying of the soil is not allowed, therefore, if necessary, the soil should be moistened.
- If the air in the room is very dry, then the glasses are covered with a bag on top, and a greenhouse is obtained. Periodically remove the polyethylene for ventilation when traces of condensation are visible.
- After 1.5 months, babies appear. When they are medium in size, they should be planted in the main pot.
The advantage of the first method is that the development of the root system is visible, and in the second, the fact that rooting occurs in the natural environment and does not require adaptation to new conditions, as in the first case.
Reproduction of violets by a leaf
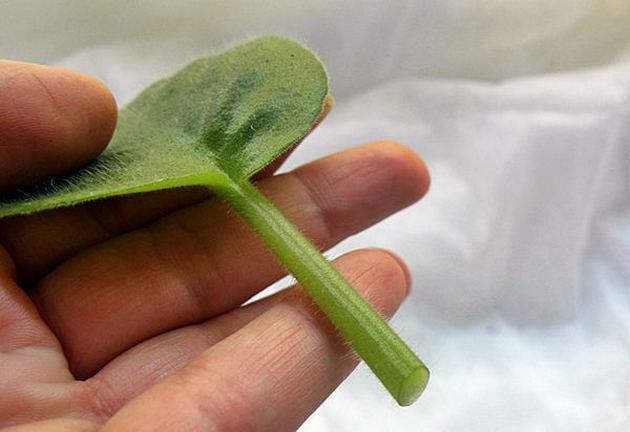
Reproduction of violets by a leaf is the simplest, most successful and, therefore, the most often used method at home. In the spring, during active vegetation, in an adult violet, a middle-aged leaf with a petiole of 2 to 5 cm in length is cut from the second or third row of the rosette (under the peduncle). If the stalk is long, cut off the excess with an oblique cut. For some time, about half an hour, the cut cutting should air dry.
You can root the selected leaf or its stalk both in water and in the substrate.Do not use all kinds of preparations, the so-called rooting accelerators, to root the violet. They are more likely to be harmful than beneficial, since violets have too delicate tissue structure, and the use of chemicals can cause burns and subsequent rotting. To prevent fungal infections, treat the cut with crushed activated charcoal.
How to root a leaf in water

If you choose to root a violet leaf in water, do it this way. Pour into a glass, preferably dark with a narrow neck, separated water at room temperature 1 cm deep. You will have to maintain a 1 cm water level in a glass throughout the entire rooting period (top up as it evaporates).

After the roots appear, plant the violet stalk in a small pot with good drainage and light loose soil. The seedling needs to be watered often so that the substrate does not dry out. You can make a small greenhouse with plastic wrap. After a month or so, violet babies will appear at the end of the cutting - tiny rosettes of leaves that are ready to be planted in normal soil (for Saintpaulias or indoor violets).
How to root a leaf in the ground
If you decide to root a violet leaf immediately in the substrate (it is better to use sphagnum moss cut into pieces), do it like this. Cut off, slightly air-dried, treat the cutting with crushed activated carbon and plant at an angle of 45 grams. to a depth of 1 - 2 cm into a moistened substrate, which fill a plastic cup. At the bottom of the cup there should be a drainage hole and a layer of expanded clay or foam. Place this cup in the other cup used as a tray. You will pour warm water there to moisten the substrate.

Cover the composition with the handle with a plastic bag with holes made in it. This is done to remove condensate from the mini-greenhouse. If you use a transparent plastic container with a lid, then, if necessary, the container will need to be ventilated and the substrate moistened. Choose a bright and warm place for the greenhouse. When small leaves of new rosettes appear from the substrate at the end of the cutting, you will understand that rooting was successful, and the seedling is ready to be transplanted into its small pot with soil suitable for violets.

Violet rooting was successful
If several babies hatch at the rooting site at once, and this happens when you have chosen a strong stalk, transplant the babies in turn. The best option for further transplanting each child is to wait until she has two or three leaves, will be about 3 - 5 cm in diameter and gain strength. After that, you can separate the violet baby along with its roots from the mother's leaf and plant it in the ground.
There are two ways to separate the baby from the handle:
Gently remove the leaf stalk from the pot, shake off the soil from the roots
With your hands, carefully separate each baby from the cuttings and other babies. In this case, all children should be seated in separate small cups 4 cm in diameter.
Do not take out the leaf stalk from the pot, but cut off the grown baby, which has already formed roots, with a clean blade (sharp clerical knife) and plant in a separate pot with loose soil, which should contain sphagnum moss and vermiculite
Do not touch the rest of the babies - let them continue to develop on the mother's handle. When they grow up, you will also separate them from the cutting and plant them in your pot.
Make sure that when transplanting children, the growth point of the seedling is not deepened. In about a month, or maybe more, your children will grow up so that the size of their rosette will exceed the diameter of their pot by three times. Now you need to transplant the young, along with a lump of earth, into your permanent pots in accordance with all the rules for transplanting adult plants.
Rooting a violet leaf
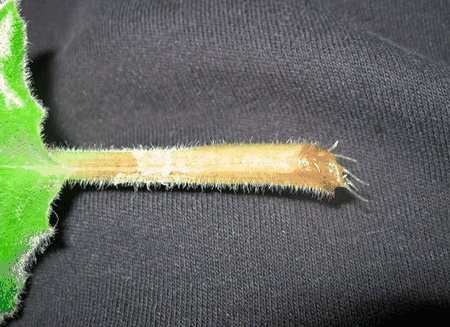
Reproduction of violets with a leaf is the easiest way.The whole process is that you need to root the cut leaf. This can be done in several ways, and each of them has its pros and cons.
Rooting methods for violets:
1. Method. Rooting a leaf in water. For this we need:
- Clean glass 0.2l. It is better to use disposable dishes for such purposes.
- Pure boiled water.
- Activated carbon tablet.
- Prepared violet leaf.
- Cutting tool.
Pour water into a glass and put a tablet of activated carbon there. Then we inspect the cut at the sheet, if necessary, update it, stepping back a few millimeters. We immerse the sheet in a disposable glass to a depth of 1 centimeter, no more. We remove the glass in a warm place, just not in the sun, and as the water evaporates, add it to the same level. After a while, you will see that the leaf has given roots, as soon as they grow 1 centimeter or more, transplant the violet into the ground (the rooting time directly depends on the conditions created). If the stalk begins to rot at the base, we cut off the damaged tissue and start the whole process from the beginning. In a month and a half, the leaf will give children. And how to properly transplant a violet into the ground, we will talk a little later.
The advantages of this method - the root system is always in sight, which allows you to control the entire process of root formation. The disadvantages of this method - when transplanting into the ground, damage to the root system is possible, which will take some time to adapt to new conditions.
2. Method. Rooting the leaf in the ground. For this we need:
- Clean glass 0.2l. - 2 pcs.
- Pure boiled water.
- Drainage (Styrofoam can be used).
- Soil or vermiculite.
- Prepared violet leaf.
- Cutting tool.
We take a disposable glass and make drainage holes in it with a cutting tool, which are necessary to drain excess moisture. Then we pour a layer of drainage (foam) on the bottom of the glass, evenly distributing it over the entire surface. We fill up the soil. We plant the sheet in a container, to a depth of about one centimeter. We put on this glass one more only without drainage holes. We moisten the soil a little. We remove the glass in a warm place, periodically water it. If your room has less than 50% humidity, cover the cup with a plastic bag, thus creating a greenhouse. If you watered the violet abundantly when planting, then this moisture will be enough for several weeks. The greenhouse can be ventilated if desired. Children will appear in a month and a half.
If the leaf withers rapidly for some time, carefully release the cutting and inspect it. If the stalk is rotten, cut it back and repeat the entire procedure. As soon as the size of the children reaches an average size, we make a transplant (transfer) to a permanent pot.
The advantages of this method are that the rooting of the leaf occurs immediately in place. The disadvantages of this method are that there is no way to monitor the development of the root system.
Florist tips
Experienced florists recommend to be patient. Since there are varieties of violets that can form roots for up to 2-3 months. Their leaves are in no hurry to form babies, and the reproduction procedure is delayed up to 6 months. Despite the leaf, it is impossible to stimulate with top dressing, from the excess of nutrients, it will begin to actively grow itself and will not give offspring.
 Violets
With all methods, except for rooting in water, before placing the cuttings in the substrate, the cut must be dried for 15-20 minutes. This postulate of experienced florists is ignored by many, which leads to failures in the reproduction of violets. However, it is impossible to place the "open wound" of the cutting directly into the soil. After drying the cut, sap flow stops. If the cut is not dried, the cutting will begin to rot.
During rooting, the edge of the leaf often begins to rot. This process cannot be ignored, since rotting will spread further to the entire leaf and spread to the cutting.The decayed parts of the leaf must be cut off and treated with activated or charcoal.
Rooting a leaf in the ground
Rooting a leaf in the ground also has its advantages. The violet does not have to be transplanted and the young roots are disturbed, making it easier for the plant to adapt.
If you decide to root your leaf in the ground, then first you need to take care of the composition of the soil for rooting. A little charcoal and perlite, as well as vermiculite, should be added to the soil. Sod land is very good for growing violets.
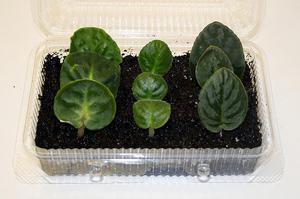
The soil should be light and loose, drainage is required.
In this case, the step-by-step algorithm of your actions is as follows:
- Take a small plastic cup and make a small hole in the bottom to drain the water.
- pour the drainage into the glass first, then the soil prepared for the violet.
- insert a leaf into it, deepening it by about 1.5 cm, it is not necessary deeper.
- spill the leaf with water, while not allowing excessive moisture.

You can create a greenhouse effect for a leaf by covering it with a film, but this is not necessary. Do not forget that the soil should not be too wet, and water the leaf as the soil dries.
In order to keep the leaf upright and prevent it from falling over, you can use plastic cocktail tubes - they are long and light enough.
If traces of decay are found, proceed in the same way as in the case of rooting in water - cut off the decayed place, and place the cutting in the ground again.
If everything goes well, then after about one and a half to two months, a lot of young green shoots will appear near the leaf.

Violet breeding methods: pros and cons
Depending on the experience in breeding Saintpaulias, everyone can choose the method that suits him. It is useful to know all of them, because sometimes there is no choice at all, depending on the state of the mother plant.
Rooted Saintpaulia leaf with babies
Leaflets
Any strong leaf without traces of disease and spoilage can become an excellent material for vegetative propagation of the Saintpaulia rosette. The optimal time is March, when there is no heat, and the day is lengthening. But as a measure of emergency rescue, the method can be used almost all year round.
Pros:
- material is always at hand;
- a large output of children: from one sheet to several dozen outlets;
- almost guaranteed result if simple rules are followed;
- can be carried out all year round.
Minuses:
- rooting in March gives the best results;
- violation of the containment regime will lead to the death of both the sheet and the children;
- the minimum time for receiving children is two months.
Having gained experience on how to plant violets in a pot with a leaf, in the future it can be repeated as many times as you like, noticing additional nuances.
Cuttings, parts of the stem
This type of reproduction is practically no different from leaf and is used when there is no whole and strong leaf on the plant. Therefore, take a leaf cutting with a piece of the main vein or cut out the central part of the stem. The longer the stalk, the better. A part of the stem is taken 1-1.5 cm long from the center, removing the crown (if it is in poor condition), as well as the entire lower part with roots.
Important! For grafting, they use a very sharp knife, and all the cuts are slightly dried, and then treated with alcohol
Part of a violet stem with a crown and young roots
The planting material is buried 1-1.5 cm into the ground and covered with a transparent cap. In such a greenhouse, in the next 2-3 weeks, viable parts of the violet will be able to give roots. If you take a container with transparent walls for landing, then soon the roots will be clearly distinguishable. Part of the stem, like the stalk, should give children, which in 2-3 months can be carefully planted in separate pots.
Advantage: Larger parts have more vitality for growing young roots.Disadvantage: in the presence of some kind of fungal disease, there is practically no chance of rooting.
Peduncle
Some varieties of violets, for example, chimeras, can only be diluted in larger quantities. Seeds and leaves do not carry a complete set of genes that can preserve the unique shade of flowers and their shape, as well as leaves. To obtain clones, peduncles are taken, rooting them in the same way as the leaves.
Rooted part of the peduncle
Advantage of the method: 100% preservation of all the characteristics of a rare variety.
Disadvantage: extreme meticulousness of the technique and low survival rate of peduncles (on average 1 out of 4-5 or less).
Seeds
Violet seeds are very small and difficult to handle. They are practically not found on sale. Main reason: short germination period (up to four months). Therefore, the method is used exclusively by those who are purposefully engaged in the development of new varieties. Plus: you can get new shades of flowers by crossing violets with different traits.
Common breeding errors
To obtain the desired result, the main thing is not only to select high-quality planting material, but also to create the right conditions for rooting. Failure to follow the rules of reproduction and further care often leads to the invasion of harmful parasites. Higher temperatures can cause red ticks. When they appear, it is urgent to treat violets with insecticidal agents.

Blooming Saintpaulia
By performing a number of simple activities, in a fairly short period you can get a whole flower gallery from one flower. She will not only delight with her appearance, but also cheer up and cleanse the air in the house.
Reproduction using a leaf fragment
This method of breeding violets is used in cases where it was not possible to obtain the normal amount of material for planting. Sometimes a rare plant begins to rot or dry out, and in order to save it, a cutting is cut off and a certain part of the leaf is left.

Sometimes the leaf is divided into fragments on purpose in order to get more material for planting.
Trimming the sheet must be done in such a way that its upper third with a vein remains. The cut should dry out, it is also processed, sprinkled with crushed activated carbon. When planting a sheet in the ground, it should be borne in mind that the trimmed part must be deepened as much as possible into the soil. To make it take root more quickly, more marsh moss is added to the soil. Because it has bactericidal properties and retains moisture.

An example of plant propagation by fragmentation
From the cutting to the violet bloom ...
Bringing home a leaf of some unique variety, we always want to quickly see the result of its flowering, but alas ... At best, a multiplied violet leaf gives babies in terms of one month, sometimes you need to wait longer.

Approximate terms from the moment of separation of a leaf from an adult violet:
- after 3 weeks roots appear,
- in 5-6 weeks - babies,
- after 12 weeks - the seating of children from the mother's sheet,
- after 5 months - transplant into an "adult" pot,
- after 6-9 months, the violet blooms.
Why do these terms depend? There are some factors to consider when breeding and growing violets at home ..
First of all, on the conditions of keeping the rooted leaf (lighting, the presence of a greenhouse, air temperature); from the nutrition of the mother plant (just do not need to feed the young violet rosettes during growing).
In spring, the plant will give babies faster than in autumn. It also depends on the varietal characteristics of the violets. There are varieties that germinate quickly, there are those who are slow-witted on long stalks, which have taken root and live happily ever after, and are in no hurry to give children.

If leafy cuttings are planted in October-November, new rosettes are received in February, transplanted, and in the summer, with proper home maintenance, these violets bloom in full bloom.It is undesirable to propagate a violet during flowering, it is better to wait for the houseplant to fade.
Separation and planting of outlets in separate pots.
You can separate the children after the leaves are sufficiently grown and rich in green. Do the transplant in a small pot or in separate cups. At the bottom, you need to put drainage in the form of expanded clay or foam. Everything is covered with soil, a depression of about 1 cm is made and a violet rosette is planted.

Children should receive excellent lighting, warmth, moderate watering. When the rosettes grow up, it will be possible to "transfer" into a pot, which should correspond in size to the plant. By observing these simple requirements for the propagation of violets with leaves, you will get a wonderful plant that will delight you with a beautiful and long flowering.
There is a method of grafting, when the violet leaf is propagated directly in a transparent plastic bag.
Senpolists share their experience on how to propagate a violet, when a substrate for rooting is poured into a small bag, a cut of a cutting is inserted into the soil, the bag is tightly closed and simply suspended from the rack. At the same time, they make sure that the leaf blade does not rot from excess moisture, therefore they often ventilate.
Reproduction of violets by seeds
The process of collecting planting material is quite laborious, because first you have to choose two healthy, strong plants suitable for reproduction, after which you can independently collect pollen from one of them and pollinate another plant with it. The next step is to wait for the pollinated violet to bloom and collect the seeds. On average, this happens after 3.5 months when the seed boxes are dry. Then the seeds will need to be carefully collected and sent for storage in a dark place for 2-3 days.
For planting seeds, choose a spacious container, into which soil and fertilizers are pre-poured. Then you need to add fine sand to the planting material and pour this mixture into the container. It is not required to cover the soil with the top layer.

Growing violets from seeds
The seed container is placed under artificial lamps and covered with a plastic lid. When the first shoots appear, they are dived into hotel glasses, and then planted according to standard rules.
Perennial garden violets
Experts say that there are about 500 species of perennial violets in nature.

Varietal features
The most famous ones that are grown at home (you can see the photo under the name):
Horned violet Viola cornyta. Its scary name comes from a small spur on a flower. The bushes are 10-20 cm high. The flowers themselves are small, but there can be 50-60 of them on the bush. After sowing the seeds, flowering can begin in 2-3 months. Colors - from white and pale lilac to purple with black shades;

Fragrant violet (Viola odorata). It was popular even in Ancient Greece and Rome. April and May are its flowering period in nature. Its aroma is special and strong in the morning and in the evening;

Violet labrador;

Violet tricolor (our popular Pansies);
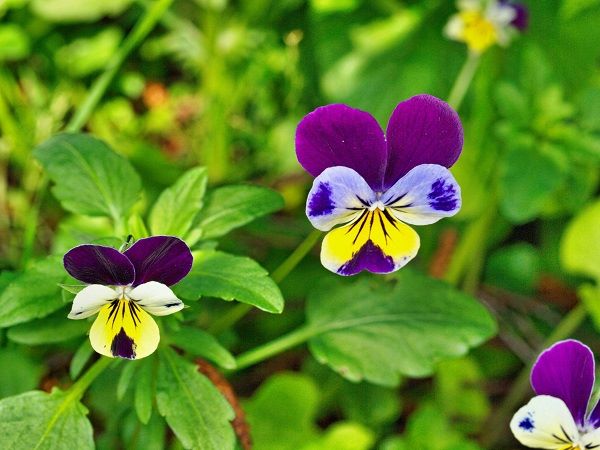
Violet graceful;

Violet Manchu;
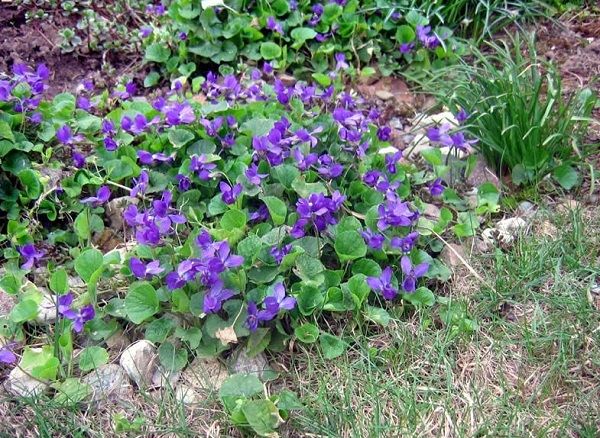
Violet moth;

Violet variegated;
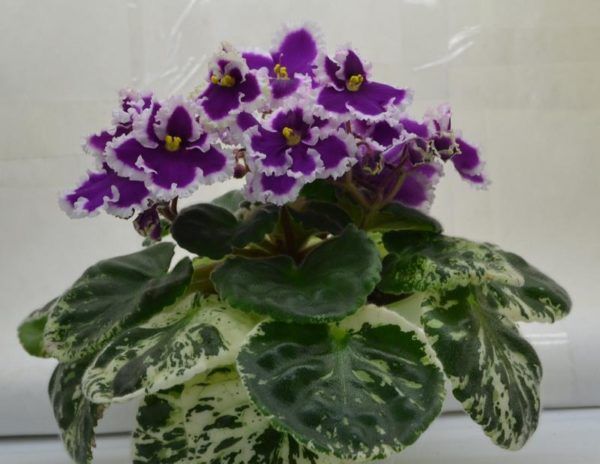
Korean violet.
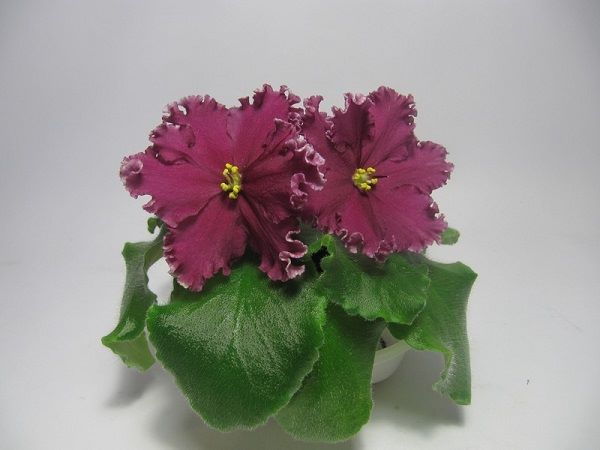
Popular varieties

Boughton Blue.
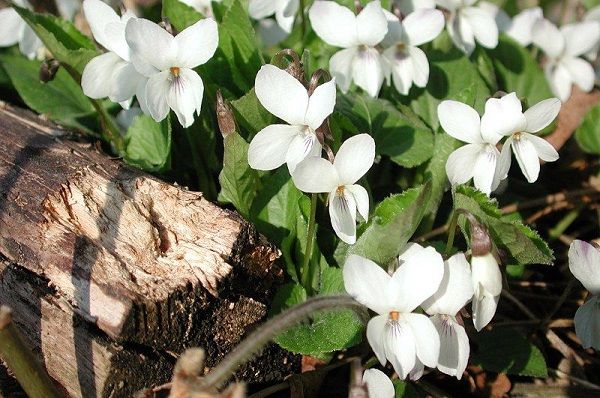
Foxbrook Cream.

Gazelle.

Penny Black.

Little David.
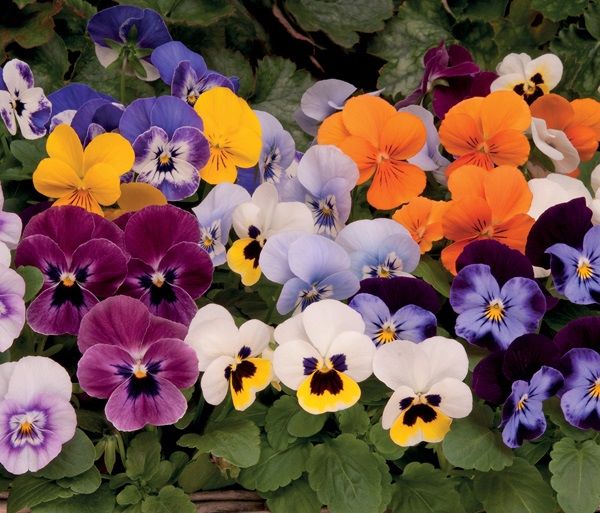
There are 10 varieties of Sorbet F1.
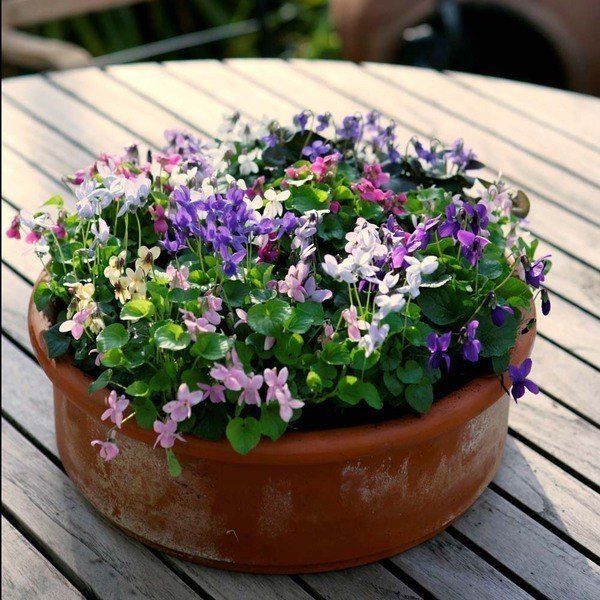
And these are definitely familiar flowers (photo of fragrant violets).
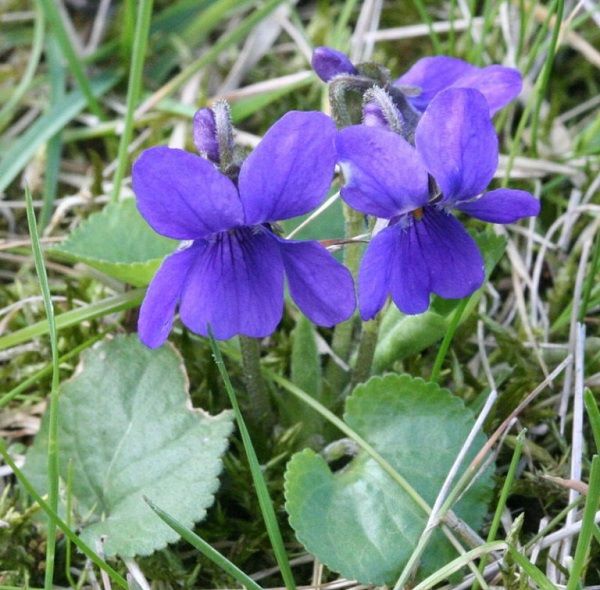
Bechtles Ideal.

Czar.

Red Charm.
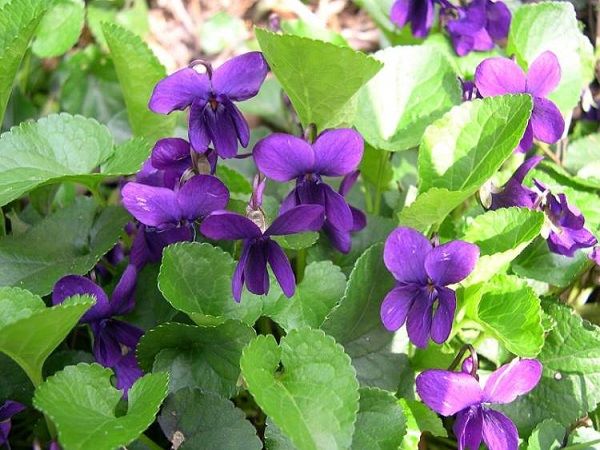
Queen Charlotte.

Christmas.
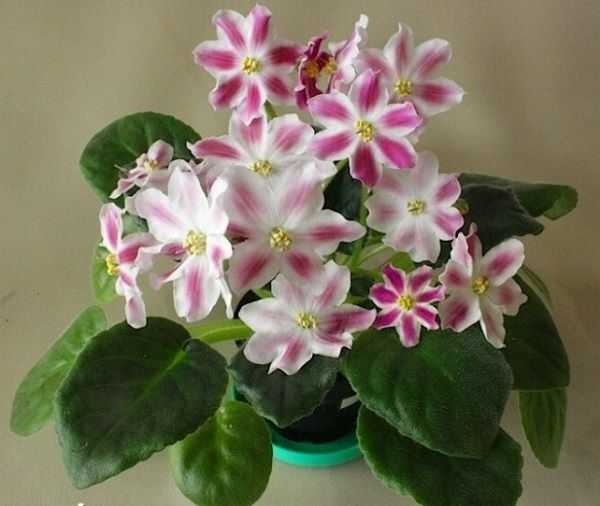
Triumph.
Features of planting in open ground and care
Places for perennial violets:
- Spring flower beds and as ground cover plants;
- Rock gardens and slides;
- Borders and rockeries;
- Very cute bouquets.

The soil for these plants must be prepared light. Planted with seeds and separated bushes. The places are sunny and slightly shaded. Planted with seeds in the fall. It is advisable to cover for the winter.
Fragrant violet can also be grown from seeds. If they have been collected not so long ago (fresh) - no more than 2 months have passed since collection. They can even tolerate frost. Short-term. And our forest violets - even severe frosts.
Growing from seeds
The most difficult breeding method. Choose two flowering plants. Manually collect pollen from the peduncles of one of them and pollinate another flower. The seed pods will ripen in about 4-6 months.
On a note! You can understand that the seed is ready by completely dried seed bolls.
What growable seeds look like
Self-collected planting material is the key to quality growth in the future. If it is not possible to perform the procedure with your own hands, you should take the most responsible attitude to the choice of purchased seed.
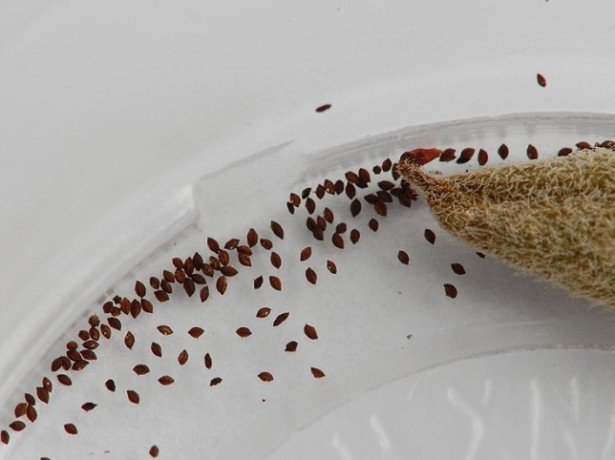
Healthy seed
It is not recommended to purchase seeds from dubious sellers. Buying at a specialty store or at a flower show will give you confidence in quality.
How to prepare seeds for planting in soil
Before sowing seeds in the ground, pre-planting measures are carried out:
- freshly harvested seeds are dried in room conditions for 2 days;
- for disinfection, they are soaked for 30-50 minutes in a weak solution of manganese;
- the next stage is drying the seed.
Additional Information! For sowing, it is better to use special containers filled with perlite. Due to the fact that the seeds of the species are very small, it is recommended to mix them with sand.
Landing in the ground is performed by a surface method. In the future, the container with seeds is sprayed from a finely dispersed spray bottle.
Optimal conditions for seed germination
For normal development, the container with landings is covered with glass. Illumination with fluorescent lamps is carried out for 10-12 hours daily. To avoid rotting or acidification of the soil, the plantings are aired daily.
When the substrate dries out, the seeds may not sprout at all. You can remove the glass only after the first leaves appear on the seedlings.


