Further care
Whichever variety the petunia belongs to, it will need proper and regular care in any case.
Only if this important rule is observed can you count on growing really healthy and beautiful flowers that are not prone to frequent ailments and attacks of parasites.
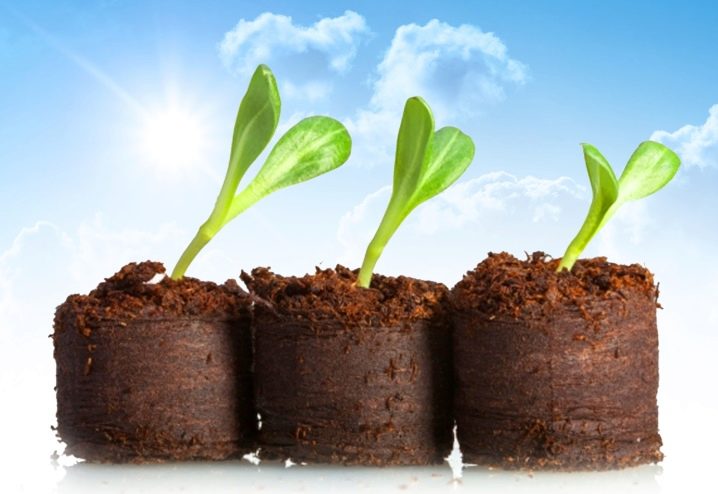
It should be borne in mind that young sprouts are very fragile and vulnerable, so during the first time they will need to be given as much attention as possible. Be sure to ensure that there is sufficient lighting. A moderate humidity level is important, as well as the optimal temperature indicators indicated above.
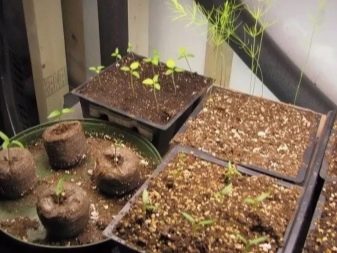
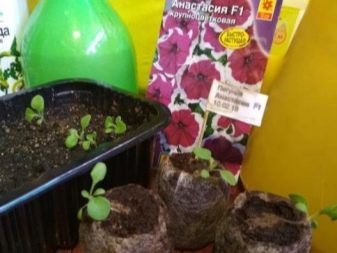
Be sure to make sure that the peat tablets do not dry out or, conversely, become waterlogged. Watering should be done with warm and settled water. Top dressing is not needed here at all. It is necessary to ensure that condensation does not form on the material that covers the containers. If it does appear, then you need to immediately remove it and then repeat the procedure for airing the room.
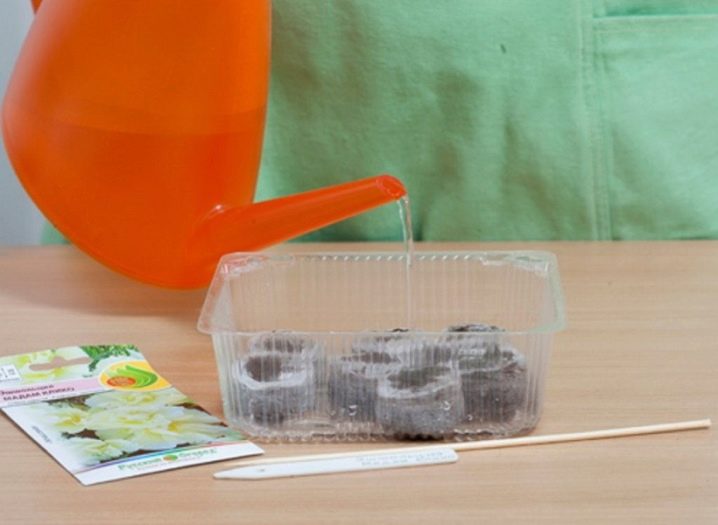
It is allowed to open seedlings only on the 5th day of growing a flower. If you do not follow the simple rules of watering and do not provide the necessary flow of oxygen, then the tablets can easily become moldy.
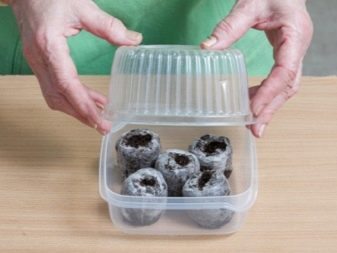
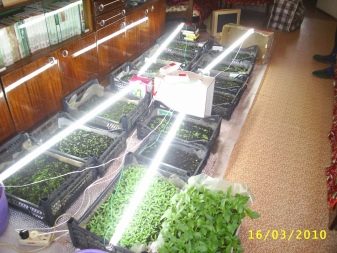
If you transplanted petunias into tablets by the end of the winter season, then the subsequent seedlings that are formed in the early days of March will need to be illuminated in an additional order using a fluorescent lamp. Petunias must be provided with high-quality lighting for 12 hours a day. It is permissible to open the greenhouse as soon as the flower becomes stronger and more stable, and several leaves appear on it, albeit very small.
How to dive petunia seedlings correctly - step by step instructions
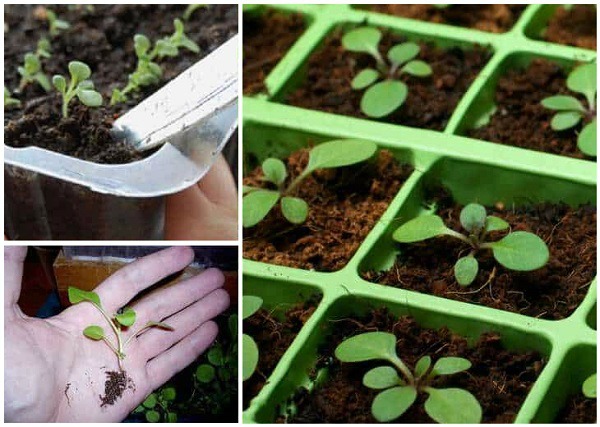 Diving petunia seedlings at home is to provide the plant with a larger area of nutrition and you need to prepare for this in advance.
- Make it yourself or buy a nutritious soil in the store.
- Carry out preventive treatment of soil mixtures against diseases and pests.
- Prepare individual cups, plastic cassettes or larger boxes. Wash with hot soapy water or aqueous potassium permanganate solution. All containers must be equipped with drainage holes.
- On the eve of the dive, water the seedlings of petunias.
The diving process itself should not cause difficulties for the grower. All that is required of him is accuracy and patience, especially if the shoots of the petunia are thickened.
Picking from common containers into cups
We fill cups or other containers with soil mixture, slightly compact so that 0.5-1 cm remains to the edges.
With a blunt peg, 1-2 cm in diameter, we make indentations in the center of the planting container. Pour in a small amount of water.
Gently, using a teaspoon or a flat stick from ice cream, we remove the sprouts from the general container, holding the cotyledon leaf.
We transfer the plant to a new container, keeping an earthen lump on the roots if possible.
We place the sprout in the grooves up to the lower leaf plates
Carefully fill in the voids around the stem and water a little.
The transplantation of petunias grown in individual containers looks somewhat different.
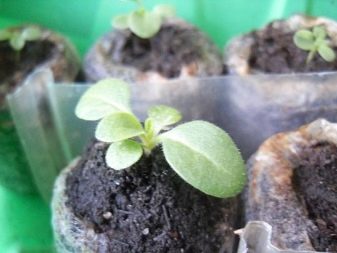
Picking petunias after sprouting from peat tablets
 It is very convenient to grow petunia seedlings in peat tablets. This is especially true for expensive varieties and seeds in granules.
For sowing petunias, tablets with a diameter of 3-4 cm are suitable, which are pre-soaked in warm water. After saturation with moisture, the tablets turn into small barrels, about 5-6 cm high. The size of the diameter does not increase, becauseit is held back by a special mesh.
If the seeds are pelleted, then they are laid out one by one in special recesses and sprayed with water to destroy the shell.
Ordinary seeds are hooked with a toothpick so that there are no more than 3-4 grains in one barrel.
Single shoots of petunia do not experience practically any stress during transplantation. You just need to cut the mesh at the base and along the edges so that the plant can release roots outside the allotted volume of the peat tablet.
Pour a little of the prepared substrate into the glass and set the barrel so that the cotyledon leaves are above the level of the planting container. Fill the voids around the petunia keg with the same soil, slightly compact and water.
On peat tablets with several sprouts, the mesh is carefully cut along its entire height. Then they open it and select sprouts one by one together with a part of the peat. Further steps are similar to transplanting from a common seedling box.
Transfer of petunia seedlings
 Often, petunia seedlings require a double dive. To a greater extent, this applies to seedlings from early crops. If the first transplant of tiny sprouts can be carried out in cups with a volume of 150-200 ml, then after some time the roots will surround the entire earthy ball and the development of the plant will stop. And there is still a long way to go before planting seedlings in open ground. This is where the method of transshipment for petunias into a larger container comes in handy.
- Moisten the soil in the vessels of the flowers you intend to transplant.
- Take a pot, cut juice box, or other available container with a minimum volume of 0.5 liters.
- Provide drainage holes and cover with a 1 cm thick layer of expanded clay.
- Pour some nutritious soil on top of the drainage, taking into account the height of the earthen ball of the transplanted plant.
- Holding the flower by the stem at the very base, turn the container over and remove it along with the earthen lump, pressing lightly on the walls.
- Place the flower in a new container and fill the voids with the existing nutritious potting soil.
- Compact the soil around the pot and water.
After a short time, the roots will feel free, and the petunia will continue to develop with renewed vigor.
Stage 6. Picking up petunia seedlings
The correct seedling of petunia is ready for picking at the stage of 2-3 true (not cotyledonous!) Leaves. This time usually occurs 3-4 weeks after sowing.
In principle, picking plants at the cotyledonous leaf stage is also possible. This can be especially true in case of black leg disease, when it is required to isolate healthy plants from sick ones.
Picking - transfer of seedlings from one common to separate, larger containers for their better development. For a pick, prepare a separate container for each seedling with a diameter of at least 7 cm, with holes for the outflow of excess moisture at the bottom. With a wooden stick or dessert spoon, gently pick up a clod of earth with roots under the plant and transfer it to a "new house", where there is already some fresh soil, preferably already moistened and enriched with humus or granular fertilizer compared to the initial one. The seedling is placed in the hole so that the cotyledons are visible above the soil level.
By the way, if you sowed seeds in peat tablets, then this stage of care can be safely skipped, which is important for novice gardeners who are afraid of severely damaging the root system during this process. Seedlings are placed in new pots directly in the "parent" tablets
In 1.5-2 weeks after the pick, the plants are considered “mature enough” to continue their hardening. Young petunia can gradually be transferred to a temperature of about 15 ° С at night and 18 ° С - during the day. This can be achieved by regularly ventilating the room or by temporarily but systematic removal of seedlings to the open air. Plus, every 14 days, you can feed with complex fertilizer for flowers (according to the instructions).
Variety selection and seed preparation for sowing
For petunia lovers who have dealt with this flower more than once, choosing a variety for seedlings is not difficult. But what about newbies, whose eyes run wild in the store from the countless number of bright packages with flower seeds?
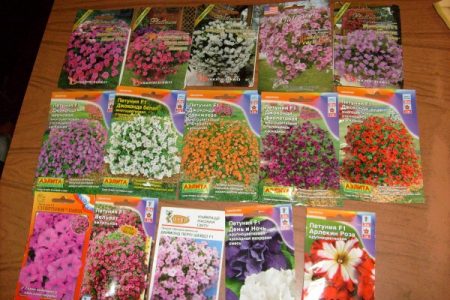
Many people make the mistake of choosing flowers from the picture. Yes, you can, of course, buy those flowers that are best depicted on the packages, but then you can get an unpredictable result, which will possibly negate the whole future associated with such a beautiful flower as petunia. When choosing a variety, it is best to rely on objective criteria:
- place of cultivation. For a flower garden (open ground), bush varieties are suitable, for balcony cultivation - ampelous or cascading;
- external effect. If you need a flower cap made of small flowers along the bottom row of the flower garden, then you should choose petunias - multiflora; and when you want to make something bright and unusual out of the front garden, large-flowered terry varieties or superbissima are suitable;
- a certain color. Many summer residents skillfully combine the colors and shades of their flower garden. Therefore, the variety can be selected based on the color of the overall color composition.
In addition, you can choose a variety that is characterized by strong immunity, resistance to adverse weather conditions, flowering time, etc.
You also need to pay attention to what type of petunia you are getting: a hybrid or a variety. After all, it is known that the harvested seeds of hybrid varieties are not used for sowing seedlings, since they do not have the same qualities as the maternal ones.
Seeds of the usual variety can be collected by yourself and sown in the new season.
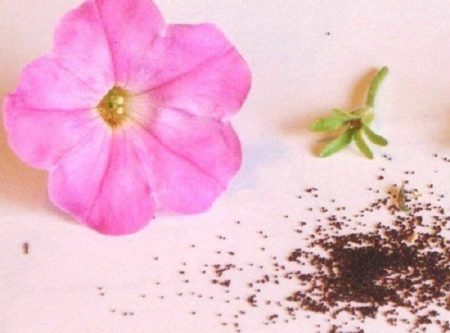
The shelf life of the seeds is of no small importance: the seeds of petunia hatch for a very long time, if they also turn out to be old, then the seedlings may not appear at all. And the waiting time will be wasted
Most of the seeds are sold today in pelleted or granulated form. These seeds are larger, and therefore more convenient to sow (for example, in a peat tablet). In addition, the seeds have already been treated with special preparations that are responsible for immunity and friendly, early shoots. There are usually few seeds in a package, and they cost several times more than ordinary petunia seeds.
The cheaper bags contain more seeds. All of them are very small, so they are planted mainly in bulk, since it is almost impossible to pry them with tweezers. Such seeds need pre-planting preparation, since their germination percentage is usually not very high.

Seed processing stages:
- etching. Reception is performed in order to prevent diseases. It can be carried out by soaking in hot water (50 degrees) for 30 minutes or soaking in a manganese solution;
- soaking. To speed up the germination process, the seeds are kept in warm water (25-30 degrees) in a saucer, covered with gauze. As soon as the seeds absorb moisture, add a little water again. There should not be too much water. As soon as the seeds hatch, they are dried and sown;
- processing with a solution of trace elements. This speeds up seed germination, seedling growth and increases disease resistance.
Sowing petunias for seedlings in the snow
Pour the prepared soil mixture into a bowl, lightly compact it by tapping and level the surface. Spread snow on the soil surface in a layer of 1-1.5 cm (1), compact it (2).

Spread the petunia seeds gently over the surface of the snow. First, shake the seeds off the paper in small portions. Then lightly loosen the snow with a toothpick in the places where the petunia is sown too thick, and distribute some of the seeds to the free areas (3).

When the snow melts, the seeds will be slightly pulled into the soil. It is not necessary to sprinkle the crops with earth - petunia rises in the light. Place the bowl in a bright, warm place. If it is cold on the windowsill, you can define it under a table lamp and cover it with glass (4).

A week later, shoots of petunias will appear. From this moment on, they need to be ventilated at least once a day (preferably twice).
To do this, remove the lid, wipe off the condensation from it and leave the crops open for 10-15 minutes. The exact time doesn't really matter. Nothing bad will happen if you cover crops right away (for example, being late for work). You can ventilate crops and an hour if you have other things to do at this time.
It is only important not to forget to do it every day.

At first, petunia seedlings develop very slowly, their strength goes to building up the root system. If the seedlings are too thick in places, thin them out with tweezers.
When the petunia leaves touch the glass, remove it, but continue to carefully monitor the soil moisture. Petunia is demanding watering. Overdrying will kill your plants. You can moisten it from a pallet or by watering "under the root", the main thing is that no drops remain on the leaves.
As soon as the petunia seedlings grow up so that they can be held with your fingers, spread them into pots or cassettes, gently loosening the thin roots with a spatula or toothpick (5). If the roots are long, pinch them down so that they can be freely distributed in the soil when planting. ... (6)
(6)

To prevent the plants from stretching, place the grown petunia in a cooler place. A month after the pick, it can be taken out to the glazed balcony, veranda or greenhouse (7).

Varieties and hybrids of petunias with strong shoot growth need a pinch. When the petunia plants reach 5-7 cm, for better tillering of the plants, pinch the shoots over 4-5 leaves (8).

A new shoot grows from the axils of each leaf, and the petunia blooms more abundantly (9).

In early June, the seedlings are ready for planting in a flowerpot, balcony box or flower bed (10).

Petunia seedling care after picking
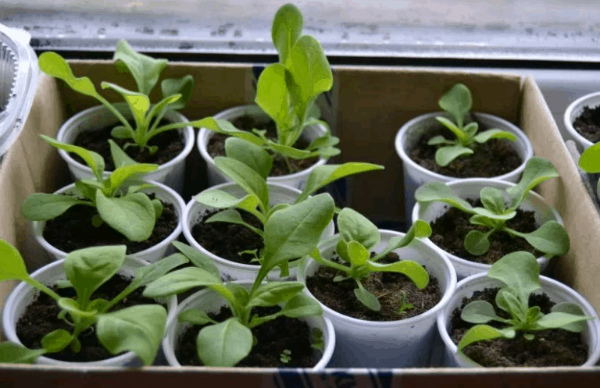 It will take a little more effort to bring petunia seedlings to high-quality and abundant flowering and to reveal the entire color palette laid down in them by nature and breeders.
Temperature regime
Seated petunias need increased care and attention. For plant adaptation to be successful, it is necessary to ensure the optimal temperature regime within 20-22⁰С for the first time two weeks in a new place. Drafts are unacceptable.
Insulating foam or wooden supports are made between cold stone window sills and seedling containers.
Lighting
For petunias, sunlight is paramount from the moment the seeds are sown. So after picking, the pots with seedlings are placed on light windowsills. Lack of natural light leads to stretching of the plants, which makes them more vulnerable to care. The fragile, tall and thin stems fall off and break easily if the plant needs to be turned upside down to the light or tilted for loosening.
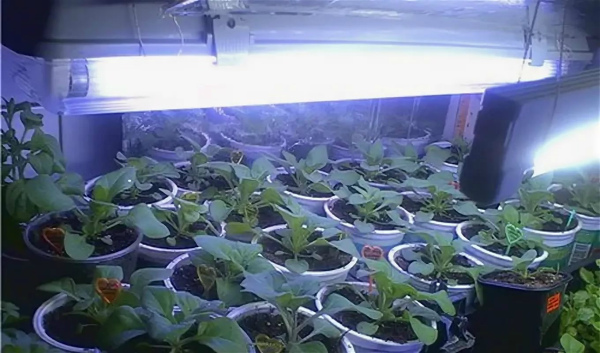 Additional illumination with fluorescent lamps or specially designed photo lamps will help to correct the situation. They are installed in the immediate vicinity of the plants, and on short light days they are turned on for 2-3 hours in the morning and evening.
On gloomy spring days, the lamps are left on all day.
Watering
Moisture is essential for all plants, but supply should be moderate. Watering is carried out with settled water at room temperature and only when the top soil layer in the pot dries out. Water is supplied until it begins to ooze from the drainage holes. The excess liquid is drained from the pan.
Keep in mind, however, that frequent and unregulated watering can lead to blackleg and root rot.
Top dressing
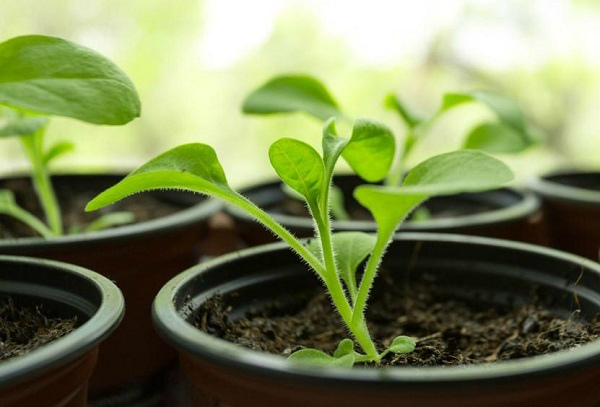 They begin to feed the seedlings of petunias 2 weeks after transplanting or transshipment. For these purposes, you can use Kristallon or Uniflora micro, according to the attached instructions.
If it is noticed that the leaf plates are not sufficiently saturated green, this means that the petunias lack iron. In this case, you will need foliar feeding of petunias with iron-containing substances, these are:
- Iron chelate;
- Micro Fe;
- Ferovit.
In an accessible liquid form, iron is easily absorbed by plants, and soon the color of the leaves of a diseased petunia will not differ from healthy seedlings.
Subsequent fertilizing is carried out with an interval of 10-14 days with complex fertilizers with microelements for flowers.
- Agricola;
- Kemira Suite;
- Ideal;
- Uniflor.
At home, when growing petunia seedlings, you can use the infusion of wood ash. It will not only enrich the plant with potassium and phosphorus, but will also serve as protection against fungal diseases and scare off pests. Dry ash can be scattered over the surface of the soil around the stem, or an aqueous solution can be prepared, spending 0.5 tbsp. sifted ash for 3 liters of water.
With correct and timely feeding, petunia seedlings will grow healthy and by the time they are planted in open ground, they will have time to lay flower buds.
Pinching and shaping
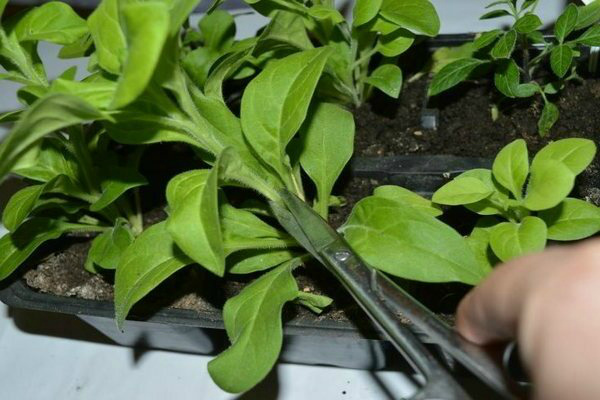 Florists grow petunias to decorate their summer cottage or garden plot, terrace or balcony with a beautiful annual. To achieve the maximum return from a flower, it must be formed in a timely manner and correctly.
The first pinching, i.e. removal of part of the main stem is carried out on rooted and strong seedlings after 5-6 leaves. This operation will give an impetus for the growth of shoots from the axillary leaves, which will make the petunia bush lush and allow new flower buds to be laid in large quantities.
The subsequent formation of petunia will be carried out, most likely, already in the open field. If the grower wants to see a neat petunia bush, then it is advisable to shorten the lateral shoots over 6-8 leaves, giving the plant the desired shape.
Do not throw away cut petunia shoots - you can grow a full-fledged plant from them. The lower leaves are cut off from the cuttings, put in water and wait for the formation of roots. When they appear, the petunia bush is planted in fertile and light soil. This will be a good option for increasing the number of seedlings.
Growing seedlings of petunias
You need to grow petunia through seedlings. Sowing seeds directly into the soil does not give the desired result. For petunias to bloom in the second half of May, sowing seeds for seedlings is carried out in the second half of February or early March. If there is a lack of light, the plants must be illuminated. No matter how early you sow the seeds, they will bloom only if the daylight hours are at least 13 hours.
Soil preparation
You can grow excellent seedlings on store-bought soil. These are potting mixes, peat pots and tablets, which are everywhere in the assortment.
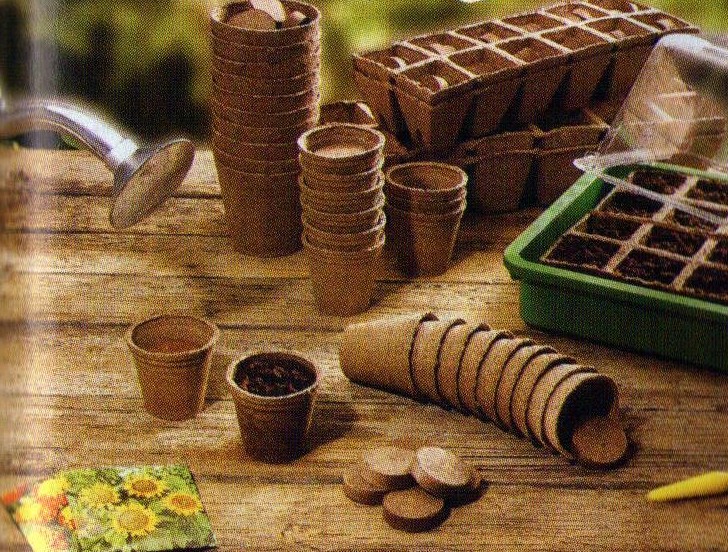
Peat pots and tablets are great for growing petunia seedlings
If you are preparing the soil for seedlings yourself in the fall, a mixture of 2 parts of humus, 1 part of garden or turf soil, and 1 part of sand works well. This composition is universal.
Growing seedlings through a pick
Small plastic or wooden boxes are suitable for this.
Pay particular attention to the presence of holes at the bottom of the boxes to drain excess water when watering
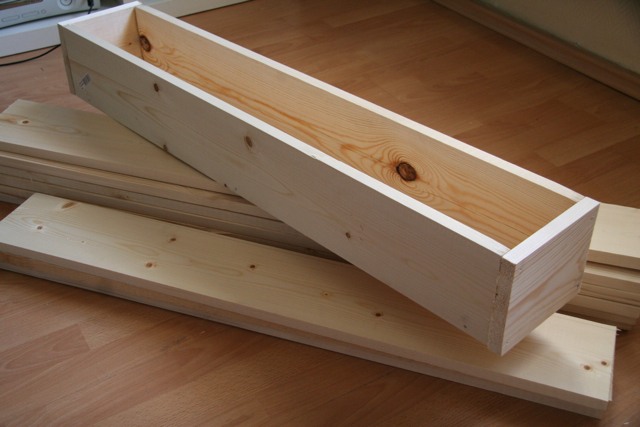
Wooden crates for growing petunia seedlings
We fill the boxes with soil, retreating from the upper edge by 2-3 centimeters. The soil stored in the cold must be warm for at least a week before sowing seeds in it, since the soil bacteria have partially died and it takes time to restore them. The boxes filled with soil are placed on pallets and spilled with a hot solution of potassium permanganate. This operation will get rid of pests that have hibernated in the soil, mold and mildew. The solution should be very hot and light pink in color. After the soil has cooled down, we sow.Petunia seeds are very small and there are several sowing methods:
- The seeds are mixed with the sand. For 1 part of the seeds, take 5 parts of dry sand, mix thoroughly and sow on a wet soil surface without embedding, slightly pressing the seeds to the wet surface of the soil.
-
The seeds are poured onto a white sheet of paper. The tip of a toothpick is dipped in a glass of water, a seed adheres to the wet tip of the toothpick, which is neatly placed in place in the box.
- A thin layer of snow is poured onto the surface of the soil and seeds are scattered over its surface. They are clearly visible on a white surface.
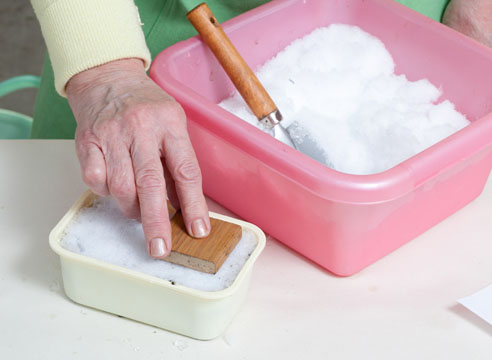
Sowing petunias with snow. Snow compaction

Pouring petunia seeds onto the snow
The seeds in the shell are large enough and not difficult to sow.
After sowing, cover the boxes with plastic wrap or glass to create a greenhouse effect, and place the boxes in a warm place until shoots appear. Typically, seedlings appear 8-10 days after sowing, and coated seeds 6-10 days later. Boxes with seedlings should be placed in a well-lit place; young plants should be watered regularly, avoiding waterlogging or drying out. For rapid germination, the air temperature should be at least 24-26 degrees Celsius.
Petunias that have grown up to 3-5 centimeters must be cut open. For this, boxes, cups, pots and a pointed stick similar to a lance (from which the name of the operation came) are suitable.
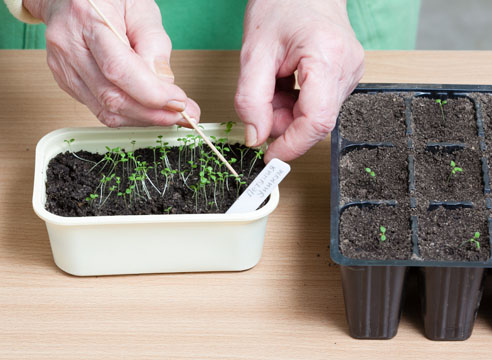
Picking a petunia with a stick
The roots of the seedlings must be pinched. This simple operation makes the root grow actively, and in a plant with a well-developed root system, the ground part is healthy and blooming well.
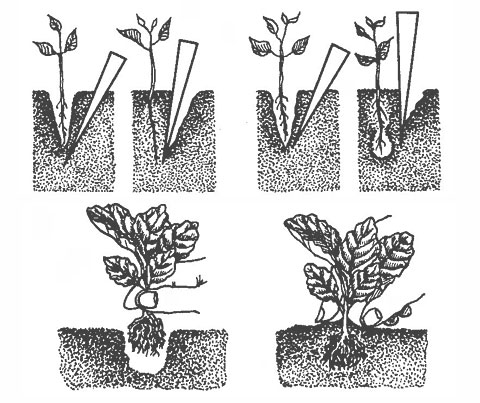
Correct picking of seedlings
Until complete rooting, the seedlings need to be shaded a little, and after 3-5 days they should be put back in a well-lit place.
Topping
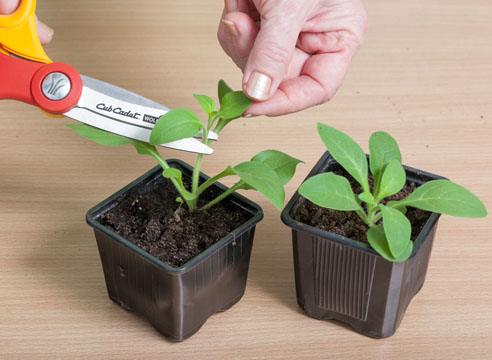
Pinching petunia sprouts
Rooted seedlings with a height of about 10 centimeters must be pinched to activate the growth of side shoots. By the beginning of flowering, a compact, branched bush should form. Old varieties of petunias need pinching, modern hybrids do not need pinching, the tendency to branching is genetically inherent in them. It makes no sense to pinch ampelous petunias, they branch weakly.


