Planting irises
After choosing the most suitable time and preparing the soil, you can start planting the iris. The peculiarities of planting the plant in question include the following:
- The flower bud can be laid even in the summer. This moment determines that before the onset of winter, it is already forming and is ready to give flowers next spring and summer.
- When planting an iris, it should be borne in mind that the plants of this genus most susceptible to cold cannot tolerate the effects of frost around -10 degrees Celsius. When exposed to this temperature, flower buds may die.
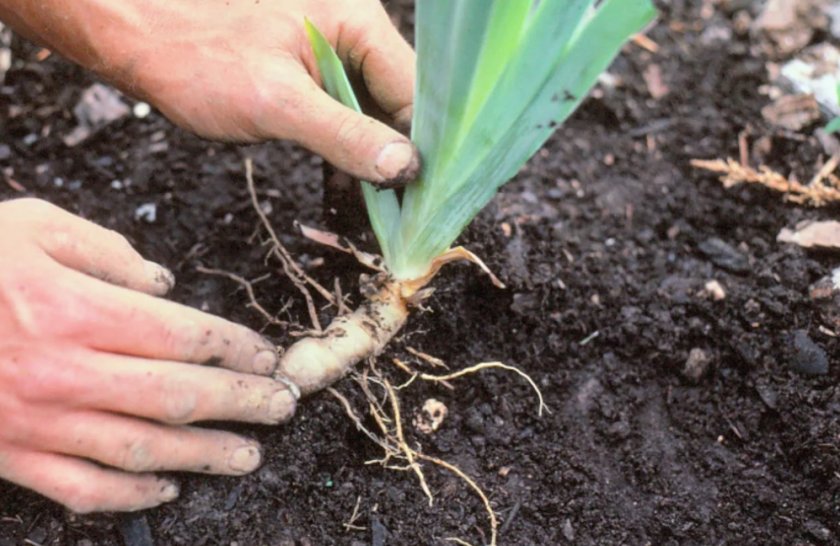
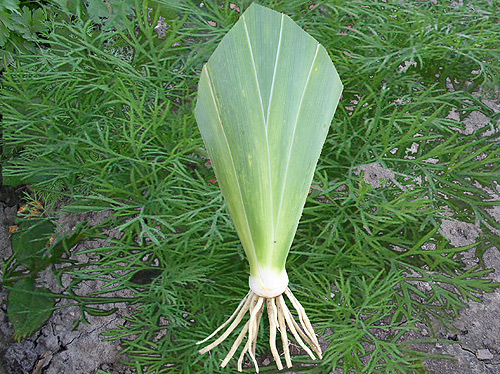
- The planting unit of the iris is considered to be a fan, a layering, a scapula. It is an annual link of the rhizome, the length is 3 centimeters, the diameter of the planting unit is 1-2 centimeters.
- The leaves are shortened by a third of their length, the roots should be about 10 centimeters long.
The above recommendations apply to the case of disembarkation in spring and summer. At this point, the bud is not yet starting to set, but the rhizome has already produced young links. Young links begin to actively develop only 14 days after planting. At the time of planting the flower bud, the iris will already take root well.
When planting in autumn, it is recommended to choose buds that have already been laid, which are about 6 centimeters long and about 3 centimeters in diameter. Providing favorable conditions, the flower will quickly take root and begin to bloom the next year.
The success of the planting carried out largely depends on the correct location of the rhizome in the ground. You can create a planting pit taking into account the recommendations below:
- How the plant takes root depends on the correct location of the root system in the ground.
- The hole should correspond to the length of the root system, but be at the level of the soil that was previously fertilized.
- At the bottom of the hole being created, a small mound is created on which the location of the root system is carried out.
- During planting, the seedling is pressed down and then covered with a layer of earth.
- The arrangement of the iris leaf fan should be strictly vertical.
- The poured earth from above is slightly compacted.
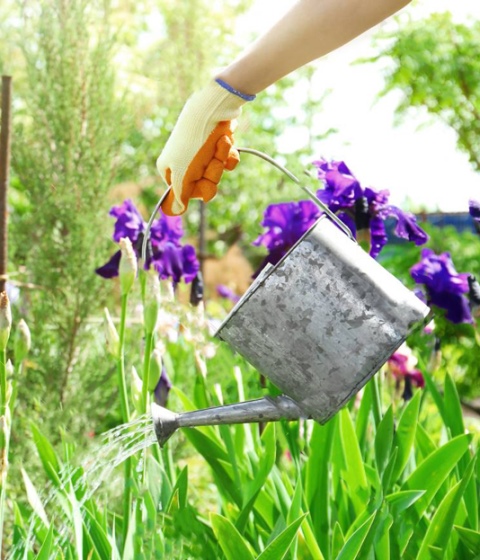
- Water the iris immediately after planting.
- Re-watering is carried out in the next 3-5 days.
- If the planting is carried out on a hot day, then the seedling should be shaded, since the intense heat can worsen the growth of the iris at the very beginning of its planting.
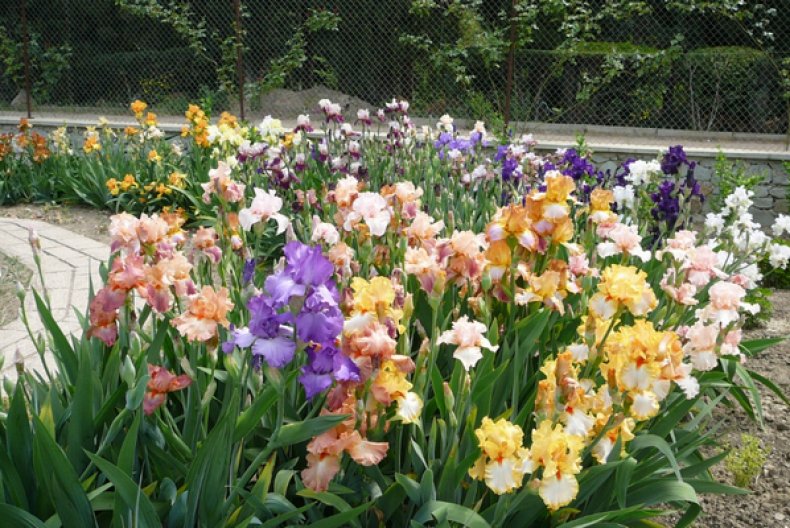
How to plant irises correctly
Many gardeners do not cultivate irises, thinking that this is a rather laborious process. But in fact, breeding is not at all tiring and not as difficult as it seems at first glance.
You just need to know a few tips on how to plant irises in the summer:
- The peculiarity of flowers is that the rhizomes grow horizontally and can be bare when they come to the surface. In winter, they must be sprinkled with earth, peat or other fertilizers so that they do not freeze. This cover is removed with the arrival of spring.
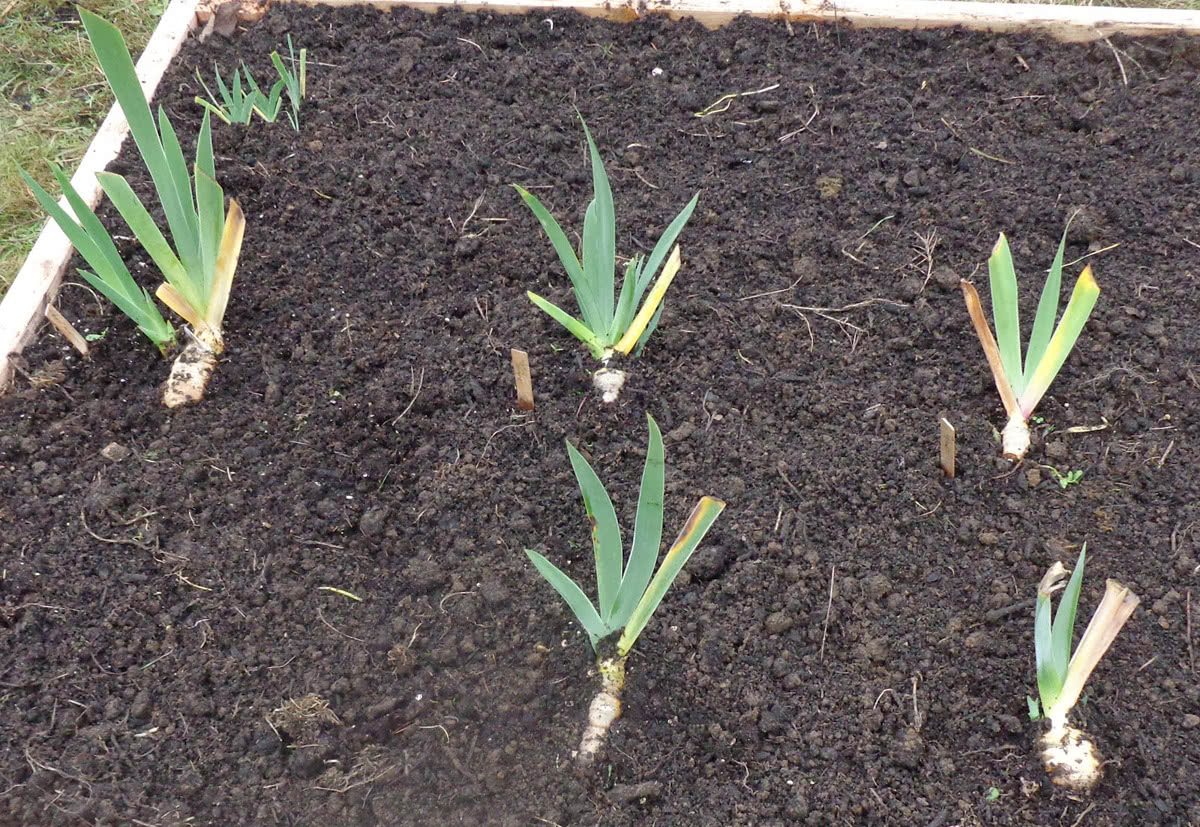
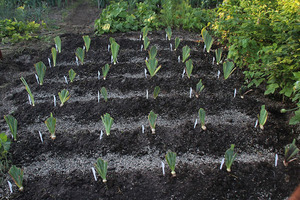
- Irises can move. And in just a year they can shift a few centimeters to the side. You need to plant with leaves along the row so that the planting rows look neat and even.
- Bearded irises should be planted in sandy soil. To do this, a pile of sand is poured into the hole and roots are laid out on it. If you plant it too deep, the plant will either disappear or not bloom.
- DO NOT fertilize the beds with organic matter. It doesn't work for them. It is better to feed with mineral dressings in liquid form.
There is a widespread belief that irises need to be divided and then transplanted immediately after their flowering, so that they have time to take on the onset of winter.But if autumn is warm enough and long enough in your belt, then it is not necessary to rush with a transplant. These unpretentious flowers can be replanted in spring, autumn and summer, but after they bloom. Remember to repot your bushes every 3-5 years.
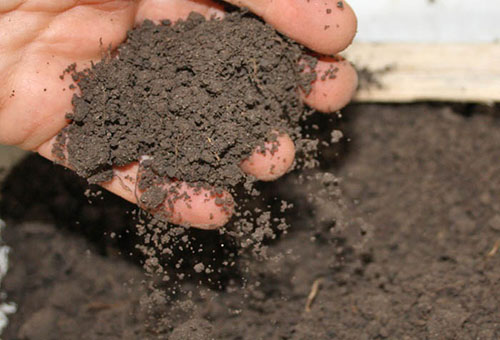
Necessary preparation
A flower bed for irises begins to be prepared about a week before they are planted. The selected area is cleaned of plant and other debris, dug to a depth of one shovel bayonet, while simultaneously removing weeds and applying fertilizers:
- humus (12-15 l / m²);
- phosphorus and potassium (25-30 g of simple superphosphate and 15-20 g of potassium sulfate per 1 m² or about 40 g of special "autumn" fertilizer).
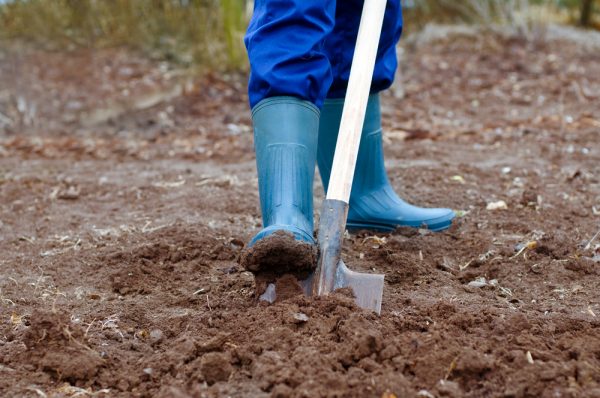 When digging a future flower bed, carefully remove plant debris - if the weed breaks through the curtain of irises, it will be difficult to pull it out without damaging them
Sand is added to heavy soil, and powder clay is added to light soil (bucket per 1 m²). A good deoxidizer for the substrate is wood ash, dolomite flour, crushed chalk (1 m² glass). About the same amount of peat or fresh coniferous sawdust is added to the alkaline soil.
 Dolomite flour is a natural soil deoxidizer, if you follow the dosage, it does not give any side effects
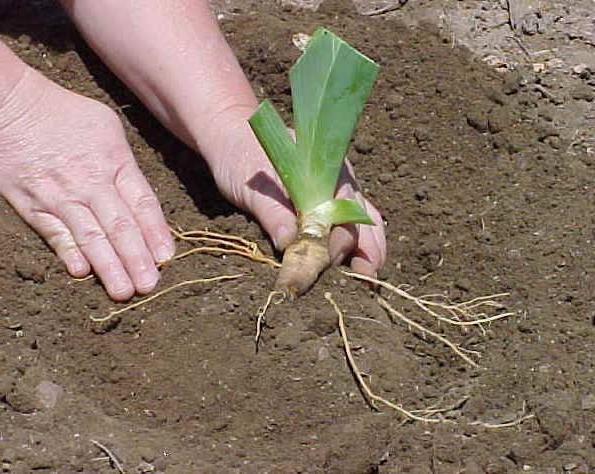
High-quality planting material is the key to abundant flowering, so you need to carefully choose rhizomes and iris bulbs. The main selection criteria are large size, density and elasticity, the absence of spots and traces similar to mold and rot, the presence of at least two additional sprouts - "children" from the buds of renewal on the rhizome (the more, the better), a strong stem. The roots should be flexible, light beige or yellowish in color.


When choosing planting material, pay attention to both the condition of the iris rhizome and the aerial part
Difficulties in growing
In order to fully answer the question of how to grow irises correctly, you still need to provide some information. Any plant can be infected with parasites or diseases, and irises are no exception. There are inappropriate growing conditions, which provoke the emergence of certain problems.
Possible diseases.
Irises can be affected by both viral and fungal infections. Indeed, there are different diseases of irises. But fighting them will keep the plant healthy. Here we will tell you how you can deal with them and what they are in general.
Mosaic - it is carried by aphids.
It manifests itself in characteristic stripes and spots on the foliage. A cure for the mosaic has not yet been found, so it is worth focusing on prevention, which includes the following activities:
- Immediate removal of infected plants.
- Correct agricultural technology and pest treatment with Confidorm or Actellik, etc.
Bacterial rot.
It appears as spots on the leaves of brown color. It may appear in the spring, right after wintering. The affected areas are immediately removed, and the leaves are treated with potassium permanganate. If you notice the disease late and it has already progressed, it is easier to immediately remove the entire plant and shed the soil with antibacterial compounds.
This disease occurs under the following conditions:
- Bushy planting.
- Too wet soil.
- The roots froze over the winter.
- The plant lacks phosphorus and calcium in the soil.
Gray rot.
It affects either the roots or leaves with stems. Stagnant water in the soil contributes greatly to this. Good drainage on the site is the key to preventing gray rot. But this does not apply to marsh irises. Also, do not allow a deficiency of potassium with phosphorus in the soil, this can also cause disease. Gray rot is treated with fungicides, but it is better to immediately destroy plants that are severely neglected in disease.
Pests - insects
The most common ones are:
- slugs.
- iris fly.
- thrips.
- scoops.
- bears.
Iris fly or flower girl - very much like a common fly. She infects iris buds with diseases, she just feeds on them.The buds then rot, in order to prevent this, the buds that are being tied must be treated as a prophylaxis with Aktara or Aktellik.


Scoops are a dangerous pest, they eat up the base of the flower and then it turns yellow, right up to death, and even provokes bacteriosis. Karbofos is a reliable method of controlling the scoop.
Slugs - not only do they eat the leaves, they also carry bacterial rot on themselves. The soil must be treated with superphosphate, and the slugs themselves must be manually collected. Weeding also gives good preventive results.
Medvedka is a common insect in the south of our country, and in the middle lane it is not at all uncommon. It damages both the roots and the bulbs of irises, thereby causing irreparable damage to the flowers. You can fight with crushed shells poured with sunflower oil, or you can pour soap solution into the moves of the bear. Plant marigolds nearby, they are great at scaring away this pest.
Thrips are small but very dangerous insects. If they populate iris leaves, they will dry out and turn yellow. Then the thrips will move to the buds as a result they will not open. It helps karbofos and laundry soap. You can also use insecticides - Aktellik, Aktara.
Other problems
Sometimes it happens:
- The leaves wrinkled - bad weather conditions, with time it will pass by itself.
- Scanty or sluggish flowering - little sun color or strongly acidic soil.
- Stop in flowering - the soil is depleted, buds, pests are frozen, the root has grown strongly, there is little moisture during a drought.
- Yellow / brown spots on foliage - heavy rainfall or frequent watering. It is better to cut off such leaves immediately.
- Prevention - in the spring or a month or two before flowering, treat irises with fungicides.
Care after landing
Special attention should be paid to the plant immediately after planting. At this point, it is most vulnerable to environmental influences.
The requirements for caring for iris are somewhat different from those for the care of other perennial plants.
The main points that relate to leaving after planting an iris include the following:
- It is necessary to periodically loosen the soil, as well as remove weeds that may appear near the iris.
- The perennial plant in question may be affected by diseases and pests.
- Timely watering should also be carried out in the event of severe drought.
- Seasonal feeding is carried out in order to prepare the plant for the deterioration of growing conditions.
- For the wintering period, it is recommended to cover one-year-old irises with foliage, and when spring comes, the shelter is removed. This is necessary in order to protect the not yet fully established plant from the effects of cold. Old plantings do not need to be covered with foliage for the winter.
- The use of fertilizer for feeding is not always a prerequisite for ensuring the best growing conditions. If the type of soil requires top dressing, then three types of fertilizers are used. As a rule, feeding is carried out in early spring and during the ripening of the buds, as well as a month after passing the flowering stage.
- In dry times, it is recommended to water in the evening. Do not allow water to come into contact with flowers and petals. After half the summer has passed, watering should be significantly reduced.
- Peduncles that have completely faded are recommended to be cut closer to the base almost immediately.
Compliance with the above recommendations allows you to keep the plant in excellent condition.
Particular attention should be paid to the fight against diseases and pests, as they are more likely to harm the iris. Despite the fact that the plant has a high resistance to diseases and pests, certain exposure can lead to damage to the base of the leaves and the root system.
It is recommended to avoid waterlogging of the soil, as this will lead to decay of the root system.
If it was not possible to avoid waterlogging of the soil and rotting of the root system, then you should:
- Dig up a bush.
- Cut out the decayed parts of the root system.
- After removing the affected areas, the bush should be placed in a special solution.
- After soaking in a special solution, you can leave the root system in an open place for about 12 hours.
Another threat to the plant can be heterosporosis. A similar disease manifests itself quite often in the second half of the summer. It manifests itself in brown spots on the leaves. The disease progresses very quickly. Recommendations for the treatment of the plant include cutting off the affected leaves and burning them. In order to help the iris, it must be treated with copper sulfate, which is created when calculating 5 liters per 50 grams of the drug.


Not many pests attack iris, but gladiolus thrips can be called the most dangerous. When exposed to the plant, the leaves become depressed, after a while the wax bloom is lost. You can get rid of the pest in question with a special chemical that is sold in many garden stores.
Another pest that attacks iris is the scoop. They eat out the base of the peduncles - as a result, the peduncles turn yellow and the whole plant dies. This phenomenon can be avoided by spraying the plant at the beginning of the growing season with a 10% solution of karbofos. Spraying frequency - 2 times with a week break.
Slugs can also affect irises. The most effective method of dealing with slugs is to place wet rags and burdock leaves between the iris bushes. Slugs use wet rags and burdock leaves for cover. By collecting these leaves and rags, you can destroy the slugs. Another, more effective method of dealing with the pest in question, can be called the use of granular metaldehyde in the evening, in dry weather, at the rate of about 30 grams per 10 square meters of area.
What will we plant
Irises reproduce both vegetatively and by seeds. The second method is too complicated, you will have to wait 2-3 years for flowering. Why do you need such a hassle? This method is used at breeding stations to develop new varieties. If you still want to experiment and get a flower of an unusual shape or color, sow the seeds in early spring or autumn in a nursery. There, young plants will develop for 2 years, then you can plant them on a flower bed. In the northern regions, the grains do not have time to ripen before the onset of cold weather. If there is a threat of frost, cut the pods and keep them at home until the seeds are ripe.
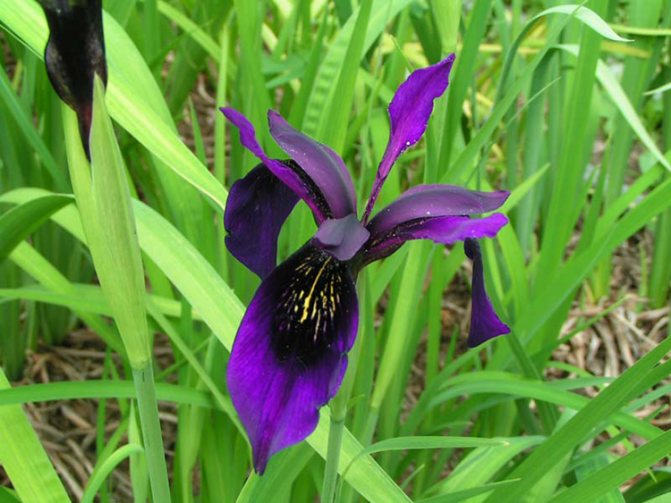
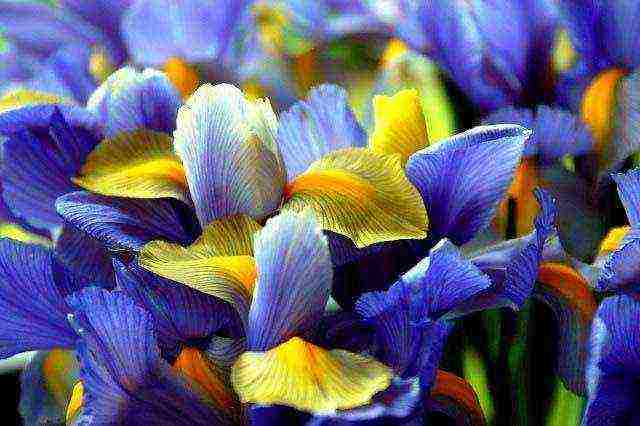
To properly prepare the place, think about what kind of irises you will plant on the site. All varieties bloom well for 4 years, then they need to be transplanted. The Siberian species can live in one place for up to 10 years, but these flowers have a drawback: they do not fill the air with aroma. For bearded varieties, a soil with a good outflow of groundwater and rainwater is needed, they grow better on a hill, and marsh iris loves moisture, it is often placed near water bodies. You can plant bulbous varieties, they have a richer palette of colors, an interesting combination of colors. This species has one drawback: immediately after flowering, the bulbs must be dug up and stored all summer in a cool place, and in the fall they must be buried again in the ground. If the extra work doesn't scare you, enrich your flower garden with these plants.
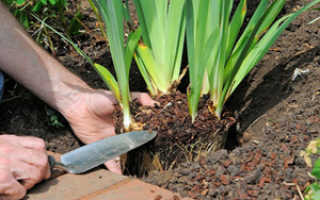
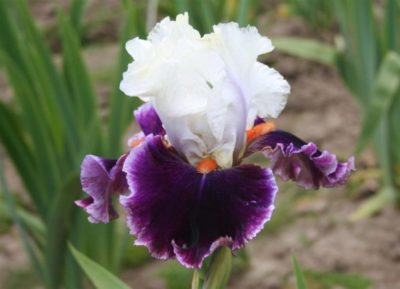
The owners of summer cottages usually give preference to the cultivation of bearded irises and propagate them by dividing the rhizomes. If you want to start planting in the spring, take care of the preparation of the tubers in the fall. There are recommendations to divide the bushes at the end of September, but it will be correct to look not at the calendar, but at the plant. When the flowers wither, and the greenery and underground parts continue to develop, it's time to harvest the rhizomes. You may have to do this work several times: each variety has its own ripening time.Do not wait until all the bushes are ready, if you are late, the quality and vitality of the planting material will deteriorate.
Dig up the plant, shake off the ground and divide it into pieces. Each new seedling should have a bunch of leaves and an underground part of two annual links. At the rhizome of the main bush, cut off the dried parts and shorten the root processes by a third. Completely remove dry and damaged leaves from all fragments, and cut off the top half of the remaining feathers. Treat the underground part with a disinfectant solution, dry it, sprinkle the wounds from the cuts with crushed coal and sulfur and put it in a dark, cool room, where the seedlings will be stored until spring. Sometimes flower growers do it easier: before planting with a shovel, they cut off part of the bush and transfer it to a new place. In this case, there is a risk of damaging the plant, but usually both the main bush and the cut off fragment feel good.
Planting irises in open ground

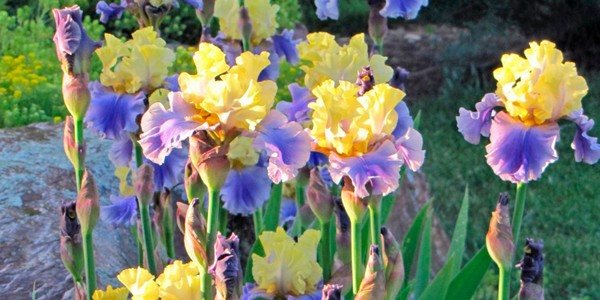
Decide on the flowering time you need before planting
The procedure for growing irises depends on what type of plant: rhizome or bulbous. They have different breeding and planting methods.
Bulbous plants prefer nutrient-rich soils, warm and well-lit areas. It is more difficult for these plants to choose the right place to grow. Rhizomes are more unpretentious. They grow well on lean soils. But they also require an abundance of sunlight and warmth.
Selection of planting material for rhizome varieties
The success of growing irises directly depends on how correctly the planting material is chosen. If it is a rhizome plant, it is propagated by dividing the bush. In this case, the choice of planting material consists of several stages.
- Select the parent plant. He should be 1–2 years old with no signs of any disease.
- Dig up a flower, not forgetting that its roots are sufficiently branched. Therefore, the pitchfork is immersed in the ground at a distance of 30–40 cm from the base of the stem.
- Take out the root and gently clean it from the ground.
- The rhizome is carefully examined. If there are pest-infested or decaying places, remove them by cutting off with a sharp knife.
- Carefully divide the root into two parts, starting from the base of the stem.
- They are treated with crushed charcoal or immersed in a strong solution of potassium permanganate for 10-15 minutes.
- Dry in the sun for an hour.
In this way, he receives two divisions. This is the name of a part of the mother plant. The best time to obtain planting material for rhizome irises is the period of completion of flowering, late July-early August.


Selection of bulbous species

Planting bulbs can be purchased or grown independently
Iris bulbous varieties require a different approach to the choice of planting material. A good bulb must meet several requirements.
- Be tight.
- No signs of rot.
- Have a rounded shape without lateral outgrowths.
Planting material is obtained independently or bought in shops for gardeners. In the first case, proceed as follows:
- after flowering ends, dig up the plant;
- separate the onion, and if there is, children;
- cleaned of soil using a napkin or rag;
- immersed for several minutes in a weak solution of potassium permanganate;
- taken out and dried in the sun for several days.
Planting material is stored in a cool dark place until September.
Landing times and methods

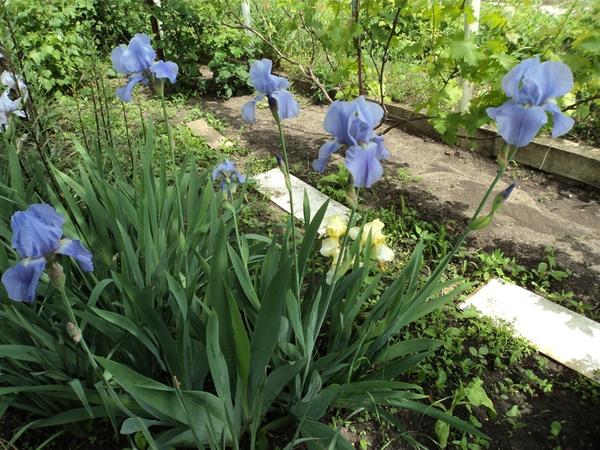
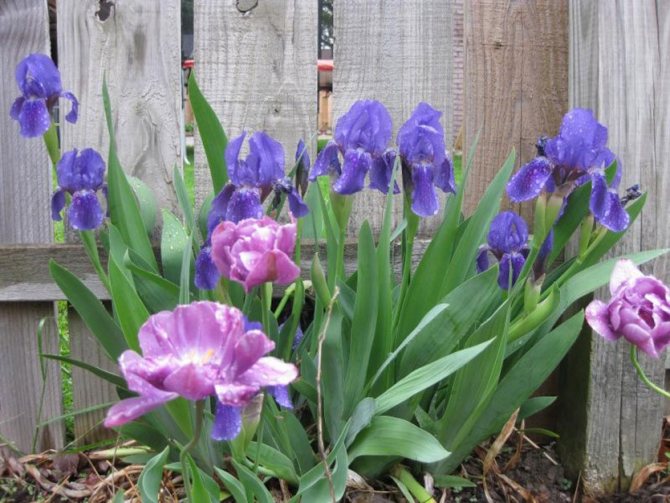
All irises love good lighting.
Bulbous varieties are planted in late September and early October. This is an easy task, but you need to know all the nuances of its implementation. The place should be sheltered from the wind, sunlit most of the day, with low groundwater.
- A hole is prepared with a depth of 15–20 cm.
- Dip an onion into it. Do not press down or screw it in.
- At a distance of 3-4 diameters of the planted bulb, form the next hole of the same depth.
- Plant the next onion.
- The holes are buried, lightly tamping the ground.
- Watering.
- Cover the planting site with a thick (10–20 cm) layer of mulch.
Rhizome varieties are planted immediately after dividing the bush. For these plants, you can choose any place
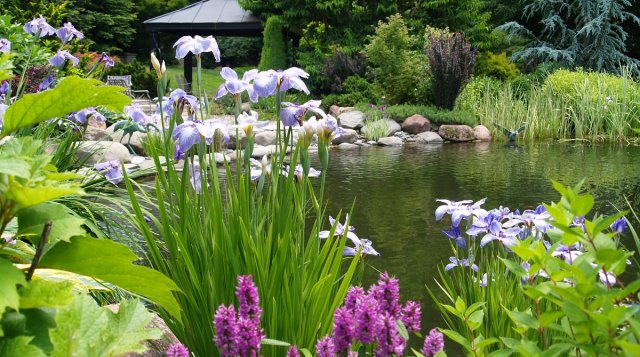
But it is important that the groundwater does not come close to the soil surface. Iris grows poorly in wetlands
The best soil for them is loam.
Choose a not very damp area for planting flowers.
Rhizome varieties are more resistant to wind and frost. In most regions, no shelter is required for the winter. The optimal planting time is 15-30 days after flowering.
Planting rhizome flowers consists of several stages.
- Dig a hole 20-30 cm deep.
- A pile of soil 5-10 cm high is poured at the bottom.
- A flower is immersed in the hole so that the base of the root is at the central point of the hill at the bottom. The upper part of the rhizome should rise 1–2 cm above the soil level.
- Spread the roots along the slopes of the soil slides.
- Gradually pour the earth into the hole and lightly press it to the roots. In this way, the hole is completely filled with soil.
- A mound of earth is formed around the part of the root protruding above the soil surface and compacted.
- Water the plant abundantly.
Further care of the plantings
The planted irises are left alone for the next 3-5 days. Then they need abundant (5–7 l / m²) watering from a watering can or a hose with a splitter, so as not to wash the soil off the rhizomes and bulbs. Further, if the weather is warm, dry in autumn, irises are watered every two weeks.

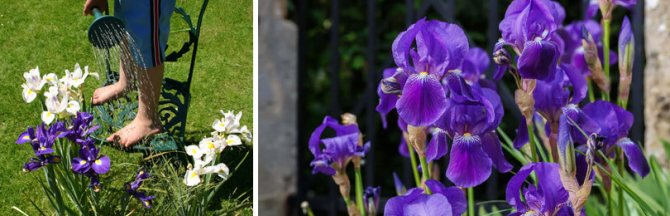
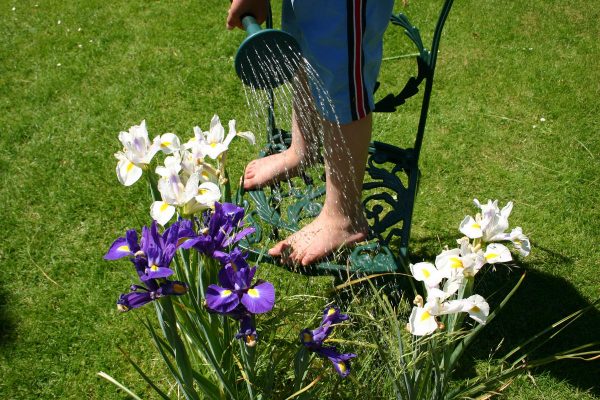 Irises are watered so that the water jet does not wash the soil off the bulbs and rhizomes - this applies to both newly planted and long-growing flowers on the flower bed
Plants need weeding. Mulching the garden will save time on this. It is also an alternative to loosening, which is not recommended for irises (you can damage rhizomes and bulbs).
 Mulching for newly planted irises is an optional procedure, but very desirable.
In the first year after planting, irises need careful preparation for winter, especially if frosts and a lack of snow are predicted. The Dutch, Spanish and Japanese varieties are most sensitive to cold weather. The most frost-resistant are iridodictiums, dwarf and wild beardless irises.
 Iridodictium is one of the most cold-tolerant varieties of iris, but in the first winter after planting and it needs shelter
The shelter is built about 7-10 days before the first frost. A flowerbed on top of a layer of mulch with a thickness (5–7 cm) is thrown with fallen leaves, sawdust, spruce branches or straw (up to 10 cm), then snow is shoveled on top. Shelter is removed after the first thaws.
Correct planting of irises is a guarantee of their abundant flowering in the future. The plant is not capricious, but still makes certain requirements for the growing conditions and the place of planting, which must be taken into account.