Diseases and pests of blunt peperomia
Like any houseplant grown outside its native range, it is susceptible to a variety of ailments. Among them it is worth highlighting:
- Pest attack - spider mites, thrips, mealybugs and others. If any of them were found, the plant should be treated with an insecticide, for example, Anti-mite and Fufanon, and transplanted into a new substrate. In the future, follow the rules of care, because many of these insects start where an ideal environment is created for this, for example, increased dryness of the substrate.
- Root collar rot... Peperomia blunt-leaved disease is hard to bear, reacting with growth retardation, wilting of the ground part, and a change in the color of the leaves with decay of the roots. It is necessary to remove the plant from the pot, remove all dead areas, treat it with a fungicide to combat putrefactive diseases, for example, Discor or Fitosporin-M. After that, sprinkle the cut sites with activated carbon and transplant into a new substrate, normalizing the irrigation regime.
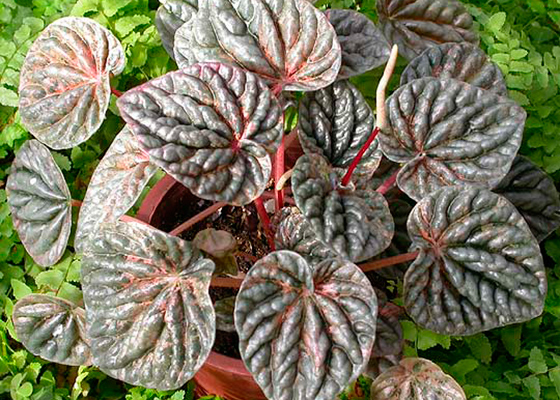
- Chlorosis... It causes blanching of the color of the leaves. It occurs due to hard water and iron deficiency, therefore it is necessary to soften the water and enrich it with mineral.
Planting and transplanting
Planting a plant is considered by flower growers to be the most difficult stage in breeding this green pet. The health, development and even life of the plant depends on compliance with the planting rules. The main difficulties associated with planting are in the preparation of the soil, the choice of capacity. This flower is planted only in spring, using soil through which air easily circulates. The soil should be loose, nutritious; a clay-based substrate is excellent in this capacity. It is recommended to buy special soil in specialized stores, especially if you are not professionally engaged in crop production.

The container for the flower should be of a suitable size with a drainage layer at the bottom, the size of which cannot be less than 3 cm. Use fine brick, expanded clay, small pebbles as drainage material. Then a plant is placed in the pot, soil is poured on top, which in no case should be pressed and rammed. In general, the planting procedure should not be accompanied by sudden movements that can damage the rhizome. At the end of the procedure, it is necessary to thoroughly moisten the green pet and take it to its permanent place of residence.
If you purchased the plant from the store, do not replant it on the same day, it is better if you give a couple of weeks for the flower to adapt to the new conditions. The transplant is also carried out in the spring:
- young plants - every year;
- three-year-olds and older - every two years.
Do not choose too deep containers, but in width they should be one and a half centimeters larger than the previous ones. If you are preparing the soil yourself, mix:
- one part of sand;
- one part of peat;
- one part of humus;
- three pieces of land of the sheet type.
Leaf propagation
To get a young plant from an old leaf, first select the leaf itself. He must look healthy. Cut it straight from the stem along with the stem. Treat the cut site with ash or crushed charcoal.
If the stalk is long enough, place the leaf in a glass of clean water and wait for the root panicle to form. If the stalk is short, then dig it in. Moisten the soil well.
Some growers do this not immediately, but a day after cutting. Water the dug-in leaf regularly, do not allow the topsoil to dry out. Place the pot with a leaf in a place that is not too brightly lit.If you cover the pot with a transparent film, then the root panicle will form faster than it happens in the open air.
After that, all that remains is to be patient. The first stem for leaf propagation will appear in six months. As for the formation of the root panicle, you will see it after three weeks.
Reproduction of peperomia

Leaf propagation
This propagation method requires a healthy, large leaf without visible defects or damage. Cut off the sheet with a sharp blade. The petiole should remain short. For rooting a leaf, you can use several options:
- Substrate of equal parts of sand and peat;
- Clean water (in this case, the water is changed every day);
- Sphagnum moss.
In order for the plant to take root and strengthen faster and more likely, it is covered with glass or polyethylene, thus arranging greenhouse conditions for peperomia.
After a month, the leaf will take root firmly and can be transplanted into a pot no more than 7 centimeters in diameter. Very soon, the plant will harden and begin to develop rapidly.
Propagation by stem cuttings
First you need to prepare an earthen mixture, consisting of equal parts:
- Humus;
- Peat;
- Sand.
For propagation, you can choose both stem and apical cuttings. Cuttings with one, two or three internodes are suitable for successful rooting and further development.
Roots are best formed on cuttings placed in a substrate made from equal parts of leafy soil and sand, or in clean water. In this case, it is necessary to change the water once a day.
When the roots appear and grow a few centimeters, the cuttings can be planted in the prepared earthen mixture. Young plants must be covered with glass or polyethylene so that the air temperature does not drop below +25 degrees.
A month later, young plants are planted in separate pots and cared for as adult plants.
Reproduction by dividing the bush
This method is suitable if you plan to transplant peperomia. Simultaneously with the transplant, an adult bush is divided into several small ones and planted in separate pots with a layer of drainage and a prepared earthen mixture of leafy earth, sand, peat and humus.
Seed propagation
The optimal period for sowing planting material is March-April. For planting, a substrate of equal parts of leafy earth and sand is used. It is better to choose pots in the form of bowls.
After planting the seeds in the soil, the containers are covered with glass or polyethylene. Watering is regularly carried out using a fine sieve or simply sprayed. The temperature in a small greenhouse should not fall below +25 degrees
It is important to periodically ventilate young plants by removing films or glass
Small shoots of peperomia dive when the second full-fledged leaf appears. A wooden box with a similar substrate is prepared for diving. Plants are planted at a distance of several centimeters from each other. The container is placed in a bright room where there is no direct sunlight.
After three weeks, peperomia can be transplanted into separate pots with a diameter of no more than 7 centimeters
It is important to provide a drainage layer. Post-transplant care is provided as for an adult plant
Home care
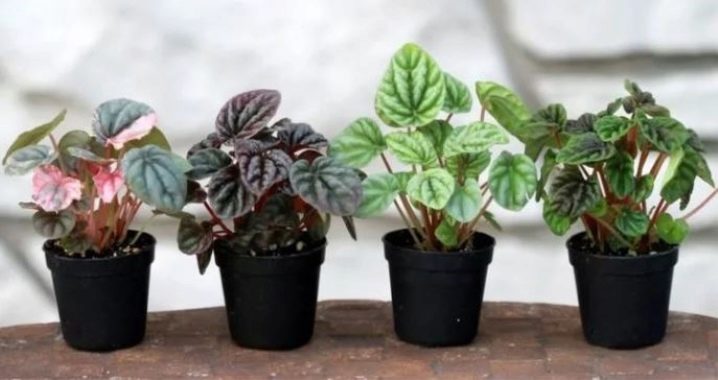
Peperomia Rosso is an unpretentious plant. But, since the natural habitat of this flower is the tropics, caring for it involves some features.
Temperature
Optimal temperature conditions for growing Rosso peperomia:
- in spring and summer - from 20 to 22 ° C;
- in autumn and winter - from 18 to 22 ° C.
The soil temperature should not drop below 17 ° C.
Important! Peperomia Rosso is afraid of drafts. Therefore, it is not recommended to take it out of the room.
Watering
Like all tropical flora, Rosso's peperomia loves moisture. The flower needs intensive watering in spring and summer.At other times of the year, it is recommended to reduce the frequency of soil moisture.
Before watering, the water must first be defended. Its temperature should be slightly higher than the ambient temperature (approximately 2 degrees).
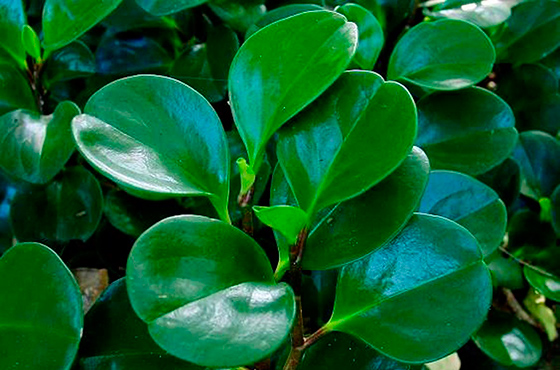
Fleshy leaves are able to independently provide themselves with moisture reserves. But if the specimen has delicate foliage and a thin stem, dry air can harm it. Therefore, you should take care of additional humidification by placing containers with water nearby. On hot days, it is recommended to spray the plant.
Over-watering can lead to blackening of the leaves, and sometimes to their dropping. In this case, it is recommended to abandon watering for a week, allowing the soil to dry out.
Light
Since in nature, Rosso's peperomia grows in areas shaded from the sun, it is necessary to provide the plant with subdued diffused lighting. Window sills located in the western and eastern parts of the house are considered the best option.
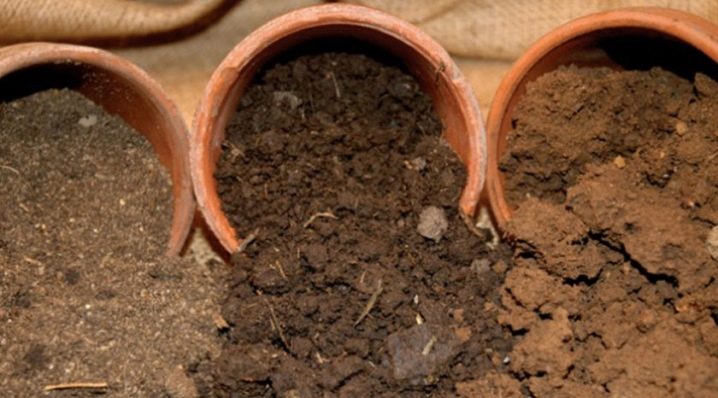
Priming
Attention! Light and loose soil is considered the most suitable for peperomia. The air permeability of the soil is important for this plant. Optimal soil composition:
Optimal soil composition:
- sheet land (2 parts);
- peat (1 part);
- coarse sand or perlite (2 parts).
It is imperative to use drainage as the bottom layer.
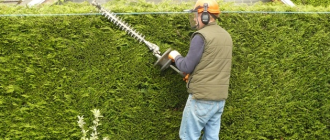
Pruning
Peperomia Rosso, does not require pruning, but to preserve the decorative effect of the flower, it is recommended to remove dry leaves. The procedure consists of the following steps:
- Inspection of the plant for dried out areas.
- Remove marked leaves and shoots with garden shears.
Pruning is recommended starting from the top of the plant.
Top dressing
In winter, peperomia does not need feeding. During other seasons, complex fertilizers are used with a frequency of 1 time in 2-3 weeks.
Pot
Peperomia Rosso prefers a tight space, so a small pot should be chosen. If you plant it in too large a container, the flower can slow down the growth of its aerial part.
For each transplant, it is recommended to use a container 2 cm larger in diameter than the previous one.
Transfer
Reference. For the first 3 years, the flower should be replanted annually in the spring. If it was purchased in winter, it is recommended to postpone the procedure to March. In the future, one transplant is enough every 2-3 years.
Procedure:
- Pour drainage into the pot. The optimal layer thickness is 2 cm.
- Fill the container with soil, leaving some free space.
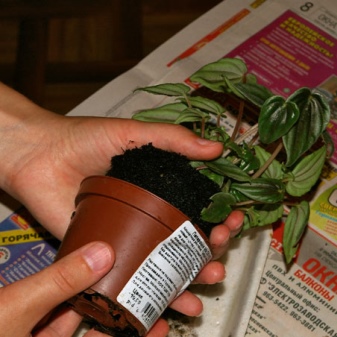
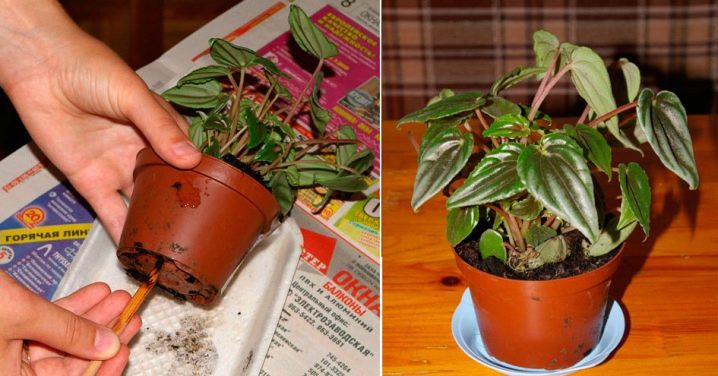
- Gently remove the cloddy plant from the pot.
- Place the flower in a new container, top up the soil.
- Water the soil.
- Fill the remaining free space with earth.
It is forbidden to tamp the soil by pressing it down. There is a danger of damaging the delicate roots of the flower.
Wintering
Spraying of the plant is not recommended in winter. Considering the short day, a source of additional lighting should be used
It is very important to control the soil temperature in winter. For insulation, you can lay a felt napkin under the pot
Top dressing should be excluded or applied no more than 1 time in 6 weeks.
Transfer
Peperomia after transplantation usually feels pretty good. The flower does not worsen its condition only if the transplant was performed correctly. Before moving the plant to another pot, you should determine its original age. Young specimens can be replanted once a year. More adults - once every 3 years.
Many lovers of home plants are interested in the question of how you can independently understand at what time a flower should be transplanted
To do this, you should pay attention to the drainage holes at the bottom of the flower pot, where the peperomia is located.

Choose a container for a flower, taking into account the size of the plant. Elongated pots are suitable for most peperomias.Since this flower does not tolerate the accumulation of moisture at the roots quite well, expanded clay should be poured onto the bottom of the container where it will be transplanted. The thickness of this layer should be approximately 2-2.5 cm.
The soil substrate is essential for good plant growth. If the soil was selected incorrectly, then peperomia will not be able to properly please the eye of its owners with spectacular green leaves.
In order to make a good soil substrate, experts recommend mixing humus, peat and sand in approximately equal proportions. You can also add leafy earth to this mixture - about 2-3 parts.
For those who want to significantly save their time, soil for growing a flower can be purchased at a special store. In such a ready-made soil substrate, all the components required for good plant growth are already present. After the flower is transplanted into a new pot, it should not be watered for several days.
How to properly transplant peperomia is in the next video.