Reproduction of orchids by children
This method is most relevant for the most common phalaenopsis orchids. It is these plants that reproduce very readily even without the additional intervention of the grower. Reproduction of orchids at home with the help of children can be triggered by hormonal pastes containing cytokinins. However, children often appear both in the roots and on the trunk of the plant itself.
This paste contains phytohormones - cytokinins, which accelerate plant metabolism, enhance the growth of new shoots and buds. However, it should only be used on healthy and mature plants.
The natural appearance of children in orchids is possible immediately after flowering. The upper or middle bud on the peduncle wakes up and gives either new growth or a new shoot. Read on to learn how to plant orchids using paste.
Baby on a peduncle
In order to get a baby on a peduncle, you can use cytokinin paste. The action plan will be as follows:
- Using a sterile instrument, it is necessary to bend the scales covering the sleeping kidney.
- Scratch the plant tissue next to it with a calcined needle or clean toothpick.
- Apply the paste to the sleeping kidney in the amount of a pinhead.
- Kidney awakening can be observed on days 7-10.
Reproduction with orchid paste can result in 2-3 new shoots per bud. Such mutations are very harmful to the aesthetic appearance and lead to severe stress on the mother plant. This can happen both due to an overdose of hormonal paste, and due to genetic pathologies in development. It is difficult to say how strong or weak the baby will be, but, according to numerous reviews of flower growers, the offspring after cytokinin paste is an order of magnitude weaker, and the flowering is not as lush as in the mother.
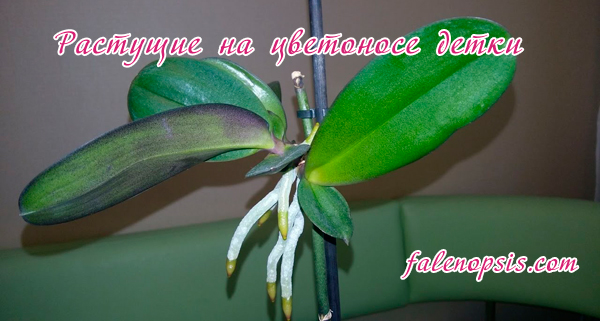
Another important point in the propagation of an orchid by children is the need for proper rooting of the baby. Quite often, young growths are in no hurry to build up the root system, but new leaves are kicked out one by one and may even bloom. This situation negatively affects the mother, she may not have enough strength to feed the baby.
A good way to quickly grow roots in young animals is to create a cushion of moss, or so-called planting in a pot right on the mother's peduncle. For this we need:
- A small pot with a diameter of 2.5 cm or a cut-off plastic bottle of 0.5 l.
- Scissors.
- Scotch.
- Sphagnum moss.
- Pin.
At the bottom of the pot we make a hole for the diameter of the peduncle. Using scissors, cut the pot vertically to the hole and wrap the pot around the peduncle so that the baby is at the level of ¾ of the pot. We fix the container from below with a clothespin. We glue the walls of the pot with adhesive tape and put sphagnum moss inside, having previously moistened it with water and a rooting agent. A good drug for this is "Kornevin" - it is available and inexpensive.
This method adapts young plants well to independent life, while the undoubted advantage is that the orchid immediately learns to feed on the roots, this reduces the stress during transplantation. Among other things, flower growers note a positive point in the fact that the roots immediately grow inside the pot and the transplant will be less traumatic.
Root baby
Basal babies, or as they are also called, basal, can appear in monopodial orchid species. Most often they begin to grow in phalaenopsis, but it is impossible to induce an orchid to such a type of reproduction.As a rule, a basal baby appears if the mother plant is in danger and the plant does not want to interrupt its life cycle.
Experienced flower growers categorically do not recommend smearing the trunk of healthy phalaenopsis with cytokinin paste - this method can be detrimental to the plant.
Problems and difficulties
Advice.
If the orchid is withering away, and the pests are not visible, the pot with it is immersed in soda.
Sometimes a florist, after planting a bulb of a Vietnamese orchid, notices pests in the soil. They are tasty prey for thrips, ticks and roundworms. This happens most often when it gives roots and stems appear from the adventitious bud.
Without which he can get sick and die.
In order to grow a healthy plant from a Vietnamese bulb, you need to know the rules for planting it and observe the necessary conditions for its growth.
Only then will she delight all household members with beautiful flowers.
The Vietnamese orchid is called papiopedilum, and the people call it the Venus shoe
... She received such an unusual name because her lower petal forms a pocket, similar to the toe of a shoe.
They are presented in two types: air and ground. The former grow with their roots in the trunks of trees, and their stems and flowers hang in the air. The latter grow on the ground in places where humus and debris accumulate.
Paphiopedilums, which tourists most often bring to Russia, also differ in color and shape of flowers, size of inflorescences.
Vietnamese
Has enough large size flower
, the diameter of which can reach 10 cm. Their color can be very diverse. Mostly, coffee lilac
.
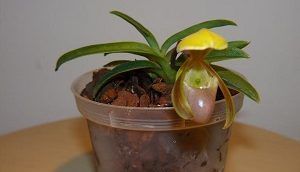
Vietnamese.
Siamese
On its peduncle is located only one flower with a lilac-green hue
... The lower petal of the inflorescence is brown.
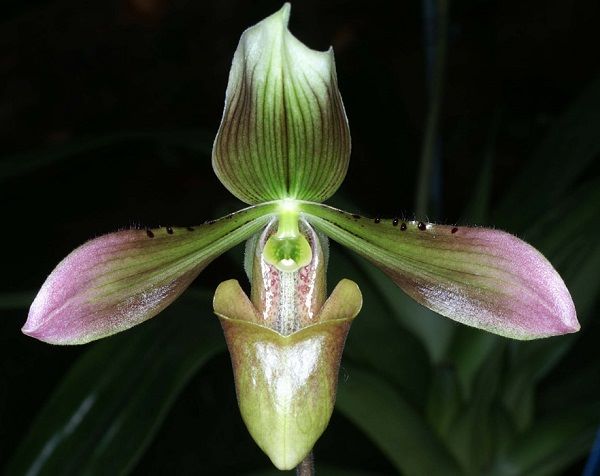
Siamese.
Beautiful
It is characteristic of flowers greenish-orange color and diameter up to 15 cm
... The petals have dark veins and large black blotches, and the lowest one is bright orange with dark green stripes.
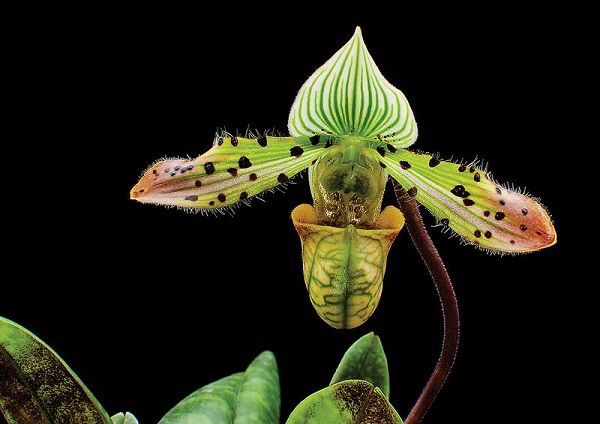
Beautiful.
Plain
The orchid received this name due to its monochrome color. Flower petals are white, with occasional cream and purple hues, as well as small purple dots
... The lower petal is elongated, has a curved edge. The core is bright yellow.

Plain.
Appleton
Differs in large flowers
having a greenish-purple calyx. The sepal is covered with purple and dark streaks. The petals have large brown spots.
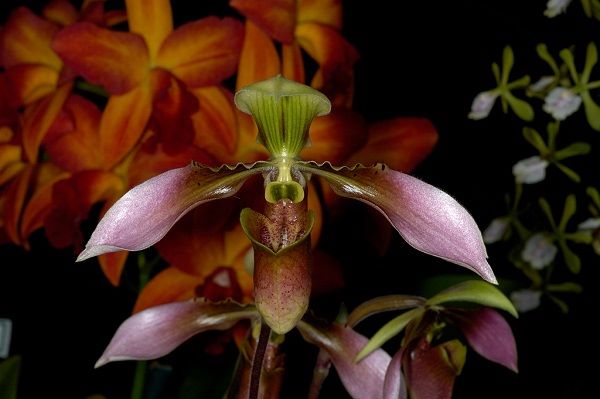
Appleton.
Bearded
This kind has large purple-green flowers up to 10 cm in diameter
... The upper sepal is pierced by dark purple stripes, and the lateral petals are covered with dark bristles and warts along the edges. They all have a white border.
Only the lower lip, which stands out with a burgundy color, differs. Light green leaves are strewn with dark spots.
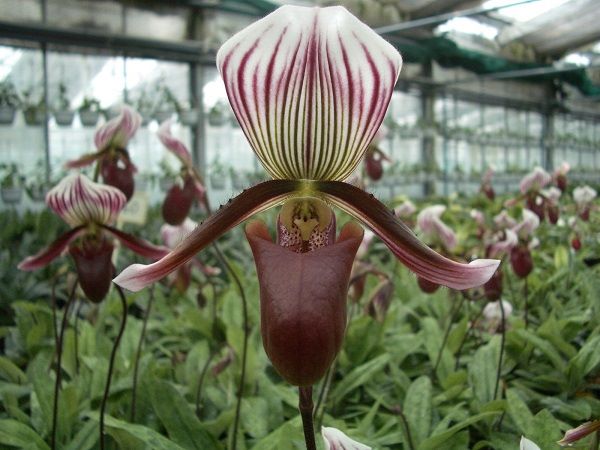
Bearded.
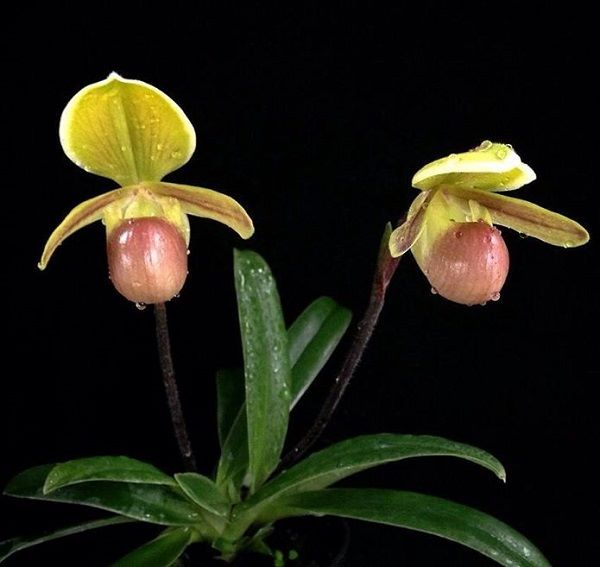
Helena
The general color of the flower is glossy, yellow-brown. Differs in the unusual texture of the petals, which are covered with wax
... The lower petal is smooth and orange-brown in color.
When buying an orchid bulb, you need to carefully examine it without trusting the seller. For this you need to follow the following guidelines:
- it is better to take a medium-sized bulb, since a small one takes more time to grow, and a large one will die faster;
- it is desirable that its shell against a brown background have a greenish tint;
- the bulb will grow faster, in which buds are outlined or there is a small sprout.
Bulba, combining the above signs, will not make you wait long for positive results.
Care
Even if you plant an orchid bulb correctly, but take care of it not as expected, it will immediately die. It is necessary to strictly fulfill all the requirements for rooting the bulbs of Vietnamese orchids.
Advice! Keeping in mind that the orchid loves light, place it on the sunny side.The air temperature in the room should be kept at 17-18 degrees at night and 20-25 degrees during the day, and the humidity is about 50-70%.
Watering and temperature
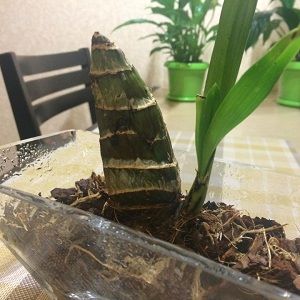 It should be remembered that you do not need to water the plant immediately after planting, as it will rot. Only the roots and shoots of the plant need moisture, and the bulb has a supply of water for a month.
Watering is started when the first roots and shoots appear. This usually happens after 30 days from the day of planting.
After planting, the pots must be removed to a bright place. But the sun should not dry out the bulb, and condensation should not form in the pot. The flower needs to create the following conditions:
- air temperature - +18 degrees and above;
- air humidity within 50 - 70%.
Leaving begins immediately after the roots appear. At this time, the first watering of the plant is carried out. After about a month, a bulb is transplanted, which has taken root. During this time, it will have time to accumulate the substances necessary for growth and development.
Caring for an orchid brought from Vietnam includes the following steps:
- monthly fertilizing with mineral fertilizers purchased in the store;
- watering is carried out only when the substrate dries up. In summer, in the heat, watering is carried out daily, and in winter - once every 2 weeks. Watering the plant is done only in the morning;
- periodically you need to shower for flowers.
As you can see, the care work is quite simple, especially if you know all the subtleties.
Photo
Next, you can see a photo of what the seeds look like and what has grown from them:
Care
After a few weeks or months, changes begin to occur with the crops. Green balls appear on them, then the first leaves. After the appearance of two or three leaves, roots begin to appear. Only after a year can the seedlings be transplanted into a pot. A substrate of moss, fern roots and pine bark is suitable for filling the pot.
The soil should be as small as possible. The sprouts are removed from the flask with forceps as carefully as possible, washed in water and transplanted into a substrate, which is pre-poured with boiling water for 30 minutes. Plants need lighting and high humidity all the time.
Reproduction of orchids by cuttings
In order to propagate an orchid by cuttings, you need to know for which species this method is suitable. Oddly enough, both sympodial and monopodial species can be bred by cuttings. In the first case, grafting will be done with a pseudobulba, and in the second, with peduncles.
The best results for this type of reproduction are given by dendrobiums and phalaenopsis. However, negative experience is also noted, since the result depends on many factors: environment, lighting, and most importantly, the genetic characteristics of the orchid. Experienced flower growers also do not recommend using cymbidiums, cattleyas and other more expensive species for this.
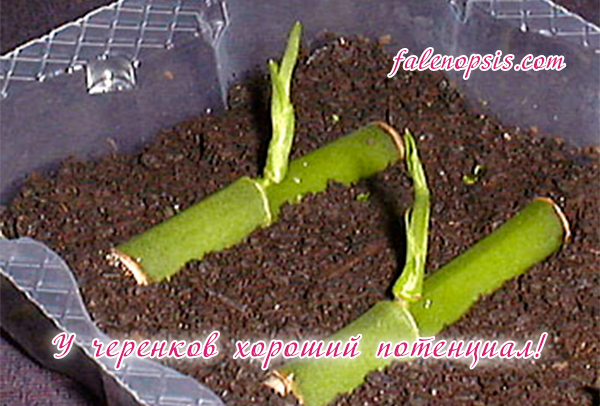
So what do you need to do for propagation by cuttings?
- We need a peduncle or pseudobulb. The peduncle can be cut off after it begins to dry out, and the pseudobulb can be taken from any faded dendrobium.
- We need a mixture of fine fraction bark and sphagnum moss.
- Slices of peduncles can be dried, slices of a pseudobulb can be treated with phytosporin or filled with paraffin.
- We place the prepared substrate in a greenhouse and put the cuttings there.
- As the substrate dries, it should be moistened with a spray bottle. The temperature should be maintained at 23-25 degrees, there should also be diffused light and regular ventilation.
The first results can be seen in 1-2 weeks. Dormant buds can wake up on the peduncles of the phalaenopsis, new processes can appear on the pseudobulbs of the dendrobium, which will eventually become children.
Landing
It is necessary to plant the bulb as quickly as possible so that it does not dry out in the air without soil. For it to sprout:
- She is planted according to certain rules;
- And they provide proper, complete care.
Substrate
The substrate can be:
- Purchase from a specialized store;
-
But you can also make it yourself.
But you cannot plant such a bulb in the soil from the garden, it will suffocate in it and die without giving the expected sprout. Components that are required when compiling the soil:
- Pine bark without resinous deposits - 5 parts;
- Charcoal - 1 part;
- Peat - 1 part;
- Perlite - 1 part.
You can also add fern roots and sphagnum moss to this mixture in an arbitrary amount, but not exceeding 1 part. The substrate is well mixed and disinfected. To do this, they put it in the freezer of the refrigerator for a day.
IMPORTANT! If you decide to prepare the soil with your own hands, you must remember to sterilize it.
Required inventory
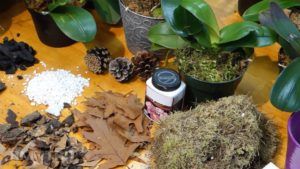 In order to plant an onion, in addition to the substrate, you must have:
- Large stones that will give stability and serve as drainage;
- Small plastic pot;
- Wooden sticks to stabilize the bulb until it takes root.
Technology
Planting a Vietnamese orchid is carried out as follows:
- Stones are laid at the bottom;
- Prepared substrate is poured on top;
- Soak the soil well with water and let it drain completely;
- The onion is laid out on the ground with the booty down, deepening by 1 cm. At the same time, so that it does not fall, it is fixed with sticks. You can use toothpicks or skewers.
Important! The container where the bulb will be planted must have drainage holes to drain the water.
Further care
From the moment of planting to flowering of such an orchid, it takes a rather long time, 5-8 years, and it all depends on properly organized care.
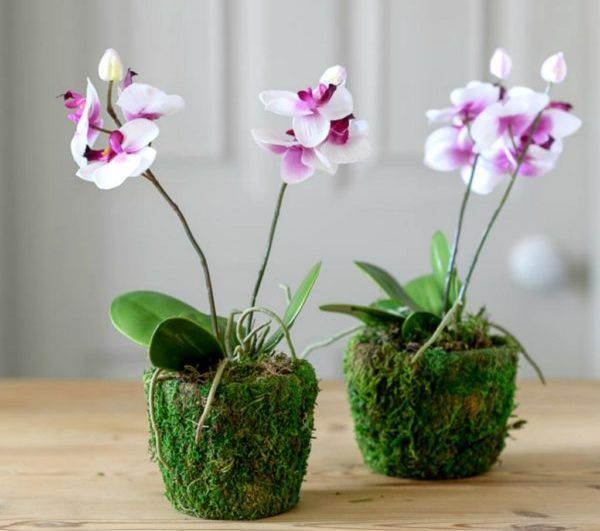
For further flowering, the orchid needs proper care.
These flowers are very whimsical and require careful attention to their content.
Conditions of detention
One of the main conditions for keeping a plant is to maintain the required temperature in the room where the flower is cultivated. It should be between 18-25 degrees Celsius. A change in temperature to either side leads to the death of bulbous orchids. It happens:
- Or from hypothermia of the bulb;
- Or overheating.
For successful growth and flowering, the plant needs a temperature difference between day and night values of 4-5 degrees.
Lighting
 The planted bulbs are exposed where there is a lot of scattered sunlight. Do not put in the sun, since direct rays will dry the bulb and it will die.
With further care, in order to determine how much lighting it needs, you need to look at its leaves.
If they are bright green, then this species prefers a lot of diffused sunlight on the east and west windows.
If there are various natural blotches on the leaves, then northern windows are suitable for this specimen.
IMPORTANT! If the apartment has only south-facing windows, then this is not a problem. For the summer period, from the beginning of May, the flower is placed deep into the apartment, and in September it is returned to the windowsill.
Watering and feeding
It is not recommended to water the bulb immediately after planting, since the soil is already thoroughly moistened during planting. Excessive watering can lead to the death of the plant.
It must also be remembered that the bulb has the necessary supply of the substances it needs in order to survive the rest period, the main thing is not to prolong it. Therefore, the first watering is performed only at the moment when the bulb comes out of the dormant state. The grower will be informed about this by the spout of the leaf, which appeared from the top of the bulb.

When planting a bulb, do not water the flower immediately.
Top dressing begins only from the moment the bulb germinates and once a month. With the beginning of flowering, feeding is increased and carried out twice a month. In winter or after the end of the flowering period, the orchid bulb enters a state of dormancy and no longer needs feeding.
Important! Top dressing is carried out only with specialized fertilizer and only on wet roots. This is done in order not to burn the root system of the orchid plant.
Plant care
Many people roll their eyes at the words “to grow an orchid at home”, believing that it is very difficult and energy-consuming. However, this is not the case, caring for these bulbous plants is quite simple. Let's dwell on the key points of care and cultivation of Vietnamese orchids in more detail. After planting, the plant is not watered until the bulb gives the first strong roots. After the first watering, you need to wait another month to transplant the plant. It is believed that this time is enough for the bulb to be saturated with all the elements necessary for growth.
Vietnamese orchids are sun-loving. The air in the room where they are located should be warm and humid. The window sill on the south side of the house will be optimal, however, you need to be careful with direct sunlight - their light should not fall on the orchid. Well, in autumn and winter, you will have to take care of the sources of artificial lighting - after all, the Asian beauty needs light all year round.
Flowers will appreciate the scattered rays of the sun much higher than direct sunlight. This rule does not apply to either the morning rays of the sun or the evening, their flowers tolerate perfectly. Slightly shading is good when the plant has already formed. In the growth phase, the orchid needs a long day of light and a short (5-6 hours) night. If you planted a bulb in winter, you can "revive" it using intense artificial light.
As for the temperature regime, you need constant, even heat without drops. It is better if the temperature does not drop below +18 and does not rise above +25 degrees. Jumps in temperature both towards the cold and towards the heat are very harmful for young, not yet formed plants. As soon as the plant "has gone into growth", it needs to be watered often, but superficially, avoiding flooding. As soon as the soil is dry, watering is done, preferably in the morning.
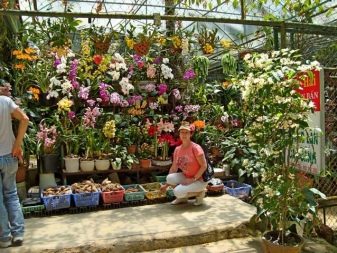
For information on how to grow an orchid from Vietnamese bulbs, see the video below.
Reproduction of orchids by division at home
As already mentioned, the division method is generally suitable for sympodial species. Since all pseudobulbs are united by a rhizome, or as it is also called, a rhizome, new growths are just a matter of time
But it is no less important to know that it is necessary to divide the plants only in cases where the pseudobulb becomes very much and the entire root system no longer fits in the pot.
If you nevertheless decide to divide an orchid, the question of how to divide it without harm to the flower will certainly arise.
For this, it is important to determine where the rhizome is located, and to make division along it. It is extremely important that in each division there are at least 3 pseudobulbs, the more there are, the faster the orchid adapts after division
Another important feature of sympodial orchids is that the faded pseudobulb will no longer bloom, therefore, dividing the plant, you need to leave the old ones with new growths, they will nourish and support the young plant for the first time, and then dry out over time

The action plan for separation should be as follows:
- We take the plant out of the pot and use a sterile tool to separate the pseudobulbs.
- The rhizome slice should be processed. For this, a garden pitch is suitable or you can simply drip it with wax or paraffin.
For many adherents of phalaenopsis, who have not encountered other species before, the question of how to plant a dendrobium orchid becomes very relevant. It should be noted that, although dendrobium belongs to the sympodial species, division is not the only type of its reproduction. Sometimes children begin to grow on pseudobulbs, which eventually grow roots.
After the baby releases a new growth, followed by a new pseudobulb, and also grows sufficient roots for independent life, it can be removed with the help of a neat cut with a sterile sharp instrument.
Transplanting an orchid
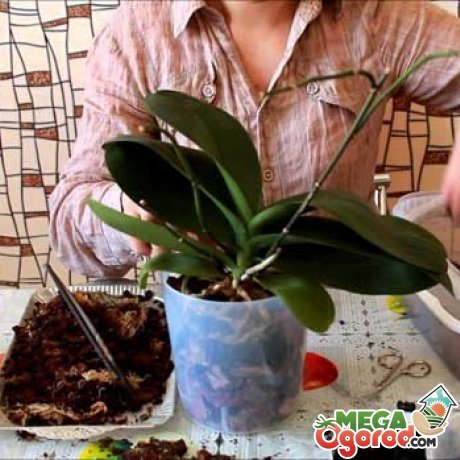
The orchid does not like frequent transplants.
She perceives each of them as stress, so this operation should be approached with special attention. Quite frequent replanting of orchids is due to the fact that the substrate in which they live is very short-lived
Made from sphagnum moss, it loses its qualities in two years. Substrate with peat - in three. It thickens, its acidity changes. It is already difficult for air to penetrate to the roots in order to supply them with useful substances. In addition, the root system of the orchid grows, and after a few years it no longer fits in the old pot. The growth of leaves and flowers slows down.
But sometimes you have to replant the orchid more often. This can happen with improper care, the presence of pests, too much watering. In this case, the roots rot, and only a transplant can save the flower. Sometimes problems happen with the substrate. It starts to smell unpleasant. This smell also indicates the need for a transplant.
Flower transplant rules:
The dishes are taken the same, but with a slightly larger diameter. Disinfect her. Prepare or buy substrate
Carefully remove the plant from the old pot. You need to do this so that the roots are not damaged.
To do this, water the flower well and wait about half an hour until the moisture is absorbed. If after that the root system is not removed, donate the pot. The plant is dipped in a bowl or bucket of warm water so that all the old soil will lag behind the roots. This usually takes about half an hour.
Examine the root system. If damaged roots are found, they are cut off, and the cut site is disinfected. You can do this by treating with charcoal. Damaged leaves are also removed.
They carefully examine the roots of the orchid to see if any pest has wound up on them. They are quite small, so it is not easy to spot them. If pests are found, soak the root part in a disinfectant solution or filtered warm water.
Remove dried leaves, old dried pseudobulbs. The cut sites are disinfected. The root part is dried for about 8 hours.
The orchid is immersed in a new dish, at the bottom of which a layer of drainage and substrate has already been poured. Carefully add the remaining substrate by shaking and tapping the pot. This will help fill in any voids. The substrate must not be strongly compacted. As a result of transplantation, the root collar should be one centimeter below the edge of the pot, but not in the ground, but above it. It is not necessary to immerse all air roots in the substrate.
Install the pot on the east window, away from direct sunlight. Maintain the room temperature at about 22 ° C. After transplanting, the orchid is watered after 4 days. Make sure that moisture does not get to the top where the growth point is located.
Transplant
Orchids need to be repotted often, because the substrate quickly deteriorates, it becomes too dense, and its acidity changes. So the flowers growing on sphagnum are transplanted every two years, on the bark every three years. Sometimes you have to do this more often if pests start, if the substrate clearly begins to deteriorate (which can be suggested by an unpleasant smell), if improper watering has led to decay of the roots. The best time for this is spring, when the flower grows most actively.
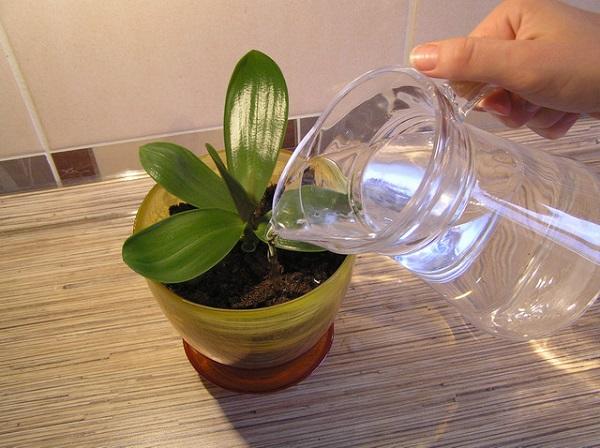
For transplantation, they take a new transparent dish of a slightly larger size, a new substrate. In the same way, stones are laid on the bottom, a drainage layer, then the substrate itself is placed. The flower is watered abundantly so that it can be removed without causing the slightest harm. Sometimes you have to sacrifice an old pot, it is broken or cut if the substrate is so dense that it is not possible to remove the plant even after watering. The roots of the plant are placed in warm water to completely free it from the old substrate.
If there are damaged or rotten roots, leaves, then they must be carefully cut off, sprinkle with crushed coal
The plant is placed in a new pot, the substrate is poured, lightly tapping on the pot so that it is better distributed.
After planting, the plant is watered, if moisture gets on the growth point, then it is better to get wet. The root collar should be above the substrate, one centimeter below the edge of the pot.
Orchids from Vietnam: how to grow from a bulb
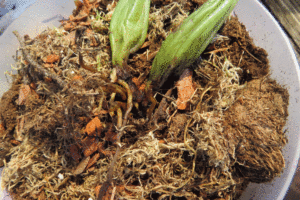
Vietnam is home to many exotic plants. Instead of traditional souvenirs, tourists often bring beautiful flower bulbs from there. Orchids from Vietnam are in special demand, but not all growers know how to grow a capricious culture from a bulb in the Russian climate. Before planting orchid bulbs, you should study the recommendations for caring for a thermophilic plant.
Vietnamese orchids.
Special taste - wonderful guests from Vietnam
The orchid is appreciated all over the world for its original shape and bright color of flowers, it is not without reason that it is called the “queen of flowers”. She is one of the few ornamental plants to bloom during the winter months.
Delicate flowers bloom when other tuberous crops are resting - this is a beneficial advantage of the plant. In addition to beauty, the culture has another rare property - its flowering lasts up to 30 days.
Some types of orchids bloom for 2-3 months.
The Vietnamese "queen of flowers" in their natural environment grows on the trunks of tall trees, in soil or limestone in moist, well-lit places.
There are 2 types of orchids growing in the wild - air and ground:
- Airy orchids from Vietnam go deep into the bark of trees or rocks, extracting nourishing juices and moisture from them, and their stems with leaves and flowers hang down to the ground.
- Land crops grow in the traditional way: their roots go into the ground, and stems, leaves and flowers reach out to the sun.
Vietnam has a large selection of orchids. They are sold everywhere: in flower shops, in markets, in stalls and tents. Tubers of terrestrial plant species are transported to Russia. An orchid bulb is called a bulb.
This part of the rhizome is a thickening at the base of the orchid shoot, which stores water and nutrients.
Bulbs can be transported in luggage wrapped in dry paper towels or packed in a container with holes.
Bulb requirements
Vietnamese orchids are chosen for the same reasons as plants from other parts of the world. An external examination of the planting material will help you not to make a mistake with the purchase. Bulbs should look strong, free from mold and rot.
It is better not to purchase dried orchid bulbs, since they are unlikely to grow out of them. The greenish tint of the tuber speaks of its freshness and germination.
In Vietnam, orchids are often sold in black, heavy-duty plastic bags. This prevents them from drying out prematurely. The bulbs can be kept in them during transportation, as well as stored at home. They are easy to care for: care consists in periodic ventilation.
To do this, the bulbs are taken out of the bag from time to time and allowed to "breathe". In order not to forget to perform this procedure, you can immediately make small holes in the polyethylene or transfer the planting material to a newspaper (paper napkin).
Bulba of the Vietnamese orchid.
: how to plant an orchid bulb from Vietnam
An orchid bulb brought from warm countries is not cheap in Russia. This is due to the cost of transportation, the excitement around exotic flowers and various marketing gimmicks.
In small flower shops the price for one tuber can reach 1000 rubles. In hypermarkets, the cost is lower - a blooming orchid can be purchased for 300 rubles.
Therefore, if possible, it is better to buy a plant in its homeland - in Vietnam, one bulb costs about 150 rubles. And if you bargain with the seller, it will be even cheaper.
Considering the high cost of the product, the planting of the tuber must be approached responsibly. Before planting an orchid bulb, you should choose the right pot and substrate. Then you need to place the planting material and provide proper care for the plant.If the flower does not grow well, it is better to seek expert advice or watch training videos.
showing how to store, how to plant and how to care for orchid bulbs from Vietnam will help solve the problem.
The planted tubers will not turn into a flowering plant soon. Sometimes you have to wait for flowering for several years. With proper care, an orchid can shoot flowering arrows 2 times a year, or it may not bloom at all.
You need to know that after the flowering period, a dormant period begins, the duration of which depends on how depleted the plant is. Sometimes an orchid needs stress to open its buds.
To do this, move it to a cooler place or reduce the frequency of watering.
The "Queen of Flowers" is a capricious plant that requires floriculture skills. Therefore, it is recommended to plant orchid bulbs from Vietnam only for experienced lovers of exotic crops or for those who are ready to deal with all the complexities and nuances of this process.


