SECRETS OF ORCHID CARE CYMBIDIUM
Lighting. Often in the fall, the orchid may not have enough sunlight, then it is recommended to rearrange it either to the south window, or use additional lighting with lamps. In summer, on the contrary, if the orchid is on the southern windowsill, it needs to be shaded. It is good if there is an opportunity to place the orchid in the open air in the summer or arrange a place on the balcony.
Temperatures. The optimum temperature of the content is + 18-20 ° C. In nature, growing in mountainous areas, cymbidium is exposed to temperature changes during the day. So at home, in order to stimulate the laying of peduncles, it is recommended to lower the night temperatures by 2-4 ° C.
Watering. The orchid calmly tolerates a short-term drought, because the water accumulated in the pseudobulbs serves as an additional source of nutrition. In summer, watered moderately. In winter, watering once every two weeks is enough. The optimum air humidity is about 60%. Can be sprayed with a spray, increasing the moisture near the flower. Fertilizer. They are fed twice a month when new pseudobulbs begin to develop. Do not feed during flowering. Complex fertilizers are used for orchids.
Transfer. Do not rush to replant the plant, even if the roots are slightly peeking out of the drainage holes. The need for a transplant appears every 2-3 years. A transplant is required if the following signs are noticeable:
- the cymbidium has greatly outgrown its pot;
- strong decomposition of old soil;
- the roots or pseudobulbs are rotten.
Among cymbidiums, there are both epiphytic and terrestrial orchids. Accordingly, they need a heavier soil than Phalaenopsis. You can use the following composition:
- light (herbal) compost;
- pine bark;
- sphagnum moss;
- fern roots.
All components are taken in equal proportions. Ready-made orchid primer is also suitable.
After transplanting, depending on the reasons for the move, watering is resumed at a different time interval.
- The plant is transplanted due to the appearance of rot. The roots were cut or unraveled. Better to wait and water the cymbidium after 7 days.
- The root system is healthy, does not unravel. Watering is resumed after 3-4 days.
Bloom. A new arrow of the peduncle in the cymbidium usually appears in the summer. Its appearance foreshadows the formation of a new pseudobulb, which is formed from the tissues of new growths when the leaves have reached their final length. The arrow begins to grow from the base of the leaves and is more rounded in contrast to the new growth.
The peduncle needs support so that it does not lean under the weight of flowers. Their number on one peduncle can reach up to 30 pieces.
Reproduction. Cymbidium is propagated by division. During transplantation, the plant, which has grown strongly and has more than 15 pseudobulbs, is carefully cut with a sharp knife. Each division should have 4-5 adult pseudobulbs.
Step by step algorithm
The step-by-step algorithm is not complicated, but it requires some preparation. Make sure you have inventory first. We need a basin or other large container in which we will clean and process the root system. Also, make sure you have a flower pot that will fit the size of your particular orchid. You cannot do without the following devices:
- Sharp tool such as scissors, knife, or pruning shears. Be sure to sterilize the instrument.
- Inert materials for the drainage layer. You can give preference to vermiculite, perlite or expanded clay.
- Bactericidal preparations. The best choice is ordinary activated carbon, but you can give preference to just crushed cinnamon.
- Fungicides. They are needed in the presence of fungal foci for processing.
- Insecticides. You will need them if you need to get rid of parasites and harmful insects.
- Warm and soft water. It is advisable to use settled or cleaned.
In principle, a ready-made substrate can be purchased. However, experienced florists recommend preparing it personally using quality ingredients. In this case, it will be possible to achieve the full development and growth of the plant, reliable protection against diseases and pests.
Now you can start the transplant. Proceed, adhere to the following algorithm:
- The first stage of the procedure is removing the orchid from the old container, cleaning and examining the roots. First you need to carefully remove the plant from the pot. If its structure allows, gently press on all sides and take out the orchid. Otherwise, the pot must be broken or cut. The plant should be placed in a previously prepared basin with warm, settled water. Leave in this form for 1-1.5 hours to separate the substrate from the roots. Never pull off pieces of bark from the roots. After the specified time, rinse the plant under water and leave to dry. During this time, inspect roots and stems for dry patches or decaying foci. If the roots are healthy, they are fleshy, firm and dark green.
- Next, you need to trim the roots, process the cuts and dry the plant before planting. Take a sharp and sanitized instrument. They need to cut off damaged, diseased or dried roots, capturing up to two to three centimeters of healthy tissue. Also trim off any yellow, dry, or damaged leaves. Root cuts should be treated with ground cinnamon or crushed activated carbon. Treat leaf slices with an antiseptic. If necessary, use an insecticide (if there are residual insect habitats) or fungicide (if there are signs of decay). Leave the plant to dry for 8-12 hours.
- Now we need to place the prepared plant in a new container. First, let's prepare the substrate. The bark should be poured with boiling water or baked in the oven, then dried or cooled. Mix the bark with the other substrate components required for your particular orchid variety. The pot should be disinfected. Then the drainage layer is laid (1.5-2 cm). Place the plant in the center of the container, distribute the roots evenly and, holding with your hand, sprinkle the prepared substrate on the roots. The latter should not be laid tightly, since the roots need to breathe, but the orchid should stand tightly in the pot.
- It remains to make the first watering. This can be done immediately if the drying of the substrate and roots has been carried out normally, or after 1-2 days.
Conditions of detention
After buying a plant, the question immediately arises in front of you, how to care for the phalaenopsis orchid at home. First of all, you need to remember that this is a tropical plant that naturally grows in a humid forest, attached by roots to the trunk of a tree.
Indoors, he also needs a well-lit place:
- It is best to settle the orchid on an eastern or western windowsill and shade from direct sunlight to avoid burning the leaves;
- If you have south-facing windows, the phalaenopsis pot can be placed on a hanging shelf next to the window;
- On the north side, the plant may not receive enough light to start flowering. The problem is solved by installing additional lighting.
The optimum temperature for growing phalaenopsis is 24-26 ° C. Exceeding this value by 5-6 ° C for several days will lead to an early end of flowering and can cause wilting of leaves. If the orchid does not bloom for a long time, you can stimulate the appearance of a peduncle by organizing a difference between day and night temperatures.The easiest way to do this is in May and September by placing it in a pot with a plant on the balcony or by placing it near a window that is slightly open at night. Such conditions will mimic a rainforest environment where it is quite hot during the day and cool at night.
Choosing a pot and substrate
Planting and grooming will be more comfortable in a transparent plastic pot. The container should have multiple drainage holes. Plastic can even be colored, the main thing is that it allows light to pass through. The roots of the butterfly orchid are involved in photosynthesis, so the plant will develop better in such a container. In addition, the transparent pot allows you to determine the need for watering by the color of the roots. If the roots are silvery white, then it's time to water the phalaenopsis.
Pine bark, chopped into small pieces, is used as a substrate for butterfly orchids. If you harvested it yourself, the bark must be boiled for an hour to remove resin residues from it and make it more moisture-absorbing. A similar substrate can be bought in a store; it does not require additional processing. A layer of expanded clay must be laid at the bottom of the pot. To prevent the development of pathogenic microorganisms, you can mix the bark with pieces of sphagnum and charcoal.
Correct care
Improper care can ruin such a beautiful plant, so you need to know what the phalaenopsis needs in order for it to live a long time and delight the owner with graceful flowers. Proper watering is very important in caring for an orchid. In the warm season, it is best to arrange a bath for phalaenopsis by immersing the pot with the plant for 20-30 minutes in a container with settled water at room temperature.
It is enough to do this procedure once a week. In winter, it is better not to soak, but to spill the flower to the bottom, be sure to drain the excess water from the pan to reduce the risk of root decay. The need for watering can be determined by the weight of the pot - when the bark dries up, it becomes light. In winter, watering is done less often if the room is cool.
Phalaenopsis are fed with special fertilizer for orchids. You can also use universal flower fertilizers, but dilute them in a weaker concentration. The dosage should be reduced by 2-3 times compared to the usual one.
Step-by-step transplant
Phalaenopsis needs a transplant no more than once every three years. Basically, it is produced when the roots completely fill the pot:
- Taking the plant out of the container, it should be inspected, having previously freed from pieces of bark.
- If some parts of the substrate have grown to the roots, do not tear them off with effort, let them remain.
- All dry, yellow or blackened roots will need to be cut off, after which powder the wounds with crushed coal.
- The plant is planted in a slightly larger pot, filling it with expanded clay from below, and then with bark.
If the purchased plant has roots in poor condition, it is advisable to transplant it as soon as possible, without waiting for the end of flowering.
Reproduction methods
It is important not only to understand how to care for the phalaenopsis orchid at home, but also how to properly reproduce this plant. It is worth remembering that it is much more difficult to propagate it than other varieties.
Phalaenopsis belongs to the monopodial type, that is, it has only one growth point. The material should be taken only from healthy plants that are not affected by rot, insects, and fungus. Reproduction can be carried out:
- children;
- cuttings;
- division.
Children are formed on the peduncle. They can be separated in 1-2 months after the end of the flowering process. The formation of children is mainly typical for an orchid that is at least 2 years old. You can separate them immediately after the appearance of the roots or at least 2 leaves.
The baby must be carefully cut off, then processed with charcoal powder and dried in a shaded, well-ventilated area. Fill disposable cups with soil to be pre-moistened
Dilute "Kornevin" according to the instructions, dip the children in the ready-made solution and put them in cups. Cover them with foil and place in a bright, warm place. It is systematically necessary to moisturize and ventilate. After a year, you can transplant a young plant into a pot.

You can also carry out reproduction by rooting the peduncle. At the same time, no more than 2-3 months should pass from the moment of flowering. The peduncle must be cut off at the base, processed with cinnamon or coal powder. The stump should be covered with beeswax. Cut each peduncle into several cuttings, leaving 1-2 buds on each. Moisten the moss with a growth stimulant and lay the resulting segments horizontally. Cover the container with plastic wrap and keep warm in good light, maintaining sufficient humidity. Periodically you need to spray them with a stimulant for faster root formation. When the roots grow and the first leaves appear, the cuttings should be planted in separate pots.
Conditions for growing babies
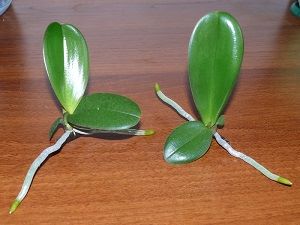 Sometimes a florist suddenly discovers that a baby has grown on an orchid. Baby education is a natural process of vegetative propagation of an orchid. They can develop from axillary buds located on the stem, at the root, or on the flowering arrow.
Their formation can be divided into several periods:
- activation of dormant kidneys;
- development of children (layering);
- separation from an adult orchid and transplant into a separate container.
Most often, the moment when the orchid let the baby go is observed after a prolonged flowering of the orchid, provided that it has at least 4 large leaves and a healthy root system. The optimal period for the formation of children is spring and the beginning of the summer season. At this time, the plant should:
- be in the final stage of flowering;
- in conditions of favorable temperature conditions;
- good lighting of the room;
- air humidity not less than 50-60%.
Short daylight hours and dry air prevent the formation of children in the orchid.
Main plant pot size
The optimal pot size of the mother plant is related to the size of its root system and should be small for her. This has a beneficial effect on the growth of the plant and the formation of shoots.
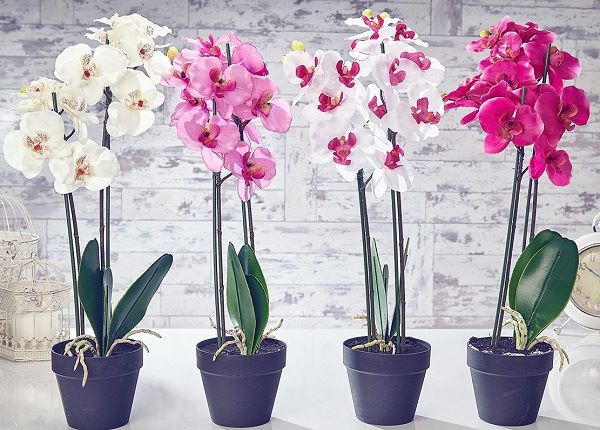
A good pot should be a little tight for an orchid.
Temperature difference
It is one of the defining conditions for the formation of children. It is optimal to create a daily temperature difference in the range of 5-7 ℃:
- cool nights with temperatures + 17-18 ℃;
- hot days - up to + 27-30 ℃.
Such conditions are usually established during the spring and summer season on a sheltered balcony.
Reducing watering
Poor watering stimulates the development of dormant buds, but only if the cultivation is carried out with sufficient air humidity.
Humidity and light
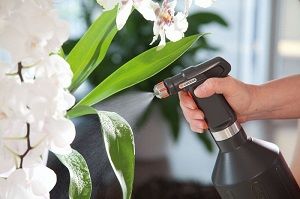 To create high humidity conditions, the orchid pot is placed on a tray with wet pebbles or moss, the leaves are regularly sprayed with water.
A very important condition for the education of children is lighting:
- the orchid is most suitable for places with diffused sunlight;
- in autumn and winter, daylight hours are extended to 12 hours using a phytolamp.
Providing optimal cultivation conditions will make it easy to stimulate the appearance of children.
Correct shortening of the peduncle
To initiate the formation of shoots on the peduncle, it is shortened after the end of flowering, making a cut 1.5-2 cm above the upper dormant bud. This prompts the rest of the dormant buds to develop.
In some cases, it can be observed that the orchid gave birth to a baby on a peduncle by itself, but sometimes their appearance needs to be stimulated.
Nitrogen fertilizing
To stimulate the formation of children, the orchid should be fed with fertilizers with a high nitrogen content. Special feeding for orchids has a balanced composition of trace elements, so it can be used every second watering during the period of active plant growth.
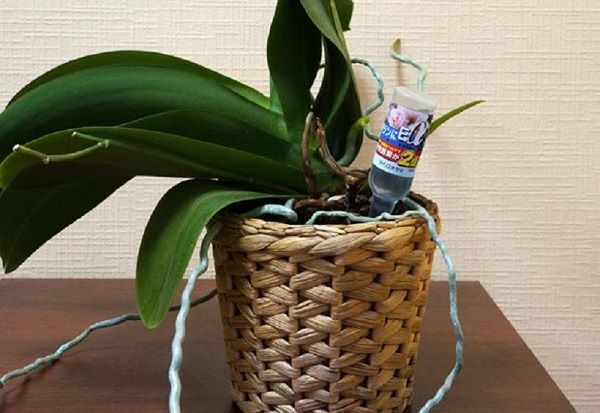
To accelerate the appearance of children, fertilizers with nitrogen are used.
Stimulating kidney awakening
To stimulate the buds on the peduncle, you can use cytokinin paste:
- the scale covering the kidney is gently lifted and trimmed to reveal a small light green dot;
- a small amount of paste is applied to it (about 2 mm in diameter);
- the kidney is evenly lubricated over the entire surface.
The most guaranteed result is obtained when processing the paste of the uppermost or lowermost buds on the peduncle.
Transplantation of Phalaenopsis babies
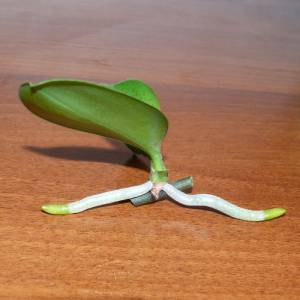 Sometimes at the top of the peduncle, instead of the expected flowers, paired leaves appear, this is the formation of Phalaenopsis babies - a new miniature plant with its roots, leaves and peduncle, which, before being separated, need to be grown a little.
When the roots of the baby have grown to a length of 3-4 cm, it can be separated from the parent flower by cutting off the peduncle of the mother plant a centimeter from the baby.
It is recommended to soak the separated baby in water with growth hormone for 10-15 minutes. The water will soften the roots for easier potting, and the growth hormone will promote faster root development in the young plant.
After that, the baby is transplanted into a small pot with holes, using a substrate for phalaenopsis. To ensure a high level of humidity, a young orchid, along with a pot, can be placed in a plastic bag, not forgetting to ventilate.
If you follow these simple recommendations, the plants will delight you with their exotic beauty for a long time.
The main mistakes when building
Extension of roots is not complete without mistakes, which can sometimes cause the final death of a flower.
It is worth paying attention to common situations and then the withering plant will regain its blooming appearance.
With the right approach, you can turn a withering plant into a blooming orchid.
Lighting
For maximum comfort, orchids should be placed on the north side. You can arrange a flower on the windowsill on the other side, but it is the north that is preferable
It is important to monitor the condition of the plant during the warm season to avoid damage to sensitive leaves.
Transfer
Transplanting a plant is a last resort and should not be used unnecessarily. If a change of soil is unavoidable, it is necessary to carefully process the roots and remove the damaged processes. Healthy shoots are treated with activated charcoal before planting in a new pot.
Humidity
It must be remembered that the orchid loves high humidity and functions normally only at an indicator of 50 percent. Additional ways to increase humidity levels should not be neglected.
Orchid is a capricious and fastidious flower, but this will not prevent a loving florist from growing its roots and giving the plant new life.
The result will not be long in coming, but it is important not only to be patient, but also to follow all the tips and instructions. Do not forget that you can save a plant even in the most neglected case.
Dormant period
It is important to know exactly how to care for phalaenopsis at home during the dormant period, so that the plant gains strength and recovers after flowering. After the inflorescences fall off, you need to give the orchid a little rest.
To do this, it is advisable to rearrange the pot with the plant in a much cooler, darker place. Watering should be reduced by 3 times.
It is not recommended to transplant, feed and spray the plant during this period. Perhaps during this period the lower leaves will turn yellow and dry, but do not worry, as this is a completely natural process. The peduncle itself can also dry out after flowering, in which case the orchid is pruned.
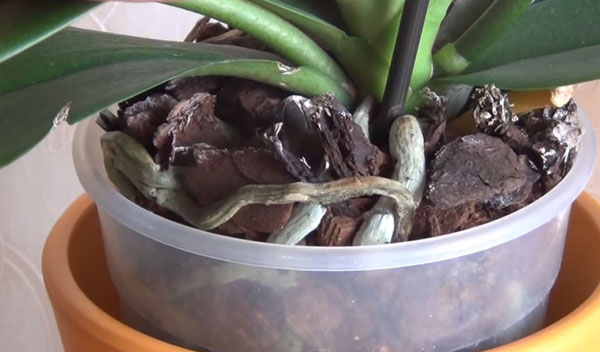
In some varieties of phalaenopsis, the peduncle remains green. In this case, you can leave the peduncle as it is and not touch it. Then new buds form on it over time.You can cut the peduncle to the first bud, and then over time a new one will appear from it. Some cut it off completely and put it in a vase of warm water. After a while, a new kidney is formed from it. Such a dormant period is simply necessary for an adult plant, since it needs to accumulate as much strength as possible for a new flowering period.
Literally after 3-6 months, new buds form on the orchid, and its abundant flowering begins. If this did not happen, and the phalaenopsis did not bloom in time, then you need to look for the reason and try to stimulate this process in a few months.
Consequences for the parent
Some novice growers do not remove children from the mother plant, especially if the processes have formed near the roots, mistakenly believing that this will make the plant more bushy and beautiful. But this is wrong, since the mother plant spends a lot of energy on the development of the offshoot, and if the baby is not removed in time, it may simply die.
Therefore, there are two main questions:
- When do you need to separate the baby from the plant?
- How to do it right?
Attention! The baby, which was planted on time and successfully, is a new independent plant in the collection. But the florist is often faced with a choice - a mother plant or a baby, if the shoot has appeared on the stem.
When to plant a shoot?
If an orchid has children, then the question arises, when should they be planted? There are several basic signs of readiness:
- Regrown roots.
While they are not there, the process should not be touched. The roots must be healthy, strong, at least 5 cm long. It is worth remembering that the more roots a child has, the more likely it is that the transplant will be successful and the young plant will survive. It is not necessary to separate the process if it has less than three roots.
- The right amount of true leaves.
At least 5 leaves should grow on a young orchid, this is the only way the chances of survival after separation from the mother plant will be high. Do not forget that good leaves are the plant's nutrition from sunlight and respiration.
- The baby spent at least 8 months on the mother plant, but it is better if exactly a year passes after its appearance.
Take your time to separate the baby from the mother, let her gain strength for further growth, being on the mother plant. Growing the root system is a tedious and long process. Preparing transplant items (tools, soil, pot).
So, the baby is ready for the transplant, now it's time to prepare everything you need for this exciting process:
- a special substrate made of pieces of bark 1 cm long;
- sphagnum moss;
- a small plastic pot - 7 to 10 cm in diameter (it should be transparent);
- pruning shears, scissors or sharp knife;
- activated carbon or cinnamon.
For self-preparation of the soil, you need to mix fine pine bark and sphagnum moss, you can add a little charcoal. The substrate should be well moistened, but not wet.
Read more about the choice of soil and pot here.
How to correctly separate the escape?
This can be done in several steps:
- Sterilize the instrument.
- Cut the baby carefully from the mother plant. If it grows on a peduncle, then it is worth making oblique cuts on both sides of the process, so that the remainder of the peduncle is 1-2 cm.If the baby is formed at the base, then it is more difficult to plant it: make a cut as accurately as possible so as not to damage the roots, both on the mother plant and on the baby.
- Cutting points should be treated with cinnamon or crushed activated carbon. This must be done, otherwise pathogenic bacteria and infections can get into the wounds.
To finally figure out how to separate an orchid shoot, watch the video:
Key recommendations
Before planting the baby, the sections must be air-dried for 30 minutes.The pot should be small, you can take a simple plastic cup and make several holes in it, both at the bottom and on the sides.
All about the children of the phalaenopsis orchid: what they look like, planting and care
It is no secret that it is possible to grow a "baby" on a phalaenopsis peduncle. After the full flowering of the orchid, you should not immediately cut off the peduncle.
Flowering continues if another peduncle (lateral) grows from the "dormant" bud. But sometimes, instead of a lateral peduncle, you can grow a baby or several processes.
If you keep the orchid under fluorescent lamps so that it has enough light, then several children can grow on healthy peduncles.
You can see the orchid babies from the trunk in the photo.
With the right lighting and nutrition, orchid babies grow healthy.
But for such a healthy flower, you also need proper lighting and nutrition. In order to raise a baby, an orchid takes a long time.
The baby is separated from the mother plant after about 6 months. First of all, a small plant grows leaves.
After fully formed leaves, roots begin to grow in young phalaenopsis. First of all, spherical neoplasms begin to form at the base of the baby.
But this is not enough to transplant a young plant from the "mother". A young plant should have several roots at least 4-6 cm long.
Conditions
Orchid lovers many times ask themselves whether it is possible to breed it at home, and also what conditions are needed for this? With proper care and rooting of cuttings, the result will not be long in coming.
In order to speed up the result, you need to know the basic rules of plant care. First of all, it is necessary to provide sunlight to the place where the plant will be located.
Important! Do not forget that the plant should not be in direct sunlight to avoid burns. Temperature control also affects the rooting of phalaenopsis baby cuttings.
It is not recommended to fill the flower.
Requirements for the conditions for orchid reproduction:
- Temperature conditions. In the summer season from + 21C to + 31C. In winter, + 16C - + 27C. There are critical deviations from + 13C to + 33C. It is undesirable to allow both a lower and an upper critical threshold;
- Humidity. According to the standard, it should be equal to 50%. It is possible to spray and make an outdoor shower only if the temperature regime is violated. The flower "bath" is allowed only a few times a week. In winter, water procedures for the plant are contraindicated;
- A short rest between flowering is recommended;
- Most often, the flowering process can be observed in winter or spring. Sometimes there are phalaenopsis, which bloom all year round, taking a short break for rest. In order for the flower to bloom, it is necessary to adhere to a temperature regime of + 19C at night and + 27C during the day;
- Indirect illumination. In order for the plant to bloom in the winter, it is necessary to give it additional light.
Correct pruning
In order for the orchid to devote all its strength to growing new shoots, it is necessary to cut off dried and withered parts.
If you cut the phalaenopsis during flowering, then you can ruin the flower. During the formation of the peduncle, the plant as a whole should not be disturbed.
Florists have brought out only two safe ways to properly cut the phalaenopsis peduncle:
- It is necessary to shorten the peduncle 2 cm above the sleeping bud;
- Leave a trimmed stump with a height of 3 - 3.5 cm.
Important! When cutting the peduncle on top of the dormant bud, you should be careful not to hurt the young stems. In this case, the phalaenopsis will have to spend additional energy on the development of new stems .. At home, the orchid should be cut with a garden pruner. It is not recommended to use scissors and a knife, as you can harm the plant
At home, pruning an orchid should be a garden pruner. It is not recommended to use scissors and a knife, as you can harm the plant.
Disinfect the instrument before pruning an orchid.
If hangnails remain on the orchid or the leaves are damaged, an infectious disease may form.
Before proceeding with the circumcision procedure, you should disinfect the pruning shears; it is best to do this with a solution of bleach, boiling water or alcohol.
At the end, the sections are treated with brilliant green, iodine, cinnamon or crushed activated carbon.
There are phalaenopsis with a hollow stem inside. During watering, water flows there and the orchid may begin to rot from the inside. In order to avoid such a situation, it is necessary to close the cut with beeswax.
How to plant an orchid shoot from a stem
The baby feeds on the mother plant. Therefore, in order to remove the load from him, the separation procedure is carried out. Sometimes the children are separated in order to propagate the whole plant, planting both in different pots. We will tell you how to plant them correctly later in the article.
Definition of readiness
Make sure that she is ready for this before dropping off the baby. Such a shoot has 2 pairs of leaves and 2-3 roots with a length of 5 cm. As usual, the shoot on the peduncle develops to such a state in 3-6 months, depending on the conditions of keeping and habitus (species) of the mother plant.
Orchid baby, ready to detach.
Separation and planting in a separate container are carried out when the young plant has acquired the appearance of a miniature orchid, it is healthy and ready for independent existence.
Technology
The procedure is elementary. After it became obvious that the baby is ready, it is carefully separated from the peduncle. The same is done with the process that formed below, next to the root system of the mother liquor.
When examining the root system, it must be remembered that it is rather fragile in orchids.
Be careful not to cause damage
Usually for these reasons, as well as for decorative reasons, such shoots are left on the mother plant. In the future, there is a high probability of getting two plants in one pot and thus doubling the flowering intensity.
The separation is carried out with a sharp disinfected instrument: a knife, scalpel or pruner. The cut is made in one precise motion. Sawing or working with a blunt tool is inadmissible. Sometimes the baby on the peduncle does not lend itself to careful manipulation, in which case you can separate it along with a short fragment of the peduncle.
All sections are processed with crushed coal or cinnamon powder, then dried before planting. It is better to dry in the shade outdoors or on a windowsill if it is summer outside.
Attention! There are times when a baby tries to bloom while still on a peduncle. This cannot be encouraged, the peduncle on the child must be removed without fail .. Sometimes children on peduncles refuse or are very reluctant to build up their own root system
In this case, you can wrap the base of a young plant with wet sphagnum, securing it with twine or soft wire. The moss must be constantly wet, but not wet, do not let it dry out
Sometimes children on peduncles refuse or are very reluctant to build up their own root system. In this case, you can wrap the base of a young plant with wet sphagnum, securing it with twine or soft wire. The moss should be constantly moist, but not wet, do not let it dry out.
You can stimulate the growth of the roots of babies using wet moss.
Good results in growing roots can be achieved by frequent spraying and any increase in air humidity around the plant. It is best if the humidity is over 70%.
If, through negligence, the baby was separated without roots, then it is necessary to increase them before the plant exhausts the water and energy stored in the leaves.In this case, the technology that is used to resuscitate orchids left without roots is applicable:
- The baby is treated with epin, heteroauxin and placed in a mini-greenhouse on a pillow of wet sphagnum in the upper layer and expanded clay in the lower one;
- A bright diffused light is required, the temperature should be 22-26 ° С, the humidity should be more than 70%;
- Top dressing can be started when the first roots appear. Frequency: every 2 weeks. Use a fertilizer with a nitrogen bias, in 1/6 of the concentration indicated on the package. Increase the dosage gradually.
Peculiarities
The separation procedure is essentially identical to pruning branches on other plants, but it has its own nuances, depending on where the baby was formed:
- separation from the peduncle. The most common place for a baby to appear is a peduncle. Separating the chunky baby is not difficult. It is enough just to cut it off along with a short fragment of the peduncle and plant it;
- from the root. The baby appears on the part of the stem where the roots grow, and which is in the substrate. It turns out that in order to separate it, you have to remove the entire plant from the pot, clean it from the substrate, dig out the roots and separate the shoot. It is not a fact that at this moment the process will be ready for the procedure (it may not have its own roots);
- a shoot from the leaf axil. It is customary to leave babies that are formed from the stem or leaf axils. The operation of pruning it can cause the death (in almost all cases) of the baby itself, and sometimes the mother plant.


