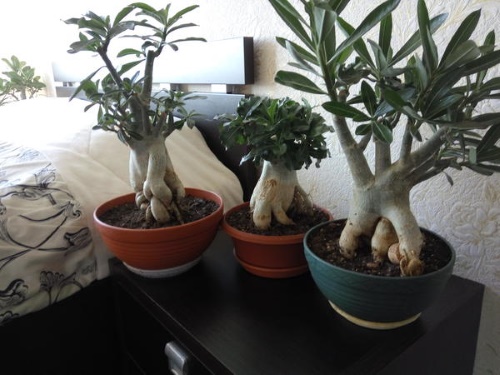
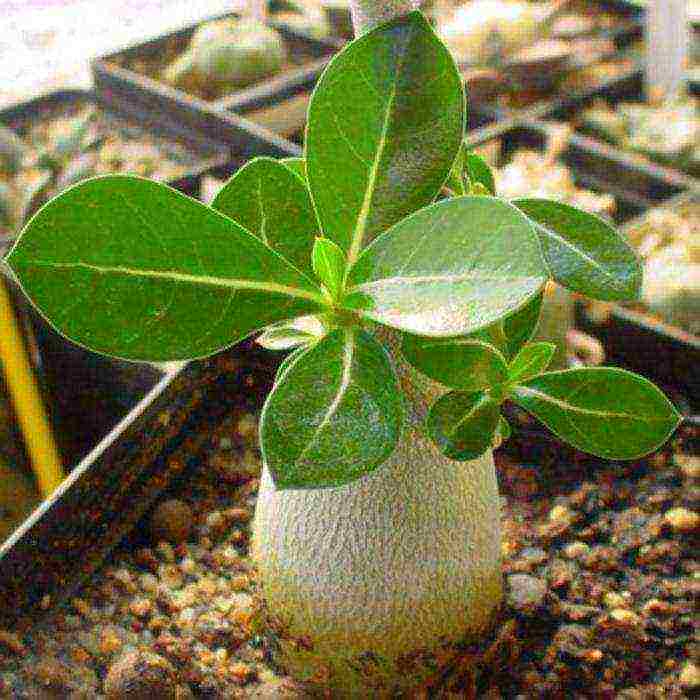
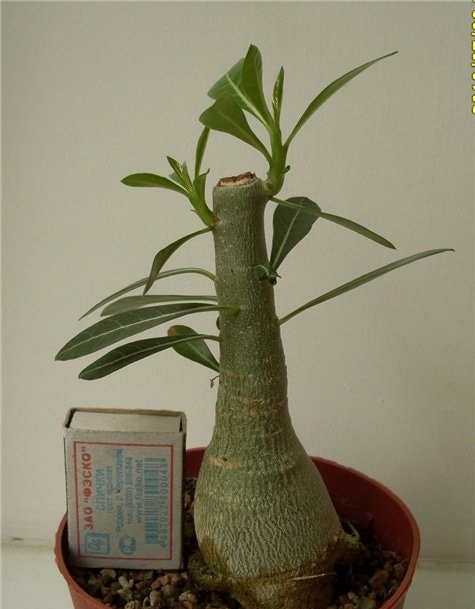
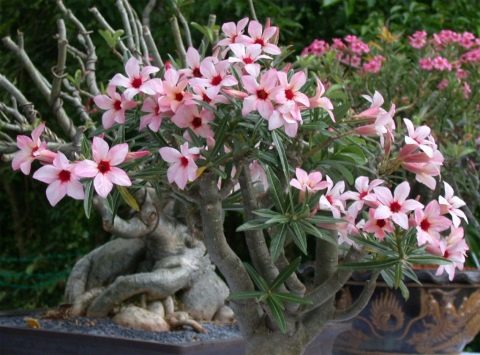
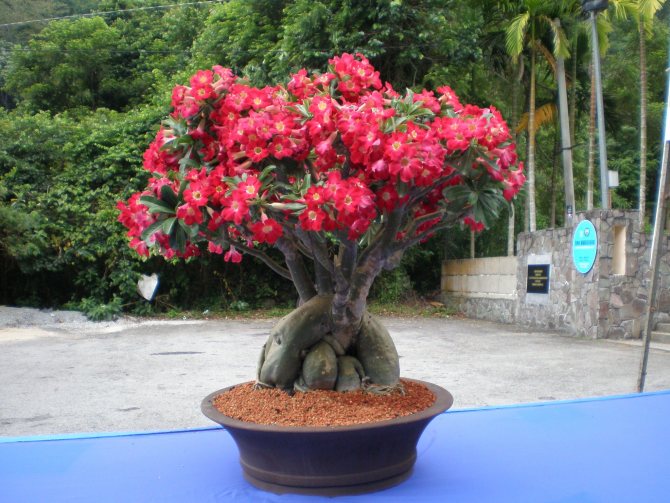
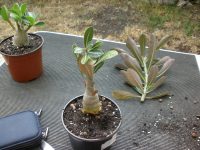
Caudex
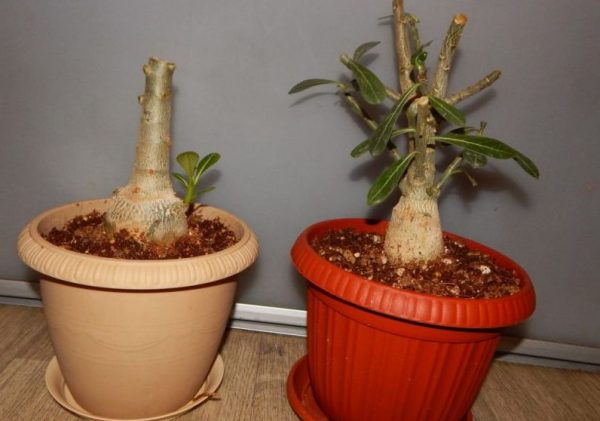
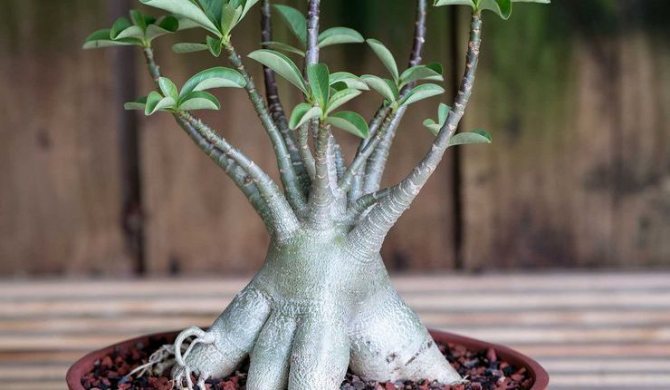
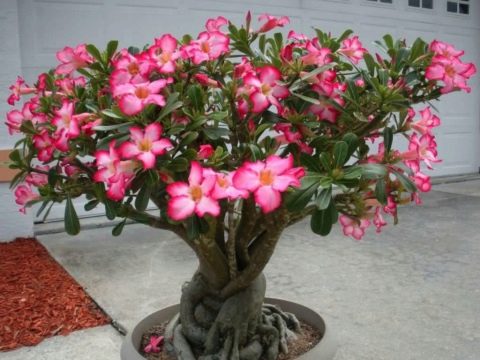
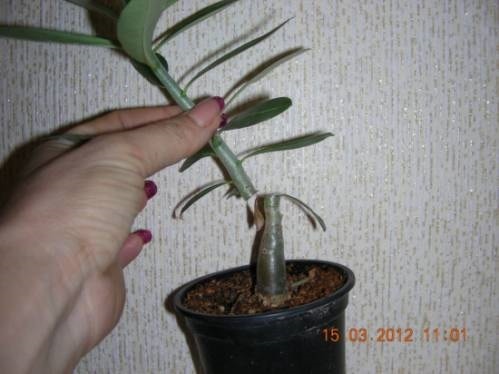
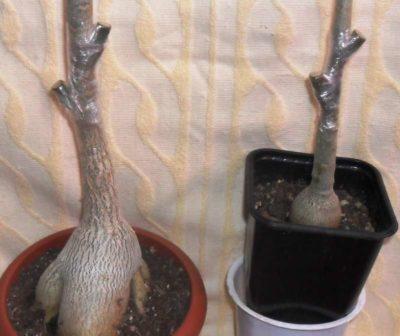
In adenium, a spectacular caudex is formed with the help of correct root trimming. This work is carried out constantly with each transplant. The soil for the flower should always be sufficiently moist, but not wet at the same time. How to form it correctly?
The right soil
To form the correct caudex in adenium, a nutritious soil, fertile, saturated with organic matter, is necessary. This flower is very fond of natural fertilizers, and therefore, it is best to use real cow dung, which is well rotted, as nutrient mixtures. Extracts from cow dung can also be used.
Landing and formation rules:
- Choose a sturdy seedling and shorten the main root and all roots growing downward.
- A slide is poured into a prepared pot with nutritious soil from above. A plastic circle is laid on the slide.
- A plant is installed on the plastic.
- The side spines should be carefully straightened and fixed in position with wire. You can use small stones or plastic sticks. A larger stone can also be placed at the base of the plant to give the roots a fancy shape.
- The roots, which will be straightened, must be sprinkled on top with soil.
The adenium must be fixed by tying it to the support. You can use a clamp so that there are no marks on the bark after dressing.
When the next transplant is carried out, the plant should be slightly raised. Do not lift the roots too quickly, otherwise the adenium will hurt.
Forming a powerful root
First, you will need to grow several strong seedlings, choosing for this specimens of about the same age and with the same growth rate. An amazing flower can be grown by combining different varieties of adenium. How should this be done correctly?
Rules for combining various varieties of adenium:
- First, the best seedlings should be tightly connected to each other, tightly rewinding them with films.
- Then they are planted in a spilled, necessarily nutritious soil, and the bandage of films is periodically renewed. It will be possible to remove this bandage only after at least 2 months. During this time, the plant will have time to build up a little mass.
- When the film bandage is removed, small cuts should be made at the points of contact between the stems.
- Then the plant is again connected together and tied with a film for only 4 weeks. During this time, they will grow well together and form a strong root.
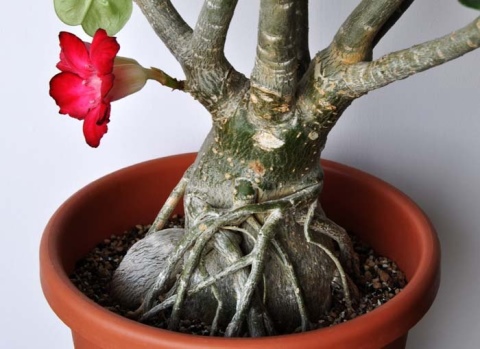
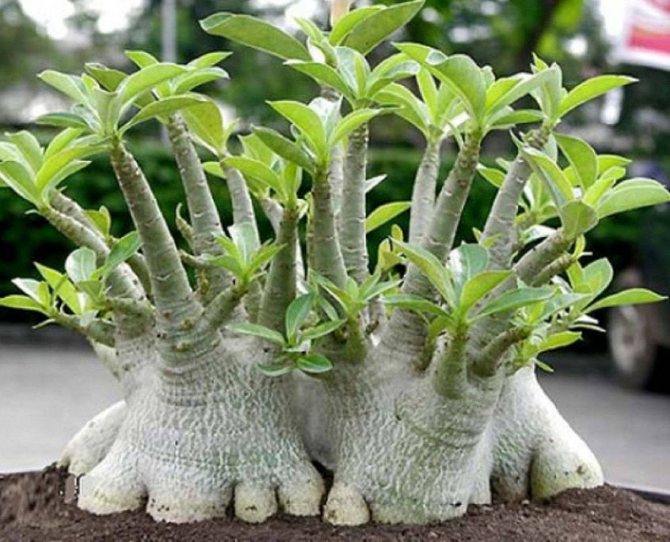
Octopus-shaped caudex formation

You should choose the strongest plants, which are at least 5-6 months old. They are taken out of the soil and the roots are cleaned of soil mixture. You can even rinse the roots to make pruning easier. It is only necessary to cut the root with a sterile and well-sharp instrument.
The sap of the plant contains poisons, so you need to work carefully. The sections are blotted, and when the juice stops flowing, the cut is poured with wax or sprinkled with charcoal
The slices should dry out a little. This usually takes up to three days. But many plant cuttings earlier so that they do not lose moisture. It is quite enough if you dry the material throughout the day. Adenium is rooted in perlite, which is very well spilled. The formation of the octopus also takes place on a plastic circle, which is placed under the roots. Sprinkle a little soil on top of the plant. Note that the top layer of earth on the plastic will dry out very quickly. Therefore, you need to water adenium very often.
Immediately after pruning, the flower is exposed to the sun. The higher the temperature, the lower the likelihood of root rot.A couple of times a day, the seedling is sprayed.
After only a month, the roots will start to grow. At this time, adenium is extracted from the perlite. The roots are untangled, the weak ones are removed. Then the flower is returned to the plastic again, and the roots are lightly sprinkled with earth. You can fix the roots in the desired position with toothpicks.
The formation of the caudex and crown of this flower is an exciting hobby that can take up all your free time.
Be sure to try growing a bizarre plant in your home that will attract attention and delight in its originality.
Trunk formation methods
There are several options for the formation of caudex:
Splice
It is necessary to choose plants of the same age and growth rate and to grow several seedlings. Quite interesting specimens turn out, especially if you take flowers with different colors.

The splicing process itself consists of several stages:
- Seedlings should be freed from the soil, connected together and wrapped with foil.
- Place in a damp substrate and periodically renew the bandage, and after two months remove it altogether. After planting, do not water for a couple of days, and if necessary, the topsoil can be moistened with a spray bottle.
- After removing the bandage, you need to make cuts in those places where the trunks touch. The deeper the cuts, the more likely the splicing will take place and the seedlings will not disintegrate over time.
- Connect the adeniums and bandage with foil. It should be removed no earlier than two weeks and no later than four weeks. During this time, they must grow together. If you keep the bandage for more than a month, it will deform the caudex.
Splicing may well be an alternative to pinching. After all, pinching is often done to save space and for beauty. All this can be achieved using splicing.
Pruning
A beautiful decorative caudex can be formed using root pruning. It must be carried out during each transplant of adenium and the soil should not be wet, but moist.
This process takes place as follows:
- The main root and all roots that are directed downward should be pruned at the young seedling. After each cut, it is necessary to wipe the blade with alcohol, and blot the juice with a napkin.
- Pour the prepared soil into a pot, put a plastic circle on top and place a seedling on it.
- Gently spread the roots along the sides and secure with stones, wire or plastic sticks. To give the roots an unusual shape, you can put a pebble at the base of the seedling.
- Next, you need to sprinkle the straightened roots with soil and fix the plant. It must be tied to the support with a clamp so that there are no traces of bandaging.
Topping
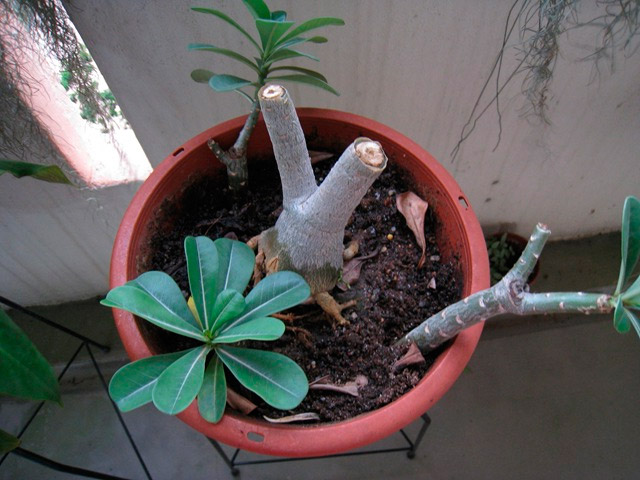
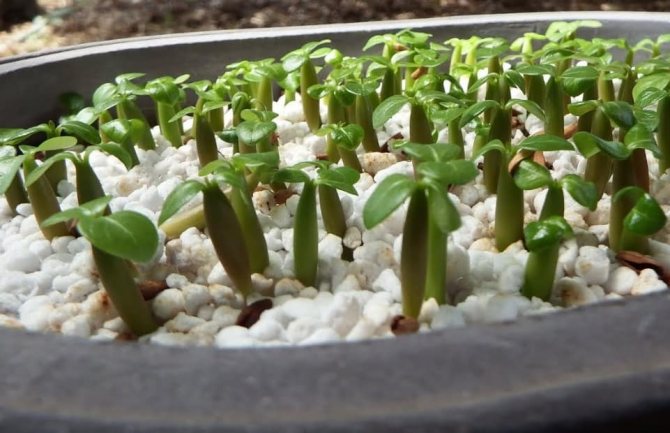
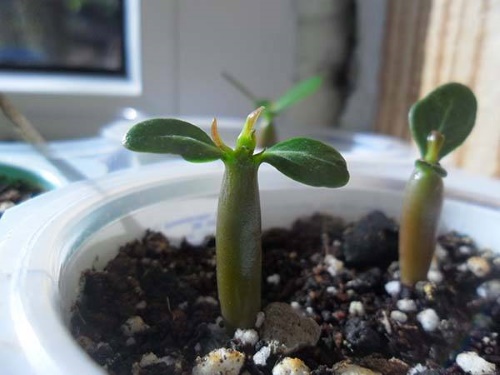
Two to three week old seedlings pinch the shoot when real leaves appear at the level of the cotyledons. Using tweezers, pluck out. The growth point must be removed without damaging the cotyledons. The area between the cotyledons must be absolutely clean. As a result, the distance between the cotyledon leaves will increase, the trunk will expand and two young shoots will appear in place of one.
It is important to remember: neither pruning nor pinching is carried out during the rest period. A few days before the upcoming operation, you need to water the plant
Octopus shape
You need to take the seedlings and cut off very carefully the bottom of the caudex with the roots. Using a thin and very sharp knife for this. Protect damaged areas from clogging.
Then air dry for 5-10 minutes the cut site and treat with a root stimulator. Place the barrel for 5-7 days in a darkened, sufficiently warm (temperature + 23 ... + 25 ° C) place and ventilate regularly. Then, at the end of drying, place the caudex on a surface with coarse sand.
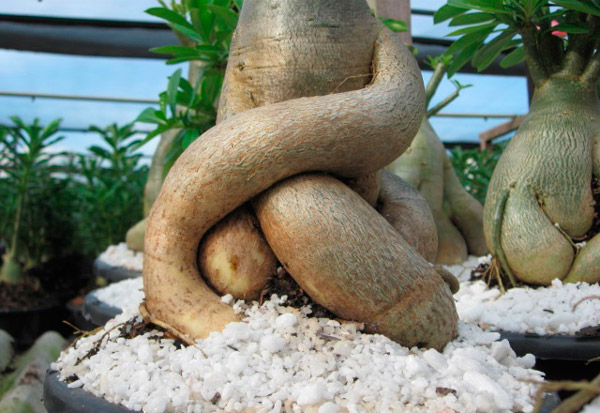
It is necessary to adhere to the following conditions for root formation: watering should be carried out only after the soil is completely dry, direct sunlight should be present in the lighting. In addition, the temperature should be around +25. ... . + 30 ° C. The rooting period lasts 5-6 weeks.
Adenium ring
When the trunk of a plant is too long, you can not cut it, but wrap it in a ring. This is a rather lengthy process. The caudex bend should be done gradually, for about five months. When a ring is formed, and possibly more than one, they should be cut and rooted, but already as a vertical spiral.
Weaving cuttings
It is necessary to plant three cuttings in one pot, their length should be about 20 cm. Further, so that you can easily bend the branches, watering should be reduced for rooted cuttings. Due to this, they will lose turgor and can be easily freed from the ground.
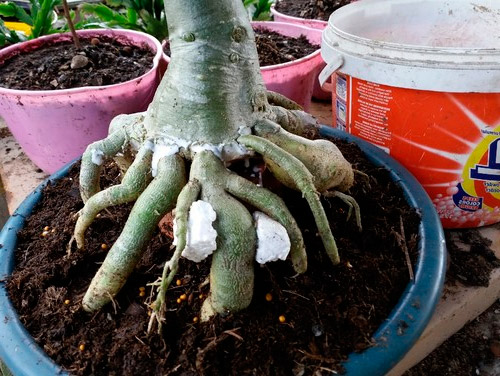
The lower part of the cuttings must be tied tightly. You can use plumbing tape. Then very slowly and smoothly, bending the cuttings, they should be intertwined, forming a kind of braid. Then fix them at the top and plant this structure in the soil. Then the caudex will grow into a braid.
If you take cuttings from different varieties of seedlings, you can get an unusual multi-colored bouquet. It is also possible to intertwine four cuttings.
So, using any method of forming caudex in adenium, you can, with a little effort, enjoy an interesting spectacular flower or even a multi-colored bouquet.
Formation step by step
With the help of pruning, the crown, trunk and root of the Adenium are formed. The kidneys have different activities, depending on their location.
Often, the apical bud develops more actively due to a special plant hormone - auxin, which is most concentrated in the upper part, stimulating its growth and inhibiting the development of lateral shoots. Removing the apical bud will help wake up the rest, but only a few of them will become full-fledged branches of the future crown.
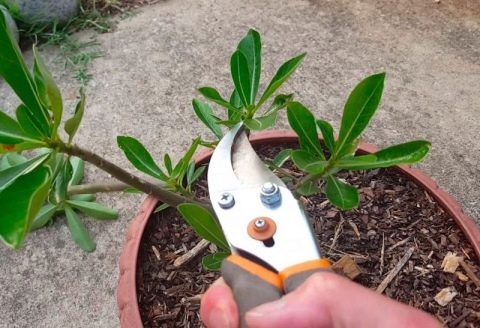
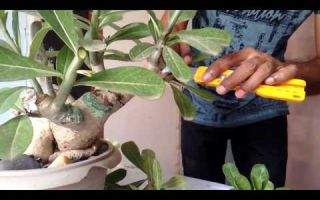
The formation of the crown is necessary to impart splendor and intense flowering, and it is carried out throughout the vegetative period of the tree's development. The thickness of the stems is visually assessed and the thinnest of them are cut off. Excess branches growing inside the crown or creating friction with others are also subject to removal.
A universal way to form a crown is to cut side branches by 2/3 of their length. With the help of this method, over time, the crown will become lush, otherwise the branches will go up with thin sticks, which is considered ugly for adenium.
In hot weather, when all the processes of plant development are accelerated, healing will occur faster.
Watch a video about the formation of the crown of adenium:
Caudex (trunk)
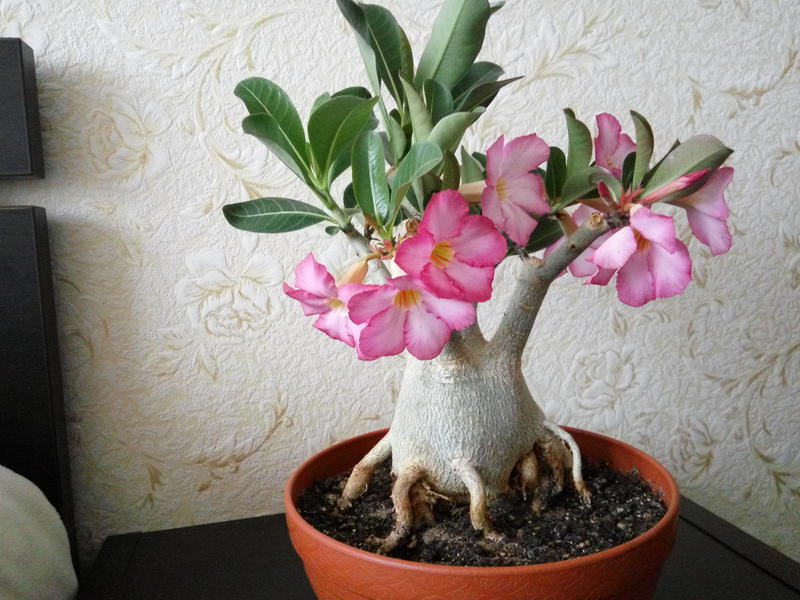
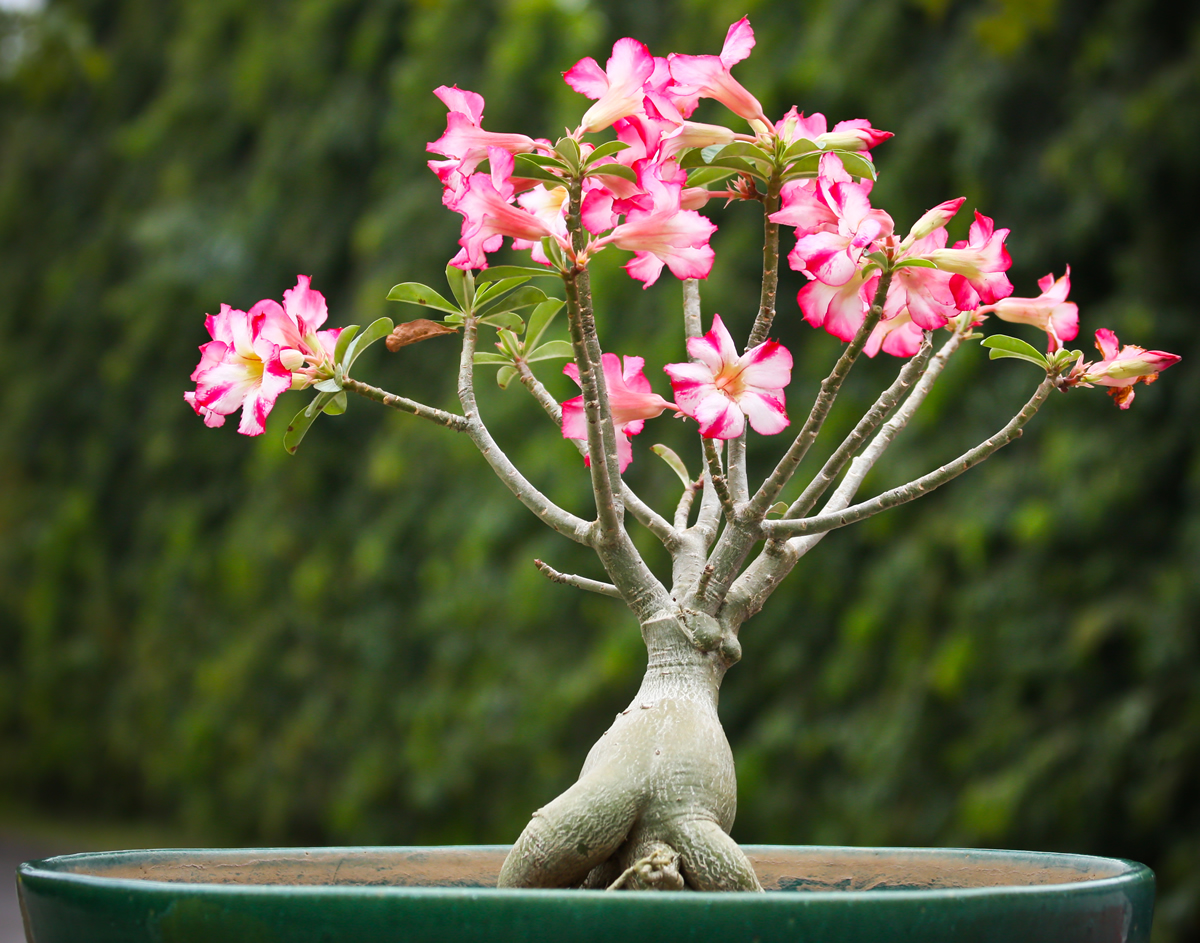
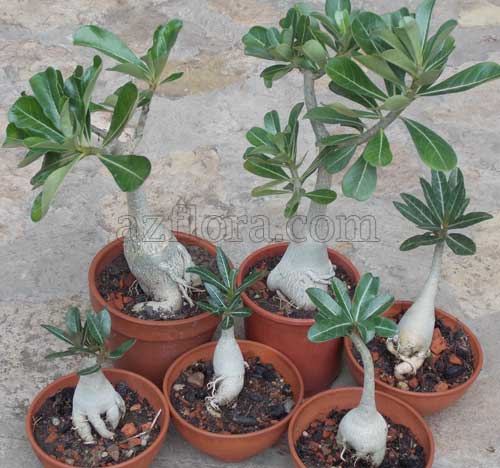
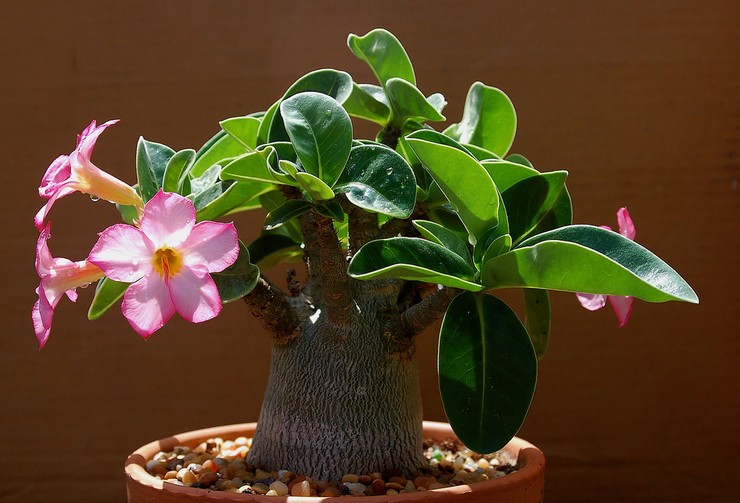
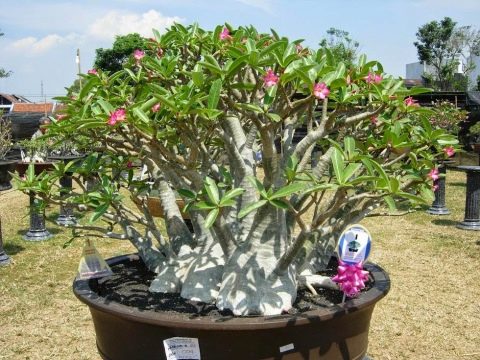
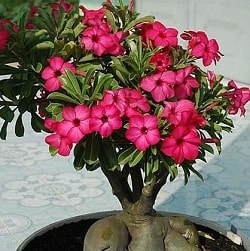
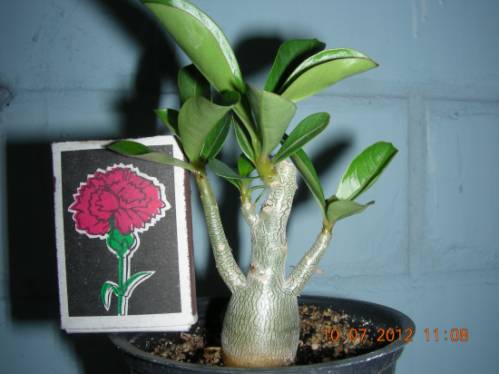
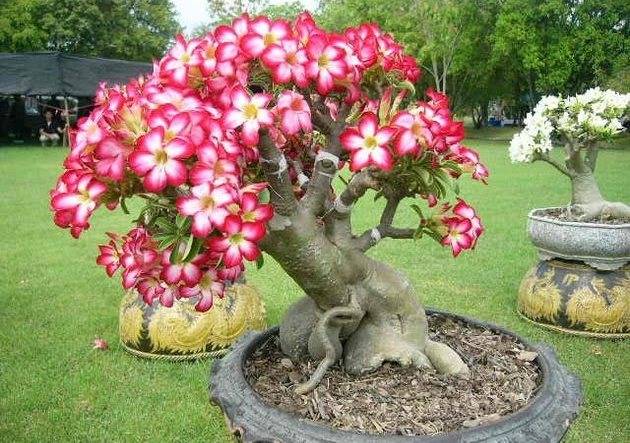
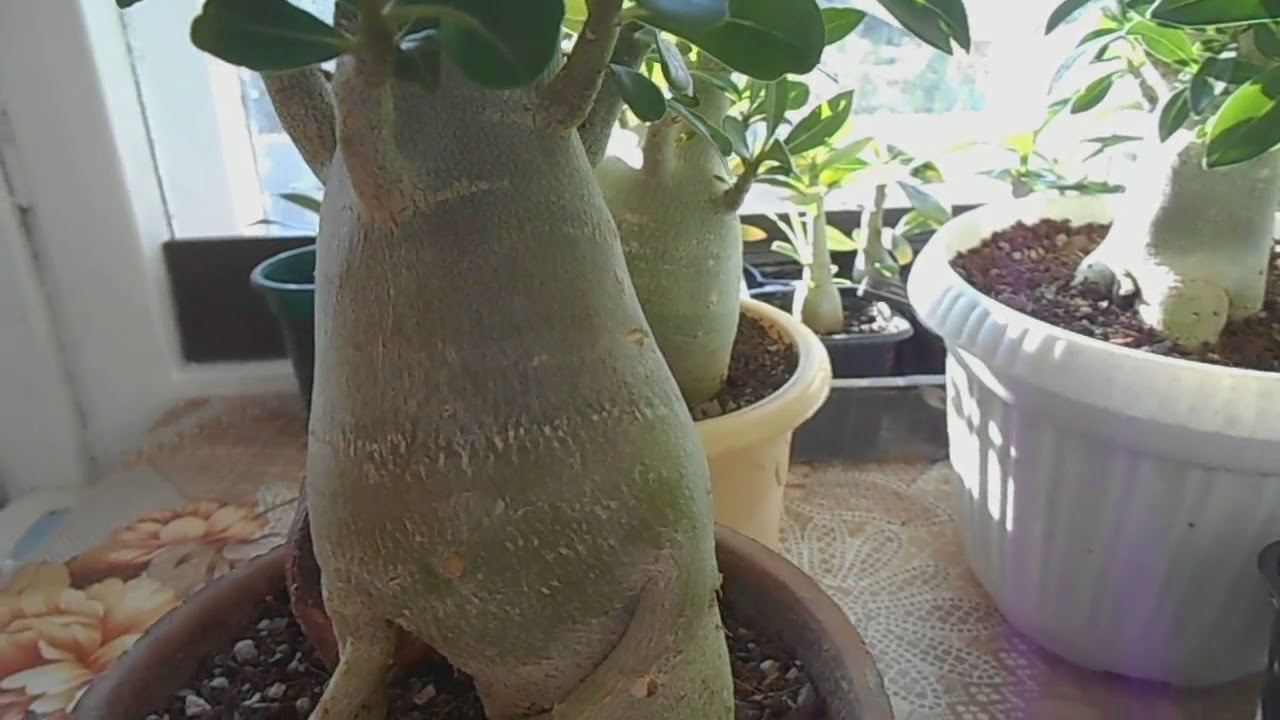
If everything is clear with the crown, then the formation of the trunk raises many questions. Caudex is an important part of the plant, which, even without leaves, is of interest. The thicker and denser the trunk, the richer the plant as a whole looks.
There are several techniques for shaping the caudex. Let's consider them.
- Splicing several seedlings is a method in which several young plants of the same age are put together. It is possible to use different varieties of Adenium to achieve a more interesting result. In places of contact of the stems, incisions are made, and the entire bundle is held together with tape. After about a month, the plants grow together and there is no need for a garter.
- Plexus is a technique in which 3 or more stems, planted in one container, are braided into a single, ornate common trunk.
- Ring formation - suitable for Adeniums with too long and thin caudex. Gradually, it is rolled into a ring, which visually thickens the plant.
How to form a plant correctly? Powerful caudex can be formed by trimming the roots. This procedure is carried out with each transplant, and the plant itself gradually rises above the soil level.
It is important to choose the right soil and nutrient mixtures, to moisten, but not flood the soil. Of the auxiliary tools, a plastic ring is used, located on a slide from the ground
Having shortened the main root, the plant is laid on a ring, carefully straightening the small roots in different directions. It is necessary to fix the plant in order for it to grow properly. For fixing, wire, small stones or chips are used. The spread roots are covered with earth.
We talked about how to properly form the caudex and what to do if it has dried out in this article.
Trimming the roots is optional, but using the root system, you can modify the plant to give it a more exotic look. There are 2 most common root formation options:
- Pinching the main root of seedlings (take plants 2-3 months old). It is done only if there are side roots. The place of the pinching is treated with peroxide and smeared over. The soil should not be very wet. Thanks to this procedure, Adenium forms several thick roots, which will further affect the growth of the caudex.
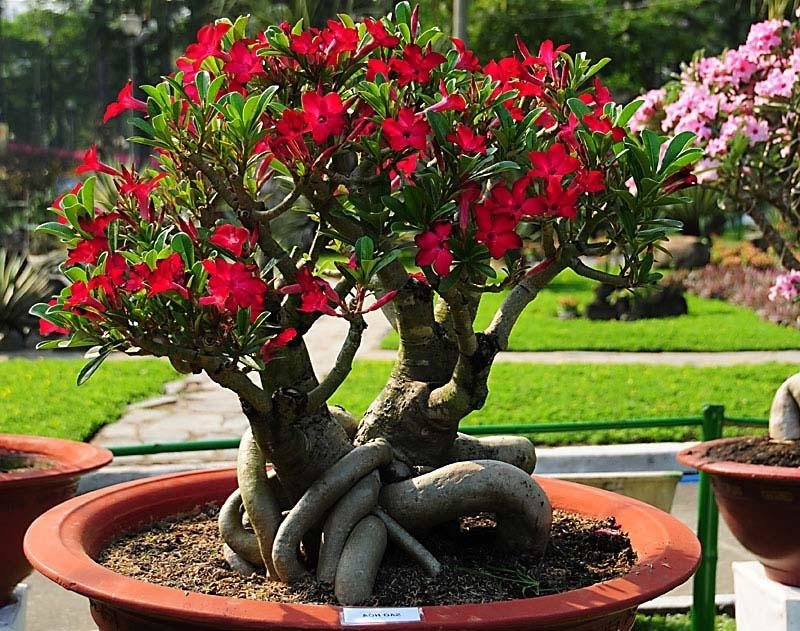
- Pruning the main root. In another way, this method is called the formation of the "Octopus". With a wide cut of the central root, the remaining roots appear smaller, similar to tentacles. Better to plant in a wide and flat pot for better root placement. With this option, there is a possibility of a long healing of the cut site, which can lead to slow growth or decay. This can be avoided by flooding the cut with paraffin and drying them thoroughly. TIP: When forming an octopus, put a pebble or a plastic cover under the center root - anything that can lift the plant, preventing the roots from growing down. In addition to the octopus, the roots can be shaped into any other shape, such as a dragon or a bird.
It should be borne in mind that pruning the roots of an adult Adenium (over 2 years old), which has already formed, can lead to its death. The appearance of an adult plant directly depends on the effort, imagination and patience of the grower.
Features of adenium
An exotic plant attracts flower growers with two features:
- luxurious flowering;
- bizarre root shape.
If on the first point many lush flowering plants compete with adenium, then the second feature is the fruit of the efforts of the grower. The outlandish interweaving of roots is an exceptionally man-made beauty. And for an amateur. Only true connoisseurs of exoticism create unique ornaments from the roots step by step.
But in order to admire the adenium in full glory, you have to make efforts, monitor the development of the flower, provide proper care and conditions of detention. And for this you need to understand what is the structure of adenium, the laws of development of an unusual plant.
It is a succulent from sandy and desert areas where temperatures are high and rainfall is rare. Plants in such conditions adapt in order to survive as best they can. In the process of evolution, desert roses have learned to accumulate moisture in the root thickening of the stem - caudex.
The best specimens of adeniums have 3 advantages among connoisseurs of this plant:
- Well-branched crown.
- Strong caudex, exceeding the main stem in diameter by more than 2-3 times.
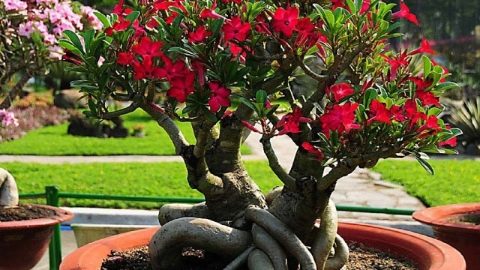
- Thick root growths in the shape that adenium growers call "octopus".
Growing exotics from seeds, year after year, adjusting the development of the flower, flower growers create real masterpieces.
Caudex formation in adenium
About the methods of forming the original caudex, the opinions of flower growers differ. Some believe that every 5–8 months it is necessary to remove the plant from the soil mixture and plant it, raising it above its level and directing the roots in different directions.
Others, on the contrary, argue that the most beautiful and plump caudex is formed underground, and if the plant is buried under the very cotyledonous leaves, the process will go faster and more actively. In addition, more secondary roots are formed, which are also used to give an unusual shape to the caudex.
Both methods are successfully used by flower growers, and it is difficult to determine for sure which is more correct or better. Everyone chooses for himself those manipulations that he considers acceptable and giving the expected result.
It is important for the owner of adenium to remember that pinching and trimming will not directly affect the increase in caudex or the formation of unusual shapes from it. Its growth rather depends on the amount of foliage and the condition of the crown during the active growing season of the flower.

Why and when should you trim?
Pruning is the partial or complete removal of branches necessary for a more intense flowering plant. At what age and how should you prune? Pruning is done when necessary:
- Activate the flowering of Adenum and form a lush crown.
- Set the required shape.
- Get rid of dead branches and rejuvenate the plant over 5-6 years old.
Pruning leads to the emergence of new buds, and then branches, at the ends of which flowers bloom. The procedure is done during the intensive growth of the plant, usually in the spring, when the dormant period ends. If there was a transplant, then pruning is postponed for 2-4 weeks to adapt the plant.
In autumn and winter, pruning is categorically not recommended, since lateral branches of a sleeping Adenium will not develop and it may die.
The wider the cut, the more likely new shoots will form. A plant that is too young with few buds after pruning will look runny and not as pretty as older trees. Florists recommend doing anti-aging pruning at least once every 2 years if the branches are too thin and the flowering is declining.
Home pruning for the plant to bloom
ATTENTION: For independent branching, the age of the Adenium should reach about 5-6 years, and until then you can help it by pinching or pruning. The crown (to give shape and intense flowering) and roots (to facilitate the process of transplanting or removing damaged fragments) of the plant are pruned
We talked about how to make Adenium bloom in a separate article.
The crown (to give shape and intense flowering) and roots (to facilitate the process of transplanting or removing damaged fragments) of the plant are pruned. We talked about how to make Adenium bloom in a separate article.
To get a positive effect from the procedure, you must follow some rules:
- Water the plant a couple of days before the intervention so that it does not experience a water deficit.
- Process the cut sites of the plant for its speedy healing.
- Protect yourself from contact with the poisonous juice of Adenium.
Tools required for the trimming procedure:
- disposable gloves (to protect the skin);
- alcohol (to disinfect the blade);
- pruner or sharp knife.
The pruning procedure itself includes several stages:
The pruning procedure begins with an assessment of the condition of the plant.
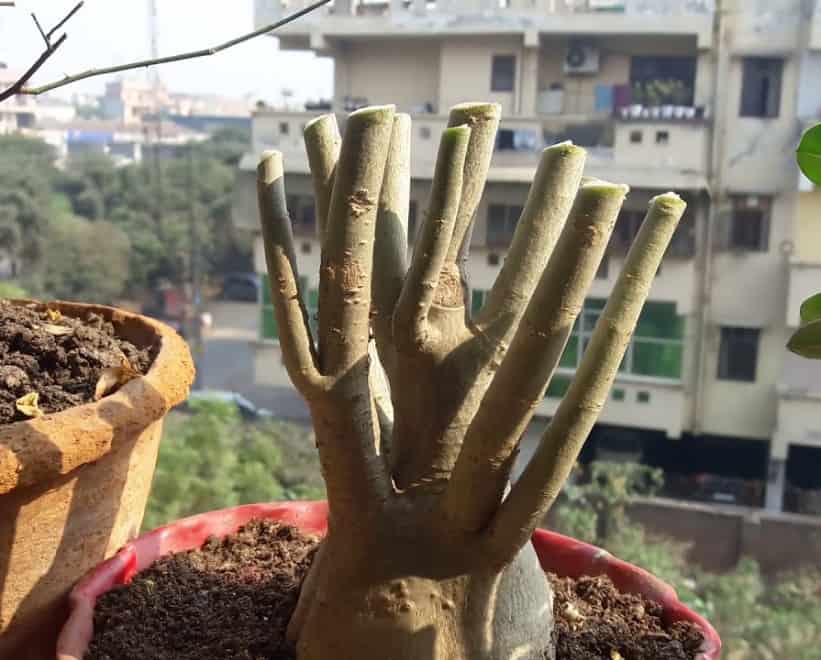
It is important to choose the right place for the cut, about a centimeter away from the caudex. The minimum universal cutting height above ground level should be about 9 centimeters.
Removing part of the stem
The stalk remaining after pruning can be rooted and planted separately.
The sap of the plant is poisonous, so disinfection of the blade is required after each cut. You can disinfect with alcohol, special antibacterial wipes, hydrogen peroxide or brilliant green. Excess secretions can also be removed with a napkin.
Cutting site processing is the final stage of the cutting procedure. It is important to cover up the wound for two reasons:
safety of fabrics, protection from water ingress and prevention of stem rot;
accurate healing without ugly marks on the trunk.
For putty, it is best to use special products: garden balm or paste.
TIP: For quick healing, you can use a regular plastic bag as a dome.
Creation of unusual shapes
Before forming the adenium at home, it is necessary to assess its condition and appearance. The caudex of a plant is formed independently, but to give it an unusual and original appearance, you need to use some techniques
For adenium, caudex formation can be performed in the following ways:
- Splicing - before starting work, you need to select the same plants by growth rate and age, and then splicate several seedlings together.
- Pruning - as soon as the plant needs to be repotted, it is recommended to immediately prune the roots. Thus, a beautiful ornamental plant is formed.
- Pinching - at the age of two to three weeks, such work should be carried out with shoots. For this, tweezers are used and with the help of them the growth point is removed on the plant.
- Octopus shape - seedlings are taken, the bottom of the caudex with the roots is carefully cut off. The trunk is placed in a shaded area for a week and then planted on a coarse sand surface.
- Adenium ring - before forming an adenium by cutting, it is better to think about whether this is necessary. After all, if the plant is not cut, but wrapped, then a ring will form.

Octopus-shaped caudex
Basically, the question of when and how to build up caudex in adenium or transplant it arises for novice growers. With experience, they already know for sure that it is possible to form a spectacular plant only with the help of correct root trimming. Work is carried out every time a flower is transplanted. With the right actions, the plant will soon branch out and will be the pride of its owner.
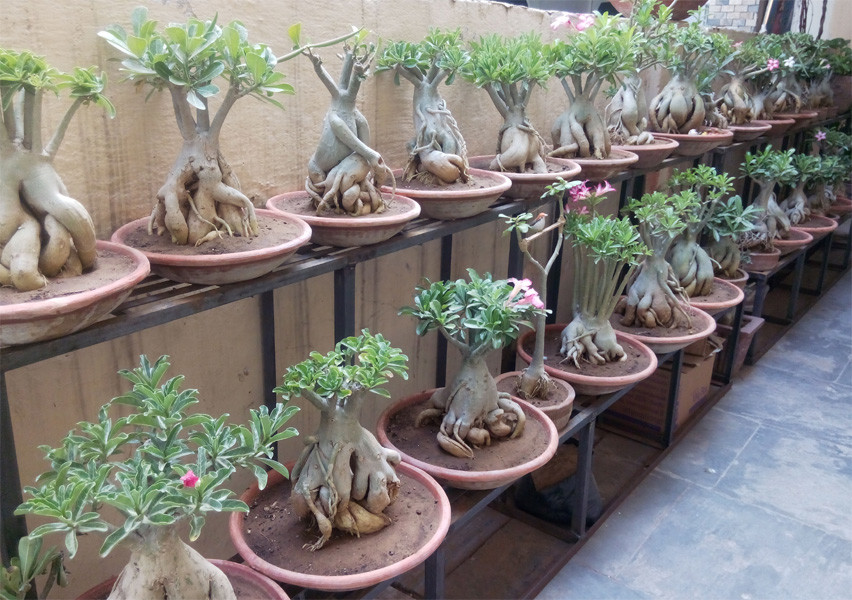
Unusual forms of adenium
Pruning adenium at home
First, let's take a look at what pruning is and what is pinching.
Pruning - This is the partial or complete removal of branches, shoots or roots.
Pinching - This is the removal of 0.5-2 centimeters of the top of the central conductor or side branches. In fact, this is the same cropping, but only very small.
With regard to adeniums, as a rule, pinching can be done on seedlings starting from 2-3 months. If we are talking about the first pruning, then the approximate age is 12-18 months. Based on this data, I made a comparison table for trimming and pinching.
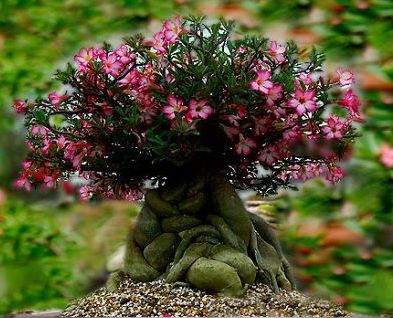
FIRST CUT OF THE ADENIUM
FIRST ADENIUM HITCH
The seedling has time to branch out on its own.
The seedling does not have time to branch out on its own.
There is a high probability of the appearance of several replacement shoots.
There is a high probability that only one or two replacement shoots will appear.
After pruning, a stalk remains, which can be used as a graft or as an independent plant.
Pinching does not produce cuttings.
Pruning leaves a "stump" that can spoil the appearance of the plant. Disappears over time.
The pinching does not leave a big "hemp", the wound quickly becomes invisible.
The desired branching is achieved already at the age of the young plant.
The desired branching can be obtained at the age of the young seedling.
There are more pluses in pruning. There are weighty arguments in both directions. So this is an individual choice. If there are few seedlings, it is better to choose the method that is closest to the desired result; if there are a lot of seedlings, then you can try both options.
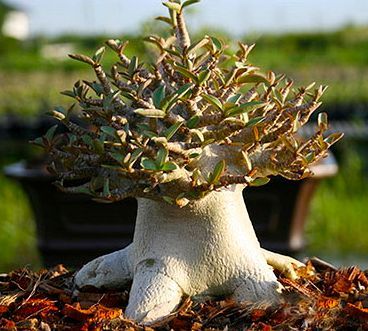 General information and recommendations:
• As a rule, pruning is done in the spring, 2-4 weeks after transplanting (if any), when the plant is already actively moving into growth. But it is possible during the entire vegetative period. During the rest period, neither pruning nor pinching is done.
• Water the plant a couple of days before pinching / pruning. On the day of crown formation, it should have a good turgor. (Turgor, turgid state - the state of plant cells, tissues and organs, in which they contain the required amount of water and, therefore, do not experience a water deficit).
• Use only a sharp knife, preferably stainless steel. Both a paper cutter and a blade will work.
• The cut is made a few millimeters (usually 3-4) above the dormant kidney.
• Wipe the blade with rubbing alcohol after each cut.

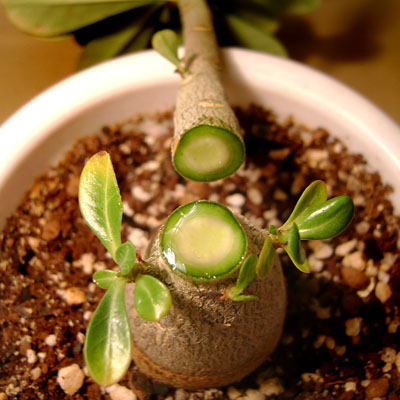
• Blot the juice secreted by the plant with a napkin.
• Do not pinch the seedlings and do not cut the plants, leaving only the buds in the place of the former cotyledon leaves, they may not start growing. The maximum depth is above the buds of the first pair of true leaves.
• After the adenium stops secreting juice, smear the cut site. Garden balm is best suited for this (commercially available, but quite expensive). Or you can do with other means, for example, garden varnish or garden paste "RanNet" (in the photo "RanNet"). Charcoal powder will work as well. You can do without putty, but this will affect the accuracy of the sections, or rather, their healing.
Protect the wounds until they heal from the ingress of water - tissue decay may occur.
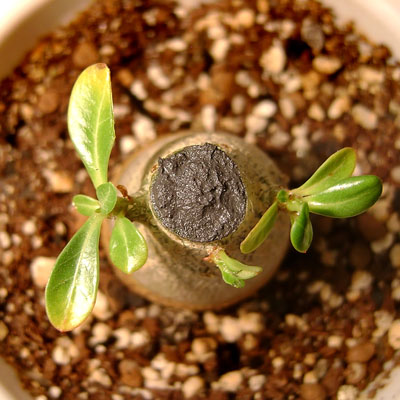

• The growth of replacement shoots begins in about 2-3 weeks, and if you are not satisfied with the result - few buds have woken up, then you can repeat the pruning, making it a little deeper.
• Adenium juice is poisonous. So wash your hands thoroughly with soap and water after pruning. If your hands have wounds or abrasions, cover them with tape. You can avoid contact with the juice altogether by using gloves.
Why do you need pruning of adenium
A sharp knife is the main tool for creating the form of adenium that the florist has set himself as a goal. Therefore, it is the pruning of adeniums at home that is the only way to achieve the desired result if the other conditions of detention are met.
And fantasies on the theme of adenium are limited only by the ability to handle this flower. It is not for nothing that desert rose fans call this succulent "plasticine in the hands of a gardener." After all, the plant, being a shrub, even takes the form of a bonsai under human control and is grown for many years in the traditions of this culture.
How necessary is pruning and can you do without it? Under normal indoor conditions, pruning will have to be done to start the development of new side shoots if the flower does not receive enough light.
The succulent has little natural light from the window: the adenium needs very abundant light from all sides for harmonious development. Even a shoot that has hatched from an awakened bud can give a couple of leaves and freeze if a shadow falls on it. A light shade from a neighboring shoot or a plant standing next to it is enough. Therefore, not every pruning gives the expected result.
A flower grower who has provided an intense daylight hours observes the seedling. If the internodes are short, the flower chases the greens abundantly, that is, there is a hope that the branching will occur naturally. The adenium will not only let the main stem into a couple of shoots, but also at the base, and along the length, buds will begin to wake up. The result is a lush bush.
But experienced adenium growers know that their favorites are capricious, unpredictable, and there are no guarantees of independent crown formation. Therefore, pruning is still a necessary procedure. But pruning may not live up to expectations: with a lack of lighting, the plant will start up one replacement shoot.
That is, it is important to learn: just pruning does not solve the issue of formation. It will stimulate the awakening of sleeping kidneys
And the adenium itself will decide how many shoots it can fully develop under existing conditions. The sun or artificial light, heat, food is enough - the flower will release several or even many branches.Conditions hold back growth - there will be one replacement shoot.

