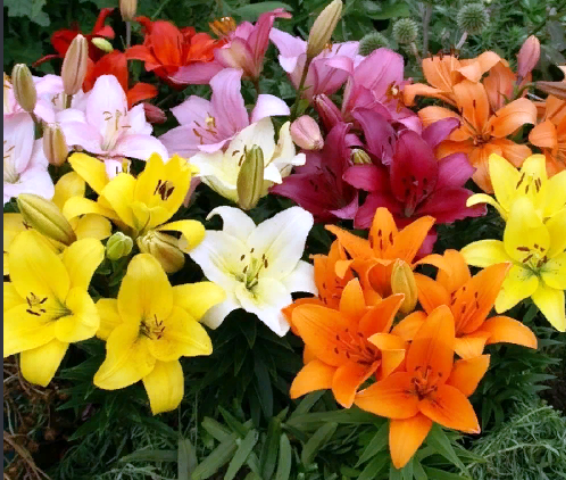
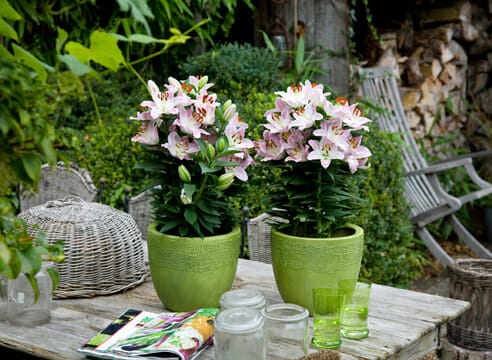
Growing lilies outdoors

Nursing begins with choosing the right conditions for development. Before deciding on some site for planting lilies, it is worth considering that these are perennials that grow in one place on for several years. They will be most comfortable in a sunny area, which will be completely protected from wind and drafts.
Soil selection
Care and cultivation of lilies in the open field requires the selection of the correct soil
This is one of the main points to which you should pay attention, because in this matter, lilies are very demanding. So, the soil should be loose, with a good drainage layer, and also fertile.
Also pay attention to the acid-base balance, since different lilies have different requirements for this indicator. For example, if you decide to plant American hybrids on your site, then they will need acidic soil, tubular ones like alkaline soil. For all other species and varieties, there are no specific requirements, and they will feel great in neutral soil.
Prepare in advance for planting the bulbs. To do this, it is necessary to dig up the soil two to three weeks before planting, adding ash to it. Please note that if you plant an oriental species, then ash will not be required, since acidic soil will be needed. You should also add humus and peat, add a little mineral fertilizers. Further, the site will need to be leveled, watered and well tamped.
Selection of quality bulbs

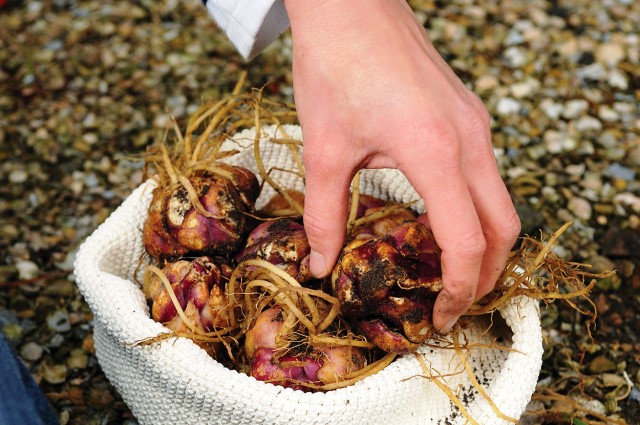
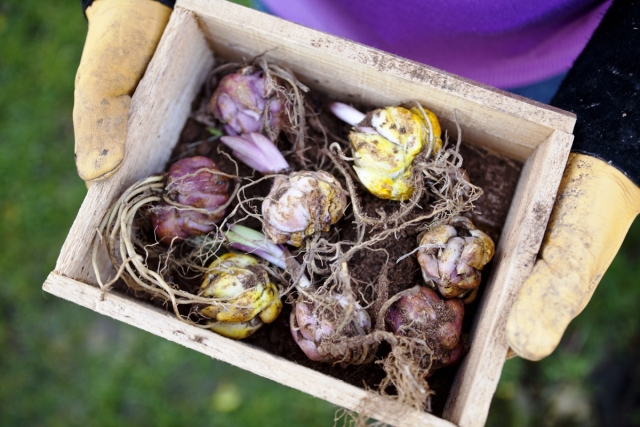
To obtain a strong flower that does not require additional care, it is necessary to approach the choice of bulbs with all responsibility. There are a number of basic rules to consider when buying planting material:
- the bulbs must be clean and dry, free of third-party stains and rotten smell;
- the bottom must be intact, without damage or defects;
- the roots are necessarily strong, too dry or rotted shoots will lead to the death of the plant or the lack of flowering;
- the diameter of the bulbs should not exceed 3-4 cm;
- tight-fitting scales should not be loose;
- the color of the bulb does not matter at all, the shade depends on the variety and type of plant;
- the absence of sprouts indicates a quality bulb.
Often in stores you can find a sale of small-sized lily bulbs, which are suspiciously cheap. There is a high probability that this is planting material taken after forcing. Such a lily, even with careful and regular care, will bloom no earlier than after 3 years.
Breeders and agronomists note that bulbs with hatched sprouts can be planted in the ground only in the spring. However, they require careful and regular care. In autumn, such planting material is not planted in open soil.
Preliminary preparation

Certain rules for the preparation of purchased or separated bulbs make it possible to obtain healthy flowers. Processing will eliminate the risks of damage to the bulbs by fungi and allow the sprouts to gain strength without hindrance.
Bulbs that are planned to be planted in a flower bed are soaked in clean water for several hours. All this time they are not touched, not turned over or pulled out of the pelvis. Then they are immersed in a special disinfectant solution. This can be a pink solution of potassium permanganate or a specialty mixture purchased from a store. Then the bulbs need to be ventilated and dried in a place protected from ultraviolet radiation.
11. Varieties and types of hyacinth:
11.1. Oriental hyacinth - Hyacinthus orientalis
The most common variety in floriculture, on the basis of which the vast majority of varietal plants in modern plant growing have been derived. These bulbous plants have green, belt-like, entire leaf blades. During the flowering period, often simultaneously with the formation of leaves, vertical, strong peduncles appear - each bulb is capable of producing 1 - 2 such peduncles. The flowers are fragrant, bright, painted in almost all shades of the rainbow.
11.1.1 Hyacinthus Gipsy Queen
Large-flowered hyacinths with delicate salmon-colored buds. Plants reach a height of 25 - 30 cm and form buds in early spring.
11.1.2 Hyacinthus Woodstock
Compact bulbous perennial bushes up to 25 cm high with large and bright inflorescences consisting of several dozen buds. The inflorescences are painted in a fairly wide palette of shades - from purple to burgundy.
11.1.3 Hyacinths Isabelle
The main distinguishing feature of these plants are bright, large, double buds with a large number of petals. The color of the buds is in the blue - violet range.
11.1.4. Hyacinth Odysseus - Hyacinthus Odysseus
Plants have light green leaf blades and tall peduncles with unusual peach-colored buds.
11.1.5 Hyacinthus Marconi
A distinctive feature of this large-flowered variety is the bright pink color of fragrant inflorescences. The height of the bushes reaches 25 cm. Each peduncle bears 15 - 17 buds at the top, each of which can reach 4 cm in diameter. Blooming later.
11.1.6. Hyacinthus grandiflorum Broadway - Hyacinthus Broadway
Flowering perennials up to 25 - 30 cm high with fairly wide, green, entire leaf plates. During the flowering period, each bulb produces a powerful vertical peduncle with 30 - 35 buds. The flowers are painted in a bright lilac shade.
11.1.7. Hyacinth Brooklyn - Hyacinthus Brooklyn
One of the few yellow hyacinth varieties bred by breeders lately. Plant height can reach 20 - 30 cm. Interestingly, hyacinths with a similar yellow color of buds are among the last to bloom.
11.1.8 Hyacinthus Bellevue
Compact bushes reach a height of 20 - 25 cm and adorn themselves with unusual peach buds during the flowering period. The variety belongs to large-flowered - buds in diameter can reach 4.5 cm, and on each inflorescence there can be up to 40 buds.
11.1.9. Hyacinth Vurbak - Hyacinthus Vuurbaak
It is unlikely that the bright inflorescences of this variety will leave anyone indifferent. Wurbak flowers are colored in crimson or deep pink shades. The bushes reach a height of 30 cm, each peduncle is capable of carrying up to 30 attractive buds up to 4 cm in diameter. A distinctive feature of this variety is its extremely high frost resistance - in the open field the plants can withstand short frosts down to -35 ° C.
11.1.10. Hyacinth Annabelle - Hyacinthus Annabelle
Charming, delicate primroses with large, double flowers, painted in a pink shade. Such buds look especially attractive against the background of dark green foliage. Plants reach a height of 25 - 30 cm.
11.1.11 Hyacinthus Marie
Quite large plants up to 30 cm high with green, thick, belt-like leaves and vertical peduncles. The flowers are large - they reach a diameter of 3.5 cm, usually painted in a rich lavender shade. The edges of the petals are edged with a light, almost white border.
11.2. Transcaspian hyacinth - Hyacinthus transcaspicus
Plants of this variety are practically unknown in floriculture, and in their natural habitat they have a limited distribution area - they were found only in Iran and Turkmenistan. Plants are compact primroses up to 20 cm high with wide, thick, green leaves. The leaf blades are entire, with a glossy surface. Each bulb forms 1 - 2 strong peduncles with delicate purple or blue buds.
You may also be interested in:
Wisteria
Crocus
Narcissus
Primrose
Planting lilies in the fall
Planting lilies in open ground can be carried out equally in spring and autumn - and the exact dates are selected depending on the type of plant and the climate of your region.
So, in the middle lane, you can start the autumn planting of lily bulbs from the beginning of September, and complete it in October and even the first days of November (in the southern regions). It is not worth planting lilies earlier - there is a possibility that in warm soil they will immediately begin to grow, which is undesirable. But it is not worth planting plants in the freezing ground - they will not survive. In the fall, you should focus on the average daily temperature, which should be established at the border of about 10 ° C, not higher: bulbous ones take root well at low positive temperatures.
What will October 2018 look like - long-term weather forecast
Mid-autumn is famous for its variable weather. What does October promise Russian summer residents and what should be done in time, despite the weather conditions?
The bulbs of the vast majority of garden lily varieties tolerate frosts in the soil well, and in April they actively start growing and feel even better than their counterparts planted in spring, which are often too delicate and fragile.
Lilies with the shortest dormancy period are planted first, so that they have time to take root before the onset of cold weather, then American hybrids, at the latest, unpretentious and frost-resistant Asian lilies can be planted. Tubular, oriental and long-flowered hybrids in our latitudes are recommended to be planted exclusively in spring or even grown in a greenhouse.
All about the types of garden lilies: names, descriptions, photos
Wondering what lilies to plant in your front garden? Our material contains the best species with descriptions and hybrids for the middle lane.
How to plant lilies in the fall? The same as in the spring.
First of all, you should choose healthy and high quality planting material.
In the fall, it is especially important to plant lilies with fresh bulbs dug up in the current season! Therefore, you should choose either self-grown planting material, or take it from a trusted local manufacturer. After all, those lily bulbs that you can buy in a garden store from a foreign supplier at the end of summer will clearly be last year's - it is better to take them in February-March for spring planting.
Before planting a lily, pay attention to what the bulb looks like.
The lily bulb should be quite dense (not friable), with live, not overdried roots, a dense bottom, clean covering scales and without a moldy smell. It should not have dry or dark wet spots.
It is better to prepare a place for the autumn planting of lilies in the summer: choose a sunny, draft-free area with loose, well-drained soil, dig it up and fertilize it with humus. If you do this just before planting, remember - it is imperative to compact the soil mixture so that after planting the soil does not settle too much.
Before planting, be sure to ask about the preferences of the variety of lilies you have chosen - some like weakly, and others like highly acidic soil.
Dig holes two or three times the height of the bulb itself - since the size of the bulbs and the location of the roots on them vary greatly from variety to variety, it can be 7 or 25 cm.Pour coarse sand into it as drainage, lower the bulb to the bottom of the hole , gently straightening the roots, and cover the top with a layer of the same sand. A layer of earth on top should be lightly tamped with your palm and watered. When planting lilies in the fall, further regular watering is not required - usually autumn rains will do everything for you. Mulch the lily planting site with leaf humus with the addition of ash or a layer of peat (for lilies-lovers of acidic soils).
How to plant a lily with sprouts in the fall
If you stored the bulbs incorrectly, and they managed to germinate by the time of autumn planting, do not panic.If the sprouts have not reached 8-10 cm, feel free to plant such a bulb as an ordinary sleeping bulb. If their length approaches 20 cm, such sprouts will have to be very carefully unscrewed from the bulb before planting. Remember that such planting material will be weakened and especially vulnerable to adverse environmental conditions - these bulbs will have to be carefully covered for the winter.
However, there is another way out - to send the sprouted bulbs for the winter in a pot with soil, and plant them in open ground next season.
What to plant with
The heroines of the article bloom magnificently, but their stems are nondescript and unattractive. Therefore, the task of the neighbors of these plants is to emphasize the beauty of the buds and cover everything else. Usually, for this, low specimens are chosen with abundant bright flowering to match or, conversely, sharply contrasting
It is important that they feel good in comfortable conditions for lilies, because royal beauty will fade against the background of wretched and faded neighbors.
Sorry, there are currently no polls available.
The same goes for Echinacea purpurea, yarrow.
Openwork panicles of astilba next to lilies create the impression of a chic bouquet in the place of a flower garden.
Garden geraniums themselves seem rather plain, but they do an excellent job of hiding the lily stems.
Almost any plant with small flowers is a great backdrop for lilies.
Multi-colored delphiniums can become good neighbors of lilies if you correctly work out the combination of shades. For example, you can plant whites next to blues, pinks, and purples.
They go well with lilies and any brightly colored annuals, which can be easily changed depending on your own wishes.
Never place lilies next to daylilies. The latter will seem very nondescript against the backdrop of impressive neighbors.
 Never place lilies next to daylilies
Not the best pair for lilies - roses
First, they are good on their own and distract attention from each other. Secondly, roses need dung, and lilies are strictly against it.
The scent of lilies is not combined with the delicate scent of roses. For the same reason, you need to be careful when planting different varieties of lilies next to each other - they can create a stifling composition of smells.
Do not plant lilies in natural flower beds. They get lost and look unnatural in such an environment.
These recommendations will help you find and create the ideal conditions for your lilies. Remember to keep an eye on the flower garden to correct mistakes and improve it.
Diseases, pests, other problems
Most diseases of lilies are a consequence of improper care of them, first of all, excessive watering, which provokes stagnation of moisture at the roots:
-
Gray rot. On the leaves and stems, starting from the bottom, slimy dark spots are spreading, gradually tightening with a “fluffy” grayish bloom with small black blotches. Affected tissues rot. Severely damaged flowers are dug up and destroyed. If the disease is noticed at an early stage, according to the instructions, the drugs Discor, Vitaros, HOM are used.
-
Fusarium. Infection comes from the bottom of the bulb - it turns brown, breaks down into scales. On the aerial part of the plant during the active growing season, the disease is imperceptible, the lily develops due to the roots not affected by the fungus. But in winter she inevitably dies. To prevent fusarium, the flower bed is sprayed with Baktofit, Fitosporin, Maxim every 10–12 days.
-
Cercosporosis. Brownish-yellow spots with a darker border appear on the leaves, gradually spreading from the edges to the middle. Affected tissues dry and die off. For prophylaxis, plants and soil are treated with Fitosporin or Alirin-B, drugs Topaz, Abiga-Peak, HOM destroy the fungus.
-
Rust. Leaves and shoots are covered with bright yellow-orange "pads", gradually turning into spots of rusty-brick color. The plant dries up and dies.Any fungicide is used to combat the disease.
Lilies have a lot of pests. The most dangerous of them are:
-
Spider mite. Leaves, buds, tops of shoots are entwined with a thin "web". The affected parts of the plant are discolored and deformed, the development of lilies is inhibited. Acaricides are used to control pests - Neoron, Omite, Apollo.
-
Squeak beetle (aka lily beetle or bulbous rattle). A bright red beetle lays eggs on the leaves, from which pinkish larvae hatch, in a matter of days they devour almost all the greens. The drugs Inta-Vir, Fufanon are effective against the pest.
-
Lily fly. It lays eggs in flower buds, the damage left by the larvae becomes visible only when the flowers open. Affected buds need to be torn off, the plants should be treated with Aliot, Spark Double Effect.
The most common problem not related to disease and pest attacks is the lack of flowering of lilies. This is due to certain care errors:
- unsuitable for quality and acidity substrate in the flower bed;
- lack of light;
- cold drafts;
- deficiency of nutrients in the soil;
- improper watering (both surplus and lack of water).
The varietal variety of lilies is simply amazing. But it is not enough to choose the variety that you like externally - for abundant and annual flowering, you need to provide the plant with optimal conditions and competent care. There is nothing difficult in this, but it is better to learn about important nuances in advance.
About transplanting hosts (when you can transplant from one place to another)
An ornamental hosta plant can be an incredible decoration for your garden. It is very loved by gardeners and landscape designers for its lush foliage, as well as the low cost of material resources, time and physical strength for growing.
Its leaves can be of different sizes, shapes and textures. The inflorescences are graceful, standing out above the lush mass of leaves. Their coloration ranges from white to purple and dark blue.
To reach its full potential, the plant needs proper care, including periodic replanting.
Variety host
About 40 host species are known and many cultivars that boggle the imagination.
Hosts differ:
- Height (from miniature to the size of a person of average height);
- By color (from soft cream shades to deep green with the presence of yellow, light green, lime, blue shades of different intensities and combinations);
- By the shape of the leaf (lanceolate, round, wavy);
- By the texture of the sheet (from glossy-smooth to "waffle").
The most popular types of host include: plantain, wavy, white-bordered, straight-leaved, ovate, small, lanceolate, curly, beautiful, Siebold, decorative, tall, swollen.
Landing hosts
In order for the host to take root well when planting, it is necessary:
- Choose the right landing time. Hosta can be planted in early spring, before the leaves bloom, in early autumn or at the end of summer, so that the plant has time to take root before the cold weather, and as a result - successfully overwinter;
- Select healthy plants for planting. A good planting material on the rhizome should have at least 1 bud, ideally a few, not too overgrown. The roots should be developed, lively and resilient, 10-12 cm long. Examine the plant well to make sure there are no signs of disease. If the plant was purchased in advance and it is still early to plant it, then in this case it must be stored in a cool, dark place, at a temperature within 5-10 degrees (in the basement, refrigerator, on the loggia);
- Find a suitable landing site. Hosta is a shade-loving plant, especially if the color of its foliage is green. Variegated hosts grow well in the sun, but in the midday heat they still require shading;
- Consider and ensure the host's soil requirements. The soil should be light, moist, and breathable. Raw plots for host cultivation are unsuitable.Poor soils are improved by adding humus, sand, mineral fertilizers.
What are the features of preparing hosts for winter in different regions
The southern regions require little or no shelter. The procedure is necessary if the forecast portends any frost. In others, the host situation winters well in vivo.
In the middle lane (Moscow region) and in the Volga region
In the Volga and Moscow regions, she can survive the winter without much shelter. In these places, it is enough to heap spruce branches and throw snow masses. If winter with severe frosts is expected, then it is advisable to mulch the root system with a thick layer of peat mixed with sawdust.
Also, cut leaves are applied on top, covering them with pine trees. The latter are recommended to be laid on top with bricks or to pull a tourniquet so that the branches are not carried away during strong hurricanes.
In the Urals and Siberia
Siberia and the Urals are characterized by severe frosts and sub-zero temperatures. To insulate hosts in these regions, you will need all the knowledge and skills to shelter a plant. Be sure to dig up the root circle to remove all pests. Lay the surface with mulch. Cover the top with material for covering plants for the winter.
After the snow falls, it is recommended to collect it and pour it over the insulation
It is important that the snow is not frozen, crusty, but crumbly, fresh. Otherwise, sharp snow masses can damage the shelter and provoke freezing of plant growth buds
Breeding features
The most common and affordable way to breed a host is to divide overgrown bushes.
Bushes at the age of 4-6 years are subject to division. The bush is dug out completely, the soil is shaken off well from the roots. To rejuvenate the hosta, the ends of its roots are slightly trimmed.
The rhizome itself is cut with a knife and broken by hand. Fracture points are treated with ash or a fungicide solution, you can sprinkle it with charcoal, cinnamon.
The resulting plots are planted in a permanent place with prepared soil.
How to transplant correctly
If an adult bush needs to be moved to a new site, before removing it, it is dug in from all sides and, together with a lump of earth, is lifted with a pitchfork.


